service schedule CHEVROLET ASTRO 2004 Owners Manual
[x] Cancel search | Manufacturer: CHEVROLET, Model Year: 2004, Model line: ASTRO, Model: CHEVROLET ASTRO 2004Pages: 382, PDF Size: 2.73 MB
Page 1 of 382
Seats and Restraint Systems........................... 1-1
Front Seats
............................................... 1-2
Rear Seats
............................................... 1-7
Safety Belts
.............................................1-13
Child Restraints
.......................................1-35
Air Bag System
.......................................1-63
Restraint System Check
............................1-70
Features and Controls..................................... 2-1
Keys
........................................................ 2-2
Doors and Locks
....................................... 2-6
Windows
.................................................2-14
Theft-Deterrent Systems
............................2-16
Starting and Operating Your Vehicle
...........2-17
Mirrors
....................................................2-30
HomeLink
žTransmitter
.............................2-31
Storage Areas
.........................................2-34
Instrument Panel............................................. 3-1
Instrument Panel Overview
.......................... 3-2
Climate Controls
......................................3-18
Warning Lights, Gages and Indicators
.........3-23
Audio System(s)
.......................................3-38
Driving Your Vehicle....................................... 4-1
Your Driving, the Road, and Your Vehicle
..... 4-2
Towing
...................................................4-29Service and Appearance Care.......................... 5-1
Service
..................................................... 5-3
Fuel
......................................................... 5-4
Checking Things Under the Hood
................. 5-9
All-Wheel Drive
........................................5-47
Rear Axle
...............................................5-48
Front Axle
...............................................5-48
Bulb Replacement
....................................5-49
Windshield Wiper Blade Replacement
.........5-56
Tires
......................................................5-56
Appearance Care
.....................................5-86
Vehicle Identi®cation
.................................5-95
Electrical System
......................................5-95
Capacities and Speci®cations
...................5-102
Normal Maintenance Replacement Parts
....5-104
Maintenance Schedule..................................... 6-1
Maintenance Schedule
................................ 6-2
Customer Assistance and Information.............. 7-1
Customer Assistance and Information
........... 7-2
Reporting Safety Defects
...........................7-10
Index................................................................ 1
2004 Chevrolet Astro Owner ManualM
Page 154 of 382
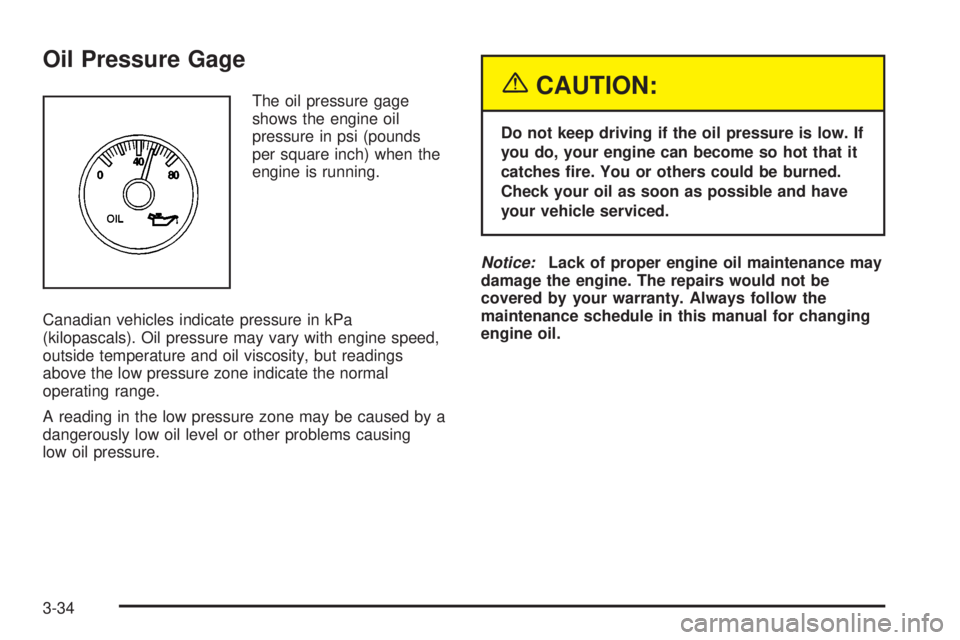
Oil Pressure Gage
The oil pressure gage
shows the engine oil
pressure in psi (pounds
per square inch) when the
engine is running.
Canadian vehicles indicate pressure in kPa
(kilopascals). Oil pressure may vary with engine speed,
outside temperature and oil viscosity, but readings
above the low pressure zone indicate the normal
operating range.
A reading in the low pressure zone may be caused by a
dangerously low oil level or other problems causing
low oil pressure.{CAUTION:
Do not keep driving if the oil pressure is low. If
you do, your engine can become so hot that it
catches ®re. You or others could be burned.
Check your oil as soon as possible and have
your vehicle serviced.
Notice:Lack of proper engine oil maintenance may
damage the engine. The repairs would not be
covered by your warranty. Always follow the
maintenance schedule in this manual for changing
engine oil.
3-34
Page 214 of 382
Maintenance When Trailer Towing
Your vehicle will need service more often when you're
pulling a trailer. See the Maintenance Schedule for more
on this. Things that are especially important in trailer
operation are automatic transmission ¯uid (don't over®ll),
engine oil, axle lubricant, belt, cooling system and
brake system. Each of these is covered in this manual,
and the Index will help you ®nd them quickly. If
you're trailering, it's a good idea to review these sections
before you start your trip.
Check periodically to see that all hitch nuts and bolts
are tight.
Trailer Wiring Harness
If you have the optional trailering package, your vehicle
will have an eight-wire harness, including the center
high-mounted stoplamp battery feed wire. The harness
is stored on the passenger's side of the vehicle near
the rear wheel well. This harness has a 30 amp battery
feed wire and no connector, and should be wired by
a quali®ed electrical technician. After choosing an
aftermarket trailer mating connector pair, have the
technician attach one connector to the eight-wire trailer
harness and the other connector to the wiring harness
on the trailer. Be sure the wiring harness on the trailer is
taped or strapped to the trailer's frame rail and leave
it loose enough so the wiring doesn't bend or break, but
not so loose that it drags on the ground. The eight-wireharness must be routed out of your vehicle between the
rear door and the ¯oor, with enough of the harness
left on both sides so that the trailer or the body won't pull
it. If you do not have the optional trailering package,
your vehicle will still have a trailering harness. The
harness is located near the passenger's side rear wheel
well. It consists of six wires that may be used by
after-market trailer hitch installers.
The technician can use the following color code chart
when connecting the wiring harness to your trailer.
·Brown: Rear lamps.
·Yellow: Left stoplamp and turn signal.
·Dark Green: Right stoplamp and turn signal.
·White (Heavy Gage): Ground.
·Light Green: Back-up lamps.
·White (Light Gage): Center High-Mounted Stoplamp.
·Blue: Auxiliary circuit (eight-wire harness only).
·Orange: Fused auxiliary (eight-wire harness only).
Store the harness in its original place. Wrap the
harness together and tie it neatly so it won't
be damaged.
4-44
Page 230 of 382
Notice:Use only engine oil identi®ed as meeting
GM Standard GM6094M and showing the American
Petroleum Institute Certi®ed For Gasoline Engines
starburst symbol. Failure to use the recommended
oil can result in engine damage not covered by
your warranty.
GM Goodwrench
žoil meets all the requirements for
your vehicle.
If you are in an area of extreme cold, where the
temperature falls below-20ÉF (-29ÉC), it is
recommended that you use either an SAE 5W-30
synthetic oil or an SAE 0W-30 oil. Both will provide
easier cold starting and better protection for your engine
at extremely low temperatures.
Engine Oil Additives
Do not add anything to your oil. The recommended oils
with the starburst symbol that meet GM Standard
GM6094M are all you will need for good performance
and engine protection.
When to Change Engine Oil
If any one of these are true for you, use the short
trip/city maintenance schedule:
·Most trips are less than 5 miles (8 km). This is
particularly important when outside temperatures
are below freezing.
·Most trips include extensive idling (such as frequent
driving in stop-and-go traffic).
·You frequently tow a trailer or use a carrier on top
of your vehicle.
·The vehicle is used for delivery service, police, taxi
or other commercial application.
Driving under these conditions causes engine oil to
break down sooner. If any one of these is true for your
vehicle, then you need to change your oil and ®lter
every 3,000 miles (5 000 km) or 3 months ± whichever
occurs ®rst.
5-16
Page 231 of 382
If none of them is true, use the long trip/highway
maintenance schedule. Change the oil and ®lter every
7,500 miles (12 500 km) or 12 months ± whichever
occurs ®rst. Driving a vehicle with a fully warmed engine
under highway conditions will cause engine oil to
break down slower.
What to Do with Used Oil
Used engine oil contains certain elements that may be
unhealthy for your skin and could even cause cancer.
Do not let used oil stay on your skin for very long. Clean
your skin and nails with soap and water, or a good
hand cleaner. Wash or properly dispose of clothing or
rags containing used engine oil. See the manufacturer's
warnings about the use and disposal of oil products.
Used oil can be a threat to the environment. If you
change your own oil, be sure to drain all the oil from the
®lter before disposal. Never dispose of oil by putting it
in the trash, pouring it on the ground, into sewers, or into
streams or bodies of water. Instead, recycle it by
taking it to a place that collects used oil. If you have a
problem properly disposing of your used oil, ask
your dealer, a service station or a local recycling center
for help.
Engine Cover
Removing the Engine Cover
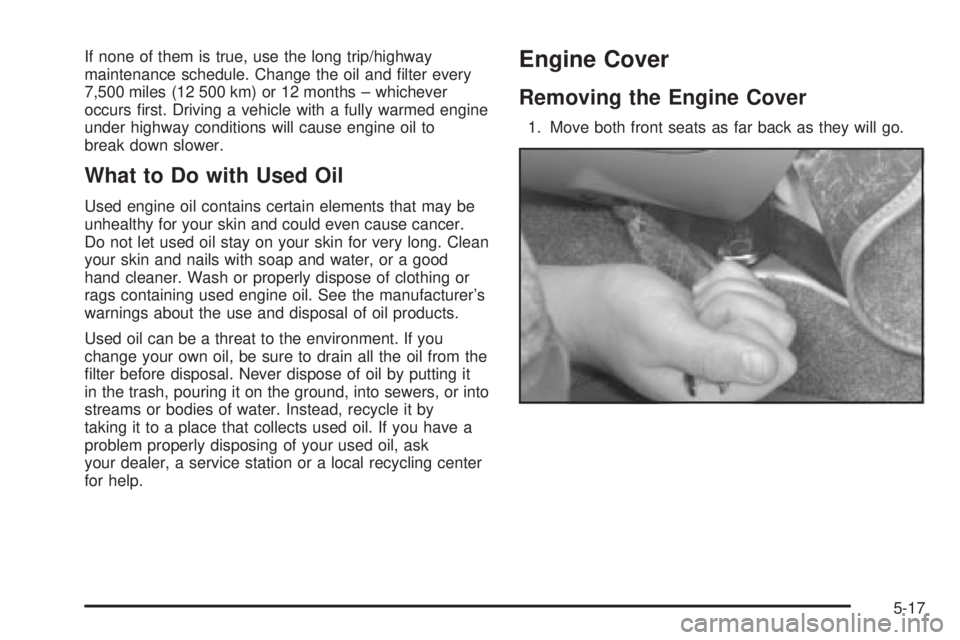
1. Move both front seats as far back as they will go.
5-17
Page 236 of 382
How to Inspect the Engine Air
Cleaner/Filter
To inspect the engine air cleaner/®lter remove the ®lter
from the vehicle and lightly shake ®lter to release
loose dust and dirt. If the ®lter remains caked with dirt, a
new ®lter is required.
To inspect or replace the ®lter, do the following:
1. Unsnap both clips on the cover.
2. Remove the cover.
3. Change the ®lter.
4. Snap both clips to secure the engine air
cleaner/®lter cover.
{CAUTION:
Operating the engine with the air cleaner/®lter
off can cause you or others to be burned. The
air cleaner not only cleans the air, it helps to
stop ¯ame if the engine back®res. If it is not
there and the engine back®res, you could
be burned. Do not drive with it off, and be
careful working on the engine with the air
cleaner/®lter off.
Notice:If the air cleaner/®lter is off, a back®re can
cause a damaging engine ®re. And, dirt can
easily get into your engine, which will damage it.
Always have the air cleaner/®lter in place when you
are driving.
Automatic Transmission Fluid
When to Check and Change
A good time to check your automatic transmission ¯uid
level is when the engine oil is changed.
Change both the ¯uid and ®lter every 15,000 miles
(25,000 km) if the vehicle is mainly driven under one or
more of these conditions:
·In heavy city traffic where the outside temperature
regularly reaches 90ÉF (32ÉC) or higher.
·In hilly or mountainous terrain.
·When doing frequent trailer towing.
·Uses such as found in taxi, police or delivery
service.
If you do not use your vehicle under any of these
conditions, change the ¯uid and ®lter every 50,000 miles
(83 000 km).
See
Part A: Scheduled Maintenance Services on
page 6-4.
5-22
Page 262 of 382
Rear Axle
When to Check Lubricant
Refer to the Maintenance Schedule to determine how
often to check the lubricant. SeePart A: Scheduled
Maintenance Services on page 6-4.
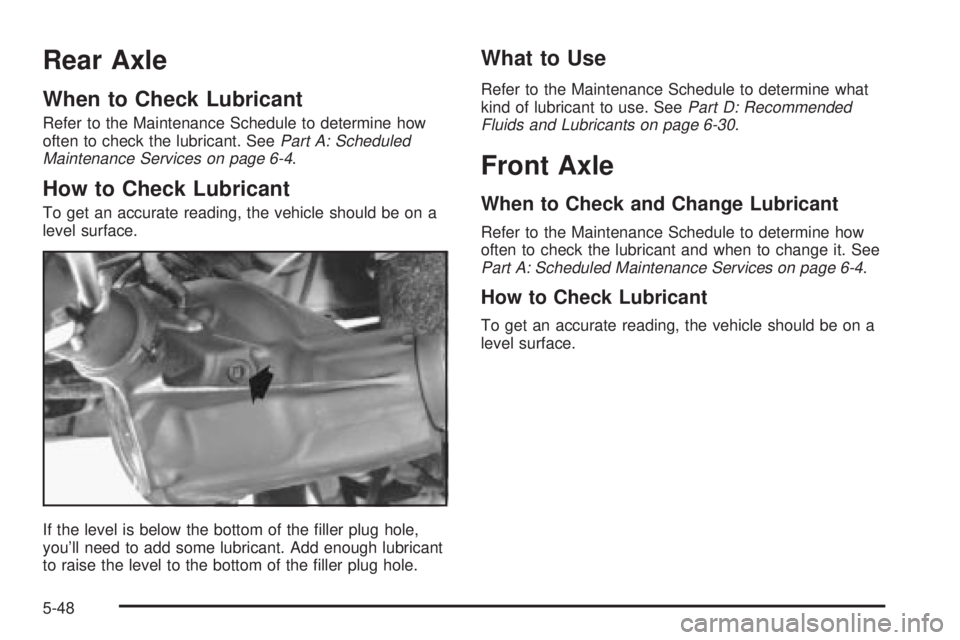
How to Check Lubricant
To get an accurate reading, the vehicle should be on a
level surface.
If the level is below the bottom of the ®ller plug hole,
you'll need to add some lubricant. Add enough lubricant
to raise the level to the bottom of the ®ller plug hole.
What to Use
Refer to the Maintenance Schedule to determine what
kind of lubricant to use. SeePart D: Recommended
Fluids and Lubricants on page 6-30.
Front Axle
When to Check and Change Lubricant
Refer to the Maintenance Schedule to determine how
often to check the lubricant and when to change it. See
Part A: Scheduled Maintenance Services on page 6-4.
How to Check Lubricant
To get an accurate reading, the vehicle should be on a
level surface.
5-48
Page 282 of 382
Tire Inspection and Rotation
Tires should be rotated every 5,000 to 8,000 miles
(8 000 to 13 000 km).
Any time you notice unusual wear, rotate your tires as
soon as possible and check wheel alignment. Also
check for damaged tires or wheels. See
When It Is Time
for New Tires on page 5-69andWheel Replacement
on page 5-72for more information.
Make sure the spare tire is stored securely. Push, pull,
and then try to rotate or turn the tire. If it moves,
use the ratchet/wheel wrench to tighten the cable. See
Changing a Flat Tire on page 5-75.
The purpose of regular rotation is to achieve more
uniform wear for all tires on the vehicle. The ®rst rotation
is the most important. See
Part A: Scheduled
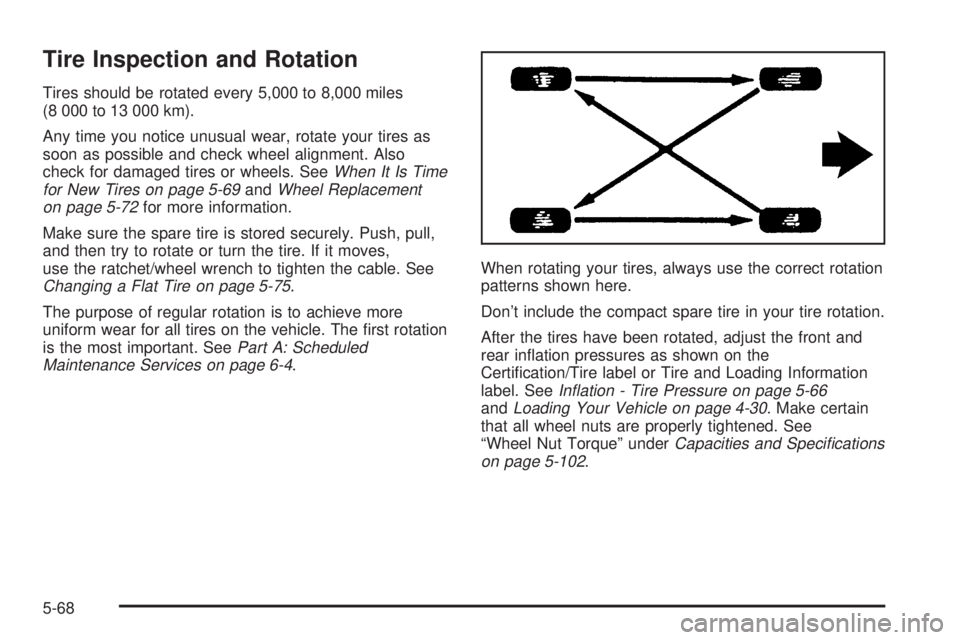
Maintenance Services on page 6-4.When rotating your tires, always use the correct rotation
patterns shown here.
Don't include the compact spare tire in your tire rotation.
After the tires have been rotated, adjust the front and
rear in¯ation pressures as shown on the
Certi®cation/Tire label or Tire and Loading Information
label. See
In¯ation - Tire Pressure on page 5-66andLoading Your Vehicle on page 4-30. Make certain
that all wheel nuts are properly tightened. See
ªWheel Nut Torqueº under
Capacities and Speci®cations
on page 5-102.
5-68
Page 321 of 382
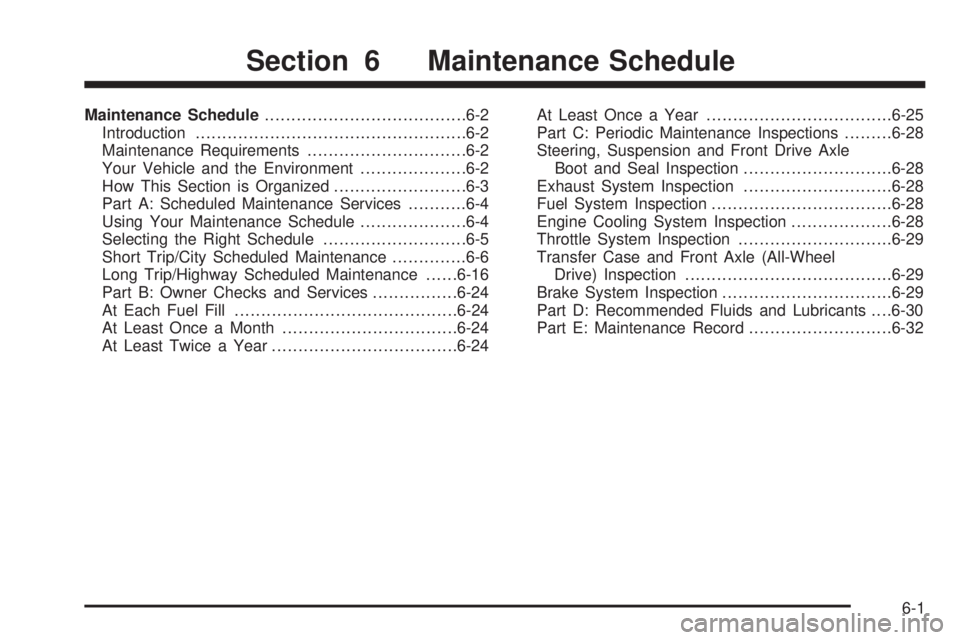
Maintenance Schedule......................................6-2
Introduction...................................................6-2
Maintenance Requirements..............................6-2
Your Vehicle and the Environment....................6-2
How This Section is Organized.........................6-3
Part A: Scheduled Maintenance Services...........6-4
Using Your Maintenance Schedule....................6-4
Selecting the Right Schedule...........................6-5
Short Trip/City Scheduled Maintenance..............6-6
Long Trip/Highway Scheduled Maintenance......6-16
Part B: Owner Checks and Services................6-24
At Each Fuel Fill..........................................6-24
At Least Once a Month.................................6-24
At Least Twice a Year...................................6-24At Least Once a Year...................................6-25
Part C: Periodic Maintenance Inspections.........6-28
Steering, Suspension and Front Drive Axle
Boot and Seal Inspection............................6-28
Exhaust System Inspection............................6-28
Fuel System Inspection..................................6-28
Engine Cooling System Inspection...................6-28
Throttle System Inspection.............................6-29
Transfer Case and Front Axle (All-Wheel
Drive) Inspection.......................................6-29
Brake System Inspection................................6-29
Part D: Recommended Fluids and Lubricants. . . .6-30
Part E: Maintenance Record...........................6-32
Section 6 Maintenance Schedule
6-1
Page 323 of 382
How This Section is Organized
This maintenance schedule is divided into ®ve parts:
ªPart A: Scheduled Maintenance Servicesºexplains
what to have done and how often. Some of these
services can be complex, so unless you are technically
quali®ed and have the necessary equipment, you
should let your GM dealer's service department do
these jobs.
Your GM dealer has GM-trained and supported
service people that will perform the work using genuine
GM parts.
{CAUTION:
Performing maintenance work on a vehicle can
be dangerous. In trying to do some jobs, you
can be seriously injured. Do your own
maintenance work only if you have the
required know-how and the proper tools and
equipment for the job. If you have any doubt,
have a quali®ed technician do the work.
If you want to get the service information, see
Service
Publications Ordering Information on page 7-11.ªPart B: Owner Checks and Servicesºtells you what
should be checked and when. It also explains what
you can easily do to help keep your vehicle in good
condition.
ªPart C: Periodic Maintenance Inspectionsºexplains
important inspections that your dealer's service
department can perform for you.
ªPart D: Recommended Fluids and Lubricantsºlists
some recommended products necessary to help
keep your vehicle properly maintained. These products,
or their equivalents, should be used whether you do
the work yourself or have it done.
ªPart E: Maintenance Recordºis a place for you to
record and keep track of the maintenance performed on
your vehicle. Keep your maintenance receipts. They
may be needed to qualify your vehicle for warranty
repairs.
6-3