fuel CHEVROLET AVALANCHE 2007 2.G Owners Manual
[x] Cancel search | Manufacturer: CHEVROLET, Model Year: 2007, Model line: AVALANCHE, Model: CHEVROLET AVALANCHE 2007 2.GPages: 618, PDF Size: 3.25 MB
Page 2 of 618
Service and Appearance Care
.................. 429
Service
................................................. 432
Fuel
...................................................... 435
Checking Things Under the Hood
......... 442
Rear Axle
............................................. 482
Four-Wheel Drive
.................................. 483
Front Axle
............................................ 484
Headlamp Aiming
................................. 485
Bulb Replacement
................................ 488
Windshield Wiper Blade Replacement
.... 491
Tires
..................................................... 492
Appearance Care
.................................. 537Vehicle Identi�cation
............................. 546
Electrical System
.................................. 547
Capacities and Speci�cations
................ 556
Maintenance Schedule
.............................. 559
Maintenance Schedule
.......................... 560
Customer Assistance Information
............. 581
Customer Assistance and Information
..... 582
Reporting Safety Defects
...................... 599
Index
.......................................................... 603
2
Page 91 of 618
Keys.............................................................. 93
Remote Keyless Entry (RKE) System.......... 94
Remote Keyless Entry (RKE)
System Operation.................................... 95
Doors and Locks........................................ 102
Door Locks................................................ 102
Power Door Locks..................................... 103
Delayed Locking........................................ 103
Programmable Automatic Door Locks........ 103
Rear Door Security Locks......................... 104
Lockout Protection..................................... 104
Midgate
®................................................... 105
Tailgate..................................................... 115
Power Running Boards.............................. 115
Windows...................................................... 116
Power Windows........................................ 117
Sun Visors................................................ 118
Theft-Deterrent Systems............................. 118
Content Theft-Deterrent............................. 118
PASS-Key
®III+......................................... 120
PASS-Key®III+ Operation......................... 121Starting and Operating Your Vehicle........... 122
New Vehicle Break-In................................ 122
Ignition Positions....................................... 123
Retained Accessory Power (RAP)............. 124
Starting the Engine.................................... 124
Adjustable Throttle and Brake Pedal.......... 126
Engine Coolant Heater.............................. 126
Active Fuel Management™........................ 127
Automatic Transmission Operation............. 128
Tow/Haul Mode......................................... 131
Four-Wheel Drive...................................... 132
Parking Brake........................................... 138
Shifting Into Park (P) ................................. 139
Shifting Out of Park (P)............................. 141
Parking Over Things That Burn................. 142
Engine Exhaust......................................... 143
Running the Engine While Parked............. 144
Mirrors......................................................... 145
Automatic Dimming Rearview Mirror
with OnStar
®, Compass and
Temperature Display.............................. 145
Section 2 Features and Controls
91
Page 99 of 618
3. Slide the new battery into the transmitter with
the positive side of the battery facing down.
Use a type CR2032 battery, or equivalent
type. Make sure the cover is on tightly,
so water will not get in.
4. Snap the front and the back of the
transmitter together.
5. Test the operation of the transmitter with
the vehicle.
Remote Vehicle Start
Your vehicle may have a remote starting feature.
This feature allows you to start the engine
from outside of the vehicle. It may also start up
the vehicle’s heating or air conditioning systems
and rear window defogger. Normal operation of the
system will return after the key is turned to the
RUN position.
If your vehicle has an automatic climate control
system, during remote start, the climate control
system will default to a heating mode during colder
outside temperatures and a cooling mode during
warmer outside temperatures. If your vehicle
does not have an automatic climate controlsystem, during remote start the climate control
system will turn on at the setting the vehicle was
set to when the vehicle was last turned off.
If your vehicle has heated seats, they will turn
on during colder outside temperatures and will shut
off when the key is turned to RUN.
Laws in some communities may restrict the use
of remote starters. For example, some laws
may require a person using the remote start to
have the vehicle in view when doing so. Check
local regulations for any requirements on remote
starting of vehicles.
Do not use the remote start feature if your vehicle
is low on fuel. Your vehicle may run out of fuel.
The RKE transmitter with the remote start
button, provides an increased range of operation.
However, the range may be less while the
vehicle is running. As a result, you may need to
be closer to your vehicle to turn it off, than
you were to turn it on.
There are other conditions which can affect the
performance of the transmitter, seeRemote
Keyless Entry (RKE) System on page 94for
additional information.
99
Page 126 of 618
Adjustable Throttle and Brake Pedal
If your vehicle has this feature, you can change
the position of the throttle and brake pedals.
This feature is designed for shorter drivers, since
the pedals cannot move farther away from the
standard position, but can move toward the driver
for better pedal reach.
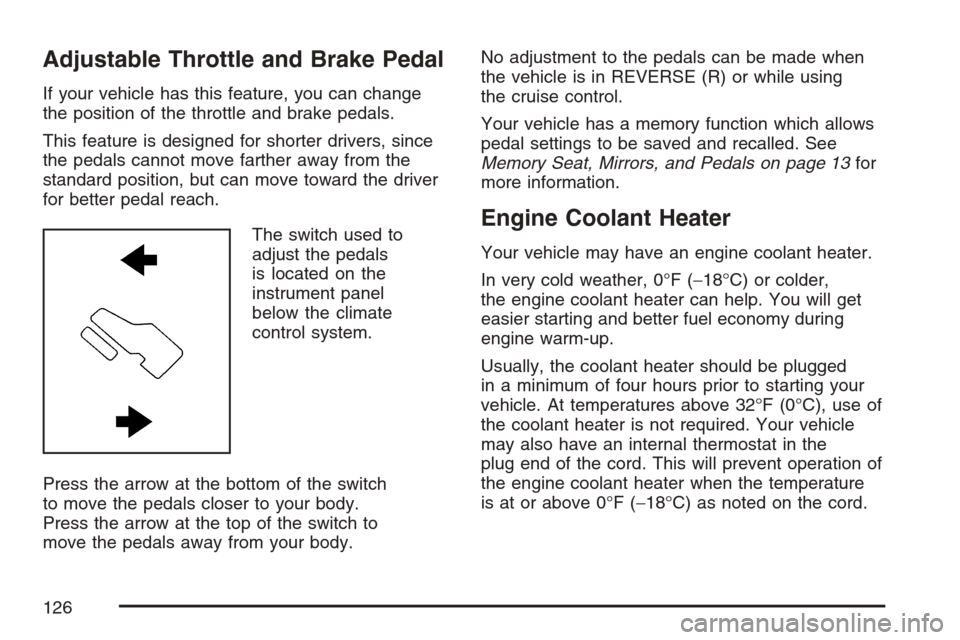
The switch used to
adjust the pedals
is located on the
instrument panel
below the climate
control system.
Press the arrow at the bottom of the switch
to move the pedals closer to your body.
Press the arrow at the top of the switch to
move the pedals away from your body.No adjustment to the pedals can be made when
the vehicle is in REVERSE (R) or while using
the cruise control.
Your vehicle has a memory function which allows
pedal settings to be saved and recalled. See
Memory Seat, Mirrors, and Pedals on page 13for
more information.
Engine Coolant Heater
Your vehicle may have an engine coolant heater.
In very cold weather, 0°F (−18°C) or colder,
the engine coolant heater can help. You will get
easier starting and better fuel economy during
engine warm-up.
Usually, the coolant heater should be plugged
in a minimum of four hours prior to starting your
vehicle. At temperatures above 32°F (0°C), use of
the coolant heater is not required. Your vehicle
may also have an internal thermostat in the
plug end of the cord. This will prevent operation of
the engine coolant heater when the temperature
is at or above 0°F (−18°C) as noted on the cord.
126
Page 127 of 618
To Use the Engine Coolant Heater
1. Turn off the engine.
2. Open the hood and unwrap the electrical
cord. The cord is located on the driver’s
side of the engine compartment, near
the power steering �uid reservoir.
3. Plug the cord into a normal, grounded
110-volt AC outlet.
{CAUTION:
Plugging the cord into an ungrounded
outlet could cause an electrical shock.
Also, the wrong kind of extension cord
could overheat and cause a �re. You
could be seriously injured. Plug the cord
into a properly grounded three-prong
110-volt AC outlet. If the cord will not
reach, use a heavy-duty three-prong
extension cord rated for at least 15 amps.
4. Before starting the engine, be sure to unplug
and store the cord as it was before to keep it
away from moving engine parts. If you do
not, it could be damaged.How long should you keep the coolant heater
plugged in? The answer depends on the outside
temperature, the kind of oil you have, and
some other things. Instead of trying to list
everything here, we ask that you contact your
dealer in the area where you will be parking your
vehicle. The dealer can give you the best
advice for that particular area.
Active Fuel Management™
Your vehicle’s V8 engine may have Active Fuel
Management™. This system allows the engine to
operate on either all or half of its cylinders,
depending on the driving conditions.
When less power is required, such as cruising at a
constant vehicle speed, the system will operate
in the half cylinder mode, allowing your vehicle to
achieve better fuel economy. When greater
power demands are required, such as accelerating
from a stop, passing, or merging onto a freeway,
the system will maintain full-cylinder operation.
Your vehicle has an Active Fuel Management™
indicator. For more information on using this
display seeDIC Operation and Displays (With
DIC Buttons) on page 258orDIC Operation and
Displays (Without DIC Buttons) on page 264.
127
Page 130 of 618
DRIVE (D):This position is for normal driving. It
provides the best fuel economy for your vehicle.
If you need more power for passing, and you are:
Going less than about 35 mph (56 km/h), push
your accelerator pedal about halfway down.
Going about 35 mph (56 km/h) or more, push
the accelerator all the way down.
DRIVE (D) can be used when towing a trailer,
carrying a heavy load, driving on steep hills or
for off-road driving. You may want to shift the
transmission to THIRD (3) or, if necessary, a lower
gear selection if the transmission shifts too often.
Downshifting the transmission in slippery road
conditions could result in skidding, see “Skidding”
underLoss of Control on page 367
THIRD (3):This position is also used for normal
driving. However, it reduces vehicle speed
more than DRIVE (D) without using your brakes.
You can use THIRD (3) on hills. It can help control
your speed as you go down steep mountain
roads, but then you would also want to use your
brakes off and on.SECOND (2):This position reduces vehicle speed
even more than THIRD (3) without using your
brakes. You can use SECOND (2) on hills. It can
help control your speed as you go down steep
mountain roads, but then you would also want to
use your brakes off and on.
If you select SECOND (2) and the Tow/Haul has
not been selected, the transmission will drive
in SECOND (2) gear. You may use this feature
for reducing the speed of the rear wheels
when you are trying to start your vehicle from
a stop on slippery road surfaces.
If you select SECOND (2) and the Tow/Haul has
also been selected, the transmission operation will
be limited to FIRST (1) and SECOND (2) gears.
You may use this feature for reducing the speed
of the rear wheels when you are trying to start your
vehicle from a stop on slippery road surfaces.
FIRST (1):This position reduces vehicle speed
even more than SECOND (2) without using
your brakes. You can use it on very steep hills,
or in deep snow or mud. If the shift lever is put in
FIRST (1) while the vehicle is moving forward,
the transmission will not shift into �rst gear until
the vehicle is going slowly enough.
130
Page 133 of 618
You can choose among �ve driving settings:
Indicator lights in the switches show you which
setting you are in. The indicator lights will come on
brie�y when you turn on the ignition and the last
chosen setting will stay on. If the lights do not come
on, you should take your vehicle in for service. An
indicator light will �ash while shifting. Fast �ashing
means the conditions were not met to make the
desired shift, typically the vehicle was going too
fast, the automatic transmission was not in neutral.
or the clutch pedal was not fully pressed. Slow
�ashing means the shift is in progress. It will stay on
when the shift is completed. If for some reason the
transfer case cannot make a requested shift, it will
return to the last chosen setting.
2
m(Two-Wheel Drive High):This setting is
used for driving in most street and highway
situations. Your front axle is not engaged in
two-wheel drive. This setting also provides the
best fuel economy.
AUTO (Automatic Four-Wheel Drive):This
setting is ideal for use when road surface traction
conditions are variable. When driving your
vehicle in AUTO, the front axle is engaged,but the vehicle’s power is primarily sent to the
rear wheels. When the vehicle’s software
determines a need for more traction, the system
will transfer more power to the front wheels.
Driving in this mode results in slightly lower fuel
economy than Two-Wheel Drive High.
4
m(Four-Wheel Drive High):Use the
four-wheel high position when you need extra
traction, such as on snowy or icy roads or in most
off-road situations. This setting also engages
your front axle to help drive your vehicle. This is
the best setting to use when plowing snow.
4
n(Four-Wheel Drive Low):This setting also
engages your front axle and delivers extra torque.
You may never need this setting. It sends maximum
power to all four wheels. You might choose
Four-Wheel Drive Low if you are driving off-road
in deep sand, deep mud, deep snow, and while
climbing or descending steep hills. StabiliTrak
®
will not engage in this mode. SeeStabiliTrak®
System on page 359for more information.
133
Page 202 of 618
Malfunction Indicator Lamp........................ 250
Oil Pressure Gage..................................... 253
Oil Pressure Light..................................... 254
Security Light............................................ 255
Fog Lamp Light......................................... 255
Cruise Control Light.................................. 255
Highbeam On Light................................... 256
Tow/Haul Mode Light................................ 256
Fuel Gage................................................. 256
Driver Information Center (DIC).................. 257
DIC Operation and Displays
(With DIC Buttons)................................. 258
DIC Operation and Displays
(Without DIC Buttons)............................ 264
DIC Warnings and Messages.................... 267
DIC Vehicle Customization
(With DIC Buttons)................................. 278
Audio System(s)......................................... 286
Setting the Time (MP3 Radio
with a Single CD Player)........................ 288
Setting the Time (MP3 Radio
with a CD and DVD Player)................... 289Setting the Time (MP3 Radio
with a Six-Disc CD Player)..................... 290
Radio with CD (MP3)................................ 291
Radio with CD and DVD (MP3) ................. 301
Using an MP3 (Radio with CD
or Six-Disc CD Player)........................... 319
Using an MP3 (Radio with CD
and DVD Player).................................... 325
XM Radio Messages................................. 332
Navigation/Radio System........................... 334
Rear Seat Entertainment System............... 334
Rear Seat Audio (RSA)............................. 345
Theft-Deterrent Feature............................. 347
Audio Steering Wheel Controls.................. 347
Radio Reception........................................ 348
Care of Your CDs and DVDs.................... 349
Care of the CD and DVD Player............... 349
Fixed Mast Antenna.................................. 349
XM™ Satellite Radio Antenna System....... 349
Section 3 Instrument Panel
202
Page 240 of 618
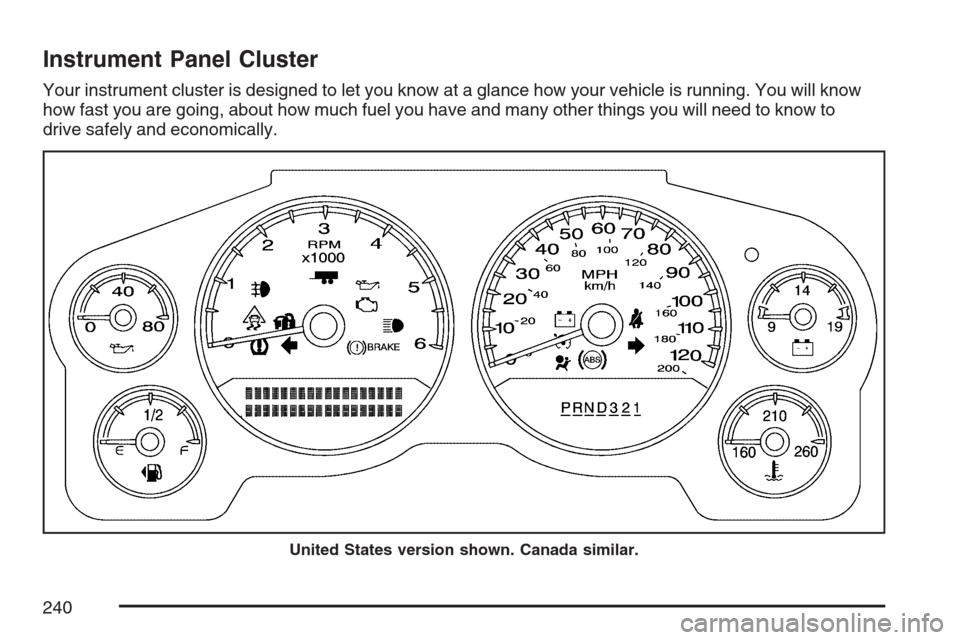
Instrument Panel Cluster
Your instrument cluster is designed to let you know at a glance how your vehicle is running. You will know
how fast you are going, about how much fuel you have and many other things you will need to know to
drive safely and economically.
United States version shown. Canada similar.
240
Page 246 of 618
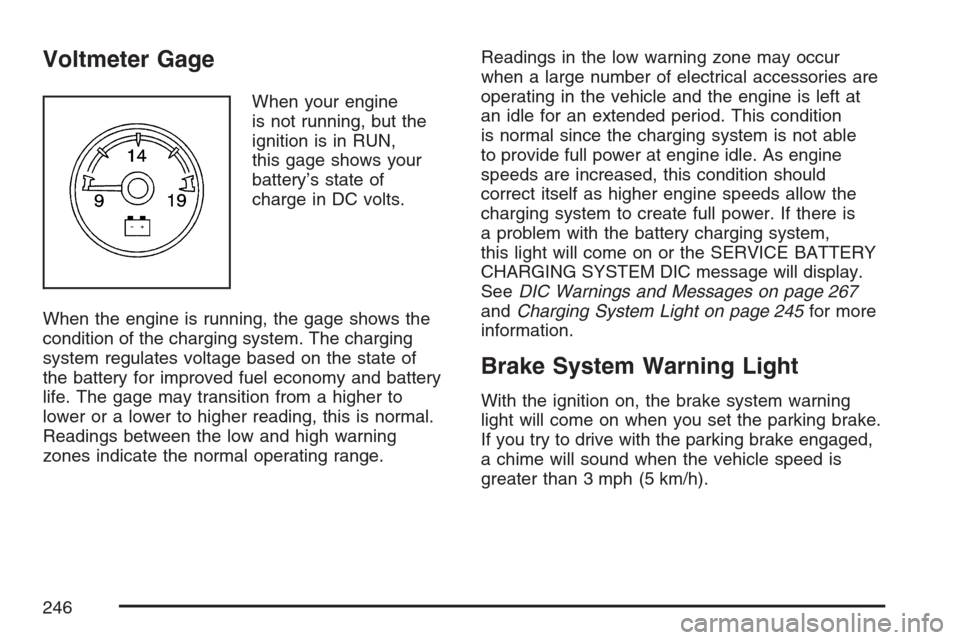
Voltmeter Gage
When your engine
is not running, but the
ignition is in RUN,
this gage shows your
battery’s state of
charge in DC volts.
When the engine is running, the gage shows the
condition of the charging system. The charging
system regulates voltage based on the state of
the battery for improved fuel economy and battery
life. The gage may transition from a higher to
lower or a lower to higher reading, this is normal.
Readings between the low and high warning
zones indicate the normal operating range.Readings in the low warning zone may occur
when a large number of electrical accessories are
operating in the vehicle and the engine is left at
an idle for an extended period. This condition
is normal since the charging system is not able
to provide full power at engine idle. As engine
speeds are increased, this condition should
correct itself as higher engine speeds allow the
charging system to create full power. If there is
a problem with the battery charging system,
this light will come on or the SERVICE BATTERY
CHARGING SYSTEM DIC message will display.
SeeDIC Warnings and Messages on page 267
andCharging System Light on page 245for more
information.
Brake System Warning Light
With the ignition on, the brake system warning
light will come on when you set the parking brake.
If you try to drive with the parking brake engaged,
a chime will sound when the vehicle speed is
greater than 3 mph (5 km/h).
246