light CHEVROLET BLAZER 1996 2.G Repair Manual
[x] Cancel search | Manufacturer: CHEVROLET, Model Year: 1996, Model line: BLAZER, Model: CHEVROLET BLAZER 1996 2.GPages: 392, PDF Size: 20.35 MB
Page 293 of 392
Downloaded from www.Manualslib.com manuals search engine Mixing tires could cause you to lose control while
driving.
If you mix tires of different sizes or types
(radial and bias-belted tires), the vehicle may not
handle properly, and you could have a crash.
Using tires
of different sizes may also cause
damage to your vehicle. Be sure
to use the same
size and type tires
on all wheels.
Uniform Tire Quality Grading
The following information relates to the system
developed by the United States National Highway
Traffic Safety Administration, which grades tires by
treadwear, traction and temperature performance. (This
applies only to vehicles sold
in the United States.) The
grades are molded on the sidewalls of most passenger
car tires. The Uniform Tire Quality Grading system does
not apply to deep tread, winter-type snow tires,
space-saver or temporary use spare tires, tires with
nominal rim diameters of
10 to 12 inches (25 to 30 cm),
or to some limited-production tires. While the tires
available on General Motors passenger
cars and light trucks may vary with respect to these
grades, they must also conform to Federal safety
requirements and additional General Motors Tire
Performance Criteria (TPC) standards.
Treadwear
The treadwear grade is a comparative rating based on
the wear rate of the tire when tested under controlled
conditions on a specified government test course. For
example, a tire graded
150 would wear one and a half
(1 1/2) times as well on the government course as a tire
graded 100. The relative performance of tires depends
upon the actual conditions of their use, however, and
may depart significantly from the norm due to variations
in driving habits, service practices and differences in
road characteristics and climate.
Traction - A, B, C
The traction grades, from highest to lowest, are A, B,
and C, and they represent the tire’s ability to stop
on wet pavement as measured under controlled
conditions on specified government test surfaces
of asphalt and concrete. A tire marked C may have
poor traction performance.
6-45
Page 297 of 392

Downloaded from www.Manualslib.com manuals search engine Don’t use any of these unless this manual says you can.
In many uses, these will damage your vehicle:
0 Alcohol
0 Laundry Soap
0 Bleach
0 Reducing Agents
Cleaning the Inside of Your Vehicle
Use a vacuum cleaner often to get rid of dust and loose
dirt. Wipe vinyl or leather with
a clean, damp cloth.
Your GM dealer has two GM cleaners,
a solvent-type
spot lifter and a foam-type powdered cleaner. They will
clean normal spots and stains very well. Do not use
them on vinyl or leather.
Here are some cleaning tips:
0 Always read the instructions on the cleaner label.
0 Clean up stains as soon as you can -- before they set.
0 Use a clean cloth or sponge, and change to a clean area
often. A soft brush may be used if
stains are stubborn.
0 Use solvent-type cleaners in a well-ventilated area
only. If you use them, don’t saturate the stained area.
If a ring forms after spot cleaning, clean the entire
area immediately or it will set.
Using Foam-Type Cleaner on Fabric
0 Vacuum and brush the area to remove any loose dirt.
0 Always clean a whole trim panel or section. Mask
0 Mix Multi-Purpose Powdered Cleaner following the
surrounding
trim along stitch or welt lines.
directions
on the container label.
0 Use suds only and apply with a clean sponge.
0 Don’t saturate the material.
0 Don’t rub it roughly.
As soon as you’ve cleaned the section, use a sponge
0 Rinse the section with a clean, wet sponge.
to remove
the suds.
a Wipe off what’s
left with a slightly damp paper towel
or cloth.
0 Then dry it immediately with a blow dryer.
0 Wipe with a clean cloth.
6-49
Page 298 of 392

Downloaded from www.Manualslib.com manuals search engine Using Solvent-Type Cleaner on Fabric
First, see if you have to use solvent-type cleaner at all.
Some spots and stains will clean off better with just
water and mild soap.
If
you need to use a solvent:
Gently scrape excess soil from the trim material with a
clean, dull knife or scraper. Use very little cleaner, light
pressure
and clean cloths (preferably cheesecloth).
Cleaning should start at the outside of the stain,
.. “featheri-ng” tgward the center. Keep changing to a
clean section
of the cloth.
When you clean a stain from tdbric, immediately
dry the area with a blow dryer
to help prevent a
cleaning ring.
Fabric Protection
Your vehicle has upholstery and carpet that has been
treated with Scotchgard” Fabric Protector, a
3M
product. It protects fabrics by repelling oil and water,
which are
the carriers of most stains. Even with this
protection,
you still need to clean your upholstery and
carpet often
to keep it looking new.
Further information
on cleaning is available by calling
1-800-433-3296 (in Minnesota, 1-800-642-6 167).
Special Cleaning Problems
Greasy or Oily Stains
Stains caused by grease, oil, butter, margarine, shoe
polish, coffee with cream, chewing gum, cosmetic
creams, vegetable oils, wax crayon, tar and asphalt can
be removed as follows:
0 Carefully scrape off excess stain.
0 Follow the solvent-type instructions described
earlier.
Shoe polish, wax crayon, tar and asphalt will stain
if left on a vehicle’s seat fabric. They should be
removed as soon as possible. Be careful, because
the cleaner will dissolve them and may cause them
to spread.
Non-Greasy Stains
Stains caused by catsup, coffee (black), egg, fruit, fruit
juice, milk, soft drinks, wine, vomit, urine and blood can
be removed as follows:
J
Carefully scrape off excess stain, then sponge the
soiled area
with cool water.
If a stain remains, follow the foam-type instructions
described earlier.
6-50
Page 299 of 392

Downloaded from www.Manualslib.com manuals search engine 0 If an odor lingers after cleaning vomit or urine,
treat the area with a waterhaking soda solution:
1 teaspoon (5 ml) of baking soda to 1 cup (250 ml)
of lukewarm water.
0 If needed, clean lightly with solvent-type cleaner.
Combination Stains
Stains caused by candy, ice cream, mayonnaise, chili
sauce and unknown stains can be removed as follows:
0 Carefully scrape off excess stain, then clean with
cool water and allow to dry.
If a stain remains, clean it with solvent-type cleaner.
Cleaning Vinyl
Use warm water and a clean cloth.
0 Rub with a clean, damp cloth to remove dirt. You
may have to do it more than once.
Things like tar, asphalt and shoe polish will stain if
you don’t get them off quickly. Use a clean cloth and
a
GM Vinylkeather Cleaner or equivalent product.
Cleaning Leather
Use a soft cloth with lukewarm water and a mild soap or
saddle soap.
0 For stubborn stains, use a GM VinyVLeather Cleaner
0 Never use oils, varnishes, solvent-based or abrasive
or
equivalent product.
cleaners, furniture polish or shoe polish
on leather.
0 Soiled leather should be cleaned immediately. If
dirt is allowed to work into the finish, it can harm
the leather.
Cleaning the Top of the Instrument Panel
Use only mild soap and water to clean the top surfaces
of the instrument panel. Sprays containing silicones or
waxes may cause annoying reflections
in the windshield
and even make
it difficult to see through the windshield
under certain conditions.
6-5 1
Page 307 of 392

Downloaded from www.Manualslib.com manuals search engine Fuses and Circuit Breakers
The wiring circuits in your vehicle are protected from
short circuits by a combination
of fuses, circuit breakers
and fusible thermal links. This greatly reduces
the
chance of fires caused by electrical problems.
Look at the silver-colored band inside the
fuse. If the
band is broken or melted, replace the fuse. Be sure
you
replace a bad fuse with a new one of the identical size
and rating.
If
you ever have a problem on the road and don’t have a
spare fuse, you can borrow one that has the same
amperage. Just pick some feature
of your vehicle that
you can get along without
-- like the radio or cigarette
lighter
-- and use its fuse, if it is the correct amperage.
Replace it as soon as
you can.
Instrument Panel Fuse Block
The fuse block is at the
driver’s end
of the
instrument panel.
Remove the cover by turning the fastener
counterclockwise. Extra fuses and the fuse extractor are
provided
in the cover. To reinstall the fuse panel cover,
push
in and turn the fastener clockwise.
6-59
Page 308 of 392
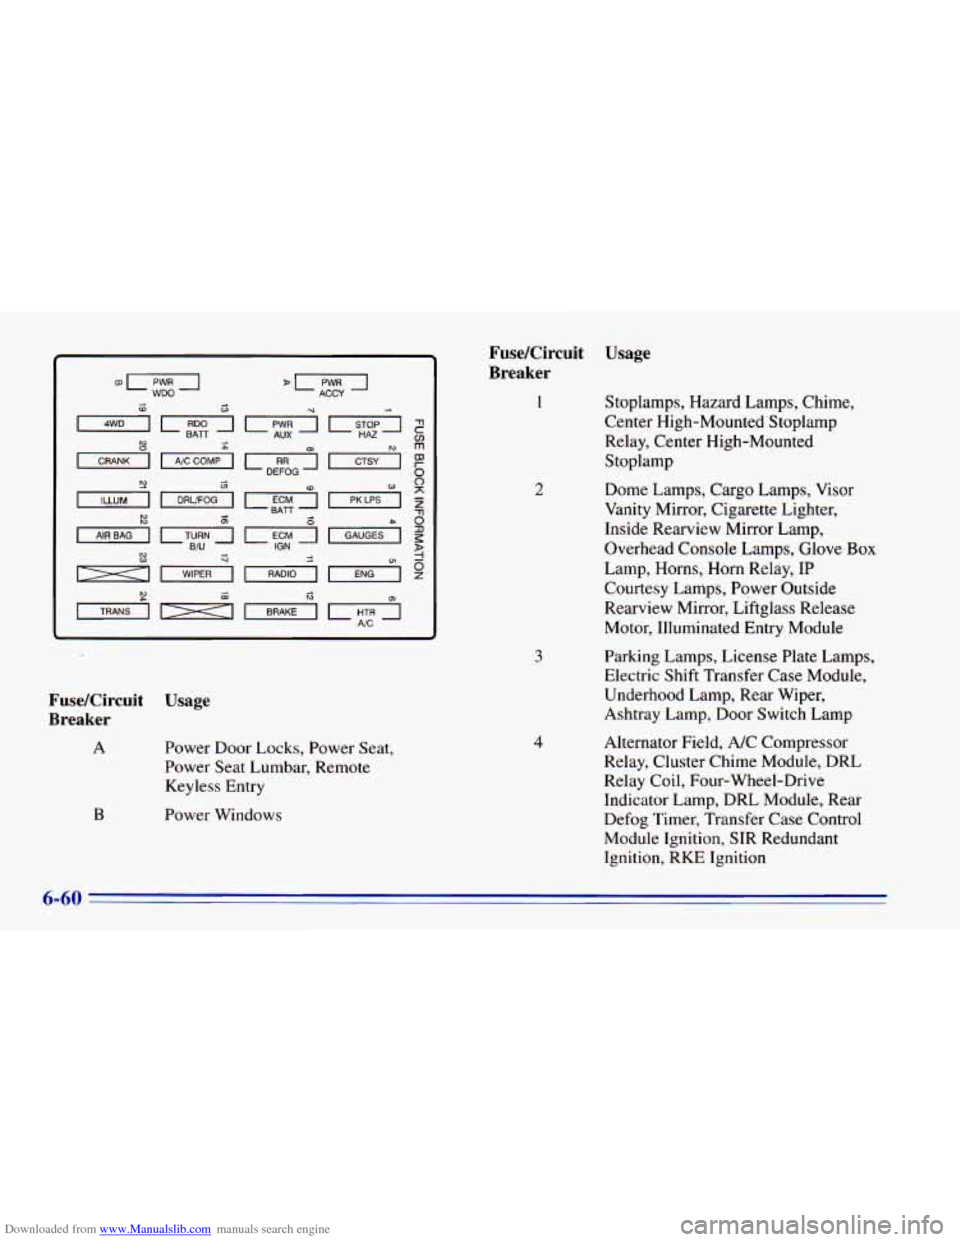
Downloaded from www.Manualslib.com manuals search engine FuseKircuit Usage
Breaker
1
2
3
FuseKircuit Usage
Breaker
A
B
Power Door Locks, Power Seat,
Power Seat Lumbar, Remote Keyless Entry
Power Windows 4
Stoplamps, Hazard Lamps, Chime,
Center High-Mounted Stoplamp
Relay, Center High-Mounted
Stoplamp
Dome Lamps, Cargo Lamps, Visor
Vanity Mirror, Cigarette Lighter,
Inside Rearview Mirror Lamp,
Overhead Console Lamps, Glove
Box
Lamp, Horns, Horn Relay, IP
Courtesy Lamps, Power Outside
Rearview Mirror, Liftglass Release
Motor, Illuminated Entry Module
Parking Lamps, License Plate Lamps,
Electric Shift Transfer Case Module,
Underhood Lamp, Rear Wiper,
Ashtray Lamp, Door Switch Lamp
Alternator Field, A/C Compressor
Relay, Cluster Chime Module, DRL
Relay Coil, Four-Wheel-Drive
Indicator Lamp, DRL Module, Rear
Defog Timer, Transfer Case Control
Module Ignition, SIR Redundant
Ignition, RKE Ignition
6-60
Page 360 of 392
Downloaded from www.Manualslib.com manuals search engine At Least Twice a Year
Restraint System Check
Make sure the safety belt reminder light and all your
belts, buckles, latch plates, retractors and anchorages are working properly. Look for any other loose or damaged
safety belt system parts. If
you see anything that might
keep a safety belt system from doing its job, have
it
repaired. Have any torn or frayed safety belts replaced.
Also look for any opened or broken air bag covers, and
have them repaired or replaced. (The air bag system
does not need regular maintenance.)
Manual Transmission Check
Check the transmission fluid level; add if needed.
See “Manual Transmission” in the Index.
A fluid loss
may indicate a problem. Check the system and repair
if needed.
Automatic Transmission Check
Check the transmission fluid level; add if needed. See
“Automatic Transmission” in the Index.
A fluid loss
may indicate a problem. Check the system and repair
if needed.
Hydraulic Clutch System Check
Check the fluid level in the clutch reservoir. See
“Hydraulic Clutch Fluid” in the Index.
A fluid loss in
this system could indicate a problem. Have the system
inspected and repaired at once.
At Least Once a Year
Key Lock Cylinders Service
Lubricate the key lock cylinders with the lubricant
specified in Part
D.
Body Lubrication Service
Lubricate all body door and fuel door hinges, rear
compartment hinges, latches and locks including the
glove box, console doors and
the body hood and any
moving seat hardware. Lubricate the hood safety lever
pivot and prop rod pivot. Part
D tells you what to use.
More frequent lubrication may be required when
exposed to a corrosive environment.
7-48
Page 375 of 392

Downloaded from www.Manualslib.com manuals search engine FREE Locksmith/Key Service (when keys are lost
on the road or locked inside)
0 FREE Flat Tire Service (spare installed on the road)
FREE Jump Start (at home or on the road)
0 FREE Fuel Delivery ($5 of fuel delivered on
the road)
Chevrolet/Geo offers Courtesy Transportation
for customers needing warranty service. Courtesy
Transportation
will be offered in conjunction with the
coverage provided by the Bumper
To Bumper New
Vehicle Limited Warranty to eligible purchasers of
1996
Chevrolet/Geo passenger car and light duty trucks.
(Please see your selling dealer for details.)
Note:
Courtesy Care is available to Retail and Retail Lease
Customers operating
1996 and newer Chevrolet/Geo
vehicles for a period
of 36 months/36,000 miles,
whichever occurs first.
All Courtesy Care services must
be pre-arranged by Chevrolet Roadside or Dealer
Service Management.
Basic Care and Courtesy Care are not part of or
included
in the coverage provided by the New Vehicle
Limited Warranty. Chevrolet reserves the right to
modify or discontinue
Basic Care and Courtesy Cure
at any time. For
complete program details, see your Chevrolet/Geo
dealer
to obtain a Roadside Assistance Center brochure.
The Roadside Assistance Center uses companies that
will provide you with quality and priority service. When
roadside services are required, our advisors will explain
any payment obligations that may be incurred for
utilizing outside services.
For prompt assistance when calling, please have the
following available to give to the advisor:
Vehicle Identification Number
License plate number
Vehicle color
Vehicle location
0 Telephone number where you can be reached
0 Vehicle mileage
0 Description of problem
Please refer to the Roadside Assistance brochure inside
your owner information portfolio for
full program details.
8-5
Page 381 of 392
Downloaded from www.Manualslib.com manuals search engine Section 9 Index
Accessory Power Outlet ......................... 2-59
Adding Sound Equipment
........................ 3-17
Add-on Equipment
............................. 4-46
AirBag
....................................... 1-18
Adding Equipment
.......................... .' . 1-23
How Does it Restrain
.......................... 1-21
How
it Works ................................ 1-20
Location
.................................... 1-20
Readiness Light
......................... I . 19. 2-66
Servicing
................................... 1-23
What Makes
it Inflate .......................... 1-21
What You See After
it Inflates ................... 1-22
When Should
it Inflate ......................... 1-21
Aircleaner
.................................... 6-13
Air Conditioning
................................ 3-2
Refrigerants
................................. 6-64
Alignment and Balance. Tire
...................... 6-46
All-Wheel Drive
.......................... 2.21. 6.20
Aluminum Wheels. Cleaning
...................... 6-54
Antenna. Fixed
................................. 3-18
Anti-Lock Brake System Warning Light
......... 2.68. 4.6
Appearancecare
............................... 6-48
Materials
.................................... 6-56
Arbitration Program
.............................. 8-7
Armrest. Storage
........................ 2.53. 2.54 Ashtrays
...................................... 2-58
Audio Systems
.................................. 3-5
Automatic Overdrive
............................
Check ...................................... 7-48
Fluid
....................................... 6-14
Operation
................................... 2-16
Park Mechanism Check
........................ 7-50
Shifting ..................................... 2-16
Starting Your Engine
.......................... 2-13
Front
....................................... 6-21
Rear
....................................... 6-19
Backglass Wipers, Blade Replacement
............. 6-40
Battery
....................................... 6-32
ChargeLight
................................ 2-66
Jump Starting ................................. 5-2
Replacement, Keyless Entry
..................... 2-6
Warnings
.................................... 5-2
BBB Auto Line
................................. 8-7
Better Business Bureau Mediation
................... 8-7
BrakeFluid
.................................... 6-28
Brake, Parking
................................. 2-26
Brake System Warning Light
............. ... 2-67
Axle
9-1
Page 382 of 392
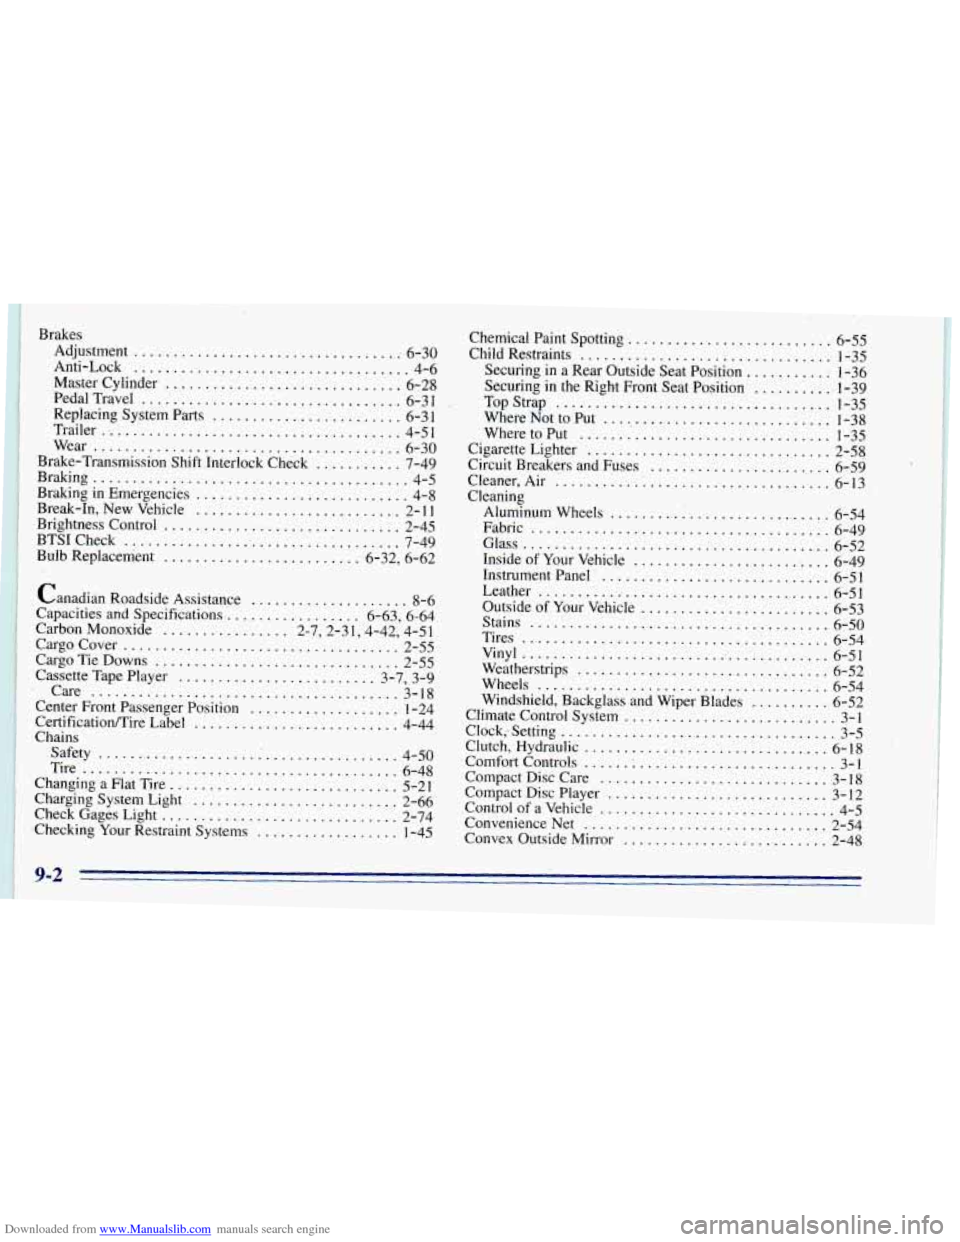
Downloaded from www.Manualslib.com manuals search engine Brakes ................................. Adjustment .. 6-30
Anti-Lock
................................... 4-6
Master Cylinder
................................ 6-28
Pedal Travel '6-3 1
Replacing System Parts
.......................... 6-31
Wear
....................................... 6-30
..................................
Trailer ....................................... 4-51
Brake-Transmission Shift Interlock Check
........... 7-49
Braking
........................................ 4-5
Braking in Emergencies ........................... 4-8
Break-In, New Vehicle
.......................... 2- 11
Bulb Replacement ......................... 6-32, 6-62
Brightness Control
............................. : . 2-45
BTSICheck
.................................... 7-49
Canadian Roadside Assistance
.................... 8-6
Capacities and Specifications
................. 6.63. 6.64
Carbon Monoxide
................ 2.7.2.31.4.42. 4.51
. Care ....................................... 3-18
Center Front Passenger Position ................... 1-24
Certificationrnire Label
.......................... 4-44
Tire
........................................ 6-48
Charging System Light
.......................... 2-66
Check Gages Light
.............................. 2-74
.Checking Your Restraint Systems
.................. 1-45
Cargocover
................................... 2-55
Cargo Tie Downs 2-55
Cassette Tape Player
......................... 3-7, 3-9
................................
'Chains
Safety
...................................... 4-50
Changing a Flat Tire 5-21
.............................
Chemical Paint Spotting .. .. ....................... 6-55
................................ Child Restraints 1-35
Securing in a Rear Outside Seat Position
.......... - . : 1-36
Securing
in the Right Front Seat Position .......... -1-39
Top Strap 1-35
WheretoPut
................................ 1-35
Circuit Breakers and Fuses
....................... 6-59
Cleaner. Air
.. ..................................6-1 3.
Cleaning Aluminum Wheels 6-54
Fabric
...................................... 6-49
Glass
....................................... 6-52
...................................
Where Not to Put .............................. 1-38
Cigarette Lighter
............................... 2-58
............................
Inside of Your Vehicle .......................... 6-49
Instrument Panel
.............................. 6-51
Leather 6-51
Outside of Your Vehicle 6-53
Stains
....................................... 6-50
Tires 6-54
Vinyl
........................................ 6-51
Weatherstrips 6-52
Wheels
..................................... 6-54
3-1
C1ock;Setting
................................... 3-5
Comfort Controls
...... : ......................... 3-1
......................................
.........................
........................................
................................
Windshield, Backglass and Wiper Blades .......... 6-52
Clutch, Hydraulic
............................... 6-18
Compact Disc Care
............................. 3-18
Compact Disc Player
............................ 3-12
Convex Outside Mirror
............................ 2-48
Climate
Control System
...........................
.............................. Control of a Vehicle 4-5
ConvenienceNet
............................... 2-54
9-2