fuse CHEVROLET BLAZER 1998 2.G Owners Manual
[x] Cancel search | Manufacturer: CHEVROLET, Model Year: 1998, Model line: BLAZER, Model: CHEVROLET BLAZER 1998 2.GPages: 416, PDF Size: 22.4 MB
Page 9 of 416
Downloaded from www.Manualslib.com manuals search engine Supplement to the 1998 Chevrolet SlO (with ZR2 Suspension) and
Chevrolet Blazer (with
ZR2 Suspension) Owner’s Manuals
This information should be included with the “Daytime
Running Lamps
(Dm)” information located in
Section 2 in your owner’s manual.
Vehicles built for the U.S. domestic market are not
equipped
with Daytime Running Lamps (DRL).
Part Number 15040820
This information should be included with the “Engine
Compartment Fuse Block” information located in
Section
6 in your owner’s manual.
DRL Not used for Daytime Running Lamps in
vehicles built for the
U.S. domestic market.
“Copyxight General Motors Corporation 1998
All Rights Reserved
1
Page 15 of 416
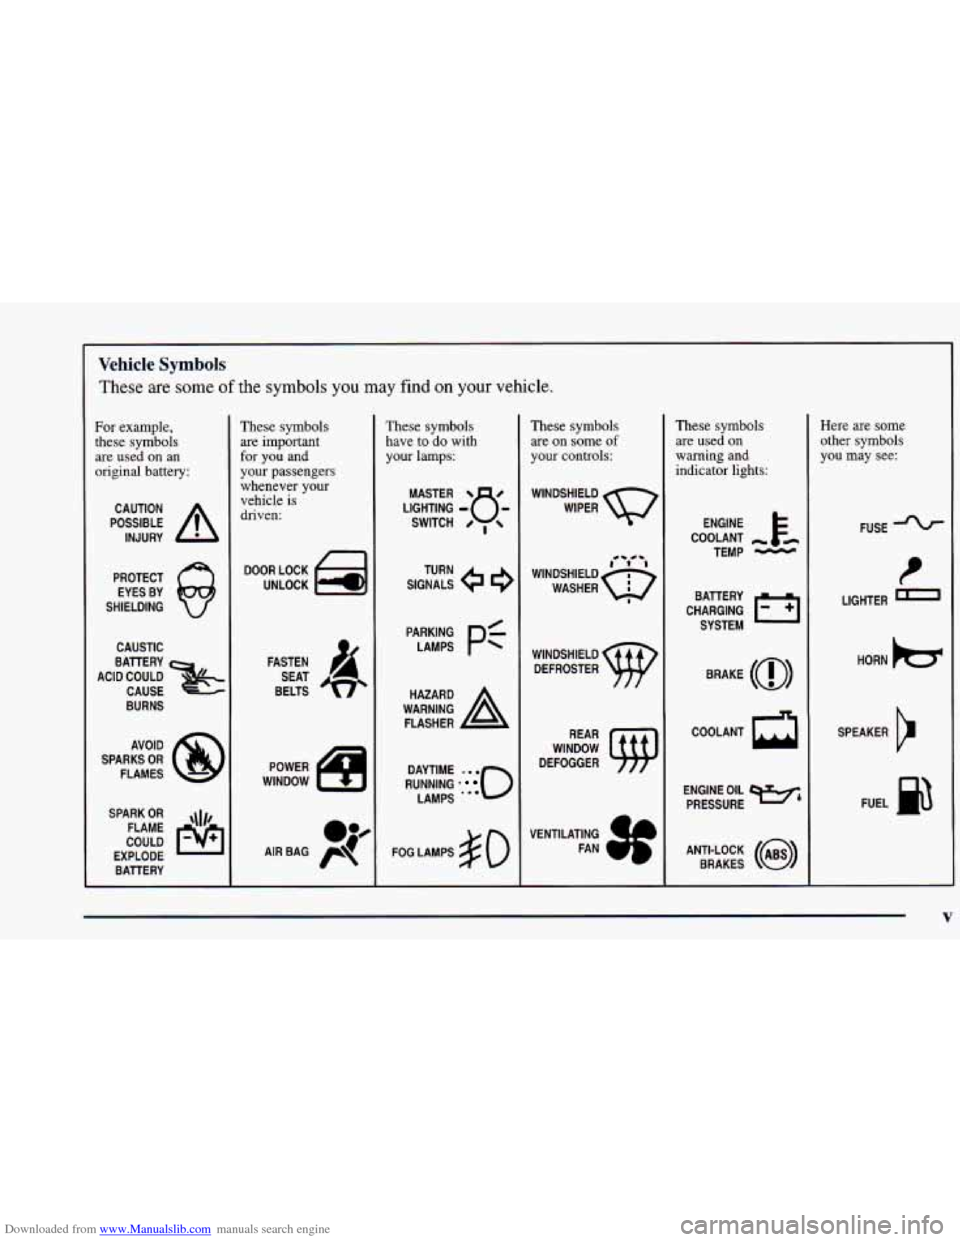
Downloaded from www.Manualslib.com manuals search engine Vehicle Symbols
These are some of the symbols you may find on your vehicle.
For example,
these symbols
are used on an
original battery:
POSSIBLE A
CAUTION
INJURY
PROTECT EYES BY
SHIELDING
CAUSTIC
BURNS
SPARK
OR ,111,
COULD FLAME
EXPLODE BATTERY
These symbols
are important
for you and
your passengers
whenever your vehicle is
driven:
FASTEN
SEAT
BELTS
POWER
WINDOW
These symbols have
to do with
your lamps:
SIGNALS e
TURN
RUNNING
* 0
DAYTIME . . .
LAMPS "'
FOG LAMPS # 0
These symbols
are on some
of
your controls:
WINDSHIELD
DEFROSTER
WINDOW
DEFOGGER
VENTILATING FAN
These symbols
are used on
warning and
indicator lights:
COOLANT -
TEMP -
BRAKE (a)
h COOLANT
ENGINE OIL
e,
PRESSURE
ANTI-LOCK
(@)
BRAKES
Here are some
other symbols
you may see:
FUSE -%-
I
LIGHTER m
HORN b
SPEAKER
b
FUEL 93
J
V
Page 18 of 416
Downloaded from www.Manualslib.com manuals search engine Seats and Seat Controls
This section tells you about the seats -- how to adjust
them, and fold them
up and down.
Manual Front Seat
You can lose control of the vehicle if you try to
adjust a manual driver’s seat while the vehicle is
moving. The sudden movement could startle and confuse you, or make you push a pedal when you
don’t
want to. Adjust the driver’s seat only when
the vehicle
is not moving.
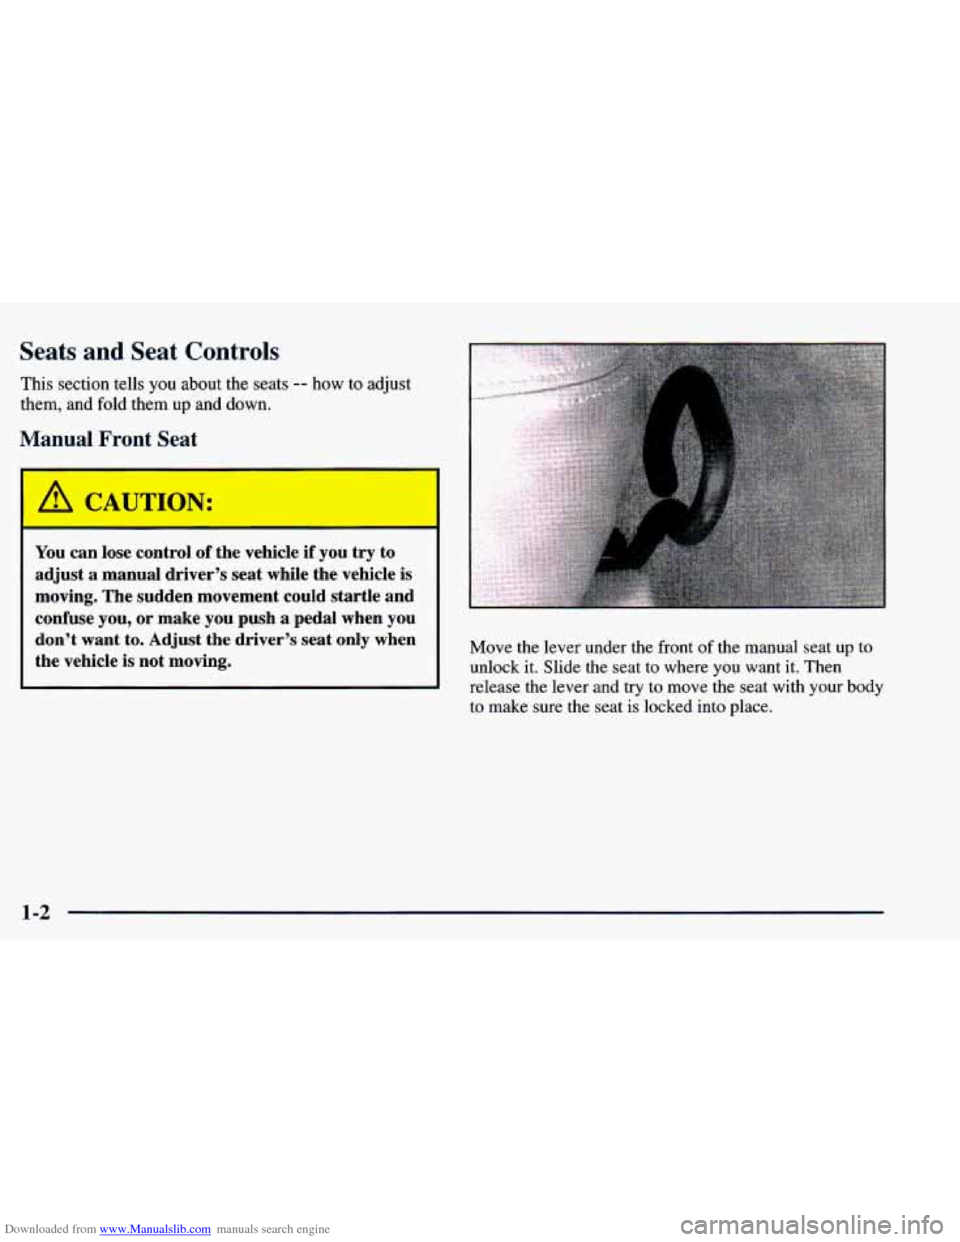
Move the lever under the front of the manual seat up to
unlock it. Slide the seat to where you want it. Then
release the lever and try
to move the seat with your body
to make sure the seat
is locked into place.
1-2
Page 87 of 416
Downloaded from www.Manualslib.com manuals search engine If the engine stalls and the SECURITY light flashes,
wait about
10 minutes until the light stops flashing
before trying to restart the engine. Remember to release
the
key from the START position as soon as the
engine starts.
If the engine does not start after three (3) tries, the
vehicle needs service.
If you are driving and the SECURITY light comes on,
you will be able to restart the engine if you turn the
engine
off. However, your Passlock system is not
working properly and must be serviced by your dealer.
Your vehicle is not protected by Passlock at this time.
You may also want to check the fuse (see “Fuses and
Circuit Breakers” in the Index). See your dealer
for service.
If the
SECURITY light flashes, wait until the light stops
flashing before starting the engine.
If the
SECURITY light comes on while the engine is
running, a problem has been detected and the system
may need service. See your dealer for service.
In an emergency, call the
GM Roadside Assistance
Center. See “Roadside Assistance” in the Index.
New Vehicle “Break-In”
NOTICE:
Your vehicle doesn’t need an elaborate
“break-in.” But
it will perform better in the long
run if
you follow these guidelines:
a
0
0
0
Keep your speed at 55 mph (88 km/h) or
less for the
first 500 miles (805 km).
Don’t drive at any one speed
-- fast or
slow -- for the first 500 miles (805 km).
Don’t make full-throttle starts.
Avoid making hard stops for the first
200 miles (322 km) or so. During this time
your new brake linings aren’t yet broken
in. Hard stops with new linings can mean
premature wear and earlier replacement.
Follow this breaking-in guideline every
time
you get new brake linings.
Don’t tow
a trailer during break-in.
See “Towing a Trailer’’ in the Index for
more information.
2-13
Page 91 of 416
Downloaded from www.Manualslib.com manuals search engine 3. If your engine still won’t start (or starts but then
stops), wait
15 seconds and start over.
When the engine starts, let go of the key and
the
accelerator pedal.
NOTICE:
Your engine is designed to work with the
electronics in your vehicle.
If you add electrical
parts or accessories, you could change the way
the engine operates. Before adding electrical
equipment, check with your dealer.
If you don’t,
your engine might not perform properly.
If you ever have to have your vehicle towed, see,
the part
of this manual that tells how to do it
without damaging your vehicle. See “Towing
Your Vehicle” in the Index.
Engine Coolant Heater (If Equipped)
In very cold weather, 0°F (- 1 SOC) or colder, the engine
coolant heater can help. You’ll get easier starting and
better fuel economy during engine warm-up. Usually,
the coolant heater should be plugged in a minimum of
four hours prior to starting your vehicle.
To Use the Engine Coolant Heater
1. Turn off the engine.
2. Open the hood and unwrap the electrical cord. The
cord is located
on the driver’s side of the engine
compartment, behind the underhood fuse block.
3. Plug it into a normal, grounded 1 10-volt AC outlet.
Plugging the cord into an ungrounded outlet
could cause an electrical shock. Also, the wrong
kind
of extension cord could overheat and cause
a fire.
You could be seriously injured. Plug the
cord into
a properly grounded three-prong
110-volt
AC outlet. If the cord won’t reach, use a
heavy-duty three-prong extension cord rated for
at least
15 amps.
4. Before starting the engine, be sure to unplug and store
the cord as it was before to keep it away from moving
engine parts. If you don’t,
it could be damaged.
2-17
Page 109 of 416
Downloaded from www.Manualslib.com manuals search engine If a bulb is burned out, replace it to help avoid an
accident. If the arrows don’t
go on at all when you
signal a turn, check the fuse (see “Fuses and Circuit
Breakers” in the Index) and for burned-out bulbs.
If
you have a trailer towing option with added wiring for
the trailer lamps, a different turn signal flasher is used.
With this flasher installed, the signal indicator will flash
even
if a turn signal bulb is burned out. Check the front
and rear turn signal lamps regularly to make sure they
are working.
-7 Signal On Chime
lr your turn signal is left on ror more than 3/4 of a mile
(1.2 km), a chime will sound at each flash of the turn
signal.
To turn off the chime, move the turn signal lever
to the off position.
Headlamp High/Low Beam Changer
To change the headlamps from low beam to high or high
to low, pull the multifunction lever all the way toward
you. Then release it.
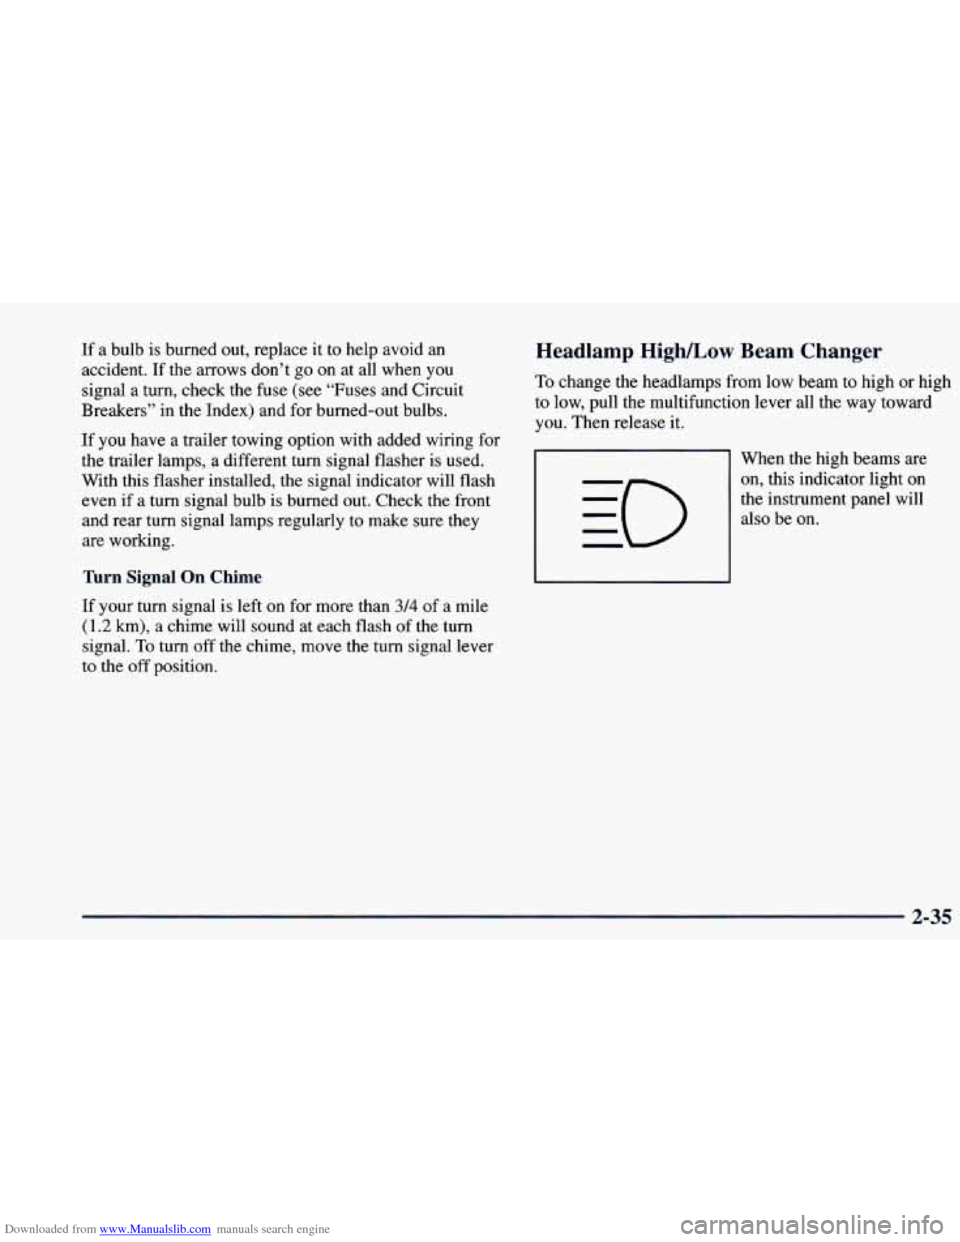
When the high beams are on, this indicator light on
the instrument panel will
also be on.
2-35
Page 132 of 416
Downloaded from www.Manualslib.com manuals search engine Visor Vanity Mirror
Pull the sun visor down and lift the cover to expose the
vanity mirror.
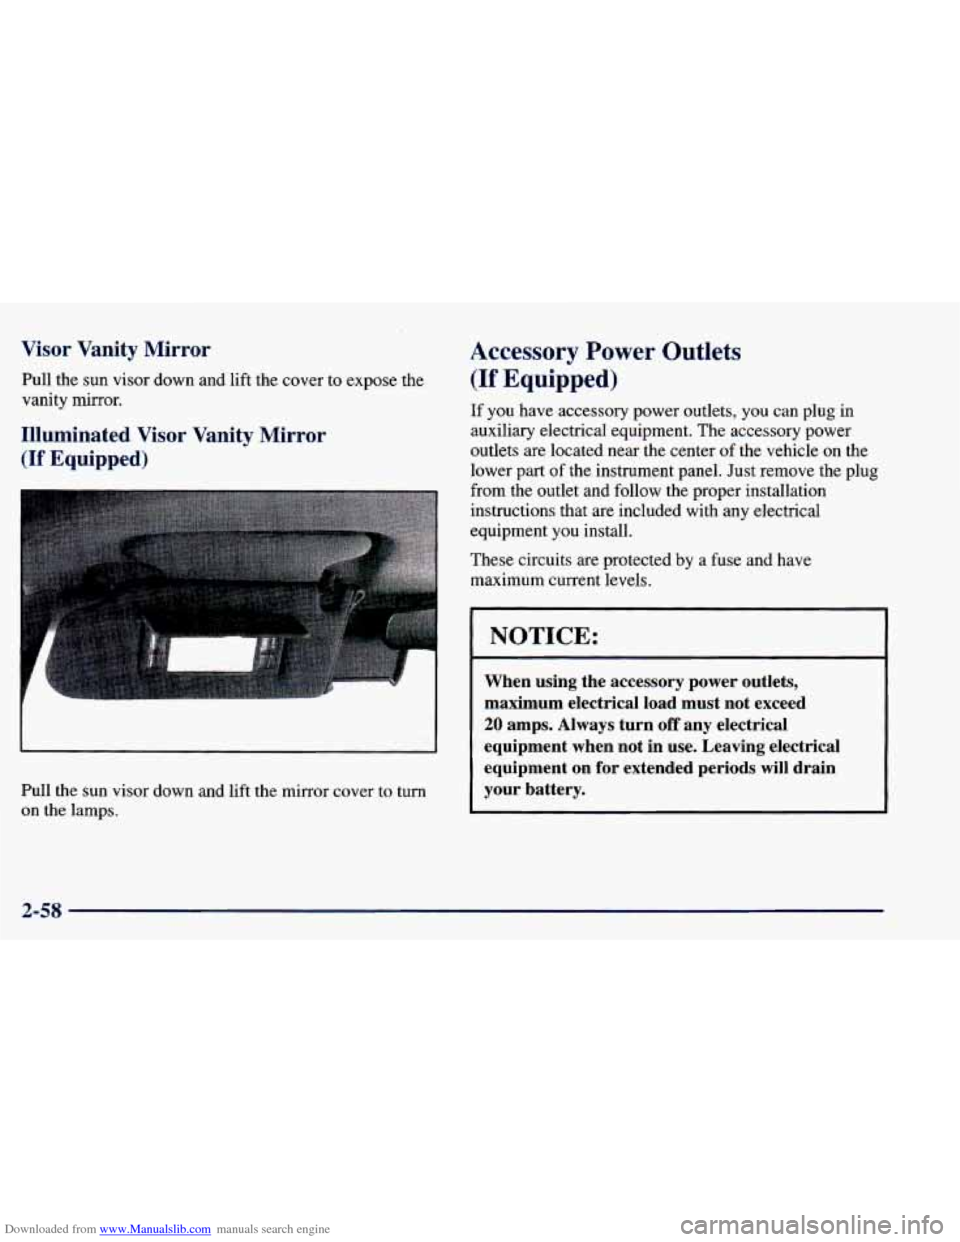
Illuminated Visor Vanity Mirror
(If Equipped)
Pull the sun visor down and lift the mirror cover to turn
on the lamps.
Accessory Power Outlets
(If Equipped)
If you have accessory power outlets, you can plug in
auxiliary electrical equipment. The accessory power
outlets are located near the center of the vehicle
on the
lower part of the instrument panel.
Just remove the plug
from the outlet and follow the proper installation
instructions that are included with any electrical
equipment you install.
These circuits are protected by a fuse and have
maximum current levels.
I NOTICE:
When using the accessory power outlets,
maximum electrical load must not exceed
20 amps. Always turn off any electrical
equipment when not in use. Leaving electrical
equipment on for extended periods will drain
your battery.
2-58
Page 198 of 416
Downloaded from www.Manualslib.com manuals search engine Environmental Concerns
Off-road driving can provide wholesome and satisfying
recreation. However, it also raises environmental
concerns.
GM recognizes these concerns and urges
every off-roader to follow these basic rules for
protecting the environment:
0
0
0
0
0
Always use established trails, roads and areas that
have been specially set aside for public off-road
recreational driving;
obey all posted regulations.
Avoid any driving practice that could damage the
environment
-- shrubs, flowers, trees, grasses -- or
disturb wildlife (this includes wheel-spinning,
breaking down trees or unnecessary driving through
streams or over soft ground).
Always carry
a litter bag . . . make sure all refuse is
removed from any campsite before leaving.
Take extreme care with open fires (where permitted),
camp stoves and lanterns.
Never park your vehicle over dry grass or other combustible materials that could catch fire from the
heat
of the vehicle’s exhaust system.
Traveling to Remote Areas
It makes sense to plan your trip, especially when going
to a remote area. Know the terrain and plan your route.
You are much less likely to get bad surprises. Get
accurate maps of trails and terrain. Try to learn of any
blocked
or closed roads.
It’s also a good idea to travel with at least
one other
vehicle. If something happens to
one of them, the other
can help quickly.
Does your vehicle have a winch? If
so, be sure to read
the winch instructions. In a remote area, a winch can
be
handy if you get stuck. But you’ll want to know how to
use it properly.
Getting Familiar with Off-Road Driving
It’s a good idea to practice in an area that’s safe and
close to home before you
go into the wilderness.
Off-road driving does require some new and different
driving skills. Here’s what we mean.
Tune your senses to different kinds of signals. Your
eyes, for example, need
to constantly sweep the terrain
for unexpected obstacles. Your ears need to listen for
unusual tire or engine sounds. With your arms, hands,
feet and body, you’ll need to respond to vibrations and
vehicle bounce.
4-16
Page 232 of 416
Downloaded from www.Manualslib.com manuals search engine 2. Let up on the brake pedal.
3. Drive slowly until the trailer is clear of the chocks.
4. Stop and have someone pick up and store the chocks.
Maintenance When Trailer Towing
Your vehicle will need service more often when you’re
pulling
a trailer. See the Maintenance Schedule for more
on this. Things that are especially important
in trailer
operation are automatic transmission fluid (don’t
overfill), engine oil, axle lubricant, belt, cooling system
and brake adjustment. Each
of these is covered in this
manual, and the Index will help
you find them quickly.
If
you’re trailering, it’s a good idea to review these
sections before you start your trip.
Check periodically to see that all hitch nuts and bolts
are tight.
Trailer Wiring H-T--- ess
The light duty trailer wir is a six-wire harness
assembly. The optional heavy-duty trailer wiring
is an
eight-wire harness assembly. The harnesses are stored under the vehicle, along the passenger-side frame
crossmember on two-door vehicles or on the driver’s side
corner frame rear crossmember on four-door vehicles. The
heavy-duty trailer wiring has a 30-amp feed wire with
an
inline fuse located by the junction block. See
“Fuses and Circuit Breakers” in the Index. Both
harnesses have
no connector and should be wired by a
qualified electrical technician. The technician
can use
the following color code chart when connecting the
wiring harness to your trailer.
0
0
0
0
0
0
0
0
Dark Blue: Use for electric trailer brakes or
auxiliary wiring.
Red: Use for battery charging; it connects to the
starter solenoid (eight-wire harness only).
Light Green: Back-up lamps (eight-wire
harness only).
Brown: Taillamps and parking lamps. Yellow: Left stoplamp and turn signal.
Dark Green: Right stoplamp and turn signal.
White (Heavy Gage): Ground wire.
White (Light Gage): Auxiliary stoplamp.
Securely attach the harness to the trailer, then tape or
strap
it to your vehicle’s frame rail. Be sure you leave
it loose enough
so the wiring doesn’t bend or break,
but not
so loose that it drags on the ground. Store the
harness in its original place. Wrap the harness together
and tie it neatly
so it won’t be damaged.
Page 273 of 416
Downloaded from www.Manualslib.com manuals search engine /! CAUTION:
You can be injured and your vehicle could be
damaged if you
try to do service work on a
vehicle without knowing enough about it.
Be sure you have sufficient knowledge,
experience, the proper replacement parts
and tools before you attempt any vehicle
maintenance task.
Be sure to use the proper nuts, bolts and
other fasteners. “English” and “metric”
fasteners can be easily confused.
If you use
the wrong fasteners, parts can later break
or fall
off. You could be hurt.
Adding Equipment to the Outside of
Your Vehicle
Things you might add to the outside of your vehicle can
affect the airflow around it. This may cause wind noise
and affect windshield washer performance. Check with
your dealer before adding equipment to the outside of
your vehicle. Use regular unleaded
gasoline rated at
87 octane or
higher. At a minimum, it should meet specifications
ASTM D48 14 in
the United States and CGSB 3.5-M93
in Canada. Improved gasoline specifications have
been developed by the American Automobile
Manufacturers Association (AAMA) for better
vehicle performance and engine protection. Gasolines
meeting the AAMA specification could provide
improved driveability and emission control system
protection compared to other gasolines.
Be sure the posted octane
is at least 87. If the octane is
less than
87, you may get a heavy knocking noise when
you drive. If it’s bad enough, it can damage your engine.
If you’re using fuel rated at
87 octane or higher and you
hear heavy knocking, your engine needs service. But
don’t worry if you hear
a little pinging noise when
you’re accelerating or driving up a hill. That’s normal,
and you don’t have to buy a higher octane
fuel to get rid
of pinging. It’s the heavy, constant knock that means
you have
a problem.
6-3