ECO mode CHEVROLET BLAZER 2003 2.G Owners Manual
[x] Cancel search | Manufacturer: CHEVROLET, Model Year: 2003, Model line: BLAZER, Model: CHEVROLET BLAZER 2003 2.GPages: 420, PDF Size: 2.94 MB
Page 75 of 420

All doors lock/All doors unlock:Press the lock side
of the power door lock switch once, and then the
unlock side twice.
All doors lock/None of the doors unlock:Press the
lock side of the power door lock switch once, and
then the unlock side three times.
No doors lock/None of the doors unlock:Press the
lock side of the power door lock switch twice. This
turns off the automatic lock feature. This is the factory
setting.
For more information, see your dealer.
The following instructions detail how to program your
door locks. Choose one of the programming options
before entering the programming mode.
To enter the program mode, do the following:
1. Begin with the ignition in OFF. Then pull the turn
signal/multifunction lever all the way toward you
and hold it while you perform the next step.2. Turn your key to RUN and OFF twice. Then, with
the key in OFF, release the turn signal/multifunction
lever. Once you do this, you will hear the lock
switch lock and unlock.
3. You are now ready to program the automatic door
locks. Select one of the previous four programming
options and follow the instructions. You will have
30 seconds to begin programming. If you exceed
the 30 second limit, the locks will automatically lock
and unlock to indicate you have left the program
mode. If this occurs, repeat the procedure beginning
with Step 1. You can exit the program mode any
time by turning the ignition to RUN. The locks
will automatically lock and unlock to indicate you
are leaving the program mode. If the lock/unlock
switches are not pressed while in the programming
mode, the auto lock/unlock setting will not be
modi®ed.
2-9
Page 92 of 420

FIRST (1):This position gives you even more power
but lower fuel economy than SECOND (2). You can use
it on very steep hills, or in deep snow or mud. If the
shift lever is put in FIRST (1) while the vehicle is moving
forward, the transmission won't shift into ®rst gear
until the vehicle is going slowly enough.
Notice:If your wheels won't turn, don't try to drive.
This might happen if you were stuck in very deep
sand or mud or were up against a solid object. You
could damage your transmission. Also, if you
stop when going uphill, don't hold your vehicle there
with only the accelerator pedal. This could overheat
and damage the transmission. Use your brakes
or shift into PARK (P) to hold your vehicle in
position on a hill.
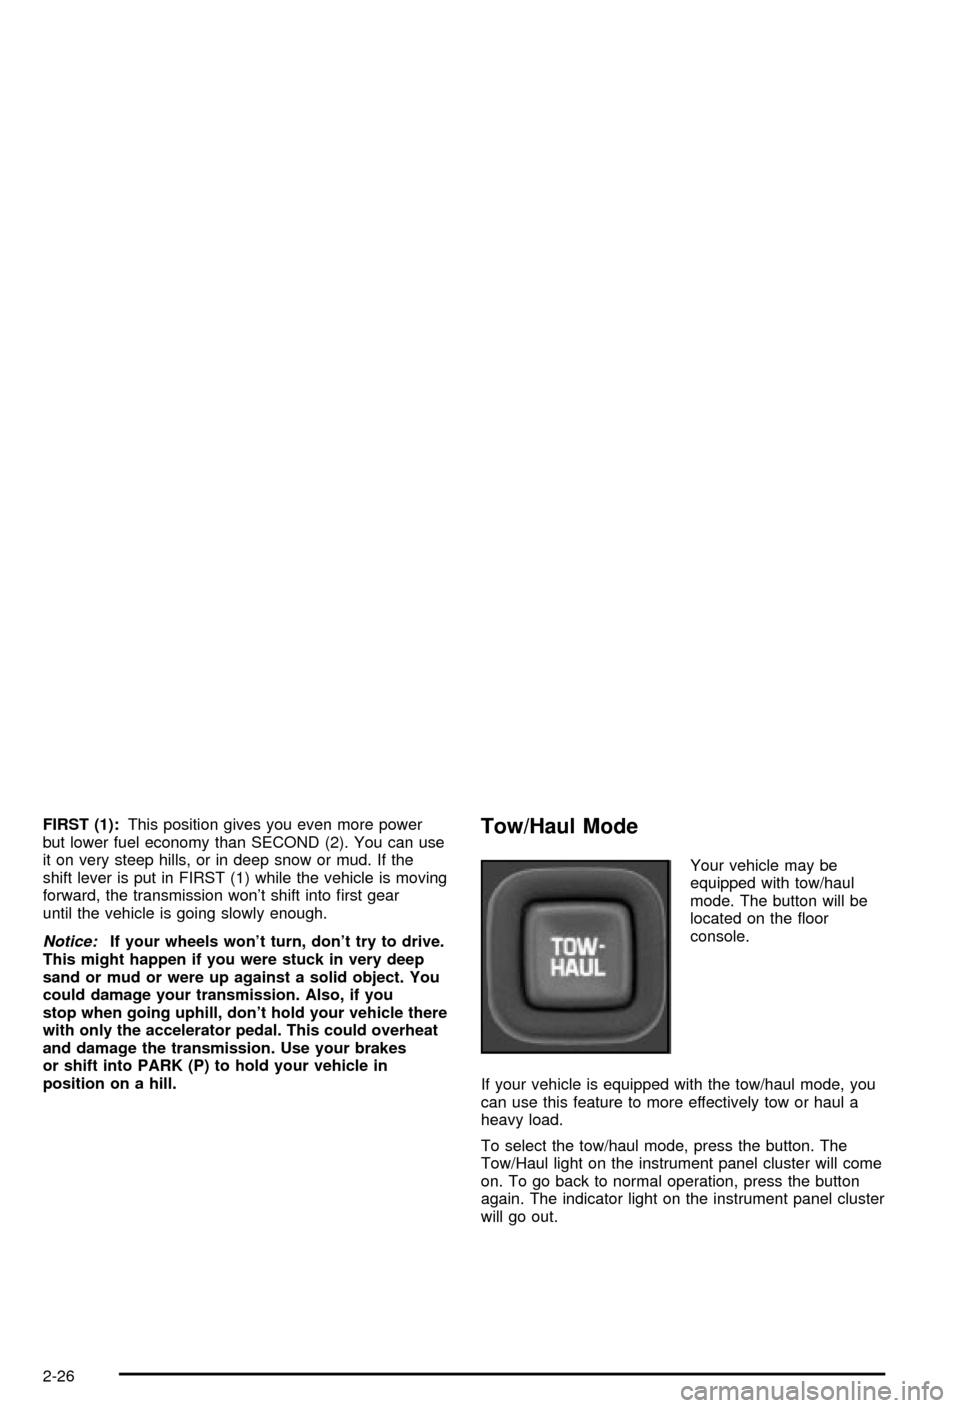
Tow/Haul Mode
Your vehicle may be
equipped with tow/haul
mode. The button will be
located on the ¯oor
console.
If your vehicle is equipped with the tow/haul mode, you
can use this feature to more effectively tow or haul a
heavy load.
To select the tow/haul mode, press the button. The
Tow/Haul light on the instrument panel cluster will come
on. To go back to normal operation, press the button
again. The indicator light on the instrument panel cluster
will go out.
2-26
Page 97 of 420

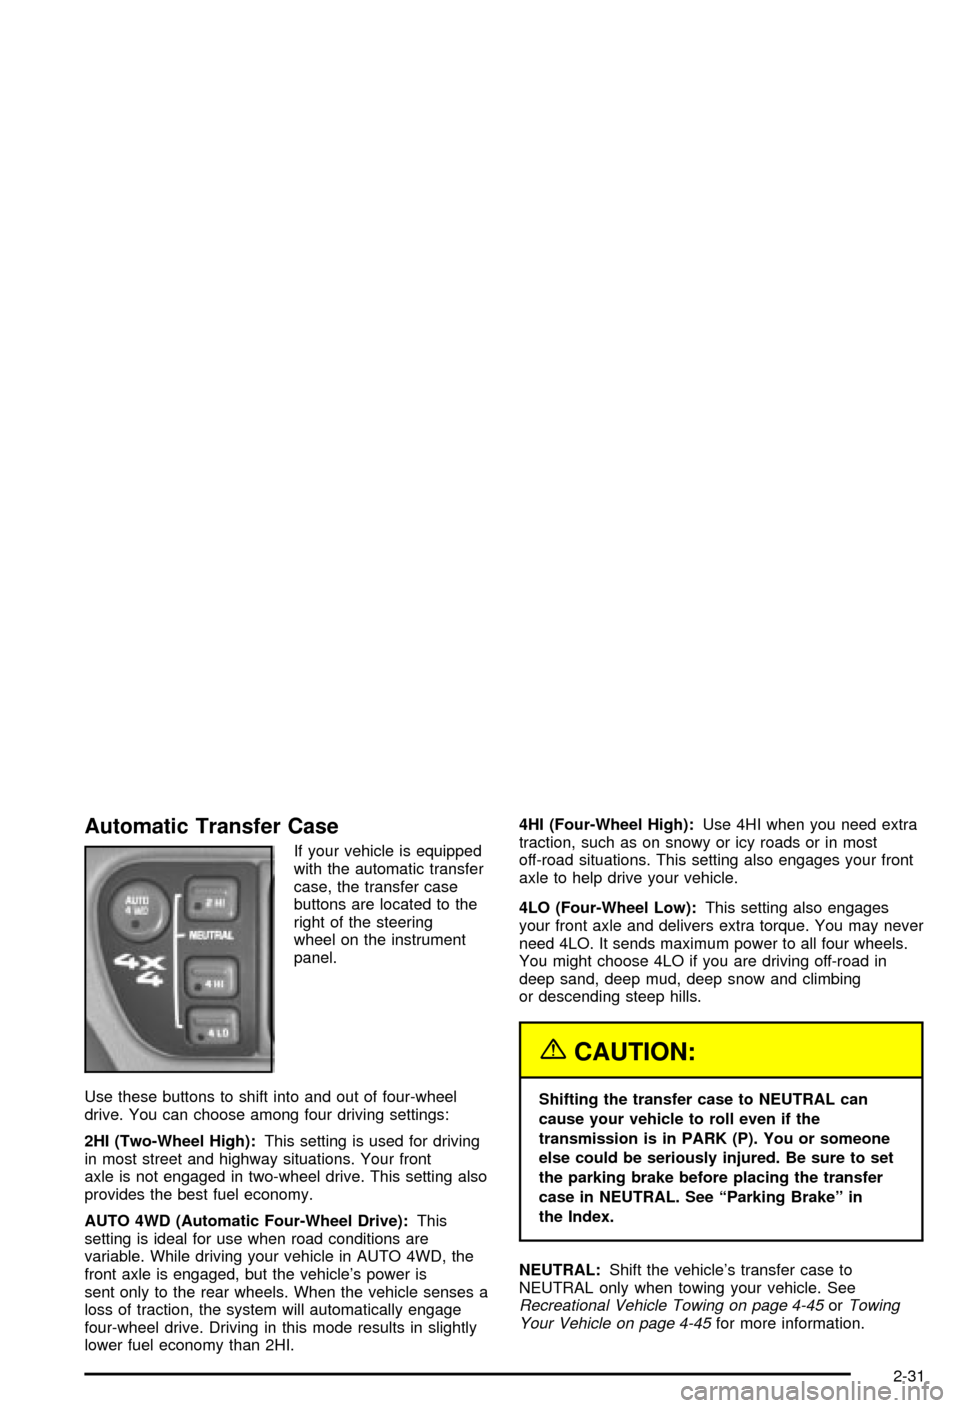
Automatic Transfer Case
If your vehicle is equipped
with the automatic transfer
case, the transfer case
buttons are located to the
right of the steering
wheel on the instrument
panel.
Use these buttons to shift into and out of four-wheel
drive. You can choose among four driving settings:
2HI (Two-Wheel High):This setting is used for driving
in most street and highway situations. Your front
axle is not engaged in two-wheel drive. This setting also
provides the best fuel economy.
AUTO 4WD (Automatic Four-Wheel Drive):This
setting is ideal for use when road conditions are
variable. While driving your vehicle in AUTO 4WD, the
front axle is engaged, but the vehicle's power is
sent only to the rear wheels. When the vehicle senses a
loss of traction, the system will automatically engage
four-wheel drive. Driving in this mode results in slightly
lower fuel economy than 2HI.4HI (Four-Wheel High):Use 4HI when you need extra
traction, such as on snowy or icy roads or in most
off-road situations. This setting also engages your front
axle to help drive your vehicle.
4LO (Four-Wheel Low):This setting also engages
your front axle and delivers extra torque. You may never
need 4LO. It sends maximum power to all four wheels.
You might choose 4LO if you are driving off-road in
deep sand, deep mud, deep snow and climbing
or descending steep hills.
{CAUTION:
Shifting the transfer case to NEUTRAL can
cause your vehicle to roll even if the
transmission is in PARK (P). You or someone
else could be seriously injured. Be sure to set
the parking brake before placing the transfer
case in NEUTRAL. See ªParking Brakeº in
the Index.
NEUTRAL:Shift the vehicle's transfer case to
NEUTRAL only when towing your vehicle. See
Recreational Vehicle Towing on page 4-45orTowing
Your Vehicle on page 4-45for more information.
2-31
Page 111 of 420

This device complies with RSS-210 of Industry Canada.
Operation is subject to the following two conditions:
(1) this device may not cause interference, and
(2) this device must accept any interference, including
interference that may cause undesired operation of
the device.
Changes and modi®cations to this system by other than
an authorized service facility could void authorization
to use this equipment.
Programming the HomeLinkž
Transmitter
Do not use the HomeLinkžTransmitter with any garage
door opener that does not have the ªstop and reverseº
feature. This includes any garage door opener model
manufactured before April 1, 1982. If you have a newer
garage door opener with rolling codes, please be
sure to follow steps 6 through 8 to complete the
programming of your HomeLink
žTransmitter.
Read the instructions completely before attempting to
program the HomeLink
žTransmitter. Because of
the steps involved, it may be helpful to have another
person available to assist you in programming the
transmitter.Keep the original transmitter for use in other vehicles as
well as for future HomeLink
žprogramming. It is also
recommended that upon the sale of the vehicle,
the programmed HomeLink
žbuttons should be erased
for security purposes. Refer to ªErasing HomeLinkž
Buttonsº or, for assistance, contact HomeLinkžon the
internet at: www.homelink.com or by calling
1-800-355-3515.
Be sure that people and objects are clear of the garage
door or gate operator you are programming. When
programming a garage door, it is advised to park outside
of the garage.
It is recommended that a new battery be installed in
your hand-held transmitter for quicker and more
accurate transmission of the radio frequency.
Your vehicle's engine should be turned off while
programming the transmitter. Follow these steps to
program up to three channels:
1. Press and hold down the two outside buttons,
releasing only when the indicator light begins to
¯ash, after 20 seconds. Do not hold down the
buttons for longer than 30 seconds and do not
repeat this step to program a second and/or third
transmitter to the remaining two HomeLink
žbuttons.
2. Position the end of your hand-held transmitter about
1 to 3 inches (3 to 8 cm) away from the HomeLink
ž
buttons while keeping the indicator light in view.
2-45
Page 113 of 420

Gate Operator and Canadian
Programming
Canadian radio-frequency laws require transmitter
signals to ªtime outº or quit after several seconds of
transmission. This may not be long enough for
HomeLink
žto pick up the signal during programming.
Similarly, some U.S. gate operators are manufactured to
ªtime outº in the same manner.
If you live in Canada, or you are having difficulty
programming a gate operator by using the
ªProgramming HomeLink
žº procedures (regardless of
where you live), replace Step 3 under ªProgramming
HomeLink
žº with the following:
Continue to press and hold the HomeLink
žbutton while
you press and release every two seconds (cycle)
your hand-held transmitter until the frequency signal has
been successfully accepted by HomeLink
ž. The
indicator light will ¯ash slowly at ®rst and then rapidly.
Proceed with Step 4 under ªProgramming HomeLink
žº
to complete.
Using HomeLinkž
Press and hold the appropriate HomeLinkžbutton for at
least half of a second. The indicator light will come
on while the signal is being transmitted.
Erasing HomeLinkžButtons
To erase programming from the three buttons do the
following:
1. Press and hold down the two outside buttons until
the indicator light begins to ¯ash, after 20 seconds.
2. Release both buttons. Do not hold for longer than
30 seconds.
HomeLink
žis now in the train (learning) mode and can
be programmed at any time beginning with Step 2
under ªProgramming HomeLink
ž.º
Individual buttons can not be erased, but they can be
reprogrammed. See ªReprogramming a Single
HomeLink
žButtonº next.
Reprogramming a Single HomeLinkž
Button
To program a device to HomeLinkžusing a HomeLinkž
button previously trained, follow these steps:
1. Press and hold the desired HomeLink
žbutton. Do
not release the button.
2. The indicator light will begin to ¯ash after
20 seconds. While still holding the HomeLink
ž
button, proceed with Step 2 under ªProgramming
HomeLinkž.º
2-47
Page 119 of 420

Driver Information Center (DIC)
If your vehicle is equipped with a Driver Information
Center (DIC), this system displays the outside air
temperature, compass direction and trip information in
the overhead console.
US/MET (United States/Metric):The US/MET (United
States/metric) button allows you to switch the display
between the English and metric system.
MODE:The MODE button can be used to toggle
between three modes of operation: OFF, COMP/TEMP
and TRIP.
COMP/TEMP (Compass/Temperature):The display
provides the outside temperature and one of eight
compass readings to indicate the direction the vehicle
is facing.Before you turn on the ignition and move the vehicle,
the temperature indicated will be the last outside
temperature recorded with the ignition on. If the outside
temperature is 37ÉF (3ÉC) or lower, the display will
toggle between the ICE and the current temperature
every eight seconds. This is a warning to the drive that
road conditions may be icy, and that appropriate
precautions should be taken.
The compass is self-calibrating, so it does not need to
be manually set. However, if C (Calibration) is displayed,
the compass will need to be calibrated. You may also
place the compass in a noncalibrated mode by pressing
the holding the MODE and US/MET buttons at the
same time while in the COMP/TEMP mode. After about
10 seconds, the compass will display C and you can
release the buttons. Drive the vehicle in a complete
360É circle three times at a speed of less than 5 mph
(8 km/h), and the compass will function normally.
Once the calibration is complete, the display will return
to a compass reading.
2-53
Page 120 of 420

Variance is the different between magnetic north and
geographic north. In some areas, the difference between
the two can be great enough to cause false compass
readings. If this happens, follow these instructions to set
the variance for your particular location:
1. Find your location on the zone map. Record your
zone number.
2. Press and hold both the MODE and the US/MET
buttons in the COMP/TEMP mode.3. After ®ve seconds, the compass will acknowledge
the variation mode by displaying the current zone
number. When it does, release both buttons.
4. Press US/MET until your zone number appears on
the display.
5. Press MODE to set your zone number. Your
variance is now set and the display will return to the
COMP/TEMP mode.
TRIP:Once in the TRIP mode, press the MODE button
for the following trip functions:
AVG ECON (Average Economy):The average fuel
economy since the last reset is displayed.
INST ECON (Instantaneous Economy):Instantaneous
fuel economy for the last second of driving is displayed.
RANGE:The display indicates the estimated distance
that can be travelled with the remaining fuel in the tank,
based on the fuel economy for the last few hours of
driving.
FUEL USED:The fuel used since the last reset is
displayed.
AVG SPEED (Average Speed):The average speed
since the last reset is displayed.
2-54
Page 121 of 420

To reset the trip computer, press the MODE and
US/MET buttons simultaneously for at least two
seconds. All functions will be displayed brie¯y once the
system is reset. Reset can only be performed in the
AVG ECON, FUEL USED and AVG SPEED modes. All
three modes are reset at the same time.
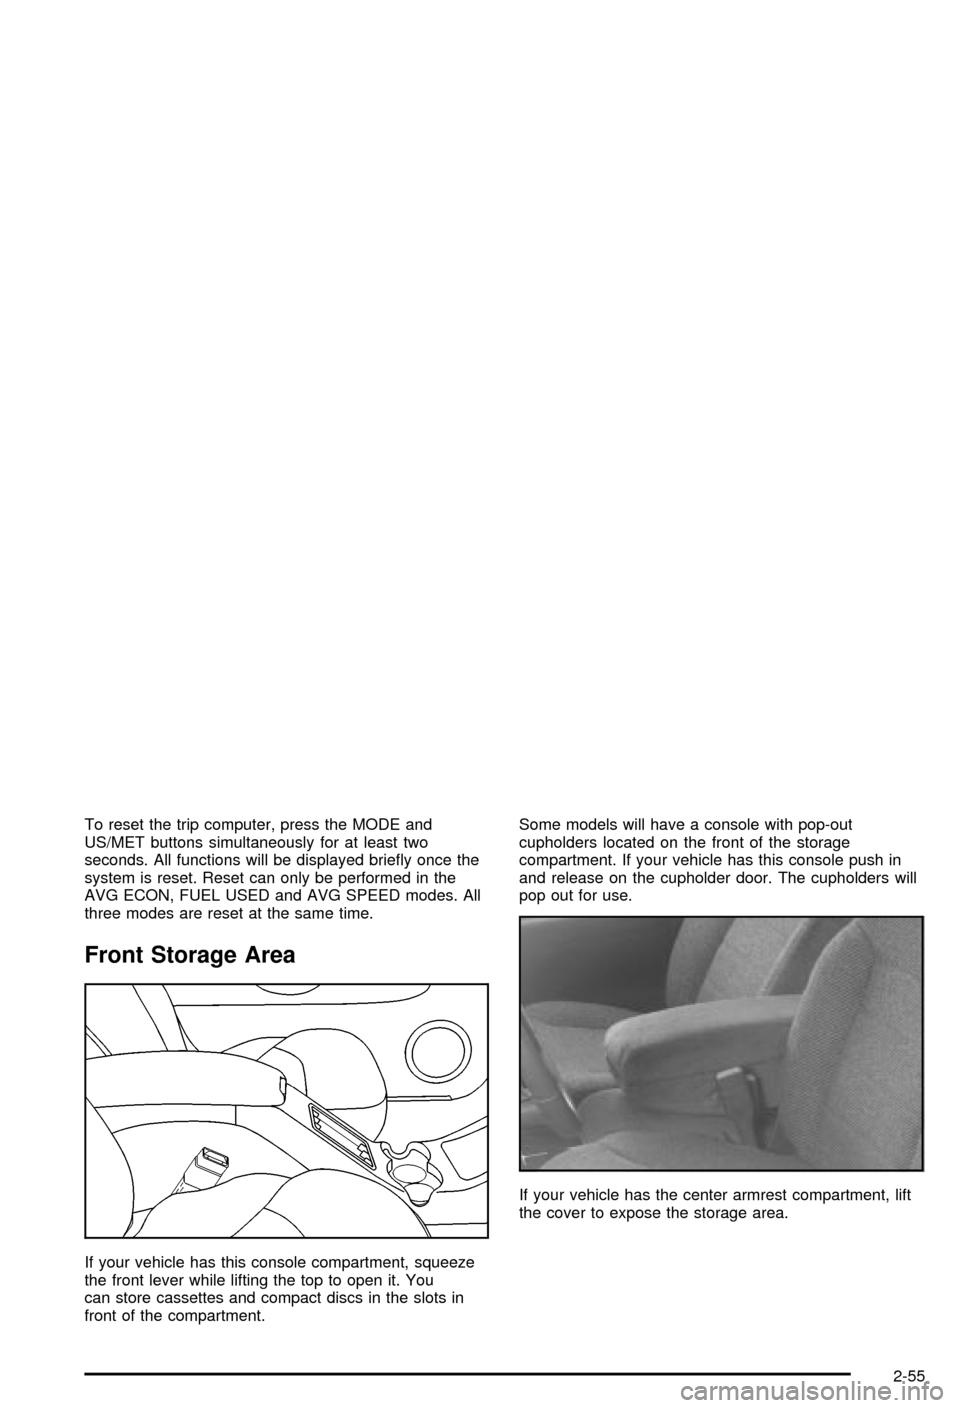
Front Storage Area
If your vehicle has this console compartment, squeeze
the front lever while lifting the top to open it. You
can store cassettes and compact discs in the slots in
front of the compartment.Some models will have a console with pop-out
cupholders located on the front of the storage
compartment. If your vehicle has this console push in
and release on the cupholder door. The cupholders will
pop out for use.
If your vehicle has the center armrest compartment, lift
the cover to expose the storage area.
2-55
Page 141 of 420

When the DRL are on, only your headlamps will be on.
The taillamps, sidemarker and other lamps won't be
on. The instrument panel won't be lit up either.
When it begins to get dark, the headlamps will
automatically switch from DRL to the regular headlamps.
The DRL system on some vehicles may turn off
temporarily while the turn signals are activated.
To idle an automatic transmission vehicle with the DRL
off, put the transmission in PARK (P). To idle a
manual transmission vehicle with the DRL off, set the
parking brake. The DRL will stay off until you shift out of
PARK (P) or release the parking brake.
The following does not apply to vehicles sold in Canada.
When necessary, you may turn off the automatic
headlamp system and the Daytime Running Lamps
(DRL) feature by following the steps below:
1. Turn the ignition to RUN.
2. Press the DOME OVERRIDE button four times
within six seconds. After the fourth press of the
button, a chime will sound informing you that
the system is off. The system will revert back to the
automatic on mode when the ignition is turned to
OFF and then to RUN again.3. To return to the automatic mode, push the DOME
OVERRIDE button four times within six seconds (a
chime will sound), or turn the ignition to OFF
and then to RUN again.
As with any vehicle, you should turn on the regular
headlamp system when you need it.
Fog Lamps
Your vehicle may be equipped with fog lamps. Use your
fog lamps for better vision in foggy or misty conditions.
Your parking lamps or headlamps must be on for
your fog lamps to work.
The fog lamp button is located on the instrument panel
near the lamp control.
3-13
Page 146 of 420

Heating
Turn the center knob clockwise or counterclockwise to
raise or lower the temperature on the inside of your
vehicle.
When it's cold outside 0ÉF (-18ÉC) or lower, use the
engine coolant heater, if equipped, to provide warmer air
faster to your vehicle. An engine coolant heater warms
the coolant that the engine uses to provide heat to
warm the inside of your vehicle. For more information,
see
Engine Coolant Heater on page 2-22.
Cooling
On hot days, open the windows to let hot inside air
escape; then close them. This helps to reduce the time
it takes for your vehicle to cool down. It also helps
the system to operate more efficiently.
A/C (Air Conditioning):Turn the knob to the A/C
position to turn the air-conditioning system on or
off. When the system is on, this setting cools and
dehumidi®es the air entering your vehicle and directs it
through the ¯oor outlets as well as the instrument
panel outlets.MAX A/C (Maximum Air Conditioning):This mode
recirculates much of the air inside your vehicle so
it cools quickly. It directs most of the air through the
instrument panel vents and a small amount through the
¯oor vents.
You may notice a slight change in engine performance
when the air-conditioning compressor shuts off and
turns on again. This is normal. The system is designed
to make adjustments to help with fuel economy while
still maintaining the selected temperature.
For quick cool down on hot days, do the following:
1. Select A/C.
2. Select the coolest temperature.
3. Select the highest fan speed.
On cool, but sunny days, the sun may warm the upper
part of your body, but the lower part may not be
warm enough. To remedy this, do the following:
1. Select the bi-level mode.
2. Select the temperature.
3. Select the fan speed.
The air-conditioning system removes moisture from the
air, so you may sometimes notice a small amount of
water dripping underneath your vehicle while idling
or after turning off the engine. This is normal.
3-18