charging CHEVROLET BOLT EV 2021 Owner's Manual
[x] Cancel search | Manufacturer: CHEVROLET, Model Year: 2021, Model line: BOLT EV, Model: CHEVROLET BOLT EV 2021Pages: 293, PDF Size: 9.21 MB
Page 6 of 293
Chevrolet Bolt EV Owner Manual (GMNA-Localizing-U.S./Canada-
14637856) - 2021 - CRC - 10/2/20
Introduction 5
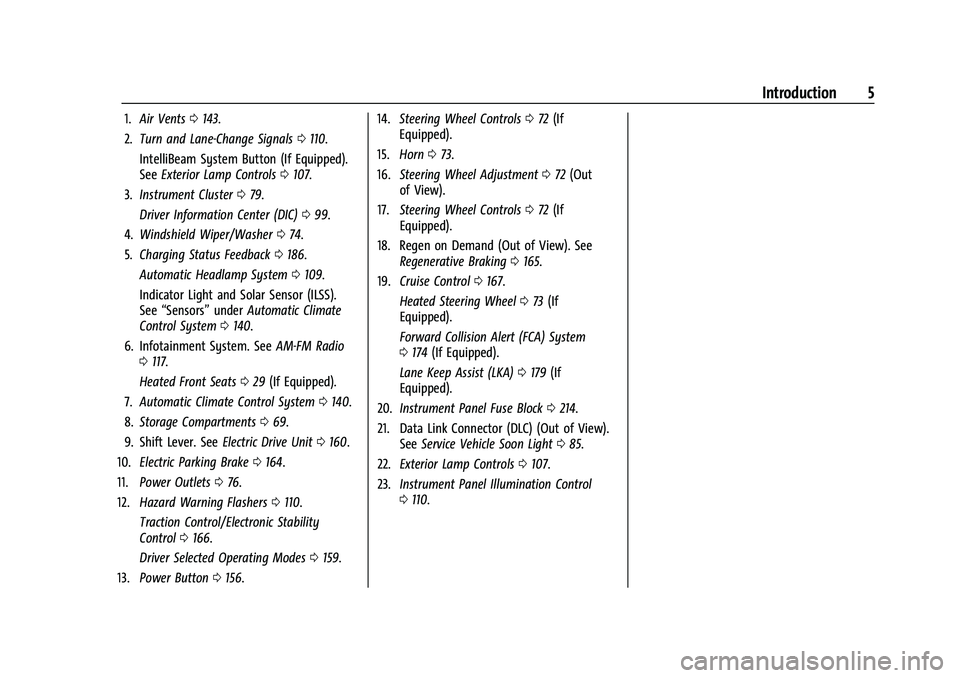
1.Air Vents 0143.
2. Turn and Lane-Change Signals 0110.
IntelliBeam System Button (If Equipped).
See Exterior Lamp Controls 0107.
3. Instrument Cluster 079.
Driver Information Center (DIC) 099.
4. Windshield Wiper/Washer 074.
5. Charging Status Feedback 0186.
Automatic Headlamp System 0109.
Indicator Light and Solar Sensor (ILSS).
See “Sensors” underAutomatic Climate
Control System 0140.
6. Infotainment System. See AM-FM Radio
0 117.
Heated Front Seats 029 (If Equipped).
7. Automatic Climate Control System 0140.
8. Storage Compartments 069.
9. Shift Lever. See Electric Drive Unit0160.
10. Electric Parking Brake 0164.
11. Power Outlets 076.
12. Hazard Warning Flashers 0110.
Traction Control/Electronic Stability
Control 0166.
Driver Selected Operating Modes 0159.
13. Power Button 0156. 14.
Steering Wheel Controls 072 (If
Equipped).
15. Horn 073.
16. Steering Wheel Adjustment 072 (Out
of View).
17. Steering Wheel Controls 072 (If
Equipped).
18. Regen on Demand (Out of View). See Regenerative Braking 0165.
19. Cruise Control 0167.
Heated Steering Wheel 073 (If
Equipped).
Forward Collision Alert (FCA) System
0 174 (If Equipped).
Lane Keep Assist (LKA) 0179 (If
Equipped).
20. Instrument Panel Fuse Block 0214.
21. Data Link Connector (DLC) (Out of View). SeeService Vehicle Soon Light 085.
22. Exterior Lamp Controls 0107.
23. Instrument Panel Illumination Control
0110.
Page 72 of 293
Chevrolet Bolt EV Owner Manual (GMNA-Localizing-U.S./Canada-
14637856) - 2021 - CRC - 10/2/20
Instruments and Controls 71
Instruments and Controls
Controls
Steering Wheel Adjustment . . . . . . . . . . . . . 72
Steering Wheel Controls . . . . . . . . . . . . . . . . 72
Heated Steering Wheel . . . . . . . . . . . . . . . . . 73
Horn . . . . . . . . . . . . . . . . . . . . . . . . . . . . . . . . . . . . 73
Pedestrian Safety Signal . . . . . . . . . . . . . . . . 73
Windshield Wiper/Washer . . . . . . . . . . . . . . 74
Rear Window Wiper/Washer . . . . . . . . . . . 75
Compass . . . . . . . . . . . . . . . . . . . . . . . . . . . . . . . 76
Clock . . . . . . . . . . . . . . . . . . . . . . . . . . . . . . . . . . . 76
Power Outlets . . . . . . . . . . . . . . . . . . . . . . . . . . 76
Wireless Charging . . . . . . . . . . . . . . . . . . . . . . 77
Warning Lights, Gauges, and Indicators
Warning Lights, Gauges, andIndicators . . . . . . . . . . . . . . . . . . . . . . . . . . . . . 79
Instrument Cluster . . . . . . . . . . . . . . . . . . . . . 79
Speedometer . . . . . . . . . . . . . . . . . . . . . . . . . . . 81
Odometer . . . . . . . . . . . . . . . . . . . . . . . . . . . . . . 81
Trip Odometer . . . . . . . . . . . . . . . . . . . . . . . . . . 82
Battery Gauge (High Voltage) . . . . . . . . . . 82
Driver Efficiency Gauge . . . . . . . . . . . . . . . . . 82
Power Indicator Gauge . . . . . . . . . . . . . . . . . 83
Seat Belt Reminders . . . . . . . . . . . . . . . . . . . . 83
Airbag Readiness Light . . . . . . . . . . . . . . . . . 84
Passenger Airbag Status Indicator . . . . . . 84
Charging System Light (12-Volt Battery) . . . . . . . . . . . . . . . . . . . . . . . . . . . . . . 85 Service Vehicle Soon Light . . . . . . . . . . . . . . 85
Brake System Warning Light . . . . . . . . . . . 85
Electric Parking Brake Light . . . . . . . . . . . . . 86
Service Electric Parking Brake Light . . . . . 86
Antilock Brake System (ABS) Warning
Light . . . . . . . . . . . . . . . . . . . . . . . . . . . . . . . . . 86
Sport Mode Light . . . . . . . . . . . . . . . . . . . . . . . 87
Lane Keep Assist (LKA) Light . . . . . . . . . . . . 87
Vehicle Ahead Indicator . . . . . . . . . . . . . . . . 87
Pedestrian Ahead Indicator . . . . . . . . . . . . . 87
Traction Off Light . . . . . . . . . . . . . . . . . . . . . . . 87
StabiliTrak OFF Light . . . . . . . . . . . . . . . . . . . 88
Traction Control System (TCS)/StabiliTrak Light . . . . . . . . . . . . . . . . . . . . . . . . . . . . . . . . . 88
Tire Pressure Light . . . . . . . . . . . . . . . . . . . . . 88
Security Light . . . . . . . . . . . . . . . . . . . . . . . . . . 89
Vehicle Ready Light . . . . . . . . . . . . . . . . . . . . 89
High-Beam On Light . . . . . . . . . . . . . . . . . . . . 89
Lamps On Reminder . . . . . . . . . . . . . . . . . . . . 89
Cruise Control Light . . . . . . . . . . . . . . . . . . . . 89
Door Ajar Light . . . . . . . . . . . . . . . . . . . . . . . . . 89
Information Displays
Power Flows . . . . . . . . . . . . . . . . . . . . . . . . . . . 90
Programmable Charging . . . . . . . . . . . . . . . . 90
Energy Information . . . . . . . . . . . . . . . . . . . . . 97
Charging Options . . . . . . . . . . . . . . . . . . . . . . . 98
Driver Information Center (DIC) . . . . . . . . 99
Vehicle Messages
Vehicle Messages . . . . . . . . . . . . . . . . . . . . . 100 Propulsion Power Messages . . . . . . . . . . . 100
Vehicle Speed Messages . . . . . . . . . . . . . . . 101
Vehicle Personalization
Vehicle Personalization . . . . . . . . . . . . . . . . . 101
Page 78 of 293
Chevrolet Bolt EV Owner Manual (GMNA-Localizing-U.S./Canada-
14637856) - 2021 - CRC - 10/2/20
Instruments and Controls 77
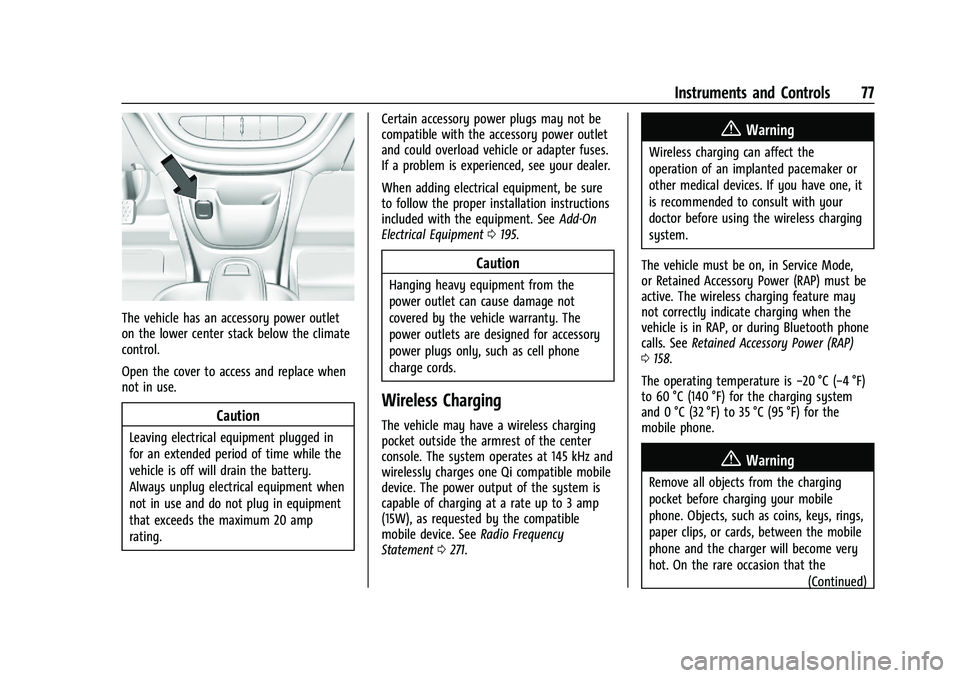
The vehicle has an accessory power outlet
on the lower center stack below the climate
control.
Open the cover to access and replace when
not in use.
Caution
Leaving electrical equipment plugged in
for an extended period of time while the
vehicle is off will drain the battery.
Always unplug electrical equipment when
not in use and do not plug in equipment
that exceeds the maximum 20 amp
rating.Certain accessory power plugs may not be
compatible with the accessory power outlet
and could overload vehicle or adapter fuses.
If a problem is experienced, see your dealer.
When adding electrical equipment, be sure
to follow the proper installation instructions
included with the equipment. See
Add-On
Electrical Equipment 0195.
Caution
Hanging heavy equipment from the
power outlet can cause damage not
covered by the vehicle warranty. The
power outlets are designed for accessory
power plugs only, such as cell phone
charge cords.
Wireless Charging
The vehicle may have a wireless charging
pocket outside the armrest of the center
console. The system operates at 145 kHz and
wirelessly charges one Qi compatible mobile
device. The power output of the system is
capable of charging at a rate up to 3 amp
(15W), as requested by the compatible
mobile device. See Radio Frequency
Statement 0271.
{Warning
Wireless charging can affect the
operation of an implanted pacemaker or
other medical devices. If you have one, it
is recommended to consult with your
doctor before using the wireless charging
system.
The vehicle must be on, in Service Mode,
or Retained Accessory Power (RAP) must be
active. The wireless charging feature may
not correctly indicate charging when the
vehicle is in RAP, or during Bluetooth phone
calls. See Retained Accessory Power (RAP)
0 158.
The operating temperature is −20 °C (−4 °F)
to 60 °C (140 °F) for the charging system
and 0 °C (32 °F) to 35 °C (95 °F) for the
mobile phone.
{Warning
Remove all objects from the charging
pocket before charging your mobile
phone. Objects, such as coins, keys, rings,
paper clips, or cards, between the mobile
phone and the charger will become very
hot. On the rare occasion that the
(Continued)
Page 79 of 293
Chevrolet Bolt EV Owner Manual (GMNA-Localizing-U.S./Canada-
14637856) - 2021 - CRC - 10/2/20
78 Instruments and Controls
Warning (Continued)
charging system does not detect an
object, and the object gets wedged
between the mobile phone and the
charger, remove the mobile phone and
allow the object to cool before removing
it from the charging pocket, to prevent
burns.
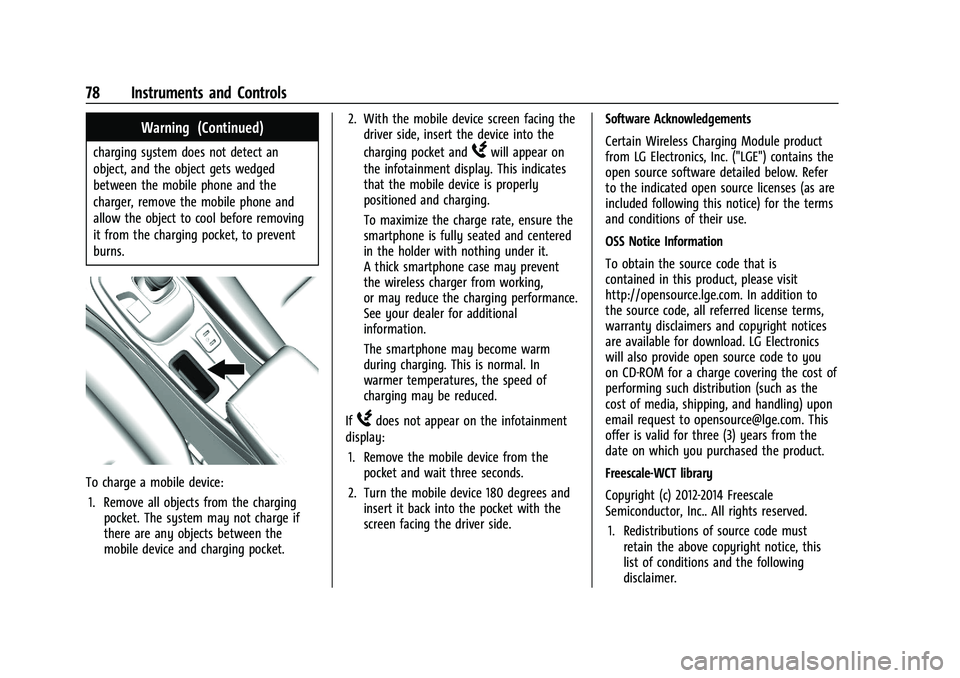
To charge a mobile device:1. Remove all objects from the charging pocket. The system may not charge if
there are any objects between the
mobile device and charging pocket. 2. With the mobile device screen facing the
driver side, insert the device into the
charging pocket and
Wwill appear on
the infotainment display. This indicates
that the mobile device is properly
positioned and charging.
To maximize the charge rate, ensure the
smartphone is fully seated and centered
in the holder with nothing under it.
A thick smartphone case may prevent
the wireless charger from working,
or may reduce the charging performance.
See your dealer for additional
information.
The smartphone may become warm
during charging. This is normal. In
warmer temperatures, the speed of
charging may be reduced.
If
Wdoes not appear on the infotainment
display:
1. Remove the mobile device from the pocket and wait three seconds.
2. Turn the mobile device 180 degrees and insert it back into the pocket with the
screen facing the driver side. Software Acknowledgements
Certain Wireless Charging Module product
from LG Electronics, Inc. ("LGE") contains the
open source software detailed below. Refer
to the indicated open source licenses (as are
included following this notice) for the terms
and conditions of their use.
OSS Notice Information
To obtain the source code that is
contained in this product, please visit
http://opensource.lge.com. In addition to
the source code, all referred license terms,
warranty disclaimers and copyright notices
are available for download. LG Electronics
will also provide open source code to you
on CD-ROM for a charge covering the cost of
performing such distribution (such as the
cost of media, shipping, and handling) upon
email request to [email protected]. This
offer is valid for three (3) years from the
date on which you purchased the product.
Freescale-WCT library
Copyright (c) 2012-2014 Freescale
Semiconductor, Inc.. All rights reserved.
1. Redistributions of source code must retain the above copyright notice, this
list of conditions and the following
disclaimer.
Page 80 of 293
Chevrolet Bolt EV Owner Manual (GMNA-Localizing-U.S./Canada-
14637856) - 2021 - CRC - 10/2/20
Instruments and Controls 79
2. Redistributions in binary form mustreproduce the above copyright notice,
this list of conditions and the following
disclaimer in the documentation and/or
other materials provided with the
distribution.
3. Neither the name of the copyright holder nor the names of its contributors may be
used to endorse or promote products
derived from this software without
specific prior written permission.
THIS SOFTWARE IS PROVIDED BY THE
COPYRIGHT HOLDERS AND CONTRIBUTORS
"AS IS" AND ANY EXPRESS OR IMPLIED
WARRANTIES, INCLUDING, BUT NOT LIMITED
TO, THE IMPLIED WARRANTIES OF
MERCHANTABILITY AND FITNESS FOR A
PARTICULAR PURPOSE ARE DISCLAIMED. IN
NO EVENT SHALL THE COPYRIGHT HOLDER
OR CONTRIBUTORS BE LIABLE FOR ANY
DIRECT, INDIRECT, INCIDENTAL, SPECIAL,
EXEMPLARY, OR CONSEQUENTIAL DAMAGES (INCLUDING, BUT NOT LIMITED TO,
PROCUREMENT OF SUBSTITUTE GOODS OR
SERVICES; LOSS OF USE, DATA, OR PROFITS;
OR BUSINESS INTERRUPTION) HOWEVER
CAUSED AND ON ANY THEORY OF LIABILITY,
WHETHER IN CONTRACT, STRICT LIABILITY, OR
TORT (INCLUDING NEGLIGENCE OR
OTHERWISE) ARISING IN ANY WAY OUT OF
THE USE OF THIS SOFTWARE, EVEN IF
ADVISED OF THE POSSIBILITY OF SUCH
DAMAGE.
Warning Lights, Gauges, and
Indicators
Warning lights and gauges can signal that
something is wrong before it becomes
serious enough to cause an expensive repair
or replacement. Paying attention to the
warning lights and gauges could prevent
injury.
Some warning lights come on briefly when
the propulsion system is started to indicate
they are working. When one of the warning
lights comes on and stays on while driving,
or when one of the gauges shows there
may be a problem, check the section that
explains what to do. Waiting to do repairs
can be costly and even dangerous.
Instrument Cluster
The instrument cluster displays a preview of
information that includes electric range,
charging, odometer, and battery status. This
happens upon entry when the driver door is
opened, before starting the vehicle. This
preview will dismiss after starting the
vehicle or soon after closing the driver door.
Page 86 of 293
Chevrolet Bolt EV Owner Manual (GMNA-Localizing-U.S./Canada-
14637856) - 2021 - CRC - 10/2/20
Instruments and Controls 85
If the word OFF or the off symbol is lit on
the passenger airbag status indicator, it
means that the passenger sensing system
has turned off the front outboard passenger
frontal airbag and knee airbag.
If, after several seconds, both status
indicator lights remain on, or if there are no
lights at all, there may be a problem with
the lights or the passenger sensing system.
See your dealer for service.
{Warning
If the airbag readiness light ever comes
on and stays on, it means that
something may be wrong with the airbag
system. To help avoid injury to yourself
or others, have the vehicle serviced right
away. SeeAirbag Readiness Light 084
for more information, including important
safety information.
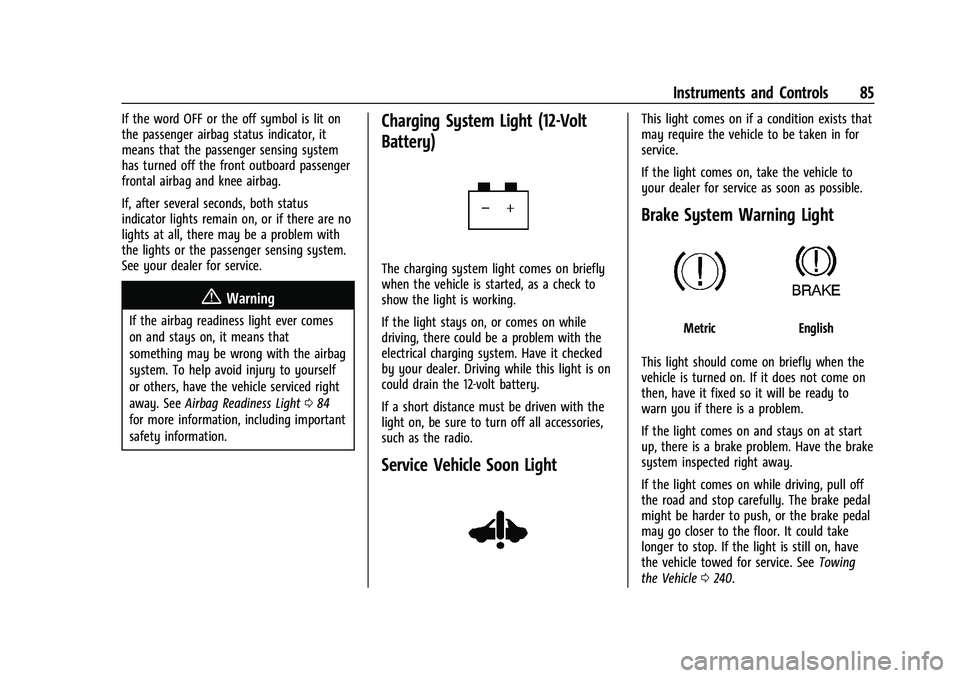
Charging System Light (12-Volt
Battery)
The charging system light comes on briefly
when the vehicle is started, as a check to
show the light is working.
If the light stays on, or comes on while
driving, there could be a problem with the
electrical charging system. Have it checked
by your dealer. Driving while this light is on
could drain the 12-volt battery.
If a short distance must be driven with the
light on, be sure to turn off all accessories,
such as the radio.
Service Vehicle Soon Light
This light comes on if a condition exists that
may require the vehicle to be taken in for
service.
If the light comes on, take the vehicle to
your dealer for service as soon as possible.
Brake System Warning Light
MetricEnglish
This light should come on briefly when the
vehicle is turned on. If it does not come on
then, have it fixed so it will be ready to
warn you if there is a problem.
If the light comes on and stays on at start
up, there is a brake problem. Have the brake
system inspected right away.
If the light comes on while driving, pull off
the road and stop carefully. The brake pedal
might be harder to push, or the brake pedal
may go closer to the floor. It could take
longer to stop. If the light is still on, have
the vehicle towed for service. See Towing
the Vehicle 0240.
Page 91 of 293
Chevrolet Bolt EV Owner Manual (GMNA-Localizing-U.S./Canada-
14637856) - 2021 - CRC - 10/2/20
90 Instruments and Controls
Information Displays
Power Flows
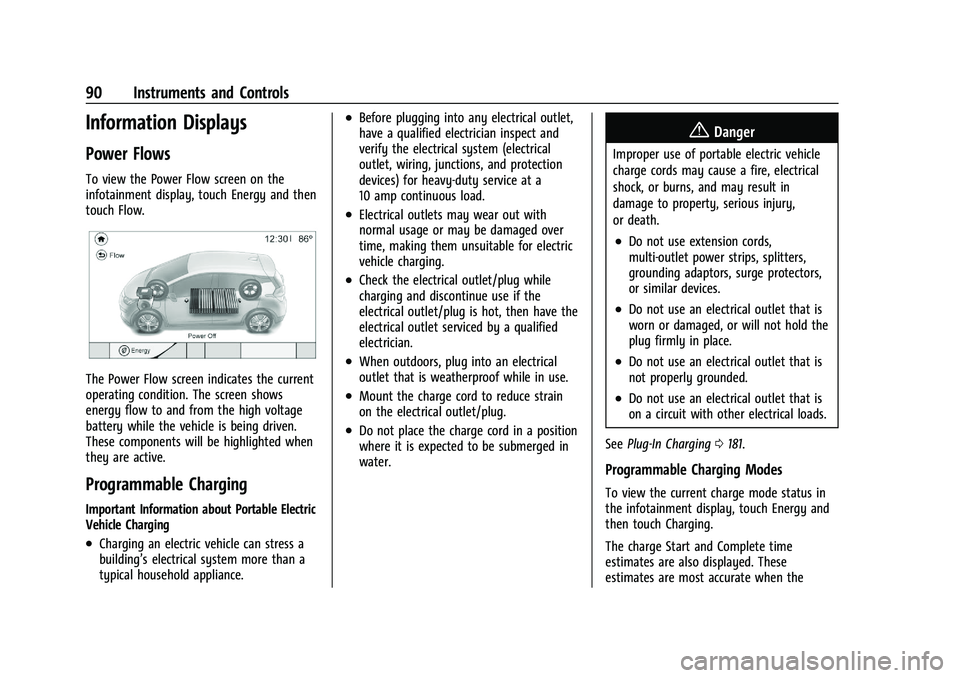
To view the Power Flow screen on the
infotainment display, touch Energy and then
touch Flow.
The Power Flow screen indicates the current
operating condition. The screen shows
energy flow to and from the high voltage
battery while the vehicle is being driven.
These components will be highlighted when
they are active.
Programmable Charging
Important Information about Portable Electric
Vehicle Charging
.Charging an electric vehicle can stress a
building’s electrical system more than a
typical household appliance.
.Before plugging into any electrical outlet,
have a qualified electrician inspect and
verify the electrical system (electrical
outlet, wiring, junctions, and protection
devices) for heavy-duty service at a
10 amp continuous load.
.Electrical outlets may wear out with
normal usage or may be damaged over
time, making them unsuitable for electric
vehicle charging.
.Check the electrical outlet/plug while
charging and discontinue use if the
electrical outlet/plug is hot, then have the
electrical outlet serviced by a qualified
electrician.
.When outdoors, plug into an electrical
outlet that is weatherproof while in use.
.Mount the charge cord to reduce strain
on the electrical outlet/plug.
.Do not place the charge cord in a position
where it is expected to be submerged in
water.
{Danger
Improper use of portable electric vehicle
charge cords may cause a fire, electrical
shock, or burns, and may result in
damage to property, serious injury,
or death.
.Do not use extension cords,
multi-outlet power strips, splitters,
grounding adaptors, surge protectors,
or similar devices.
.Do not use an electrical outlet that is
worn or damaged, or will not hold the
plug firmly in place.
.Do not use an electrical outlet that is
not properly grounded.
.Do not use an electrical outlet that is
on a circuit with other electrical loads.
See Plug-In Charging 0181.
Programmable Charging Modes
To view the current charge mode status in
the infotainment display, touch Energy and
then touch Charging.
The charge Start and Complete time
estimates are also displayed. These
estimates are most accurate when the
Page 92 of 293
Chevrolet Bolt EV Owner Manual (GMNA-Localizing-U.S./Canada-
14637856) - 2021 - CRC - 10/2/20
Instruments and Controls 91
vehicle is plugged in and in moderate
temperature conditions. Also, to get an
accurate time estimate, the vehicle uses an
internal clock for Programmable Charging,
not the clock in the center stack.
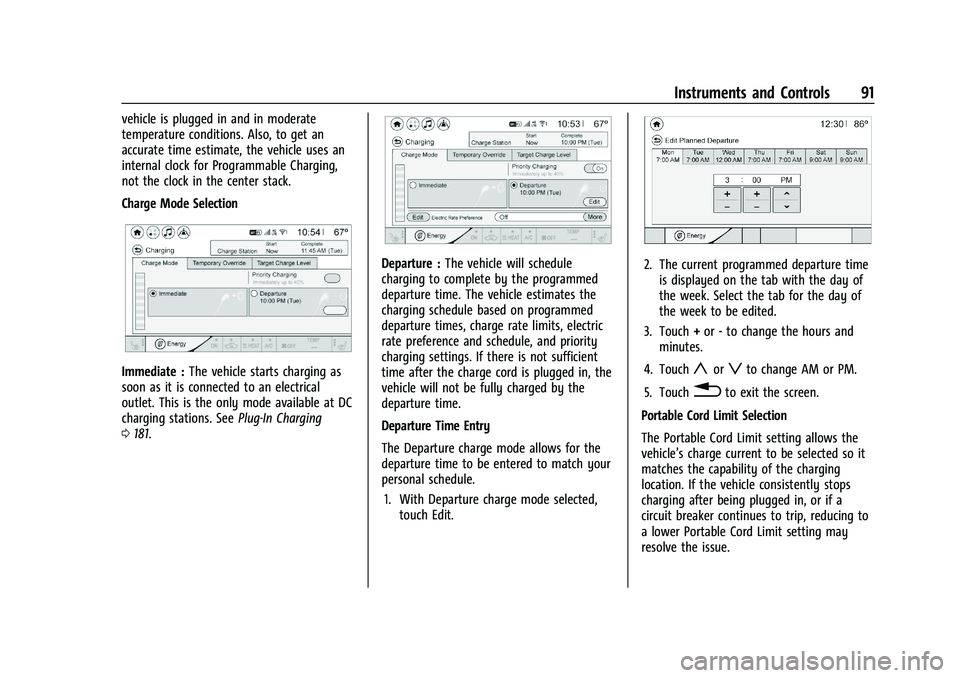
Charge Mode Selection
Immediate :The vehicle starts charging as
soon as it is connected to an electrical
outlet. This is the only mode available at DC
charging stations. See Plug-In Charging
0 181.
Departure : The vehicle will schedule
charging to complete by the programmed
departure time. The vehicle estimates the
charging schedule based on programmed
departure times, charge rate limits, electric
rate preference and schedule, and priority
charging settings. If there is not sufficient
time after the charge cord is plugged in, the
vehicle will not be fully charged by the
departure time.
Departure Time Entry
The Departure charge mode allows for the
departure time to be entered to match your
personal schedule.
1. With Departure charge mode selected, touch Edit.2. The current programmed departure timeis displayed on the tab with the day of
the week. Select the tab for the day of
the week to be edited.
3. Touch +or -to change the hours and
minutes.
4. Touch
yorzto change AM or PM.
5. Touch
0to exit the screen.
Portable Cord Limit Selection
The Portable Cord Limit setting allows the
vehicle’s charge current to be selected so it
matches the capability of the charging
location. If the vehicle consistently stops
charging after being plugged in, or if a
circuit breaker continues to trip, reducing to
a lower Portable Cord Limit setting may
resolve the issue.
Page 93 of 293
Chevrolet Bolt EV Owner Manual (GMNA-Localizing-U.S./Canada-
14637856) - 2021 - CRC - 10/2/20
92 Instruments and Controls
The Portable Cord Limit setting should be
configured to match the electrical current
rating for the electrical outlet that the
charge cord is connected to. On the Charge
Mode tab, toggle the Portable Cord Limit
selection between:
.12 amps
.8 amps
Exact current levels may vary from the
values shown in this manual. Check the
vehicle for the current available levels. When
the vehicle is plugged into a charging
station, the Portable Cord Limit option on
the Charge Mode tab will not be available.
The Portable Cord Limit can be changed and
saved using Location Based Charging
settings. The default value is the lower
Portable Cord Limit. The Portable Cord Limit
will reset to the lower value when the
vehicle is shifted from P (Park) unless the
Location Based Charging feature is active
and set to retain this preference. See
“Location Based Charging” later in this
section.
{Warning
Using a charge level that exceeds the
electrical circuit or electrical outlet
capacity may start a fire or damage the
electrical circuit. Use the lowest charge
level until a qualified electrician inspects
the electrical circuit capacity. Use the
lowest charge level if the electrical circuit
or electrical outlet capacity is not known.
Electric Rate Preference
The vehicle estimates the charging start
time based on the utility rate schedule,
utility rate preference, and programmed
departure time for the current day of the
week. The vehicle will charge during the
least expensive rate periods to achieve a full
battery charge by the departure time.
Electrical rate information from the utility
company for the charging location is
required for this mode. If the selected
charge mode is Departure, then electric rate
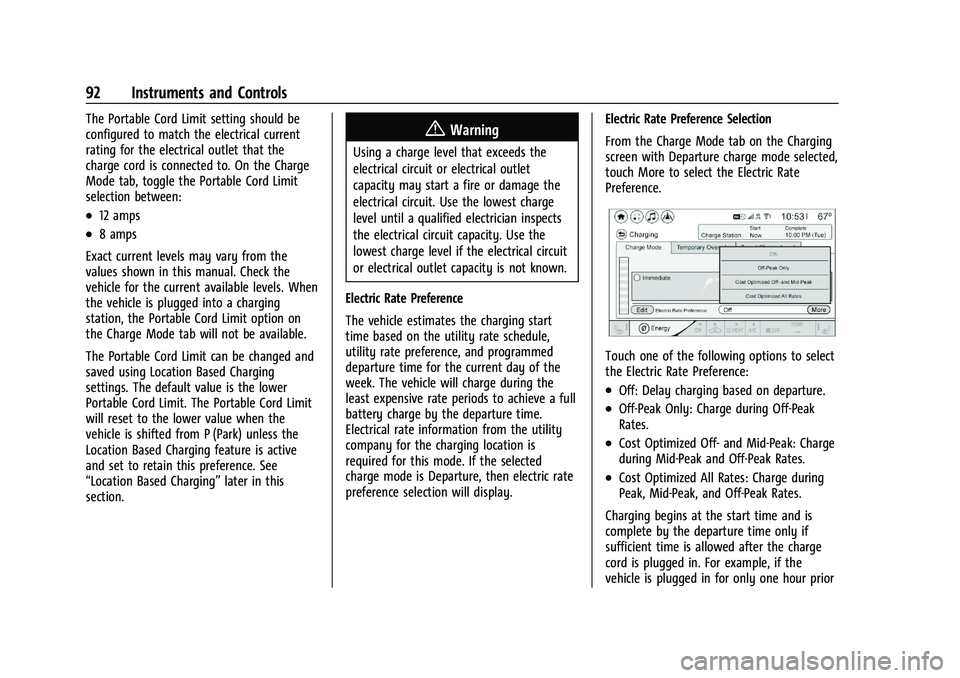
preference selection will display. Electric Rate Preference Selection
From the Charge Mode tab on the Charging
screen with Departure charge mode selected,
touch More to select the Electric Rate
Preference.
Touch one of the following options to select
the Electric Rate Preference:
.Off: Delay charging based on departure.
.Off-Peak Only: Charge during Off-Peak
Rates.
.Cost Optimized Off- and Mid-Peak: Charge
during Mid-Peak and Off-Peak Rates.
.Cost Optimized All Rates: Charge during
Peak, Mid-Peak, and Off-Peak Rates.
Charging begins at the start time and is
complete by the departure time only if
sufficient time is allowed after the charge
cord is plugged in. For example, if the
vehicle is plugged in for only one hour prior
Page 94 of 293
Chevrolet Bolt EV Owner Manual (GMNA-Localizing-U.S./Canada-
14637856) - 2021 - CRC - 10/2/20
Instruments and Controls 93
to the departure time, and the battery is
completely discharged, the vehicle will not
be fully charged by the departure time
regardless of the rate selection.
Also, if the selected electric rate settings
result in a very long charge completion
time, the vehicle will start charging
immediately upon plug-in. For example,
if the electric rate table is set up with all
Peak rates and the rate preference is to
charge during Off-Peak rates only, then the
vehicle will start charging immediately upon
plug-in.
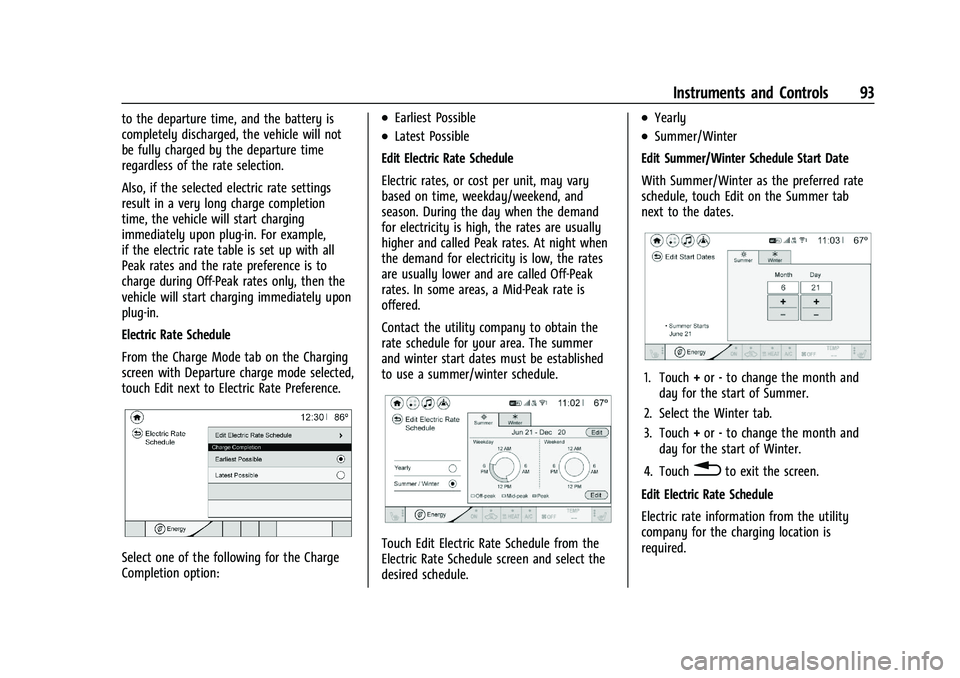
Electric Rate Schedule
From the Charge Mode tab on the Charging
screen with Departure charge mode selected,
touch Edit next to Electric Rate Preference.
Select one of the following for the Charge
Completion option:
.Earliest Possible
.Latest Possible
Edit Electric Rate Schedule
Electric rates, or cost per unit, may vary
based on time, weekday/weekend, and
season. During the day when the demand
for electricity is high, the rates are usually
higher and called Peak rates. At night when
the demand for electricity is low, the rates
are usually lower and are called Off-Peak
rates. In some areas, a Mid-Peak rate is
offered.
Contact the utility company to obtain the
rate schedule for your area. The summer
and winter start dates must be established
to use a summer/winter schedule.
Touch Edit Electric Rate Schedule from the
Electric Rate Schedule screen and select the
desired schedule.
.Yearly
.Summer/Winter
Edit Summer/Winter Schedule Start Date
With Summer/Winter as the preferred rate
schedule, touch Edit on the Summer tab
next to the dates.
1. Touch +or -to change the month and
day for the start of Summer.
2. Select the Winter tab.
3. Touch +or -to change the month and
day for the start of Winter.
4. Touch
0to exit the screen.
Edit Electric Rate Schedule
Electric rate information from the utility
company for the charging location is
required.