check engine light CHEVROLET CAMARO 1994 4.G Owner's Manual
[x] Cancel search | Manufacturer: CHEVROLET, Model Year: 1994, Model line: CAMARO, Model: CHEVROLET CAMARO 1994 4.GPages: 292, PDF Size: 15.35 MB
Page 205 of 292
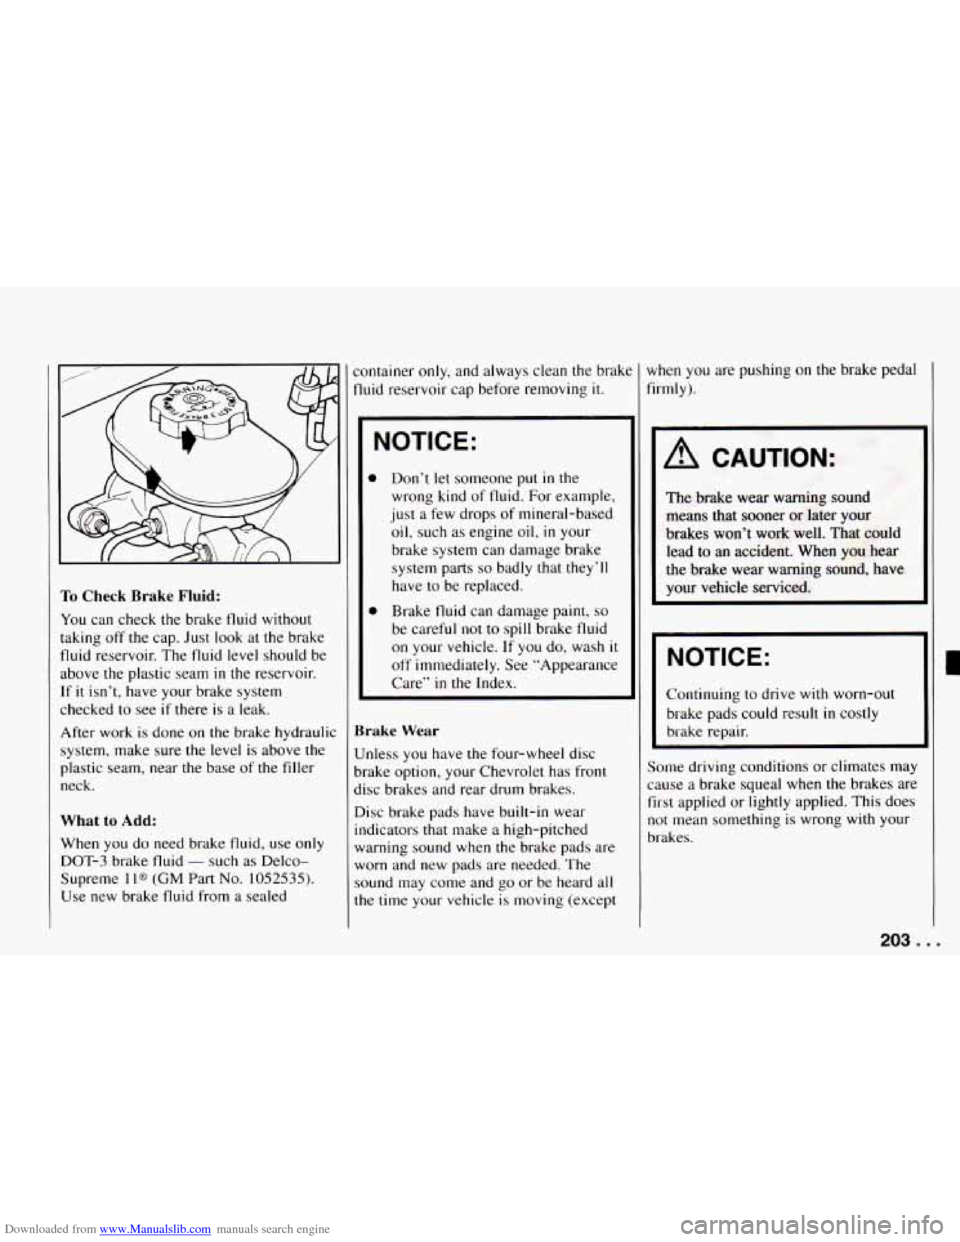
Downloaded from www.Manualslib.com manuals search engine To Check Brake Fluid:
You can check the brake fluid without
taking off the cap. Just look at the brake
fluid reservoir. The fluid level should be
above the plastic seam
in the reservoir.
If it isn’t, have your brake system
checked to see
if there is a leak.
After work is done on the brake hydraulic
system, make sure the level
is above the
plastic seam, near the base of the filler
neck.
What to Add:
When you do need brake fluid, use only
DOT-3 brake fluid
- such as Delco-
Supreme 1 l@ (GM Part No. 1052535).
Use new brake fluid from a sealed container
only, and always clean the brakt
fluid reservoir cap before removing it.
NOTICE:
0 Don’t let someone put in the
wrong kind
of fluid. For example,
just a few drops
of mineral-based
oil, such as engine oil, in your
brake system can damage brake
system parts
so badly that they’ll
have to be replaced.
0 Brake fluid can damage paint, so
be careful not to spill brake fluid
on your vehicle.
If you do, wash it
off immediately. See ”Appearance
Care”
in the Index.
Brake Wear
Unless you have the four-wheel disc
brake option, your Chevrolet has front
disc brakes and rear drum brakes.
Disc brake pads have built-in wear
indicators that make
a high-pitched
warning sound when the brake pads are
worn and new pads are needed. The
sound may come and go or be heard all
the time your vehicle is moving (except when
you are
pushing on the brake pedal
firmly).
A CAUTION:
The brake wear warning sound
means that sooner or later your
brakes won’t work well. That could
lead to an accident. When you hear
the brake wear warning sound, have
your vehicle serviced.
NOTICE:
Continuing to drive with worn-out
brake pads could result in costly
brake repair.
Some driving conditions or climates may
cause
a brake squeal when the brakes are
first applied or lightly applied. This does
not mean something is wrong
with your
brakes.
203. I
Page 207 of 292
Downloaded from www.Manualslib.com manuals search engine Contacr your dealer to learn how to
prepare your vehicle for longer storage
periods.
Bulb Replacement
For the proper type of replacement bulb,
see “Replacement Bulbs”
in the Index.
Halogen Bulbs Headlights
Headlight Aiming
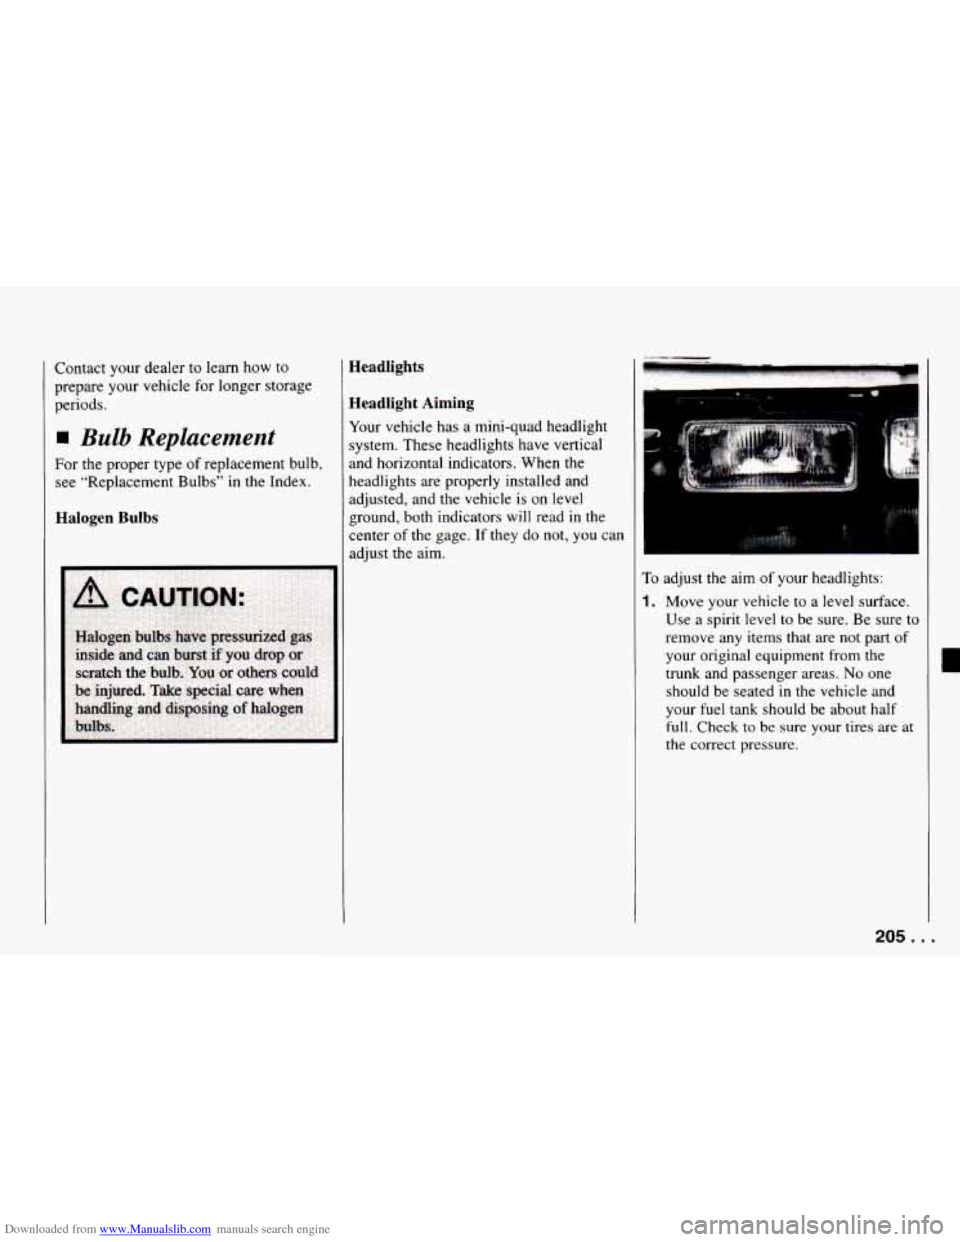
Your
vehicle has a mini-quad headlight
system. These headlights have vertical
and horizontal indicators. When the
headlights are properly installed and
adjusted, and the vehicle is on level
ground, both indicators will read in the
:enter of the gage.
If they do not, you can
adjust the aim.
To adjust the aim of your headlights:
1. Move your vehicle to a level surface.
Use a spirit level to be sure. Be sure to
remove any items that are not part of
your original equipment from the
trunk and passenger areas.
No one
should be seated
in the vehicle and
your fuel tank should be about half
full. Check to be sure your tires are at
the correct pressure.
205. .
Page 208 of 292
Downloaded from www.Manualslib.com manuals search engine Service and Appearance Care
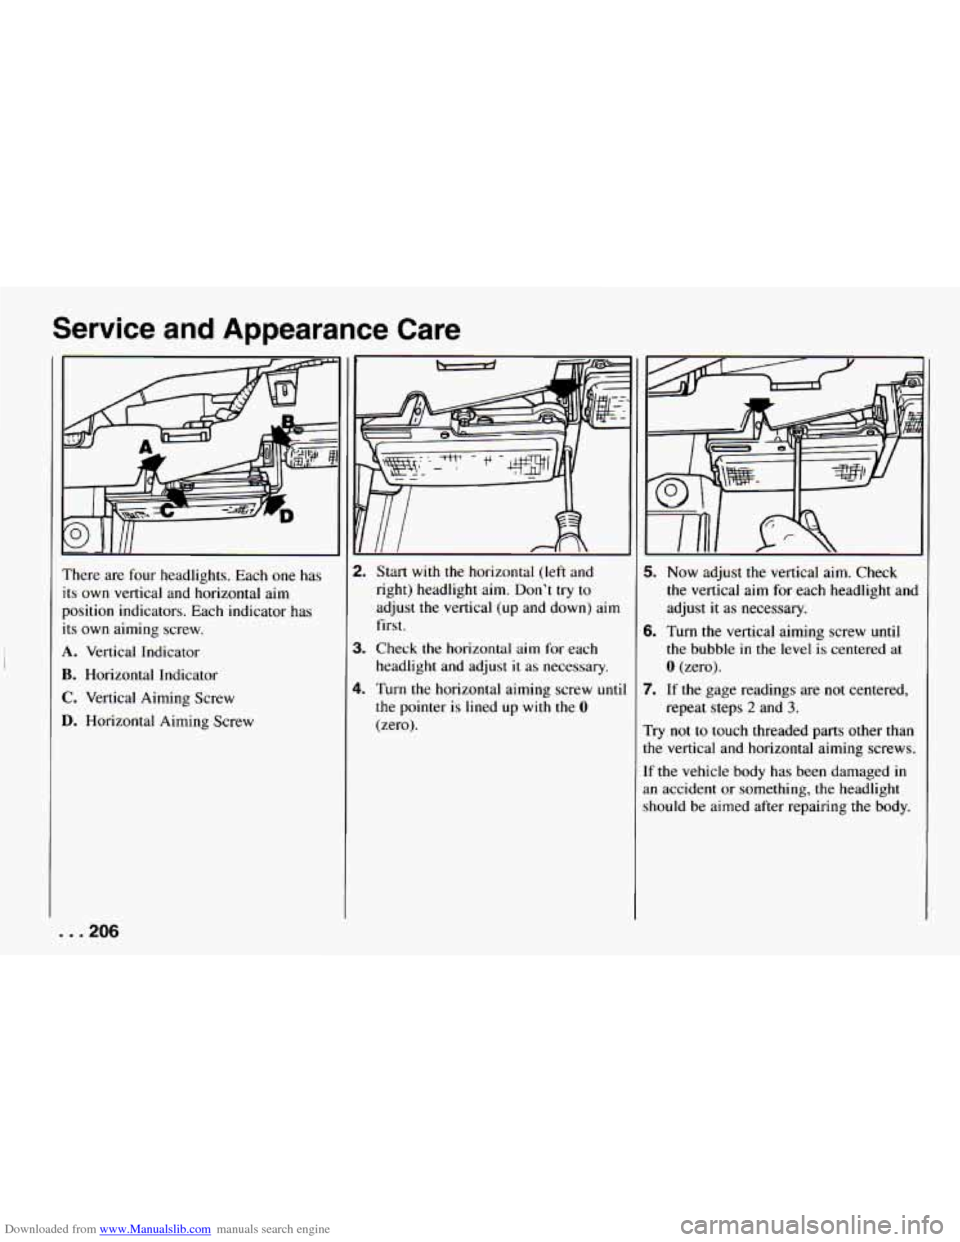
There are four headlights. Each one has
its own vertical and horizontal aim
position indicators. Each indicator has
its own aiming screw.
A. Vertical Indicator
B. Horizontal Indicator
C. Vertical Aiming Screw
D. Horizontal Aiming Screw
II
!.
I.
I.
Start with the horizontal (left and
right) headlight aim. Don't try to
adjust the vertical (up and down) aim
first.
Check the horizontal aim for each
headlight and adjust
it as necessary.
Turn the horizontal aiming screw
until
the pointer is lined up with the 0
(zero).
5. Now adjust the vertical aim. Check
the vertical aim for each headlight and
adjust it as necessary.
6. Turn the vertical aiming screw until
the bubble in the level is centered at
0 (zero).
repeat steps
2 and 3.
7. If the gage readings are not centered,
Try not to touch threaded parts other than
the vertical and horizontal aiming screws.
If the vehicle body has been damaged
in
an accident or something, the headlight
should be aimed after repairing the body.
. . .206
Page 209 of 292
Downloaded from www.Manualslib.com manuals search engine I To replace a headlight:
Before replacing a headlight that does not
light, check to make sure that the wiring
connector
is securely fastened to it.
See “Replacement
Bulbs” in the Index to
check the size and type of headlight you
need
to use before you begin to replace
the headlight.
You must replace a
headlight
with one that is exactly the
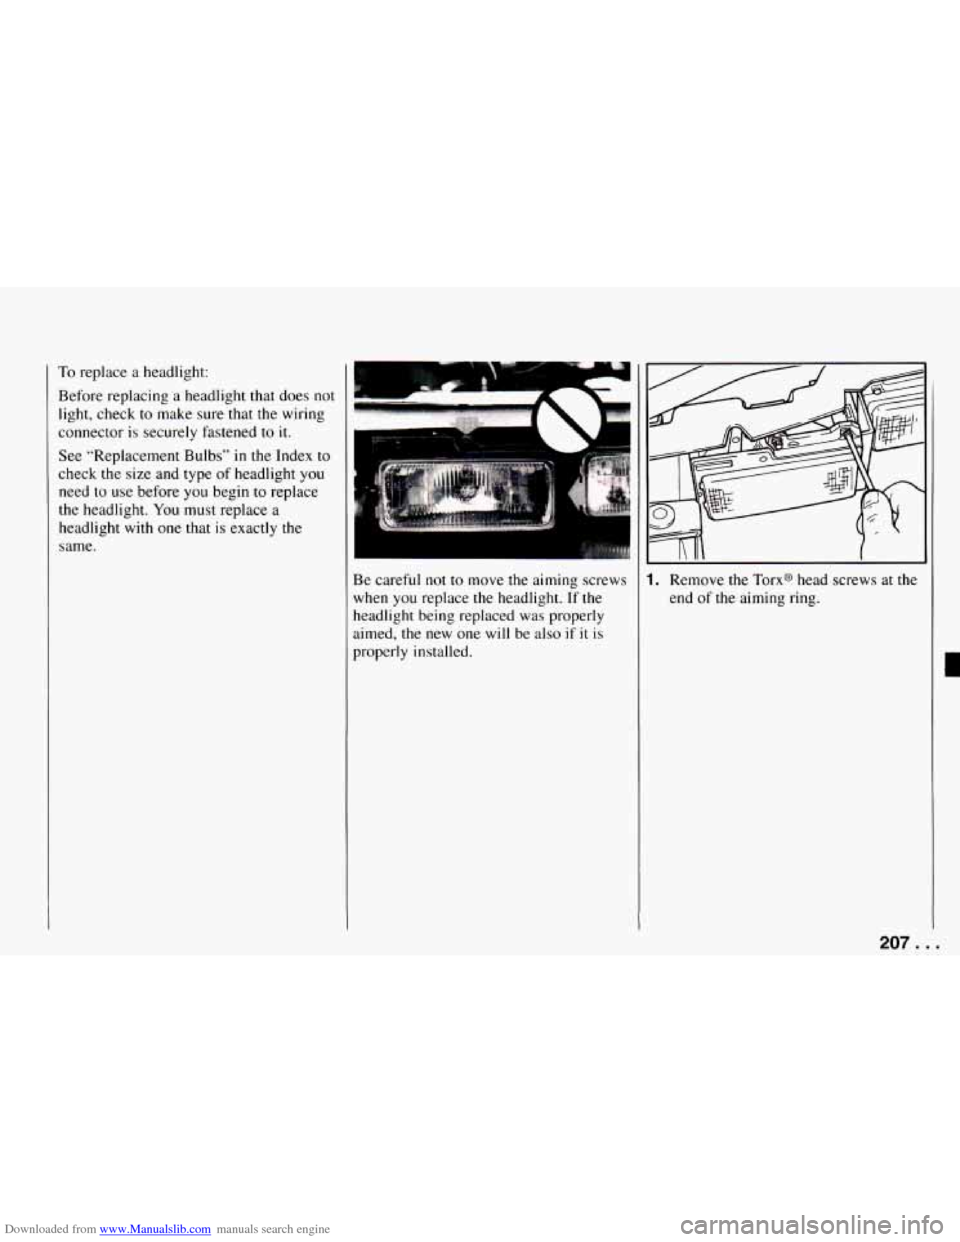
Be careful not to move the aiming screws
when you replace the headlight.
If the
headlight being replaced was properly
aimed, the new one
will be also if it is
properly installed.
~~
I. Remove the Torx@ head screws at the
end of the aiming ring.
207. . .
Page 210 of 292
Downloaded from www.Manualslib.com manuals search engine Service and Appearance Care
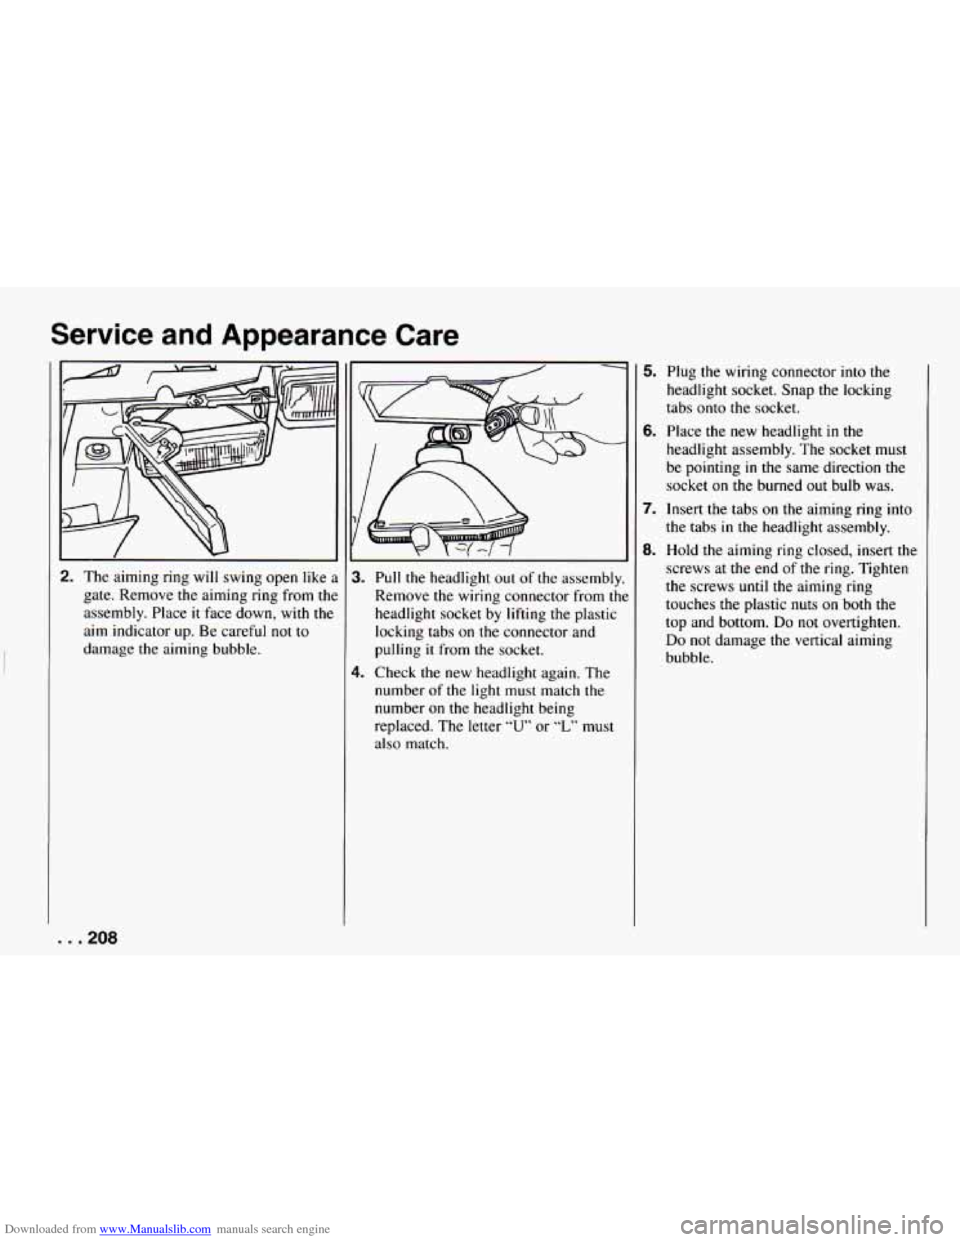
2. The aiming ring will swing open like
gate. Remove the aiming ring from
thl
assembly. Place it face down, with the
aim indicator up. Be careful not to
damage
the aiming bubble.
. . .208
I
-
a3
e
4,
Pull the headlight out of the assembly.
Remove the wiring connector from
thl
headlight socket by lifting the plastic
locking tabs on the connector and
pulling
it from the socket.
Check the new headlight again. The
number
of the light must match the
number on the headlight being
replaced. The letter
“U” or “L” must
also match.
5.
6.
7.
0.
Plug the wiring connector into the
headlight socket. Snap the locking
tabs onto the socket.
Place the new headlight in the
headlight assembly. The socket must
be pointing
in the same direction the
socket on
the burned out bulb was.
Insert the tabs on the aiming ring into
the tabs
in the headlight assembly.
Hold the aiming ring closed, insert the
screws at the end of the ring. Tighten
the screws until the aiming ring
touches the plastic nuts on
both the
top and bottom.
Do not overtighten.
Do not damage the vertical aiming
bubble.
Page 211 of 292
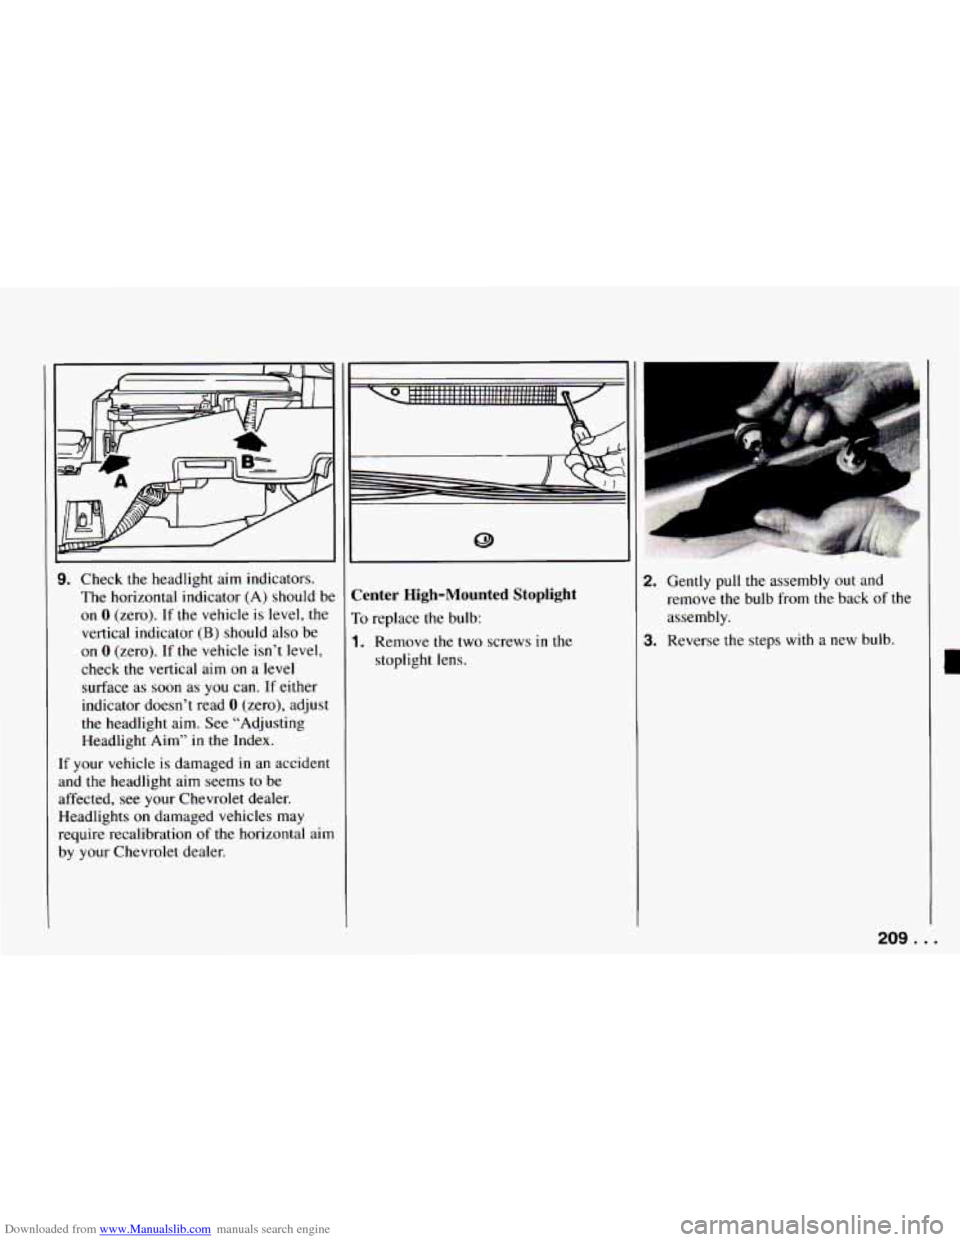
Downloaded from www.Manualslib.com manuals search engine 9. Check the headlight aim indicators.
The horizontal indicator (A) should be
on
0 (zero). If the vehicle is level, the
vertical indicator (B) should also be
on 0 (zero). If the vehicle isn’t level,
check the vertical aim on a
level
surface as soon as you can. If either
indicator doesn’t read
0 (zero), adjust
the headlight aim. See “Adjusting Headlight Aim” in the Index.
If your vehicle is damaged in an accident
and the headlight aim seems to be
affected, see your Chevrolet dealer.
Headlights
on damaged vehicles may
require recalibration
of the horizontal aim
by your Chevrolet dealer.
s ....... I,
... I......, 1..1...... . . . , . . . . . .
Center High-Mounted Stoplight
To replace the bulb:
1. Remove the two screws in the
stoplight
lens.
2. Gently pull the assembly out and remove the bulb from
the back of the
assembly.
3. Reverse the steps with a new bulb.
209. ,
Page 230 of 292
Downloaded from www.Manualslib.com manuals search engine Service and Appearance Care
Fuses and Circuit
Breakers
The wiring circuits in your vehicle are
protected from short circuits by a
combination of fuses, circuit breakers,
and fusible thermal links in the wiring
itself. This greatly reduces the chance of
fires caused by electrical problems.
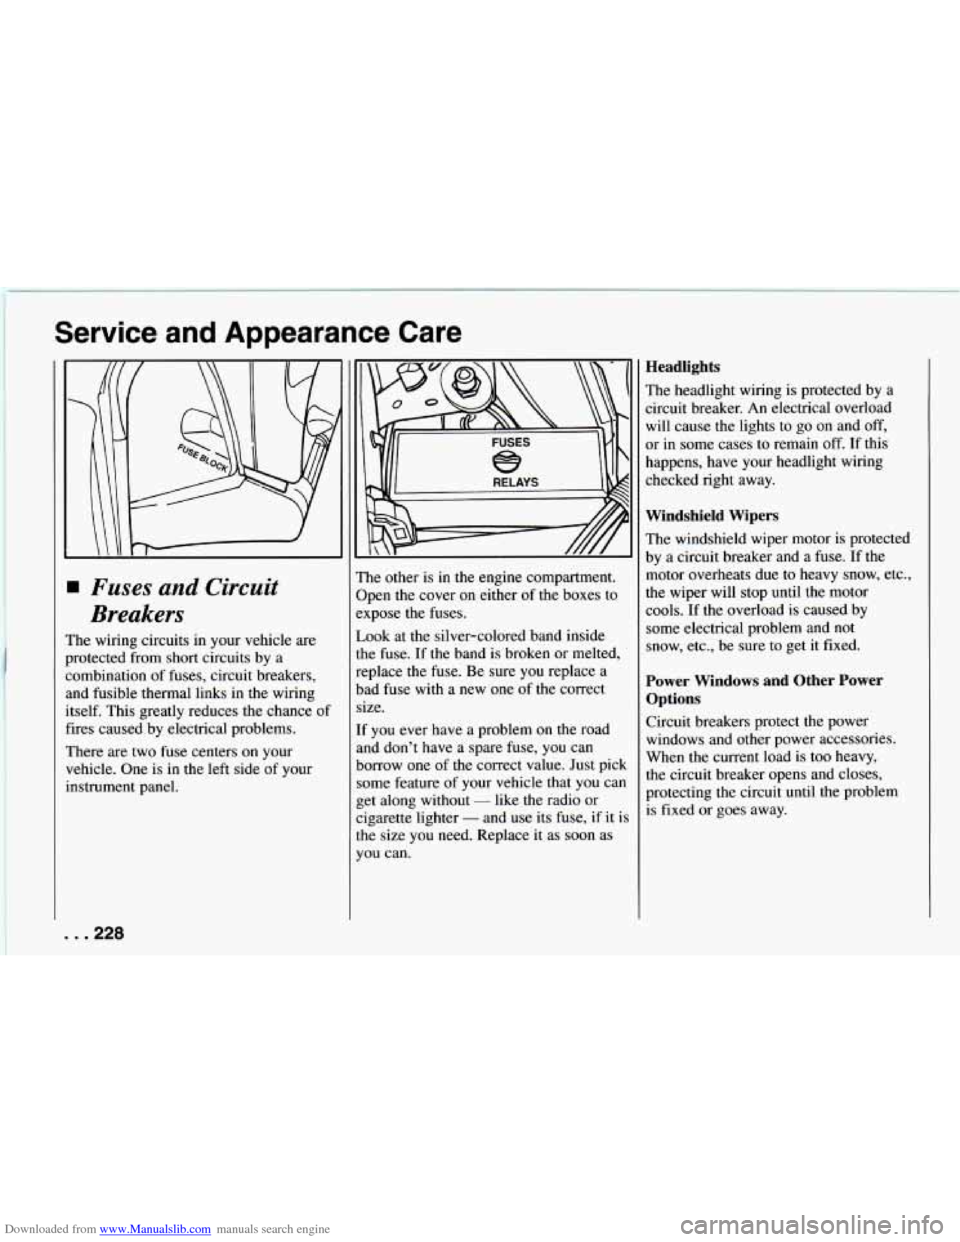
There are two fuse centers on your
vehicle. One is in the left side of your
instrument panel. The other
is in the engine compartment.
Open the cover on either of the boxes to
expose
the fuses.
Look at the silver-colored band inside
the fuse.
If the band is broken or melted,
replace the fuse. Be sure you replace a
bad fuse
with a new one of the correct
size.
If you ever have a problem on the road
and don’t have a spare fuse, you can
borrow one of the correct value. Just pick
some feature of your vehicle that you car
get along without
- like the radio or
cigarette lighter
- and use its fuse, if it i
the size you need. Replace it as soon as
you can.
Headlights
The headlight wiring is protected by a
circuit breaker. An electrical overload
will cause the lights to go on and off,
or
in some cases to remain off. If this
happens, have your headlight wiring
checked right away.
Windshield Wipers
The windshield wiper motor is protected
by a circuit breaker and a fuse. If the
motor overheats due to heavy snow, etc.,
the wiper will stop until the motor
cools. If the overload is caused by
some electrical problem and not
snow, etc., be sure to get it fixed.
Power Windows and Other Power
Options
Circuit breakers protect the power
windows and other power accessories.
When the current load is too heavy,
the circuit breaker opens and closes,
protecting the circuit until the problem
is fixed or goes away.
. . .228
Page 252 of 292
Downloaded from www.Manualslib.com manuals search engine Maintenance Schedule
Section C: Periodic Maintenance Inspections (Cont.)
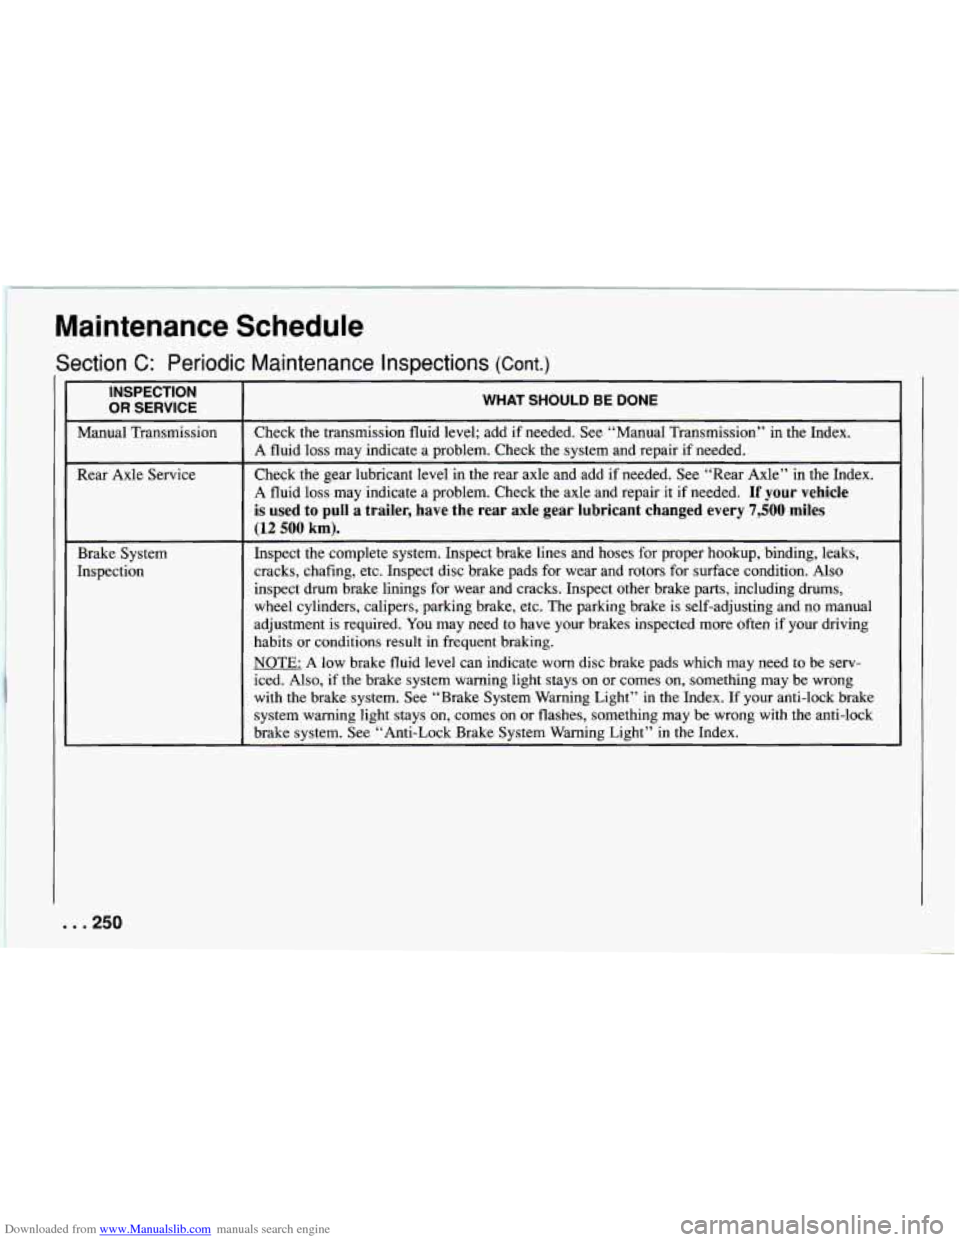
INSPECTION
OR SERVICE
Rear Axle Service
Brake System
Inspection
-
WHAT SHOULD BE DONE
Check the transmission fluid level; add if needed. See “Manual Transmission” in the Index.
A fluid loss may indicate a problem. Check the system and repair if needed.
Check the gear lubricant level in the rear axle and add if needed. See “Rear Axle” in the Index.
A fluid loss may indicate a problem. Check the axle and repair it
if needed. If your vehicle
is used to pull a trailer, have the rear axle gear lubricant changed every
7,500 miles
(12 500 km).
Inspect the complete system. Inspect brake lines and hoses for proper hookup, binding, leaks,
cracks, chafing, etc. Inspect disc brake pads for wear and rotors for surface condition. Also
inspect drum brake linings for wear and cracks. Inspect other brake parts, including drums,
wheel cylinders, calipers, parking brake, etc. The parking brake is self-adjusting and
no manual
adjustment is required. You may need to have your brakes inspected more often if your driving
habits or conditions result in frequent braking.
NOTE: A low brake fluid level can indicate worn disc brake pads which may need to be serv-
iced. Also, if the brake system warning light stays on or comes on, something may be wrong
with the brake system. See “Brake System Warning Light” in the Index.
If your anti-lock brake
system warning light stays on, comes on or flashes, something may be wrong with the anti-lock
brake system. See “Anti-Lock Brake System Warning Light” in the Index.
. . .250
Page 264 of 292
Downloaded from www.Manualslib.com manuals search engine Customer Assistance Information
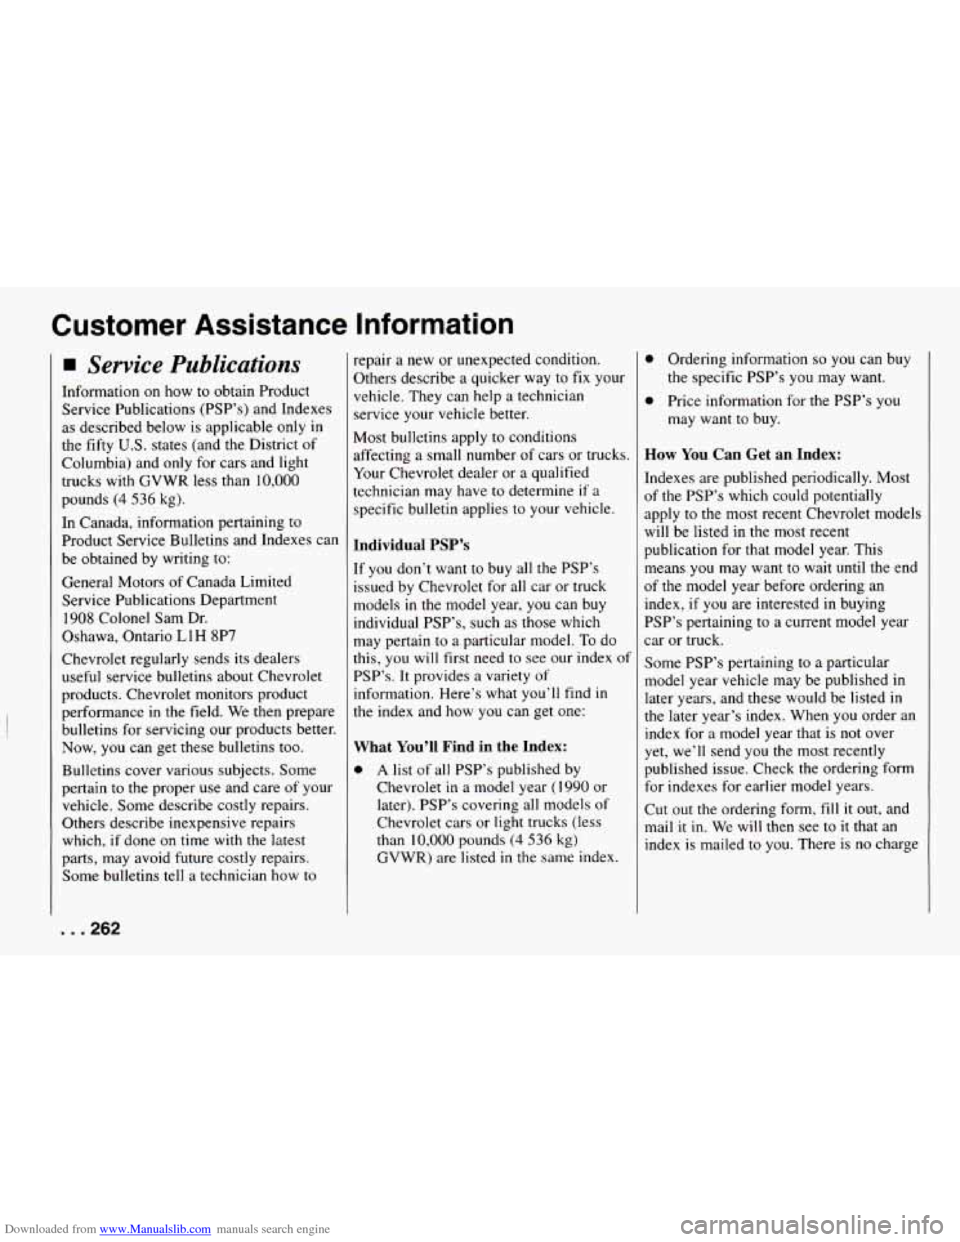
Service Publications
Information on how to obtain Product
Service Publications (PSP’s) and Indexes
as described below is applicable only
in
the fifty U.S. states (and the District of
Columbia) and only for cars and light
trucks with
GVWR less than 10,000
pounds
(4 536 kg).
In Canada, information pertaining to
Product Service Bulletins and Indexes can
be obtained by writing to:
General Motors of Canada Limited
Service Publications Department
1908 Colonel Sam Dr.
Oshawa, Ontario
L 1 H 8P7
Chevrolet regularly sends its dealers
useful service bulletins about Chevrolet
products. Chevrolet monitors product
performance in the field. We then prepare
bulletins for servicing our products better.
Now, you can get these bulletins too.
Bulletins cover various subjects. Some
pertain to the proper use and care
of your
vehicle. Some describe costly repairs.
Others describe inexpensive repairs
which, if done on time with the latest
parts, may avoid future costly repairs.
Some bulletins tell a technician how to repair
a new or unexpected condition.
Others describe a quicker way to fix your
vehicle. They can help a technician
service your vehicle better.
Most bulletins apply to conditions
affecting a small number
of cars or trucks.
Your Chevrolet dealer or
a qualified
technician may have to determine
if a
specific bulletin applies to your vehicle.
Individual PSP’s
If you don’t want to buy all the PSP’s
issued by Chevrolet for all car or truck
models
in the model year, you can buy
individual PSP’s, such as those which
may pertain to a particular model. To do
this, you will first need to see our index of
PSP’s. It provides a variety of
information. Here’s what you’ll find
in
the index and how you can get one:
What You’ll Find in the Index:
0 A list of all PSP’s published by
Chevrolet
in a model year (I 990 or
later). PSP’s covering all models of
Chevrolet cars or light trucks (less
than
10,000 pounds (4 536 kg)
GVWR) are listed in the same index.
0 Ordering information so you can buy
the specific PSP’s you may want.
0 Price information for the PSP’s you
may want to buy.
How You Can Get an Index:
Indexes are published periodically. Most
of the PSP’s which could potentially
apply to the most recent Chevrolet models
will be listed in the most recent
publication for that model year. This
means you may want to wait until the
end
of the model year before ordering an
index, if you are interested in buying
PSP’s pertaining to a current model year
car or truck.
Some PSP’s pertaining to a particular
model year vehicle may be published
in
later years, and these would be listed in
the later year’s index. When you order an
index for
a model year that is not over
yet, we’ll send you the most recently
published issue. Check the ordering form
for indexes for earlier model years.
Cut out the ordering
form, fill it out, and
mail
it in. We will then see to it that an
index is mailed to you. There is no charge
. . .262
Page 270 of 292
Downloaded from www.Manualslib.com manuals search engine Index
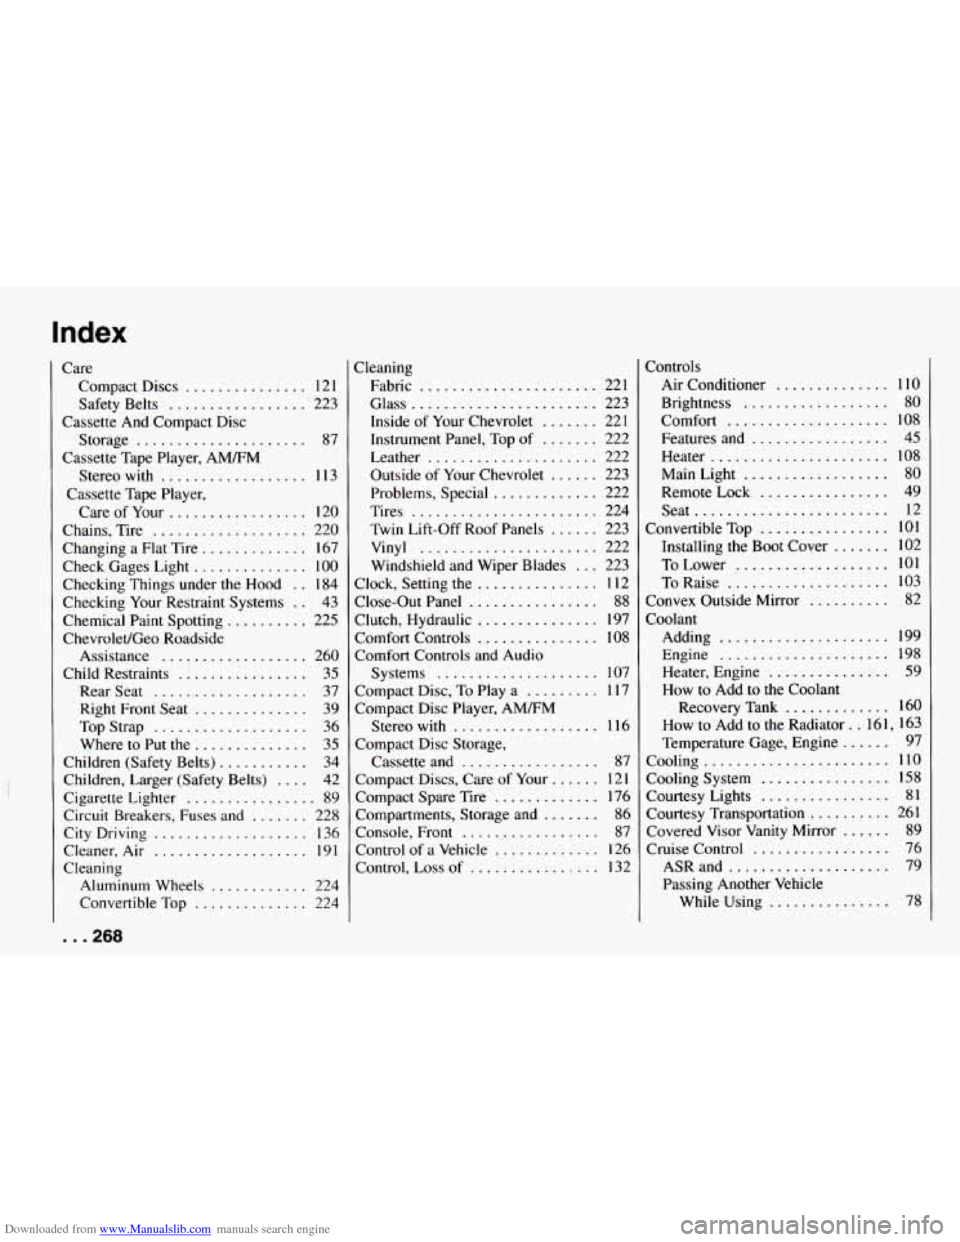
Care Compact Discs
............... 121
Safety Belts
................. 223
Cassette And Compact Disc
Storage
..................... 87
Cassette Tape Player. AMFM
Stereo
with .................. 1 13
Cassette Tape Player.
Care of Your
................. 120
Chains. Tire
................... 220
Changing a Flat Tire ............. 167
Check Gages Light
.............. 100
Checking Things under
the Hood . . 184
Checking Your Restraint Systems
. . 43
Chemical Paint Spotting
.......... 225
Chevrolet/Geo Roadside Assistance
.................. 260
Child Restraints
................ 35
Rear Seat
................... 37
Right Front Seat
.............. 39
Top Strap
................... 36
Where to Put the
.............. 35
Children (Safety Belts) ........... 34
Children. Larger (Safety Belts)
.... 42
Cigarette Lighter
................ 89
Circuit Breakers. Fuses and ....... 228
City Driving
................... 136
Cleaner. Air ................... 191
Cleaning
Aluminum Wheels
............ 224
Convertible Top
.............. 224 Cleaning
Fabric
...................... 221
Glass
....................... 223
Inside
of Your Chevrolet ....... 221
Instrument Panel. Top
of ....... 222
Leather
..................... 222
Outside of Your Chevrolet
...... 223
Problems. Special
............. 222
Tires
....................... 224
Twin Lift-off Roof Panels
...... 223
Vinyl ...................... 222
Windshield and Wiper Blades
... 223
Clock. Setting the
............... 112
Close-Out Panel
................ 88
Clutch. Hydraulic ............... 197
Comfort Controls
............... 108
Comfort Controls and Audio
Systems
.................... 107
Compact Disc. To Play a
......... 1 17
Compact
Disc Player. AMFM
Stereo
with .................. 116
Compact Disc Storage.
Cassette and
................. 87
Compact Discs. Care
of Your ...... 121
Compact Spare Tire
............. 176
Compartments. Storage and
....... 86
Console. Front
................. 87
Control of a Vehicle
............. 126
Control.
Loss of ................ 132 Controls
Air Conditioner
.............. 110
Brightness .................. 80
Comfort .................... 108
Features and
................. 45
Heater
...................... 108
Main Light
.................. 80
Remote Lock ................ 49
Seat
........................ 12
Convertible Top
................ 101
Installing the Boot Cover ....... 102
To Lower
................... 101
To Raise .................... 103
Convex Outside Mirror
.......... 82
Coolant Adding
..................... 199
Engine
..................... 198
Heater. Engine ............... 59
How to Add to the Coolant
Recovery Tank
............. 160
How to Add to the Radiator
. . 161. 163
Temperature Gage. Engine
...... 97
Cooling
....................... 110
Cooling System ................ 158
Courtesy Lights
................ 81
Courtesy Transportation .......... 261
Covered Visor Vanity Mirror
...... 89
Cruise Control
................. 76
ASR and
.................... 79
Passing Another Vehicle
While Using
............... 78
... 268