tires CHEVROLET CAMARO 1997 4.G Owner's Manual
[x] Cancel search | Manufacturer: CHEVROLET, Model Year: 1997, Model line: CAMARO, Model: CHEVROLET CAMARO 1997 4.GPages: 404, PDF Size: 20.96 MB
Page 284 of 404
Downloaded from www.Manualslib.com manuals search engine Some driving conditions or climates may cause a brake
squeal when the brakes are first applied
or lightly
applied. This does not mean something is wrong with
your brakes.
See “Caliper/Knuckle Maintenance Inspection” in
Section
7 of this manual under Part C “Periodic
Maintenance Inspections.”
If you have rear drum brakes, they don’t have wear
indicators, but if you ever hear a rear brake rubbing
noise, have the rear brake linings inspected. Also, the
rear brake drums should be removed and inspected each
time the tires are removed for rotation or changing.
When
you have the front brakes replaced, have the rear
brakes inspected, too.
Brake linings should always be replaced as complete
axle sets.
See “Brake System Inspection” in Section
7 of this
manual under Part
C “Periodic Maintenance
Inspections”.
Brake Pedal Travel
See your dealer if the brake pedal does not return to
normal height, or if there is a rapid increase in pedal
travel. This could be a sign
of brake trouble.
Brake Adjustment
Every time you make a moderate brake stop, your disc
brakes adjust for wear. If you rarely make a moderate or
heavier stop, then your brakes might not adjust correctly.
If you drive in that way, then
-- very carefully -- make
a few moderate brake stops about every
1,000 miles
(1 600 km), so your brakes will adjust properly.
If your brake pedal goes down farther than normal, your
rear drum brakes may need adjustment. Adjust them by
backing up and firmly applying the brakes a few times.
6-38
Page 286 of 404
Downloaded from www.Manualslib.com manuals search engine Bulb Replacement
For the proper type of replacement bulb, see
“Replacement Bulbs”
in the Index.
Halogen Bulbs
Halogen bulbs have pressurized gas inside and
can burst if you drop or scratch the bulb. You or
others could be injured. Be sure to read and
follow the instructions on the bulb package.
Headlamp Aiming
Your vehicle has the 55 x 135 mini-quad headlamp
system. These headlamps have horizontal and vertical
aim indicators. The aim has been pre-set at the factory
and should need
no further adjustment.
If your vehicle is damaged in an accident and the
headlamp aim seems to be affected, see your
Chevrolet dealer. Headlamps on damaged vehicles may
require recalibration of the horizontal aim by your
Chevrolet dealer.
To check the aim, the vehicle should be properly
prepared as follows:
0
0
0
0
0
The vehicle must have all four tires on a perfectly
level surface.
The vehicle should not have any snow, ice or mud
attached to it.
There should not be any cargo or loading of the
vehicle, except it should have a full tank
of gas and
one person or
160 lbs. (75 kg) on the driver’s seat.
Tires should be properly inflated.
The horizontal indicator should read
“0.”
6-40
Page 287 of 404
Downloaded from www.Manualslib.com manuals search engine I NOTICE:
To make sure your headlamps are aimed
properly, read all the instructions before
beginning. Failure to follow these instructions
could cause damage
to headlamp parts.
State inspection stations will allow a vertical reading of
plus 0.76 degrees or minus 0.76 degrees from the center
of the bubble.
It
is recommended that the upper limit not exceed plus
0.4 degrees from the center of the bubble. Other drivers
may flash their high beams at
you if your adjustment is
much above plus
0.4 degrees.
If you find that the headlamp aiming needs adjustment,
follow these steps:
To adjust the aim of your headlamps:
1. Move your vehicle to a level surface. Use a spirit level
to be sure. Be sure to remove any items that
are not
part of your original equipment from the trunk and
passenger areas. No one should be seated in the vehicle
and
your fuel tank should be about half full. Check to
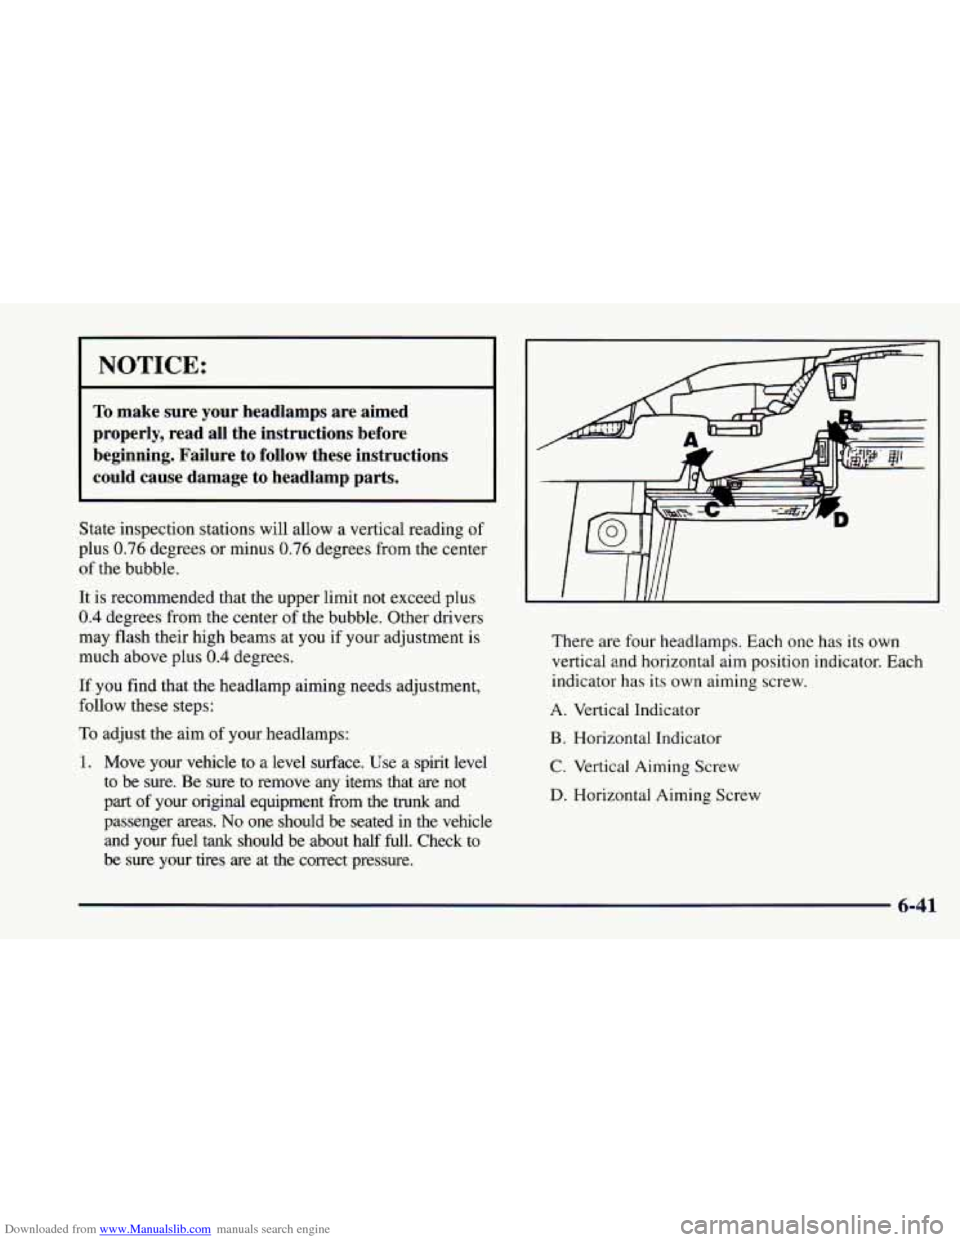
be sure your tires are at the correct pressure. There are four
headlamps. Each one has its own
vertical and horizontal aim position indicator. Each
indicator has its own aiming screw.
A. Vertical Indicator
B. Horizontal Indicator
C. Vertical Aiming Screw
D. Horizontal Aiming Screw
6-41
Page 296 of 404
Downloaded from www.Manualslib.com manuals search engine ~ 3. At
the heel end of the wiper blade assembly, notched
end of blade element last, slide the blade element
into the blade claw sets. The plastic retainer caps
will be forced
off as the element is fully inserted.
Make sure that all the claw sets are properly engaged
in the slots of the blade element.
4. Install the wiper blade assembly on the wiper arm.
For information on wiper blade replacement length and
type, see “Capacities and Specifications” in the Index.
Tires
Your new Chevrolet comes with high-quality tires made
by a leading tire manufacturer. If you ever have
questions about your tire warranty and where to obtain
service, see your Chevrolet Warranty booklet for details.
Poorly maintained and improperly used tires
are dangerous.
CAUTION: (Continued)
Overloading your tires can cause
overheating as
a result of too much friction.
You could have an air-out and a serious
accident. See “Loading Your Vehicle” in
the Index.
0 Underinflated tires pose the same danger as
overloaded tires. The resulting accident
could cause serious injury. Check all tires
frequently to maintain the recommended
pressure. Tire pressure should be checked
when your tires are cold.
cut, punctured or broken
by a sudden
impact
-- such as when you hit a pothole.
Keep tires at the recommended pressure.
0 Worn, old tires can cause accidents. If your
tread
is badly worn, or if your tires have
been damaged, replace them.
See “Inflation
-- Tire Pressure’’ in this section
for inflation pressure adjustment for higher
speed driving.
Overinflated tires are more likely to be
6-50
Page 297 of 404
Downloaded from www.Manualslib.com manuals search engine Inflation -- Tire Pressure
The Tire-Loading Information label, which is on the
driver’s door shows the correct inflation pressures
for
your tires when they’re cold. “Cold” means your vehicle
has been sitting for
at least three hours or driven no
more than 1 mile
(1.6 km).
If you’ll be driving at speeds higher than 100 mph
(160 km/h) where it is legal, raise the cold inflation
pressure
of each tire to 35 psi (240 kPa). When you
end this very high-speed driving, reduce the cold
inflation pressures to those listed on the Tire-Loading
Information label.
NOTICE:
Don’t let anyone tell you that underinflation or
overinflation is all right.
It’s not. If your tires
don’t have enough air (underinflation), you can
get the following:
NOTICE: (Continued) NOTICE:
(Continued)
Too much flexing
Too much heat
Tire overloading
Bad wear
Bad handling
0 Bad fuel economy.
If your tires have too much air (overinflation),
you can get the following:
Unusual wear
0 Bad handling
Rough ride
Needless damage from road hazards.
When to Check
Check your tires once a month or more.
Don’t forget your compact spare tire. It should be at
60 psi (420 kPa).
6-51
Page 298 of 404
Downloaded from www.Manualslib.com manuals search engine How to Check
Use a good quality pocket-type gage to check tire
pressure. You can’t tell if your tires are properly inflated
simply by looking at them. Radial tires may look
properly inflated even when they’re underinflated.
Be sure to put
the valve caps back on the valve stems.
They help prevent leaks by keeping out dirt and moisture.
Tire Inspection and Rotation
Tires should be rotated every 6,000 to 8,000 miles
(10
000 to 13 000 km). Any time you notice unusual
wear, rotate your tires as soon as possible and check
wheel alignment.
Also check for damaged tires or
wheels. See “When It’s Time for New Tires” and
“Wheel Replacement” later in this section for
more information.
The purpose of regular rotation is
to achieve more
uniform wear for all tires on the vehicle. The first
rotation is the most important. See “Scheduled
Maintenance Services” in the Index for scheduled
rotation intervals.
c-
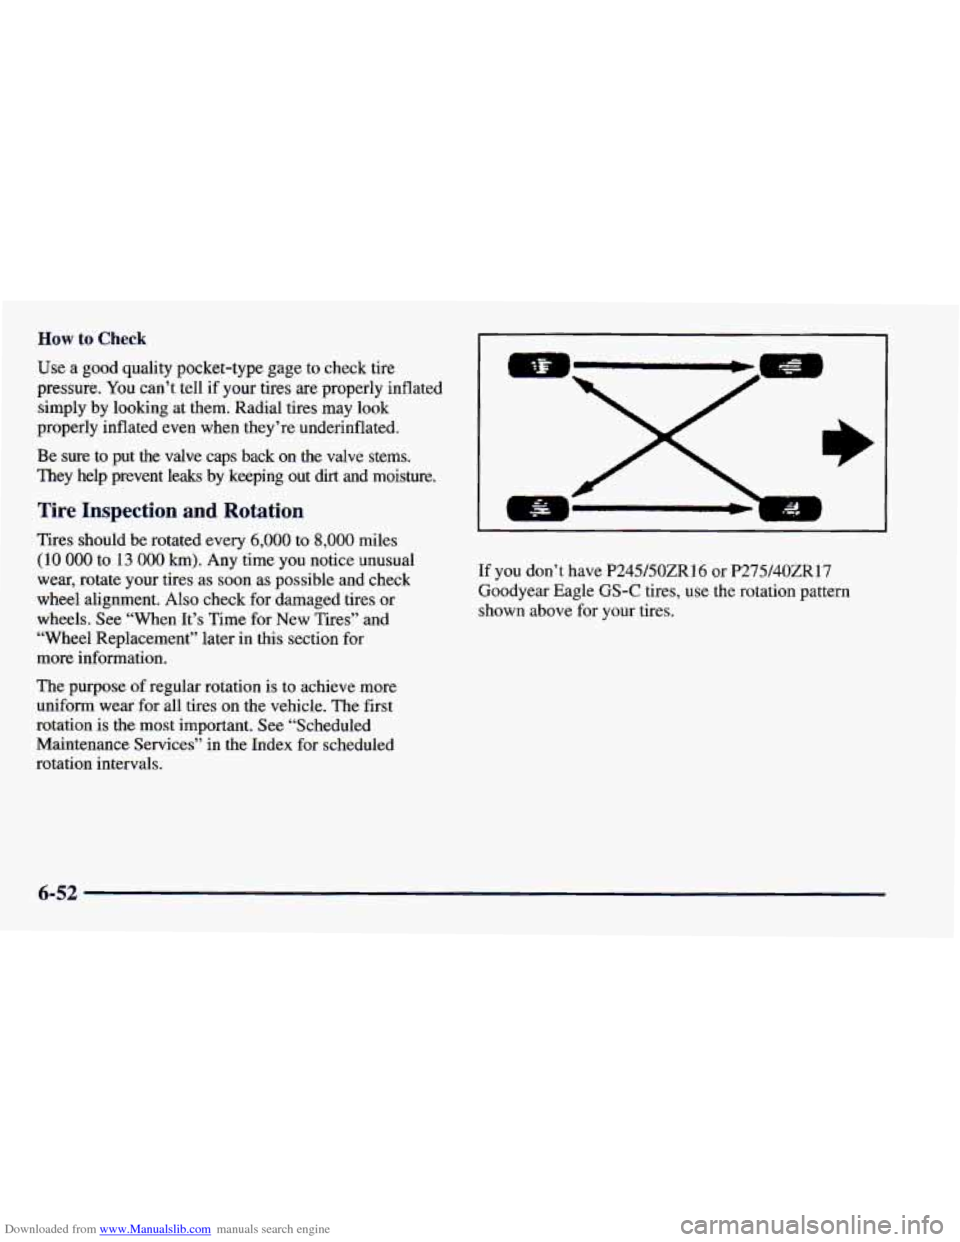
If you don’t have P245/5OZR16 or P275/40ZR17
Goodyear Eagle GS-C tires, use the rotation pattern
shown above for your tires.
6-52
Page 299 of 404

Downloaded from www.Manualslib.com manuals search engine L
If you have P245/50ZR 16 or P275/40ZR17 Goodyear
Eagle GS-C tires, they must roll in a certain direction
for the best overall performance. The direction is shown
by an arrow
on the sidewall. Because these tires are
directional, they
should be rotated as shown here. These
tires should
only be moved from front to rear and rear to
front on the same side of the vehicle.
Don’t include the compact spare tire in your tire rotation. After the tires have been rotated,
adjust the front and
rear inflation pressures as shown
on the Tire-Loading
Information label. Make certain that all wheel
nuts are
properly tightened.
See “Wheel Nut Torque” in
the Index.
Rust or dirt on a wheel, or on the parts to which
it is fastened, can make wheel nuts become loose
after a time. The wheel could come
off and cause
an accident. When you change a wheel, remove
any rust or dirt from places where the wheel
attaches to the vehicle. In an emergency, you can
use a cloth or a paper towel to do this; but be
sure to use
a scraper or wire brush later, if you
need to, to get all
the rust or dirt off. (See
“Changing
a Flat Tire” in the Index.)
6-53
Page 300 of 404
Downloaded from www.Manualslib.com manuals search engine When It’s Time for New Tires
L
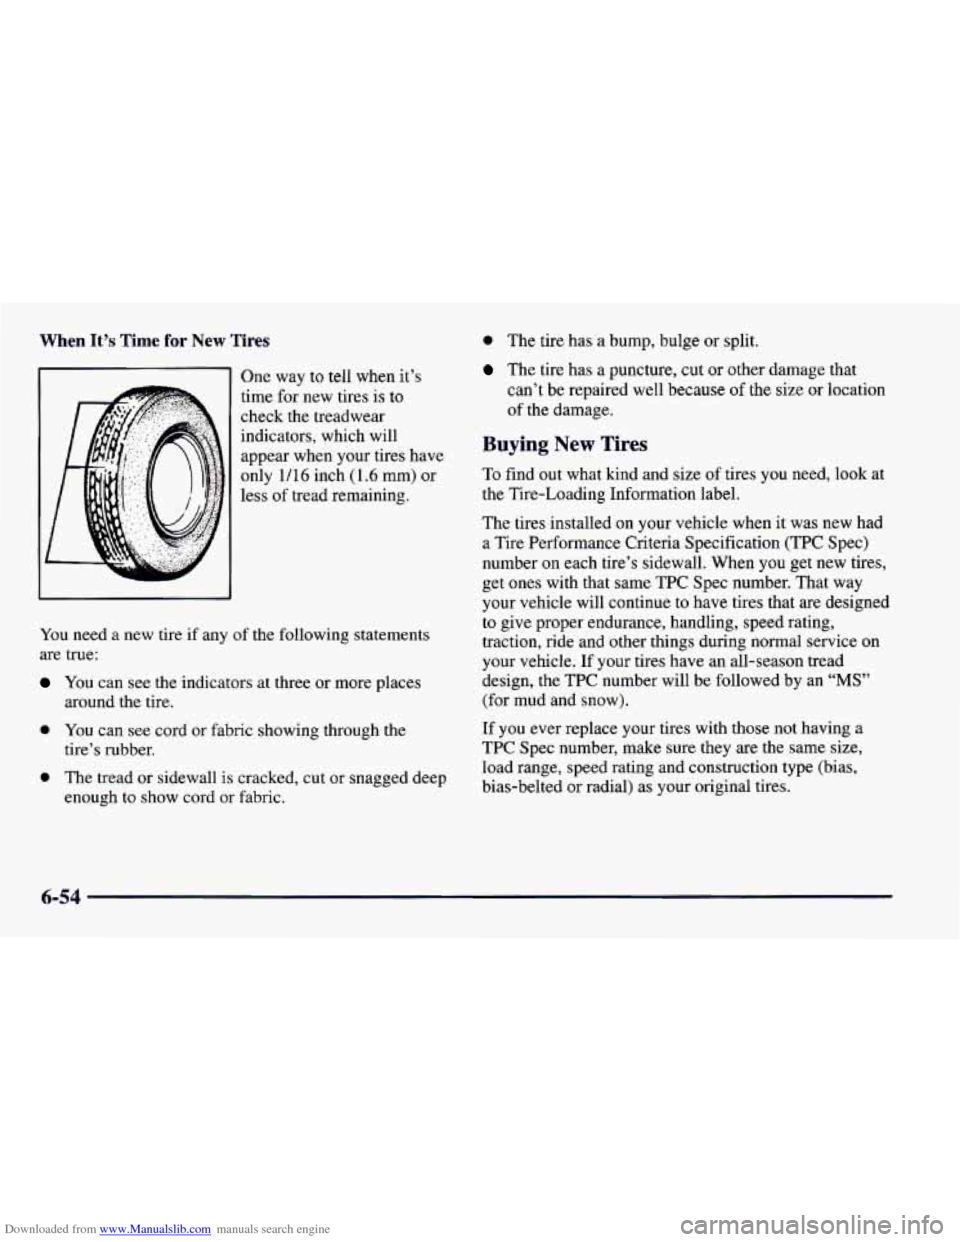
One way to tell when it’s
time
for new tires is to
check the treadwear
indicators, which will
appear when your tires have
only
1/16 inch (1.6 mm) or
less of tread remaining.
You need a new tire if any of the following statements
are true:
You can see the indicators at three or more places
around the tire.
0 You can see cord or fabric showing through the
tire’s rubber.
0 The tread or sidewall is cracked, cut or snagged deep
enough to show cord or fabric.
0 The tire has a bump, bulge or split.
The tire has a puncture, cut or other damage that
can’t be repaired well because
of the size or location
of the damage.
Buying New Tires
To find out what kind and size of tires you need, look at
the Tire-Loading Information label.
The tires installed on your vehicle when it was new had
a Tire Performance Criteria Specification (TPC Spec)
number
on each tire’s sidewall. When you get new tires,
get ones with that same TPC Spec number. That way
your vehicle will continue to have tires that are designed
to give proper endurance, handling, speed rating,
traction, ride and other things during normal service on
your vehicle. If your tires have an all-season tread
design, the TPC number will be followed by an
“MS”
(for mud and snow).
If you ever replace your tires with those not having a
TPC Spec number, make sure they
are the same size,
load range, speed rating and construction type (bias,
bias-belted or radial) as your original tires.
6-54
Page 301 of 404
Downloaded from www.Manualslib.com manuals search engine Mixing tires could cause you to lose control while
driving.
If you mix tires of different sizes or types
(radial and bias-belted tires), the vehicle may not
handle properly, and you could have
a crash.
Using tires of different sizes may also cause
damage to your vehicle. Be sure to use the same
size and type tires on all wheels,
It's all right to drive with your compact spare,
though. It
was developed for use on your vehicle,
Uniform Tire Quality Grading
The following information relates to the system
developed by the United States National Highway
Traffic Safety Administration, which grades tires by
treadwear, traction and temperature performance. (This
applies only to vehicles sold in the United States.) The
grades are molded on the sidewalls
of most passenger car
tires. The Uniform Tire Quality Grading system
does not apply
to deep tread, winter-type snow tires,
space-saver or temporary use spare tires, tires with
nominal rim diameters
of 10 to 12 inches (25 to 30 cm),
or to some limited-production tires.
While the tires available on General Motors passenger
cars and light trucks may vary with respect to these
grades, they must also conform
to Federal safety
requirements and additional General Motors Tire
Performance Criteria (TPC) standards.
Treadwear
The treadwear grade is a comparative rating based on
the wear rate of the tire when tested under controlled
conditions on a specified government test course. For
example, a tire graded 150 would wear one and a half
'( 1 1/2) times as well on the government course as a tire
graded 100. The relative performance
of tires depends
upon the actual conditions of their use, however, and
may depart significantly from the norm due to variations
in driving habits, service practices and differences in
road characteristics and climate.
6-55
Page 302 of 404
Downloaded from www.Manualslib.com manuals search engine Traction -- A, B, C
The traction grades, from highest to lowest, are A, B,
and C, and they represent the tire’s ability to stop on
wet pavement as measured under controlled conditions
on specified government test surfaces of asphalt
and concrete. A tire marked C may have poor
traction performance.
Warning: The traction grade assigned to this tire is based
on braking (straightahead) traction tests and does not
include cornering (turning) traction.
Temper ’ ----, -- A, B, C
The temperature grades are A (the highest), B, and C,
representing the tire’s resistance to the generation of
heat and its ability to dissipate heat when tested under
controlled conditions on a specified indoor laboratory
test wheel. Sustained high temperature can cause the
material of the tire to degenerate and reduce tire life, and
excessive temperature can lead to sudden tire failure.
The grade
C corresponds to a level of performance
which all passenger car tires must meet under the
Federal Motor Vehicle Safety Standard
No. 109. Grades
B and A represent higher levels of performance on the
laboratory test wheel than the minimum required by law.
Warning: The temperature grade for this tire is
established for a tire that is properly inflated and not overloaded. Excessive speed,
underinflation,
or
excessive loading, either separately or in combination,
can cause heat buildup and possible tire failure.
Wheel Alignment and Tire Balance
The wheels on your vehicle were aligned and balanced
carefully at the factory to give you the longest tire life
and best overall performance.
Scheduled wheel alignment and wheel balancing are not
needed. However, if
you notice unusual tire wear or
your vehicle pulling one way
or the other, the alipnment
may need
to be reset. If you notice your vehicle
vibrating when driving on a smooth road, your wheels may need to be rebalanced.
Wheel Replacement
Replace any wheel that is bent, cracked, or badly rusted
or corroded.
If wheel nuts keep coming loose, the wheel,
wheel bolts and wheel nuts should be replaced. If the
wheel leaks air, replace it (except some aluminum
wheels, which can sometimes be repaired).
See your
Chevrolet dealer if any of these conditions exist.
Your dealer will know the kind of wheel you need.
Each new wheel should have the same load-carrying
capacity, diameter, width, offset and be mounted the
same way as the one it replaces.
6-56