sensor CHEVROLET CAMARO 2014 5.G Owners Manual
[x] Cancel search | Manufacturer: CHEVROLET, Model Year: 2014, Model line: CAMARO, Model: CHEVROLET CAMARO 2014 5.GPages: 432, PDF Size: 6.2 MB
Page 9 of 432

Black plate (3,1)Chevrolet Camaro Owner Manual (GMNA-Localizing-U.S./Canada/Mexico-
6042601) - 2014 - CRC - 1/21/14
In Brief 1-3
1.Air Vents on page 8-3.
2. Turn Signal Lever. See Turn and
Lane-Change Signals on
page 6-4.
Headlamp High/Low-Beam
Changer on page 6-2.
Flash-to-Pass on page 6-2.
Driver Information Center (DIC)
Buttons (If Equipped). See
Driver Information Center (DIC)
on page 5-24.
3. Tap Shift (If Equipped). See Manual Mode on page 9-32.
4. Instrument Cluster on page 5-7.
5. Windshield Wiper/Washer on
page 5-3.
6. Light Sensor. See Automatic
Headlamp System on page 6-2.
7. Infotainment on page 7-1.
8. Hood Release (Out of View). See Hood on page 10-5.
9. Data Link Connector (DLC) (Out of View). See Malfunction
Indicator Lamp on page 5-16. 10.
Exterior Lamp Controls on
page 6-1.
Front Fog Lamps on page 6-4
(If Equipped).
Instrument Panel Illumination
Control on page 6-5.
11. Cruise Control on page 9-46.
12. Steering Wheel Adjustment on
page 5-2.
13. Horn on page 5-3.
14. Steering Wheel Controls on
page 5-2.
15. Head-Up Display (HUD) on
page 5-28 (If Equipped).
16. Climate Control Systems on
page 8-1.
17. Transmission Temperature
Gauge (Except ZL1) on
page 5-12.
Voltmeter Gauge on page 5-13.
Engine Oil Temperature Gauge
on page 5-11. Engine Oil Pressure Gauge on
page 5-10.
18. Traction Control/Electronic
Stability Control on page 9-39.
Performance Traction
Management (PTM). See
Competitive Driving Mode on
page 9-41 (ZL1 or Z/28
Models Only).
19. Shift Lever. See Automatic
Transmission on page 9-28 or
Manual Transmission on
page 9-34.
20. Power Outlets on page 5-5.
21. Hazard Warning Flashers on
page 6-4.
Page 22 of 432
Black plate (16,1)Chevrolet Camaro Owner Manual (GMNA-Localizing-U.S./Canada/Mexico-
6042601) - 2014 - CRC - 1/21/14
1-16 In Brief
Driver Information
Center (DIC)
The DIC display is in the center of
the instrument cluster. It shows the
status of many vehicle systems. The
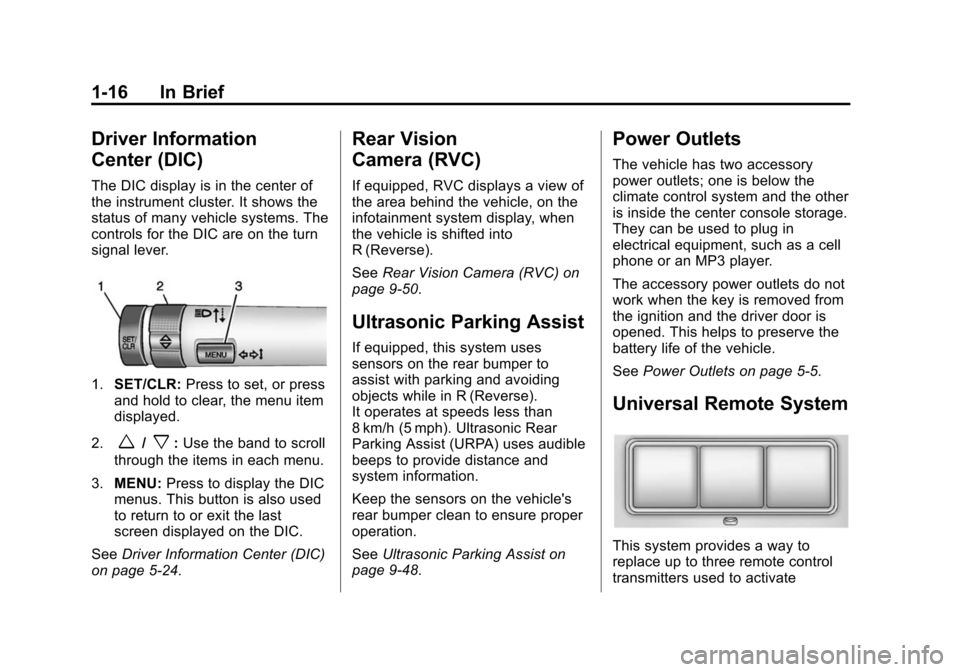
controls for the DIC are on the turn
signal lever.
1.SET/CLR: Press to set, or press
and hold to clear, the menu item
displayed.
2.
w/x: Use the band to scroll
through the items in each menu.
3. MENU: Press to display the DIC
menus. This button is also used
to return to or exit the last
screen displayed on the DIC.
See Driver Information Center (DIC)
on page 5-24.
Rear Vision
Camera (RVC)
If equipped, RVC displays a view of
the area behind the vehicle, on the
infotainment system display, when
the vehicle is shifted into
R (Reverse).
See Rear Vision Camera (RVC) on
page 9-50.
Ultrasonic Parking Assist
If equipped, this system uses
sensors on the rear bumper to
assist with parking and avoiding
objects while in R (Reverse).
It operates at speeds less than
8 km/h (5 mph). Ultrasonic Rear
Parking Assist (URPA) uses audible
beeps to provide distance and
system information.
Keep the sensors on the vehicle's
rear bumper clean to ensure proper
operation.
See Ultrasonic Parking Assist on
page 9-48.
Power Outlets
The vehicle has two accessory
power outlets; one is below the
climate control system and the other
is inside the center console storage.
They can be used to plug in
electrical equipment, such as a cell
phone or an MP3 player.
The accessory power outlets do not
work when the key is removed from
the ignition and the driver door is
opened. This helps to preserve the
battery life of the vehicle.
See Power Outlets on page 5-5.
Universal Remote System
This system provides a way to
replace up to three remote control
transmitters used to activate
Page 69 of 432
Black plate (19,1)Chevrolet Camaro Owner Manual (GMNA-Localizing-U.S./Canada/Mexico-
6042601) - 2014 - CRC - 1/21/14
Seats and Restraints 3-19
Warning (Continued)
that person causing severe injury
or even death. The path of an
inflating airbag must be kept
clear. Do not put anything
between an occupant and an
airbag, and do not attach or put
anything on the steering wheel
hub or on or near any other
airbag covering.
Do not use seat accessories that
block the inflation path of a
seat-mounted side impact airbag.
Never secure anything to the roof
of a vehicle with roof-rail airbags
by routing a rope or tie‐down
through any door or window
opening. If you do, the path of an
inflating roof-rail airbag will be
blocked.
When Should an Airbag
Inflate?
This vehicle is equipped with
airbags. SeeAirbag System on
page 3-15. Airbags are designed to
inflate if the impact exceeds the
specific airbag system’ s deployment
threshold. Deployment thresholds
are used to predict how severe a
crash is likely to be in time for the
airbags to inflate and help restraint
the occupants. The vehicle has
electronic frontal sensors that help
the airbag system determine the
severity of the impact. Deployment
thresholds can vary with specific
vehicle design.
Frontal airbags are designed to
inflate in moderate to severe frontal
or near-frontal crashes to help
reduce the potential for severe
injuries, mainly to the driver's or
front outboard passenger's head
and chest.
Whether the frontal airbags will or
should inflate is not based primarily
on how fast the vehicle is traveling. It depends on what is hit, the
direction of the impact, and how
quickly the vehicle slows down.
Frontal airbags may inflate at
different crash speeds depending on
whether the vehicle hits an object
straight on or at an angle, and
whether the object is fixed or
moving, rigid or deformable, narrow
or wide.
Frontal airbags are not intended to
inflate during vehicle rollovers, in
rear impacts, or in many side
impacts.
In addition, the vehicle has
advanced technology frontal
airbags. Advanced technology
frontal airbags adjust the restraint
according to crash severity.
The vehicle also has a seat position
sensor that enables the sensing
system to monitor the position of the
driver seat. The seat position sensor
provides information that is used to
adjust the deployment of the frontal
airbags.
Page 72 of 432
Black plate (22,1)Chevrolet Camaro Owner Manual (GMNA-Localizing-U.S./Canada/Mexico-
6042601) - 2014 - CRC - 1/21/14
3-22 Seats and Restraints
In many crashes severe enough to
inflate the airbag, windshields are
broken by vehicle deformation.
Additional windshield breakage may
also occur from the front outboard
passenger airbag.
.Airbags are designed to inflate
only once. After an airbag
inflates, you will need some new
parts for the airbag system.
If you do not get them, the
airbag system will not be there
to help protect you in another
crash. A new system will include
airbag modules and possibly
other parts. The service manual
for the vehicle covers the need
to replace other parts.
.The vehicle has a crash sensing
and diagnostic module which
records information after a
crash. SeeVehicle Data
Recording and Privacy on
page 13-13 andEvent Data
Recorders on page 13-13.
.Let only qualified technicians
work on the airbag systems.
Improper service can mean that
an airbag system will not work
properly. See your dealer for
service.
Passenger Sensing
System
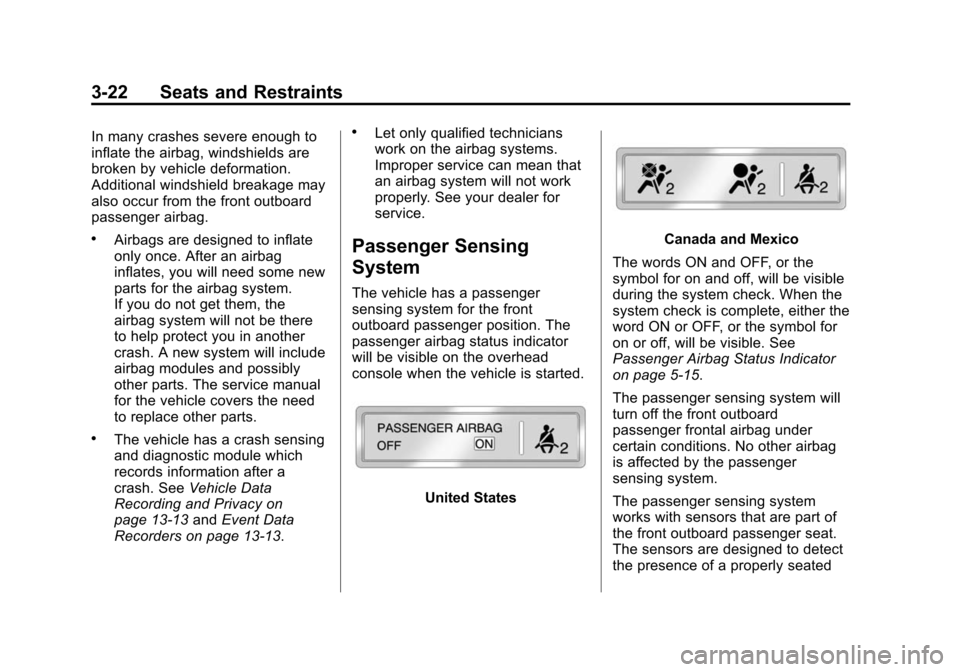
The vehicle has a passenger
sensing system for the front
outboard passenger position. The
passenger airbag status indicator
will be visible on the overhead
console when the vehicle is started.
United States
Canada and Mexico
The words ON and OFF, or the
symbol for on and off, will be visible
during the system check. When the
system check is complete, either the
word ON or OFF, or the symbol for
on or off, will be visible. See
Passenger Airbag Status Indicator
on page 5-15.
The passenger sensing system will
turn off the front outboard
passenger frontal airbag under
certain conditions. No other airbag
is affected by the passenger
sensing system.
The passenger sensing system
works with sensors that are part of
the front outboard passenger seat.
The sensors are designed to detect
the presence of a properly seated
Page 77 of 432
Black plate (27,1)Chevrolet Camaro Owner Manual (GMNA-Localizing-U.S./Canada/Mexico-
6042601) - 2014 - CRC - 1/21/14
Seats and Restraints 3-27
operation of the airbag system can
also be affected by changing or
moving any parts of the front seats,
safety belts, the airbag sensing and
diagnostic module, steering wheel,
instrument panel, roof-rail airbag
modules, ceiling headliner or pillar
garnish trim, front sensors, side
impact sensors, or airbag wiring.
Your dealer and the service manual
have information about the location
of the airbag sensors, sensing and
diagnostic module, and airbag
wiring.
In addition, the vehicle has a
passenger sensing system for the
front outboard passenger position,
which includes sensors that are part
of the passenger seat. The
passenger sensing system may not
operate properly if the original seat
trim is replaced with non-GM
covers, upholstery, or trim; or with
GM covers, upholstery, or trim
designed for a different vehicle. Any
object, such as an aftermarket seat
heater or a comfort-enhancing pad
or device, installed under or on topof the seat fabric, could also
interfere with the operation of the
passenger sensing system. This
could either prevent proper
deployment of the passenger
airbag(s) or prevent the passenger
sensing system from properly
turning off the passenger airbag(s).
See
Passenger Sensing System on
page 3-22.
If the vehicle has rollover roof-rail
airbags, see Different Size Tires
and Wheels on page 10-77.
If you have to modify your vehicle
because you have a disability and
you have questions about whether
the modifications will affect the
vehicle's airbag system, or if you
have questions about whether the
airbag system will be affected if the
vehicle is modified for any other
reason, call Customer Assistance.
See Customer Assistance Offices
on page 13-3.Airbag System Check
The airbag system does not need
regularly scheduled maintenance or
replacement. Make sure the airbag
readiness light is working. See
Airbag Readiness Light on
page 5-14.
{Caution
If an airbag covering is damaged,
opened, or broken, the airbag
may not work properly. Do not
open or break the airbag
coverings. If there are any
opened or broken airbag
coverings, have the airbag
covering and/or airbag module
replaced. For the location of the
airbags, see Where Are the
Airbags? on page 3-17. See your
dealer for service.
Page 118 of 432
Black plate (14,1)Chevrolet Camaro Owner Manual (GMNA-Localizing-U.S./Canada/Mexico-
6042601) - 2014 - CRC - 1/21/14
5-14 Instruments and Controls
Safety Belt Reminders
Driver Safety Belt Reminder
Light
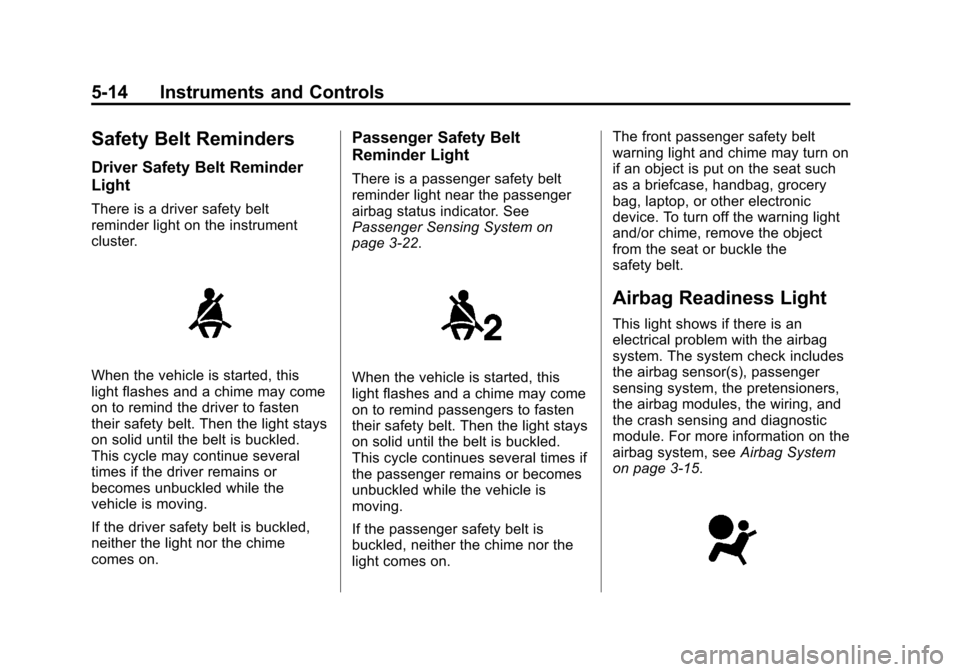
There is a driver safety belt
reminder light on the instrument
cluster.
When the vehicle is started, this
light flashes and a chime may come
on to remind the driver to fasten
their safety belt. Then the light stays
on solid until the belt is buckled.
This cycle may continue several
times if the driver remains or
becomes unbuckled while the
vehicle is moving.
If the driver safety belt is buckled,
neither the light nor the chime
comes on.
Passenger Safety Belt
Reminder Light
There is a passenger safety belt
reminder light near the passenger
airbag status indicator. See
Passenger Sensing System on
page 3-22.
When the vehicle is started, this
light flashes and a chime may come
on to remind passengers to fasten
their safety belt. Then the light stays
on solid until the belt is buckled.
This cycle continues several times if
the passenger remains or becomes
unbuckled while the vehicle is
moving.
If the passenger safety belt is
buckled, neither the chime nor the
light comes on.The front passenger safety belt
warning light and chime may turn on
if an object is put on the seat such
as a briefcase, handbag, grocery
bag, laptop, or other electronic
device. To turn off the warning light
and/or chime, remove the object
from the seat or buckle the
safety belt.
Airbag Readiness Light
This light shows if there is an
electrical problem with the airbag
system. The system check includes
the airbag sensor(s), passenger
sensing system, the pretensioners,
the airbag modules, the wiring, and
the crash sensing and diagnostic
module. For more information on the
airbag system, see
Airbag System
on page 3-15.
Page 156 of 432
Black plate (2,1)Chevrolet Camaro Owner Manual (GMNA-Localizing-U.S./Canada/Mexico-
6042601) - 2014 - CRC - 1/21/14
6-2 Lighting
Headlamp High/
Low-Beam Changer
Push the turn signal lever away
from you and release to turn the
high beams on. To return to low
beams, push the lever again or pull
it toward you and release.
This indicator light turns on in the
instrument cluster when the
high-beam headlamps are on.
Flash-to-Pass
The flash-to-pass feature works with
the low beams or Daytime Running
Lamps (DRL) on or off.
To flash the high beams, pull the
turn signal lever all the way toward
you, then release it.
Daytime Running
Lamps (DRL)
DRL can make it easier for others to
see the front of your vehicle during
the day. DRL are required on all
vehicles first sold in Canada.
A light sensor on top of the
instrument panel makes the DRL
work, so be sure it is not covered.
The DRL system will make the
low-beam headlamps come on at a
reduced brightness or for vehicles
with High Intensity Discharge (HID)
headlamps, the dedicated DRL
lights will come on when the
following conditions are met:
.The ignition is in the ON/RUN
position.
.The exterior lamps control is in
AUTO, or has been briefly
turned to
Pto turn the
automatic light control on again.
.The engine is running. When the DRL are on, the
headlamps, taillamps, sidemarker
lamps, instrument panel lights, and
other lamps will not be on.
The headlamps automatically
change from DRL to the regular
headlamps depending on the
darkness of the surroundings. The
other lamps that come on with the
headlamps will also come on.
When it is bright enough outside,
the headlamps will go off and the
DRL will come on.
To turn the DRL off or on again, turn
the exterior lamps control to the
P
position and then release. For
vehicles first sold in Canada, the
DRL cannot be turned off.
The regular headlamp system
should be turned on when needed.
Automatic Headlamp
System
When it is dark enough outside and
the headlamp switch is in AUTO,
the automatic headlamp system will
Page 157 of 432
Black plate (3,1)Chevrolet Camaro Owner Manual (GMNA-Localizing-U.S./Canada/Mexico-
6042601) - 2014 - CRC - 1/21/14
Lighting 6-3
turn on the headlamps at the normal
brightness along with other lamps
such as the taillamps, sidemarker
lamps, parking lamps, license plate
lamps, and the instrument panel
lights. The radio lights will also
be dim.
To turn off the automatic headlamp
system, turn the exterior lamps
switch to the
Pposition and then
release. For vehicles first sold in
Canada, the transmission must be
in the P (Park) position, before the
automatic headlamp system can be
turned off.
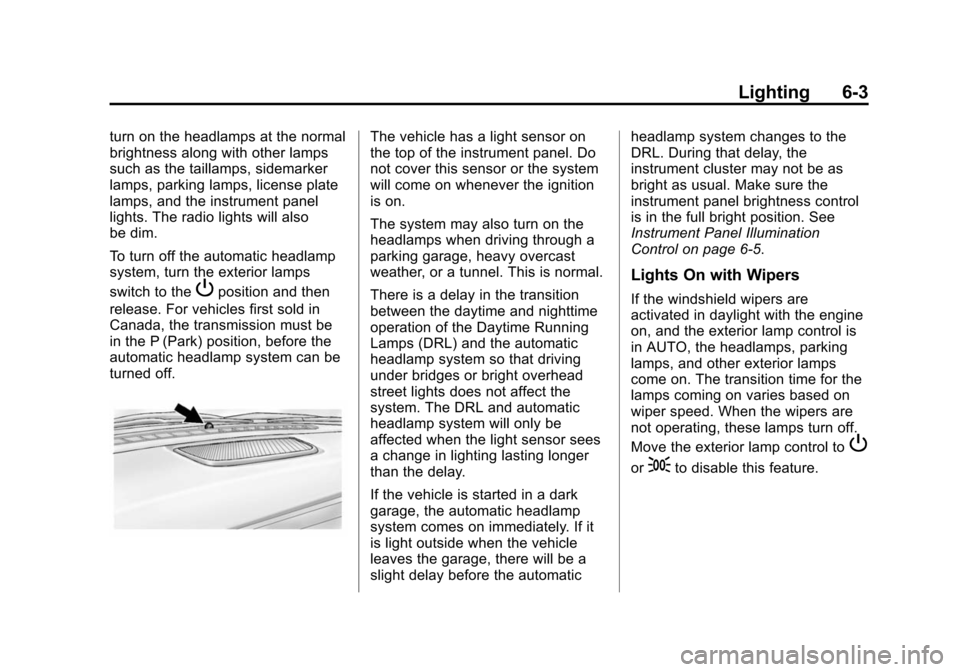
The vehicle has a light sensor on
the top of the instrument panel. Do
not cover this sensor or the system
will come on whenever the ignition
is on.
The system may also turn on the
headlamps when driving through a
parking garage, heavy overcast
weather, or a tunnel. This is normal.
There is a delay in the transition
between the daytime and nighttime
operation of the Daytime Running
Lamps (DRL) and the automatic
headlamp system so that driving
under bridges or bright overhead
street lights does not affect the
system. The DRL and automatic
headlamp system will only be
affected when the light sensor sees
a change in lighting lasting longer
than the delay.
If the vehicle is started in a dark
garage, the automatic headlamp
system comes on immediately. If it
is light outside when the vehicle
leaves the garage, there will be a
slight delay before the automatic headlamp system changes to the
DRL. During that delay, the
instrument cluster may not be as
bright as usual. Make sure the
instrument panel brightness control
is in the full bright position. See
Instrument Panel Illumination
Control on page 6-5.
Lights On with Wipers
If the windshield wipers are
activated in daylight with the engine
on, and the exterior lamp control is
in AUTO, the headlamps, parking
lamps, and other exterior lamps
come on. The transition time for the
lamps coming on varies based on
wiper speed. When the wipers are
not operating, these lamps turn off.
Move the exterior lamp control to
P
or;to disable this feature.
Page 246 of 432
Black plate (48,1)Chevrolet Camaro Owner Manual (GMNA-Localizing-U.S./Canada/Mexico-
6042601) - 2014 - CRC - 1/21/14
9-48 Driving and Operating
Passing Another Vehicle While
Using Cruise Control
Use the accelerator pedal to
increase the vehicle speed. When
you take your foot off the pedal, the
vehicle slows down to the previously
set cruise control speed. While
pressing the accelerator pedal or
shortly following the release to
override cruise control, briefly
moving the thumbwheel toward
SET/–will result in cruise control set
to the current vehicle speed.
Using Cruise Control on Hills
How well the cruise control works
on hills depends upon the vehicle's
speed, load, and the steepness of
the hills. When going up steep hills,
you might have to step on the
accelerator pedal to maintain the
vehicle speed. When going
downhill, you might have to brake or
shift to a lower gear to maintain the
vehicle speed. When the brakes are
applied the cruise control is
disengaged. Ending Cruise Control
There are three ways to end the
cruise control:
.To disengage cruise control,
step lightly on the brake pedal or
clutch. The indicator light on the
instrument cluster goes out.
.Press*on the steering wheel.
.To turn off cruise control, press1on the steering wheel.
Erasing Speed Memory
The cruise control set speed is
erased from memory if
1is pressed
or if the vehicle is turned off.
Driver Assistance
Systems
Ultrasonic Parking Assist
If equipped, the Ultrasonic Rear
Parking Assist (URPA) system
assists the driver with parking and
avoiding objects while in
R (Reverse). URPA operates at
speeds less than 8 km/h (5 mph).
The sensors on the rear bumper
detect objects up to 2.5 m (8 ft)
behind the vehicle, and at least
20 cm (8 in) off the ground. The
distance objects can be detected
may be less during warmer or humid
weather.
{Warning
The parking assist system does
not detect children, pedestrians,
bicyclists, animals, or objects
below the bumper or that are too
close or too far from the vehicle.
(Continued)
Page 247 of 432
Black plate (49,1)Chevrolet Camaro Owner Manual (GMNA-Localizing-U.S./Canada/Mexico-
6042601) - 2014 - CRC - 1/21/14
Driving and Operating 9-49
Warning (Continued)
It is not available at speeds
greater than 8 km/h (5 mph). To
prevent injury, death, or vehicle
damage, even with parking assist,
always check the area around the
vehicle and check all mirrors
before backing.
How the System Works
URPA comes on automatically when
the shift lever is moved into
R (Reverse). A single beep sounds
to indicate the system is working.
An obstacle detection is indicated
by beeps. The interval between the
beeps becomes shorter as the
vehicle gets closer to the obstacle.
When the distance is less than
30 cm (12 in), the beeping is a
continuous beep for five seconds.
Turning the System On and Off
The URPA system can be turned on
and off using the infotainment
system controls. SeeVehicle
Personalization on page 5-43.
When the system is off, PARK
ASSIST OFF displays on the Driver
Information Center (DIC). The
message disappears after a short
period of time.
URPA defaults to the on setting
each time the vehicle is started.
Turn off URPA when towing a trailer.
When the System Does Not
Seem to Work Properly
The following messages may be
displayed on the DIC:
SERVICE PARKING ASSIST: If
this message occurs, check the
following conditions:
.The ultrasonic sensors are not
clean. Keep the vehicle's rear
bumper free of mud, dirt, snow, ice, and slush. For cleaning
instructions, see
Exterior Care
on page 10-101.
.The park assist sensors are
covered by frost or ice. Frost or
ice can form around and behind
the sensors and may not always
be seen; this can occur after
washing the vehicle in cold
weather. The message may not
clear until the frost or ice has
melted.
If the above conditions do not exist,
take the vehicle to your dealer to
repair the system.
PARK ASSIST OFF: If the URPA
system does not activate due to a
temporary condition, the message
displays on the DIC. This can occur
under the following conditions:
.The driver has disabled the
system.