CHEVROLET CAVALIER 1984 1.G Manual Online
Manufacturer: CHEVROLET, Model Year: 1984, Model line: CAVALIER, Model: CHEVROLET CAVALIER 1984 1.GPages: 105, PDF Size: 24.23 MB
Page 81 of 105
Downloaded from www.Manualslib.com manuals search engine The cooting system was filled at the factory with a quality coolant that meets
GM Specifications.
~ is important to use proper coolant to prevent damage to
cooling system components . Coolants meeting GM Specification 1825-M or
those specially formulated for aluminum co"1JOflent protection should be used.
The cooling system is designed to use coolant (a mixture of ethylene glycol ,
corrosion inhibitors and water) rather than plain water. The coolant solution
must be used year round
to provide:
• freezing protection down to -37'C (-34'F),
• boiling protection up to 128 'C (262'F),
• protection against rust and corrosion in the cooling system,
• the proper engine temperature for efficient operation and emission control,
and
• proper operation of the coolant temperature light or gage .
See the Maintenance Schedule folder to find out when the coolant must be
replaced . Note that changing the coolant is needed
to make certain that all
parts
of the cooling system work well.
.-~~~~--~-.
CooUng System Care
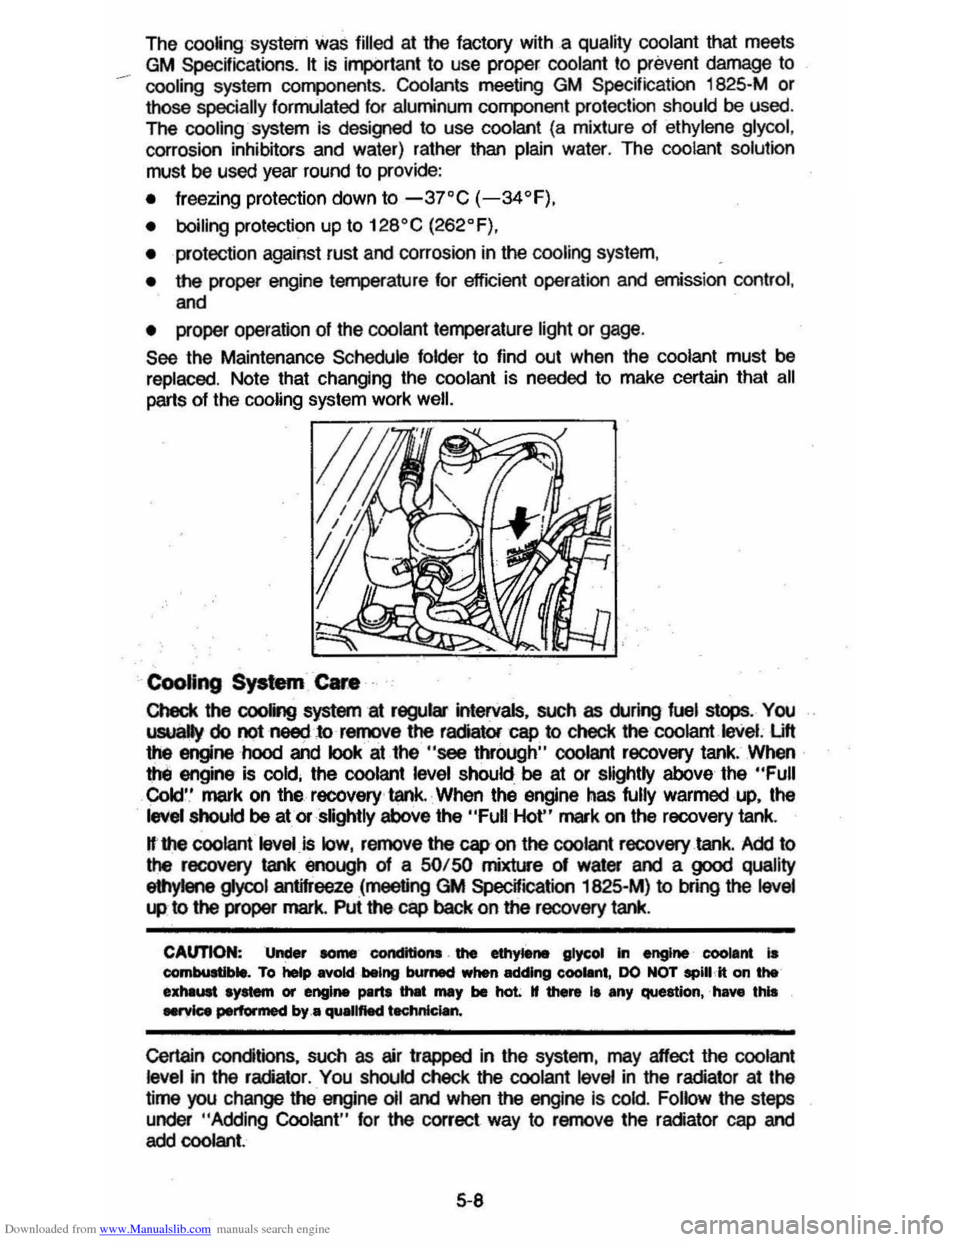
Check the cooling system at regular intervals, such as during fuel sI
Cold' .' mark on the recovery ' tank. When the engine has fully warmed up, the
level should be at or slightly above the "Full Hot" mark on the recovery tank.
H·the coolant level is low, remove the cap on the coolant recovery tank. Add to the recovery tank enough of a SO/ SO mixture 01 water and a good quality
eIIlyIene gIyool antifreeze (meeting GM SpecWication 1825-M) to bfing the level
"" to the proper mark. Pui the cap back on the recovery tank.
CAUTION: Under some' condttlons . the ethytene glycol In engine' coolant is combultlble. To help Rold being burMCf when adding eoollnt, DO NOT spill It on the exhliUlt system or engine ~rtI tMt mIIy be haL tf there It any question,' have this .....,ice performed by .• quallftecl t.chnlclan.
Certain conditions, such as air trapped in the system, may effect the coolant level in the radiator . You should check the coolant level in the radiator at the
time you change the engine 011 and when the engine Is cold. Follow the steps
under
"Adding Coolant" for the correct way to remove the radiator cap and add coolant.
5-8
Page 82 of 105
Downloaded from www.Manualslib.com manuals search engine If you have to add coolant more than four times a year (either to the recovery
tank or to the radiator), or if
coolant is dirty or discolored, see your dealer for a cooling system check.
NOTICE: rr you use the proper quality antifreeze, there is no need to add extra inhibitors or additives which claim to improve the system. They may be harmful to the proper operation of the system.
Adding Coolant
CAUTION: To help avoid the danger of being burned, do not remove the radiator cap while the engine and radiator are stili hot. Scalding fluid and steam can be blown out under pressure if the cap is taken off too soon.
1. When the engine is cool, remove the radiator cap.
• Turn the cap slowly to the left until it reaches a "stop." Do not press
down
while turning the cap.
• Wait until any remaining pressure (indicated by a hissing sound) is relieved, then press down on the cap and continue turning it to the left.
2. Add enough water and ethylene glycol anmreeze (meeting GM Specification 1825-M) to provide the required cooling, freezing and
corrosion protection. Use a solution that is at least 50 percent antifreeze
but no more than 70 percent antHreeze. Fill the radiator to the base of the
filler neck and fill the coolahUocave,y lank to at or above the "Full Hot" mark. Put the recovery tank cap back on.
3. Run the engine, with the radiator cap removed, until the upper radiator
hose is
hot. With the engine idling, add coolant to the radiator until it
reaches
the bottom of the filler neck. Install the radiator cap, making sure
the arrows on the cap line up with the overflow tube on the radiator filler
neck.
II is Ihe owner's responsibility 10:
• Maintain cooling system freeze protection at -37°G (-34°F) to ensUre
protection against corrosion and loss of coolant from boiling. (A SO/SO mixture of water and ethylene glycol antifreeze will provide freeze
protection to -37°G or -34°F.) You should do this even if you don't
expect freezing temperatures. Periodic
replacement of coolant is needed to replace the anti-corrosion additives that wear out with use. Coolant that
has become dark in color shows that it needs to be changed for this reason.
• Add ethylene glycol base antifreeze that meets GM SpecHication 1825-M
when antifreeze has to be added because of coolant loss or for more
protection against freezing at temperatures less than stated.
NOTICE: Do not use methanol-base antifreeze, or alcohol, . or plain water alone, in your vehicle at anytime. They will boil ata lower point than that at which the "TEMP" light (or temperature gage) will warn of overheating, and they do not provide proper protection against corrosion.
Thermostat
The engine coolant temperature is controlled by a thermostat. It stops coolant
flow through the radiator until a preset temperature is reached. This thermostat
is installed in the engine coolant oullet on the engine block. The same
thermostat is used in both winter and summer. When a replacement is needed, AG-Oelco paris are recommended.
5-9
Page 83 of 105
Downloaded from www.Manualslib.com manuals search engine Radiator Pressure Cap
The radiator cap, a 105 kPa (15 psi) pressure type, must be installed tightly, otherwise coolant may be lost and damage to engine may resuK from
overheating . Radiator pressure cap
should be checked periodically for proper
operation .
If replacement is required, an AC cap is recommencled.
ACCELERATOR LINKAGE
Lubricate all pivot points with .engine oil at the interval shown in the
Maintenance
Schedule. Do not lubricate the accelerator cable.
AIR CLEANER ELEMENT
When replacement of air cleaner fmer element is necessary, an AC air Imer
elemenl
is recornmencled .
See your Maintenance Schedule for change intervals . Operation of vehicle in
dusty areas will necessitate more frequent replacement. Your dealer can be of
assistance
in determining the proper replacement frequency for the conditions
under which you operate your
vehicle.
CAUTION: The air cleaner a* functions ... name arrestor in the event of engine backfire . The -air cleaner ehould be lnstaIIed at an times unit .. III removal is neceaary for repair or maintenance. To help reduce the-risk of pereonal Injury and lor property damage , be sure that no one 18 ne.-the engine comJ*1ment before starting the engine wiU'l the air cleaner removed. If engine backfire occurs with the air cleaner remowd, thwe could be-a burst of flame and posaibly other fnln the engine compartment.
HOOD LATCHES AND HOOD HINGE
SeetHe Maintenance Schedule folder to find out how to lubricate hood.latch ·
and hood hinge assembly .
BRAKE MASTER CYLINDER
Check masler cylinder fluid· level in the reservoir at the interval shown in the Maintenance Schedule . If the fluid is low in the reservoir, it should be filled to
the maximum
level line with Delco Supreme No. 11 or OOT-3 fluids.
POWER STEERING SYSTEM
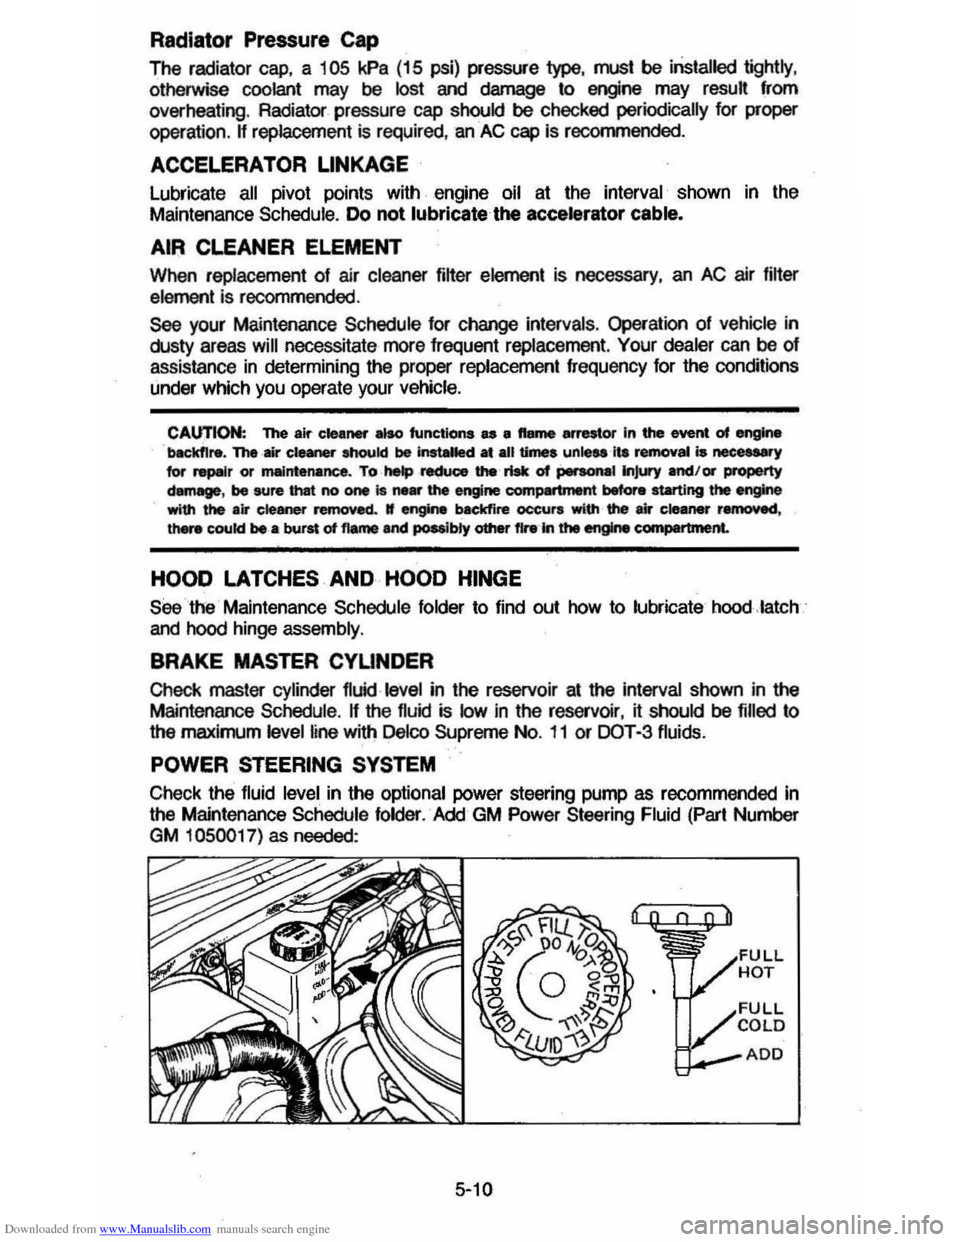
Check the fluid level in the optional power steering pump as recommended in
the Maintenance Schedule folder. Add GM Power Steering Fluid (Part Number
GM 1050017) as needed:
5-10
Page 84 of 105
Downloaded from www.Manualslib.com manuals search engine • If the fluid is warmed up (about 66"C or 150"F -- hot to the touch), the
fluid level should be between the "HOT" and "Cold" marks on the power steering reservoir.
• If cool (about 21"C or 70"F), the fluid level should be between the "Add" and "Cold" marks.
This fluid does not need periodic changing.
FRONT SUSPENSION AND STEERING LINKAGE
Lubricate fillings at the interval shown in the Maintenance Schedule with water
resistant
EP Chassis Lubricant which meets GM Specification 6031M.
NOTICE: Ball joints should not be lubricated unless their temperature is -12"C (10"F), or-higher. During cold weather, they should be allowed to warm up as necessary before
being lubricated or damage to the ball jOint could occur.
FREEDOM BATTERY
Your new vehicle has a Delco FREEDOM battery. It needs no periodic
maintenance.
Its top is permanently sealed (except for two small vent holes) and has no filler caps. ,You will never have to add water.
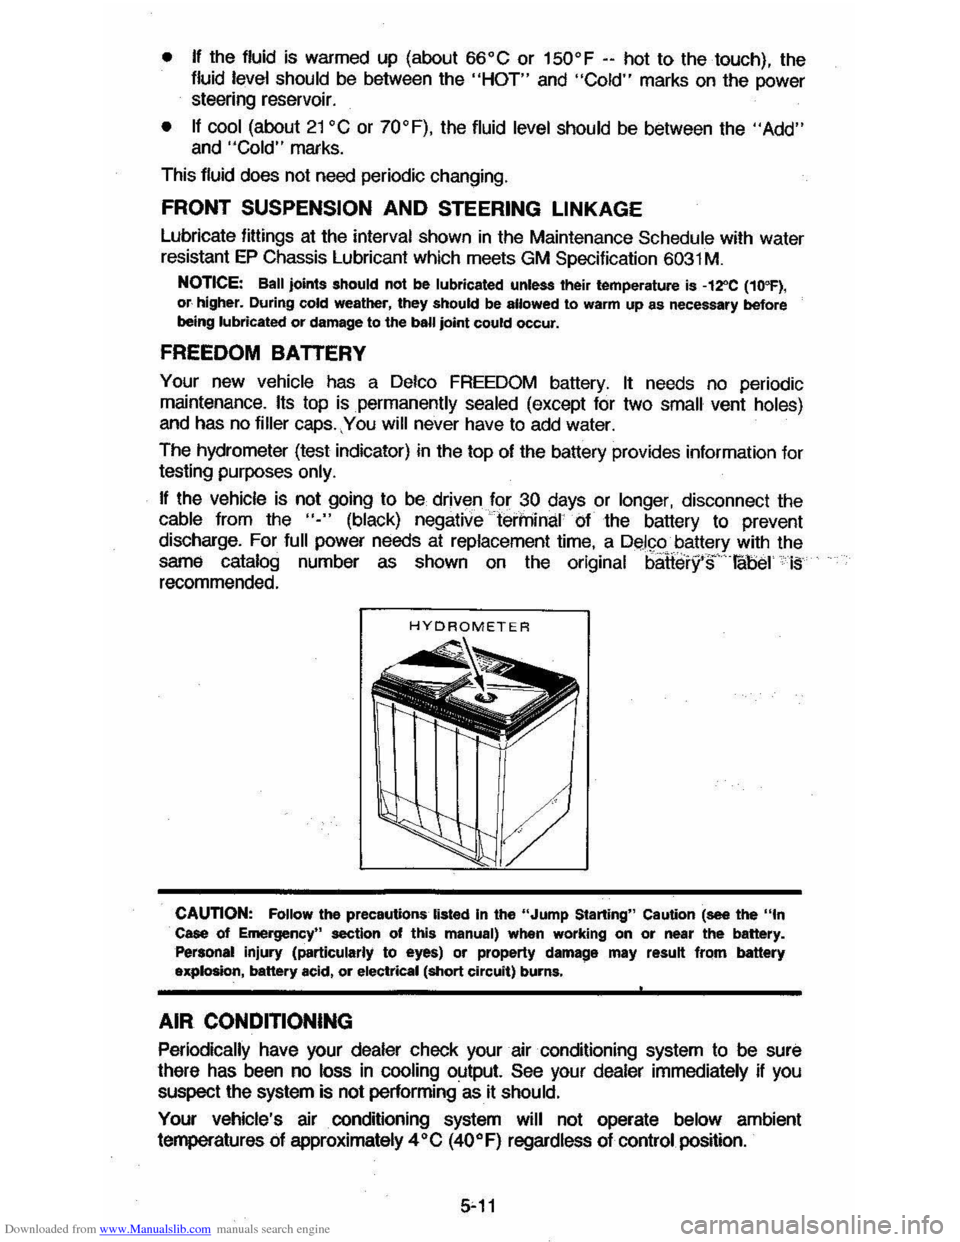
The hydrometer (test indicator) in the top of the battery provides information for
testing purposes only.
If the vehicle is not going to be driven .f?r 30 days or longer, disconnect the cable from the "-" (black) negative terminal of the battery to prevent
discharge. For
full power needs at replacement time, a Del~o battery with the sarne catalog number as shown on the original battery'if . !abel " is recommended.
CAUTION: Follow the precautions listed in the "Jump Starting" Caution (see the "In Case of Emergency" section of this manual) when working on or near the battery. Personal injury (particularly to eyes) or property damage may result from battery explosion, battery acid, or electrical (Short circuit) burns.
AIR CONDITIONING
Periodically have your dealer check your air conditioning system to be sure
there has been no loss in cooling output. See your dealer immediately if you
suspect the system is not performing"as it should.
Your vehicle's air conditioning system will not operate below ambient
temperatures of approximately
4·C (40·F) regardless of control position.
Page 85 of 105
Downloaded from www.Manualslib.com manuals search engine CAVAUER BUMPER SYSTEM
The front and rear bumpers have a rubber- ike plastic cover over an energy
absorbing impact bar.
In an impact , the cover may return to its original shape
without showing that it was struck.
If the impact was great enough, the energy
absorbing devices and impact bar may have been damaged.
To be sure the burrc:>er is in a state of full readiness , it should be checked by your Chevrolet
dealer . The check should be mada if you can sae Ihat the burrc:>er is out of
position . " should also be checked ij the car has been in a serious collision in
which the bumper was struck, even when no damage to the bumper system
can be seen.
TIRES
CAUTION: To reduce the risk of loa of vehicle control and personal injury:
• The tires MUST BE properly in118Wd, and your vehicle MUST NOT BE overioaded (Me the Tir. Placard on the driver'. door).
• Your vehiele MUST NOT BE operated at speeds fa. than 85 mph ('140 km/h) un .... _ft-has police pursuit tires or equlVaienthigh ·speed capability tirea , regllf'dless of the legal speed 1irn!L Be Stn to cOIl$un a Ure dealer to determine II the tires on your vehicle are hlgh speed capability tires before operating )our vehk:le at such
-For more safety information, see the reat of this "Tire.~' ,~on.
The tires installed on your vehicle are engineered to provide a proper balance
of these peffor~ characteristics under noonal driving conditions :
• Endurance
• Handling
•
Noise
• Aide
• Road Hazard Resistance
• Aoling Resistance
• Traction
• Tread Mileage
This section has some tipS on how you can get the most benefit from these
tires .
Vehicle Loading
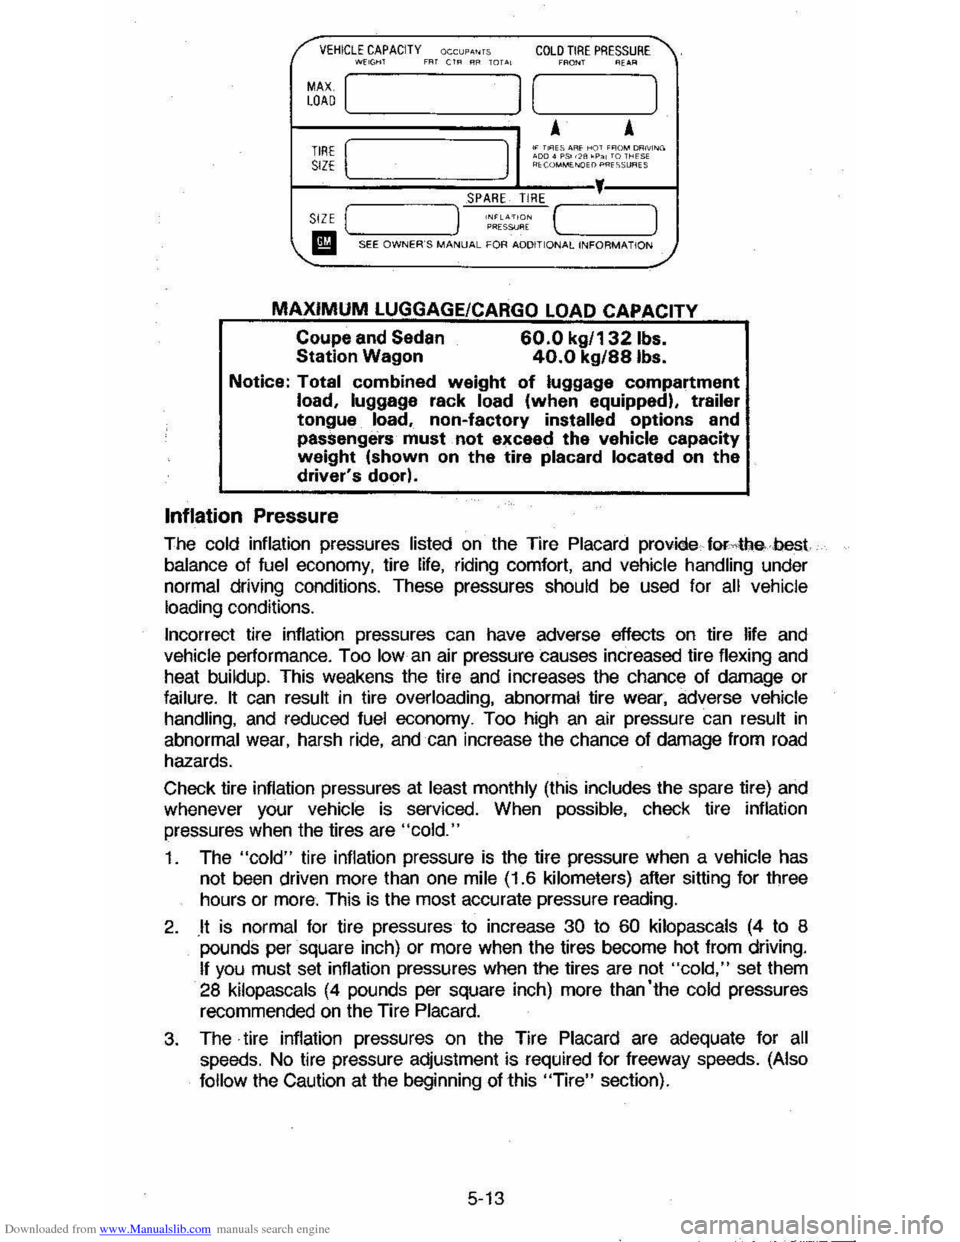
The tires on your vehicle will perform well at all normal loads when. inflated as
recommended on the Tire
Placard (located on the driver's door of your vehicle). Do not load your vehicle beyond the load limits (total kilograms or
pounds) shown on the Tire Placard . The placard tells you the design limits of the vehicle, not just of the tires .
Station wagon loads should be moved as far forward as possible. Luggage carriers do not increase the maximum load limits shown on the Tire Placard. See also "Stowing Things In (or On) The Car" in Section 2 of this manual.
5-12
Page 86 of 105
Downloaded from www.Manualslib.com manuals search engine /" VEHICLE CAPACITY OCCUP."TS COLD TIRE PRESSURE ' , ~~, mT CtR RR TOTAL C_, ~E~R
MAX [ LOAD I [ 1
A A TIRE [ I
.. T"ES AAf ,.qT ,~o ... OONiNG '00' "50 ". 'P" TO THE'" SIZE R'V,""ME>.<:lEl) PR"5lJRES
SPARE TIRE ,
SIZE ( )
MAXIMUM LUGGAGE/CARGO LOAD CAPACITY
Coupe and Sedan Station Wagon 60.0 kg/' 321bs. 40.0 kg/88Ibs.
Notice: Total combined weight of luggage compartment load, luggage rack load (when equipped), trailer tongue load, non-factory installed options and
passenge'rs' must. not exceed the vehicle capacity weight (shown on the tire placard located on the driver's door).
Inflation Pressure
The cold inflation pressures listed on the Tire Placard provide forAIlebest
balance of fuel economy, tire life, riding comfort, and vehicle handling under normal driving conditions. These pressures should be used for all vehicle
loading conditions.
Incorrect tire inflation pressures can have adverse effects on tire life
and vehicle performance. Too Iowan air pressure causes increased tire flexing and
heat buildup. This weakens the tire and increases the chance of damage or
failure. It can result in tire overloading, abnormal tire wear, adverse vehicle handling, and reduced fuel economy. Too high an air pressure can result in
abnormal wear, harsh ride, and can increase the chance of damage from road
hazards.
Check tire inflation pressures at
least monthly (this includes the spare tire) and
whenever your vehicle is serviced. When possible, check tire inflation
pressures
when the tires are "cold."
1. The "cold" tire inflation pressure is the tire pressure when a vehicle has
not been driven more than one mile (1.6 kilometers) after sitting for three
hours or
more. This is the most accurate pressure reading.
2. .It is normal for tire pressures to increase 30 to 60 kilopascals (4 to 8 pounds per square inch) or more when the tires become hot from driving.
If you must set inflation pressures when the tires are not "cold," set them
28 kilopascals (4 pounds per square inch) more than'the cold pressures
recommended on the Tire Placard.
3. The· tire inflation pressures on the Tire Placard are adequate for all speeds. No tire pressure adjustment is required for freeway speeds. (Also
follow
the Caution at the beginning of this "Tire" section).
5-13
Page 87 of 105
Downloaded from www.Manualslib.com manuals search engine 4. Always use a tire pressure gage when checking inflation pressures (we
suggest you purchase a
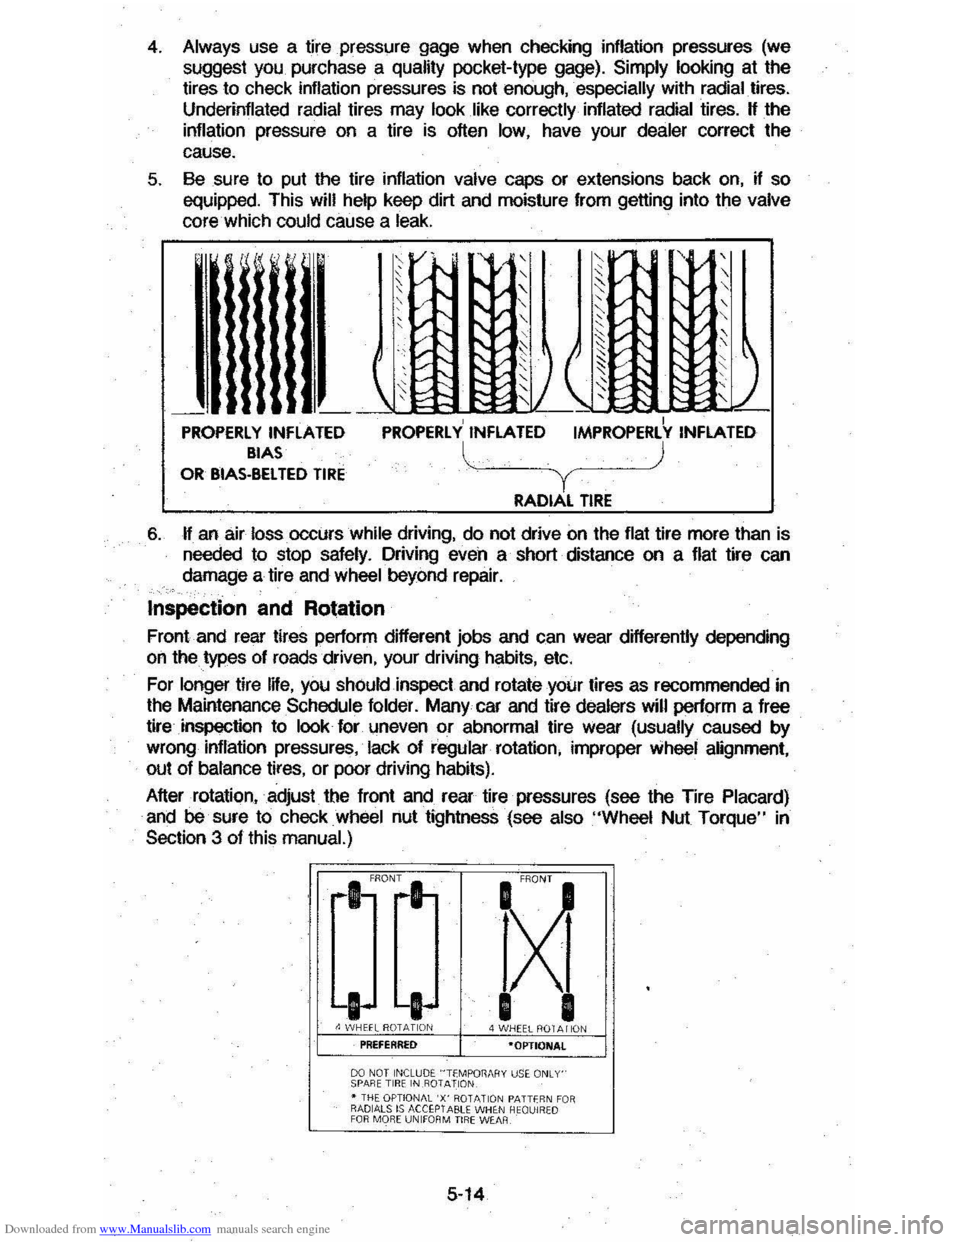
quality pocket-type gage). Simply looking at the tires to check inflation pressures is not enough, . especially with radial. tires.
Underinflated radial tires may look like correctly inflated radial tires. H the
inflation pressure on a tire is often low, have your dealer correct the
cause.
5. Sesure to put the tire inflation valve caps or extensions back on, if so
equipped. This will help keep dirt and moisture from getting into the valve core which could cause a leak.
't! [' V-. , ,-',/ ,
~v"
, " ,
, ,,-I"-v " I'V " ' v-I'-,
" "
,/ " I~ ~::;: ~ ~, ,/
~ J ( " ~ ~ ~ r;S ) :::: ~ ~ t;: ~/ 2~ t: ,
\' , --I PROPERLY INflATED PROPERLY INFLATED IMPROPERLY INFLATED BIAS l ) OR BIAS-BelTED TIRE Y RADIAL TIRE
6. H an air loss. occurs while driving, do not drive on the flat tire more than is
needed to stop safely. Driving even a short distance on a flat tire can
damage a tire and
wheel beyond repair.
Inspection and Rotation
Front and rear tires perform different jobs and can wear differently depending
on the types of roads driven, your driving habits, etc.
For
longer tire IHe, you shOuld inspect and rotate your tires as recommended in
the Maintenance Schedule folder. Many car and tire dealers will perform a free
tire
inspection to look for \meven or abnormal tire Wear (usually caused by
wrong inflation pressures, lack of regular rotation, improper wheel alignment,
out of bslance tires, or poor driving habits).
After rotation, adjust the front and rear tire pressures (see the Tire
Placard)
and be sure to check wheel nut tightness (see also "Wheel Nut Torque" in
Section 3 of this manual.)
fXi
I I 4 WHEEL ROT A I iON ·OPTIONAl
00 NOT INCLUDE "TfMPOT1MIY uS~ ONLY' SPARE TIR E IN .R01 AllON • THE OPTIONAL 'X' ROTATIO N PATTfR N FO R RADIALS IS ACCEPTABU WHE N HEQUIRW
FOR MO RE UNIfOR M TIRE WEAR
5-14
Page 88 of 105
Downloaded from www.Manualslib.com manuals search engine CAUTION; Whenever a wheel is changed, always remove any corrOsion that may be present on inside of wheeland wheel mounting surface on vehicle. Installing wheels
without good metal·to--metalcontact at the mounting surfaces can cause wheel nuts to
loosen, which can later allow a wheel to come off while the vehicle -is moving, possibly
causing loss of control.
Alignment and Balance
Proper wheel alignment improves tire tread life. Your vehicle's suspension
parts should be inspected often and
aligned when needed. (See the
Maintenance
Schedule Folder for more information.) Ball joints have built-in
wear indicators and some movement in the joints is normal.
Improper alignment • will not-cause the vehicle to vibrate. However, improper
alignment can cause:
• the tires to roll at an angle, which will result in faster tire wear;
• your tires _ to wear unevenly;
•
your vehicle to "pull" to the left or right.
Proper tire balancing provides the
best riding comfort and helps reduce tire
tread wear. Out-of-balance tires can cause annoying vibration and uneVen tire
wear such as cupping and flat spots.
Traction
Driving, cornering, and braking traction are reduced -w~ater. snovv' ic:e., gravel, or other material is on the road. Adjust driving practices and vehiCia
speed to road conditions.
When driving on wet
or sluShy roads, a wedge of water can build up between
the tire and road. This is known as hydroplaning, and may cause partial or
complete loss of traction, vehicle control, and stopping ability.
To red\ICe the chance of traclion loss, follow these tips:
1. Slow down during rainstorms or when roads are slushy.
2. StoW down if the road has standing water or puddles.
3. Replace the tires when the tread wear indicators are showing.
4. Keep the tires properly inflated.
H your vehicle has Tpc radial tires (see "Tire Replacement" in this section),
yoU, .lifes were designed to provide better snow traction. In fact, these tires
shOuld be adequate for driving in mO$ wiAter conditions. Howeve" ij you do feel you do need to buyconvenlional snow tires, be sure they are the same
size, load range, and .construction type (bias, bias· belled, Or radial) as your
other tires.
Tire Chain$ or Similar Traction Devices
If you buy tire chains for your car, make sure they are'designated as SAE
Class "S" type chaios. Use of other types of chains may cause damage to
your vehicle.
Use
of chains may adversely affect your vehicle's handling. -When using
chains: (1) adjust speed to road conditions, (2) avoid sharp turns, and (3) when
possible, avoid
locked-wheel braking.
In addition, to help prevent chain damage to your vehicle:
5-15
Page 89 of 105
Downloaded from www.Manualslib.com manuals search engine • Install the chains on the front tires as tightly as possible, then tighten them
again after driving 1/4 to 1/2 mile (0.4 to 0.8 kilometer). The use of chains
on the rear tires is not recommended; the chains may contact and
possibly damage the vehicle. If you intend to use chains on the rear tires, be sure
there is enough clearance.
• Do not exceed 45 mph (70 km/h), or the chain manufacturer's speed limitation, if lower.
• Drive in a restrained manner and avoid large bumps, potholes, severe turns and other manuevers which CQuid cause the tires to bounce up and down.
• Follow any other instructions of the chain manufacturer which do not
disagree with the above.
Spare Tire
For the use and installation of your spare tire, see "In Case of Emergency,"
Section 3 of this manual.
Tire Replacement
CAUTION:" 00 not mix different tire construction types (such as radial, bias, and biasbetted) on your vehicle exceptio emergencies, because your vehicle's handling could be affected and may result in loss Of control. This caution does not apply to a compact spare tire furnished with your vehicle.
On most vehicles originally eqUipped with radial tires, you will find a TPC Spec.
No. (Tire Performance Criteria Specification Number)
molded into the tire
sidewall
near the tire size marking. This shows that the tire meets rigid size
and performance standards which were developed for your vehicle. The TPC
Spec. No. assures a proper combination of endurance,
handHng, load capacity,
ride and traction on wet, dry, or snow-covered surfaces. When you replace your tires with tires having the same TPC Spec. No., your new tires will be
compatible with your vehicle.
When replacing tires with those not having a TPC Spec. No., you should use
the same size, load range, and construction type (bias, bias-belted, or radial)
as the original tires on your vehicle. A different size or type of tire may affect
such things as ride, handling, speedometer/odometer calibration, vehicle
ground clearance, and tire or tire chain clearance to the body or chassis. If
replacing only a single tire, it should be paired on the same axle with the least worn tire of the other three.
Uniform Tire Quality Grading
The following information relates to the tire grading system developed by the
United States
National Highway Traffic Safety Administration which will grade
tires by traction and temperature performance. (This applies only to vehicles
sold in the United States.)
Traction -A, B, C
The traction grades, from highest to lowest are: A, S, and C. They represent
the tire's
::ability to stop on wet pavement as measured under controlled
conditions on specified government test
~urfaces of asphalt and concrete. A
tire marked C may have poor traction performance.
Warning: The traction grade assigned to this tire is based on braking (straight
ahead) traction tests
and does not include cornering (turning) traction.
5-16
Page 90 of 105
Downloaded from www.Manualslib.com manuals search engine ,
Temperature -A, B, C
The temperature grades are A (the highest), B, and C, representing the tire's
resistance 10 the generation of heat and its ability 10 dissipate heat when tested
under controlled conditions on a specified indoor laboratory test wheel.
Sustained high temperature can cause the material of the tire to degenerate
and reduce tire life, and excessive temperature can lead to sudden tire failure .
The grade
C corresponds 10 a level of performance which all passenger car
tires must meet under the Federal Motor
Vehicle Safety Standard No. 109. Grades B and A represent higher levels of performance on the laboratory lest
wheel than the ",nimum required by law.
Warning : The temperature grade forlhis tire is established for a tire that is properly inflated and not overloaded . . Excessive speed, underinflation, or
excessive loading, either separately or in combination , can cause heal buildup and possible tire failure .
These grades are molded on the sidewalls 01 passenger car tires.
While
the tires available as 'standard or optional equipment .on General
Motors vehicles may vary with respect to these grades, all such tires meet General Motors performance s!andards and have been approved for
use on General Motors vehicles. All passenger car tires must conform to Federal safety requirements in addition to these grades.
You
should replace your tires when:
1 . The tires are worn to a point where 1.6
milHmeters (2/ 32 inch) or less t.read remains, or the cord or fabric is showing. '.
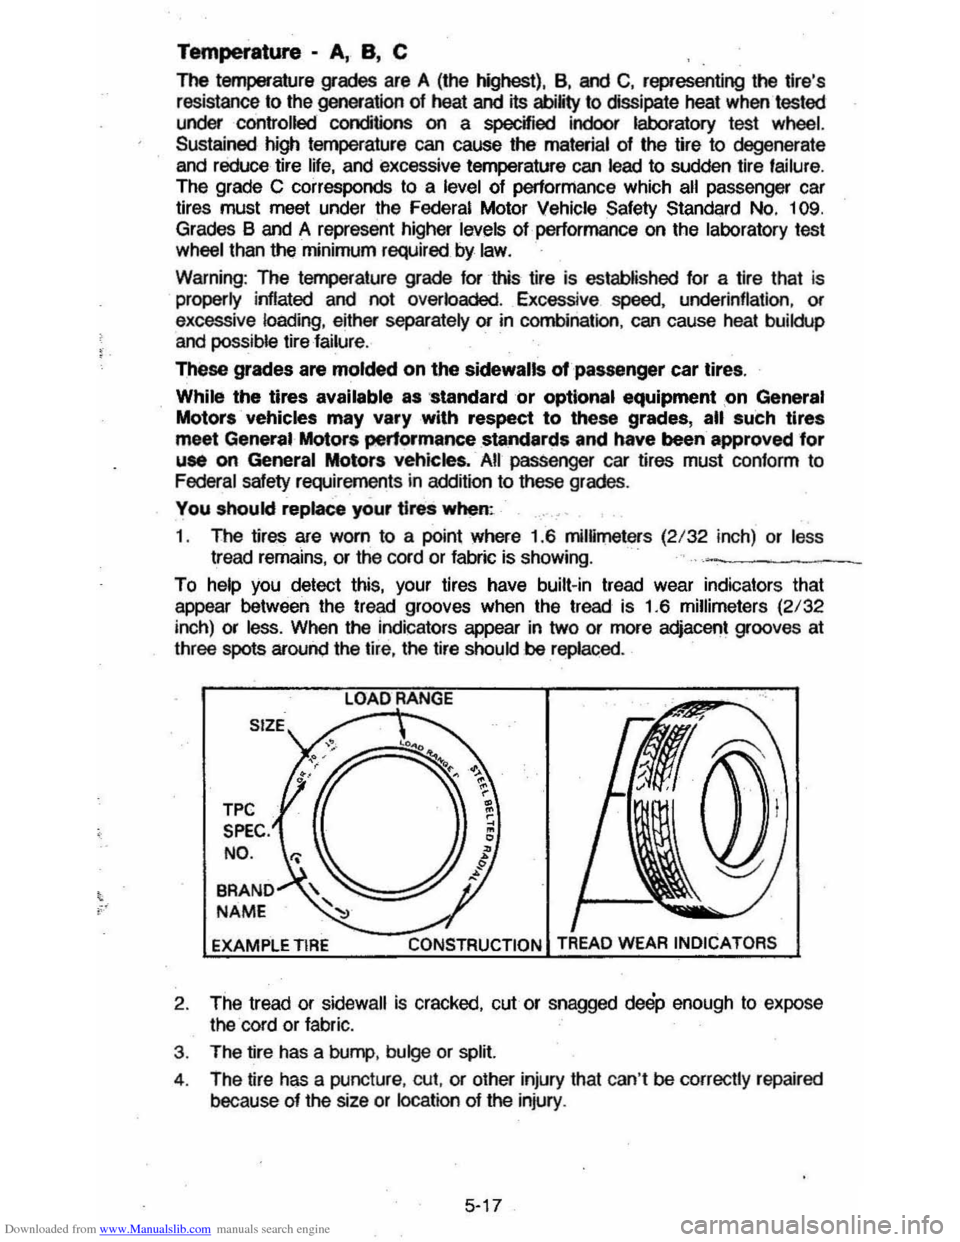
To help you detect this, your tires have built-in tread wear indicators that
appear between the tread grooves when the tread is 1.6 millimeters
(2/32
inch) or less. When the indicators appear in two or more adjacent grooves at
three spots around the tire, the tire should be replaced.
TPC
SPEC. NO .
BRAND
NAME
EXAMPLE TIRE LOAD
RANGE
CONSTRUCTION
2
. The tread or sidewall is cracked, cut or snagged deep enough to expose
the cord or fabric.
3. The tire has a bump , bulge or split.
4 . The tire has a puncture , cut, or other injury thai can 't
be correctly repaired
because of the size or
location of the injury .
5-17