check oil CHEVROLET CAVALIER 1984 1.G Owners Manual
[x] Cancel search | Manufacturer: CHEVROLET, Model Year: 1984, Model line: CAVALIER, Model: CHEVROLET CAVALIER 1984 1.GPages: 105, PDF Size: 24.23 MB
Page 22 of 105
Downloaded from www.Manualslib.com manuals search engine Other Gasolinel Alcohol Blends
Some fuel suppliers sell gasoline containing alcohol without advertising the
presence of
alcohol or giving it a special name such as gasohol. " you are not
sure whether there is alcohol in the gasoline you buy, check with the service
station operator.
DO NOT USE gasolines containing methanol (methyl or wood alcohol) that do
not
also contain cosolvents and corrosion inhibitors for methanol. Also, DO NOT USE gasolines that contain more than 5 percent methanol even if they
contain
cosolvents and corrosion inhib~ors. Fuel system damage or vehicle performance problems resuHing from the use of such fuels is not the
responsibility
of Chevrolet and may not be covered under the new vehicle
warranties.
Mhough gasolines containing 5 percent or less methanol and appropriate
cosolvents and inhibitors for methanol may be suitable for use in your vehicle,
evidence of their suitability is as yet incomplete; therefore, Chevrolet cannot, at
this time, endorse their use.
NOTICE: Take care to not spill gasoline during refueling. Guolines containing alcohol can cause paint damage, whiCh may notba covered under the New Vehicle Warranty.
OPERATION IN FOREIGN COUNTRIES
All models are specifically bum to comply with United States Federal Regulations regarding environmental quality. To comply, unleaded fuel of
sufficient octane rating must be used. These
fuels may not be available in
other countries. "you intend to take your vehicle outside the U.S. or Canada,
contact the GM Overseas Service Section at the
following address, to find out
what you must
do in order to operate your vehicles in other countries, or for
additional information and a. copy of the applicable maintenance schedule.
General Motors Corporation, Overseas Service Section, 2-128 General Motors
Building,
Detroij, Michigan 48202, (313) 556-4862.
When
writing, please include:
•
the Vehicle Identification Number and
• the countries in which yOu plan to travel.
Before taking your vehicle to a foreign country, check to see if the proper fuel
is available. Most major oil companies or domestic auto clubs should have this
information. Foreign offices of major oil
COmpanies or auto clubs may also be
of
help.
Be aware that, use of leaded gasoline or use of fuel that has a lower octane
rating than is required by your
vehicle, will cause the emission control system to lose its effectiveness and can cause ,engine knock or serious engine
damage. Ne~her GM Overseas nor Chevrolet will be responsible for damage to
your
vehicle as a result of not USing the proper fuel.
IMPORTANT FACTS YOU SHOULD KNOW ABOUT FUEL
ECONOMY AND HOW
TO IMPROVE IT
How you drive, where you drive, and when you drive all affect how many
miles/kilometers you can get from a galion/liter of fuel. You can save fuel if
you avoid
"Jackrabbit" starts, maintain as constant a throttle position as traffic
conditions
allow once you have reached cruising speed, and avoid sudden
stops which waste energy in the form of heat generated in braking.
2-6
Page 25 of 105
Downloaded from www.Manualslib.com manuals search engine • Lane Change Signal -In some turns, such as changing lanes, the steering wheel tS not turned far enough to cancel the turn signal. For convenience, you can flash the turn signal by moving the lever part way (to the first stop)
and holding it there. The lever will return to horizontal when you release it.
A green light on the instrument panel is designed to flash to tell you that the
front
and rear turn signal lights are working. If the light stays on, but does not flash, check for burned-out turn signal bulbs. If the green light does not come
on when
you move the lever, check the fuse and indicator bulb.
However, if you ordered a trailertowing·optiOil.·in which extra wiring was added to attach the trailer lighting, a different type of flasher was installed. In this
case, the green light will continue to flash even if a turn signal bulb burns out.
Therefore, you must regularly look at the front
and rear turn signal lights to be
sure they are working.
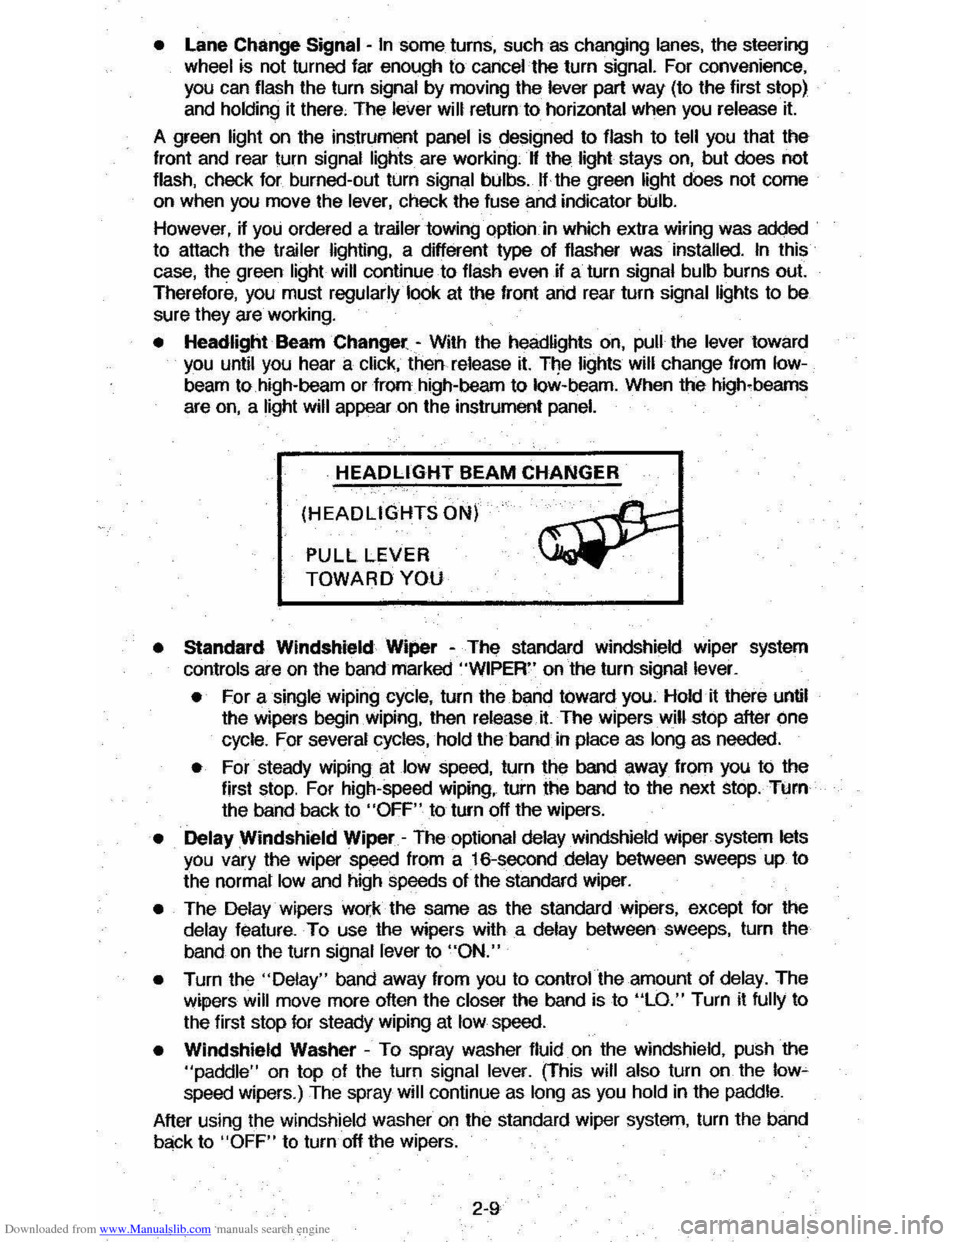
• Headlight Beam Changer -With the headlights on, pull the lever toward you until you hear a click, then release it. The lights will change from Iow
beam to high-beam or from high-beam to low-beam. When the high-beams
are
on, a light will appear on the instrument panel.
HEADLIGHT BEAM CHANGER
(HEADLIGHTS ON)
PULL LEVER
TOWARD YOU
• Standard Windshield Wiper -The standard Windshield wiper system
con
ols are on the band marked "WIPER" on the turn signal lever.
• For a single wiping cycle, turn the band toward you. Hold it there until
the wipers begin
Wiping, then release.it. The wipers will stop after one
cycle. For several cycles, hold the band in place as long as needed.
• For steady wiping at low speed, turn the band away from you to the
first stop. For high-speed wiping, turn the band to the next stop. Turn
the band back to
"OFF" to turn off the wipers.
• Delay Windshield Wiper -The optional delay windshield wiper system lets you vary the wiper speed from a 16-second delay between sweeps up to
the normal
low and high speeds of the standard wiper.
• The Delay wipers work the same as the standard wipers, except for the
delay feature. To use the wipers with a delay between sweeps, turn the
band on the turn signal lever to
"ON."
• Turn the "Delay" band away from you to control the amount of delay. The
wipers will move more often the closer the band is to "LO." Turn it fully to
the first stop for steady wiping at
low speed.
• Windshield Washer -To spray washer fluid on the windshield, pUSh the "paddle" on top of the turn signal lever. (This will also turn on the low~ speed wipers.) The spray will continue as long as you hold in the paddle.
After using the windshield washer
on the standard wiper system, turn the band
back to "OFF" to turn off the wipers.
2-9
Page 37 of 105
Downloaded from www.Manualslib.com manuals search engine • Amount of fuel required for fill-up may not exactly correspond to gage.
• Needle may not move away from FULL until some time after fill-up.
• Needle may move during turns; stops and accelerations.
When the ignition switch is turned to the OFF position, the needle will not
necessarily return
all the way to the EMPTY mark.
Oil Pressure Light
When the ignition is turned to "Run," the "Oil" warning light appears until the
engine is started. Thereafter, the light should be off unless there is insufficient
oil pressure or engine idle speed is below normal. If the light should come on
at any time while driving (other than momentarily at idle speed or after a
sudden stop), stop immediately and investigate the cause of
low oil pressure.
This could possibly be caused by low oil level in the crankcase. Engine
operation with low oil pressure will 9ause damage to the engine.
Engine Coolant Temperature Light
This light is located in the instrument cluster and is designed to come on to warn the driver that the engine coolant has overheated and immediate
action is required to correct the condition. As a check that the bulb and its
circuit are working, the light will come on during engine starting; if it does not,
have it repaired
promptly. If the light comes on at any other time, see "Engine
Cooling System Overheating" in "In Case of Emergency," Section 3 of this manual.
CAUTION: It the Engine Coolant Temperature Light shows an overheat condition or you have other reason to suspect the engine may be overheating, continued operation of the engine EVEN FOR A SHORT TIME may result in a fire and the risk of personal injury and/or severe vehicle damage. Take immediate action as outlined under "Engine Cooling System Overheating" in "In Case of Emergency," Section 3.
Generator Indicator Light
The VOLT light is designed to come on when the ignition key is in the "RUN" position, but before the engine is started. After the engine starts, the light
should go out and remain out. If the light remains· on when engine is running,
have your authorized
dealer locate and correct the trouble as soon as possible.
Shift Indicator Light
The Shift Indicator Light is covered in the "Manual Transaxle" information in
this section.
"Check Engine" Light
Most gasoline engine vehicles sold in the Unijed States (and some vehicles
sold
in Canada) have the Computer Command Control system.
Vehicles with the Computer Command Control system include a "CHECK
ENGINE" light
on the instrument panel designed to indicate the need for
system service. It will come on during engine starting to let you know the bulb
is working. (The light will stay on a short time after the engine starts.)
2-21
Page 39 of 105
Downloaded from www.Manualslib.com manuals search engine '" ,
t:l
STANDARD INSTRUMENT CLUSTER
IJ
12
OPTIONAL INSTRUMENT CLUSTER
~~~~-:'----,~~:
l'l
1l
10
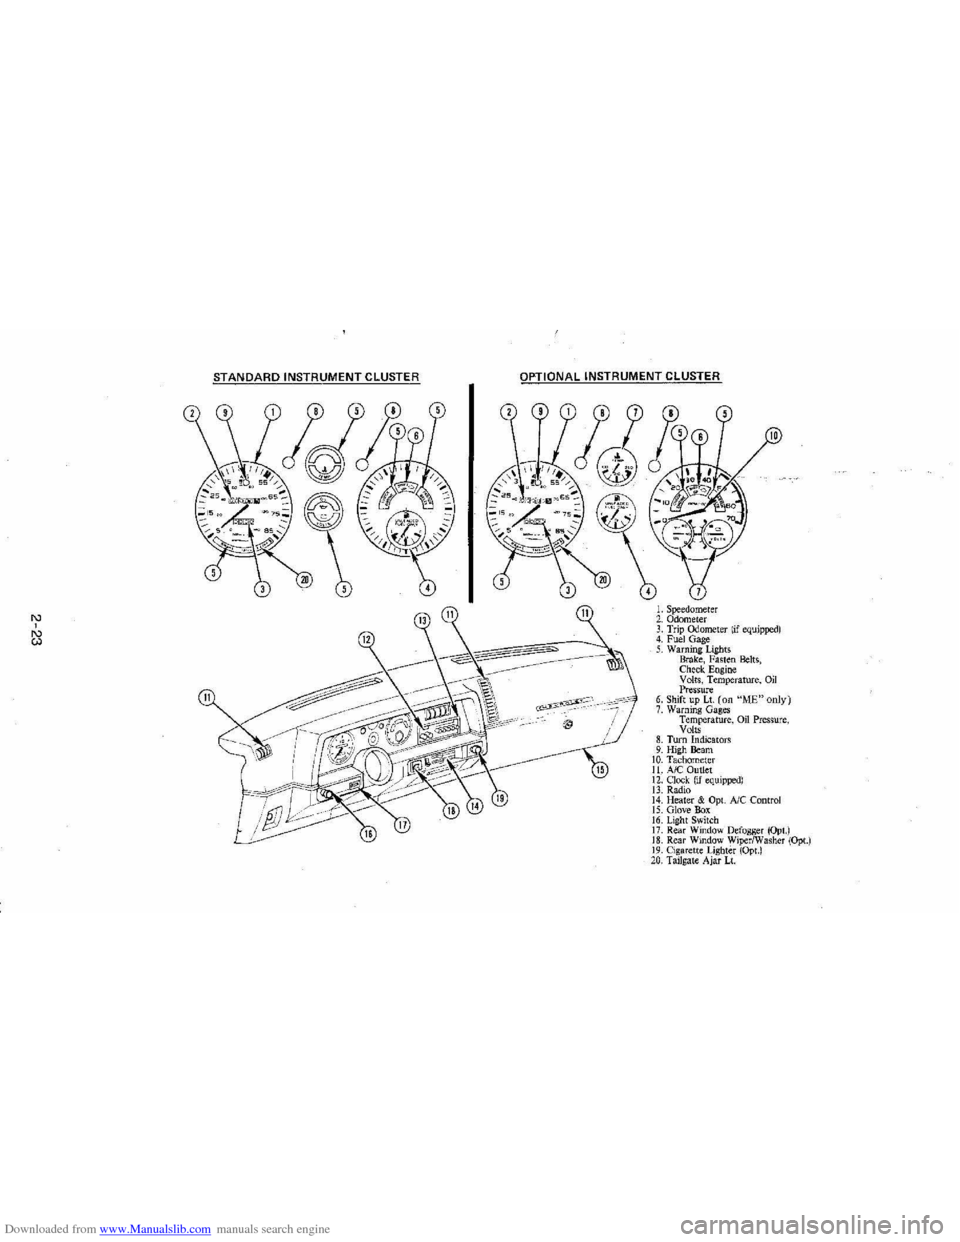
L Speedometer 2. Odometer 3. Trip ()jometer lif equipped) 4. Fuel Gage 5. Warning Lights Brake, Fasten Belts, Check. Engine Volts, Temperature, Oil Pressure 6. Shift up Lt. (on "ME"only) 7. Warning Gages Temperature, on Pressure, Volts 8. Turn Indicators 9. High Beam 10. Tachomet er 11. A/C Outlet 12. Clock. (if equipped) 13. Radio 14. Heater & Opt. Ale Control 15. Glove Box 16. Lig ht Switch 17. Rear Window Defogger (Opt.) 18. Rear Window WiperlWasher (Opt.) 19. Cigare tt e Lighter (Opt.) 20, Tailgat e Ajar Lt.
Page 40 of 105
Downloaded from www.Manualslib.com manuals search engine Engine Coolant Temperature Gage
This optional gage is located in the instrument cluster. If the gage shows that
an overheat condition exists-as indicated by pointer moving beyond the
center of the band immediate action by the driver is required. If an overheat
condition is shown, see "Engine
Cooling System Overheating" in "In Case of
Emergency,"
Section 3 of this manual. The coolant temperature indication will VaIY with air temperature and operating conditions. The ignition must be in
"Run" for accurate readings. Prolonged driving or idling in very hot weather
may cause the pointer to move beyond the center of the gage. Make a practice
of scanning this and other gages
while driving, especially in hot weather and!
or when the
vehicle is under load.
CAUTION: II the Engine Coolant Temperature Gage shows an overheat condition or you have other reason to suspect the engine may be overheating, continued operation of the engine EVEN FOR A SHORT TIME may result in a fire and the risk of personal injury and/or severe vehicle damage. Take immediate action as outlined under "Engine Cooling System Overheating" in "In Case of Emergency," Section 3.
Oil Pressure Gage
The oil pressure gage indicates the pressure at which oil is being delivered to
the vaIiOUS paIls of the engine requiring lubrication. Pressures registered by
the gage may
vBIY according to outside air temperatures or weight of oil being
used. Oil pressure of a cold engine being operated at a given speed will be
somewhat higher than when the engine is at normal operating temperature at
the
SaIne speed. Prolonged high speed operation on a hot day at the given
speed will
resuH in somewhatlower oil pressure readings. Readings of 205 to
275 kPa
(30 to 40 psi) may be considered normal during moderate road
speeds of 35 to 40 mph (55 to 60 km!h) with the engine at proper operating
temperature. Gage readings which are consistently high
or low under these conditions may indicate lubrication system and/ or engine malfunction.
Light Switch
The three· position light switch controls the headlights, taillights, paIking lights,
sidemaIker lights,
instrument lights and dome lights.
Instrument light intensity can be varied by turning knob clockwise or
counterclockwise. Full counterclockwise position turns on interior light.
The headlight circuit is protected by a circuit breaker in the
light switch. An overload on the breaker will cause the lights to "flicker" on and off. If this
condition
develops, have your headlight wiring checked immediately. The
headlight beaIn changer is located in the Turn Signal Lever; for operation see
Section 2 under heading "Turn Signal and Muiji-Function Lever."·
Headlight High Beam Indicator Light
The headlights of your vehicle have. high and low beams to provide you with
proper nighttime visibility for most driving conditions. The
"low" beams are
used during most city driving. The
"high" beams are especially useful when
driving on daIk roads since they provide long range illumination. The headlight
beam indicator light (located on the speedometer face) will be ON whenever
the high beams or "brights" are in use. The turn
signal lever controls the
headlight beaIns and is described in "Steering Column Controls."
2-24
Page 64 of 105
Downloaded from www.Manualslib.com manuals search engine Stowage of Tire and Jack
CAUTION: Always securely reatow the, spare tire assembly (or flat tir.), all jacking
equipment, and the cover , using the means provided . When driving the car with the Compact Spare instel~. stow the ",Met COYer in the trunk. In station wagons and hatchbecks, when the rear seat Is folded down, stow the wheel cover nat on the rear floor behind the right front seat. When the r •• r' seat is up, stow the wheel cover in the rear area . This will help keep SUch1tung. trom being thrown about and injuring people during II colhion or • sudden maneuver ..
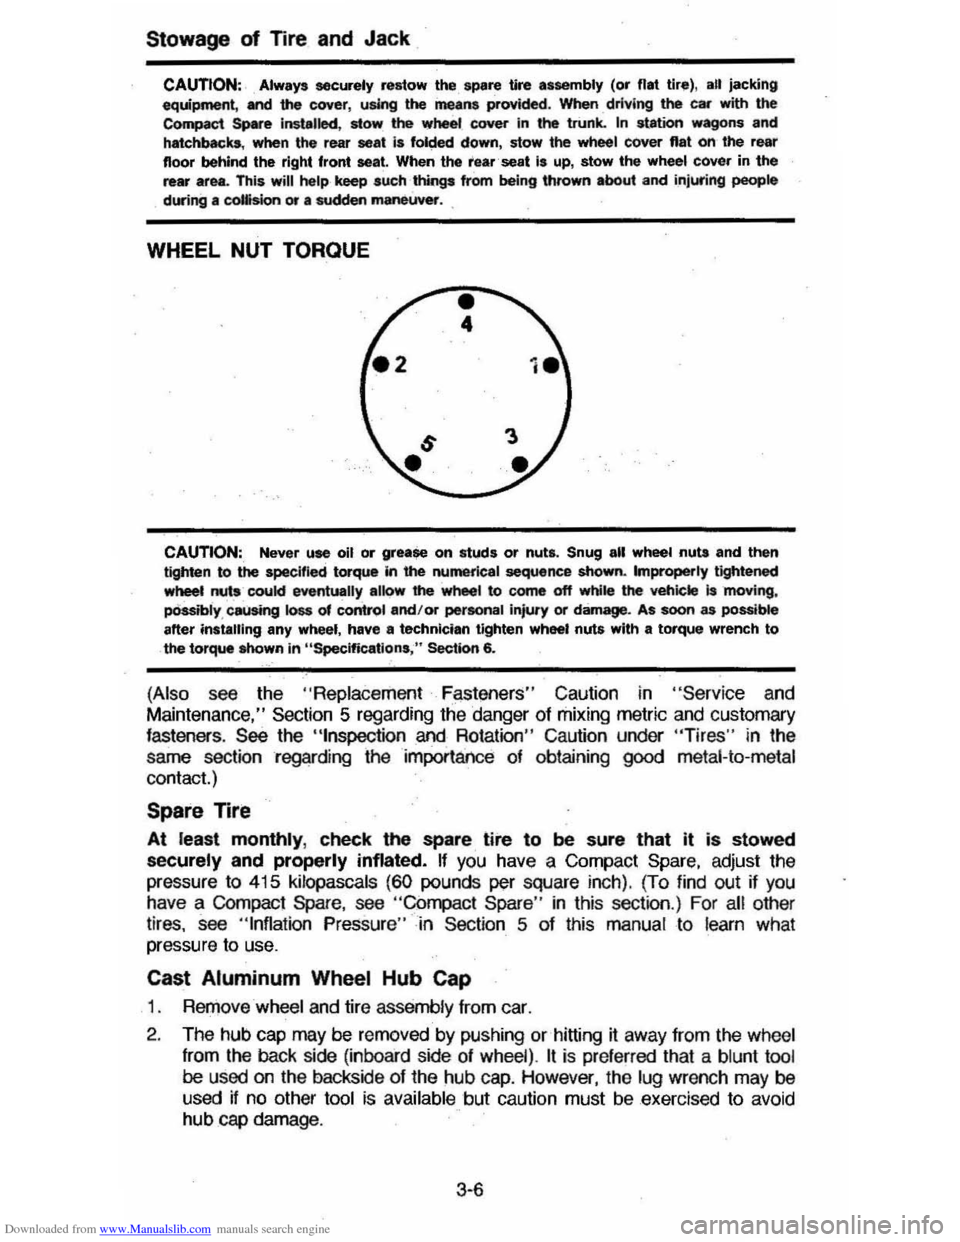
WHEEL NUT TORQUE
CAUTION:, Never use oil or grease on studs or nuts. Snug all wheel nuta and then tighten to the specified torque In the numerical sequence shown. Improperly tightened wheet nuts coukl eventually alk>w' the wheel to come off while the veh;ckt is 'moving, pOssibly , causing loss of control and/or pertonal injury or damage. As soon as possible after instilling any wheel, have II technician tighten wheel nuts with a torque wrench to the torque Mlown in "Specifications ," Section 6.
(Also see the "Replace ment F~st!3ners" Caution in "Servic e and
Maintenance," Section 5 regarding the danger of mixing metric and customary fasteners . See the "tnspection and Rotation" Caution under "Tires" in the
same section regarding the importance of obtaining
good metal-to-metal
contact.)
Spare Tire
At least monthly, check the spare tire to be sure that it is stowed
securely and properly inflated. If you have a Compact Spare, adjust the
pressure
to 415 kilopascals (60 pounds per square inch). (To find out if you have a COmpact Spare, see "Compact Spare " in this section .) For all other
tires, see "Inflation Pressure"-in Section 5 of this manual to learn what
pressure to use.
Cast Aluminum Wheel Hub Cap
1 . RerJ)ove wheel and tire assemb ly from car.
2 . The hub
cap may be removed by pushing or hitting it away from the wheel
from
the back side (inboard side of wheel) . It is pre ferred that a blunt tool be used on the backside of the hub cap. However, the lug wrench may be
used if no other tool is available but caution must be exercised to avoid hub cap damage .
3·6
Page 75 of 105
Downloaded from www.Manualslib.com manuals search engine NOTICE: H you need to replace the fuel cap, use only a cap specified for your model. An incorrect fuel cap can result in a serious maHunction of the fuel system or emission control system. You can get a correct replacement cap from your dealer.
CATALYTIC CONVERTER
The catalytic converter is an emission control device added to the exhaust system to reduce exhaust gas pollutants. The converter contains
a ceramic material coated with noble metal catalysts. To prevent contamination
and loss of effectiveness of the catalysts. unleaded gasoline must be used.
Unleaded
gasoline also reduces spark plug fouling, exhaust system corrosion and engine oil deterioration. Leaded gasoline will also damage the oxygen
sensor
in the Computer Command Control system which could affect emission
control.
To help prevent damage:
1. Keep your engine properly maintained. Engine malfunctions involving the
electrical, carburetion, electronic fuel injection or ignition systems may
result in unusually high catalytic converter and exhaust system
temperatures which, under extreme malfunctioning conditions, may ignite
interior floor ·covering materials above the converter. Do not keep driving
your vehicle if you detect engine misfire, noticeable loss of
performance, or other unusual operating conditions. Instead, have it
serviced promptly. See the Maintenance Schedule folder for information on inspecting and maintaining the engine, exhaust system, and other
components.
2. Do not push or tow this vehicle to start it. This may result in unusually
high catalytic converter
and exhaust system temperatures which under
extreme conditions may ignite interior floor-covering material above the
converter.
Disregarding these instructions
could damage the catalytic converter, the vehicle, or nearby property and affect warranty coverage.
COMPUTER COMMAND CONTROL SYSTEM
Most vehicles sold in the United States (and some vehicles sold in Canada)
have the Computer Command Control system.
The Computer Command Control system monitors the exhaust stream with
an oxygen sensor. Based on sensor signals, the electronic control module adjusts
the air-fuel ratio
as needed. It is very important to use only unleaded
gasoline in vehicles equipped with the Computer Command Control system.
Leaded gasoline will damage the oxygen sensor,
and may affect emission
control.
"Check Engine" Light
Most vehicles sold in the United States (and some vehicles sold in Canada)
have the Computer Command Control system.
Vehicles
.with the Computer Command Control system, include a "CHECK
ENGINE" light
on the instrument panel designed to indicate the need for
system service. It will come on during engine starting to let you know the bulb
is working. (The
light will stay on a short time aiter the engine starts.) Have the
system repaired if the "CHECK ENGINE" light does not come on during engine
starting.
If the light comes on, either intermittently or continuously while driving,
service to the Computer Command Control system is required. Although in
5-2
Page 76 of 105
Downloaded from www.Manualslib.com manuals search engine most cases the vehicle is drivable, and does not require towing, see your
authorized dealer as soon as possible for service of the system.
Continued
driving without having the Computer Command Control system serviced could eventually cause damage to the emission control system. It
could
also affect fuel economy and drivability .
ENGINE OIL AND FILTER RECOMMENDATIONS
The following engine oil recommendations are based upon the operation . of your engine with the fuels recommended under "Fuel Requirements" in Section 2 of this manual.
Checking Oil Level
The engine oil must be kepi at the right level to help assure proper lubrication
of your vehicle's engine. n Is normal for an engine to use some oil, and some
engines may use more oil when they are new.
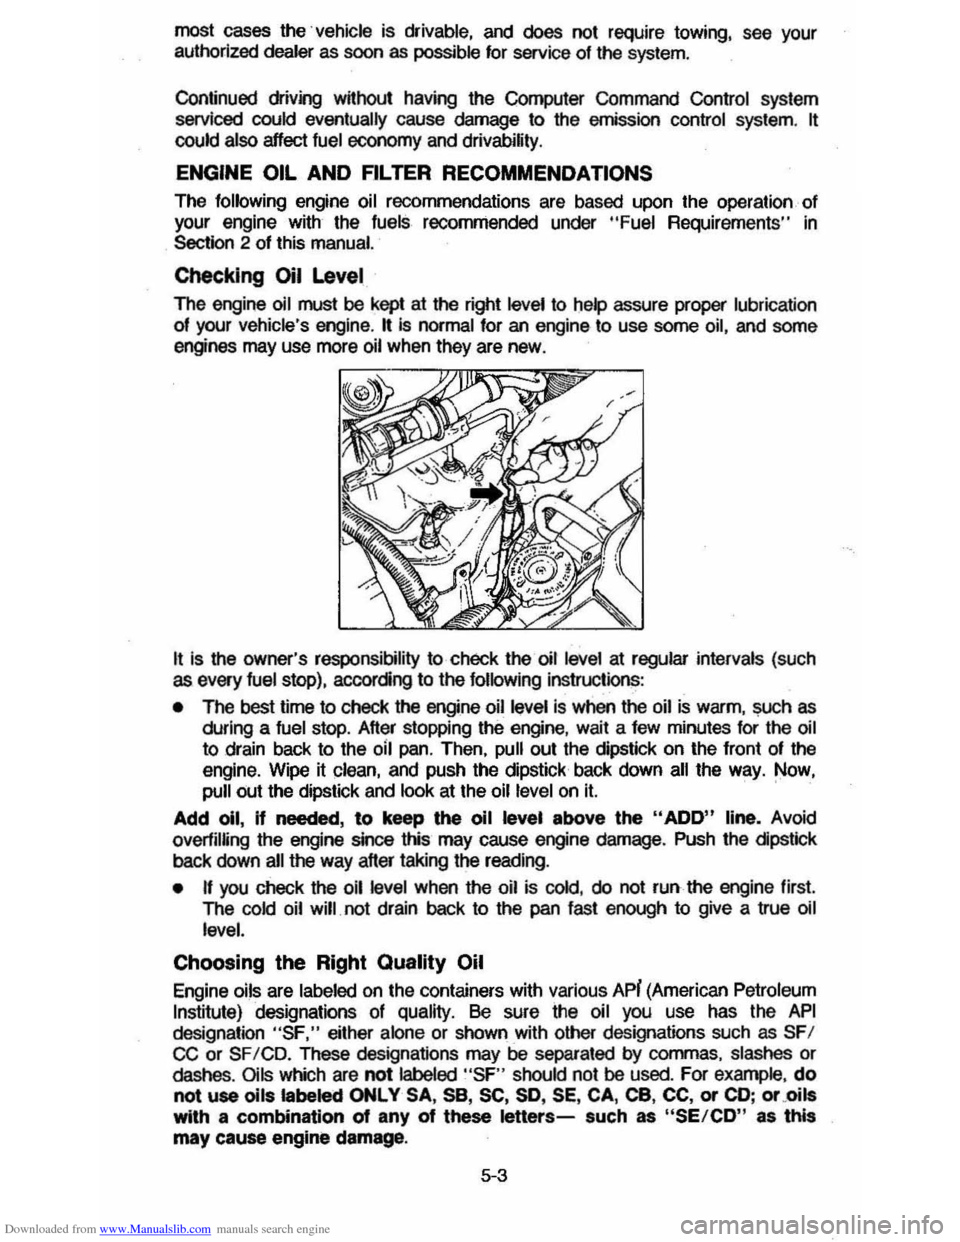
It is the owner's responsibility to check the oil level at regular intervals (such as every fuel stop), accorcing to the following instructions:
• The best time to check the engine oil level is when the oil is warm, ~h as
during a fuel stop. After stopping the engine, wait a few minutes for the oil
to drain back to the oil pan. Then, pull out the dipstick on the front of the
engine. Wipe it clean, and push the dipstick back down
all the way. Now, pull out the dipstick and look at the oil level on It. '
Add 011, If needed, to keep the 011 level above the "ADD" line, Avoid
overfilUng
the engine since this may cause engine damage. Push the cipstlck
back down all the way after taking the reading.
• n you check the oil level when the oil is cold, do not run the engine first.
The
cold oil will. not drain back to the pan fast enough to give a true oil
level.
Choosing the Right Quality Oil
Engine oils are labeled on the containers with various APi (American Petroleum
Institute) designations of quality. Be sure the oil you use has the API
designation "SF," either alone or shown with other designations such as SFI CC or SF ICD. These designations may be separated by commas. slashes or dashes. Oils which are not labeled "SF " should not be used. For example , do
not use oils labeled ONLY SA, sa, SC, SO, SE, CA, ca, CC, or CD; or .oils with a combination of any of these letters-such as "SE/CD" as this
may cause engine damage.
5·3
Page 79 of 105
Downloaded from www.Manualslib.com manuals search engine AUTOMATIC TRANSAXLE FLUID RECOMMENDATIONS
Use the Proper Fluid
Use only automatic transmission fluid labeled DEXRON'" II. You can buy this
fluid from your dealer or other service outlets.
Check the Fluid Level with Care
Check the automatic transaxle fluid level at each engine oil change. Driving
with too much or too
little fluid can damage the transaxle.
To check the fluid
level, first set the parking brake, then start the engine in
"P"(Park), and let idle for two minutes . You must check the fluid level with the
engine running at slow
idle and the vehicle level.
You cannot read the correct fluid level if you have just driven the vehicle for a
long time at high speed, in city traffic in hot weather, or if the vehicle has been
pulling a trailer. Wait
until the fluid has cooled down (about 30 minutes).
Remove the dipstick located
On the driver's side forward of the cowl. Carefully
touch the wet end of the dipstick to find out if the fluid is cool, warm or hot. Wipe it clean and push it back in until the cap seats. Pull out the dipstick and
read the fluid level.
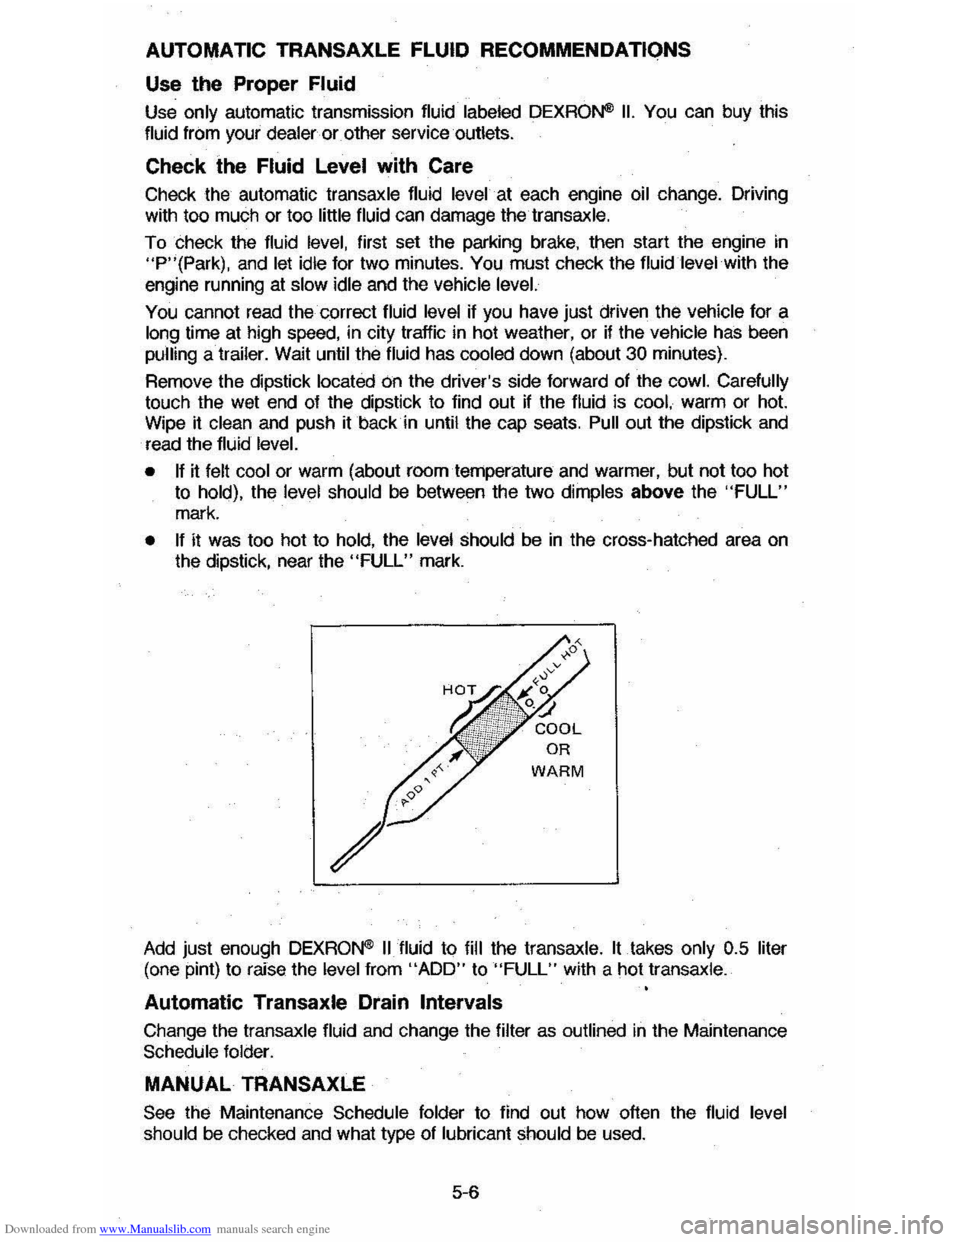
• If it felt cool or warm (about roomternperature and warmer, but not too hot
to hold), the level should be between the two dimples above the "FULL"
mark.
• If it was too hot to hold, the level should be in the cross-hatched area on the dipstick, near the "FULL" mark.
Add just enough DEXRON'" II fluid to fill the transaxle. It takes only 0.5 liter
(one pint) to raise the level from "ADD" to "FULL" with a hot transaxle.
Automatic Transaxle Drain Intervals
Change the transaxle fluid and change the filter as outlined in the Maintenance Schedule folder.
MANUAL TRANSAXLE
See the Maintenance Schedule folder to find out how often the fluid level should be checked and what type of lubricant should be used.
5-6
Page 80 of 105
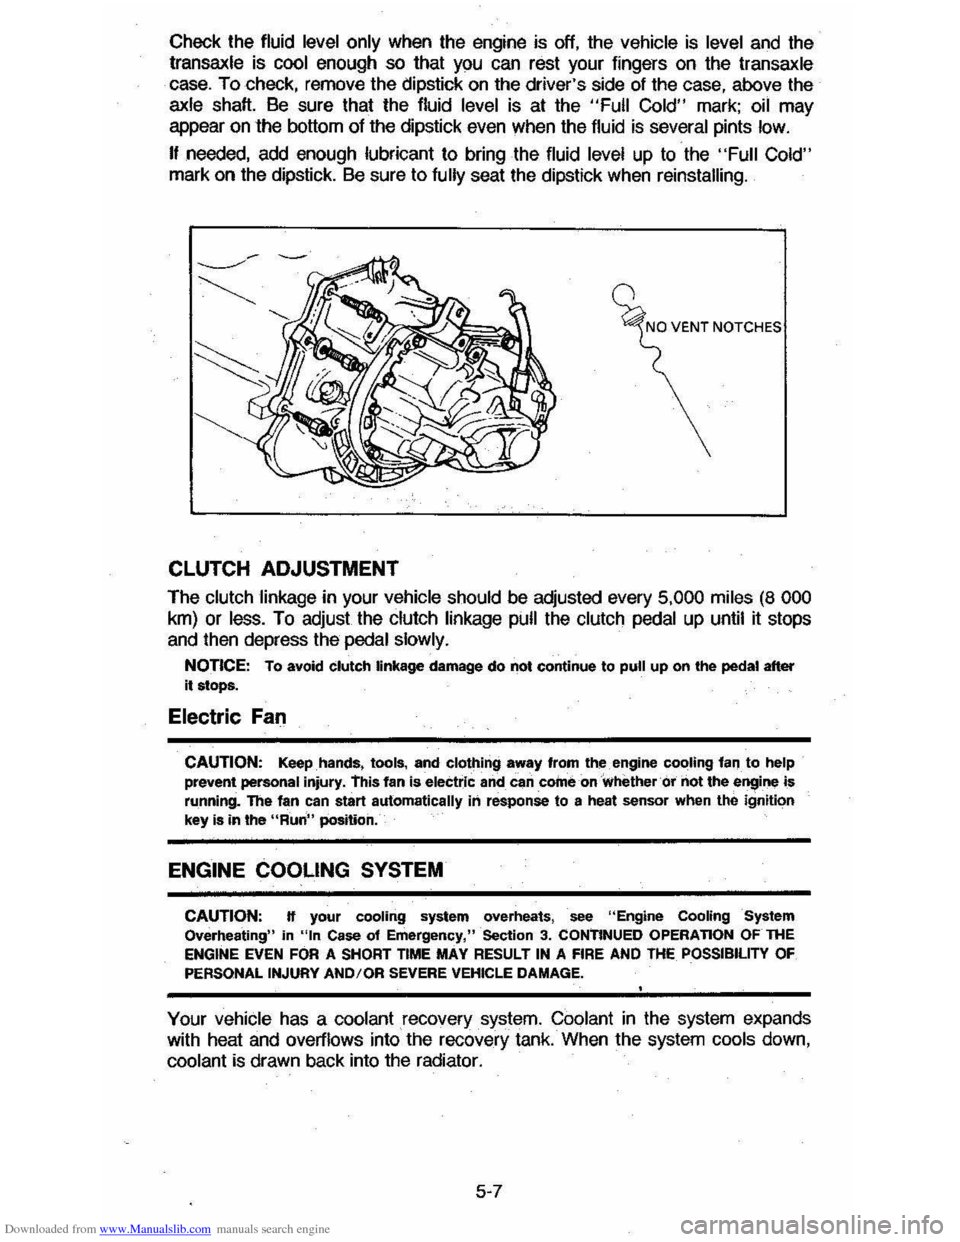
Downloaded from www.Manualslib.com manuals search engine Check the fluid level only when the engine is off, the vehicle is level and the transaxle is cool enough so that you can rest your fingers on the transaxle
case. To check, remove the dipstick on the driver's side of the case, above the
axle shaft, Be sure that the fluid level is at the "Full Cold" mark; oil may
appear on the bottom of the dipstick even when the fluid is several pints low.
I! needed, add enough lubricant to bring the fluid level up to the "Full Cold" mark on the dipstick. Be sure to fully seat the dipstick when reinstalling.
CLUTCH ADJUSTMENT
The clutch linkage in your vehicle should be adjusted every 5,000 miles (8 000
km) or less. To adjust the clutch linkage pull the clutch pedal up until it stops
and then depress the
pedal slowly.
NOTICE: To avoid clutch linkage damage do not continue to pull up on the pedal after
it stops.
Electric Fan
CAUTION: Keep hands, tools, and clothing away fr,om th~engine cooUng lanto help prevent personal injury. this fan is electric and can corne on whether or not the engine is
running. The fan can start automatically in response to a heat sensor when the ignition
key is in the "Run" position.
ENGINE COOLING SYSTEM
CAUTION: H your cooling system overheats, see "Engine Cooling System Overheating" in "In Case of Emergency," Section 3. CONTINUED OPERATION OFTHE ENGINE EVEN FOR A SHORT TIME MAY RESULT IN A FIRE AND THE POSSIBILITY OF
PERSONAL INJURY ANDIOR SEVERE VEHICLE DAMAGE.
Your vehicle has a coolant recovery.system. Coolant in the system expands with heat and overflows into the recovery tank. When the system cools down,
coolant is drawn back into the radiator.
5-7