light CHEVROLET CAVALIER 1984 1.G Owners Manual
[x] Cancel search | Manufacturer: CHEVROLET, Model Year: 1984, Model line: CAVALIER, Model: CHEVROLET CAVALIER 1984 1.GPages: 105, PDF Size: 24.23 MB
Page 3 of 105
Downloaded from www.Manualslib.com manuals search engine INTRODUCTION
This manual has been prepared to acquaint you with the operation and
maintenan ce of your 1984
Cavalier. and to provide important safety
information .
It is supplemented by a Maintenance Schedule Folder and a
Warranty and Owner Assistance Information booklet. We urge you to read all
Uvee
publications carefully . Following the recommendations will help assure
the most enjoyable. safe and troubl efree operation of your
vehicle.
When it comes to ser vice, remember that your Chevrolet dealer knows your
vehicle best and is inter ested in your complete satisfaction . Your dealer invites
you to return for all 01 your service needs both during and after the warranty
period.
To help dealers handle your needs. Chevrolet has a number of Zone Offices
throughout the country .
If you have a problem that has not been handled to your satisfaction. follow the steps in the separate "Warranty and Owner
Assistance
Information" booklet.
We thank you for choosing a Chevrolet product, and want to assure you of our continuing interest in your motoring pleasure and satisfaction .
SPECIAL NOTE TO CANADIAN OWNERS
Some vehicles sold in Canada have the Computer Command Control system.
while others do not. II a "CHECK ENGINE" light comes on during engine
starting . your vehicle does have this system . For those vehicles sold in
'"canada which do not have the Computer Command Control system, please refer to the Canadian OWner's Manual Supplement supplied with
your vehicle for information on engine starting, specifications, etc. The
"CHECK ENGINE" light is covered in "Instrument Panel." Section 2 of this
manual.
FRENCH OWNER'S MANUAL
If preferred. a French Owner's Manual can be obtained either from your dealer
or by writing to General Motors of Canada ~imited. Technical Publications
Department . Oshawa. Ontario L 1 J 5Z6.
Aux proprietaires canadians:
Vous pouvez vous procurer un exemplaire dece
guide en fran~ais chez votre concessionnaire OU au Service des publications
techniques . General Motors du Canada Limit"", Oshawa . Ontario L 1 J 5Z6.
FOR CONTINUING SATISFACTION. KEEP YOUR GM CAR ALL GM.
GENERAL MOTORS PARTS ARE IDENTIFIED BY ONE OF THESE
TRADEMARKS: ~[j]~
Page 5 of 105
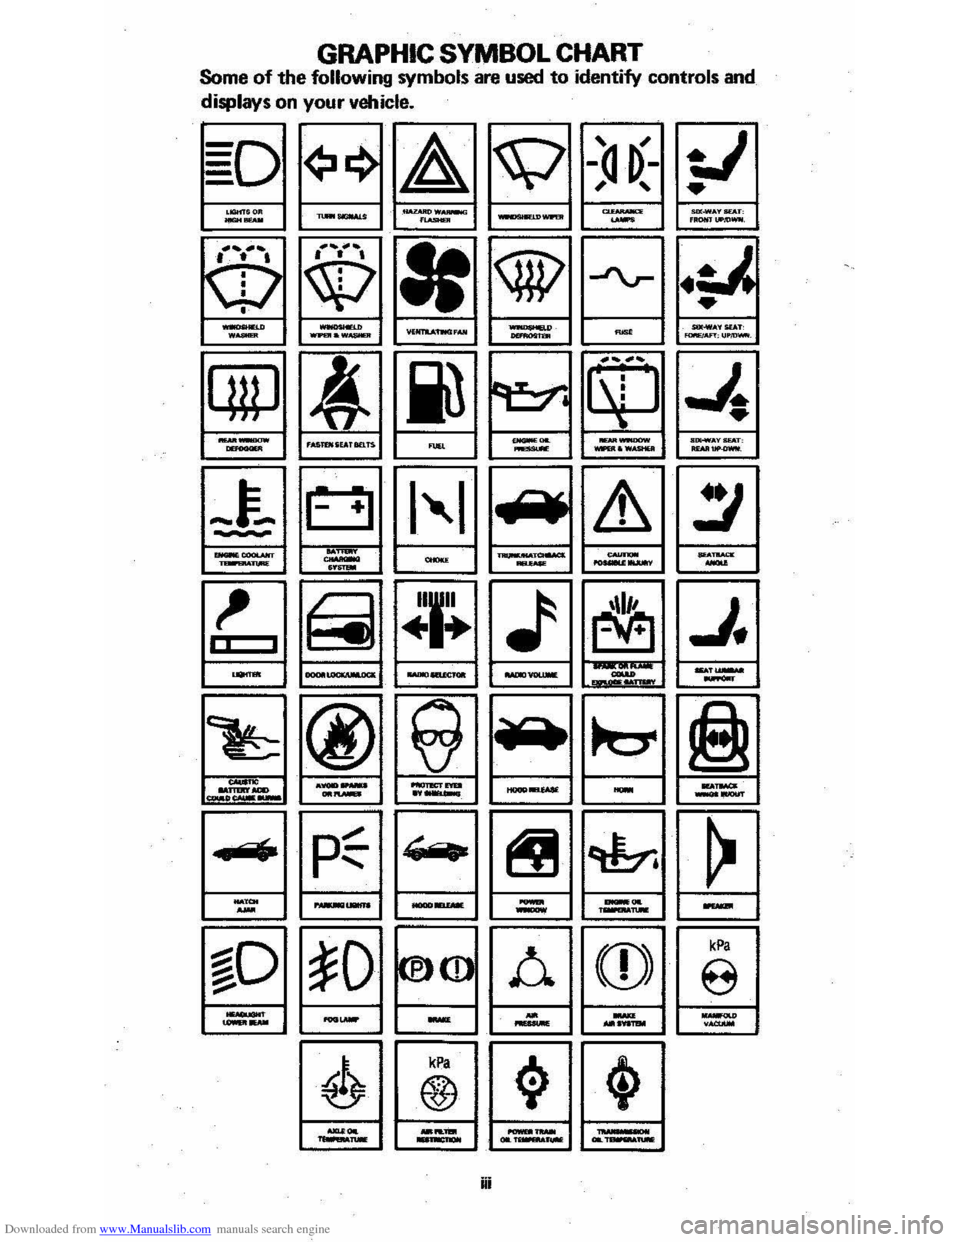
Downloaded from www.Manualslib.com manuals search engine GRAPHIC SYMBOL CHART Some of the following symbols are used to identify controls and
displays on
your vehicle.
~D
~ LIGHT."" --........... ..........
• • I • • ,
~ \\P
--.-........ -
~
~ FASTIN .... ronTS
iii
Page 6 of 105
Downloaded from www.Manualslib.com manuals search engine SECTION 1
BEFORE DRIVING YOUR CAVALIER
TRANSAXLE
While reading this manual, you will nole many references 10 Ihe "transaxle." The transaxle is a transmission and differential (axle) combined in a singl ,e unit.
To avoid confusion, the word
"transaxle" will be used throughout this manual 10 refer to bolh Ihe transmission and differenlial funclions.
DRIVER DAILY CHECKUST
Be sure you know how to use your vehicle and its equipment before operating it
Before Entering the Vehicle
1. See that windows, mirrors and lights are clean and unobstructed.
2. If any lire does not look normal, check it with a pressure gage.
3. Look for fluid leaks .
4. Be sure everything is properly stowed.
5. Check the area behind the vehicle if you are about to back up.
__ Before Driving Off
1. Lock all doors.
2. Adjust the seat and any movable head restraint
3. Adjust inside and outside mirrors.
4. DO NOT allow anyone to ride where there is no seat belt ; and ALWAYS properly fasten the seat belt.
5. Check that all the warning lights work as the key is turned to "Run" or "Start"
6. Check all gages (including the fuel gage).
7 . Release the parking brake (and make sure the
"BRAKE " light turns .off).
See related topics in this manual
or the Maintenance Schedule folder H problems are found.
STOWING THINGS IN (OR ON) THE VEHICLE
CAUTION: Put luggage or cargo In the trunk, or rea' area if postible. Cargo weight,
whether In the trunk or rear area, should be located as far forward as possible. Cargo weight on the roof Shoukt be positioned .s evenly as possible. Secure all i1ems in place to help keep them -from being thrown about and injuring people during a cot"-ion or sudden maneuver. Do not pile luggage or cargo higher than the seetbaCks. Do not place anything on the filler panel, or any cargo cover between the rear seat~.ck and window.
GUARD AGAINST THEFT
Your new Cava~er has many features to help prevent then of the vehicle, its
equipment, and contents. But these anti-then features
depend upon you to work.
t -1
Page 7 of 105
Downloaded from www.Manualslib.com manuals search engine The time to be most on guard is when leaving the vehicle:
1. Park in a lighted spot when you can, and fully close all windows and
any roof panels.
2 .
Lock the steering column and take the keys:
• Turn the key to "Lock" while depressing the key release lever (if so
equipped) and remove the
key. This locks the ignition and both
steering and shift controls , unless your manual transaxJe vehicle has a key release lever . In thai case . Ihe shiH control is not locked. The key can be removed only when the ignition is locked.
• II you must leave a key wilh the vehicle. leave the square-head key
only. Take the oval-head key with you. This will help prevent unwanted
entry into your vehicle or any locked compartment at a later date. Be
sure to
lock the glove box since the remote release button allows the
hatchback.
tailgate , or trunk to be opened even though the ignition key
has been removed .
3. Keep items that may appear to be of value out of sight and locked up
when possible.
4 .
Lock all doors.
KEYS
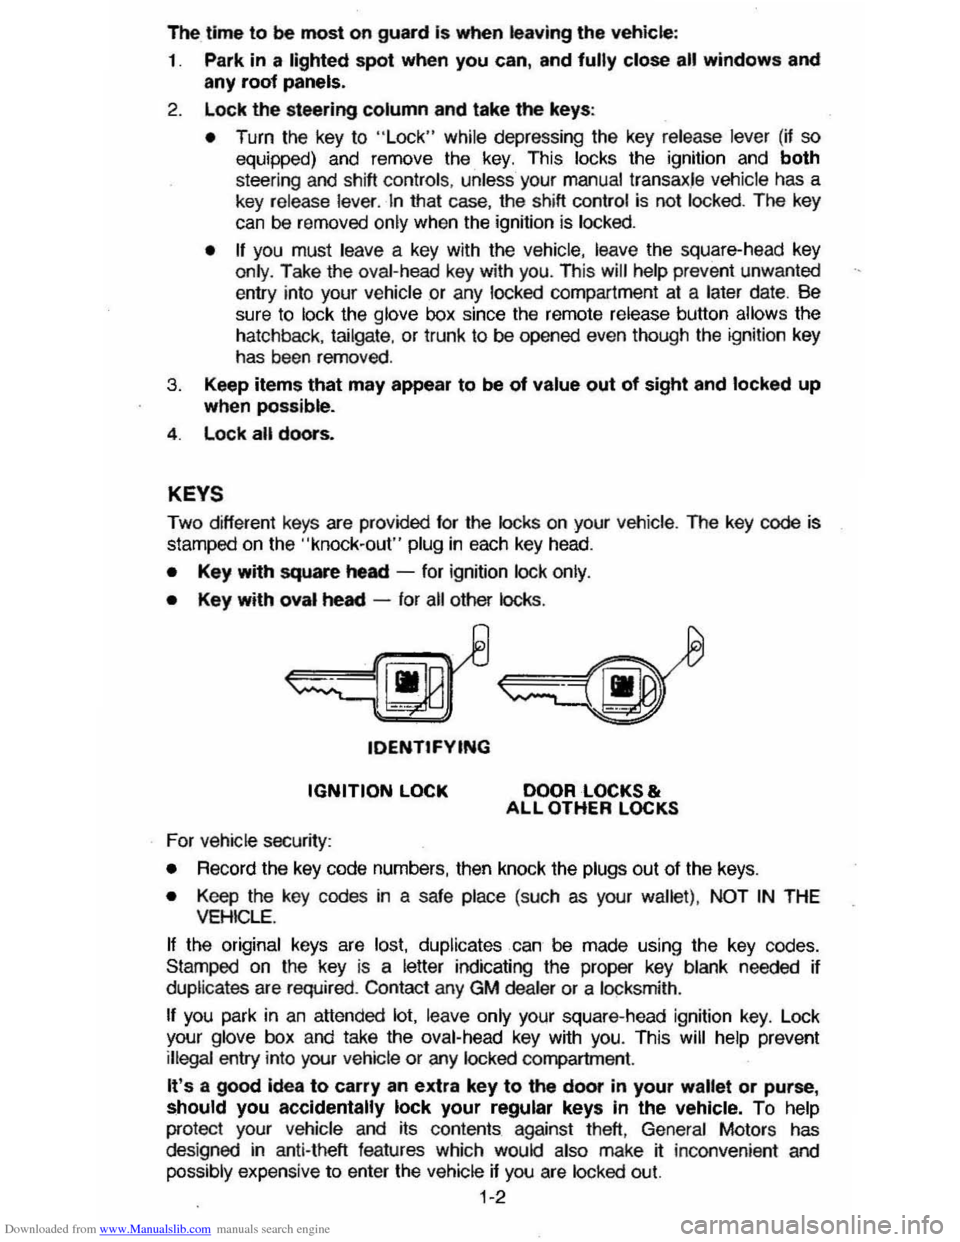
Two different keys are provided for the locks on your vehicte. The key code is
stamped on the "knock-out" plug in each key head.
• Key with square heed -for ignition lock only.
• Key with oval heed -for all other locks .
tDENTtFYING
IGNITION LOCK
For vehicle security:
DOOR LOCKS & ALL OTHER LOCKS
•
Record the key code numbers, then knock the plugs out of the keys.
• Keep the key codes in a safe place (such as your wallet) . NOT IN THE VEHICLE.
If the original keys are lost. duplicates can be made using the key codes.
Stamped on the key
is a letter indicating the proper key blank needed if
duplicates are required . Contact any GM dealer or a locksmith .
If you park in an attended lot. leave only your square-head ignition key. Lock
your glove box and take the oval-head key with you. This will help prevent illegal entry into your vehicle or any locked compartment.
It's a good idea to carry an extra key to the door in your wallet or purse, should you accidentally lock your regular keys In the vehicle. To help
protect your Vehicle and its contents against theft, General Motors has
des igned in anti-theft features which would also make jf: inconvenient and
possibly expensive to enter the vehicle if you are locked out.
1-2
Page 10 of 105
Downloaded from www.Manualslib.com manuals search engine Convex Rearview Mirror
Your vehicle may have an optional convex outside right-hand mirror. (A convex
mirror has a curved surface.)
• Use care when judging the size or distance of a vehicle· or object seen in Ihis convex mirror -such objecls will LOOK smaller and appear farther
away than when seen in a flat mirror.
• Use your inside mirror (or glance rearward) to determine the size and distance of objects seen in the convex mirror.
• Adjust the mirror so you can just see the side of your vehicle.
SEAT CONTROLS
Bucket Seats
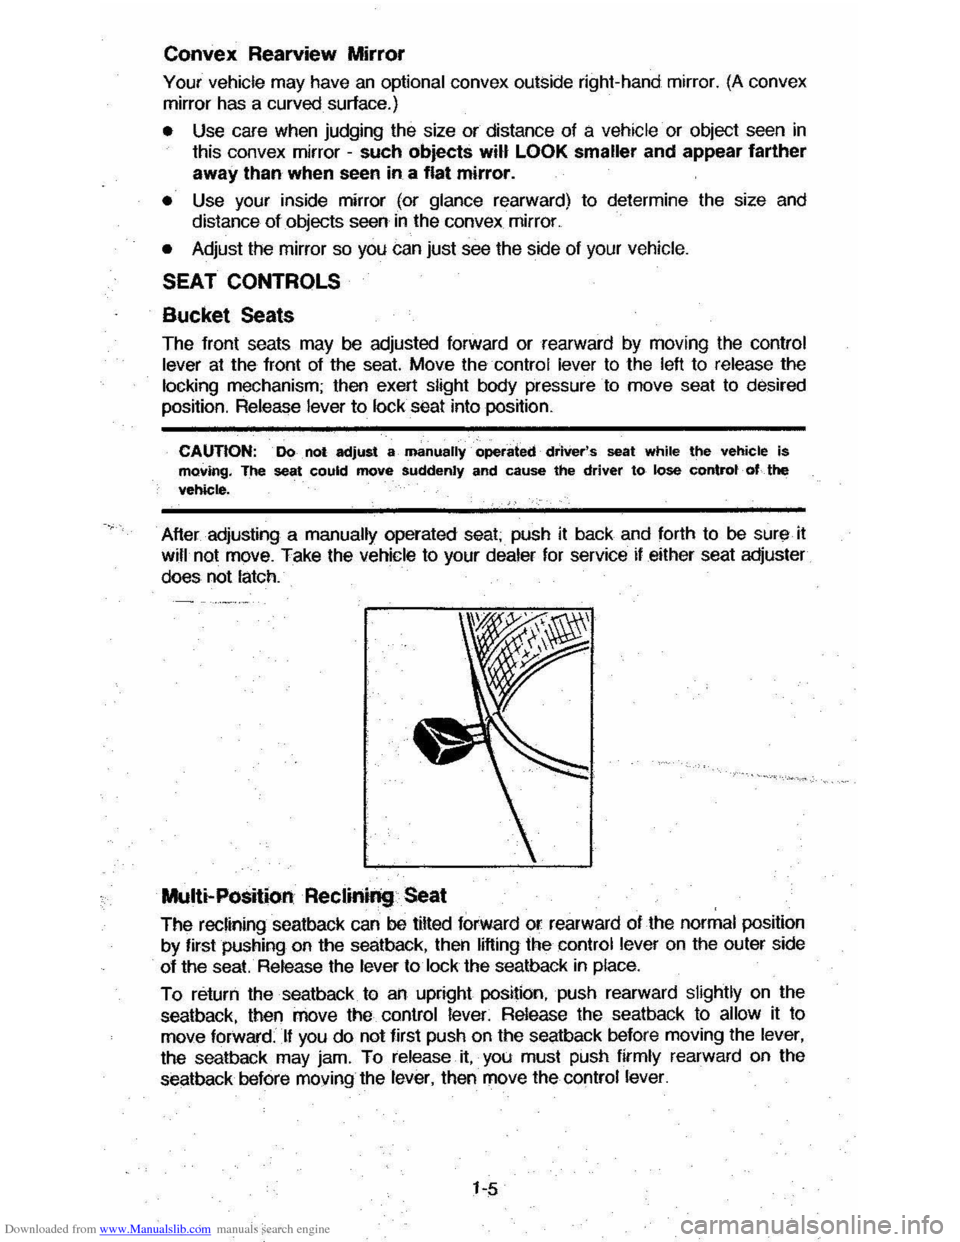
The fronl seals may be adjusled forward or rearward by moving Ihe conlrol
lever at the front of the seat. Move thecontro! lever to the left to release the locking mechanism; then exert slight body pressure· to move seat to desired position. Release lever to lock seat into position.
CAUTION: . Do . not adjust a· manually· operated· driVer's seat while the vehicle is moving. The seat could move suddenly and cause the driver to lose controt· of.. the vehicle.
After adjusling a manually operaled seal; push il back and forlh 10 be sur" il wifl not move. Take the vehicle to your dealer for service if either seat adjuster
does not lalch.
Multi-Position Reclinil'lg Seat
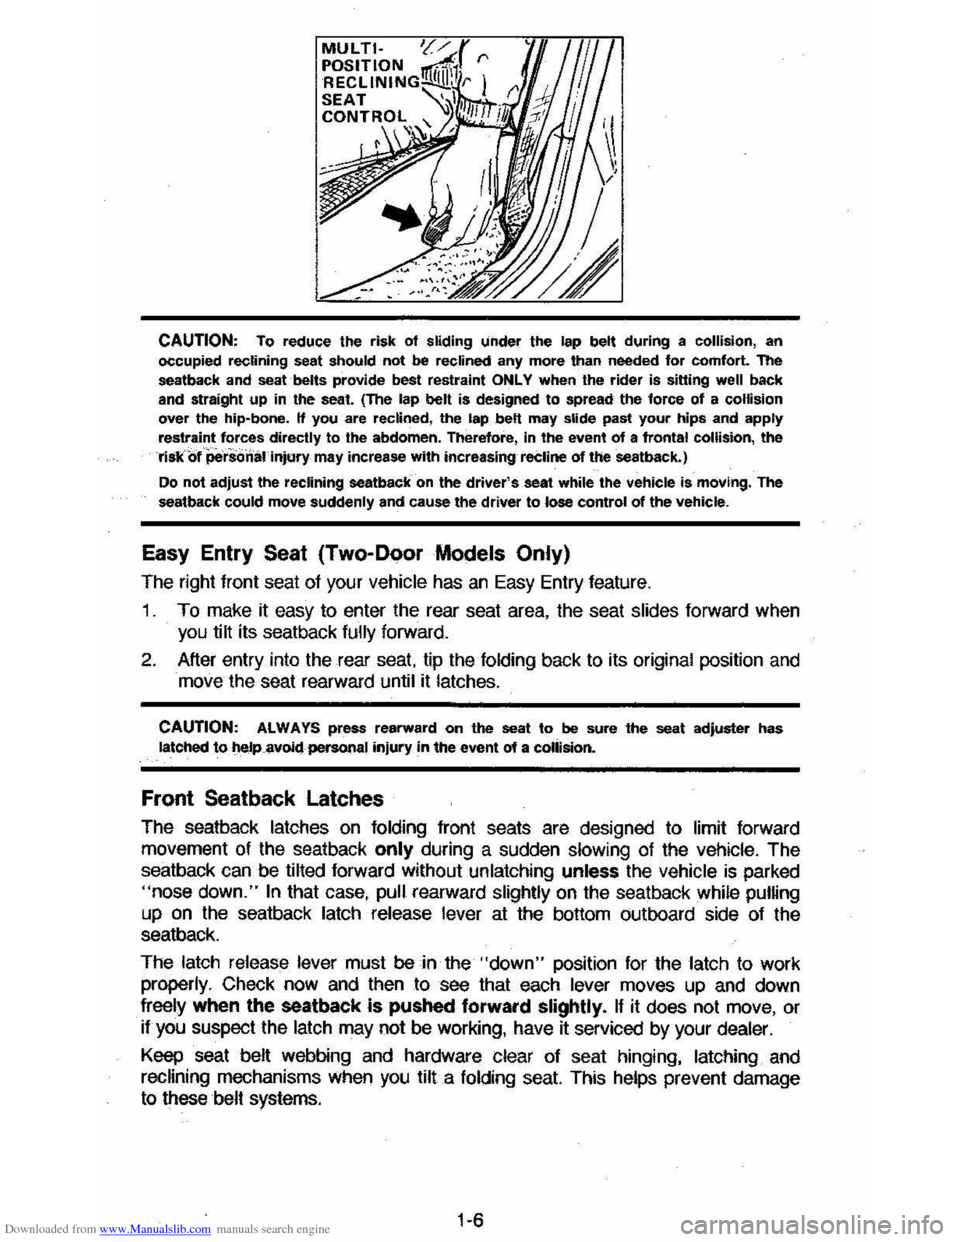
The reclining sealback can be tilted forward or rearward of Ihe normal posilion
by firsl pushing on
Ihe sealback, Ihen lifting the conlrol lever on Ihe ouler side
of
Ihe seat. Release Ihe lever 10 lock the sealback in place.
To relurn Ihe sealback 10 an uprighl position, push rearward slightly on the
sealback, lhen move
Ihe conlrol lever. Release the sealback 10 allow il 10 move forward:· .Lf you do not first push on the seatback before moving the lever,
the seatback may jam.
To release it, you must push firmly rearward on the
seatback before moving the lever, then move
the control lever.
1-5
Page 11 of 105
Downloaded from www.Manualslib.com manuals search engine CAUTION: To reduce the risk of sliding under the lap belt during a collision, an
occupied reclining seat should not be reclined any more than needed for comfort. The
seatback and seat belts provide best restraint ONLY when the rider is siuing well back
and straight up in the seat. (The lap belt is designed to spread the force of a collision over the hip-bone. If you are reclined, the lap belt may slide past your hips and apply restraint forces directly to the abdomen. Therefore, in the event of a frontal collision, the riskof 'personal Injury may increase with increasing reCline of theseatback.)
Do not adjust the reclining seatback on the driver's seat while the vehicle is moving. The
seatback could move suddenly and cause the driver to lose control of the vehicle.
Easy Entry Seat (Two-Door Models Only)
The right front seat of your vehicle has an Easy Entry feature.
1 . To make it easy to enter the rear seat area, the seat slides forward when
you tilt its seatback
fully forward.
2. After entry into the rear seat. tip the folding back to its original position and
move the seat rearward until it latches.
CAUTION: ALWAYS press rearward on the seat to be sure the seat adjuster has latched to t\eJp.8voidpersonal injury in the event of a collision.
Front Seatback Latches
The seatback latches on folding front seats are designed to limit forward
movement of the seatback
only during a sudden slowing of the vehicle. The
seatback can be tilted forward without unlatching unless the vehicle
is parked "nose down." In that case, pull rearward slightly on the seatback while pumng
up on the seatback latch release lever at the bottom outboard side of the
seatback.
The latch release lever must
be in the "down" position for the latch to work
properly. Check now and then to see that each lever moves up and down
freely when the seatback
is pushed forward slightly. If it does not move, or
if you suspect the latch may not be working, have it serviced by your dealer.
Keep seat belt webbing and hardware clear of seat hinging, latching and
recHning mechanisms When you tilt a folding seat. This helps prevent damage
to these belt systems.
1·6
Page 16 of 105
Downloaded from www.Manualslib.com manuals search engine Keep any shoulder belt slack to a minimum. Too much belt slack could
reduce the amount of protection in an accident because the belt is too loose to restrain you properly_
Seat Belt Inspection
Now and Ihen check that belts. buckles, latch plates, retractors, reminder
systems and guide
loops work properly; look for loose parts or damage that
could keep the restraint system from doing its job. Replace a
belt if the
webbing has been cut or otherwise damaged. Replace belts in use during all
but a minor collision; if there is any question, replace the belt.
SEAT BELT LIGHT/BUZZER REMINDER
When the key is turned to "Run" or "Start," a light will come on for four to
eight seconds to remind people to fasten their· seat belts. Unless the driver's
seat
belt is buckled, a buzzer will sound at the same time.
If the seat belt or reminder system does not work as described, see your dealer
for service.
CHILD RESTRAINT
All vehicle occupants and especially children should be restrained
whenever riding
in vehicles. Holding a child in your arms is NOT a substitute for a child restraint system. In an accident, a child held in a person's arms can
be struck or crushed by any unrestrained- rider. An unrestrained child could
also be injured by striking the interior, or by being ejected from the vehicle
during a sudden maneuver or impact. A child restraint system can help
protect a child in a vehicle.
In convertibles, a top-strap-equipped child restraint can only be used in
the Iront seat because there is no appropriate place to aUach a top strap
anchor bracket behind the rear seat in this vehicle. Installing a top strap
anchor bracket behind the rear seat may expose the child to hazards if the top
is raised or lowered with the child restraint occupied,
and, the bracket itself
may damage the convertible top.
In using any child restraint system, be sure to read and follow all instructions on installation and use that come with the system.
Riding Without A Child Restraint
For the best protection in an accident or sudden maneuver, children
small enough lor child restraint systems should be restrained that way.
However, the
following may provide some degree of protection for such children if a child restraint is not used.
• Place an infant who cannot sit up in a baby carrier, preferably covered and
padded. Put it crossways on the vehicle seat and securely restrain it with the vehicle's seat belts. Or, if that is not possible, place it crossways on the floor behind the driver's seat.
• Children who can sit up by themselves should be restrained with a lap belt
when riding in a rear seat. In the front seat a child should wear both lap
and shoulder belt. If the shoulder belt irritates the neck or face move the
child
closer to the center of the vehicle or to the rear seat. Never let a child stand or kneel on any seat. If unusual conditions prevent the use of
restraints, the
child should stand on the floor behind the driver's seat.
1-11
Page 21 of 105
Downloaded from www.Manualslib.com manuals search engine FUEL REQUIREMENTS
Your engine is designed to use Only unleaded gasoline. Unleaded gasoline
must be used for the emission control system to operate properly. Its use will
also reduce spark plug fouling, exhaust system corrosion and engine oil deterioration.
Using leaded gasoline can damage the emission control system and could result in loss of emission warranty coverage. The effectiveness of the catalyst in the catalytic converter decreases after use of as little as one tank of leaded
gasoline. Also, your vehicle may have the "Computer Command Control"
system, which includes an oxygen sensor. Leaded gasoline will damage the sensor, and deteriorate emission control. (For more information, see
"Computer Command Control System" in "Service and Maintenance," Section 5 of this manual).
Federal
regulations require that pumps delivering unleaded gasoline be labeled with the word UNLEADED. Only these pumps have nozzles which fit the filler neck of your vehicle's gasoline tank.
In the United States, Federal law also requires that gasoline octane ratings be
posted on the pumps. The octane rating shown is an average of Research (A)
octane number and Motor (M) octane number. In most parts of the United
States, you should use unleaded gasoline with an octane rating of at least 87. However, you may use unleaded gasoline with an octane fating as low as 85 in these high-altitude areas: Colorado, Montana, New Mexico, Utah, Wyoming,
northeastern Nevada, southern
Idaho, western South Dakota, and that part of
Texas which
is directly south of New Mexico.
Using
unleaded gasoline with an octane rating lower than stated above can
cause persistent, heavy "spark knock."
("Spark knock" is a metallic rapping
noise.) If severe, this can lead to engine damage. If you detect heavy spark
knock even when using gasoline of the recommended octane rating, or if you hear steady spark knock while holding a steady speed on level roads, have
your
dealer correct the problem. Failure to take steps to stop such knocking is misuse of the vehicle, for which Chevrolet is not responsible.
However, now and then you may notice light spark knock for a short time while
accelerating or driving up hills. This'is no cause for concern, becauseyou,,~et the greatest fuel economy benefit from the gasoline's octane rating when there
is occasional light spark knock. Using gasoline with a higher octane rating than
that which allows occasional spark knock is an unnecessary expense.
Gasoline/Ethanol Blends
Blends of unleaded gasoline and ethanol (grain alcohol) sometimes known as gasohol are available in some areas. You may use these blends in your
vehicle, if they are no more than 10 percent ethanol, without jeopardizing the New Vehicle and Emission Warranties. Be sure the gasoline-ethanol blend has
octane ratings no lower than those recommended for unleaded gasoline. Most
drivers
will not notice operating differences with blends of up to 1 0 percent
ethanol, but some may. In that case, your authorized dealer can make certain
adjustments, provided they
do not violate the Federal Emission Standards. If you are still not satisfied with ethanol-gasoline blend performance, you may
prefer
to use unleaded gasoline.
2-5
Page 24 of 105
Downloaded from www.Manualslib.com manuals search engine CAunOM: tf you need to tum oft the ... whikt the vehicte ls moving, turn the key only to "Oft." DO NOT depreSS the key release lever while turning the Ignition off._This
wln ·lock the steering column and result in loss arability to steer the vehlete.
If you have trouble turning the key to unlock the ignition, first be sure the key is
pushed in all the way . Then , try to turn the steering wheel as hard as you can .
in the direclioo the
wheels are tUrned . At the same ti me , turn the ignition kay
w~h as much eftort as you can apply with your hand. Do not try to use a tool of
any kind to
apply more force on the lock knob , as tnis could break the knob.
NOTICE: Do not park, idle, or operate your vehk:le over combustible materials, such
as grass or leaves . They couki touch the hot exhaust ay8tem and ignite.
Parking
CAUTION: Before the driver leaves this vehicle, to reduce the risk of personal injury ... resun of vehicle movement:
1. Firmly apply the parking brake.
2. Shift the automatic transtixle to Park or the manual tranSlale to "Reverse."
3. Tum the kef to "Lock. " On vehietn wrth manual transaxle$, __ ~ the key reiease tever and tum the key to·'Loclic. " .
4. Remove the key (the chime ia designed to remind you).
To reduce the chance of persona' injury and/or vehicle damage due' to engine overheating , never lellVe the engine Idling without an alert driver present. If the engine ahoukl overheat, as indicated by the Erlgine Coolant Temperature light Of gage,
Immediate action 1a required to correct the concIUon. Continued operation 01' the engine . enn FOA -A SHORT TtME may resutt In a fire.
TURN SIGNAL AND MULTI-FUNCTION LEVER
The turn signal lever on the left side of the steering column also controls headlight low-beam and high-beam, the windshield wiper/washer, and the
optional Cruise
Control. (See Cruise Control operatiOn in this section .)
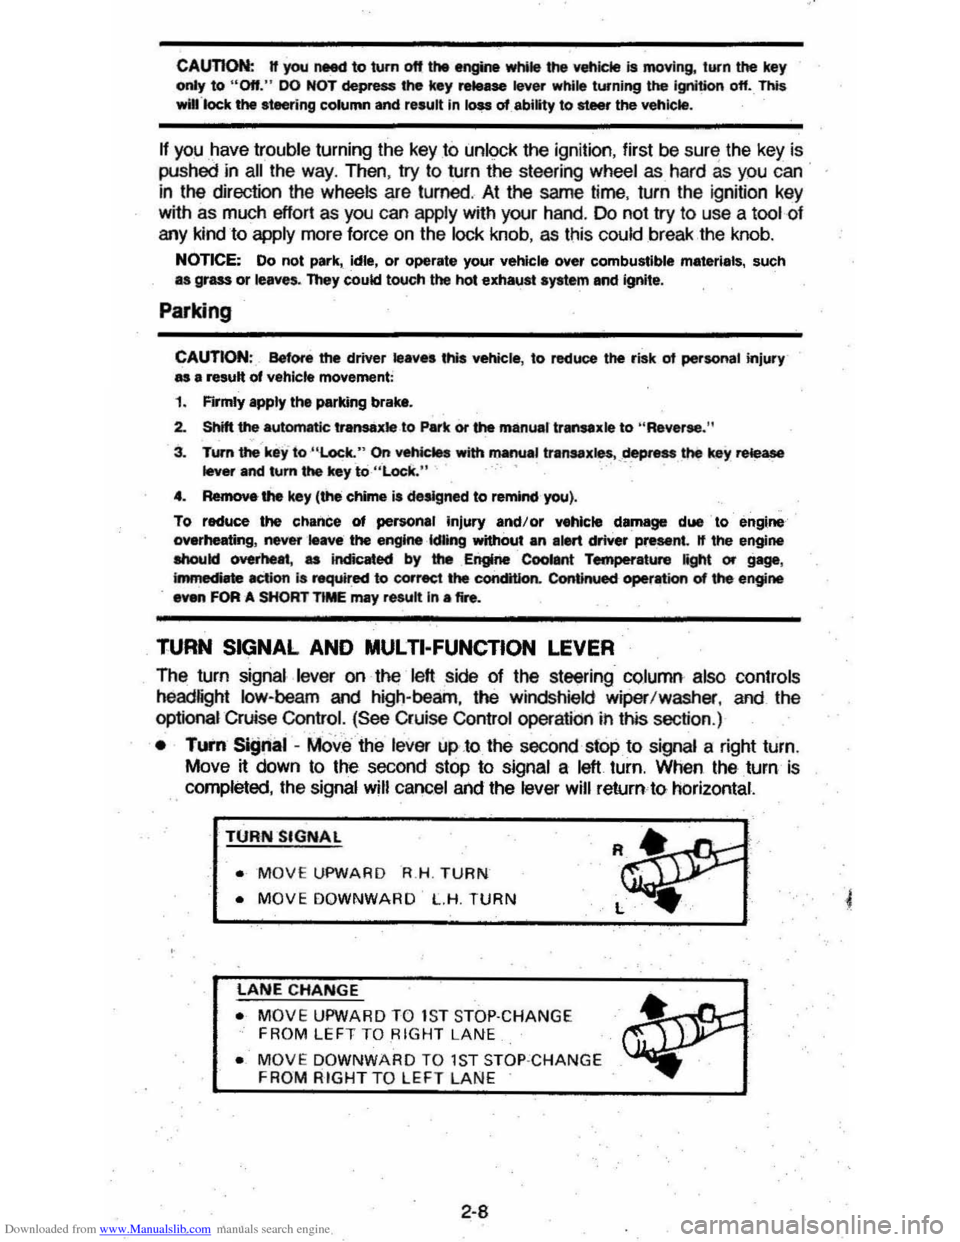
• TUI'fI Si!Jnal -MOve the lever up .to the second stop to signal a right turn.
Move
~ down to the second stop to signal a left turn. When the turn is
completed, the signal will cancel and the lever will return to horizontal.
TURN SIGNAL
• MOVE UPWARD R.H . TURN
• MOVE DOWNWARD L.H. TURN
LANE CHANGE
• MOVE UPWARD TO 1S T STOP·CHANGE
FROM LEFT TO RIGHT LANE
• MOVE DOWNWARD TO 1ST STOP ·CHANGE FROM RIGHT TO LEFT LAN E
2-8
Page 25 of 105
Downloaded from www.Manualslib.com manuals search engine • Lane Change Signal -In some turns, such as changing lanes, the steering wheel tS not turned far enough to cancel the turn signal. For convenience, you can flash the turn signal by moving the lever part way (to the first stop)
and holding it there. The lever will return to horizontal when you release it.
A green light on the instrument panel is designed to flash to tell you that the
front
and rear turn signal lights are working. If the light stays on, but does not flash, check for burned-out turn signal bulbs. If the green light does not come
on when
you move the lever, check the fuse and indicator bulb.
However, if you ordered a trailertowing·optiOil.·in which extra wiring was added to attach the trailer lighting, a different type of flasher was installed. In this
case, the green light will continue to flash even if a turn signal bulb burns out.
Therefore, you must regularly look at the front
and rear turn signal lights to be
sure they are working.
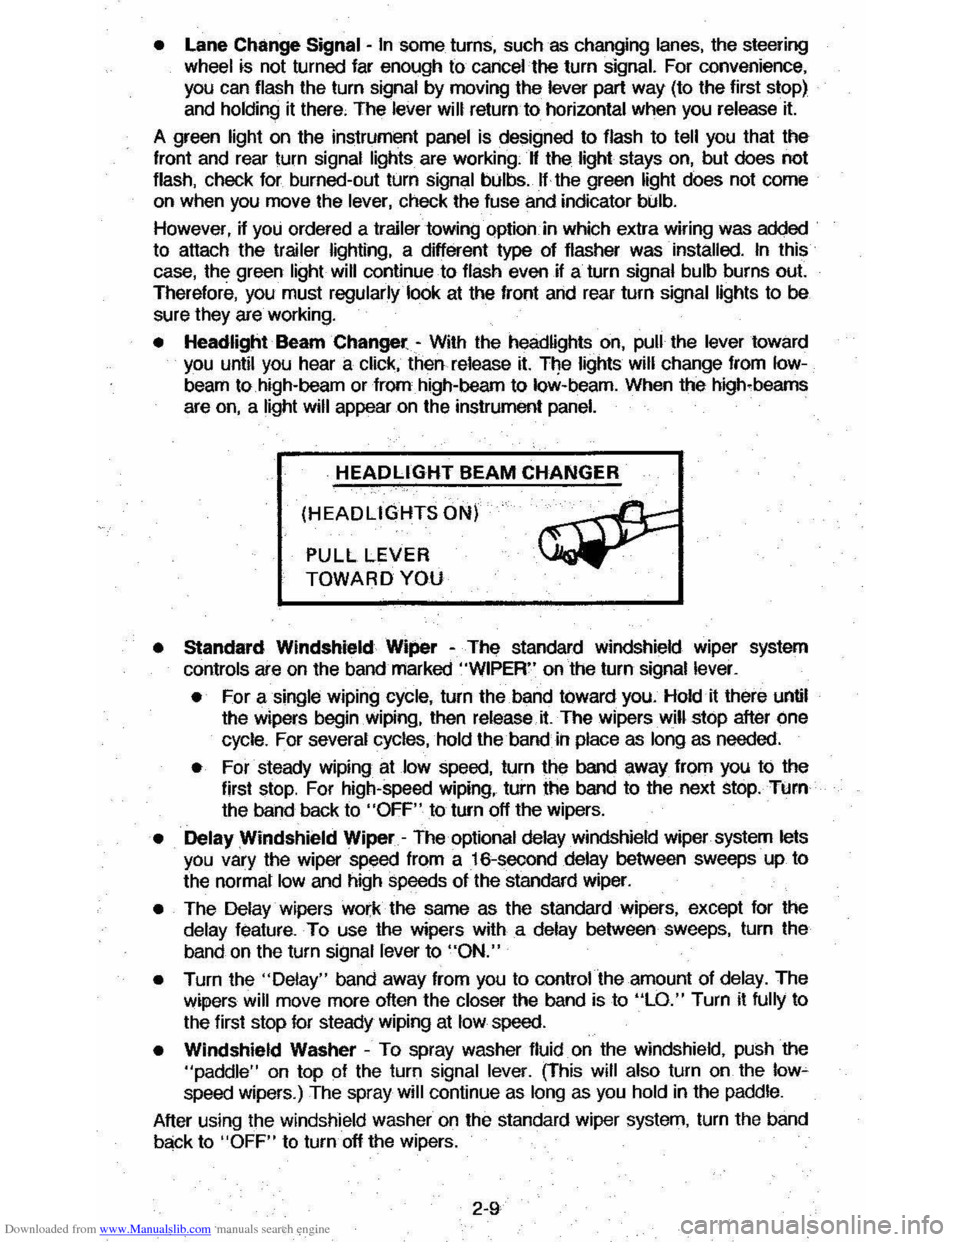
• Headlight Beam Changer -With the headlights on, pull the lever toward you until you hear a click, then release it. The lights will change from Iow
beam to high-beam or from high-beam to low-beam. When the high-beams
are
on, a light will appear on the instrument panel.
HEADLIGHT BEAM CHANGER
(HEADLIGHTS ON)
PULL LEVER
TOWARD YOU
• Standard Windshield Wiper -The standard Windshield wiper system
con
ols are on the band marked "WIPER" on the turn signal lever.
• For a single wiping cycle, turn the band toward you. Hold it there until
the wipers begin
Wiping, then release.it. The wipers will stop after one
cycle. For several cycles, hold the band in place as long as needed.
• For steady wiping at low speed, turn the band away from you to the
first stop. For high-speed wiping, turn the band to the next stop. Turn
the band back to
"OFF" to turn off the wipers.
• Delay Windshield Wiper -The optional delay windshield wiper system lets you vary the wiper speed from a 16-second delay between sweeps up to
the normal
low and high speeds of the standard wiper.
• The Delay wipers work the same as the standard wipers, except for the
delay feature. To use the wipers with a delay between sweeps, turn the
band on the turn signal lever to
"ON."
• Turn the "Delay" band away from you to control the amount of delay. The
wipers will move more often the closer the band is to "LO." Turn it fully to
the first stop for steady wiping at
low speed.
• Windshield Washer -To spray washer fluid on the windshield, pUSh the "paddle" on top of the turn signal lever. (This will also turn on the low~ speed wipers.) The spray will continue as long as you hold in the paddle.
After using the windshield washer
on the standard wiper system, turn the band
back to "OFF" to turn off the wipers.
2-9