engine oil CHEVROLET CAVALIER 1984 1.G Owners Manual
[x] Cancel search | Manufacturer: CHEVROLET, Model Year: 1984, Model line: CAVALIER, Model: CHEVROLET CAVALIER 1984 1.GPages: 105, PDF Size: 24.23 MB
Page 17 of 105
Downloaded from www.Manualslib.com manuals search engine SECTION 2
STARTING AND OPERATING
ENGINE EXHAUST GAS CAUTION
(CARBON MONOXIDE)
CAUTION:-Do not breathe exhaust gas because it contains carbon monoxide, which by itself has no color crador. Carbon monoxide is a
dangerous gas. It can cause unconsciousness and can be lethal.
If at any time you think exhaust fumes are entering the vehicle, have the cause
determined and corrected as soon as possible. If you must drive under these conditions, drive only with ALL windows lully OPEN.
Protect against carbon monoxide entry into the vehicle body. The best way is
to keep the engine exhaust system,
vehicle body and body ventilation system
properly maintained. We recommend that the exhaust system and body be
inspected by a competent technician:
• each time the vehicle is raised for an oil change;
• whenever a change is noticed in the sound, of the exhaust system;
• whenever the exhaust system, underbody or rear of the vehicle is damaged
or becomes corroded.
See your Maintenance Schedule folder for parts requiring inspection.
To allow proper operation of your vehicle's ventilation system, keep the air inlet
grille in front of the windshield clear of snow, leaves or other obstructions at all
times.
DO NOT PARK WITH THE ENGINE RUNNING OR IDLE THIS VEHICLE FOR
MORE
THAN 10 MINUTES WITH THE VENTILATION SYSTEM CONTROL
SWITCH
IN THE "OFF" POSITION. EVEN WITH THE VENTILATION SYSTEM ON, RUNNING THE ENGINE WHILE PARKED OR STOPPED FOR LONGER
PERIODS OF TIME IS NOT
RECOMMENDED. ENTRY OF CARBON
MONOXIDE INTO THE CAR BODY IS POSSiBlE WITH A POORLY REPAIRED, DAMAGED, OR CORRODED EXHAUST SYSTEM OR BODY.
Do not run the engine in CONFINED areas (such as garages or next to a
building) any more than needed to move the vehicle. When the
vehicle has to
be stopped
in an UNCONFINED area with the engine running for any more
than a few minutes, take the following steps:
A. Adjust the heating or cooling system to force outside air into the vehicle as
follows:
1. On vehicles not equipped with air conditioning, set the fan to
intermediate or high speed and the upper control lever to any position.
2. On vehicles equipped with air conditioning, set the fan to an
intermediate or high speed and the upper control lever to any position
except
"OFF" or "MAX."
B. Keep the exhaust tailpipe area clear of snow and other material to help
reduce the buildup of exhaust gases under the vehicle. This is particularly
important when parked in blizzard conditions.
2-1
Page 18 of 105
Downloaded from www.Manualslib.com manuals search engine Driving with the trunk lid, hatchback or liftgate on station wagon models open is not recommended. Under some conditions, exhaust gases may be drawn
into the vehicle. If the trunk lid, hatchback or liftback must remain open for
some reason while moving, or if electrical wiring or other cable connections to a trailer must pass through the seal between the trunk lid, hatchback or liftback
and the body, follow these precautions:
• Close all windows.
• Adjust the heating or cooling system to force outside air into the vehicle as
described abcve, but set the fan to high speed.
• On vehicles with outside air vents in or under the instrument panel, open the vents fully.
NEW VEHICLE "BREAK-IN" PERIOD
You can drive your new vehicle from its very first mile/kilometer without
following a formal "break-in" schedule. However, there are things you can do during the first few hundred miles/kilometers of driving that will add to the
future performance and economy of your vehicle.
We recommend you limit your speed during the first 500 miles (800 kilometers)
to a maximum of 55 mph (90 km/h); but do not drive for long periods at any
one constant speed, either fast or slow. During this time, avoid full throttle
starts and, if possible, avoid hard stops especially during the first 200 miles (320 kilometers) of driving.
Always drive at moderate speed until the engine has completely warmed up.
I! you plan to use your new vehicle for trailer towing, see the following.
TRAILER TOWING
This car is designed and intended to be used mainly to carry people. Towing a
trailer
will affect handling, durability and economy. Your safety and satisfaction
depend upon proper use of correct equipment. Also, you should avoid
overloads and other abusive use.
The maximum loaded trailer weight you can pull with your vehicle depends on
your intended use
and what special equipment has been installed on it.
Information on trailer towing ability, special equipment required, and optional
equipment available should be obtained from your dealer. Ask for the trailering brochure. Or, write: Consumer Relations Department, Chevrolet Motor
Division, Warren, Michigan 48090.
(In Canada, write to General Motors of
Canada Limited, Customer Services Department, Oshawa, Ontario L lJ 5Z6.)
Tires
When towing trailers, be sure your tires are properly inflated to the inflation pressure shown on the Tire Placard on the driver's door.
The allowable passenger and cargo load for this vehicle, also shown on the
Tire
Placard, is reduced by the trailer tongue weight whenever the trailer is
attached to the vehicle. See "Service and Maintenance," Section 5 for more tire information.
Maintenance
More frequent service is required when using your vehicle to pull a trailer. See
the Maintenance Schedule folder for Automatic Transaxle Fluid and Engine Oil change requirements for trailering.
2-2
Page 21 of 105
Downloaded from www.Manualslib.com manuals search engine FUEL REQUIREMENTS
Your engine is designed to use Only unleaded gasoline. Unleaded gasoline
must be used for the emission control system to operate properly. Its use will
also reduce spark plug fouling, exhaust system corrosion and engine oil deterioration.
Using leaded gasoline can damage the emission control system and could result in loss of emission warranty coverage. The effectiveness of the catalyst in the catalytic converter decreases after use of as little as one tank of leaded
gasoline. Also, your vehicle may have the "Computer Command Control"
system, which includes an oxygen sensor. Leaded gasoline will damage the sensor, and deteriorate emission control. (For more information, see
"Computer Command Control System" in "Service and Maintenance," Section 5 of this manual).
Federal
regulations require that pumps delivering unleaded gasoline be labeled with the word UNLEADED. Only these pumps have nozzles which fit the filler neck of your vehicle's gasoline tank.
In the United States, Federal law also requires that gasoline octane ratings be
posted on the pumps. The octane rating shown is an average of Research (A)
octane number and Motor (M) octane number. In most parts of the United
States, you should use unleaded gasoline with an octane rating of at least 87. However, you may use unleaded gasoline with an octane fating as low as 85 in these high-altitude areas: Colorado, Montana, New Mexico, Utah, Wyoming,
northeastern Nevada, southern
Idaho, western South Dakota, and that part of
Texas which
is directly south of New Mexico.
Using
unleaded gasoline with an octane rating lower than stated above can
cause persistent, heavy "spark knock."
("Spark knock" is a metallic rapping
noise.) If severe, this can lead to engine damage. If you detect heavy spark
knock even when using gasoline of the recommended octane rating, or if you hear steady spark knock while holding a steady speed on level roads, have
your
dealer correct the problem. Failure to take steps to stop such knocking is misuse of the vehicle, for which Chevrolet is not responsible.
However, now and then you may notice light spark knock for a short time while
accelerating or driving up hills. This'is no cause for concern, becauseyou,,~et the greatest fuel economy benefit from the gasoline's octane rating when there
is occasional light spark knock. Using gasoline with a higher octane rating than
that which allows occasional spark knock is an unnecessary expense.
Gasoline/Ethanol Blends
Blends of unleaded gasoline and ethanol (grain alcohol) sometimes known as gasohol are available in some areas. You may use these blends in your
vehicle, if they are no more than 10 percent ethanol, without jeopardizing the New Vehicle and Emission Warranties. Be sure the gasoline-ethanol blend has
octane ratings no lower than those recommended for unleaded gasoline. Most
drivers
will not notice operating differences with blends of up to 1 0 percent
ethanol, but some may. In that case, your authorized dealer can make certain
adjustments, provided they
do not violate the Federal Emission Standards. If you are still not satisfied with ethanol-gasoline blend performance, you may
prefer
to use unleaded gasoline.
2-5
Page 22 of 105
Downloaded from www.Manualslib.com manuals search engine Other Gasolinel Alcohol Blends
Some fuel suppliers sell gasoline containing alcohol without advertising the
presence of
alcohol or giving it a special name such as gasohol. " you are not
sure whether there is alcohol in the gasoline you buy, check with the service
station operator.
DO NOT USE gasolines containing methanol (methyl or wood alcohol) that do
not
also contain cosolvents and corrosion inhibitors for methanol. Also, DO NOT USE gasolines that contain more than 5 percent methanol even if they
contain
cosolvents and corrosion inhib~ors. Fuel system damage or vehicle performance problems resuHing from the use of such fuels is not the
responsibility
of Chevrolet and may not be covered under the new vehicle
warranties.
Mhough gasolines containing 5 percent or less methanol and appropriate
cosolvents and inhibitors for methanol may be suitable for use in your vehicle,
evidence of their suitability is as yet incomplete; therefore, Chevrolet cannot, at
this time, endorse their use.
NOTICE: Take care to not spill gasoline during refueling. Guolines containing alcohol can cause paint damage, whiCh may notba covered under the New Vehicle Warranty.
OPERATION IN FOREIGN COUNTRIES
All models are specifically bum to comply with United States Federal Regulations regarding environmental quality. To comply, unleaded fuel of
sufficient octane rating must be used. These
fuels may not be available in
other countries. "you intend to take your vehicle outside the U.S. or Canada,
contact the GM Overseas Service Section at the
following address, to find out
what you must
do in order to operate your vehicles in other countries, or for
additional information and a. copy of the applicable maintenance schedule.
General Motors Corporation, Overseas Service Section, 2-128 General Motors
Building,
Detroij, Michigan 48202, (313) 556-4862.
When
writing, please include:
•
the Vehicle Identification Number and
• the countries in which yOu plan to travel.
Before taking your vehicle to a foreign country, check to see if the proper fuel
is available. Most major oil companies or domestic auto clubs should have this
information. Foreign offices of major oil
COmpanies or auto clubs may also be
of
help.
Be aware that, use of leaded gasoline or use of fuel that has a lower octane
rating than is required by your
vehicle, will cause the emission control system to lose its effectiveness and can cause ,engine knock or serious engine
damage. Ne~her GM Overseas nor Chevrolet will be responsible for damage to
your
vehicle as a result of not USing the proper fuel.
IMPORTANT FACTS YOU SHOULD KNOW ABOUT FUEL
ECONOMY AND HOW
TO IMPROVE IT
How you drive, where you drive, and when you drive all affect how many
miles/kilometers you can get from a galion/liter of fuel. You can save fuel if
you avoid
"Jackrabbit" starts, maintain as constant a throttle position as traffic
conditions
allow once you have reached cruising speed, and avoid sudden
stops which waste energy in the form of heat generated in braking.
2-6
Page 25 of 105
Downloaded from www.Manualslib.com manuals search engine • Lane Change Signal -In some turns, such as changing lanes, the steering wheel tS not turned far enough to cancel the turn signal. For convenience, you can flash the turn signal by moving the lever part way (to the first stop)
and holding it there. The lever will return to horizontal when you release it.
A green light on the instrument panel is designed to flash to tell you that the
front
and rear turn signal lights are working. If the light stays on, but does not flash, check for burned-out turn signal bulbs. If the green light does not come
on when
you move the lever, check the fuse and indicator bulb.
However, if you ordered a trailertowing·optiOil.·in which extra wiring was added to attach the trailer lighting, a different type of flasher was installed. In this
case, the green light will continue to flash even if a turn signal bulb burns out.
Therefore, you must regularly look at the front
and rear turn signal lights to be
sure they are working.
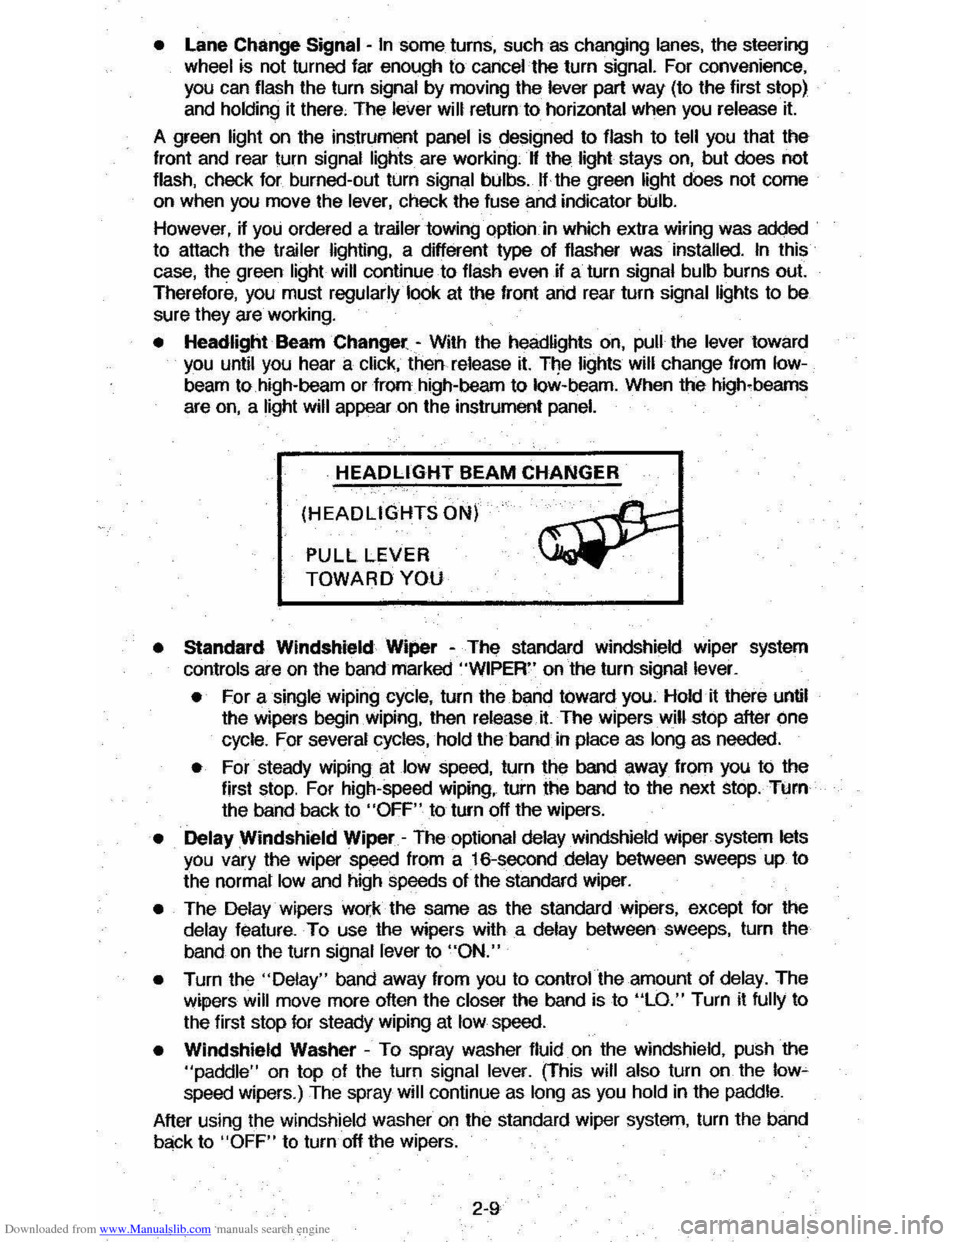
• Headlight Beam Changer -With the headlights on, pull the lever toward you until you hear a click, then release it. The lights will change from Iow
beam to high-beam or from high-beam to low-beam. When the high-beams
are
on, a light will appear on the instrument panel.
HEADLIGHT BEAM CHANGER
(HEADLIGHTS ON)
PULL LEVER
TOWARD YOU
• Standard Windshield Wiper -The standard Windshield wiper system
con
ols are on the band marked "WIPER" on the turn signal lever.
• For a single wiping cycle, turn the band toward you. Hold it there until
the wipers begin
Wiping, then release.it. The wipers will stop after one
cycle. For several cycles, hold the band in place as long as needed.
• For steady wiping at low speed, turn the band away from you to the
first stop. For high-speed wiping, turn the band to the next stop. Turn
the band back to
"OFF" to turn off the wipers.
• Delay Windshield Wiper -The optional delay windshield wiper system lets you vary the wiper speed from a 16-second delay between sweeps up to
the normal
low and high speeds of the standard wiper.
• The Delay wipers work the same as the standard wipers, except for the
delay feature. To use the wipers with a delay between sweeps, turn the
band on the turn signal lever to
"ON."
• Turn the "Delay" band away from you to control the amount of delay. The
wipers will move more often the closer the band is to "LO." Turn it fully to
the first stop for steady wiping at
low speed.
• Windshield Washer -To spray washer fluid on the windshield, pUSh the "paddle" on top of the turn signal lever. (This will also turn on the low~ speed wipers.) The spray will continue as long as you hold in the paddle.
After using the windshield washer
on the standard wiper system, turn the band
back to "OFF" to turn off the wipers.
2-9
Page 27 of 105
Downloaded from www.Manualslib.com manuals search engine 4. Apply the regular brakes and shift into the proper gear. Release the
parking brake and drive oft.
IF ENGINE FAILS TO START AFTER NORMAL STARTING
PROCEDURE
1. If you tried the Cold or Warm Engine starting procedure and the engine still
does not start, push down the accelerator pedal to the floor and hold it
there while cranking the engine. This should clear the engine
~ II is flooded.
2. If the engine has been flooded with too much fuel, it may start to run but
not have enough power to keep running .
In that case, continue cranking
with the
accelerator pedal all the way to the floor until the engine clears itseW of excess gasoline and runs smoothly . (But, do not crank more than
15 seconds at a time or you could damage the starter .)
GaSOline Engine Block Heater
The optional gasoline engine block heater is designed to warm the block area
for improved cold weather starting.
II can also help reduce fuel consumption
when a cold engine is warming up.
To use
the block heater:
1 . Open the
hood. '~".
2. Unwrap the electrical cord which is stowed In the engine compartment.
(After using the block heater, be SUre to properly restow the cord , to help
keep it away from moving engine parts.)
3. Plug the cord into any three-prong, 11 O-voll outlet (normal household
current).
NOTICE: • the cord i, too ahort, use a ~avy·duty, three-prong extension corel Do not use an extension cord such .. you would uae for • t.np because the cord rnIIY
--Outside temperature, oil viscosity, etc. will affect how tong the block~ heater should remain plugged .in . Contact your authorized dealer for advice 'jot the
conditions in your area.
TRANSAXLE
DESCENDING A GRADE
CAunON: To reduce the risk of personaJ injUry. before going down 8 .steep or long Wade reduce speed and shift the transaxte -into second or low gear to help control your speed. (00 this with EITHER an automatic or manual transax)e.) Do not hold the brake ~I down too Iorig or too otten white going down • steep or long grade. This COUld ceu" the brakes to get hot and not work as well. As • result, the vehicle will not slow down at the usual r.t.~ Failure to u.ke these steps could r8l,,1t in. Iou of vehicle control.
DRIVING ON. SUPPERY SURFACES
While driving on a slippery surface avoid sudden acceleration, or engine
braking actions (due to shifting to a lower gear), which could cause the wheels
to skid . Skid correction is called for at these times.
2-11
Page 37 of 105
Downloaded from www.Manualslib.com manuals search engine • Amount of fuel required for fill-up may not exactly correspond to gage.
• Needle may not move away from FULL until some time after fill-up.
• Needle may move during turns; stops and accelerations.
When the ignition switch is turned to the OFF position, the needle will not
necessarily return
all the way to the EMPTY mark.
Oil Pressure Light
When the ignition is turned to "Run," the "Oil" warning light appears until the
engine is started. Thereafter, the light should be off unless there is insufficient
oil pressure or engine idle speed is below normal. If the light should come on
at any time while driving (other than momentarily at idle speed or after a
sudden stop), stop immediately and investigate the cause of
low oil pressure.
This could possibly be caused by low oil level in the crankcase. Engine
operation with low oil pressure will 9ause damage to the engine.
Engine Coolant Temperature Light
This light is located in the instrument cluster and is designed to come on to warn the driver that the engine coolant has overheated and immediate
action is required to correct the condition. As a check that the bulb and its
circuit are working, the light will come on during engine starting; if it does not,
have it repaired
promptly. If the light comes on at any other time, see "Engine
Cooling System Overheating" in "In Case of Emergency," Section 3 of this manual.
CAUTION: It the Engine Coolant Temperature Light shows an overheat condition or you have other reason to suspect the engine may be overheating, continued operation of the engine EVEN FOR A SHORT TIME may result in a fire and the risk of personal injury and/or severe vehicle damage. Take immediate action as outlined under "Engine Cooling System Overheating" in "In Case of Emergency," Section 3.
Generator Indicator Light
The VOLT light is designed to come on when the ignition key is in the "RUN" position, but before the engine is started. After the engine starts, the light
should go out and remain out. If the light remains· on when engine is running,
have your authorized
dealer locate and correct the trouble as soon as possible.
Shift Indicator Light
The Shift Indicator Light is covered in the "Manual Transaxle" information in
this section.
"Check Engine" Light
Most gasoline engine vehicles sold in the Unijed States (and some vehicles
sold
in Canada) have the Computer Command Control system.
Vehicles with the Computer Command Control system include a "CHECK
ENGINE" light
on the instrument panel designed to indicate the need for
system service. It will come on during engine starting to let you know the bulb
is working. (The light will stay on a short time after the engine starts.)
2-21
Page 39 of 105
Downloaded from www.Manualslib.com manuals search engine '" ,
t:l
STANDARD INSTRUMENT CLUSTER
IJ
12
OPTIONAL INSTRUMENT CLUSTER
~~~~-:'----,~~:
l'l
1l
10
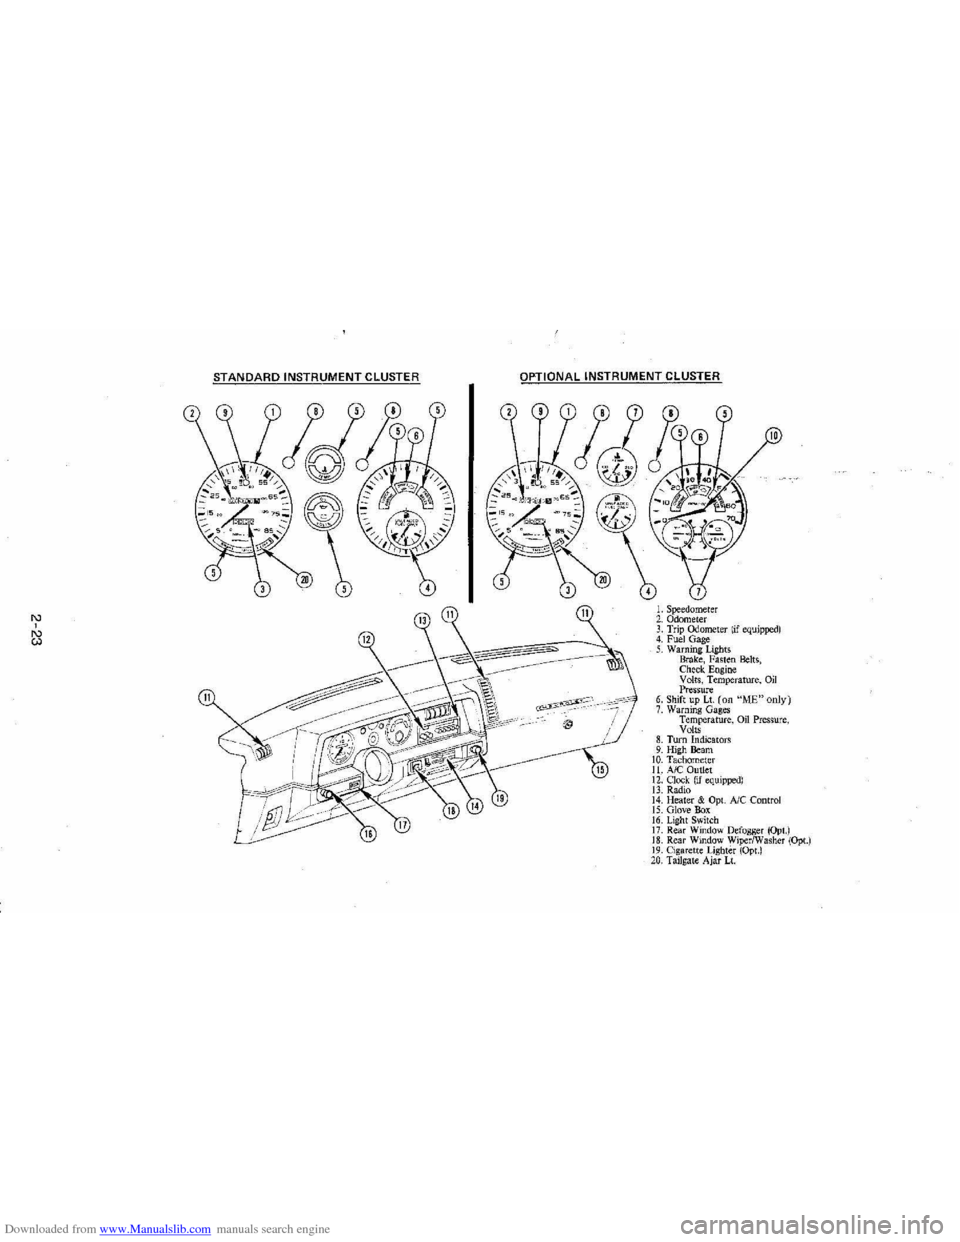
L Speedometer 2. Odometer 3. Trip ()jometer lif equipped) 4. Fuel Gage 5. Warning Lights Brake, Fasten Belts, Check. Engine Volts, Temperature, Oil Pressure 6. Shift up Lt. (on "ME"only) 7. Warning Gages Temperature, on Pressure, Volts 8. Turn Indicators 9. High Beam 10. Tachomet er 11. A/C Outlet 12. Clock. (if equipped) 13. Radio 14. Heater & Opt. Ale Control 15. Glove Box 16. Lig ht Switch 17. Rear Window Defogger (Opt.) 18. Rear Window WiperlWasher (Opt.) 19. Cigare tt e Lighter (Opt.) 20, Tailgat e Ajar Lt.
Page 40 of 105
Downloaded from www.Manualslib.com manuals search engine Engine Coolant Temperature Gage
This optional gage is located in the instrument cluster. If the gage shows that
an overheat condition exists-as indicated by pointer moving beyond the
center of the band immediate action by the driver is required. If an overheat
condition is shown, see "Engine
Cooling System Overheating" in "In Case of
Emergency,"
Section 3 of this manual. The coolant temperature indication will VaIY with air temperature and operating conditions. The ignition must be in
"Run" for accurate readings. Prolonged driving or idling in very hot weather
may cause the pointer to move beyond the center of the gage. Make a practice
of scanning this and other gages
while driving, especially in hot weather and!
or when the
vehicle is under load.
CAUTION: II the Engine Coolant Temperature Gage shows an overheat condition or you have other reason to suspect the engine may be overheating, continued operation of the engine EVEN FOR A SHORT TIME may result in a fire and the risk of personal injury and/or severe vehicle damage. Take immediate action as outlined under "Engine Cooling System Overheating" in "In Case of Emergency," Section 3.
Oil Pressure Gage
The oil pressure gage indicates the pressure at which oil is being delivered to
the vaIiOUS paIls of the engine requiring lubrication. Pressures registered by
the gage may
vBIY according to outside air temperatures or weight of oil being
used. Oil pressure of a cold engine being operated at a given speed will be
somewhat higher than when the engine is at normal operating temperature at
the
SaIne speed. Prolonged high speed operation on a hot day at the given
speed will
resuH in somewhatlower oil pressure readings. Readings of 205 to
275 kPa
(30 to 40 psi) may be considered normal during moderate road
speeds of 35 to 40 mph (55 to 60 km!h) with the engine at proper operating
temperature. Gage readings which are consistently high
or low under these conditions may indicate lubrication system and/ or engine malfunction.
Light Switch
The three· position light switch controls the headlights, taillights, paIking lights,
sidemaIker lights,
instrument lights and dome lights.
Instrument light intensity can be varied by turning knob clockwise or
counterclockwise. Full counterclockwise position turns on interior light.
The headlight circuit is protected by a circuit breaker in the
light switch. An overload on the breaker will cause the lights to "flicker" on and off. If this
condition
develops, have your headlight wiring checked immediately. The
headlight beaIn changer is located in the Turn Signal Lever; for operation see
Section 2 under heading "Turn Signal and Muiji-Function Lever."·
Headlight High Beam Indicator Light
The headlights of your vehicle have. high and low beams to provide you with
proper nighttime visibility for most driving conditions. The
"low" beams are
used during most city driving. The
"high" beams are especially useful when
driving on daIk roads since they provide long range illumination. The headlight
beam indicator light (located on the speedometer face) will be ON whenever
the high beams or "brights" are in use. The turn
signal lever controls the
headlight beaIns and is described in "Steering Column Controls."
2-24
Page 56 of 105
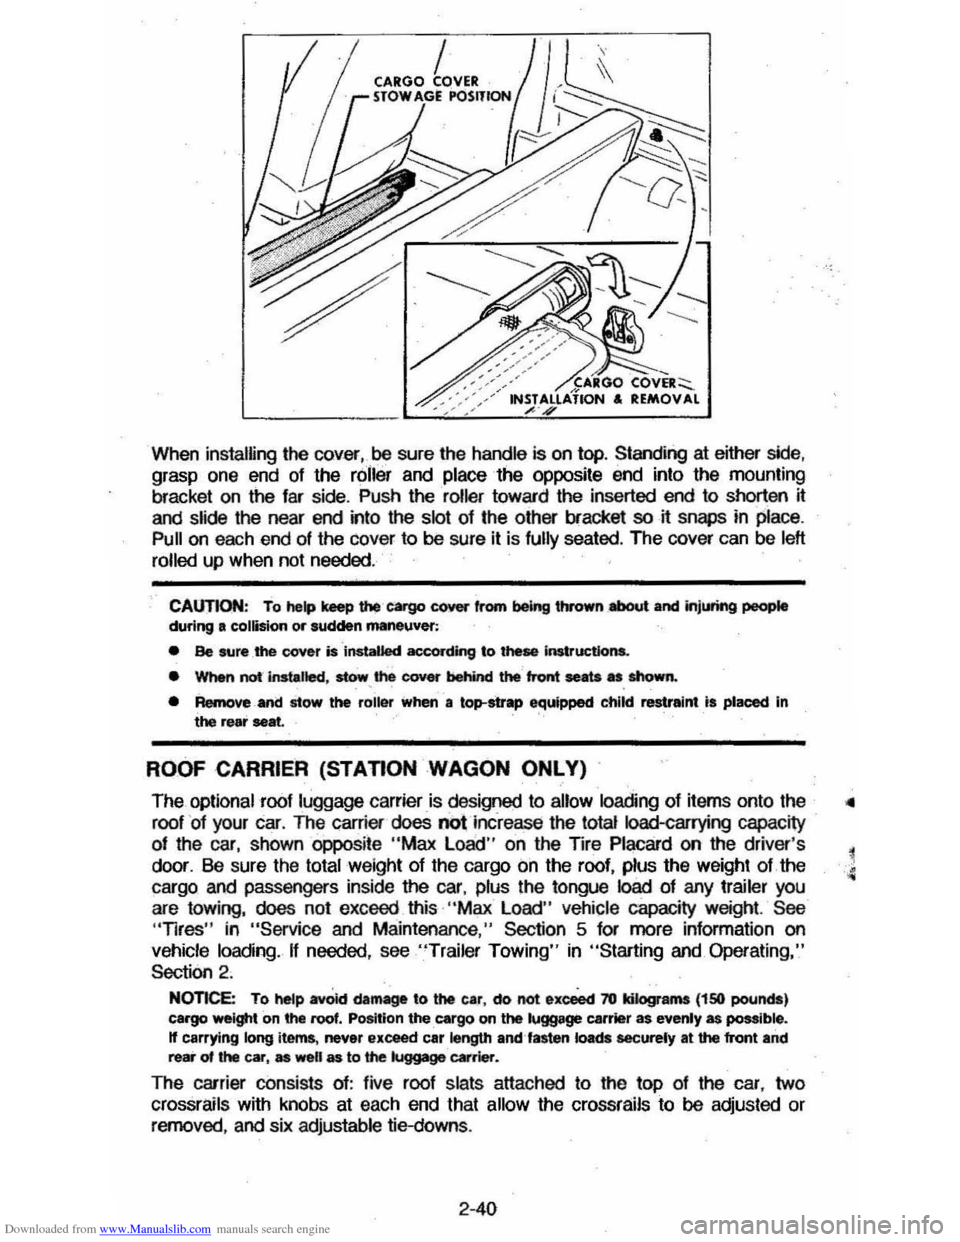
Downloaded from www.Manualslib.com manuals search engine When installing the cover,oo sure the handle is on top. Standing at either side, grasp one end of the roller and place the opposite end into the mounting
bracket on
the far side . Push the roller toward the inserted end to shorten it
and slide the near end into the slot of the other bracket so it snaps in place.
Pull on each end of the cover to 00 sure it is fully seated. The cover can be left
rolled
up when not needed .
CAUTION: To help keep u.., cargo cover from being thrown .,.a,oot and jnjlM'ing people during a collision or sudden maneuver:
• Be sure _the cover is installed according to these Instructions.
• WMn not-instalted, stow, the cover behind the front seats as shown.
• Remove and stow the roiler when a top-strap equipped child restraint is placed In the rear seat.
ROOF CARRIER (STAnON WAGON ONLY)
The optional roof luggage carrier is designed to allow loading of items onto the
roof
' of your car. The carrier does not increase the total Ioad-carrying capacity
of the car, shown oppoSite "Max Load " on the TIre Placard on the driver's
door. Be sure the
total weight of the cargo on the roof, plus the weight of the
cargo and passengers inside
the car, plus the tongue load of any trailer you
are towing, does not exceed this· "Max Load" vehicle capacity weight. See "Tires" in "Service and Maintenance," Section 5 for more information on
vehicle loading. If needed, see "Trailer Towing" in "Starting and. Operating,"
Section 2 .
NOnce: To hetp avOid damage to the car, do not exceect 70 kilograms (150 pounds) cargo weight on the roof. Position the cargo on the luggage carrier as evenly as possible. If carrying long items , never exceed car length emUasten loads eacurely at the front and rear of the car, as well as to the luggage ~rier.
The carrier consists of: five roof slats attached to the top of the car, two
crossrails with knobs at each end that allow the crossrails to 00 adjusted or removed, and six adjustable tie-downs.
2-40