low oil pressure CHEVROLET CAVALIER 1984 1.G Owners Manual
[x] Cancel search | Manufacturer: CHEVROLET, Model Year: 1984, Model line: CAVALIER, Model: CHEVROLET CAVALIER 1984 1.GPages: 105, PDF Size: 24.23 MB
Page 18 of 105
Downloaded from www.Manualslib.com manuals search engine Driving with the trunk lid, hatchback or liftgate on station wagon models open is not recommended. Under some conditions, exhaust gases may be drawn
into the vehicle. If the trunk lid, hatchback or liftback must remain open for
some reason while moving, or if electrical wiring or other cable connections to a trailer must pass through the seal between the trunk lid, hatchback or liftback
and the body, follow these precautions:
• Close all windows.
• Adjust the heating or cooling system to force outside air into the vehicle as
described abcve, but set the fan to high speed.
• On vehicles with outside air vents in or under the instrument panel, open the vents fully.
NEW VEHICLE "BREAK-IN" PERIOD
You can drive your new vehicle from its very first mile/kilometer without
following a formal "break-in" schedule. However, there are things you can do during the first few hundred miles/kilometers of driving that will add to the
future performance and economy of your vehicle.
We recommend you limit your speed during the first 500 miles (800 kilometers)
to a maximum of 55 mph (90 km/h); but do not drive for long periods at any
one constant speed, either fast or slow. During this time, avoid full throttle
starts and, if possible, avoid hard stops especially during the first 200 miles (320 kilometers) of driving.
Always drive at moderate speed until the engine has completely warmed up.
I! you plan to use your new vehicle for trailer towing, see the following.
TRAILER TOWING
This car is designed and intended to be used mainly to carry people. Towing a
trailer
will affect handling, durability and economy. Your safety and satisfaction
depend upon proper use of correct equipment. Also, you should avoid
overloads and other abusive use.
The maximum loaded trailer weight you can pull with your vehicle depends on
your intended use
and what special equipment has been installed on it.
Information on trailer towing ability, special equipment required, and optional
equipment available should be obtained from your dealer. Ask for the trailering brochure. Or, write: Consumer Relations Department, Chevrolet Motor
Division, Warren, Michigan 48090.
(In Canada, write to General Motors of
Canada Limited, Customer Services Department, Oshawa, Ontario L lJ 5Z6.)
Tires
When towing trailers, be sure your tires are properly inflated to the inflation pressure shown on the Tire Placard on the driver's door.
The allowable passenger and cargo load for this vehicle, also shown on the
Tire
Placard, is reduced by the trailer tongue weight whenever the trailer is
attached to the vehicle. See "Service and Maintenance," Section 5 for more tire information.
Maintenance
More frequent service is required when using your vehicle to pull a trailer. See
the Maintenance Schedule folder for Automatic Transaxle Fluid and Engine Oil change requirements for trailering.
2-2
Page 37 of 105
Downloaded from www.Manualslib.com manuals search engine • Amount of fuel required for fill-up may not exactly correspond to gage.
• Needle may not move away from FULL until some time after fill-up.
• Needle may move during turns; stops and accelerations.
When the ignition switch is turned to the OFF position, the needle will not
necessarily return
all the way to the EMPTY mark.
Oil Pressure Light
When the ignition is turned to "Run," the "Oil" warning light appears until the
engine is started. Thereafter, the light should be off unless there is insufficient
oil pressure or engine idle speed is below normal. If the light should come on
at any time while driving (other than momentarily at idle speed or after a
sudden stop), stop immediately and investigate the cause of
low oil pressure.
This could possibly be caused by low oil level in the crankcase. Engine
operation with low oil pressure will 9ause damage to the engine.
Engine Coolant Temperature Light
This light is located in the instrument cluster and is designed to come on to warn the driver that the engine coolant has overheated and immediate
action is required to correct the condition. As a check that the bulb and its
circuit are working, the light will come on during engine starting; if it does not,
have it repaired
promptly. If the light comes on at any other time, see "Engine
Cooling System Overheating" in "In Case of Emergency," Section 3 of this manual.
CAUTION: It the Engine Coolant Temperature Light shows an overheat condition or you have other reason to suspect the engine may be overheating, continued operation of the engine EVEN FOR A SHORT TIME may result in a fire and the risk of personal injury and/or severe vehicle damage. Take immediate action as outlined under "Engine Cooling System Overheating" in "In Case of Emergency," Section 3.
Generator Indicator Light
The VOLT light is designed to come on when the ignition key is in the "RUN" position, but before the engine is started. After the engine starts, the light
should go out and remain out. If the light remains· on when engine is running,
have your authorized
dealer locate and correct the trouble as soon as possible.
Shift Indicator Light
The Shift Indicator Light is covered in the "Manual Transaxle" information in
this section.
"Check Engine" Light
Most gasoline engine vehicles sold in the Unijed States (and some vehicles
sold
in Canada) have the Computer Command Control system.
Vehicles with the Computer Command Control system include a "CHECK
ENGINE" light
on the instrument panel designed to indicate the need for
system service. It will come on during engine starting to let you know the bulb
is working. (The light will stay on a short time after the engine starts.)
2-21
Page 40 of 105
Downloaded from www.Manualslib.com manuals search engine Engine Coolant Temperature Gage
This optional gage is located in the instrument cluster. If the gage shows that
an overheat condition exists-as indicated by pointer moving beyond the
center of the band immediate action by the driver is required. If an overheat
condition is shown, see "Engine
Cooling System Overheating" in "In Case of
Emergency,"
Section 3 of this manual. The coolant temperature indication will VaIY with air temperature and operating conditions. The ignition must be in
"Run" for accurate readings. Prolonged driving or idling in very hot weather
may cause the pointer to move beyond the center of the gage. Make a practice
of scanning this and other gages
while driving, especially in hot weather and!
or when the
vehicle is under load.
CAUTION: II the Engine Coolant Temperature Gage shows an overheat condition or you have other reason to suspect the engine may be overheating, continued operation of the engine EVEN FOR A SHORT TIME may result in a fire and the risk of personal injury and/or severe vehicle damage. Take immediate action as outlined under "Engine Cooling System Overheating" in "In Case of Emergency," Section 3.
Oil Pressure Gage
The oil pressure gage indicates the pressure at which oil is being delivered to
the vaIiOUS paIls of the engine requiring lubrication. Pressures registered by
the gage may
vBIY according to outside air temperatures or weight of oil being
used. Oil pressure of a cold engine being operated at a given speed will be
somewhat higher than when the engine is at normal operating temperature at
the
SaIne speed. Prolonged high speed operation on a hot day at the given
speed will
resuH in somewhatlower oil pressure readings. Readings of 205 to
275 kPa
(30 to 40 psi) may be considered normal during moderate road
speeds of 35 to 40 mph (55 to 60 km!h) with the engine at proper operating
temperature. Gage readings which are consistently high
or low under these conditions may indicate lubrication system and/ or engine malfunction.
Light Switch
The three· position light switch controls the headlights, taillights, paIking lights,
sidemaIker lights,
instrument lights and dome lights.
Instrument light intensity can be varied by turning knob clockwise or
counterclockwise. Full counterclockwise position turns on interior light.
The headlight circuit is protected by a circuit breaker in the
light switch. An overload on the breaker will cause the lights to "flicker" on and off. If this
condition
develops, have your headlight wiring checked immediately. The
headlight beaIn changer is located in the Turn Signal Lever; for operation see
Section 2 under heading "Turn Signal and Muiji-Function Lever."·
Headlight High Beam Indicator Light
The headlights of your vehicle have. high and low beams to provide you with
proper nighttime visibility for most driving conditions. The
"low" beams are
used during most city driving. The
"high" beams are especially useful when
driving on daIk roads since they provide long range illumination. The headlight
beam indicator light (located on the speedometer face) will be ON whenever
the high beams or "brights" are in use. The turn
signal lever controls the
headlight beaIns and is described in "Steering Column Controls."
2-24
Page 61 of 105
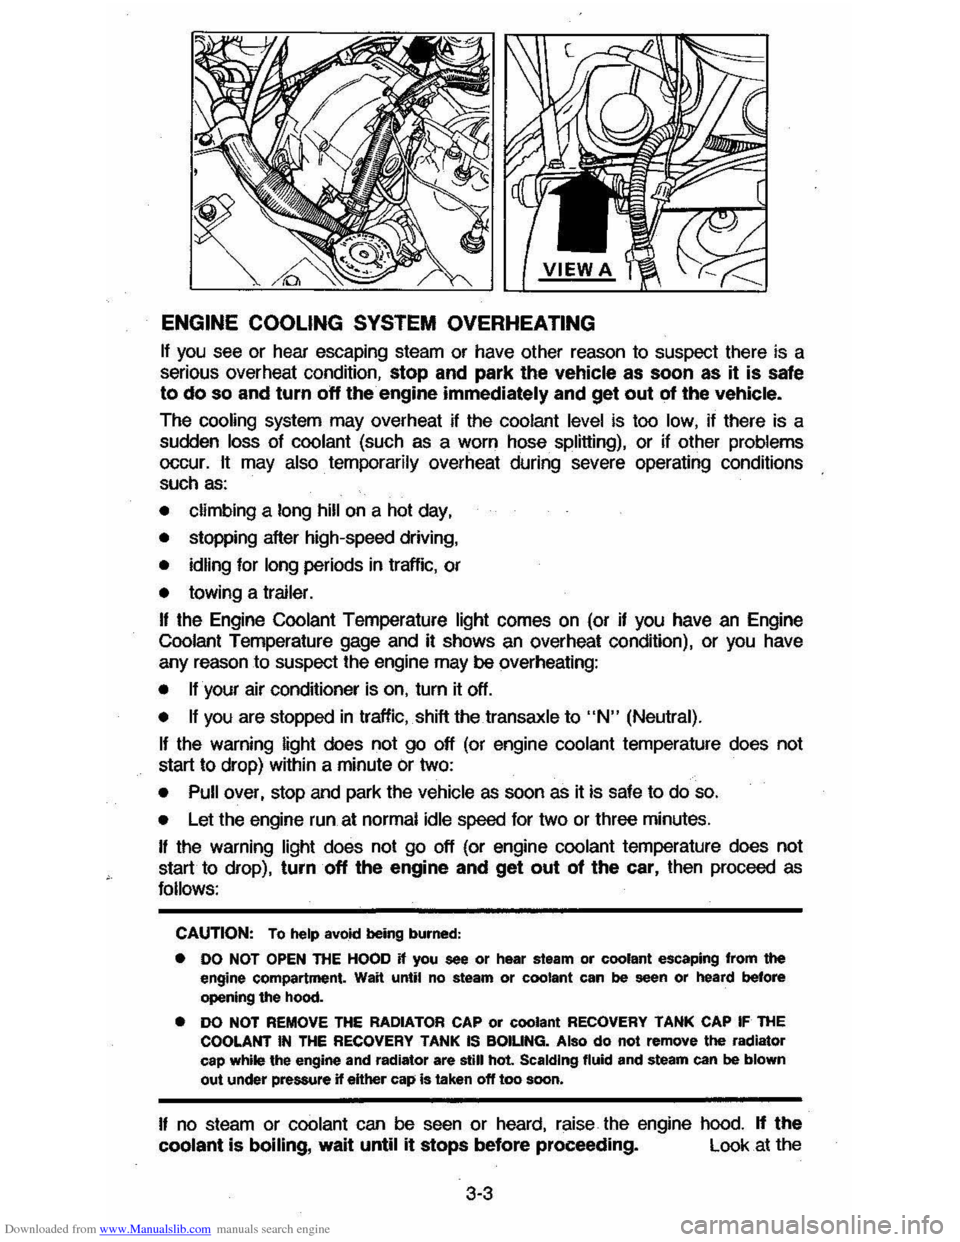
Downloaded from www.Manualslib.com manuals search engine ENGINE COOLING SYSTEM OVERHEATING
If you see or hear escaping steam or have other reason to suspect there is a
serious overheat condition, stop and park the vehicle as soon as it is safe
to do so and turn off the engine immediately and get out of the vehicle.
The cooling system may overheat if the coolant level is too low, if there is a
sudden
loss of coolant (such as a worn hose splitting), or if other problems occur. It may also temporarily overheat during severe operating conditions
such as:
• climbing a long hill on a hot day,
• stopping after high-speed driving,
• idling for long periods in trallic, or
• towing a trailer.
I! the Engine Coolant Temperature light comes on (or if you have an Engine
Coolant Temperature gage and it shows an overheat condition), or you have
any reason to suspect the engine may be overheating:
• tfyour air conditioner is on, turn it off.
• If you are stopped in traffic, shift the transaxle to "N" (Neutral).
If the warning light does not go off (or engine coolant temperature does not
start to drop) within a minute
Or two:
• Pull over, stop and park the vehicle as soon as it is safe to do so.
• Let the engine run at normal idle speed for two or three minutes.
I! the warning light does not go off (or engine coolant temperature does not
start to drop),
turn off the engine and get out of the car, then proceed as
follows:
CAUTION: To help avokt being burned:
• DO NOT OPEN ntE HOOD if you see or hear steam or coolant escaping from the engine compartment. Wait until no steam or coolant can be seen or heard before opening the hood.
• DO NOT REMOVE THE RADIATOR CAP or coolant RECOVERY TANK CAP IF THE COOLANT IN THE RECOVERY TANK IS BOIUNG. Also do not remove the radiator
cap while the engine and radiator are still hot Scalding fluid and steam can be blown out under pressure if eHher cap is taken off too soon.
I! no steam or coolant can be seen or heard, raise the engine hood. If the
coolant is boiling, wait until it stops before proceeding. Look at the
3-3
Page 64 of 105
Downloaded from www.Manualslib.com manuals search engine Stowage of Tire and Jack
CAUTION: Always securely reatow the, spare tire assembly (or flat tir.), all jacking
equipment, and the cover , using the means provided . When driving the car with the Compact Spare instel~. stow the ",Met COYer in the trunk. In station wagons and hatchbecks, when the rear seat Is folded down, stow the wheel cover nat on the rear floor behind the right front seat. When the r •• r' seat is up, stow the wheel cover in the rear area . This will help keep SUch1tung. trom being thrown about and injuring people during II colhion or • sudden maneuver ..
WHEEL NUT TORQUE
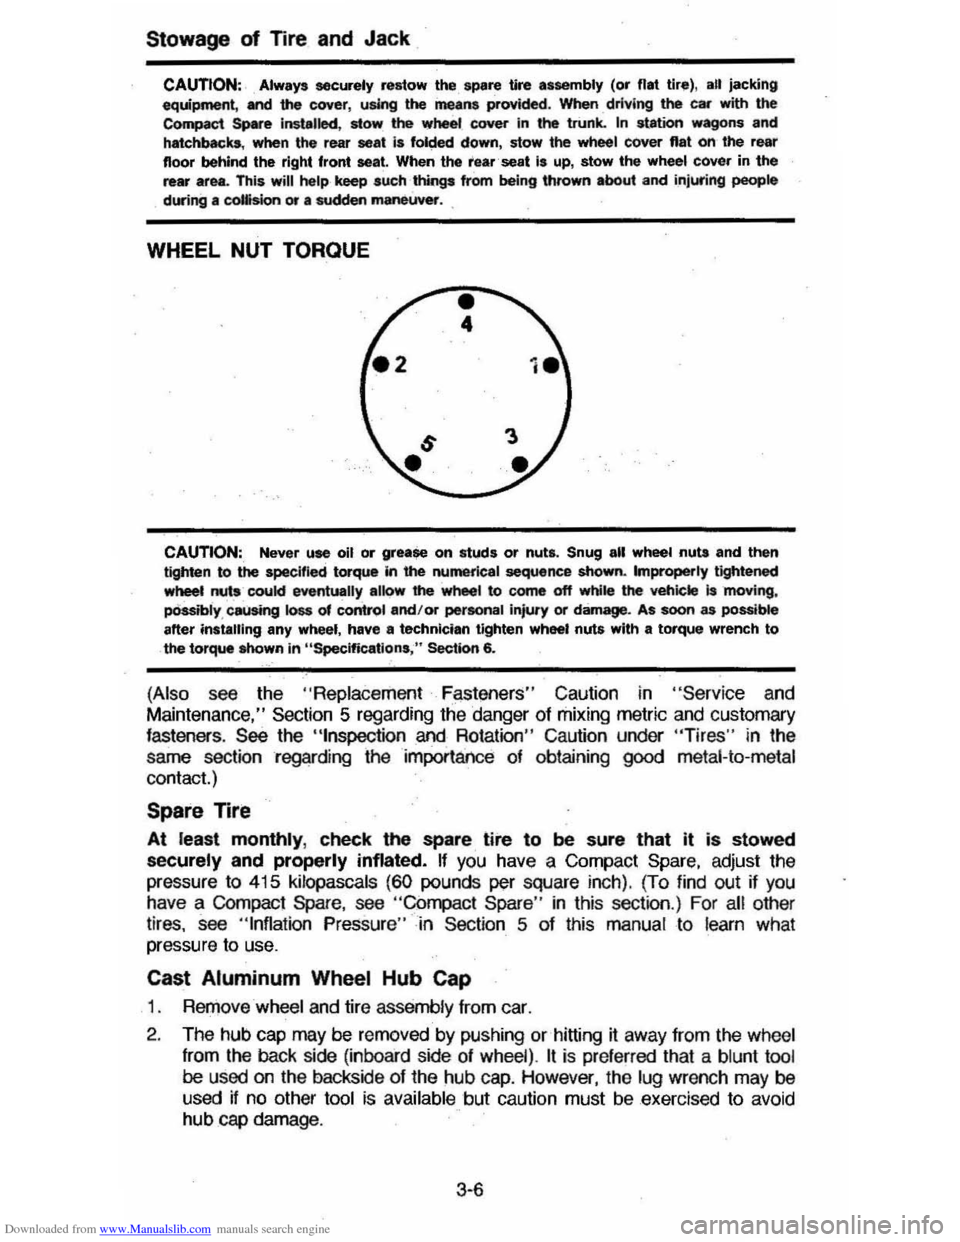
CAUTION:, Never use oil or grease on studs or nuts. Snug all wheel nuta and then tighten to the specified torque In the numerical sequence shown. Improperly tightened wheet nuts coukl eventually alk>w' the wheel to come off while the veh;ckt is 'moving, pOssibly , causing loss of control and/or pertonal injury or damage. As soon as possible after instilling any wheel, have II technician tighten wheel nuts with a torque wrench to the torque Mlown in "Specifications ," Section 6.
(Also see the "Replace ment F~st!3ners" Caution in "Servic e and
Maintenance," Section 5 regarding the danger of mixing metric and customary fasteners . See the "tnspection and Rotation" Caution under "Tires" in the
same section regarding the importance of obtaining
good metal-to-metal
contact.)
Spare Tire
At least monthly, check the spare tire to be sure that it is stowed
securely and properly inflated. If you have a Compact Spare, adjust the
pressure
to 415 kilopascals (60 pounds per square inch). (To find out if you have a COmpact Spare, see "Compact Spare " in this section .) For all other
tires, see "Inflation Pressure"-in Section 5 of this manual to learn what
pressure to use.
Cast Aluminum Wheel Hub Cap
1 . RerJ)ove wheel and tire assemb ly from car.
2 . The hub
cap may be removed by pushing or hitting it away from the wheel
from
the back side (inboard side of wheel) . It is pre ferred that a blunt tool be used on the backside of the hub cap. However, the lug wrench may be
used if no other tool is available but caution must be exercised to avoid hub cap damage .
3·6
Page 82 of 105
Downloaded from www.Manualslib.com manuals search engine If you have to add coolant more than four times a year (either to the recovery
tank or to the radiator), or if
coolant is dirty or discolored, see your dealer for a cooling system check.
NOTICE: rr you use the proper quality antifreeze, there is no need to add extra inhibitors or additives which claim to improve the system. They may be harmful to the proper operation of the system.
Adding Coolant
CAUTION: To help avoid the danger of being burned, do not remove the radiator cap while the engine and radiator are stili hot. Scalding fluid and steam can be blown out under pressure if the cap is taken off too soon.
1. When the engine is cool, remove the radiator cap.
• Turn the cap slowly to the left until it reaches a "stop." Do not press
down
while turning the cap.
• Wait until any remaining pressure (indicated by a hissing sound) is relieved, then press down on the cap and continue turning it to the left.
2. Add enough water and ethylene glycol anmreeze (meeting GM Specification 1825-M) to provide the required cooling, freezing and
corrosion protection. Use a solution that is at least 50 percent antifreeze
but no more than 70 percent antHreeze. Fill the radiator to the base of the
filler neck and fill the coolahUocave,y lank to at or above the "Full Hot" mark. Put the recovery tank cap back on.
3. Run the engine, with the radiator cap removed, until the upper radiator
hose is
hot. With the engine idling, add coolant to the radiator until it
reaches
the bottom of the filler neck. Install the radiator cap, making sure
the arrows on the cap line up with the overflow tube on the radiator filler
neck.
II is Ihe owner's responsibility 10:
• Maintain cooling system freeze protection at -37°G (-34°F) to ensUre
protection against corrosion and loss of coolant from boiling. (A SO/SO mixture of water and ethylene glycol antifreeze will provide freeze
protection to -37°G or -34°F.) You should do this even if you don't
expect freezing temperatures. Periodic
replacement of coolant is needed to replace the anti-corrosion additives that wear out with use. Coolant that
has become dark in color shows that it needs to be changed for this reason.
• Add ethylene glycol base antifreeze that meets GM SpecHication 1825-M
when antifreeze has to be added because of coolant loss or for more
protection against freezing at temperatures less than stated.
NOTICE: Do not use methanol-base antifreeze, or alcohol, . or plain water alone, in your vehicle at anytime. They will boil ata lower point than that at which the "TEMP" light (or temperature gage) will warn of overheating, and they do not provide proper protection against corrosion.
Thermostat
The engine coolant temperature is controlled by a thermostat. It stops coolant
flow through the radiator until a preset temperature is reached. This thermostat
is installed in the engine coolant oullet on the engine block. The same
thermostat is used in both winter and summer. When a replacement is needed, AG-Oelco paris are recommended.
5-9
Page 83 of 105
Downloaded from www.Manualslib.com manuals search engine Radiator Pressure Cap
The radiator cap, a 105 kPa (15 psi) pressure type, must be installed tightly, otherwise coolant may be lost and damage to engine may resuK from
overheating . Radiator pressure cap
should be checked periodically for proper
operation .
If replacement is required, an AC cap is recommencled.
ACCELERATOR LINKAGE
Lubricate all pivot points with .engine oil at the interval shown in the
Maintenance
Schedule. Do not lubricate the accelerator cable.
AIR CLEANER ELEMENT
When replacement of air cleaner fmer element is necessary, an AC air Imer
elemenl
is recornmencled .
See your Maintenance Schedule for change intervals . Operation of vehicle in
dusty areas will necessitate more frequent replacement. Your dealer can be of
assistance
in determining the proper replacement frequency for the conditions
under which you operate your
vehicle.
CAUTION: The air cleaner a* functions ... name arrestor in the event of engine backfire . The -air cleaner ehould be lnstaIIed at an times unit .. III removal is neceaary for repair or maintenance. To help reduce the-risk of pereonal Injury and lor property damage , be sure that no one 18 ne.-the engine comJ*1ment before starting the engine wiU'l the air cleaner removed. If engine backfire occurs with the air cleaner remowd, thwe could be-a burst of flame and posaibly other fnln the engine compartment.
HOOD LATCHES AND HOOD HINGE
SeetHe Maintenance Schedule folder to find out how to lubricate hood.latch ·
and hood hinge assembly .
BRAKE MASTER CYLINDER
Check masler cylinder fluid· level in the reservoir at the interval shown in the Maintenance Schedule . If the fluid is low in the reservoir, it should be filled to
the maximum
level line with Delco Supreme No. 11 or OOT-3 fluids.
POWER STEERING SYSTEM
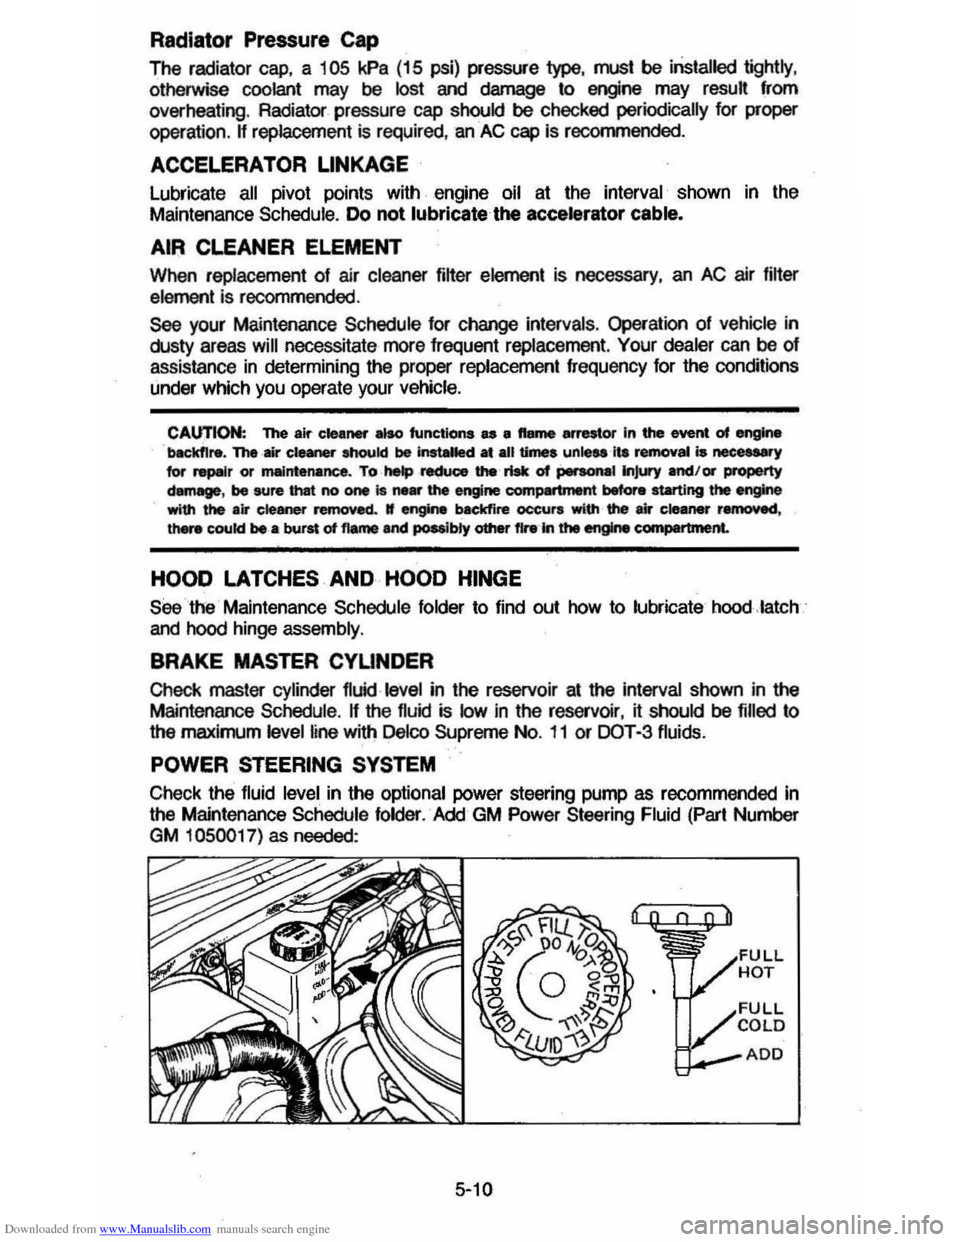
Check the fluid level in the optional power steering pump as recommended in
the Maintenance Schedule folder. Add GM Power Steering Fluid (Part Number
GM 1050017) as needed:
5-10
Page 99 of 105
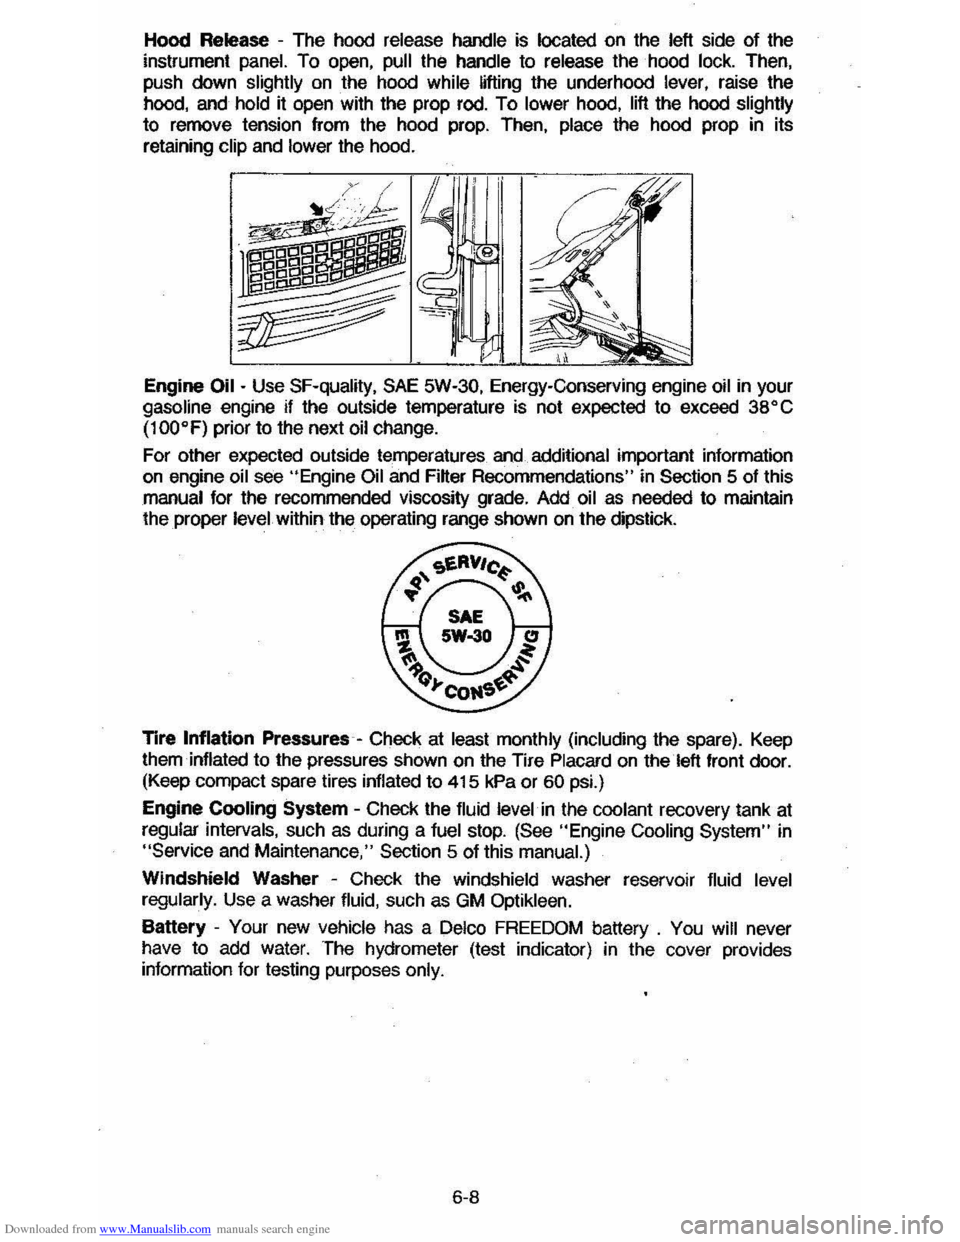
Downloaded from www.Manualslib.com manuals search engine Hood Release -The hood release handle is located on the left side of the
instrument panel. To open, pull the handle to release the hood lock. Then,
push down
slightly on the hood while lifting the underhood lever, raise the
hood, and hold it open with the prop rod. To lower hood, lift the hood slightly
to remove tension from the hood prop. Then, place the hood prop in its
retaining
clip and lower the hood.
Engine
Oil - Use SF-quality, SAE 5W-30, Energy-Conserving engine oil in your gasoline engine if the outside temperature is not expected to exceed 38" C
(100"F)
prior to the next oil change.
For other expected outside temperatures
and additional important information on engine oil see "Engine Oil and Filter Recommendations" in Section 5 of this
manual for the recommended viscosity grade. Add oil as needed to maintain
the proper level within the operating range shown on the dipstick.
Tire
Inflation Pressures -Check at least monthly (including the spare). Keep
them inflated to the pressures shown on the Tire Placard on the left front door. (Keep compact spare tires inflated to 415 kPa or 60 psi.)
Engine
Cooling System -Check the fluid level in the coolant recovery tank at
regular intervals, such as during a fuel stop. (See "Engine Cooling System" in "Service and Maintenance," Section 5 of this manual.)
Windshield Washer -Check the windshield washer reservoir fluid level
regularly. Use a washer fluid, such as GM Optikleen.
Battery -Your new vehicle has a Delco FREEDOM battery . You will never
have to add water. The hydrometer (test indicator) in the cover provides information for testing purposes only.
6-8
Page 101 of 105
Downloaded from www.Manualslib.com manuals search engine Exha.Ist SysttIm ChecltS .. 2·1 Parked Witt! Engine Rt.nning .. 2 ·' PulIng A Tr.JiIer '2·2 Flanmable 0ea1ing Sotvents . " . " 4 ·1 -. . Haz«d W.ning .. ... ... ......... .. ........ ... . . .. 3-1 Turn Signal .. 2 ·8 FloOded Engine, Starting.. .." 2'11 Floor Controls ... ................................. " 2~ 1 8 Fluid Capacities .. Drive Axle ..... . Power Steoring .. . Radiatof ..... Transaxle .\uklma tic ..
e ·" , .. . : ..... 5·1 0 .. , 5· 9; 5 ·1 0 5,6
Trensaxle MInJaI ............. .............. 5 ·6 wn:tshIekJ Washer .... . 2·9 F oreign Countries. Operation In.. 2 ·6 Freeing car From Mud and Sand .......... 3 ·8 Fuet . Requirements.. 5·1 Fuel StatiOn Information.. 6 ·7 Flimet . Engine EIChaust.. .. ..... ....... 2·1 ,,'" Chart ..... . ................... 6-5 location ..... -.""","" .. ................. 6·4 . ..... 2 ·22 . 2·24
"""""" -... .. .................................. 6-1 Do No! Usc For Cleaning F~1er cap location .. Fumes ................ ........ .. Gage .. Recommendations .... GIov ... .QQx" .. , ........ ,
.............. , 6-'
GUl¥d AgaInst Theft ................. .......... ..
2·' 2·'" 2 ·5
2 ·23
,.,
H atc hback Coupe .................... ........... .. '2-3 5 3·' Hazwd WarrWng Flasher ..
-Buzz ... FlicKering (Circuit BreMer) Hi!11 Beern Difmler SWitch ug,t S .whch., ....... Hei1Ier Operatioli .. Hitches. Trailer .. Hood
........ 6-4. 6-5 .... 2-9. 2·24
Latch Maintenance.. 5·10 RMese... .. ............................. ......... 6-7 Horn .......................... .............. 2,'8 How To ~ YOOl Gas Mileage TipS ...................................... .. ,' 2-8 IdI!InOOCaIiOn Num:lers Eng;no ........ 6-' VehiCle ......... ... . ....-Indic ator LIgtlI, Upshift ..
.. ............. 6 ·5 1 -2 ,2 ·7 2 -\5 Inflation Pressure, Tires.. 5 -1 3 Inlets. Ventilation System ............ 2-25 . 2·28 Inside RearvloW Mirror .. Instrument Panel .. J"" Caution 3·. Operation.. 3-5
S torage ................................. 3-5, 3-6 Jump Strilg With Booster Bat1ery. 3-1. 3-2 Keys.. 1-1 latches Door.. 1 ·3 Hood.. 5- 10,6·7 Light s.. 6·3
7-2
-.... .. .... ................. ........... 6-3 Brake Wamir'lIiJ.. 2-22 8rigtIt 8Mm IncicaIor .......................... 2-24 Bright Beam Switch ............................... 2-9 Bub Chart 6-3 Courtesy... 6 -3 Engine Tempe!'8ture Indicator.. 2 -21 Generator IndicalOf.. 2-21 Hazard Flasher" .................................. 3-1 Hsadlamp Circu it Breaker.. 6-5 H~.. 6-3 HeadIamp Warning Buzzer.. 2 -2 5 Oil Pr9S5Ufe IndicalOr... 2·21 SidemaIkcr .n................ . ................ 6 ·3 SWitch .. Tail SfId Brake .... Turn Slg\aJ Indicator .. Upshift Indicator LIglt .. Looks Door.. Ignition ..
. ....... .-... 2 ·2 4 . 6·3 2 -8 . 6-3 2-15
'·3 2·' Power Door:... '·3 Steemg Column .. . 2-7 Luggage Carrier.. 2·40. 2,4 1 luggaQe CompartmenI , Orimg wtile Open.. . ...... ........ .. . 2 ,1 Manual T ransaJlle Shift PoinIs .. ...................... ... .. 2·14 2 -1 4 Upshift Irdcator light ........... ... ............ 2-1 5 Mirrors Convex .. Rear View .. Mountainous Torroln Driving Down Grade s .. New car Break-In ..
1-4, 1-5
2-11 2 ·2 Odometer 2-20 Oil Pr9SfUe Gage.. . ........................ 2·24
Oil Pr88SUfe Ugr'II ................. " .......... ... .. 2 ·21 Operation in Foreign GoU'11ries ........... ~" 2--6 orher' c:or.oI!I and Featl.Ke! .. ..... ...... .. 2·35 Overheatad Engine Gage.. 2-24 Indicator light ....... ........................... 2-21 What To Do ....................................... 3-3 Parking Brake ... . . .. .. ... .. .. 2-19 , 2-22 lights.. . ......... .... ........... 6-3 Precautions .. .. .... ............. . "-Brakes ....................... ..... ... ... ... ... ........ 2 '1 8 Door locks.. ' ·3 ....... Steering .. Windows .................. . Pressure, Tire tllflatio'n .. Radiator Coolant .. Coolant Level Inspection .. Overheating ... Pressu-e Cac:I ... ..-
,. , 2 -15 ,..
.. .. 5-13
5·' 5· '
3·3 5·10
NoA ............ ................... ........ ... ... ........ . 2-30 AM/FM
AM /FM Stereo C assette .. Anlerna .....
ContrOls-A I.
Mobile Raol o System s ..
2·30 2-32, 2-33 2 -3 5 2·29 . 2-35