radiator CHEVROLET CAVALIER 1984 1.G Owners Manual
[x] Cancel search | Manufacturer: CHEVROLET, Model Year: 1984, Model line: CAVALIER, Model: CHEVROLET CAVALIER 1984 1.GPages: 105, PDF Size: 24.23 MB
Page 26 of 105
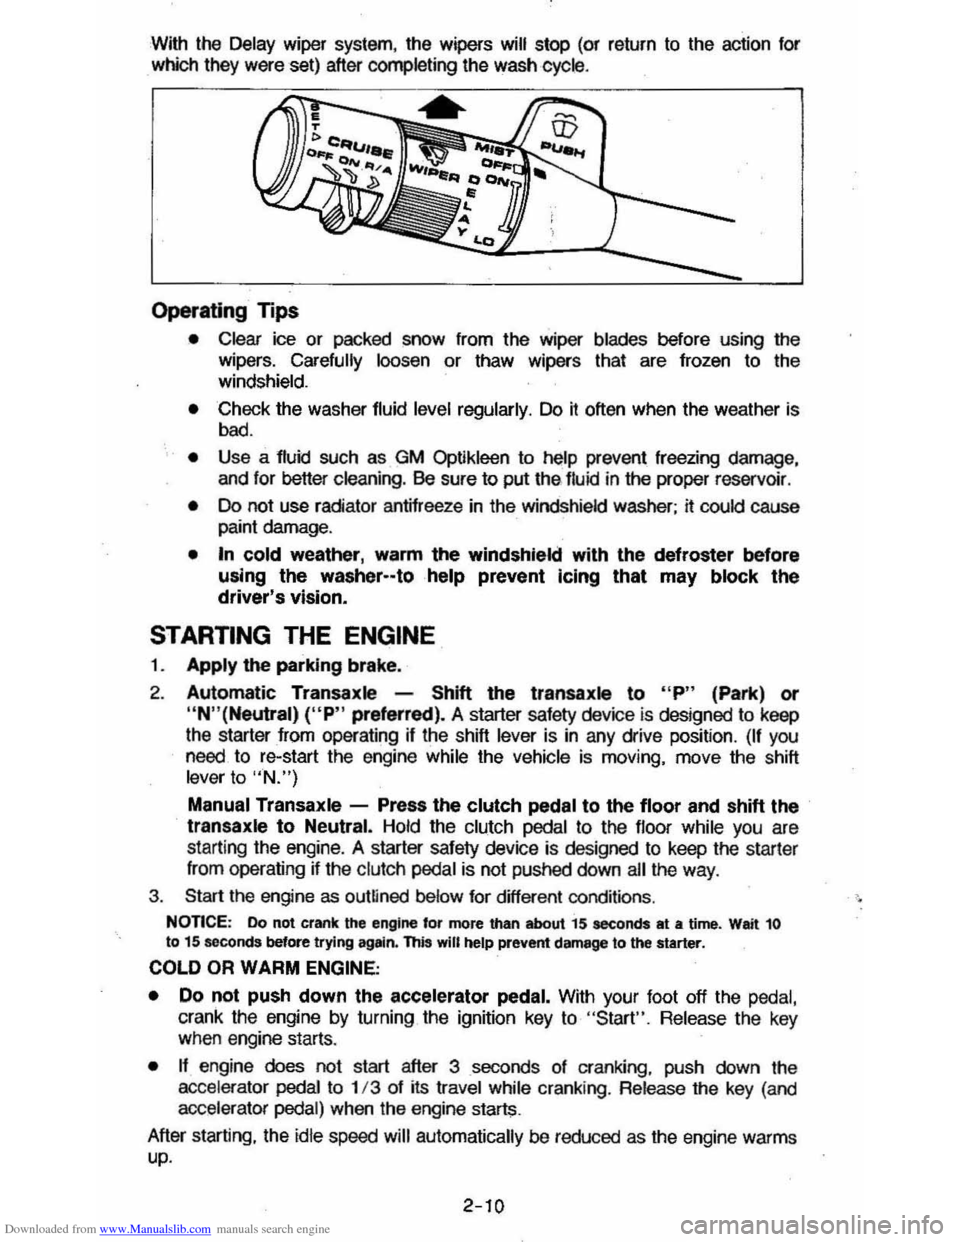
Downloaded from www.Manualslib.com manuals search engine With the Delay wiper system, the wipers will stop (or return to the action for
which they were set) after completing the wash cycle .
Operating Tips
• Clear ice or packed snow from the wiper blades before using the
wipers. Carefully loosen or thaw wipers that are frozen to the
windshield.
• Check the washer fluid level regularly. Do it often when the weather is
bad.
• Use a fluid such as GM Optikleen to help prevent freezing damage,
and lor better cleaning. Be sure to put thE> lIuid in the proper reservoir .
• Do not use radiator antifreeze in the windshield washer; it could cause paint damage.
• In cold weather, warm the windshield with the defroster before
using the washer--tohelp prevent Icing that may block the driver's vision.
STARTING THE ENGINE
1. Apply the parking brake.
2. Automatic Transaxle -Shift the transaxls to "P" (Park) or
"N"(Neutral) ("P" preferred). A starter safety device is designed to keep
the starter
from operating if the shift lever is in any drive position. (If you need. to re-start the engine while the vehicle is moving. move the shift lever to "N.")
Manual Transaxle -Press the clutch pedal to the floor and shift the transaxle to Neutral. Hold the clutch pedal to the lIoor while you are
starting the engine. A starter safety device is designed to keep the starler
Irom operating ~ the clutch pedal is not pushed down ail the way .
3. Start the engine as outlined below for different conditions .
NonCE: Do not crank the engine for more than about 15 seconds at a time. Wait 10 to 15 seconds before trying agltin. this will help prevent damage to the starter.
COLD OR WARM ENGINE;
•
Do not push down the accelerator pedal. With your foot off the pedal,
crank the engine by turning the ignition key to "Start". Release the key when engine starts.
• n engine does not start after 3 seconds 01 cranking. push down the
accelerator pedai to 1/3 of its travel while cranking . Release the key (and
accelerator pedal) when the engine starts.
After starting. the
idle speed will automatically be reduced as the engine warms up.
2-10
Page 61 of 105
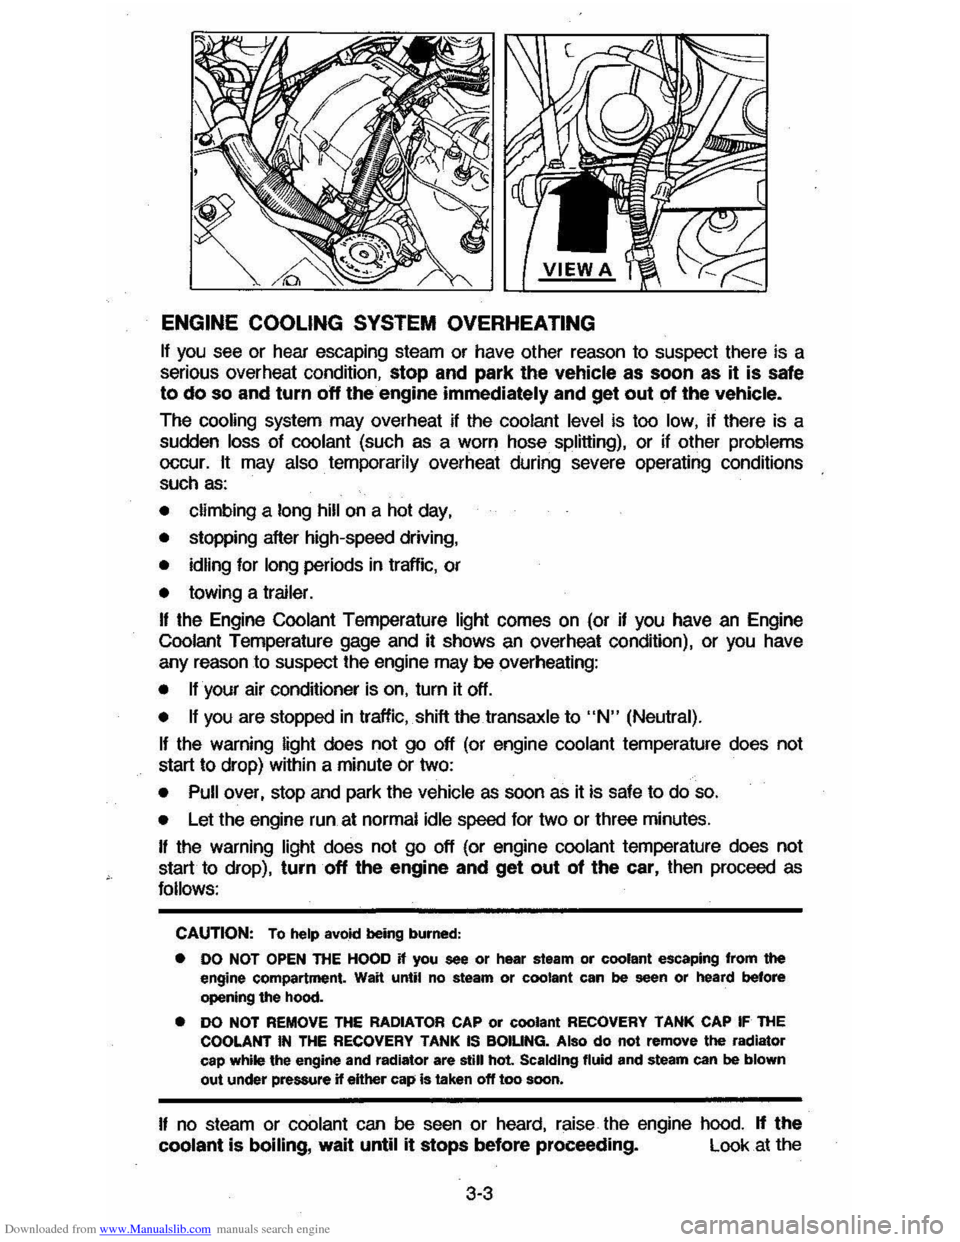
Downloaded from www.Manualslib.com manuals search engine ENGINE COOLING SYSTEM OVERHEATING
If you see or hear escaping steam or have other reason to suspect there is a
serious overheat condition, stop and park the vehicle as soon as it is safe
to do so and turn off the engine immediately and get out of the vehicle.
The cooling system may overheat if the coolant level is too low, if there is a
sudden
loss of coolant (such as a worn hose splitting), or if other problems occur. It may also temporarily overheat during severe operating conditions
such as:
• climbing a long hill on a hot day,
• stopping after high-speed driving,
• idling for long periods in trallic, or
• towing a trailer.
I! the Engine Coolant Temperature light comes on (or if you have an Engine
Coolant Temperature gage and it shows an overheat condition), or you have
any reason to suspect the engine may be overheating:
• tfyour air conditioner is on, turn it off.
• If you are stopped in traffic, shift the transaxle to "N" (Neutral).
If the warning light does not go off (or engine coolant temperature does not
start to drop) within a minute
Or two:
• Pull over, stop and park the vehicle as soon as it is safe to do so.
• Let the engine run at normal idle speed for two or three minutes.
I! the warning light does not go off (or engine coolant temperature does not
start to drop),
turn off the engine and get out of the car, then proceed as
follows:
CAUTION: To help avokt being burned:
• DO NOT OPEN ntE HOOD if you see or hear steam or coolant escaping from the engine compartment. Wait until no steam or coolant can be seen or heard before opening the hood.
• DO NOT REMOVE THE RADIATOR CAP or coolant RECOVERY TANK CAP IF THE COOLANT IN THE RECOVERY TANK IS BOIUNG. Also do not remove the radiator
cap while the engine and radiator are still hot Scalding fluid and steam can be blown out under pressure if eHher cap is taken off too soon.
I! no steam or coolant can be seen or heard, raise the engine hood. If the
coolant is boiling, wait until it stops before proceeding. Look at the
3-3
Page 62 of 105
Downloaded from www.Manualslib.com manuals search engine coolant level in the see-through recovery tank. The coolant level should be at
or above the
"FULL HOT" mark on the recovery tank.
CAUTION: Keep hand., toots and clothing -away from the engine COOling fa", to help prevent personIl intUry. lhiIlan is electric and can come on whether Or not the engine Is rUnning. 111. tan can start automatically In .respon .. to a heat sensor when the ignition Is in "Run."
Make sure the water pu"",, belts are not broken, or off the pulleys , and that the fan runs when the engine is running and there is an indication on the instrument panel of an overheat condition.
If the coolant level in the recovery tank is low, look for leaks at the radiator
hoses and connections, heater hoses and connections, radiator I and water pump. If you find major leaks, or spot other problems that may have caused
the engine to overheat,
do not run the engine untilthese problems have been
corrected. If you do not find a leak or other problem, caretully add coolant to
the recovery tank. (Coolant is a mixture of ethylene glycol antifreeze and water; see "Engine Cooling System" in "'Service and Maintenance," Section 5, for the proper antifreeze and mixture.) .
CAUTION: Under: some:' conditione, the ethylen~ glycol In engine coolant Is . combustible. -To help avoid being burned, DO NOT spill antifreeze or coolant on the exhauat system or hot engine parts..
If the coolant level in the recovery tank is at the correct level but there is still
an indication on the instrument panel of an overheat condition:
•
You may add coolant directly to the radiator. YOU MUST LET ENGINE COOL FIRST. See "Coolant Replacement" under "Engine Cooling
System"
in Section 5, "Service and Maintenance" in this manual. Follow steps t through 3 for the correct way to remove the radiator
cap
and add coolant.
Once the Engine Coolant Temperature light has gone out (or the Engine Coolant Temperature gage no longer signals an overheat condition), you can
resume
driving at a reduced speed. Return to normal driving after about ten
minutes If the light does not come back on (or the gage pointer does not again
show
ao overheat condition).
tf no cause for the overheat condition was found, see a qualified service technician.
JACKING
CAUTION
To help avoid personal injury:
• FollOW all jacking and stowage instructions .
• Use jack only for lifting this vehicle during wheel change.
• Never get beneath the vehicle, start or run engine while vehicle is
supported by jack.
• Always securely restow spare tire (or flat tire) and all jacking equipment.
3-4
Page 80 of 105
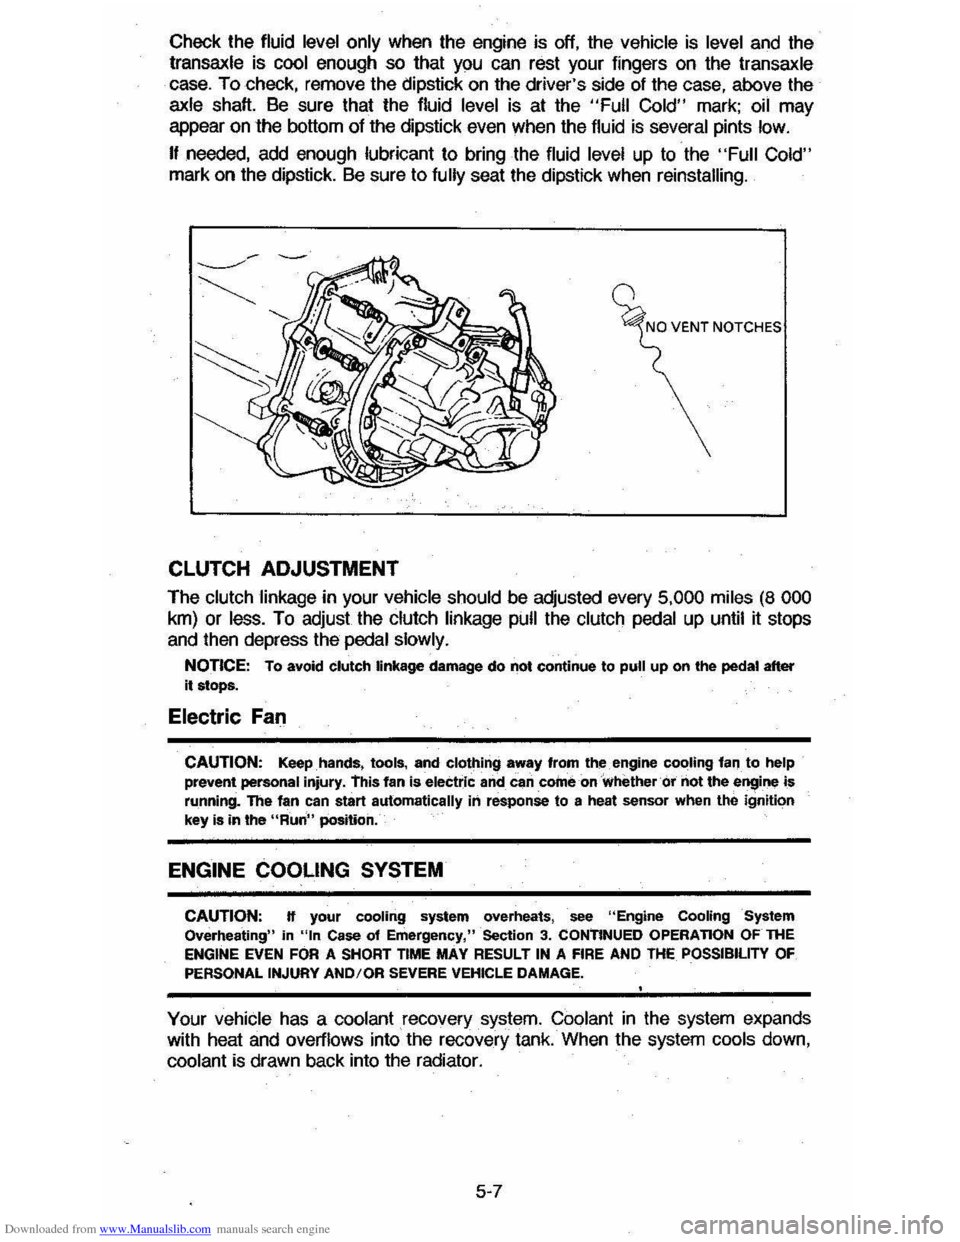
Downloaded from www.Manualslib.com manuals search engine Check the fluid level only when the engine is off, the vehicle is level and the transaxle is cool enough so that you can rest your fingers on the transaxle
case. To check, remove the dipstick on the driver's side of the case, above the
axle shaft, Be sure that the fluid level is at the "Full Cold" mark; oil may
appear on the bottom of the dipstick even when the fluid is several pints low.
I! needed, add enough lubricant to bring the fluid level up to the "Full Cold" mark on the dipstick. Be sure to fully seat the dipstick when reinstalling.
CLUTCH ADJUSTMENT
The clutch linkage in your vehicle should be adjusted every 5,000 miles (8 000
km) or less. To adjust the clutch linkage pull the clutch pedal up until it stops
and then depress the
pedal slowly.
NOTICE: To avoid clutch linkage damage do not continue to pull up on the pedal after
it stops.
Electric Fan
CAUTION: Keep hands, tools, and clothing away fr,om th~engine cooUng lanto help prevent personal injury. this fan is electric and can corne on whether or not the engine is
running. The fan can start automatically in response to a heat sensor when the ignition
key is in the "Run" position.
ENGINE COOLING SYSTEM
CAUTION: H your cooling system overheats, see "Engine Cooling System Overheating" in "In Case of Emergency," Section 3. CONTINUED OPERATION OFTHE ENGINE EVEN FOR A SHORT TIME MAY RESULT IN A FIRE AND THE POSSIBILITY OF
PERSONAL INJURY ANDIOR SEVERE VEHICLE DAMAGE.
Your vehicle has a coolant recovery.system. Coolant in the system expands with heat and overflows into the recovery tank. When the system cools down,
coolant is drawn back into the radiator.
5-7
Page 81 of 105
Downloaded from www.Manualslib.com manuals search engine The cooting system was filled at the factory with a quality coolant that meets
GM Specifications.
~ is important to use proper coolant to prevent damage to
cooling system components . Coolants meeting GM Specification 1825-M or
those specially formulated for aluminum co"1JOflent protection should be used.
The cooling system is designed to use coolant (a mixture of ethylene glycol ,
corrosion inhibitors and water) rather than plain water. The coolant solution
must be used year round
to provide:
• freezing protection down to -37'C (-34'F),
• boiling protection up to 128 'C (262'F),
• protection against rust and corrosion in the cooling system,
• the proper engine temperature for efficient operation and emission control,
and
• proper operation of the coolant temperature light or gage .
See the Maintenance Schedule folder to find out when the coolant must be
replaced . Note that changing the coolant is needed
to make certain that all
parts
of the cooling system work well.
.-~~~~--~-.
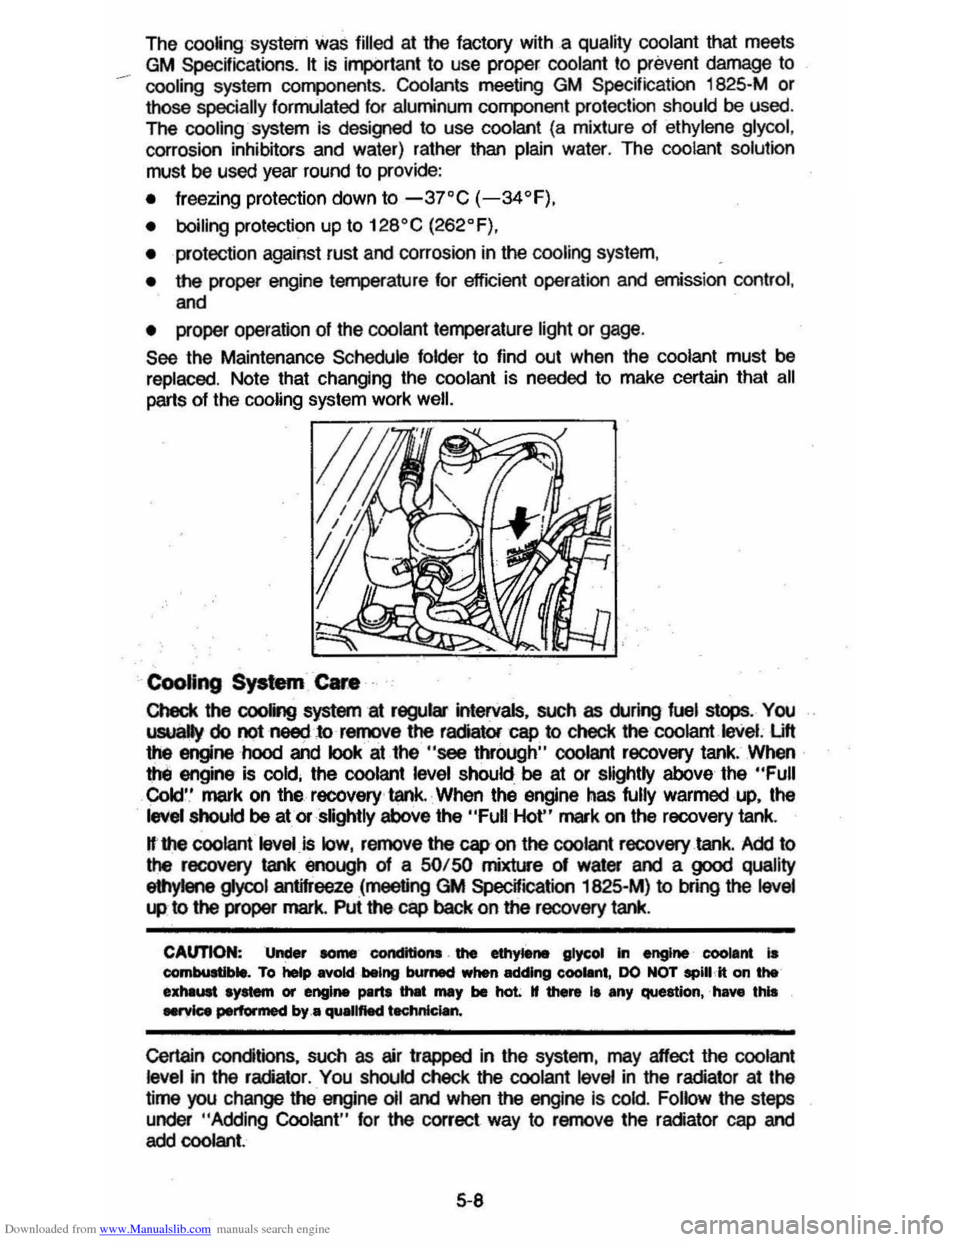
CooUng System Care
Check the cooling system at regular intervals, such as during fuel sI
Cold' .' mark on the recovery ' tank. When the engine has fully warmed up, the
level should be at or slightly above the "Full Hot" mark on the recovery tank.
H·the coolant level is low, remove the cap on the coolant recovery tank. Add to the recovery tank enough of a SO/ SO mixture 01 water and a good quality
eIIlyIene gIyool antifreeze (meeting GM SpecWication 1825-M) to bfing the level
"" to the proper mark. Pui the cap back on the recovery tank.
CAUTION: Under some' condttlons . the ethytene glycol In engine' coolant is combultlble. To help Rold being burMCf when adding eoollnt, DO NOT spill It on the exhliUlt system or engine ~rtI tMt mIIy be haL tf there It any question,' have this .....,ice performed by .• quallftecl t.chnlclan.
Certain conditions, such as air trapped in the system, may effect the coolant level in the radiator . You should check the coolant level in the radiator at the
time you change the engine 011 and when the engine Is cold. Follow the steps
under
"Adding Coolant" for the correct way to remove the radiator cap and add coolant.
5-8
Page 82 of 105
Downloaded from www.Manualslib.com manuals search engine If you have to add coolant more than four times a year (either to the recovery
tank or to the radiator), or if
coolant is dirty or discolored, see your dealer for a cooling system check.
NOTICE: rr you use the proper quality antifreeze, there is no need to add extra inhibitors or additives which claim to improve the system. They may be harmful to the proper operation of the system.
Adding Coolant
CAUTION: To help avoid the danger of being burned, do not remove the radiator cap while the engine and radiator are stili hot. Scalding fluid and steam can be blown out under pressure if the cap is taken off too soon.
1. When the engine is cool, remove the radiator cap.
• Turn the cap slowly to the left until it reaches a "stop." Do not press
down
while turning the cap.
• Wait until any remaining pressure (indicated by a hissing sound) is relieved, then press down on the cap and continue turning it to the left.
2. Add enough water and ethylene glycol anmreeze (meeting GM Specification 1825-M) to provide the required cooling, freezing and
corrosion protection. Use a solution that is at least 50 percent antifreeze
but no more than 70 percent antHreeze. Fill the radiator to the base of the
filler neck and fill the coolahUocave,y lank to at or above the "Full Hot" mark. Put the recovery tank cap back on.
3. Run the engine, with the radiator cap removed, until the upper radiator
hose is
hot. With the engine idling, add coolant to the radiator until it
reaches
the bottom of the filler neck. Install the radiator cap, making sure
the arrows on the cap line up with the overflow tube on the radiator filler
neck.
II is Ihe owner's responsibility 10:
• Maintain cooling system freeze protection at -37°G (-34°F) to ensUre
protection against corrosion and loss of coolant from boiling. (A SO/SO mixture of water and ethylene glycol antifreeze will provide freeze
protection to -37°G or -34°F.) You should do this even if you don't
expect freezing temperatures. Periodic
replacement of coolant is needed to replace the anti-corrosion additives that wear out with use. Coolant that
has become dark in color shows that it needs to be changed for this reason.
• Add ethylene glycol base antifreeze that meets GM SpecHication 1825-M
when antifreeze has to be added because of coolant loss or for more
protection against freezing at temperatures less than stated.
NOTICE: Do not use methanol-base antifreeze, or alcohol, . or plain water alone, in your vehicle at anytime. They will boil ata lower point than that at which the "TEMP" light (or temperature gage) will warn of overheating, and they do not provide proper protection against corrosion.
Thermostat
The engine coolant temperature is controlled by a thermostat. It stops coolant
flow through the radiator until a preset temperature is reached. This thermostat
is installed in the engine coolant oullet on the engine block. The same
thermostat is used in both winter and summer. When a replacement is needed, AG-Oelco paris are recommended.
5-9
Page 83 of 105
Downloaded from www.Manualslib.com manuals search engine Radiator Pressure Cap
The radiator cap, a 105 kPa (15 psi) pressure type, must be installed tightly, otherwise coolant may be lost and damage to engine may resuK from
overheating . Radiator pressure cap
should be checked periodically for proper
operation .
If replacement is required, an AC cap is recommencled.
ACCELERATOR LINKAGE
Lubricate all pivot points with .engine oil at the interval shown in the
Maintenance
Schedule. Do not lubricate the accelerator cable.
AIR CLEANER ELEMENT
When replacement of air cleaner fmer element is necessary, an AC air Imer
elemenl
is recornmencled .
See your Maintenance Schedule for change intervals . Operation of vehicle in
dusty areas will necessitate more frequent replacement. Your dealer can be of
assistance
in determining the proper replacement frequency for the conditions
under which you operate your
vehicle.
CAUTION: The air cleaner a* functions ... name arrestor in the event of engine backfire . The -air cleaner ehould be lnstaIIed at an times unit .. III removal is neceaary for repair or maintenance. To help reduce the-risk of pereonal Injury and lor property damage , be sure that no one 18 ne.-the engine comJ*1ment before starting the engine wiU'l the air cleaner removed. If engine backfire occurs with the air cleaner remowd, thwe could be-a burst of flame and posaibly other fnln the engine compartment.
HOOD LATCHES AND HOOD HINGE
SeetHe Maintenance Schedule folder to find out how to lubricate hood.latch ·
and hood hinge assembly .
BRAKE MASTER CYLINDER
Check masler cylinder fluid· level in the reservoir at the interval shown in the Maintenance Schedule . If the fluid is low in the reservoir, it should be filled to
the maximum
level line with Delco Supreme No. 11 or OOT-3 fluids.
POWER STEERING SYSTEM
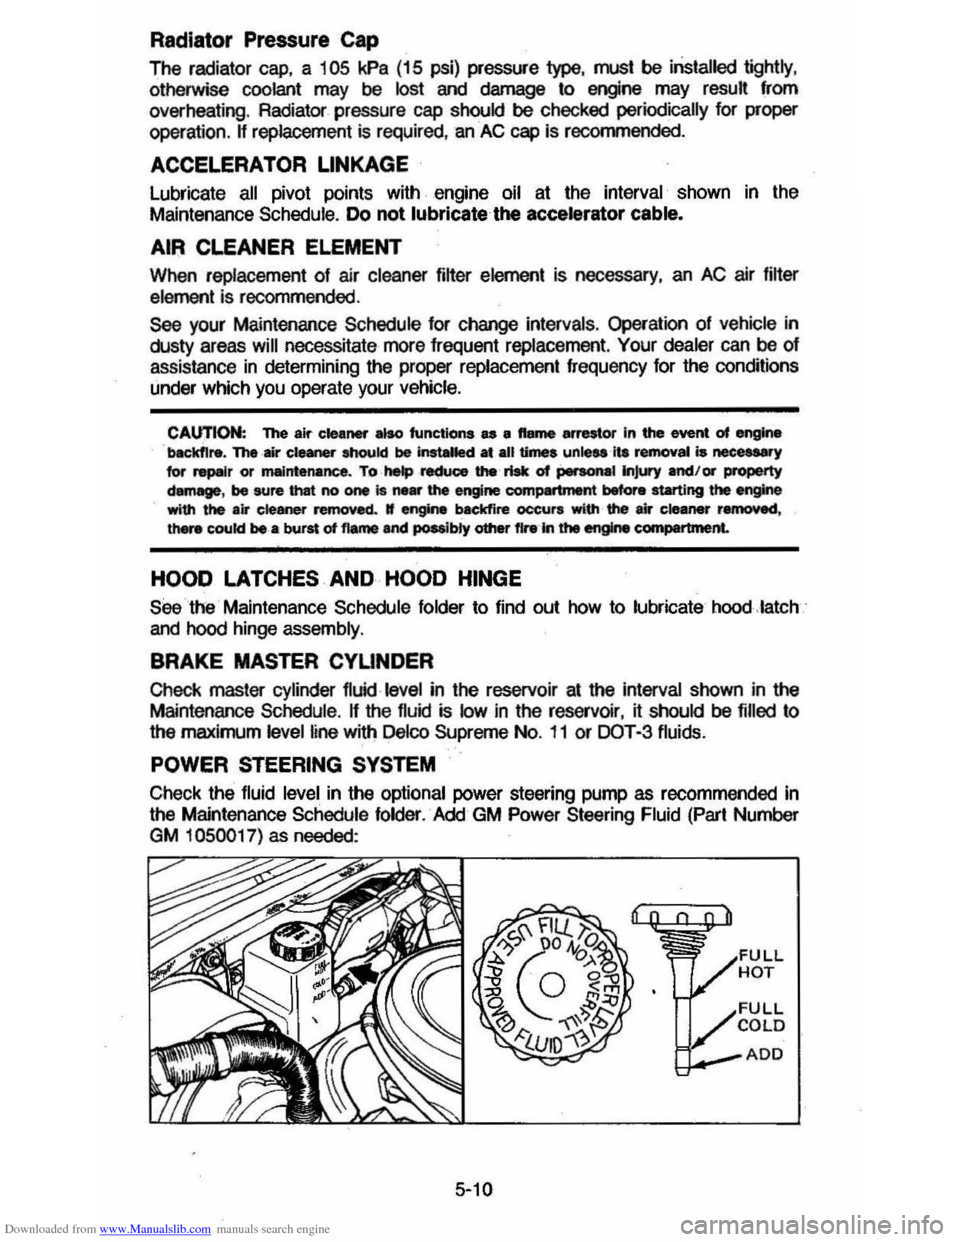
Check the fluid level in the optional power steering pump as recommended in
the Maintenance Schedule folder. Add GM Power Steering Fluid (Part Number
GM 1050017) as needed:
5-10
Page 100 of 105
Downloaded from www.Manualslib.com manuals search engine SECTION 7
Accessory Position, Steering CoIl.m Lock 2-7 AIr Cir ctJlalioo. . 2-26 Ai' Cleaner. 5-,0 Air Conditio ning ............ . 2-27 M ainte nance .. Antenna . 5-\1 2 -35 5-8 Antifreeze (See Coo~ng System) .. Appearance cae ...• ....•.. 4·t .... ...... 2 -25 ASh Tra y .. Automatic T 'ansalC!e Fluid Chedi: . ___ .. . _ ..... _ ._ ... ... . Maintenance .. Notice ,. .. Op$ralion .. Surter Safety Switch Axlo, Drive-Fluid Level Ball Joints. Ba"&,y
· ....... 5-6 .... 5'-6 2,13 · .... 2 -12 2'13
........ . 5-11 5-1 I
Caution.. 5-11 Emergenc y Starling.. 3-1 Freedom.. .. 3·1 , 5-11 Gas caution . ___ ............. ..... ... . ...... .... 3·, Specilicalions .... ... ... ... .. ... .. .. . T esl indlealor .. Belor e Driving Your cavalier .. B loc k Healer, Engine Blower, Ventilating .. Brakes Driving Through Deep Water "
Parking Brake .. P eda l TraVel .. Power ... SelI·AqusIing ...... ... ..... .. ... .. .. . T railer ..... . Warning Light .. Br eak -In Period Cars Pulrng Tra~ars New Car .. Bucke l Seats .. R ttelininQ .. Bulbs and Fuses ..
""_ Jad< Operation . Stowage ............. ... ... .. .... •..•. • _ ..
Key RemiAder .. Cap FIJI:II .. R adiator Capa.cities .. carbon Monoxide Caution .. Cargo Cover (Hatchback) .. cargO Cover (Station Wagon) ... Carrier, Infant Safety .. cataIytlc Converter .. care .... OwNheatng ....... . Changing Wheels and Tl"es .. Ct\IICI Restraint.. Cigarette lightsr ..
. .... 6 -1 . . . 5-1 1 1-1 2-11 2-25
2 -18
2 -19
2·18 •.••.•. 2, 18 2-1 8 ....... ... .. 2· 3 2·22
2-2
2-2
1 -5
1-5
6 ·3. 6·4 . 6-5
3 ·5 . 3-6 ........ . 3-5
· ....... 2·'
5 -1 5-10 .... .. 6-1 2 -1 2-38 2 -39 1·11 5-2 ...... .... 5-2 ..3 -3 ....•.••. . 3·5 1-11 · ..... 2-25
INDEX
7-1
C1eri'9 c;a.pet care .. Caution .. Exteriof Finish and Trim Fabri c and Interio r Trim .. Solvents Racomme nded Spot Removal. Vinyl Top .. C kl tch
. .... 4·' . ..... 4 -' 4 -' 4 -1
4 -1
..,
4-3
PeDa l Acl/Ustmeot ........ ... ... ... .......... ........ 5·7 Cold Wealhet Starting ... ... ... ...... ... ... ...... 2·11 CooIiIl9 System care. .. . 5 ·8 Coolan t Rocommeodation 5-9 Overhea ting caution. 3-3 Courtosy Lights .. 6-3 Cruis e Con trof 2-16 Defay Wipo( Sys tem ....................... ,.. 2 -9 [)jmensions, Ve)jcle.. . ......... 6-1 [Xsc Brake Wear IrKicator .......... 2-20 Door locks ' -3 Power Door l ocks ... Drive Axle
"""" Seal Adjus tment. .. Driving on Slippery Surfaces Electn c Fan .. Electric al System Battory .. Bulbs .• . . FI.ISOS ..•..• Emergency. In Case Of . Brake W~ning Liglt .. 1
-3
.• 5·6
1 -5 2 -\' .... ~::<',~~-
5 '11, 6·2 '·3 6-4. 6·5 . .... ..... .. 3 · . ... 2 ·22 Geoefator hdicalor... . ...... 2 ·2 1 Hazru"d Warring . .,fLashef ... -'. __ .... ,,, 3 ·1 Jaddng T o Change Wheels 3·5 Jump Starling with Auxi~ary Banel)'. . 3· Overhe.1tod Radiator.. 3·3 Pushing To Start.. 3-I Spar e Trre.. . . .................... 3-5 , 3·6 Towing.. 3·6 Engine Block Heater ... Codo .. CooIO>g •••.
2 ·' , . . .. . 6·5
5 ·7
8I:haust Gas Caution ............... ... ... ... ... 2-1 Flooded, Staring Procedlre ................ 2·11 Qvome ating ................... ....... .... ............. . 3-3 Serial NulTlbef.. . .... 6-5 Specifications . ............... . ..... . .. ..... .......... 6-' Starting... 2·10 Temperature Gage.. 2 ·24 TefTlP(Iralure Light. 2 -21 EnginO Oil Capacity .. Dipstick •• F~Of . . .
. ............ ....... ... .. .... .......... ... 6-1
Reoo .. wnonootion .. Ethyteno Glycol Coolant .• EXhaUst Gas Caution . .
• •••• 5 -3 5·5. 6 ·2
5 ·'
5 ·7 . ....... 2·' Driving With Trunk Open ..... .. ............. . 2-'
Page 101 of 105
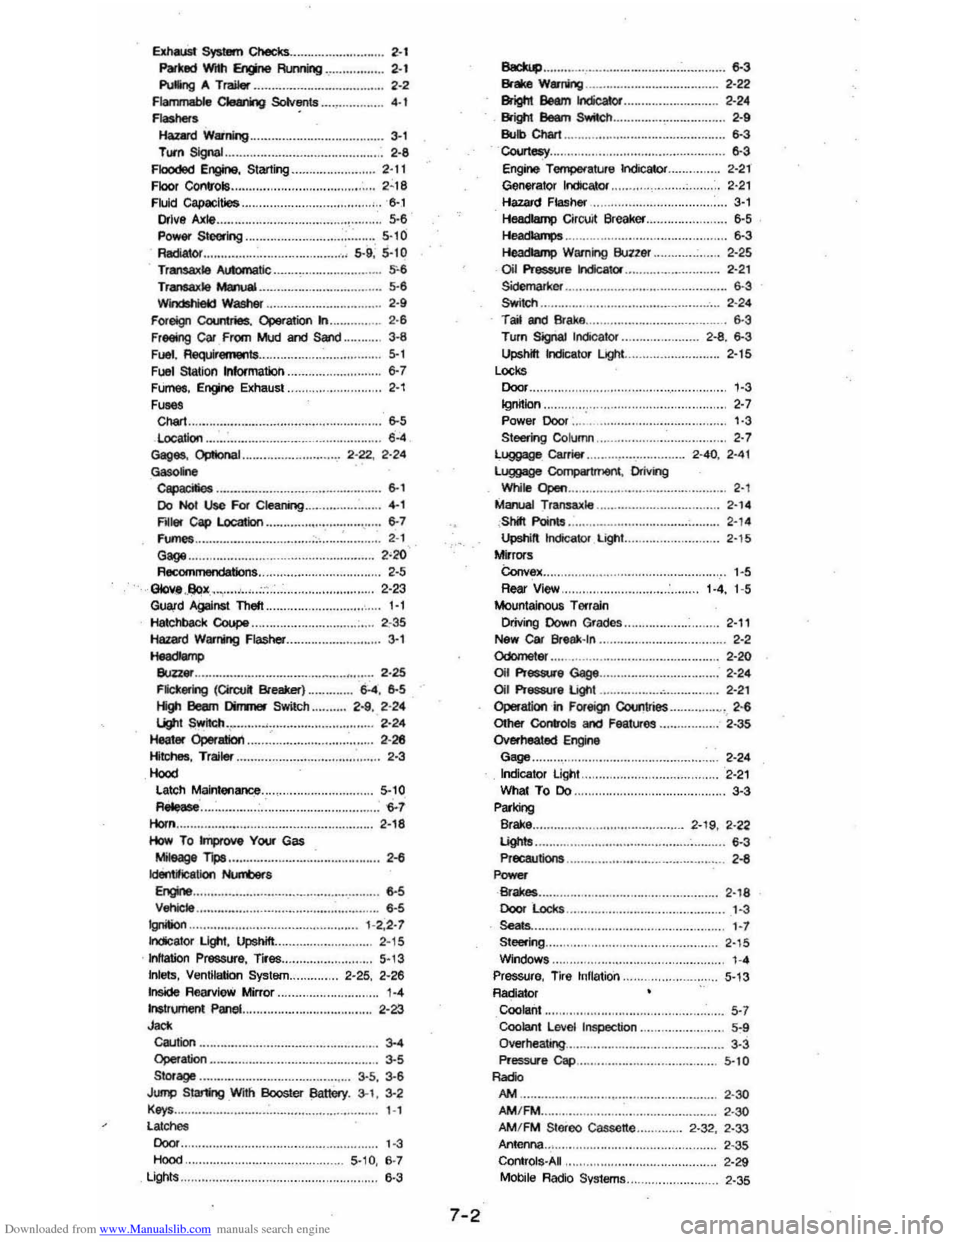
Downloaded from www.Manualslib.com manuals search engine Exha.Ist SysttIm ChecltS .. 2·1 Parked Witt! Engine Rt.nning .. 2 ·' PulIng A Tr.JiIer '2·2 Flanmable 0ea1ing Sotvents . " . " 4 ·1 -. . Haz«d W.ning .. ... ... ......... .. ........ ... . . .. 3-1 Turn Signal .. 2 ·8 FloOded Engine, Starting.. .." 2'11 Floor Controls ... ................................. " 2~ 1 8 Fluid Capacities .. Drive Axle ..... . Power Steoring .. . Radiatof ..... Transaxle .\uklma tic ..
e ·" , .. . : ..... 5·1 0 .. , 5· 9; 5 ·1 0 5,6
Trensaxle MInJaI ............. .............. 5 ·6 wn:tshIekJ Washer .... . 2·9 F oreign Countries. Operation In.. 2 ·6 Freeing car From Mud and Sand .......... 3 ·8 Fuet . Requirements.. 5·1 Fuel StatiOn Information.. 6 ·7 Flimet . Engine EIChaust.. .. ..... ....... 2·1 ,,'" Chart ..... . ................... 6-5 location ..... -.""","" .. ................. 6·4 . ..... 2 ·22 . 2·24
"""""" -... .. .................................. 6-1 Do No! Usc For Cleaning F~1er cap location .. Fumes ................ ........ .. Gage .. Recommendations .... GIov ... .QQx" .. , ........ ,
.............. , 6-'
GUl¥d AgaInst Theft ................. .......... ..
2·' 2·'" 2 ·5
2 ·23
,.,
H atc hback Coupe .................... ........... .. '2-3 5 3·' Hazwd WarrWng Flasher ..
-Buzz ... FlicKering (Circuit BreMer) Hi!11 Beern Difmler SWitch ug,t S .whch., ....... Hei1Ier Operatioli .. Hitches. Trailer .. Hood
........ 6-4. 6-5 .... 2-9. 2·24
Latch Maintenance.. 5·10 RMese... .. ............................. ......... 6-7 Horn .......................... .............. 2,'8 How To ~ YOOl Gas Mileage TipS ...................................... .. ,' 2-8 IdI!InOOCaIiOn Num:lers Eng;no ........ 6-' VehiCle ......... ... . ....-Indic ator LIgtlI, Upshift ..
.. ............. 6 ·5 1 -2 ,2 ·7 2 -\5 Inflation Pressure, Tires.. 5 -1 3 Inlets. Ventilation System ............ 2-25 . 2·28 Inside RearvloW Mirror .. Instrument Panel .. J"" Caution 3·. Operation.. 3-5
S torage ................................. 3-5, 3-6 Jump Strilg With Booster Bat1ery. 3-1. 3-2 Keys.. 1-1 latches Door.. 1 ·3 Hood.. 5- 10,6·7 Light s.. 6·3
7-2
-.... .. .... ................. ........... 6-3 Brake Wamir'lIiJ.. 2-22 8rigtIt 8Mm IncicaIor .......................... 2-24 Bright Beam Switch ............................... 2-9 Bub Chart 6-3 Courtesy... 6 -3 Engine Tempe!'8ture Indicator.. 2 -21 Generator IndicalOf.. 2-21 Hazard Flasher" .................................. 3-1 Hsadlamp Circu it Breaker.. 6-5 H~.. 6-3 HeadIamp Warning Buzzer.. 2 -2 5 Oil Pr9S5Ufe IndicalOr... 2·21 SidemaIkcr .n................ . ................ 6 ·3 SWitch .. Tail SfId Brake .... Turn Slg\aJ Indicator .. Upshift Indicator LIglt .. Looks Door.. Ignition ..
. ....... .-... 2 ·2 4 . 6·3 2 -8 . 6-3 2-15
'·3 2·' Power Door:... '·3 Steemg Column .. . 2-7 Luggage Carrier.. 2·40. 2,4 1 luggaQe CompartmenI , Orimg wtile Open.. . ...... ........ .. . 2 ,1 Manual T ransaJlle Shift PoinIs .. ...................... ... .. 2·14 2 -1 4 Upshift Irdcator light ........... ... ............ 2-1 5 Mirrors Convex .. Rear View .. Mountainous Torroln Driving Down Grade s .. New car Break-In ..
1-4, 1-5
2-11 2 ·2 Odometer 2-20 Oil Pr9SfUe Gage.. . ........................ 2·24
Oil Pr88SUfe Ugr'II ................. " .......... ... .. 2 ·21 Operation in Foreign GoU'11ries ........... ~" 2--6 orher' c:or.oI!I and Featl.Ke! .. ..... ...... .. 2·35 Overheatad Engine Gage.. 2-24 Indicator light ....... ........................... 2-21 What To Do ....................................... 3-3 Parking Brake ... . . .. .. ... .. .. 2-19 , 2-22 lights.. . ......... .... ........... 6-3 Precautions .. .. .... ............. . "-Brakes ....................... ..... ... ... ... ... ........ 2 '1 8 Door locks.. ' ·3 ....... Steering .. Windows .................. . Pressure, Tire tllflatio'n .. Radiator Coolant .. Coolant Level Inspection .. Overheating ... Pressu-e Cac:I ... ..-
,. , 2 -15 ,..
.. .. 5-13
5·' 5· '
3·3 5·10
NoA ............ ................... ........ ... ... ........ . 2-30 AM/FM
AM /FM Stereo C assette .. Anlerna .....
ContrOls-A I.
Mobile Raol o System s ..
2·30 2-32, 2-33 2 -3 5 2·29 . 2-35