lock CHEVROLET CAVALIER 1994 1.G Owners Manual
[x] Cancel search | Manufacturer: CHEVROLET, Model Year: 1994, Model line: CAVALIER, Model: CHEVROLET CAVALIER 1994 1.GPages: 243, PDF Size: 15.06 MB
Page 10 of 243
Downloaded from www.Manualslib.com manuals search engine Vehicle Symbols
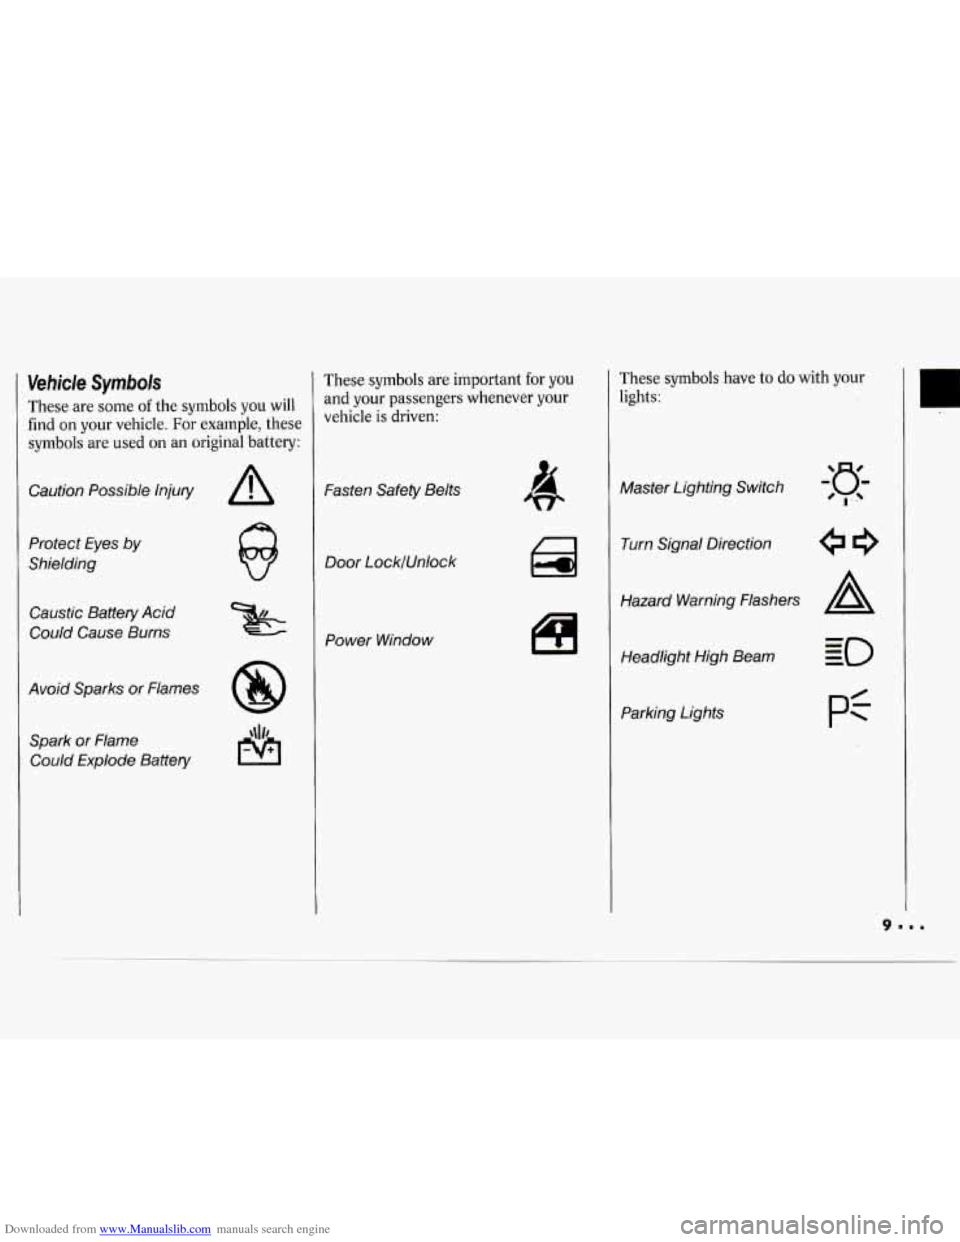
These are some of the symbols you will
find
on your vehicle. For example, these
symbols are used on an original battery:
Caution Possible lnjuty
Protect Eyes
by
Shielding
Caustic Battery Acid
Could Cause Burns
Avoid Sparks or Flames Spark or Flame Could Explode Battery
These symbols are important for you
and your passengers whenever your
vehicle
is driven:
Fasten Safety Belts
Door LocklUnlock
Power Window
These symbols have to do with your
lights:
Master Lighting Switch
Turn Signal Direction
Hazard Warning Flashers
A
Headlight High Beam
Parking Lights
pf
U
Page 11 of 243
Downloaded from www.Manualslib.com manuals search engine How to Use this Manual
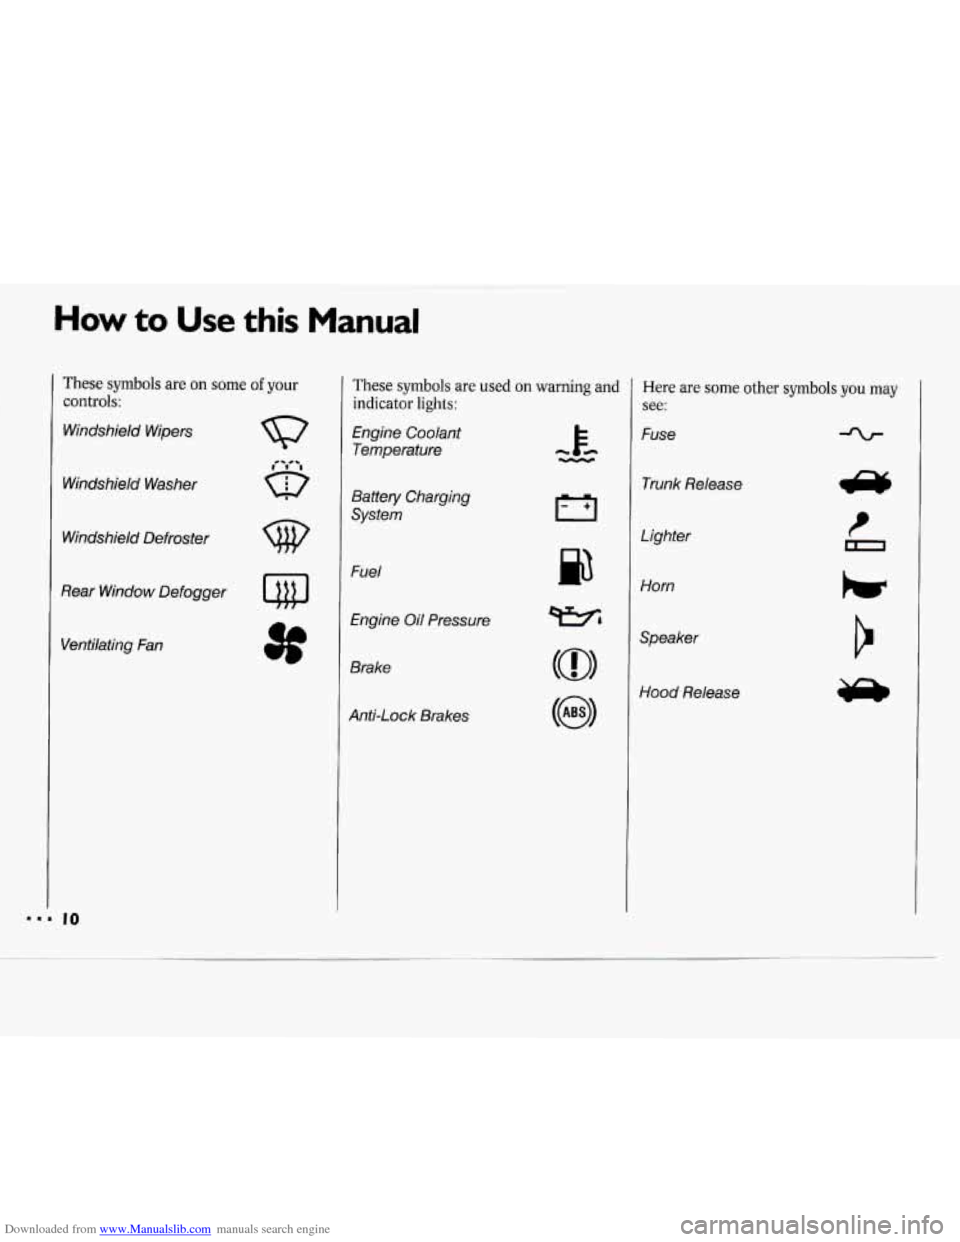
These symbols are on some of your
controls:
Windshield Wipers
Windshield Washer
Windshield Defroster
Rear Window Defogger
Ventilating Fan
These symbols are used on warning and
indicator
lights:
Engine Coolant
Temperature
Battery Charging
System
Fuel
Engine Oil Pressure
Brake
Anti-Lock Brakes
p3
Here are some other symbols you may
see:
Fuse
Trunk Release
Lighter
Horn
Speaker
Hood Release
Page 13 of 243
Downloaded from www.Manualslib.com manuals search engine Seats & Restraint Systems
Stas and Stat Controls
This section tells you about the seats-
how to adjust thern-and &a about
reclining seatbacks and head restraints.
m=m 12
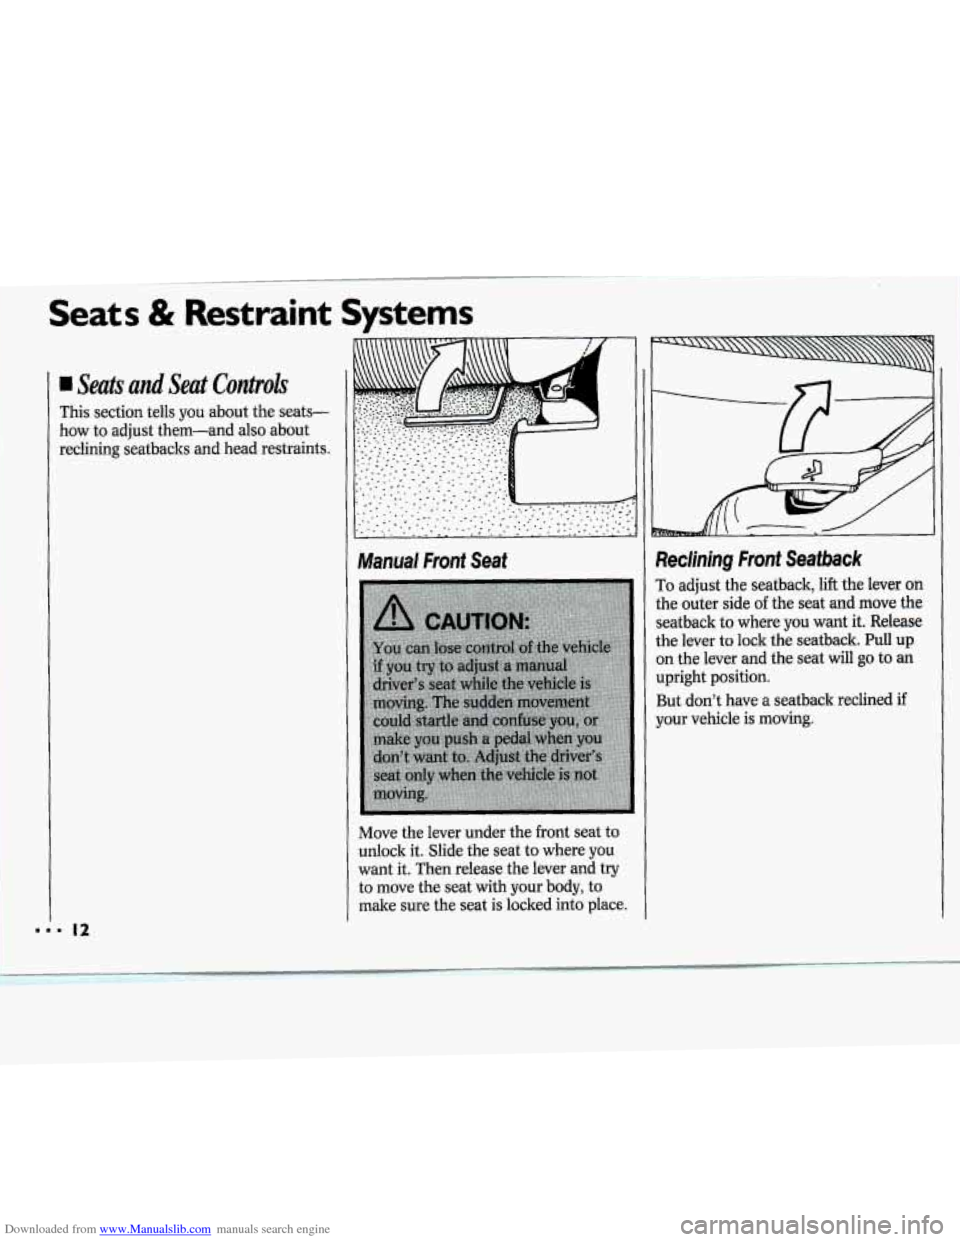
Manual Front Seat
Move the lever under the front seat to
unlock it. Slide the seat to where you
want it. Then release the lever and try
to move the seat with your body, to
make sure the seat is locked into place.
i
3
tl
tl
Si
0
U
B
Y'
kclining Front Seafbsck
'0 adjust the seatback, lift the lever or].
he outer side uf the sed md move the
eathack to where you want it. Release.
he lever to lo& the seatback. Pull up
n the kmr and the seat will go to an
pright position.
;ut don't
have a seatback reclined it
Dur vehicle is moving.
Page 15 of 243
Downloaded from www.Manualslib.com manuals search engine C I:s & F - - lraint Systems
Manual 4-WayAdjustWe Drker’s
Seat (opnouj
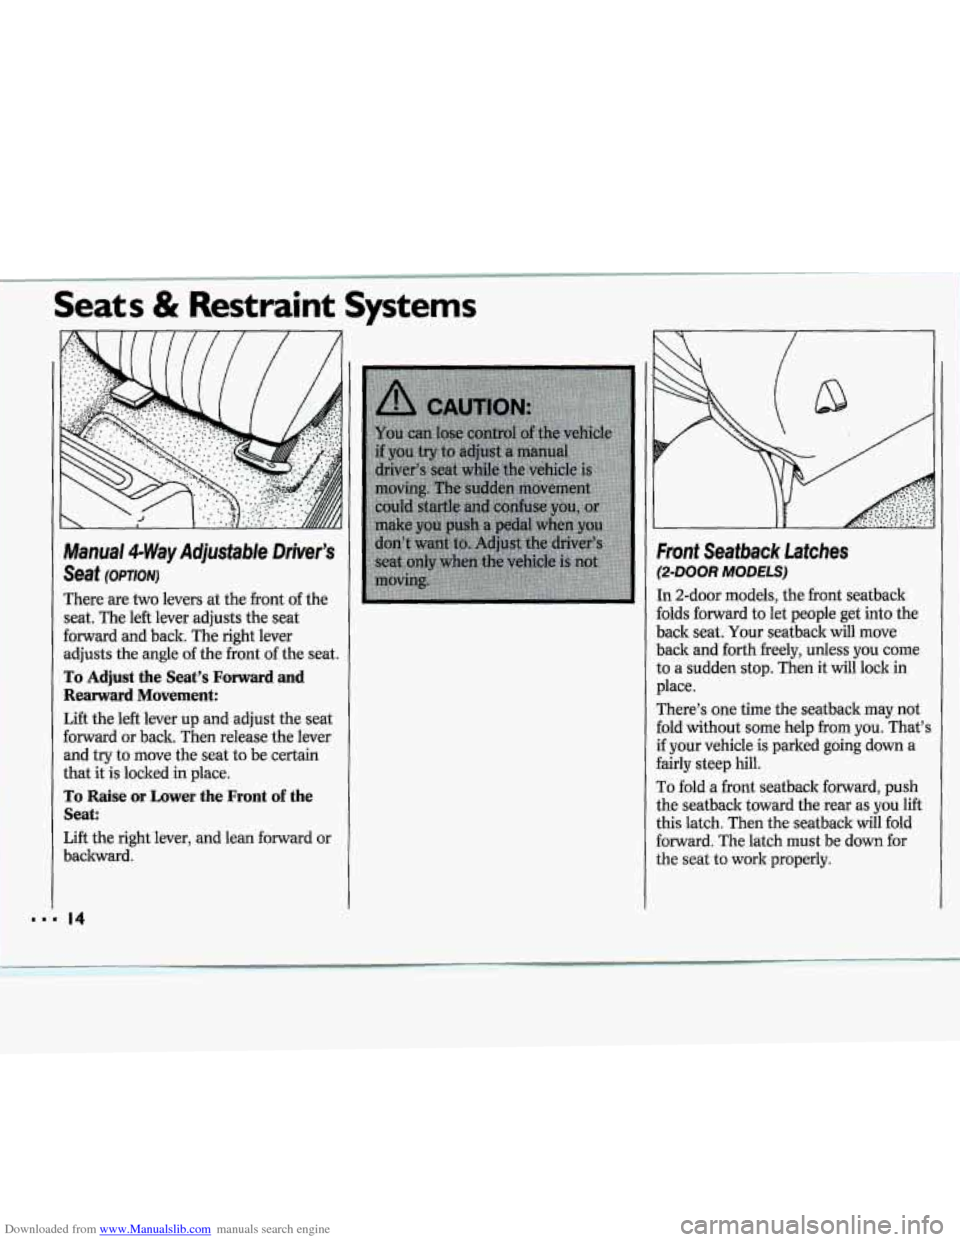
There are two levers at the front of the
seat.
The left lever adjusts the seat
forward arrd back. The right lever
adjusts
the angle of the front of the seat.
To Adjust the Seat% Forward and
Rearward Movement:
Lift the left lever up and adjust the sed
forward or back.
Then release the lever
and
try to move the seat to be certain
that it
is locked in place.
To Raise or Lower the Front of the
seat:
Lift the right lever, and lean forward or
backward.
Fmni Seatback LaRches
(%DOOR MODELS)
In 2-door models, the &oat seatback
folds forward to
let people get into the
back seat. Your seatback
will move
back
and forth freely, unless YQU come
to a sudden stop. Then it will lock in
‘‘.‘.B“ ”&q
place.
There’s one
time the seatback may not
fold without some help fmm you: That’s
if your vehicle is parked going down a
fairly steep hill.
To fold a front seatback forward, push
the seatback toward the rear
as you lift
this latch.
Then the seatback will fold
forward. The latch
must be down for
the seat to wok properly.
p&Cc;& pk .r .-
Page 16 of 243
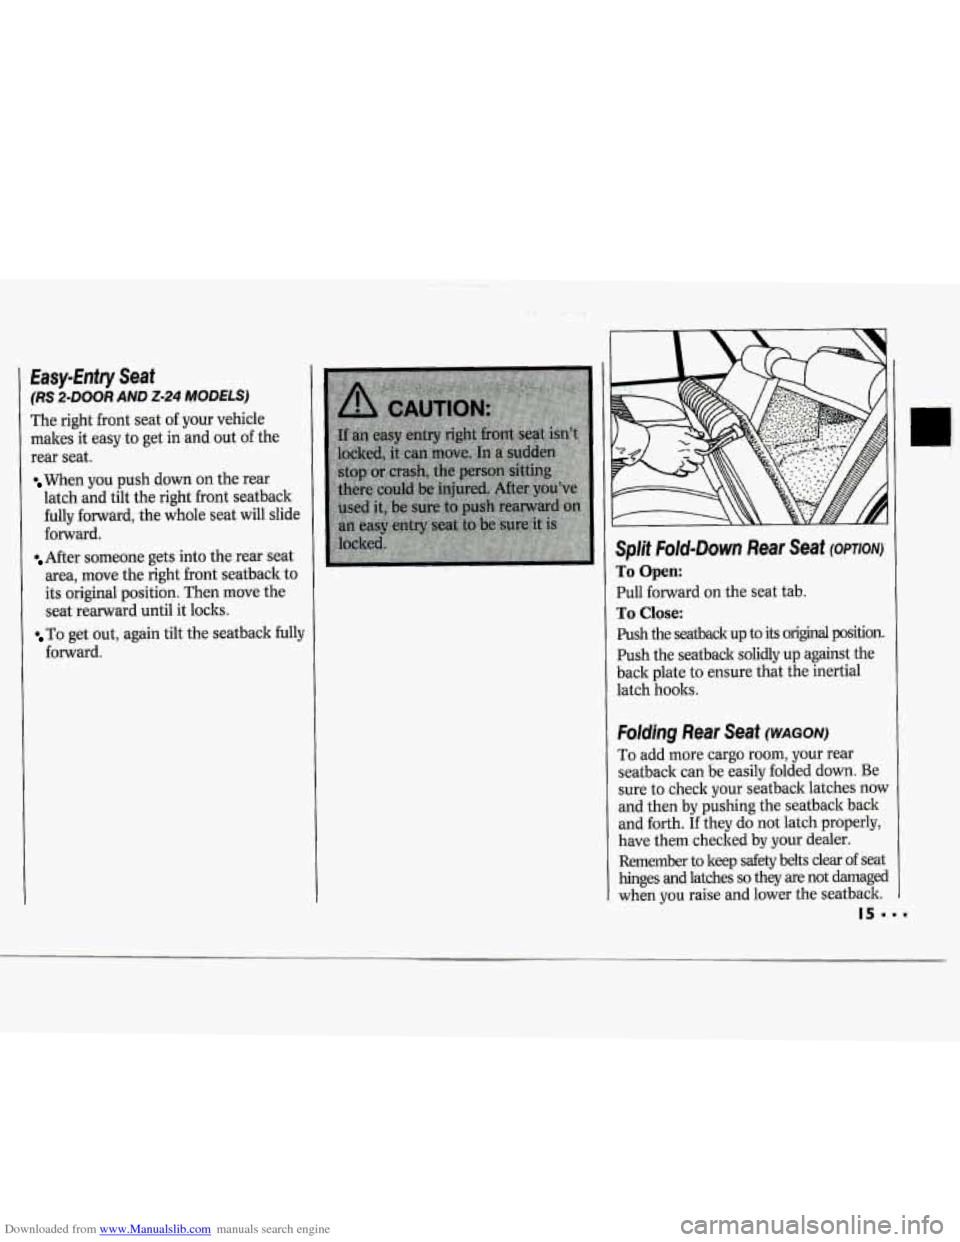
Downloaded from www.Manualslib.com manuals search engine Easy-Enfry Seaf
(RS 2-DOOR AND 2-24 MODELS)
The right front seat of your vehicle
makes it easy to get in and out of the
rear seat.
When you push down on the rear
latch and tilt the right front seatback
fully forward, the whole seat will slide
forward.
After someone gets into the rear seat
area, move the right front seatback to
its original position. Then move the
seat rearward until it locks.
To get out, again tilt the seatback fully
forward.
Splif Fold-Down Rear Seaf (OPTION)
To Open:
Pull forward on the seat tab.
To Close:
Push the seatback up to its original position.
Push the seatback solidly up against the
back plate to ensure that the inertial
latch hooks.
Folding Rear Seaf (WAGON)
To add more cargo room, your rear
seatback can be easily folded down. Be
sure to check your seatback latches now
and then by pushing the seatback back
and forth.
If they do not latch properly,
have them checked by your dealer.
Remember to keep safety belts clear
of seat
hinges and latches
so they are not damaged
when you raise and lower the seatback.
Page 17 of 243
Downloaded from www.Manualslib.com manuals search engine Seats & Restraint Systems
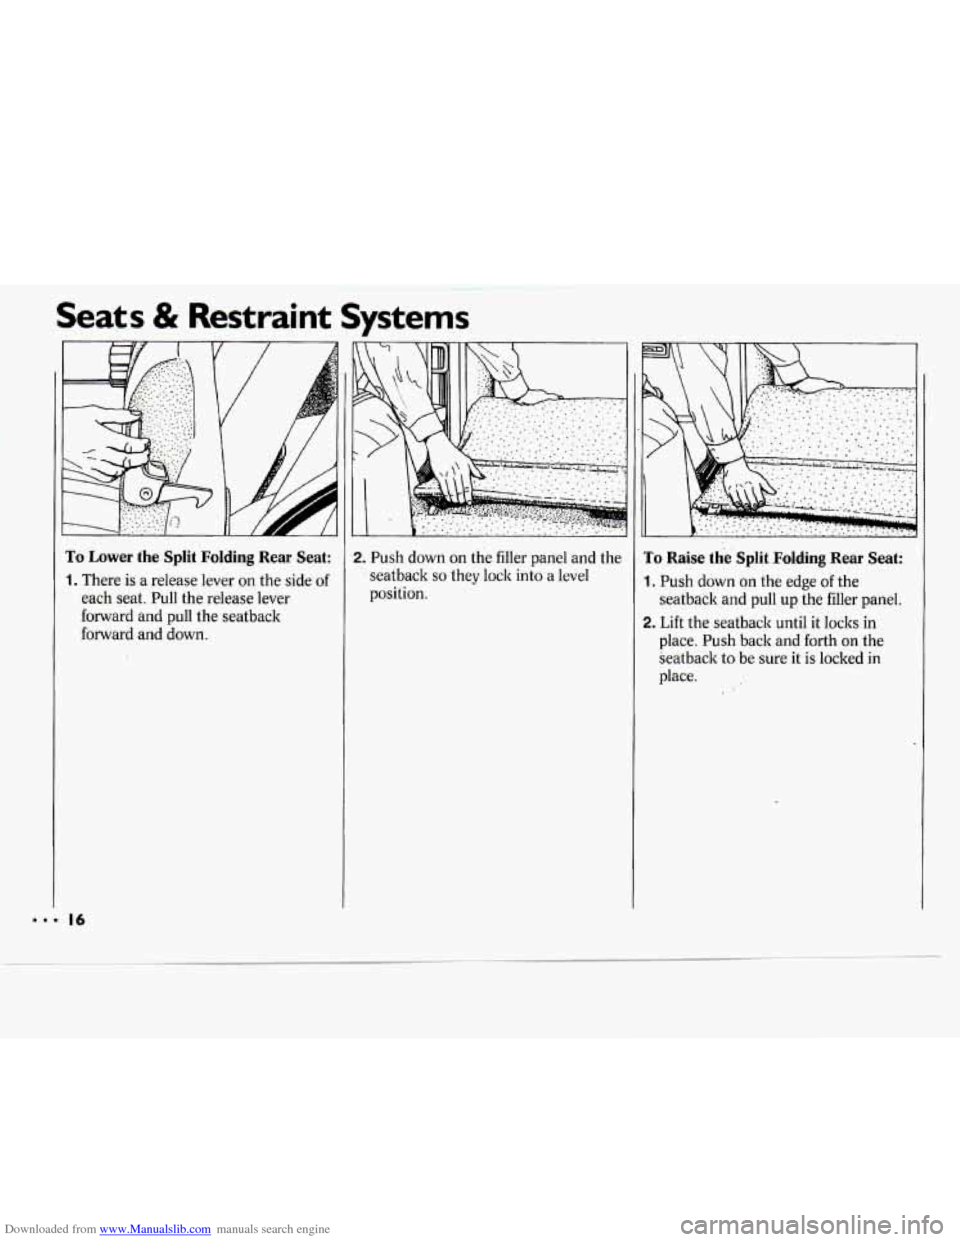
To Lower the Split Folding Rear Seat:
1. There is a release lever on the side of
each seat. Pull the release lever
forward and pull the seatback
forward and down.
2. Push down on the filler panel and the
1 seatback so they lock into a level
position.
To Raise the Split Folding Rear Seat:
1. Push down on the edge of the
seatback and pull up the filler panel.
2. Lift the seatback until it loclts in
place.
Push back and forth on the
Seatback to be sure it is locked in
place.
... 16
Page 19 of 243
Downloaded from www.Manualslib.com manuals search engine Seats & Restraint Systems
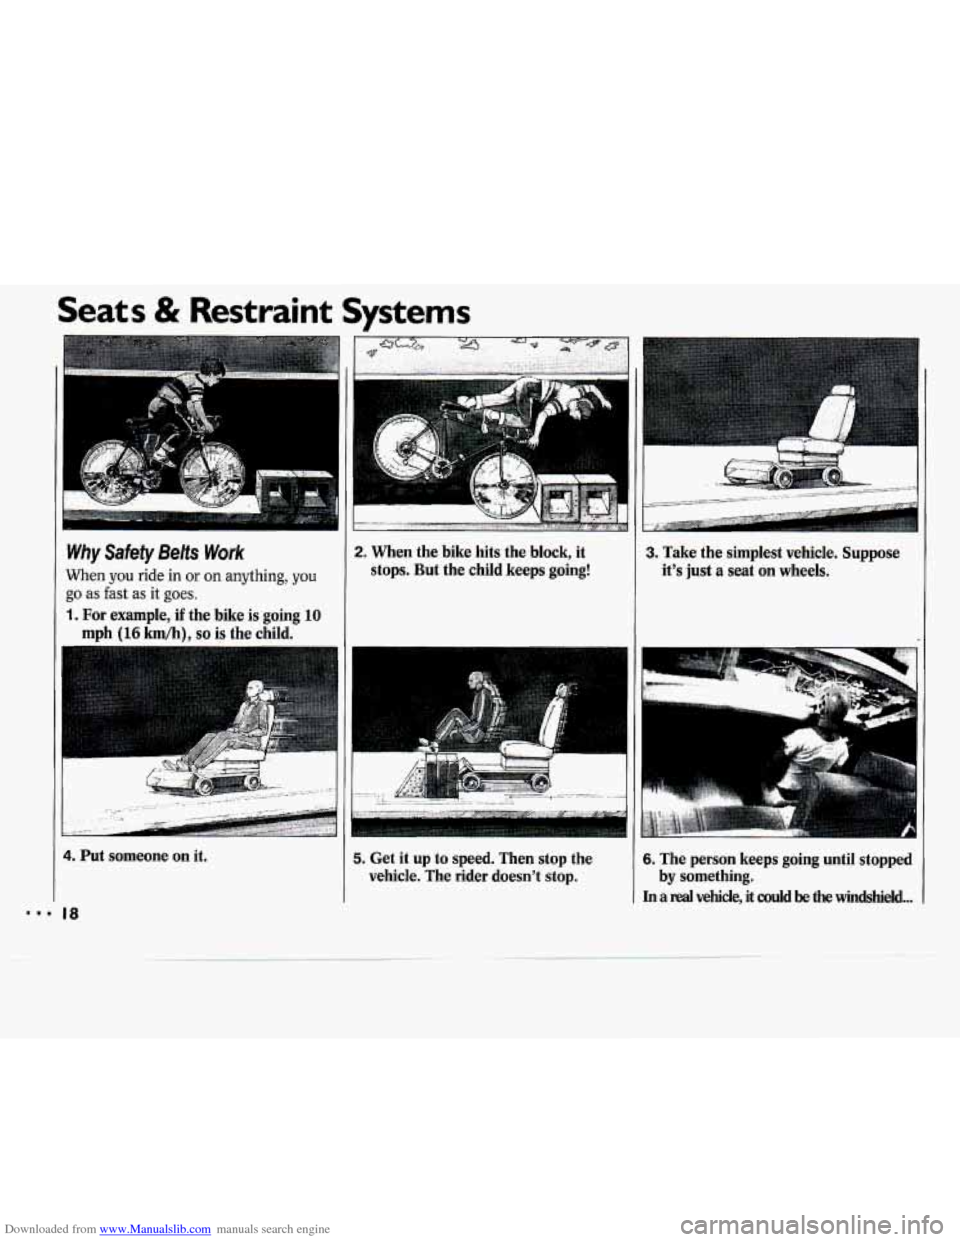
2. When the bike hits the block, it
stops. But the child keeps going! Why Safety Belts Work
When you ride in or on anything, you
go as fast as it goes.
1. For example, if the bike is going 10
mph (16 km/h). so is the child.
3. Take the simplest vehicle. Suppose
it's just a seat on wheels.
4. Put someone on it.
'8. 18
5. Get it up to speed. Then stop the
vehicle. The rider doesn't stop. 6. The person keeps going until stopped
In a real vehicle, it could be the windshield ...
by something.
Page 22 of 243
Downloaded from www.Manualslib.com manuals search engine Driver Position
This section describes the driver’s
restraint system.
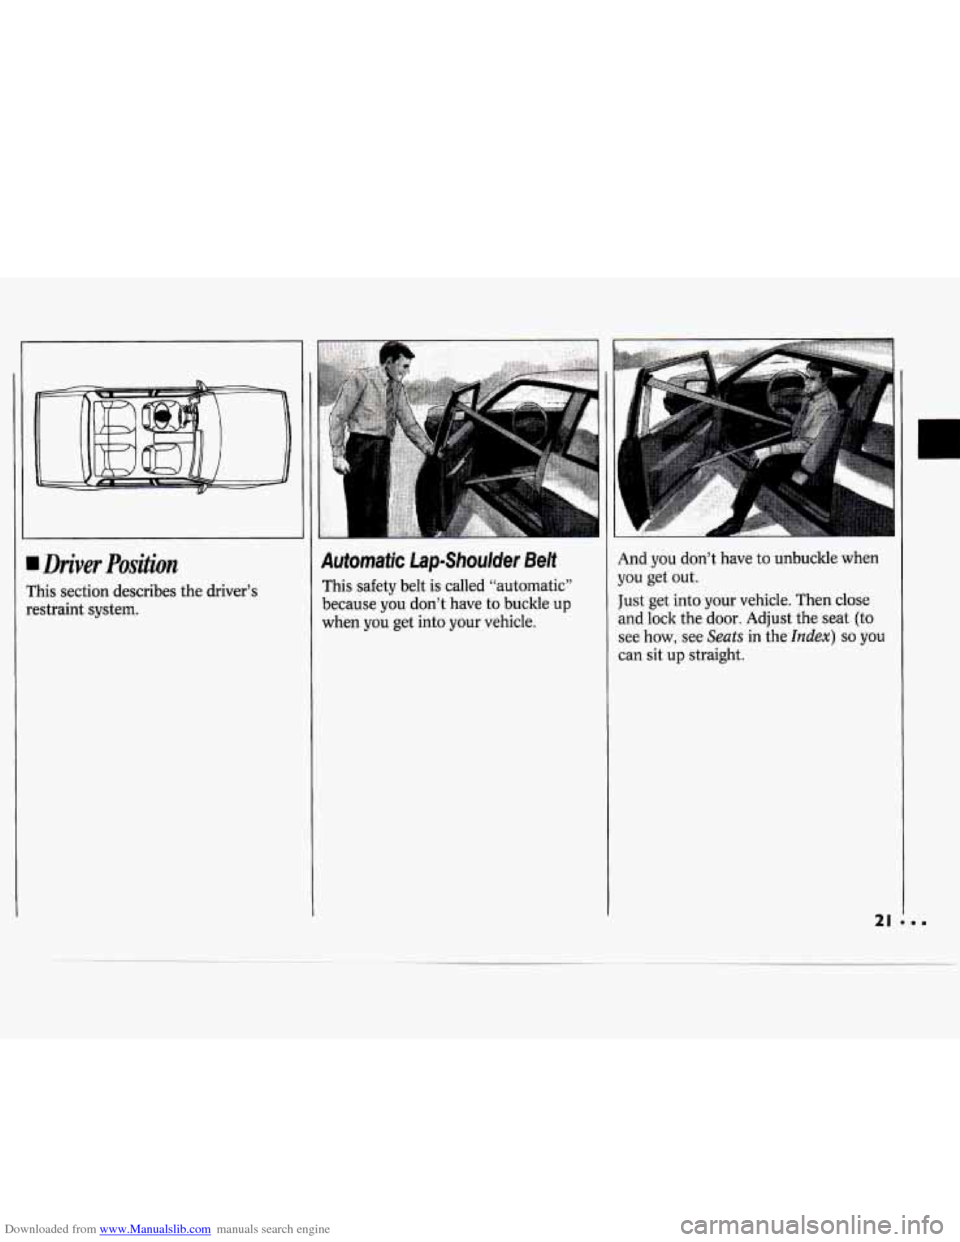
Automatic Lap-Shoulder Belt
This safety belt is called “automatic”
because you don’t have to buckle up
when you get into your vehicle.
And you don’t have to unbuckle when
you get out.
Just get into your vehicle. Then close
and lock the door. Adjust the seat (to
see how, see
Seats in the Index) so you
can sit
up straight.
21 ...
Page 24 of 243
Downloaded from www.Manualslib.com manuals search engine '1
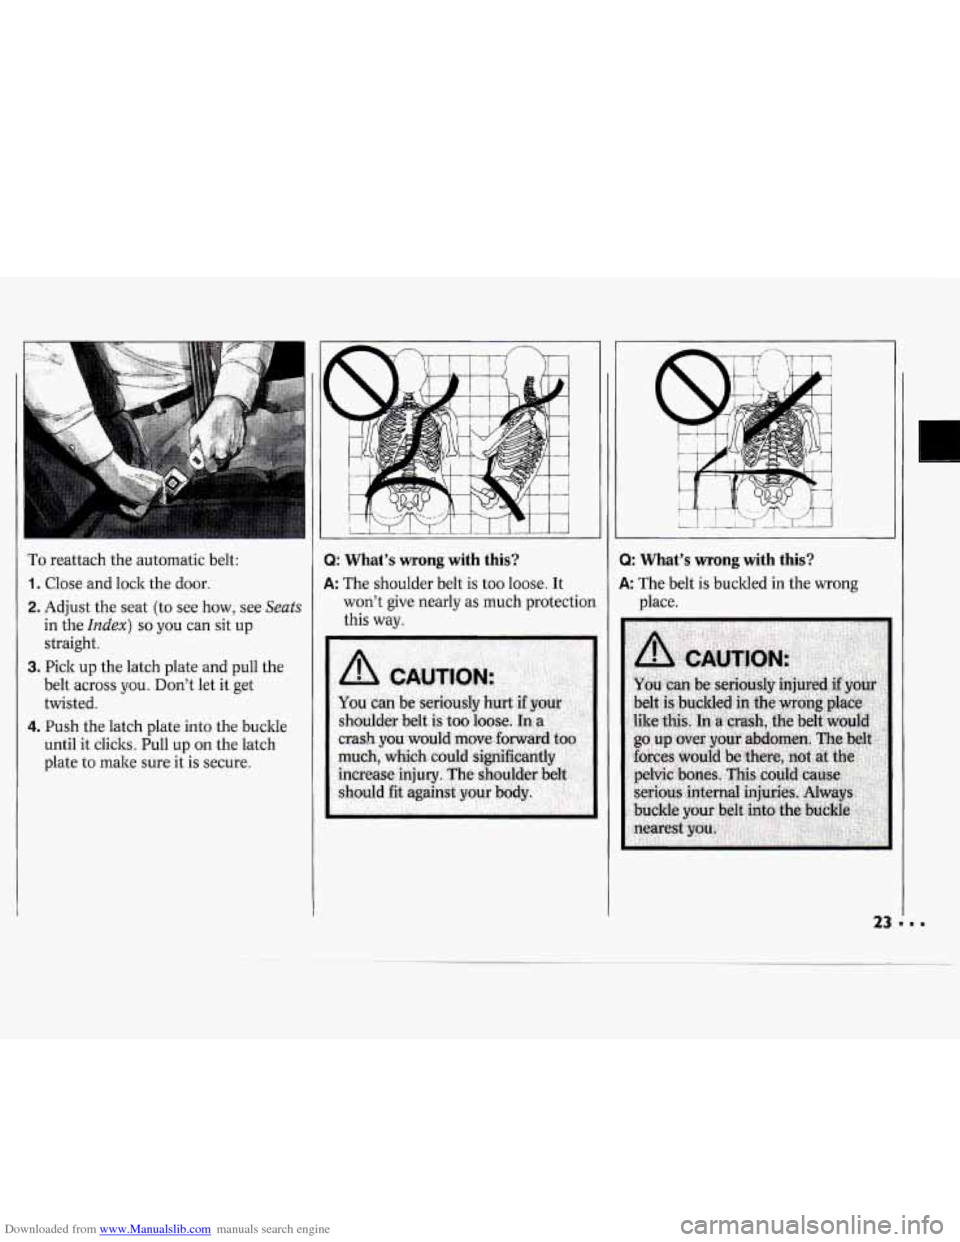
To reattach the automatic belt:
1. Close and lock the door.
2. Adjust the seat (to see how, see Seats
in the Index) so you can sit up
straight.
belt across you. Don't let it get
twisted.
1. Push the latch plate into the buckle
until it cliclts. Pull up
on the latch
plate to make sure it
is secure.
3. Pick up the latch plate and pull the
Q
A
I
i
I: What's wrong with this?
,: The shoulder belt is too loose. It
won't give nearly as much protectior
this way.
Q: What's wrong with this?
A: The belt is buclded in the wrong
place.
23 I.
Page 42 of 243
Downloaded from www.Manualslib.com manuals search engine Here you can learn about the
many standard and' optional
features on your Chevrolet. and information on starting. shifiing and
braking;
Also explained are the
instrument panel and the :warning
systems that tell you
if everything is
working properly-and what to do
if you have a problem .
........ ;\?
Keys ........................................................................\
.................................................... 42
Locks
........................................................................\
.................................................. 43
Glove
Box ........................................................................\
.......................................... 47
Ignition
50 .. ........................................................................\
...............................................
Starting Your Engine ........................................................................\
......................... 51
Engine Coolant Heater ........................................................................\
...................... 52
Automatic Transaxle
........................................................................\
......................... 53
Manual Transaxle ................................... i ................................................................. 56
Parking Brake .......................................................... 1 .................................................. 58
Shfiing into
Park ........................................................................\
............ ................. 58
Windows ..... ........................................................................\
...................................... 62
Turn Signal/Multifunction Lever ........................................................................\
...... 63
Headlights
............................................. ..I.. ................................................. .: ............ -65
Interior Lights ........................................................................\
.................................... 67
Windshield Wipers
........................................................................\
............................. 68
Windshield Washer
........................................................................\
......... .l ................. 69
Cruise Control ........................................................................\
................................... 70
Mirrors
........................................................................\
............................................... 72
Ashtrays and Lighter
........................................................................\
......................... 75
Sunroof ........................................................................\
.............................................. 75
Instrument Panel
........................................................................\
............................... 80
Warning Lights, Gages and Indicators ..................................................................... 84