lock CHEVROLET COLORADO 2012 1.G Service Manual
[x] Cancel search | Manufacturer: CHEVROLET, Model Year: 2012, Model line: COLORADO, Model: CHEVROLET COLORADO 2012 1.GPages: 394, PDF Size: 6.38 MB
Page 106 of 394

Black plate (60,1)Chevrolet Colorado Owner Manual - 2012
3-60 Seats and Restraints
7. To tighten the belt, push downon the child restraint, pull the
shoulder portion of the belt to
tighten the lap portion of the belt,
and feed the shoulder belt back
into the retractor. When installing
a forward-facing child restraint,
it may be helpful to use your
knee to push down on the child
restraint as you tighten the belt. Try to pull the belt out of the
retractor to make sure the
retractor is locked. If the
retractor is not locked, repeat
Steps 5 and 7.
8. Tighten the top tether. See Lower Anchors and Tethers for
Children (LATCH System) on
page 3‑42.
9. Before placing a child in the child restraint, make sure it is
securely held in place. To check,
grasp the child restraint at the
safety belt path and attempt to
move it side to side and back
and forth. When the child
restraint is properly installed,
there should be no more than
2.5 cm (1 in) of movement. If the vehicle is equipped with the
passenger sensing system, and
when the passenger sensing
system has turned off the right front
passenger frontal airbag, the off
indicator on the passenger airbag
status indicator should light and stay
lit when you start the vehicle. See
Passenger Airbag Status Indicator
on page 5‑11.
If a child restraint has been installed
and on indicator is lit, see
“If the On
Indicator is Lit for a Child Restraint”
under Passenger Sensing System
on page 3‑26 for more information.
To remove the child restraint,
unbuckle the vehicle safety belt and
let it return to the stowed position.
Page 109 of 394
Black plate (1,1)Chevrolet Colorado Owner Manual - 2012
Instruments and Controls 5-1
Instruments and
Controls
Controls
Steering Wheel Adjustment . . . 5-2
Horn . . . . . . . . . . . . . . . . . . . . . . . . . . 5-2
Windshield Wiper/Washer . . . . . 5-2
Compass . . . . . . . . . . . . . . . . . . . . . 5-3
Clock . . . . . . . . . . . . . . . . . . . . . . . . . 5-4
Power Outlets . . . . . . . . . . . . . . . . . 5-5
Cigarette Lighter . . . . . . . . . . . . . . 5-5
Ashtrays . . . . . . . . . . . . . . . . . . . . . . 5-6
Warning Lights, Gauges, and
Indicators
Warning Lights, Gauges, andIndicators . . . . . . . . . . . . . . . . . . . . 5-6
Chime Level Adjustment . . . . . . 5-6
Instrument Cluster . . . . . . . . . . . . 5-7
Speedometer . . . . . . . . . . . . . . . . . 5-8
Odometer . . . . . . . . . . . . . . . . . . . . . 5-8
Trip Odometer . . . . . . . . . . . . . . . . . 5-8 Tachometer . . . . . . . . . . . . . . . . . . . 5-8
Fuel Gauge . . . . . . . . . . . . . . . . . . . 5-8
Engine Coolant Temperature
Gauge . . . . . . . . . . . . . . . . . . . . . . . 5-9
Safety Belt Reminders . . . . . . . . 5-9
Airbag Readiness Light . . . . . . 5-10
Passenger Airbag Status
Indicator . . . . . . . . . . . . . . . . . . . . 5-11
Charging System Light . . . . . . 5-12
Malfunction Indicator Lamp . . . . . . . . . . . . . 5-13
Brake System Warning Light . . . . . . . . . . . . . . . . . . . . . . . 5-15
Antilock Brake System (ABS) Warning Light . . . . . . . . . . . . . . 5-16
StabiliTrak
®OFF Light . . . . . . . 5-16
Traction Control System (TCS)/StabiliTrak
®Light . . . . 5-17
Tire Pressure Light . . . . . . . . . . 5-17
Engine Oil Pressure Light . . . . 5-18
Security Light . . . . . . . . . . . . . . . . 5-18
High-Beam On Light . . . . . . . . . 5-18
Cruise Control Light . . . . . . . . . 5-19
Information Displays
Driver Information Center (DIC) . . . . . . . . . . . . . . . 5-19
Vehicle Messages
Vehicle Messages . . . . . . . . . . . 5-22
Battery Voltage and ChargingMessages . . . . . . . . . . . . . . . . . . 5-22
Brake System Messages . . . . 5-23
Door Ajar Messages . . . . . . . . . 5-23
Engine Cooling System Messages . . . . . . . . . . . . . . . . . . 5-23
Engine Oil Messages . . . . . . . . 5-24
Engine Power Messages . . . . 5-24
Fuel System Messages . . . . . . 5-24
Lamp Messages . . . . . . . . . . . . . 5-25
Ride Control System Messages . . . . . . . . . . . . . . . . . . 5-25
Service Vehicle Messages . . . 5-25
Tire Messages . . . . . . . . . . . . . . . 5-26
Transmission Messages . . . . . 5-26
Page 110 of 394
Black plate (2,1)Chevrolet Colorado Owner Manual - 2012
5-2 Instruments and Controls
Controls
Steering Wheel
Adjustment
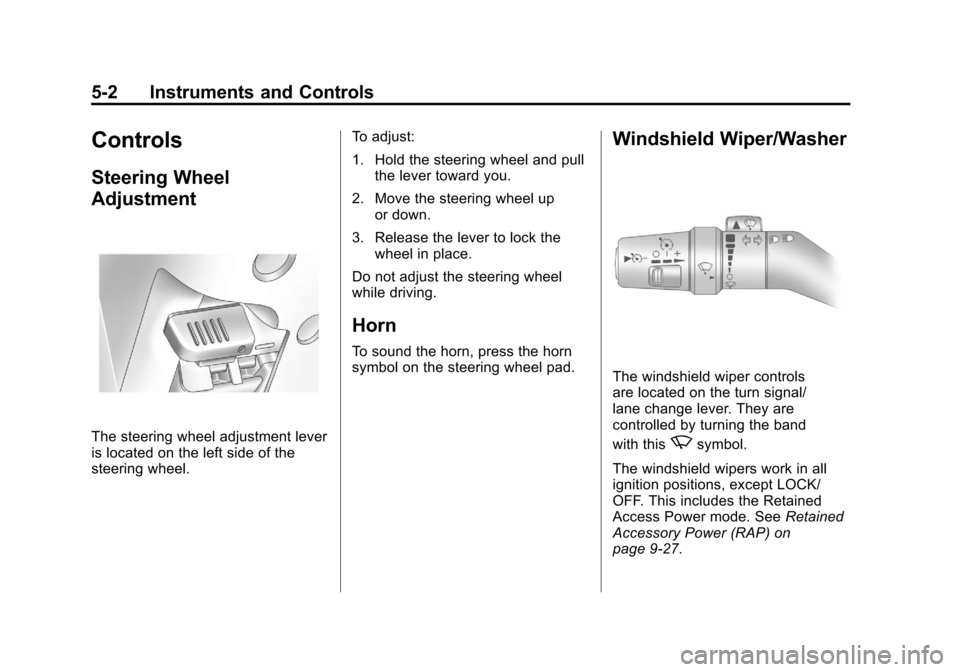
The steering wheel adjustment lever
is located on the left side of the
steering wheel.To adjust:
1. Hold the steering wheel and pull
the lever toward you.
2. Move the steering wheel up or down.
3. Release the lever to lock the wheel in place.
Do not adjust the steering wheel
while driving.
Horn
To sound the horn, press the horn
symbol on the steering wheel pad.
Windshield Wiper/Washer
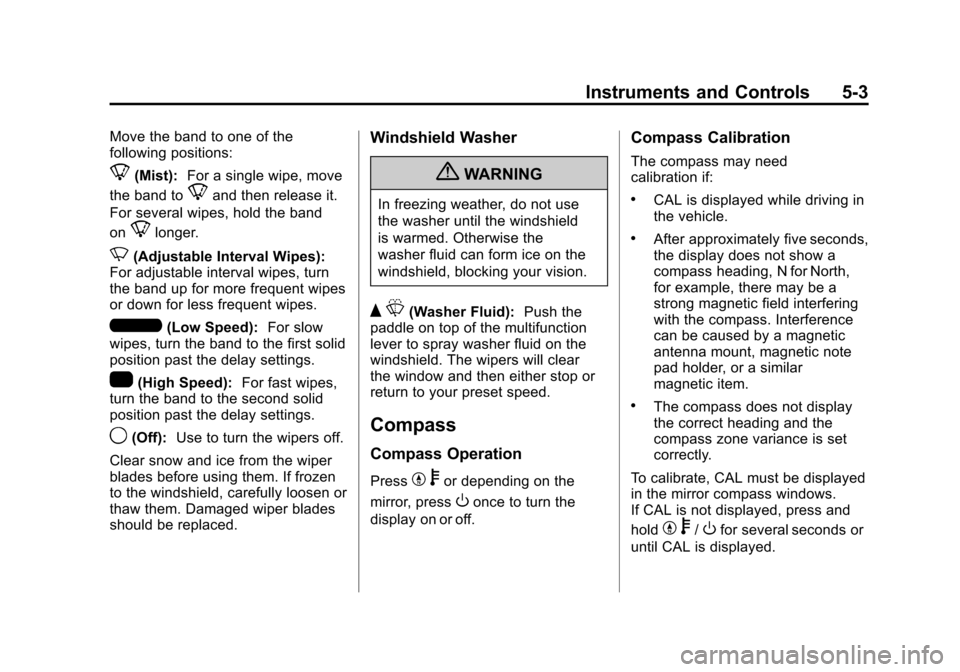
The windshield wiper controls
are located on the turn signal/
lane change lever. They are
controlled by turning the band
with this
zsymbol.
The windshield wipers work in all
ignition positions, except LOCK/
OFF. This includes the Retained
Access Power mode. See Retained
Accessory Power (RAP) on
page 9‑27.
Page 111 of 394
Black plate (3,1)Chevrolet Colorado Owner Manual - 2012
Instruments and Controls 5-3
Move the band to one of the
following positions:
8(Mist):For a single wipe, move
the band to
8and then release it.
For several wipes, hold the band
on
8longer.
N(Adjustable Interval Wipes):
For adjustable interval wipes, turn
the band up for more frequent wipes
or down for less frequent wipes.
6(Low Speed): For slow
wipes, turn the band to the first solid
position past the delay settings.
1(High Speed): For fast wipes,
turn the band to the second solid
position past the delay settings.
9(Off): Use to turn the wipers off.
Clear snow and ice from the wiper
blades before using them. If frozen
to the windshield, carefully loosen or
thaw them. Damaged wiper blades
should be replaced.
Windshield Washer
{WARNING
In freezing weather, do not use
the washer until the windshield
is warmed. Otherwise the
washer fluid can form ice on the
windshield, blocking your vision.
Q L(Washer Fluid): Push the
paddle on top of the multifunction
lever to spray washer fluid on the
windshield. The wipers will clear
the window and then either stop or
return to your preset speed.
Compass
Compass Operation
PressY bor depending on the
mirror, press
Oonce to turn the
display on or off.
Compass Calibration
The compass may need
calibration if:
.CAL is displayed while driving in
the vehicle.
.After approximately five seconds,
the display does not show a
compass heading, N for North,
for example, there may be a
strong magnetic field interfering
with the compass. Interference
can be caused by a magnetic
antenna mount, magnetic note
pad holder, or a similar
magnetic item.
.The compass does not display
the correct heading and the
compass zone variance is set
correctly.
To calibrate, CAL must be displayed
in the mirror compass windows.
If CAL is not displayed, press and
hold
Y b/Ofor several seconds or
until CAL is displayed.
Page 112 of 394
Black plate (4,1)Chevrolet Colorado Owner Manual - 2012
5-4 Instruments and Controls
The compass can be calibrated by
driving the vehicle in circles at
8 km/h (5 mph) or less until the
display reads a direction.
Compass Variance
The mirror is set to zone eight.
If you do not live in zone eight or
drive out of the area, the compass
variance needs to be changed to
the appropriate zone.
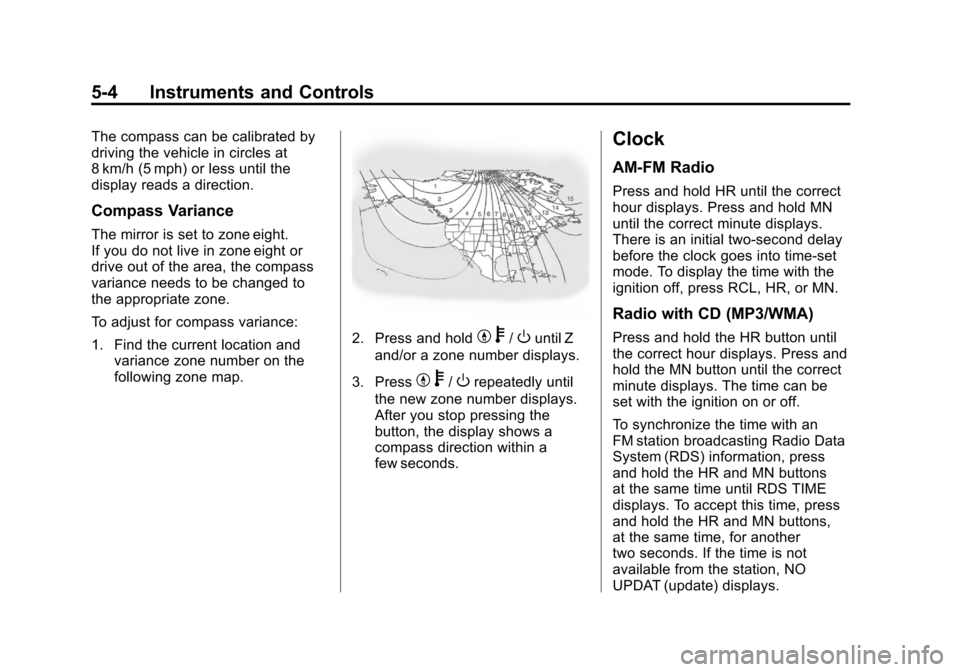
To adjust for compass variance:
1. Find the current location andvariance zone number on the
following zone map.
2. Press and holdYb/Ountil Z
and/or a zone number displays.
3. Press
Y b/Orepeatedly until
the new zone number displays.
After you stop pressing the
button, the display shows a
compass direction within a
few seconds.
Clock
AM-FM Radio
Press and hold HR until the correct
hour displays. Press and hold MN
until the correct minute displays.
There is an initial two-second delay
before the clock goes into time-set
mode. To display the time with the
ignition off, press RCL, HR, or MN.
Radio with CD (MP3/WMA)
Press and hold the HR button until
the correct hour displays. Press and
hold the MN button until the correct
minute displays. The time can be
set with the ignition on or off.
To synchronize the time with an
FM station broadcasting Radio Data
System (RDS) information, press
and hold the HR and MN buttons
at the same time until RDS TIME
displays. To accept this time, press
and hold the HR and MN buttons,
at the same time, for another
two seconds. If the time is not
available from the station, NO
UPDAT (update) displays.
Page 124 of 394
Black plate (16,1)Chevrolet Colorado Owner Manual - 2012
5-16 Instruments and Controls
If the light comes on while driving,
pull off the road and stop. The brake
pedal might be harder to push, or it
might go closer to the floor. It can
take longer to stop. If the light is
still on, have the vehicle towed for
service. SeeTowing the Vehicle on
page 10‑89.
{WARNING
The brake system might not be
working properly if the brake
system warning light is on.
Driving with the brake system
warning light on can lead to a
crash. If the light is still on after
the vehicle has been pulled off
the road and carefully stopped,
have the vehicle towed for
service.
Antilock Brake System
(ABS) Warning Light
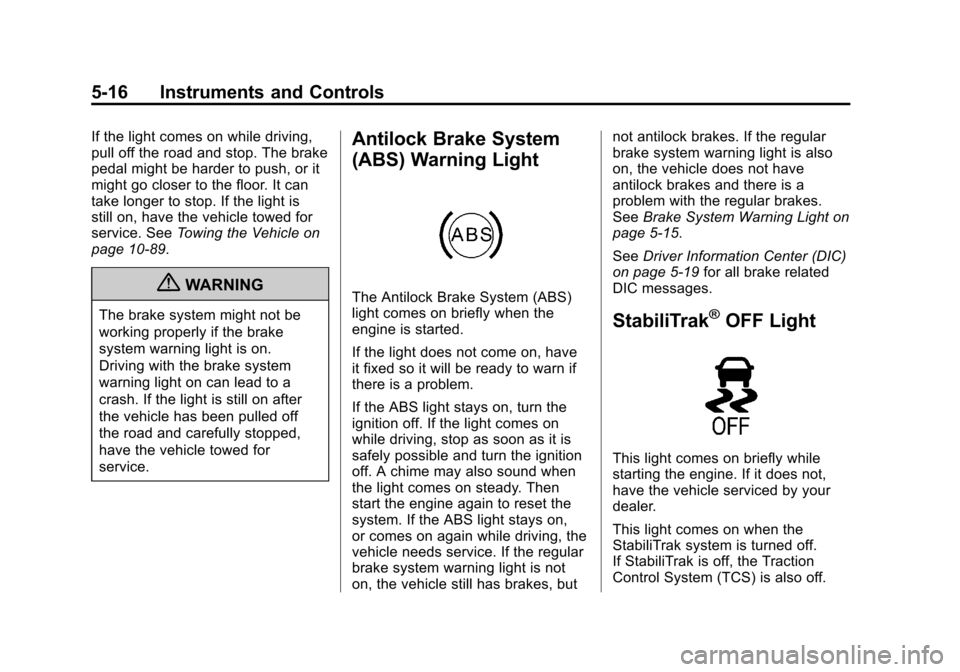
The Antilock Brake System (ABS)
light comes on briefly when the
engine is started.
If the light does not come on, have
it fixed so it will be ready to warn if
there is a problem.
If the ABS light stays on, turn the
ignition off. If the light comes on
while driving, stop as soon as it is
safely possible and turn the ignition
off. A chime may also sound when
the light comes on steady. Then
start the engine again to reset the
system. If the ABS light stays on,
or comes on again while driving, the
vehicle needs service. If the regular
brake system warning light is not
on, the vehicle still has brakes, but not antilock brakes. If the regular
brake system warning light is also
on, the vehicle does not have
antilock brakes and there is a
problem with the regular brakes.
See
Brake System Warning Light on
page 5‑15.
See Driver Information Center (DIC)
on page 5‑19 for all brake related
DIC messages.
StabiliTrak®OFF Light
This light comes on briefly while
starting the engine. If it does not,
have the vehicle serviced by your
dealer.
This light comes on when the
StabiliTrak system is turned off.
If StabiliTrak is off, the Traction
Control System (TCS) is also off.
Page 128 of 394
Black plate (20,1)Chevrolet Colorado Owner Manual - 2012
5-20 Instruments and Controls
Trip Odometer
Press and release the reset stem
until TRIP appears on the DIC
display. The trip odometer shows
the current distance traveled since
the last reset of the trip odometer in
either miles for the United States or
kilometers for Canada.
To reset the trip odometer, press
and hold the reset stem until the
display returns to zero.
Engine Oil Life System
With the engine off, turn the key
to ON/RUN and then press the
reset stem until OIL LIFE RESET
appears—alternating between OIL
LIFE and RESET —on the DIC
display. The CHANGE OIL message
alerts you to change the oil on a
schedule consistent with your
driving conditions. Always reset
the OIL LIFE message after an oil
change. To reset the message,
see Engine Oil Life System on
page 10‑12. In addition to the engine oil life
system monitoring the oil life,
additional maintenance is
recommended in the Maintenance
Schedule in this manual. See
Engine Oil on page 10‑9
and
Maintenance Schedule on
page 11‑3 for more information.
Personalization Features
Language
This feature allows you to choose
the language in which the DIC
display shows information.
To set your choice for this feature:
1. With the engine off, turn the key
to ON/RUN, but do not start the
engine.
2. Close all doors so the DOORS message does not display in
the DIC.
3. Momentarily press and release the reset stem until the current
language is displayed: English
(default), Spanish, or French. 4. To select a different language,
press and hold the reset stem
until the next language appears.
5. Repeat Step 4 until the desired language is displayed. Once the
desired language is shown on
the DIC display, the language
is set.
6. To exit the language selection, momentarily press and
release the reset stem. All DIC
messages will now display in the
language selected.
Automatic Door Locks
This feature allows you to program
the door locks to a preferred setting.
To set your choice for this feature:
1. With the engine off, turn the key to LOCK/OFF. Do not remove
the key from the ignition.
2. Press and hold the power door lock button until the DIC
display shows the current door
lock mode.
Page 129 of 394
Black plate (21,1)Chevrolet Colorado Owner Manual - 2012
Instruments and Controls 5-21
3. To view the next availablemode, press and hold the reset
stem until the mode appears.
Release the reset stem and
press and hold again to view the
next mode.
4. Once the desired mode is shown on the DIC display, briefly
press the reset stem to set your
choice. The DIC display then
clears.
The following are the available
modes:
Lock 1 (default): On vehicles with
an automatic transmission, this
mode locks all of the doors when
the vehicle is shifted out of P (Park)
and unlocks all of the doors when
the vehicle is shifted into P (Park).
On vehicles with a manual
transmission, this mode locks all of
the doors when the vehicle speed is
greater than 24 km/h (15 mph) and
unlocks all of the doors when the
key is removed from the ignition. Lock 2:
On vehicles with an
automatic transmission, this mode
locks all of the doors when the
vehicle is shifted out of P (Park) and
unlocks the driver's door when the
vehicle is shifted into P (Park).
On vehicles with a manual
transmission, this mode locks all of
the doors when the vehicle speed is
greater than 24 km/h (15 mph) and
unlocks the driver's door when the
key is removed from the ignition.
Lock 3: On vehicles with an
automatic transmission, this mode
locks all of the doors when the
vehicle is shifted out of P (Park).
The doors will not automatically
unlock.
On vehicles with a manual
transmission, this mode locks all of
the doors when the vehicle speed is
greater than 24 km/h (15 mph). The
doors will not automatically unlock. Remote Keyless Entry (RKE)
Feedback
This feature allows you to program
the Remote Keyless Entry (RKE)
feedback to a preferred setting.
To set your choice for this feature:
1. With the engine off, turn the key
to LOCK/OFF. Do not remove
the key from the ignition.
2. Press and hold the lock and unlock buttons on the RKE
transmitter at the same time.
Hold both buttons until the DIC
display shows the current RKE
feedback mode.
3. To view the next available mode, press and hold the reset
stem until the mode appears.
Release the reset stem and
press and hold again to view the
next mode.
4. Once the desired mode is shown on the DIC display, briefly
press the reset stem to set your
choice. The DIC display then
clears.
Page 130 of 394
Black plate (22,1)Chevrolet Colorado Owner Manual - 2012
5-22 Instruments and Controls
The following are the available
modes:
RFA 1 (default):This mode flashes
the parking lamps when you press
the lock or unlock buttons on the
RKE transmitter.
RFA 2: This mode flashes the
parking lamps and sounds the horn
when you press the lock button on
the RKE transmitter. This mode also
flashes the parking lamps when you
press the unlock button on the RKE
transmitter.
RFA 3: This mode flashes the
parking lamps and sounds the horn
when you press the lock or unlock
buttons on the RKE transmitter.
RFA 4: This mode disables RKE
feedback. There will be no feedback
when you press the lock or unlock
buttons on the RKE transmitter.Vehicle Messages
Messages are displayed on the DIC
to notify the driver that the status of
the vehicle has changed and that
some action may be needed by
the driver to correct the condition.
Multiple messages may appear one
after another. The messages are
displayed for several seconds each.
Some messages may not require
immediate action, but you should
press and release the trip odometer
reset stem to acknowledge that
you received the messages and to
clear them from the display. Each
message must be acknowledged
individually.
Some messages cannot be cleared
from the DIC display because they
are more urgent. These messages
require action before they can be
cleared. You should take any
messages that appear on the
display seriously and remember that
clearing the messages only makes
the messages disappear, not correct
the problem. The following are the possible
messages that can be displayed
and some information about them.
Battery Voltage and
Charging Messages
SERVICE CHARG (Charge)
SYS (System)
This message displays if there is a
problem with the battery charging
system. Under certain conditions,
the battery warning light may also
turn on in the instrument panel
cluster. See
Charging System Light
on page 5‑12. The battery will not
be charging at an optimal rate and
the vehicle will lose the ability to
enter the fuel economy mode. The
vehicle is safe to drive, however
have the electrical system checked
by your dealer. Press and release
the reset stem to acknowledge
the message and clear it from the
display.
Page 131 of 394
Black plate (23,1)Chevrolet Colorado Owner Manual - 2012
Instruments and Controls 5-23
Brake System Messages
ABS (Antilock Brake System)
FAULT
This message displays if there is a
problem with the Antilock Brake
System (ABS). Check the ABS as
soon as possible and have your
vehicle serviced by your dealer. See
Braking on page 9‑4andAntilock
Brake System (ABS) Warning Light
on page 5‑16 for more information.
Press and release the reset stem to
acknowledge the message and
clear it from the display.
BRAKES
This message displays if there is a
problem with the brakes. Check the
brakes as soon as possible and
have your vehicle serviced by your
dealer. See Braking on page 9‑4
and Antilock Brake System (ABS)
Warning Light on page 5‑16 for
more information. Press and release
the reset stem to acknowledge the
message and clear it from the
display.
FLUID
This message displays if the brake
fluid is low. Check the brake fluid
as soon as possible and have your
vehicle serviced by your dealer.
See Braking on page 9‑4 for more
information. Press and release the
reset stem to acknowledge the
message and clear it from the
display.
PARK BRK (Brake)
This message displays when the
parking brake is set. See Parking
Brake on page 9‑41 andAntilock
Brake System (ABS) Warning Light
on page 5‑16 for more information.
The message clears from the
display after the parking brake
is released or by pressing and
releasing the reset stem.
Door Ajar Messages
DOORS
This message displays when one or
more of the doors is ajar. Check all
the doors on your vehicle to make
sure they are closed. The message
clears from the display after all of
the doors are closed.
Engine Cooling System
Messages
AC (Air Conditioning) OFF
This message displays when the
engine coolant temperature is too
high and the air conditioning in your
vehicle needs to be turned off. See
Engine Overheating on page 10‑22
and Climate Control Systems on
page 8‑1 for more information. This
message displays along with the
ENG HOT message.