capacities CHEVROLET COLORADO 2017 2.G Owners Manual
[x] Cancel search | Manufacturer: CHEVROLET, Model Year: 2017, Model line: COLORADO, Model: CHEVROLET COLORADO 2017 2.GPages: 419, PDF Size: 7.38 MB
Page 288 of 419

Chevrolet Colorado Owner Manual (GMNA-Localizing-U.S./Canada/Mexico-10122675) - 2017 - crc - 8/22/16
Vehicle Care 287
checking a cold engine prior tostarting. Remove the dipstickand check the level.
.If unable to wait two hours, theengine must be off for at least15 minutes if the engine iswarm, or at least 30 minutes ifthe engine is not warm. Pull outthe dipstick, wipe it with a cleanpaper towel or cloth, then push itback in all the way. Remove itagain, keeping the tip down, andcheck the level.
When to Add Engine Oil
2.5L L4 Engine
3.6L V6 Engine
If the oil is below the cross-hatchedarea at the tip of the dipstick andthe engine has been off for at least15 minutes, add 1 L (1 qt) of therecommended oil and then recheckthe level. See“Selecting the RightEngine Oil”later in this section foran explanation of what kind of oil touse. For engine oil crankcasecapacity, seeCapacities andSpecifications0380.
Caution
Do not add too much oil. Oil
levels above or below the
acceptable operating range
shown on the dipstick are harmful
to the engine. If you find that you
have an oil level above the
operating range, i.e., the engine
(Continued)
Caution (Continued)
has so much oil that the oil level
gets above the cross-hatched
area that shows the proper
operating range, the engine could
be damaged. You should drain
out the excess oil or limit driving
of the vehicle and seek a service
professional to remove the
excess amount of oil.
SeeEngine Compartment Overview0283for the location of the engineoil fill cap.
Add enough oil to put the levelsomewhere in the proper operatingrange. Push the dipstick all the wayback in when through.
Selecting the Right Engine Oil
Selecting the right engine oildepends on both the proper oilspecification and viscosity grade.SeeRecommended Fluids andLubricants0375.
Page 300 of 419
Chevrolet Colorado Owner Manual (GMNA-Localizing-U.S./Canada/Mexico-10122675) - 2017 - crc - 8/22/16
Vehicle Care 299
heard all the time the vehicle ismoving, except when applying thebrake pedal firmly.
{Warning
The brake wear warning sound
means that soon the brakes will
not work well. That could lead to
acrash.Whenthebrakewear
warning sound is heard, have the
vehicle serviced.
Caution
Continuing to drive with worn-out
brake pads could result in costly
brake repair.
Some driving conditions or climatescan cause a brake squeal when thebrakes are first applied or lightlyapplied. This does not meansomething is wrong with the brakes.
Properly torqued wheel nuts arenecessary to help prevent brakepulsation. When tires are rotated,inspect brake pads for wear andevenly tighten wheel nuts in theproper sequence to torquespecifications inCapacities andSpecifications0380.
Brake linings should always bereplaced as complete axle sets.
Brake Pedal Travel
See your dealer if the brake pedaldoes not return to normal height,or if there is a rapid increase inpedal travel. This could be a signthat brake service may be required.
Replacing Brake System Parts
Always replace brake system partswith new, approved replacementparts. If this is not done, the brakesmay not work properly. The brakingperformance expected can changein many other ways if the wrongreplacement brake parts areinstalled or parts are improperlyinstalled.
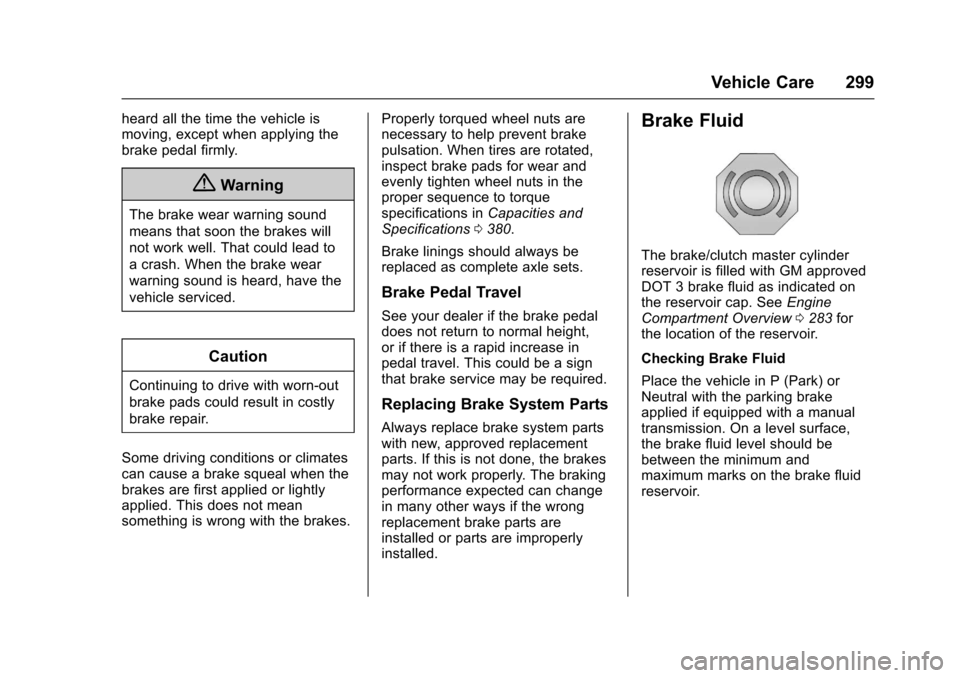
Brake Fluid
The brake/clutch master cylinderreservoir is filled with GM approvedDOT 3 brake fluid as indicated onthe reservoir cap. SeeEngineCompartment Overview0283forthe location of the reservoir.
Checking Brake Fluid
Place the vehicle in P (Park) orNeutral with the parking brakeapplied if equipped with a manualtransmission. On a level surface,the brake fluid level should bebetween the minimum andmaximum marks on the brake fluidreservoir.
Page 331 of 419
Chevrolet Colorado Owner Manual (GMNA-Localizing-U.S./Canada/Mexico-10122675) - 2017 - crc - 8/22/16
330 Vehicle Care
Reset the Tire Pressure Monitor
System. SeeTire Pressure
Monitor Operation0326.
Check that all wheel nuts are
properly tightened. See“Wheel
Nut Torque”underCapacities
and Specifications0380.
{Warning
Rust or dirt on a wheel, or on the
parts to which it is fastened, can
make wheel nuts become loose
after time. The wheel could come
off and cause an accident. When
changing a wheel, remove any
rust or dirt from places where the
wheel attaches to the vehicle. In
an emergency, a cloth or a paper
towel can be used; however, use
ascraperorwirebrushlaterto
remove all rust or dirt.
Lightly coat the center of the
wheel hub with wheel bearing
grease after a wheel change or
tire rotation to prevent corrosion
or rust build-up. Do not get
grease on the flat wheel
mounting surface or on the
wheel nuts or bolts.
When It Is Time for New
Tires
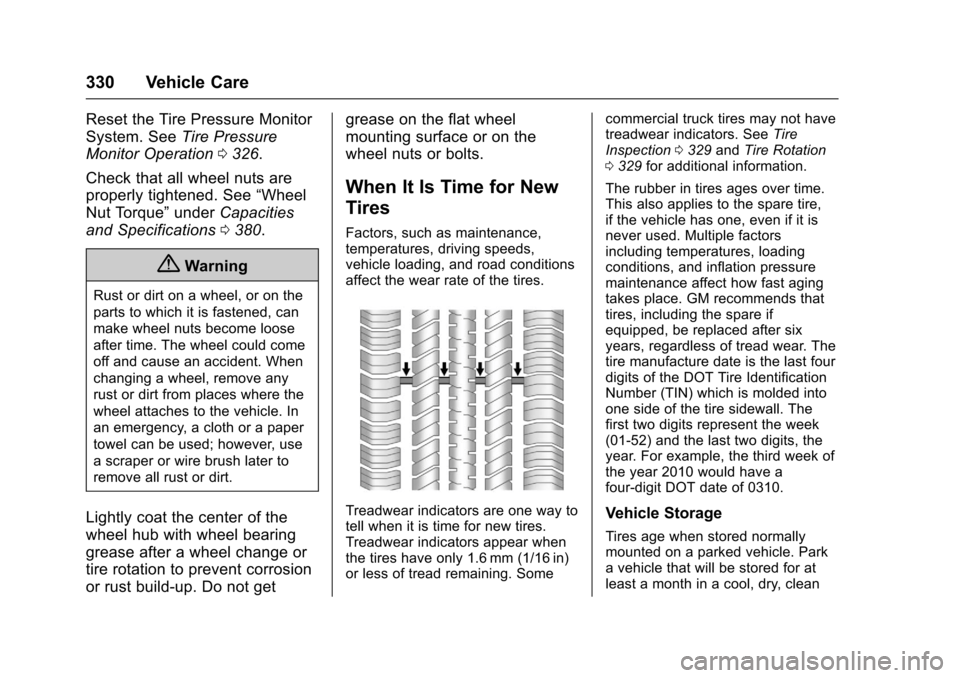
Factors, such as maintenance,temperatures, driving speeds,vehicle loading, and road conditionsaffect the wear rate of the tires.
Treadwear indicators are one way totell when it is time for new tires.Treadwear indicators appear whenthe tires have only 1.6 mm (1/16 in)or less of tread remaining. Some
commercial truck tires may not havetreadwear indicators. SeeTireInspection0329andTire Rotation0329for additional information.
The rubber in tires ages over time.This also applies to the spare tire,if the vehicle has one, even if it isnever used. Multiple factorsincluding temperatures, loadingconditions, and inflation pressuremaintenance affect how fast agingtakes place. GM recommends thattires, including the spare ifequipped, be replaced after sixyears, regardless of tread wear. Thetire manufacture date is the last fourdigits of the DOT Tire IdentificationNumber (TIN) which is molded intoone side of the tire sidewall. Thefirst two digits represent the week(01-52) and the last two digits, theyear. For example, the third week ofthe year 2010 would have afour-digit DOT date of 0310.
Vehicle Storage
Tires age when stored normallymounted on a parked vehicle. Parkavehiclethatwillbestoredforatleast a month in a cool, dry, clean
Page 344 of 419
Chevrolet Colorado Owner Manual (GMNA-Localizing-U.S./Canada/Mexico-10122675) - 2017 - crc - 8/22/16
Vehicle Care 343
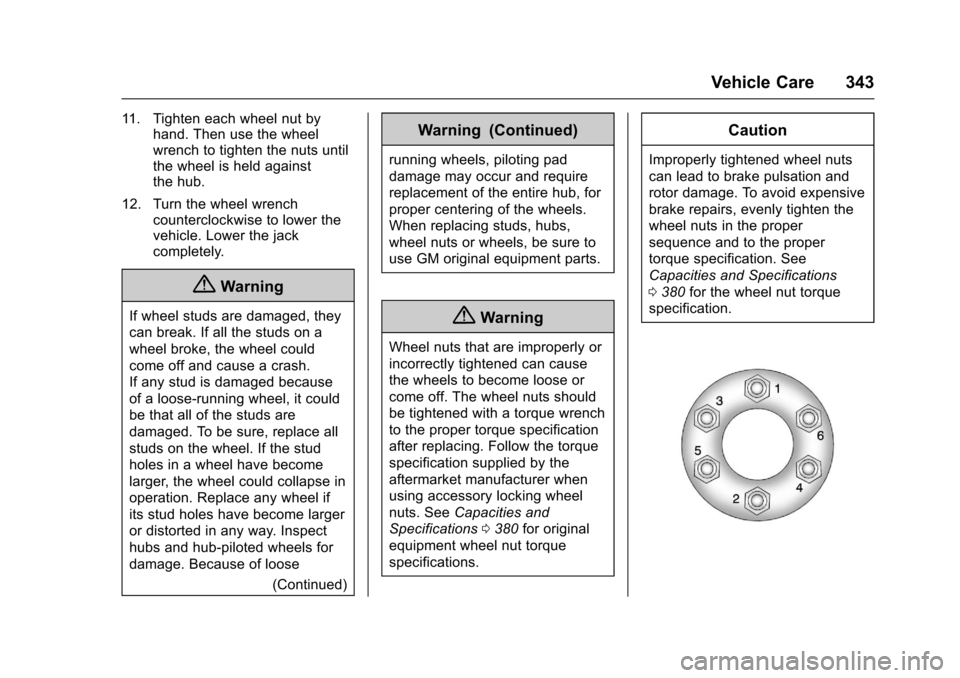
11 . Ti g h t e n e a c h w h e e l n u t b yhand. Then use the wheelwrench to tighten the nuts untilthe wheel is held againstthe hub.
12. Turn the wheel wrenchcounterclockwise to lower thevehicle. Lower the jackcompletely.
{Warning
If wheel studs are damaged, they
can break. If all the studs on a
wheel broke, the wheel could
come off and cause a crash.
If any stud is damaged because
of a loose-running wheel, it could
be that all of the studs are
damaged. To be sure, replace all
studs on the wheel. If the stud
holes in a wheel have become
larger, the wheel could collapse in
operation. Replace any wheel if
its stud holes have become larger
or distorted in any way. Inspect
hubs and hub⇣piloted wheels for
damage. Because of loose
(Continued)
Warning (Continued)
running wheels, piloting pad
damage may occur and require
replacement of the entire hub, for
proper centering of the wheels.
When replacing studs, hubs,
wheel nuts or wheels, be sure to
use GM original equipment parts.
{Warning
Wheel nuts that are improperly or
incorrectly tightened can cause
the wheels to become loose or
come off. The wheel nuts should
be tightened with a torque wrench
to the proper torque specification
after replacing. Follow the torque
specification supplied by the
aftermarket manufacturer when
using accessory locking wheel
nuts. SeeCapacities and
Specifications0380for original
equipment wheel nut torque
specifications.
Caution
Improperly tightened wheel nuts
can lead to brake pulsation and
rotor damage. To avoid expensive
brake repairs, evenly tighten the
wheel nuts in the proper
sequence and to the proper
torque specification. See
Capacities and Specifications
0380for the wheel nut torque
specification.
Page 380 of 419

Chevrolet Colorado Owner Manual (GMNA-Localizing-U.S./Canada/Mexico-10122675) - 2017 - crc - 8/22/16
Technical Data 379
Technical Data
Vehicle Identification
Vehicle IdentificationNumber (VIN) . . . . . . . . . . . . . . . 379Service Parts IdentificationLabel . . . . . . . . . . . . . . . . . . . . . . . . 379
Vehicle Data
Capacities andSpecifications . . . . . . . . . . . . . . . 380Engine Drive Belt Routing . . . . 382
Vehicle Identification
Vehicle Identification
Number (VIN)
This legal identifier is in the frontcorner of the instrument panel, onthe driver side of the vehicle. It canbe seen through the windshield fromoutside. The Vehicle IdentificationNumber (VIN) also appears on theVehicle Certification and ServiceParts labels and certificates of titleand registration.
Engine Identification
The eighth character in the VIN isthe engine code. This codeidentifies the vehicle's engine,specifications, and replacementparts. See“Engine Specifications”underCapacities and Specifications0380for the vehicle's engine code.
Service Parts
Identification Label
This label, on the inside of the glovebox, has the following information:
.Vehicle IdentificationNumber (VIN).
.Model designation.
.Paint information.
.Production options and specialequipment.
Do not remove this label from thevehicle.
Page 381 of 419

Chevrolet Colorado Owner Manual (GMNA-Localizing-U.S./Canada/Mexico-10122675) - 2017 - crc - 8/22/16
380 Technical Data
Vehicle Data
Capacities and Specifications
The following approximate capacities are given in metric and English conversions. SeeRecommended Fluids andLubricants0375.
ApplicationCapacities
Metric English
Air Conditioning Refrigerant For the air conditioning system refrigerant type andcharge amount, see the refrigerant label under thehood. See your dealer for more information.
Cooling System
2.5L L4 9.1 L 9.6 qt
3.6L V6 12.4 L 13.1 qt
Engine Oil with Filter
2.5L L4 4.7 L 5.0 qt
3.6L V6 5.7 L 6.0 qt
Fuel Tank 80 L 21 gal
Transfer Case Fluid 1.9 L 2.0 qt
Wheel Nut Torque 190Y140 lb ft
All capacities are approximate. When adding, be sure to fill to the approximate level, as recommended in thismanual. Recheck fluid level after filling.
Page 409 of 419
Chevrolet Colorado Owner Manual (GMNA-Localizing-U.S./Canada/Mexico-10122675) - 2017 - crc - 8/22/16
408 Index
Audio (cont'd)
Theft-Deterrent Feature . . . . . . . 154
Automatic
Climate Control System . . . . . . . 210
Door Locks . . . . . . . . . . . . . . . . . . . . . 34
Headlamp System . . . . . . . . . . . . 148
Transmission . . . . . . . . . . . . . . . . . 241
Transmission Fluid . . . . . . . . . . . 290
Automatic Transmission
Manual Mode . . . . . . . . . . . . . . . . . 244
Shift Lock Control Function
Check . . . . . . . . . . . . . . . . . . . . . . . 304
Auxiliary Jack . . . . . . . . . . . . . . . . . . . 179
Avoiding Untrusted Media
Devices . . . . . . . . . . . . . . . . . . . . . . . 170
Axle, Front . . . . . . . . . . . . . . . . . . . . . . 302
Axle, Rear . . . . . . . . . . . . . . . . . . . . . . 303
B
Battery
Load Management . . . . . . . . . . . . 152
Power Protection . . . . . . . . . . . . . 152
Voltage and Charging
Messages . . . . . . . . . . . . . . . . . . . 132
Battery - North America . . . . 300, 348
Blade Replacement, Wiper . . . . . 305
Blind Spot Mirrors . . . . . . . . . . . . . . . 39
Bluetooth
Overview . . . . . . . . 187, 188,192, 197
Bluetooth Audio . . . . . . . . . . . . . . . . 180
Brake
System Warning Light . . . . . . . . 120
Brakes . . . . . . . . . . . . . . . . . . . . . . . . . . 298
Antilock . . . . . . . . . . . . . . . . . . . . . . . 254
Assist . . . . . . . . . . . . . . . . . . . . . . . . . 255
Fluid . . . . . . . . . . . . . . . . . . . . . . . . . . 299
Parking . . . . . . . . . . . . . . . . . . . . . . . 254
System Messages . . . . . . . . . . . . 133
Braking . . . . . . . . . . . . . . . . . . . . . . . . . 216
Break-In, New Vehicle . . . . . . . . . . 232
Bulb Replacement . . . . . . . . . . . . . . 309
Center High-Mounted
Stoplamp (CHMSL) and
Cargo Lamp . . . . . . . . . . . . . . . . . 308
Halogen Bulbs . . . . . . . . . . . . . . . . 306
Headlamp Aiming . . . . . . . . . . . . . 306
Headlamps . . . . . . . . . . . . . . . . . . . 306
Headlamps, Front Turn
Signal, Sidemarker, and
Parking Lamps . . . . . . . . . . . . . . 307
Ta i l l a m p s , T u r n S i g n a l ,
Stoplamps, and Back-up
Lamps . . . . . . . . . . . . . . . . . . . . . . 307
Buying New Tires . . . . . . . . . . . . . . . 331
C
Calibration . . . . . . . . . . . . . . . . . . . . . . 105
California
Fuel Requirements . . . . . . . . . . . 267
Perchlorate Materials
Requirements . . . . . . . . . . . . . . . 280
California
Proposition
65 Warning . . . . . . . . . .280, 300, 348
Camera
Rear Vision (RVC) . . . . . . . . . . . . 261
Canadian Vehicle Owners . . . . . . . . 2
Capacities and
Specifications . . . . . . . . . . . . . . . . . 380
Carbon Monoxide
Engine Exhaust . . . . . . . . . . . . . . . 240
Ta i l g a t e . . . . . . . . . . . . . . . . . . . . . . . . . 3 5
Winter Driving . . . . . . . . . . . . . . . . 224
Cargo Lamp . . . . . . . . . . . . . . . . . . . . 150
Caution, Danger, and Warning . . . . 3
Center Console Storage . . . . . . . . 101
Center High-Mounted
Stoplamp (CHMSL) and
Cargo Lamp . . . . . . . . . . . . . . . . . . . 308
Chains, Tire . . . . . . . . . . . . . . . . . . . . 335
Charging
Wireless . . . . . . . . . . . . . . . . . . . . . . 107
Charging System Light . . . . . . . . . 118
Page 417 of 419

Chevrolet Colorado Owner Manual (GMNA-Localizing-U.S./Canada/Mexico-10122675) - 2017 - crc - 8/22/16
416 Index
Shifting (cont'd)
Out of Park . . . . . . . . . . . . . . . . . . . 239
Signals, Turn and
Lane-Change . . . . . . . . . . . . . . . . . 149
Software Updates . . . . . . . . . . . . . . 161
Spare Tire
Compact . . . . . . . . . . . . . . . . . . . . . . 346
Special Application Services . . . . 372
Specifications and
Capacities . . . . . . . . . . . . . . . . . . . . . 380
Speedometer . . . . . . . . . . . . . . . . . . . 114
StabiliTrak
OFF Light . . . . . . . . . . . . . . . . . . . . . 122
Start Assist, Hill . . . . . . . . . . . . . . . . . 255
Start Vehicle, Remote . . . . . . . . . . . 32
Starter Switch Check . . . . . . . . . . . 303
Starting the Engine . . . . . . . . . . . . . 234
Starting the Vehicle
Messages . . . . . . . . . . . . . . . . . . . . . 137
Steering . . . . . . . . . . . . . . . . . . . . . . . . 216
Wheel Adjustment . . . . . . . . . . . . 103
Wheel Controls . . . . . . . . . . . . . . . 104
Steering System Messages . . . . . 137
Stoplamps and Back-up Lamps
Bulb Replacement . . . . . . . . . . . . 307
Storage Areas
Center Console . . . . . . . . . . . . . . . 101
Glove Box . . . . . . . . . . . . . . . . . . . . 100
Storage Areas (cont'd)
Sunglasses . . . . . . . . . . . . . . . . . . . 101
Underseat . . . . . . . . . . . . . . . . . . . . 101
Storage Compartments . . . . . . . . . 100
Stuck Vehicle . . . . . . . . . . . . . . . . . . . 225
Sun Visors . . . . . . . . . . . . . . . . . . . . . . . 43
Sunglass Storage . . . . . . . . . . . . . . . 101
Symbols . . . . . . . . . . . . . . . . . . . . . . . . . . 3
System
Forward Collision
Alert (FCA) . . . . . . . . . . . . . . . . . . 263
Infotainment . . . . . . . . . . . . . 153, 396
T
Ta c h o m e t e r . . . . . . . . . . . . . . . . . . . . . 11 4
Ta i l g a t e . . . . . . . . . . . . . . . . . . . . . . . . . . 3 5
Ta i l l a m p s
Bulb Replacement . . . . . . . . . . . . 307
Te x t M e s s a g i n g . . . . . . . . . . . . . . . . . 2 0 1
Te x t Te l e p h o n e ( T T Y ) U s e r s . . . . 3 8 6
Theft-Deterrent Systems . . . . . . . . . 37
Immobilizer . . . . . . . . . . . . . . . . . . . . . 37
Time . . . . . . . . . . . . . . . . . . . . . . . . . . . . 106
Tires . . . . . . . . . . . . . . . . . . . . . . . . . . . . 316
All-Season . . . . . . . . . . . . . . . . . . . . 317
All-Terrain . . . . . . . . . . . . . . . . . . . . 318
Buying New Tires . . . . . . . . . . . . . 331
Chains . . . . . . . . . . . . . . . . . . . . . . . . 335
Changing . . . . . . . . . . . . . . . . . . . . . 338
Tires (cont'd)
Compact Spare . . . . . . . . . . . . . . . 346
Designations . . . . . . . . . . . . . . . . . 320
Different Size . . . . . . . . . . . . . . . . . 332
Full-Size Spare . . . . . . . . . . . . . . . 347
If a Tire Goes Flat . . . . . . . . . . . . 336
Inspection . . . . . . . . . . . . . . . . . . . . 329
Messages . . . . . . . . . . . . . . . . . . . . 137
Pressure . . . . . . . . . . . . . . . . . . . . . . 323
Pressure Light . . . . . . . . . . . . . . . . 123
Pressure Monitor Operation . . 326
Pressure Monitor System . . . . . 325
Rotation . . . . . . . . . . . . . . . . . . . . . . 329
Sidewall Labeling . . . . . . . . . . . . . 318
Te r m i n o l o g y a n d D e f i n i t i o n s . . 3 2 1
Uniform Tire Quality
Grading . . . . . . . . . . . . . . . . . . . . . 333
Wheel Alignment and Tire
Balance . . . . . . . . . . . . . . . . . . . . . 334
Wheel Replacement . . . . . . . . . . 334
When It Is Time for New
Tires . . . . . . . . . . . . . . . . . . . . . . . . 330
Winter . . . . . . . . . . . . . . . . . . . . . . . . 317
To w / H a u l M o d e . . . . . . . . . . . . . . . . . 2 4 5
To w / H a u l M o d e L i g h t . . . . . . . . . . . 1 2 1
To w i n g
Driving Characteristics . . . . . . . . 270
Equipment . . . . . . . . . . . . . . . . . . . . 275