Trailer CHEVROLET COLORADO 2021 Owner's Manual
[x] Cancel search | Manufacturer: CHEVROLET, Model Year: 2021, Model line: COLORADO, Model: CHEVROLET COLORADO 2021Pages: 359, PDF Size: 8.03 MB
Page 6 of 359
Chevrolet Colorado Owner Manual (GMNA-Localizing-U.S./Canada/Mexico-
14430421) - 2021 - CRC - 2/10/20
Introduction 5
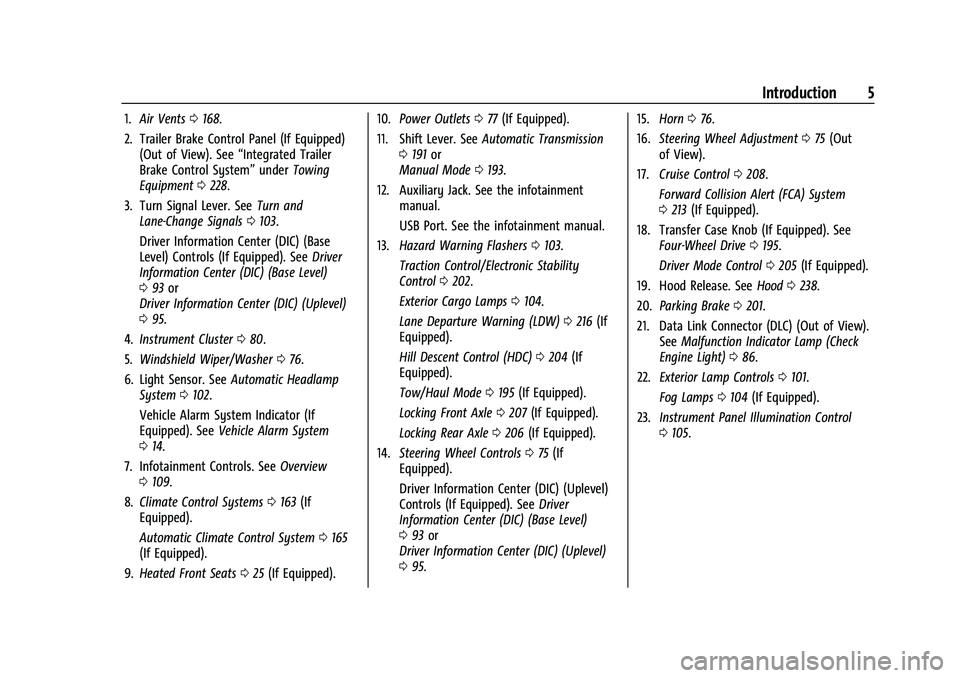
1.Air Vents 0168.
2. Trailer Brake Control Panel (If Equipped) (Out of View). See “Integrated Trailer
Brake Control System” underTowing
Equipment 0228.
3. Turn Signal Lever. See Turn and
Lane-Change Signals 0103.
Driver Information Center (DIC) (Base
Level) Controls (If Equipped). See Driver
Information Center (DIC) (Base Level)
0 93 or
Driver Information Center (DIC) (Uplevel)
0 95.
4. Instrument Cluster 080.
5. Windshield Wiper/Washer 076.
6. Light Sensor. See Automatic Headlamp
System 0102.
Vehicle Alarm System Indicator (If
Equipped). See Vehicle Alarm System
0 14.
7. Infotainment Controls. See Overview
0 109.
8. Climate Control Systems 0163 (If
Equipped).
Automatic Climate Control System 0165
(If Equipped).
9. Heated Front Seats 025 (If Equipped). 10.
Power Outlets 077 (If Equipped).
11. Shift Lever. See Automatic Transmission
0 191 or
Manual Mode 0193.
12. Auxiliary Jack. See the infotainment manual.
USB Port. See the infotainment manual.
13. Hazard Warning Flashers 0103.
Traction Control/Electronic Stability
Control 0202.
Exterior Cargo Lamps 0104.
Lane Departure Warning (LDW) 0216 (If
Equipped).
Hill Descent Control (HDC) 0204 (If
Equipped).
Tow/Haul Mode 0195 (If Equipped).
Locking Front Axle 0207 (If Equipped).
Locking Rear Axle 0206 (If Equipped).
14. Steering Wheel Controls 075 (If
Equipped).
Driver Information Center (DIC) (Uplevel)
Controls (If Equipped). See Driver
Information Center (DIC) (Base Level)
0 93 or
Driver Information Center (DIC) (Uplevel)
0 95. 15.
Horn 076.
16. Steering Wheel Adjustment 075 (Out
of View).
17. Cruise Control 0208.
Forward Collision Alert (FCA) System
0 213 (If Equipped).
18. Transfer Case Knob (If Equipped). See Four-Wheel Drive 0195.
Driver Mode Control 0205 (If Equipped).
19. Hood Release. See Hood0238.
20. Parking Brake 0201.
21. Data Link Connector (DLC) (Out of View). SeeMalfunction Indicator Lamp (Check
Engine Light) 086.
22. Exterior Lamp Controls 0101.
Fog Lamps 0104 (If Equipped).
23. Instrument Panel Illumination Control
0105.
Page 88 of 359
Chevrolet Colorado Owner Manual (GMNA-Localizing-U.S./Canada/Mexico-
14430421) - 2021 - CRC - 2/10/20
Instruments and Controls 87
If the light is flashing :A malfunction has
been detected that could damage the
emission control system and increase vehicle
emissions. Diagnosis and service may be
required.
To help prevent damage, reduce vehicle
speed and avoid hard accelerations and
uphill grades. If towing a trailer, reduce the
amount of cargo being hauled as soon as
possible.
If the light continues to flash, find a safe
place to park. Turn the vehicle off and wait
at least 10 seconds before restarting the
engine. If the light is still flashing, follow
the previous guidelines and see your dealer
for service as soon as possible.
If the light is on steady : A malfunction has
been detected. Diagnosis and service may be
required.
Check the following:
.If fuel has been added to the vehicle
using the capless funnel adapter, make
sure that it has been removed. See
“Filling the Tank with a Portable Gas Can”
under Filling the Tank 0218. The
diagnostic system can detect if the
adapter has been left installed in the
vehicle, allowing fuel to evaporate into the atmosphere. A few driving trips with
the adapter removed may turn off the
light.
.Poor fuel quality can cause inefficient
engine operation and poor driveability,
which may go away once the engine is
warmed up. If this occurs, change the fuel
brand. It may require at least one full
tank of the proper fuel to turn the light
off. See
Recommended Fuel 0217.
If the light remains on, see your dealer.
Emissions Inspection and Maintenance
Programs
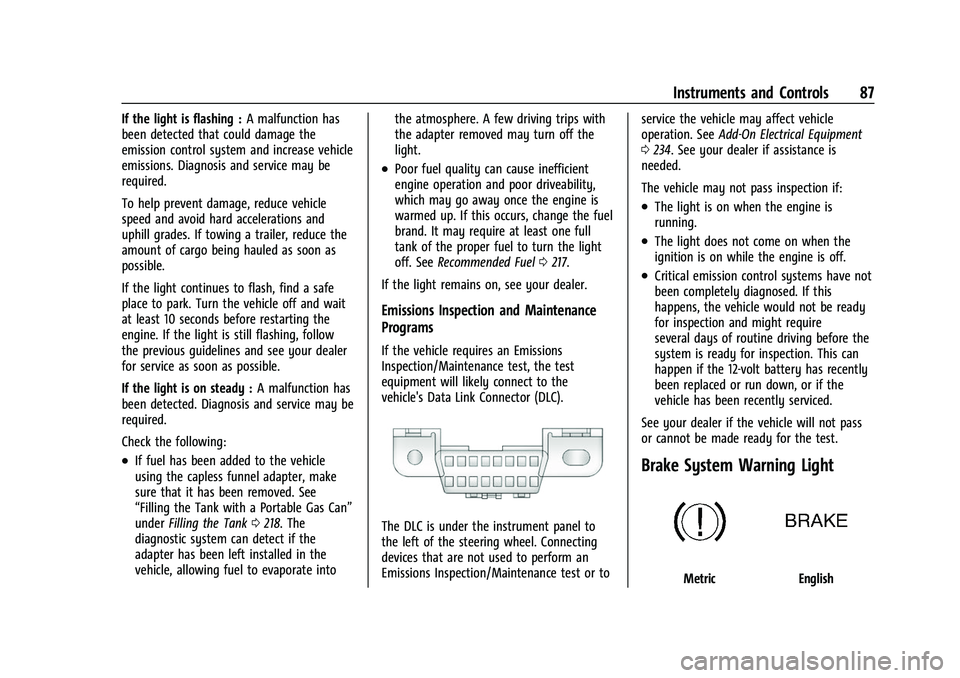
If the vehicle requires an Emissions
Inspection/Maintenance test, the test
equipment will likely connect to the
vehicle's Data Link Connector (DLC).
The DLC is under the instrument panel to
the left of the steering wheel. Connecting
devices that are not used to perform an
Emissions Inspection/Maintenance test or to service the vehicle may affect vehicle
operation. See
Add-On Electrical Equipment
0 234. See your dealer if assistance is
needed.
The vehicle may not pass inspection if:
.The light is on when the engine is
running.
.The light does not come on when the
ignition is on while the engine is off.
.Critical emission control systems have not
been completely diagnosed. If this
happens, the vehicle would not be ready
for inspection and might require
several days of routine driving before the
system is ready for inspection. This can
happen if the 12-volt battery has recently
been replaced or run down, or if the
vehicle has been recently serviced.
See your dealer if the vehicle will not pass
or cannot be made ready for the test.
Brake System Warning Light
MetricEnglish
Page 95 of 359
Chevrolet Colorado Owner Manual (GMNA-Localizing-U.S./Canada/Mexico-
14430421) - 2021 - CRC - 2/10/20
94 Instruments and Controls
time the ignition is off. Time will continue
to be counted as long as the ignition is on,
even if another display is being shown on
the DIC. The timer will record up to
99 hours, 59 minutes, and 59 seconds
(99:59:59) after which the display will return
to zero. To stop the timer, press SET/CLR
briefly while Timer is displayed. To reset the
timer to zero, press and hold SET/CLR.
Blank Display :Displays no information.
Vehicle Information Menu (VEHICLE)
Items
Press MENU on the turn signal lever until
the VEHICLE menu is displayed. Use
w x
to scroll through the menu items. Not all
items are available on every vehicle. The
following is a list of all possible menu items:
Remaining Oil Life : Displays an estimate of
the oil's remaining useful life. If REMAINING
OIL LIFE 99% is displayed, that means 99%
of the current oil life remains.
When the remaining oil life is low, the
CHANGE ENGINE OIL SOON message will
appear on the display. The oil should be
changed as soon as possible. See Engine Oil
0 243. In addition to the engine oil life
system monitoring the oil life, additional maintenance is recommended in the
Maintenance Schedule in this manual. See
Maintenance Schedule
0312.
The Oil Life display must be reset after each
oil change. Do not reset the Oil Life display
accidentally at any time other than when
the oil has just been changed. It cannot be
reset accurately until the next oil change. To
reset the engine oil life system, see Engine
Oil Life System 0245.
Oil Pressure : Oil pressure is displayed in
either kilopascal (kPa) or in pounds per
square inch (psi).
Tire Pressure : Displays a vehicle with the
approximate pressures of all four tires. Tire
pressure is displayed in either
kilopascal (kPa) or in pounds per square
inch (psi). See Tire Pressure Monitor System
0 275 and Tire Pressure Monitor Operation
0 275.
Battery Voltage : Displays the current
battery voltage, if equipped. Battery voltage
changes are normal while driving. See
Charging System Light 086. If there is a
problem with the battery charging system,
the DIC will display a message.
Engine Hours : Shows the total number of
hours the engine has run. Transmission Fluid Temperature :
Shows the
temperature of the automatic transmission
fluid in either degrees Celsius (°C) or degrees
Fahrenheit (°F).
Trailer Brake (If Equipped) : TRAILER GAIN
shows the trailer gain setting. This setting
can be adjusted from 0.0 to 10.0 with either
a trailer connected or disconnected.
OUTPUT shows the power output to the
trailer anytime a trailer with electric brakes
is connected. Output is displayed as a bar
graph. Dashes may appear in the OUTPUT
display if a trailer is not connected.
Units : Move
w xto change between
Metric or US when the Unit display is active.
Press SET/CLR to confirm the setting. This
will change the displays on the DIC to the
type of measurements you select.
ECO Drive Assist Menu (ECO) Items
This menu is only available on some
vehicles. Press MENU on the turn signal
lever until the ECO menu is displayed. Use
w xto scroll through the menu items.
Not all items are available on every vehicle.
The following is a list of all possible menu
items:
Page 98 of 359
Chevrolet Colorado Owner Manual (GMNA-Localizing-U.S./Canada/Mexico-
14430421) - 2021 - CRC - 2/10/20
Instruments and Controls 97
select“Reset Best Score.” PressVto reset
the best average fuel economy. After reset,
the best value displays “-,-”until the
selected distance has been traveled.
The display provides information on how
current driving behavior affects the running
average and how well recent driving
compares to the best that has been
achieved for the selected distance.
Engine Hours (Hourmeter) : Shows the total
number of hours the engine has run. The
display also shows the engine idle hours.
Timer : This display can be used as a timer.
To start the timer, press
Vwhile this
display is active. The display will show the
amount of time that has passed since the
timer was last reset. To stop the timer,
press
Vbriefly while this display is active
and the timer is running. To reset the timer
to zero, press and hold
Vwhile this display
is active.
Battery Voltage : Displays the current
battery voltage, if equipped. Battery voltage
changes are normal while driving. See
Charging System Light 086. If there is a
problem with the battery charging system,
the DIC will display a message. Oil Pressure :
Oil pressure is displayed in
either kilopascal (kPa) or in pounds per
square inch (psi).
Engine Hours : Shows the total number of
hours the engine has run.
Off Road Page : This page shows the
traction, four wheel drive, and steering
angle states. When the front or rear axles
are locked, a lock icon is displayed. See
Off-Road Driving 0173.
Transmission Fluid Temperature : Shows the
temperature of the automatic transmission
fluid in either degrees Celsius (°C) or degrees
Fahrenheit (°F).
Trailer Brake (If Equipped) : TRAILER GAIN
shows the trailer gain setting. This setting
can be adjusted from 0.0 to 10.0 with either
a trailer connected or disconnected.
OUTPUT shows the power output to the
trailer anytime a trailer with electric brakes
is connected. Output is displayed as a bar
graph. Dashes may appear in the OUTPUT
display if a trailer is not connected.
Blank Page : Shows no information.
Vehicle Messages
Messages displayed on the DIC indicate the
status of the vehicle or some action that
may be needed to correct a condition.
Multiple messages may appear one after
another.
The messages that do not require
immediate action can be acknowledged and
cleared by pressing
V. The messages that
require immediate action cannot be cleared
until that action is performed.
All messages should be taken seriously;
clearing the message does not correct the
problem.
If a SERVICE message appears, see your
dealer.
Follow the instructions given in the
messages. The system displays messages
regarding the following topics:
.Service Messages
.Fluid Levels
.Vehicle Security
.Brakes
.Steering
.Ride Control Systems
.Driver Assistance Systems
Page 107 of 359
Chevrolet Colorado Owner Manual (GMNA-Localizing-U.S./Canada/Mexico-
14430421) - 2021 - CRC - 2/10/20
106 Lighting
Lighting Features
Entry Lighting
Some exterior lamps and the interior lamps
turn on briefly at night, or in areas with
limited lighting, when
Kis pressed on the
Remote Keyless Entry (RKE) transmitter.
When a door is opened, the interior lamps
come on if the dome lamp control is in the
Hposition. After about 30 seconds the
exterior lamps turn off. Entry lighting can be
disabled manually by changing the ignition
out of the OFF position, or by pressing
Q
on the RKE transmitter.
This feature can be changed. See “Vehicle
Locator Lights” underVehicle Personalization
0 98.
Exit Lighting
Some exterior lamps and the interior lamps
come on at night, or in areas with limited
lighting when the key is removed from the
ignition. The exterior and interior lamps
remain on for a set amount of time and
then automatically turn off. The interior
lamps do not come on if the dome lamp
control is in the Off position. The exterior lamps turn off immediately by
turning the exterior lamps control off.
This feature can be changed. See
Vehicle
Personalization 098.
Battery Load Management
The vehicle has Electric Power Management
(EPM), which estimates the battery's
temperature and state of charge. It then
adjusts the voltage for best performance
and extended life of the battery.
When the battery's state of charge is low,
the voltage is raised slightly to quickly bring
the charge back up. When the state of
charge is high, the voltage is lowered
slightly to prevent overcharging. The
voltmeter gauge or the voltage display on
the Driver Information Center (DIC),
if equipped, may show the voltage moving
up or down. This is normal. If there is a
problem, an alert will be displayed.
The battery can be discharged at idle if the
electrical loads are very high. This is true for
all vehicles. This is because the generator
(alternator) may not be spinning fast
enough at idle to produce all the power that
is needed for very high electrical loads. A high electrical load occurs when several of
the following are on, such as: headlamps,
high beams, fog lamps, rear window
defogger, climate control fan at high speed,
heated seats, engine cooling fans, trailer
loads, and loads plugged into accessory
power outlets.
EPM works to prevent excessive discharge of
the battery. It does this by balancing the
generator's output and the vehicle's
electrical needs. It can increase engine idle
speed to generate more power, whenever
needed. It can temporarily reduce the power
demands of some accessories.
Normally, these actions occur in steps or
levels, without being noticeable. In rare
cases at the highest levels of corrective
action, this action may be noticeable to the
driver. If so, a DIC message might be
displayed and it is recommended that the
driver reduce the electrical loads as much as
possible.
Battery Power Protection
This feature shuts off the dome and reading
lamps, if they are left on for more than
10 minutes after the ignition is turned off.
Page 170 of 359
Chevrolet Colorado Owner Manual (GMNA-Localizing-U.S./Canada/Mexico-
14430421) - 2021 - CRC - 2/10/20
Driving and Operating 169
Driving and Operating
Driving Information
Driving for Better Fuel Economy . . . . . . . 170
Distracted Driving . . . . . . . . . . . . . . . . . . . . . 170
Defensive Driving . . . . . . . . . . . . . . . . . . . . . . 170
Impaired Driving . . . . . . . . . . . . . . . . . . . . . . . 171
Control of a Vehicle . . . . . . . . . . . . . . . . . . . . 171
Braking . . . . . . . . . . . . . . . . . . . . . . . . . . . . . . . . 171
Steering . . . . . . . . . . . . . . . . . . . . . . . . . . . . . . . . 171
Off-Road Recovery . . . . . . . . . . . . . . . . . . . . . 172
Loss of Control . . . . . . . . . . . . . . . . . . . . . . . . . 172
Off-Road Driving . . . . . . . . . . . . . . . . . . . . . . . 173
Driving on Wet Roads . . . . . . . . . . . . . . . . . 176
Hill and Mountain Roads . . . . . . . . . . . . . . . 177
Winter Driving . . . . . . . . . . . . . . . . . . . . . . . . . 177
If the Vehicle Is Stuck . . . . . . . . . . . . . . . . . 178
Vehicle Load Limits . . . . . . . . . . . . . . . . . . . . 179
Truck-Camper Loading Information . . . . 184
Starting and Operating
New Vehicle Break-In . . . . . . . . . . . . . . . . . . 184
Ignition Positions . . . . . . . . . . . . . . . . . . . . . . 185
Starting the Engine . . . . . . . . . . . . . . . . . . . . 186
Engine Heater . . . . . . . . . . . . . . . . . . . . . . . . . 187
Retained Accessory Power (RAP) . . . . . . . 188
Shifting Into Park . . . . . . . . . . . . . . . . . . . . . . 189
Shifting out of Park . . . . . . . . . . . . . . . . . . . 190
Parking over Things That Burn . . . . . . . . 190
Active Fuel Management . . . . . . . . . . . . . . 190
Engine Exhaust
Engine Exhaust . . . . . . . . . . . . . . . . . . . . . . . . 190
Running the Vehicle While Parked . . . . . 191
Automatic Transmission
Automatic Transmission . . . . . . . . . . . . . . . 191
Manual Mode . . . . . . . . . . . . . . . . . . . . . . . . . 193
Tow/Haul Mode . . . . . . . . . . . . . . . . . . . . . . . 195
Drive Systems
Four-Wheel Drive . . . . . . . . . . . . . . . . . . . . . . 195
Brakes
Antilock Brake System (ABS) . . . . . . . . . . . 201
Parking Brake . . . . . . . . . . . . . . . . . . . . . . . . . . 201
Brake Assist . . . . . . . . . . . . . . . . . . . . . . . . . . . 202
Hill Start Assist (HSA) . . . . . . . . . . . . . . . . . 202
Ride Control Systems
Traction Control/Electronic StabilityControl . . . . . . . . . . . . . . . . . . . . . . . . . . . . . . 202
Hill Descent Control (HDC) . . . . . . . . . . . . 204
Driver Mode Control . . . . . . . . . . . . . . . . . . 205
Limited-Slip Differential . . . . . . . . . . . . . . . 206
Locking Rear Axle . . . . . . . . . . . . . . . . . . . . . 206
Locking Front Axle . . . . . . . . . . . . . . . . . . . . . 207
Cruise Control
Cruise Control . . . . . . . . . . . . . . . . . . . . . . . . . 208
Driver Assistance Systems
Driver Assistance Systems . . . . . . . . . . . . . 209 Assistance Systems for Parking or
Backing . . . . . . . . . . . . . . . . . . . . . . . . . . . . . . . 211
Forward Collision Alert (FCA) System . . . . . . . . . . . . . . . . . . . . . . . . . . . . . . . 213
Automatic Emergency Braking (AEB) . . . 214
Lane Departure Warning (LDW) . . . . . . . . 216
Fuel
Top Tier Fuel . . . . . . . . . . . . . . . . . . . . . . . . . . 216
Recommended Fuel . . . . . . . . . . . . . . . . . . . . 217
Prohibited Fuels . . . . . . . . . . . . . . . . . . . . . . . . 217
Fuels in Foreign Countries . . . . . . . . . . . . . 217
Fuel Additives . . . . . . . . . . . . . . . . . . . . . . . . . . 217
Filling the Tank . . . . . . . . . . . . . . . . . . . . . . . . 218
Filling a Portable Fuel Container . . . . . . . 219
Trailer Towing
General Towing Information . . . . . . . . . . . 219
Driving Characteristics and
Towing Tips . . . . . . . . . . . . . . . . . . . . . . . . . . 219
Trailer Towing . . . . . . . . . . . . . . . . . . . . . . . . . 224
Towing Equipment . . . . . . . . . . . . . . . . . . . . 228
Trailer Sway Control (TSC) . . . . . . . . . . . . . 233
Conversions and Add-Ons
Add-On Electrical Equipment . . . . . . . . . . . 234
Page 181 of 359
Chevrolet Colorado Owner Manual (GMNA-Localizing-U.S./Canada/Mexico-
14430421) - 2021 - CRC - 2/10/20
180 Driving and Operating
Warning (Continued)
Overloading can also reduce stopping
distance, damage the tires, and
shorten the life of the vehicle.
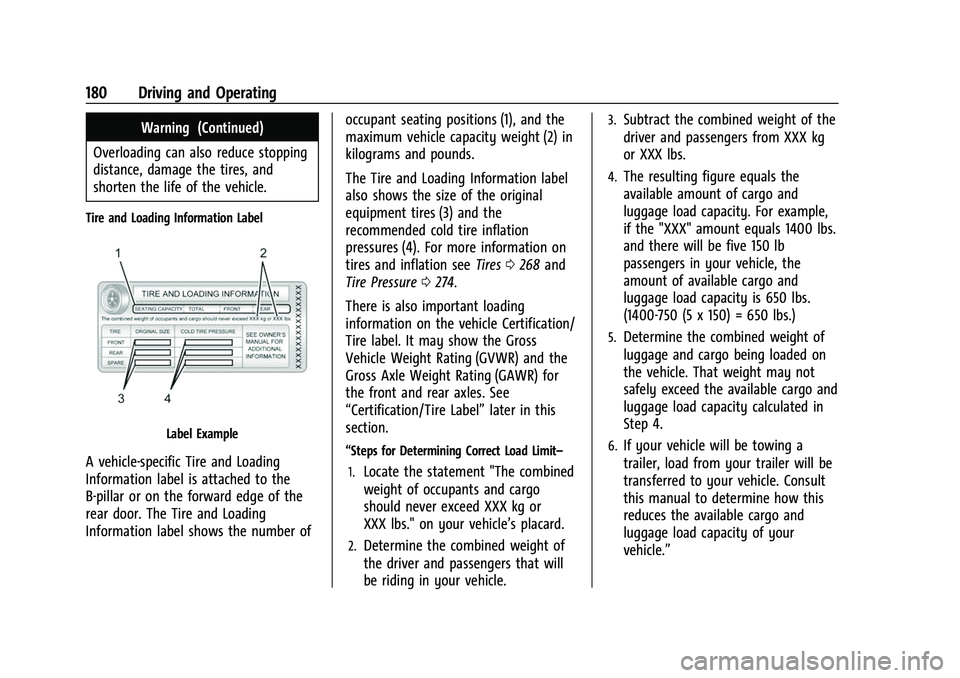
Tire and Loading Information Label
Label Example
A vehicle-specific Tire and Loading
Information label is attached to the
B-pillar or on the forward edge of the
rear door. The Tire and Loading
Information label shows the number of occupant seating positions (1), and the
maximum vehicle capacity weight (2) in
kilograms and pounds.
The Tire and Loading Information label
also shows the size of the original
equipment tires (3) and the
recommended cold tire inflation
pressures (4). For more information on
tires and inflation see
Tires0268 and
Tire Pressure 0274.
There is also important loading
information on the vehicle Certification/
Tire label. It may show the Gross
Vehicle Weight Rating (GVWR) and the
Gross Axle Weight Rating (GAWR) for
the front and rear axles. See
“Certification/Tire Label” later in this
section.“Steps for Determining Correct Load Limit–
1.
Locate the statement "The combined
weight of occupants and cargo
should never exceed XXX kg or
XXX lbs." on your vehicle’s placard.
2.Determine the combined weight of
the driver and passengers that will
be riding in your vehicle.
3.Subtract the combined weight of the
driver and passengers from XXX kg
or XXX lbs.
4.The resulting figure equals the
available amount of cargo and
luggage load capacity. For example,
if the "XXX" amount equals 1400 lbs.
and there will be five 150 lb
passengers in your vehicle, the
amount of available cargo and
luggage load capacity is 650 lbs.
(1400-750 (5 x 150) = 650 lbs.)
5.Determine the combined weight of
luggage and cargo being loaded on
the vehicle. That weight may not
safely exceed the available cargo and
luggage load capacity calculated in
Step 4.
6.If your vehicle will be towing a
trailer, load from your trailer will be
transferred to your vehicle. Consult
this manual to determine how this
reduces the available cargo and
luggage load capacity of your
vehicle.”
Page 182 of 359
Chevrolet Colorado Owner Manual (GMNA-Localizing-U.S./Canada/Mexico-
14430421) - 2021 - CRC - 2/10/20
Driving and Operating 181
SeeTrailer Towing 0224 for important
information on towing a trailer, towing
safety rules, and trailering tips.
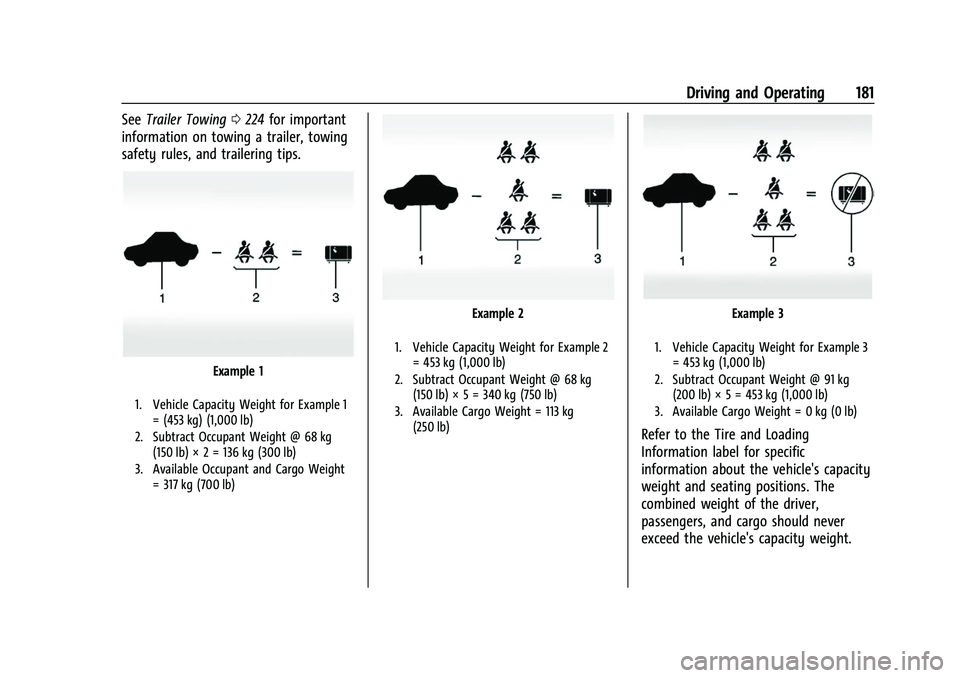
Example 1
1. Vehicle Capacity Weight for Example 1
= (453 kg) (1,000 lb)
2. Subtract Occupant Weight @ 68 kg (150 lb) Ă— 2 = 136 kg (300 lb)
3. Available Occupant and Cargo Weight = 317 kg (700 lb)
Example 2
1. Vehicle Capacity Weight for Example 2= 453 kg (1,000 lb)
2. Subtract Occupant Weight @ 68 kg (150 lb) Ă— 5 = 340 kg (750 lb)
3. Available Cargo Weight = 113 kg (250 lb)
Example 3
1. Vehicle Capacity Weight for Example 3= 453 kg (1,000 lb)
2. Subtract Occupant Weight @ 91 kg (200 lb) Ă— 5 = 453 kg (1,000 lb)
3. Available Cargo Weight = 0 kg (0 lb)
Refer to the Tire and Loading
Information label for specific
information about the vehicle's capacity
weight and seating positions. The
combined weight of the driver,
passengers, and cargo should never
exceed the vehicle's capacity weight.
Page 185 of 359
Chevrolet Colorado Owner Manual (GMNA-Localizing-U.S./Canada/Mexico-
14430421) - 2021 - CRC - 2/10/20
184 Driving and Operating
* Equipment Maximum Weight
* The combined weight for all
rail-mounted equipment should not
exceed 454 kg (1,000 lb).
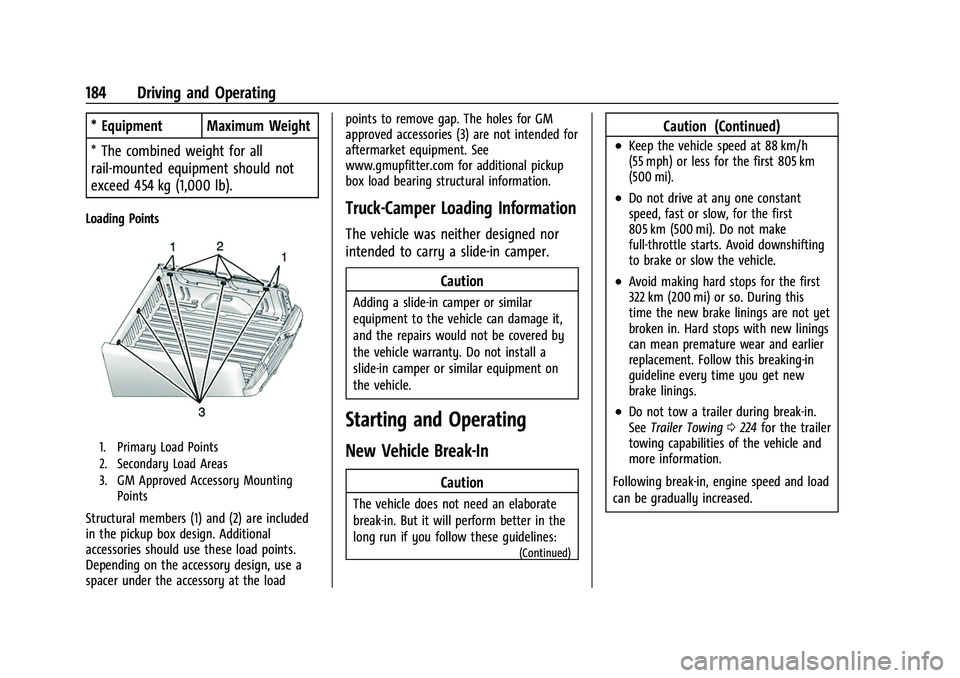
Loading Points
1. Primary Load Points
2. Secondary Load Areas
3. GM Approved Accessory MountingPoints
Structural members (1) and (2) are included
in the pickup box design. Additional
accessories should use these load points.
Depending on the accessory design, use a
spacer under the accessory at the load points to remove gap. The holes for GM
approved accessories (3) are not intended for
aftermarket equipment. See
www.gmupfitter.com for additional pickup
box load bearing structural information.
Truck-Camper Loading Information
The vehicle was neither designed nor
intended to carry a slide-in camper.
Caution
Adding a slide-in camper or similar
equipment to the vehicle can damage it,
and the repairs would not be covered by
the vehicle warranty. Do not install a
slide-in camper or similar equipment on
the vehicle.
Starting and Operating
New Vehicle Break-In
Caution
The vehicle does not need an elaborate
break-in. But it will perform better in the
long run if you follow these guidelines:
(Continued)
Caution (Continued)
.Keep the vehicle speed at 88 km/h
(55 mph) or less for the first 805 km
(500 mi).
.Do not drive at any one constant
speed, fast or slow, for the first
805 km (500 mi). Do not make
full-throttle starts. Avoid downshifting
to brake or slow the vehicle.
.Avoid making hard stops for the first
322 km (200 mi) or so. During this
time the new brake linings are not yet
broken in. Hard stops with new linings
can mean premature wear and earlier
replacement. Follow this breaking-in
guideline every time you get new
brake linings.
.Do not tow a trailer during break-in.
SeeTrailer Towing 0224 for the trailer
towing capabilities of the vehicle and
more information.
Following break-in, engine speed and load
can be gradually increased.
Page 190 of 359
Chevrolet Colorado Owner Manual (GMNA-Localizing-U.S./Canada/Mexico-
14430421) - 2021 - CRC - 2/10/20
Driving and Operating 189
.Infotainment System
.Power Windows (during RAP this
functionality will be lost when any door
is opened)
.Sunroof (during RAP this functionality will
be lost when any door is opened)
.Auxiliary Power Outlet
.Audio System
.OnStar System
Shifting Into Park
{Warning
It can be dangerous to get out of the
vehicle if the shift lever is not fully in
P (Park) with the parking brake firmly set.
The vehicle can roll. If you have left the
engine running, the vehicle can move
suddenly. You or others could be injured.
To be sure the vehicle will not move,
even when you are on fairly level ground,
use the steps that follow. With
four-wheel drive, if the transfer case is in
N (Neutral), the vehicle will be free to
roll, even if the shift lever is in P (Park).
Be sure the transfer case is in a drive
gear. If towing a trailer, seeDriving
Characteristics and Towing Tips 0219. 1. Hold the brake pedal down, then set the
parking brake.
See Parking Brake 0201.
2. Hold the button on the shift lever and push the lever toward the front of the
vehicle into P (Park).
3. Be sure the transfer case (if equipped) is in a drive gear —not in N (Neutral).
4. Push the ignition key in, towards the steering column and then turn the
ignition off.
5. Remove the key and take it with you. If you can leave the vehicle with the
ignition key in your hand, the vehicle is
in P (Park).
Leaving the Vehicle with the Engine
Running
{Warning
It can be dangerous to leave the vehicle
with the engine running. The vehicle
could move suddenly if the shift lever is
not fully in P (Park) with the parking
brake firmly set.
(Continued)
Warning (Continued)
If you have four-wheel drive and the
transfer case is in N (Neutral), the vehicle
will be free to roll, even if the shift lever
is in P (Park). So be sure the transfer case
is in a drive gear–not in N (Neutral).
And, if you leave the vehicle with the
engine running, it could overheat and
even catch fire. You or others could be
injured. Do not leave the vehicle with the
engine running unless you have to.
If you have to leave the vehicle with the
engine running, be sure the vehicle is in
P (Park) and the parking brake is firmly set
before you leave it. After you move the
shift lever into P (Park), hold the regular
brake pedal down. Then, see if you can
move the shift lever away from P (Park)
without pressing the button on the shift
lever. If you can, it means that the shift
lever was not fully locked into P (Park).
Torque Lock
If you are parking on a hill and you do not
shift the transmission into P (Park) properly,
the weight of the vehicle may put too much
force on the parking pawl in the