service schedule CHEVROLET COLORADO 2021 Owner's Manual
[x] Cancel search | Manufacturer: CHEVROLET, Model Year: 2021, Model line: COLORADO, Model: CHEVROLET COLORADO 2021Pages: 359, PDF Size: 8.03 MB
Page 44 of 359
Chevrolet Colorado Owner Manual (GMNA-Localizing-U.S./Canada/Mexico-
14430421) - 2021 - CRC - 2/10/20
Seats and Restraints 43
Warning (Continued)
system. Be sure to follow proper service
procedures, and make sure the person
performing work for you is qualified to
do so.
Adding Equipment to the
Airbag-Equipped Vehicle
{Warning
If a snow plow or similar equipment is
installed on the vehicle, the airbag
system may not function properly. An
airbag could inflate when it is not
supposed to inflate. People riding in the
vehicle could be injured, and the vehicle
and/or snow plow could be damaged. Do
not install a snow plow or similar
equipment on the vehicle.
Adding accessories that change the vehicle's
frame, bumper system, height, front end,
or side sheet metal may keep the airbag
system from working properly.
The operation of the airbag system can also
be affected by changing any parts of the
front seats, seat belts, airbag sensing and diagnostic module, steering wheel,
instrument panel, inner door seals including
the speakers, any of the airbag modules,
ceiling or pillar garnish trim, overhead
console, front sensors, side impact sensors,
or airbag wiring.
Your dealer and the service manual have
information about the location of the airbag
sensors, sensing and diagnostic module, and
airbag wiring.
In addition, the vehicle has a passenger
sensing system for the front outboard
passenger position, which includes sensors
that are part of the passenger seat. The
passenger sensing system may not operate
properly if the original seat trim is replaced
with non-GM covers, upholstery, or trim; or
with GM covers, upholstery, or trim
designed for a different vehicle. Any object,
such as an aftermarket seat heater or a
comfort-enhancing pad or device, installed
under or on top of the seat fabric, could
also interfere with the operation of the
passenger sensing system. This could either
prevent proper deployment of the passenger
airbag(s) or prevent the passenger sensing
system from properly turning off the
passenger airbag(s). See
Passenger Sensing
System 039. If the vehicle has rollover roof-rail airbags,
see
Different Size Tires and Wheels 0281 for
additional important information.
If the vehicle must be modified because you
have a disability and have questions about
whether the modifications will affect the
vehicle's airbag system, or if you have
questions about whether the airbag system
will be affected if the vehicle is modified for
any other reason, call Customer Assistance.
See Customer Assistance Offices 0330.Airbag System Check
The airbag system does not need regularly
scheduled maintenance or replacement.
Make sure the airbag readiness light is
working. See Airbag Readiness Light 085.
Caution
If an airbag covering is damaged, opened,
or broken, the airbag may not work
properly. Do not open or break the airbag
coverings. If there are any opened or
broken airbag coverings, have the airbag
covering and/or airbag module replaced.
For the location of the airbags, see Where
Are the Airbags? 036. See your dealer
for service.
Page 92 of 359
Chevrolet Colorado Owner Manual (GMNA-Localizing-U.S./Canada/Mexico-
14430421) - 2021 - CRC - 2/10/20
Instruments and Controls 91
the light will come on at every ignition
cycle. SeeTire Pressure Monitor Operation
0 275.
Engine Oil Pressure Light
Caution
Lack of proper engine oil maintenance
can damage the engine. Driving with the
engine oil low can also damage the
engine. The repairs would not be covered
by the vehicle warranty. Check the oil
level as soon as possible. Add oil if
required, but if the oil level is within the
operating range and the oil pressure is
still low, have the vehicle serviced.
Always follow the maintenance schedule
for changing engine oil.
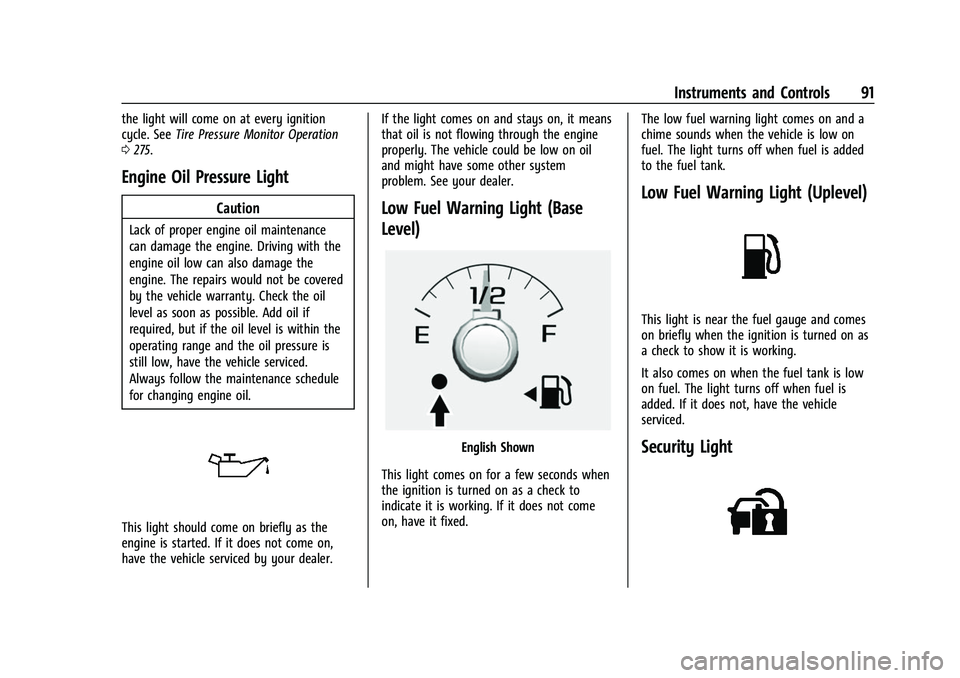
This light should come on briefly as the
engine is started. If it does not come on,
have the vehicle serviced by your dealer. If the light comes on and stays on, it means
that oil is not flowing through the engine
properly. The vehicle could be low on oil
and might have some other system
problem. See your dealer.
Low Fuel Warning Light (Base
Level)
English Shown
This light comes on for a few seconds when
the ignition is turned on as a check to
indicate it is working. If it does not come
on, have it fixed. The low fuel warning light comes on and a
chime sounds when the vehicle is low on
fuel. The light turns off when fuel is added
to the fuel tank.
Low Fuel Warning Light (Uplevel)
This light is near the fuel gauge and comes
on briefly when the ignition is turned on as
a check to show it is working.
It also comes on when the fuel tank is low
on fuel. The light turns off when fuel is
added. If it does not, have the vehicle
serviced.
Security Light
Page 157 of 359
Chevrolet Colorado Owner Manual (GMNA-Localizing-U.S./Canada/Mexico-
14430421) - 2021 - CRC - 2/10/20
156 Infotainment System
HD Radio Technology
HD Radio Technology manufactured under
license from iBiquity Digital Corporation. U.S.
and Foreign Patents. For patents see
http://dts.com/patents. HD Radio and the
HD, HD Radio, and“ARC”logos are
registered trademarks or trademarks of
iBiquity Digital Corporation in the United
States and/or other countries.
Bluetooth
The Bluetooth word mark and logos are
owned by the Bluetooth SIG, Inc. and any
use of such marks by General Motors is
under license. Other trademarks and trade
names are those of their respective owners.
Java
Java is a registered trademark of Oracle
and/or its affiliates.
Schedule I: Gracenote EULA
Music recognition technology and related
data are provided by Gracenote. Gracenote
is the industry standard in music recognition
technology and related content delivery. For
more information see www.gracenote.com.
Music-related data from Gracenote, Inc.,
copyright © 2000 to present Gracenote.
Gracenote Software, copyright © 2000 to
present Gracenote. One or more patents
owned by Gracenote may apply to this
product and service. See the Gracenote
website for a non-exhaustive list of
applicable Gracenote patents. Gracenote,
CDDB, MusicID, MediaVOCS, the Gracenote
logo and logotype, and the "Powered by
Gracenote" logo are either registered
trademarks or trademarks of Gracenote in
the United States and/or other countries. Gracenote Terms of Use
This application or device contains software
from Gracenote, Inc. of Emeryville, California
("Gracenote"). The software from Gracenote
(the "Gracenote Software") enables this
application to do disc or file identification
and obtain music-related information,
including name, artist, track, and title
information ("Gracenote Data") from online
servers or embedded databases (collectively,
"Gracenote Servers") and to perform other
functions. You may use Gracenote Data only
by means of the intended End-User
functions of this application or device.
This application or device may contain
content belonging to Gracenote’s providers.
If so, all of the restrictions set forth herein
with respect to Gracenote Data shall also
apply to such content and such content
providers shall be entitled to all of the
benefits and protections set forth herein
that are available to Gracenote.
You agree that you will use Gracenote Data,
the Gracenote Software, and Gracenote
Servers for your own personal
non-commercial use only. You agree not to
assign, copy, transfer or transmit the
Gracenote Software or any Gracenote Data
to any third party. YOU AGREE NOT TO USE
Page 169 of 359
Chevrolet Colorado Owner Manual (GMNA-Localizing-U.S./Canada/Mexico-
14430421) - 2021 - CRC - 2/10/20
168 Climate Controls
Air Vents
Adjustable air vents are in the center and on
the side of the instrument panel. Use the
sliding knobs on the air vents to change the
direction of the airflow. Slide the knob up or
down to open or close off the airflow.
Air vents blow warm air on the side
windows in cold weather. If Floor, Defog,
or Defrost modes are selected, a small
amount of air will come from the vents
close to the window. If the airflow is shut
off using the sliding knobs, warm air will be
directed to the other instrument panel
vents. This is normal operation.
Use the sliding knobs to turn vent airflow
on or off based on the mode selected.
Operation Tips
.Clear away any ice, snow, or leaves from
air inlets at the base of the windshield
that could block the flow of air into the
vehicle.
.Clear snow off the hood to improve
visibility and help decrease moisture
drawn into the vehicle.
.Keep the path under the front seats clear
of objects to help circulate the air inside
of the vehicle more effectively.
.Use of non-GM approved hood deflectors
can adversely affect the performance of
the system. Check with your dealer
before adding equipment to the outside
of the vehicle.
Maintenance
Passenger Compartment Air Filter
The passenger compartment air filter
reduces dust, pollen, and other airborne
irritants from outside air that is pulled into
the vehicle. The filter will need to be
replaced periodically. SeeMaintenance
Schedule 0312.
Using the climate control system without an
air filter installed is not recommended.
Water or other debris could enter the
system and result in leaks or noises. Always
install a new filter when removing the old
filter.
For more information on filter replacement,
see your dealer.
Service
All vehicles have a label underhood that
identifies the refrigerant used in the vehicle.
The refrigerant system should only be
serviced by trained and certified technicians.
The air conditioning evaporator should never
be repaired or replaced by one from a
salvage vehicle. It should only be replaced
by a new evaporator to ensure proper and
safe operation.
During service, all refrigerants should be
reclaimed with proper equipment. Venting
refrigerants directly to the atmosphere is
harmful to the environment and may also
create unsafe conditions based on
inhalation, combustion, frostbite, or other
health-based concerns.
The air conditioning system requires periodic
maintenance. See Maintenance Schedule
0 312.
Page 177 of 359
Chevrolet Colorado Owner Manual (GMNA-Localizing-U.S./Canada/Mexico-
14430421) - 2021 - CRC - 2/10/20
176 Driving and Operating
This affects steering, accelerating, and
braking. Drive at a reduced speed and avoid
sharp turns or abrupt maneuvers.
Traction is reduced on hard packed snow
and ice and it is easy to lose control. Reduce
vehicle speed when driving on hard packed
snow and ice.
{Warning
Driving on frozen lakes, ponds, or rivers
can be dangerous. Ice conditions vary
greatly and the vehicle could fall through
the ice; you and your passengers could
drown. Drive your vehicle on safe
surfaces only.
Driving in Water
{Warning
Driving through rushing water can be
dangerous. Deep water can sweep your
vehicle downstream and you and your
passengers could drown. If it is only
shallow water, it can still wash away the
ground from under your tires. Traction
could be lost, and the vehicle could roll
over. Do not drive through rushing water.
Caution
Do not drive through standing water if it
is deep enough to cover the wheel hubs,
axles, or exhaust pipe. Deep water can
damage the axle and other vehicle parts.
If the standing water is not too deep, drive
through it slowly. At faster speeds, water
can get into the engine and cause it to stall.
Stalling can occur if the exhaust pipe is
under water. Do not turn off the ignition
when driving through water. If the exhaust
pipe is under water, the engine will not
start. When going through water, the brakes
get wet and it may take longer to stop. See
“Driving on Wet Roads” later in this section.
After Off-Road Driving
Remove any brush or debris that has
collected on the underbody or chassis,
or under the hood. These accumulations can
be a fire hazard.
After operation in mud or sand, have the
brake linings cleaned and checked. These
substances can cause glazing and uneven
braking. Check the body structure, driveline,
steering, suspension, wheels, tires, and exhaust system for damage and check the
fuel lines and cooling system for any
leakage.
More frequent maintenance service is
required. See the
Maintenance Schedule
0 312.
Driving on Wet Roads
Rain and wet roads can reduce vehicle
traction and affect your ability to stop and
accelerate. Always drive slower in these
types of driving conditions and avoid driving
through large puddles and deep-standing or
flowing water.
{Warning
Wet brakes can cause crashes. They
might not work as well in a quick stop
and could cause pulling to one side. You
could lose control of the vehicle.
After driving through a large puddle of
water or a car/vehicle wash, lightly apply
the brake pedal until the brakes work
normally.
(Continued)
Page 224 of 359
Chevrolet Colorado Owner Manual (GMNA-Localizing-U.S./Canada/Mexico-
14430421) - 2021 - CRC - 2/10/20
Driving and Operating 223
Disconnect the wiring to the trailer before
backing the trailer into the water to prevent
damage to the electrical circuits on the
trailer. Reconnect the wiring to the trailer
after removing the trailer from the water.
If the trailer has electric brakes that can
function when the trailer is submerged, it
might help to leave the electrical trailer
connector attached to maintain trailer brake
functionality while on the boat ramp.
To back the trailer into the water:1. If equipped, place the vehicle in four-wheel-drive high.
2. Slowly back down the boat ramp until the boat is floating, but no further than
necessary.
3. Press and hold the brake pedal, but do not shift into P (Park) yet.
4. Have someone place chocks under the front wheels of the vehicle.
5. Gradually release the brake pedal to allow the chocks to absorb the load of
the trailer. 6. Reapply the brake pedal. Then apply the
parking brake and shift into P (Park).
7. Release the brake pedal.
Pulling the Trailer from the Water
To pull the trailer of the water: 1. Press and hold the brake pedals.
2. Start the engine and shift into gear.
3. Release the parking brake.
4. Let up on the brake pedal.
5. Drive slowly until the tires are clear of the chocks.
6. Stop and have someone pick up and store the chocks.
7. Slowly pull the trailer from the water.
8. Once the vehicle and trailer have been driven from the sloped part of the boat
ramp, the vehicle can be shifted from
four-wheel-drive high. Shift into the drive
mode that is appropriate for the road
conditions.Caution
If the vehicle tires begin to spin and the
vehicle begins to slide toward the water,
remove your foot from the accelerator
pedal and apply the brake pedal. Seek
help to have the vehicle towed up
the ramp.
Maintenance when Trailer Towing
The vehicle needs service more often when
used to tow trailers. See Maintenance
Schedule 0312. It is especially important to
check the automatic transmission fluid,
engine oil, axle lubricant, belts, cooling
system, and brake system before and during
each trip.
Check periodically to see that all nuts and
bolts on the trailer hitch are tight.
Engine Cooling When Trailer Towing
The cooling system may temporarily
overheat during severe operating conditions.
See Engine Overheating 0250.
Page 254 of 359

Chevrolet Colorado Owner Manual (GMNA-Localizing-U.S./Canada/Mexico-
14430421) - 2021 - CRC - 2/10/20
Vehicle Care 253
Brake Pedal Travel
See your dealer if the brake pedal does not
return to normal height, or if there is a
rapid increase in pedal travel. This could be
a sign that brake service may be required.
Replacing Brake System Parts
Always replace brake system parts with
new, approved replacement parts. If this is
not done, the brakes may not work
properly. The braking performance expected
can change in many other ways if the
wrong replacement brake parts are installed
or parts are improperly installed.
Brake Fluid
The brake master cylinder reservoir is filled
with GM approved DOT 3 brake fluid as
indicated on the reservoir cap. SeeEngine
Compartment Overview 0240 for the
location of the reservoir. Checking Brake Fluid
With the vehicle in P (Park) on a level
surface, the brake fluid level should be
between the minimum and maximum marks
on the brake fluid reservoir.
There are only two reasons why the brake
fluid level in the reservoir may go down:
.Normal brake lining wear. When new
linings are installed, the fluid level goes
back up.
.A fluid leak in the brake hydraulic system.
Have the brake hydraulic system fixed.
With a leak, the brakes will not
work well.
Always clean the brake fluid reservoir cap
and the area around the cap before
removing it.
Do not top off the brake fluid. Adding fluid
does not correct a leak. If fluid is added
when the linings are worn, there will be too
much fluid when new brake linings are
installed. Add or remove fluid, as necessary,
only when work is done on the brake
hydraulic system.
{Warning
If too much brake fluid is added, it can
spill on the engine and burn, if the
engine is hot enough. You or others could
be burned, and the vehicle could be
damaged. Add brake fluid only when
work is done on the brake hydraulic
system.
When the brake fluid falls to a low level,
the brake warning light comes on. See Brake
System Warning Light 087.
Brake fluid absorbs water over time which
degrades the effectiveness of the brake fluid.
Replace brake fluid at the specified intervals
to prevent increased stopping distance. See
Maintenance Schedule 0312.
What to Add
Use only GM approved DOT 3 brake fluid
from a clean, sealed container. See
Recommended Fluids and Lubricants 0321.
Page 256 of 359
Chevrolet Colorado Owner Manual (GMNA-Localizing-U.S./Canada/Mexico-
14430421) - 2021 - CRC - 2/10/20
Vehicle Care 255
How to Check Lubricant
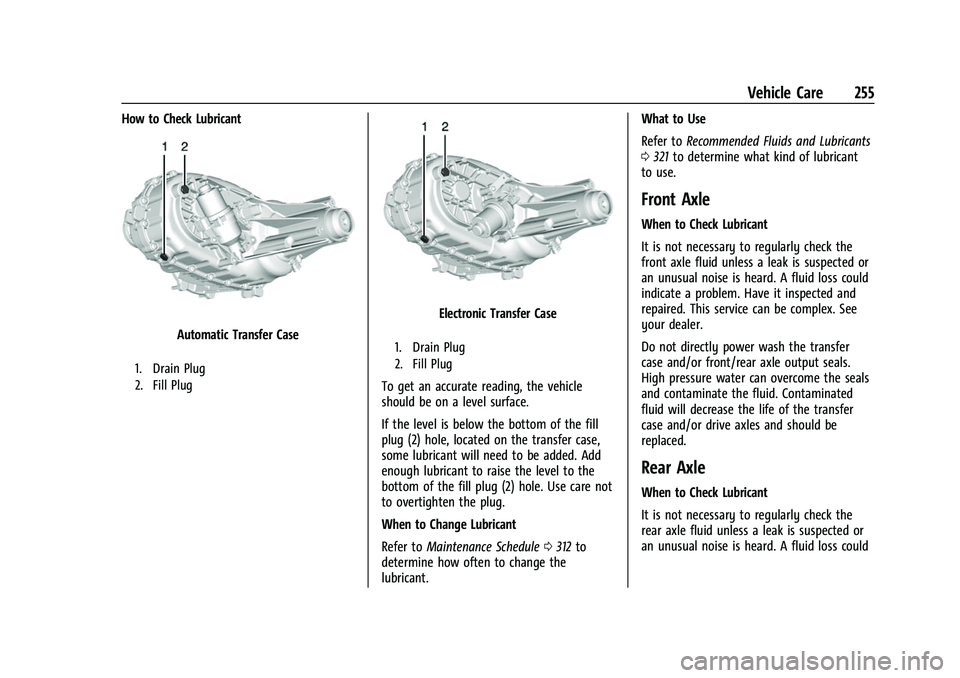
Automatic Transfer Case
1. Drain Plug
2. Fill Plug
Electronic Transfer Case
1. Drain Plug
2. Fill Plug
To get an accurate reading, the vehicle
should be on a level surface.
If the level is below the bottom of the fill
plug (2) hole, located on the transfer case,
some lubricant will need to be added. Add
enough lubricant to raise the level to the
bottom of the fill plug (2) hole. Use care not
to overtighten the plug.
When to Change Lubricant
Refer toMaintenance Schedule 0312 to
determine how often to change the
lubricant. What to Use
Refer to
Recommended Fluids and Lubricants
0 321 to determine what kind of lubricant
to use.
Front Axle
When to Check Lubricant
It is not necessary to regularly check the
front axle fluid unless a leak is suspected or
an unusual noise is heard. A fluid loss could
indicate a problem. Have it inspected and
repaired. This service can be complex. See
your dealer.
Do not directly power wash the transfer
case and/or front/rear axle output seals.
High pressure water can overcome the seals
and contaminate the fluid. Contaminated
fluid will decrease the life of the transfer
case and/or drive axles and should be
replaced.
Rear Axle
When to Check Lubricant
It is not necessary to regularly check the
rear axle fluid unless a leak is suspected or
an unusual noise is heard. A fluid loss could
Page 259 of 359
Chevrolet Colorado Owner Manual (GMNA-Localizing-U.S./Canada/Mexico-
14430421) - 2021 - CRC - 2/10/20
258 Vehicle Care
Warning (Continued)
damage periodically. Check to make sure
the hood/trunk/liftgate is held open with
enough force. If struts are failing to hold
the hood/trunk/liftgate, do not operate.
Have the vehicle serviced.
Caution
Do not apply tape or hang any objects
from gas struts. Also do not push down
or pull on gas struts. This may cause
damage to the vehicle.
See Maintenance Schedule 0312.
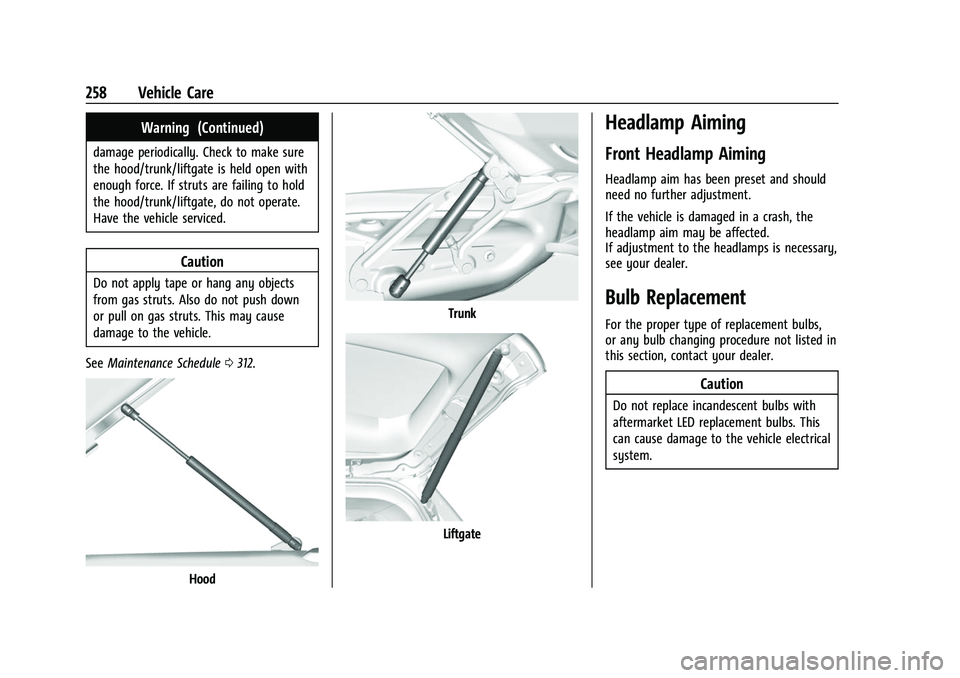
Hood
Trunk
Liftgate
Headlamp Aiming
Front Headlamp Aiming
Headlamp aim has been preset and should
need no further adjustment.
If the vehicle is damaged in a crash, the
headlamp aim may be affected.
If adjustment to the headlamps is necessary,
see your dealer.
Bulb Replacement
For the proper type of replacement bulbs,
or any bulb changing procedure not listed in
this section, contact your dealer.
Caution
Do not replace incandescent bulbs with
aftermarket LED replacement bulbs. This
can cause damage to the vehicle electrical
system.
Page 295 of 359
Chevrolet Colorado Owner Manual (GMNA-Localizing-U.S./Canada/Mexico-
14430421) - 2021 - CRC - 2/10/20
294 Vehicle Care
try to turn the tire. If the tire moves,
use the wheel wrench to tighten the
cable.
Repeat this tightness check procedure
when checking the spare tire pressure
according to the scheduled maintenance
information or any time the spare tire is
handled due to service of other
components.
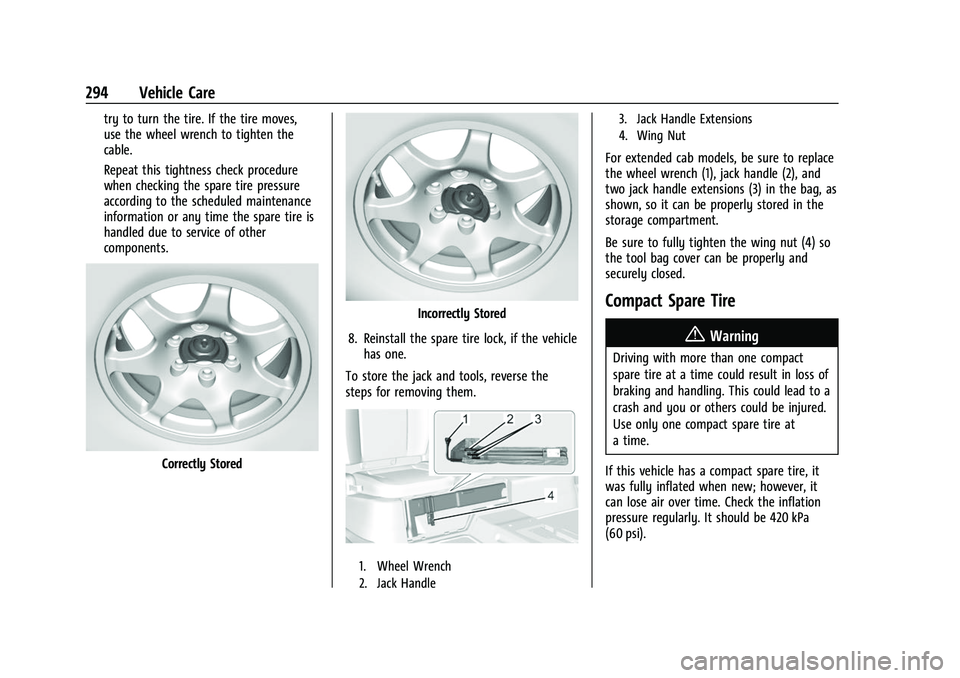
Correctly Stored
Incorrectly Stored
8. Reinstall the spare tire lock, if the vehicle has one.
To store the jack and tools, reverse the
steps for removing them.
1. Wheel Wrench
2. Jack Handle 3. Jack Handle Extensions
4. Wing Nut
For extended cab models, be sure to replace
the wheel wrench (1), jack handle (2), and
two jack handle extensions (3) in the bag, as
shown, so it can be properly stored in the
storage compartment.
Be sure to fully tighten the wing nut (4) so
the tool bag cover can be properly and
securely closed.
Compact Spare Tire
{Warning
Driving with more than one compact
spare tire at a time could result in loss of
braking and handling. This could lead to a
crash and you or others could be injured.
Use only one compact spare tire at
a time.
If this vehicle has a compact spare tire, it
was fully inflated when new; however, it
can lose air over time. Check the inflation
pressure regularly. It should be 420 kPa
(60 psi).