CHEVROLET CORVETTE 1993 4.G Owners Manual
CORVETTE 1993 4.G
CHEVROLET
CHEVROLET
https://www.carmanualsonline.info/img/24/8108/w960_8108-0.png
CHEVROLET CORVETTE 1993 4.G Owners Manual
Trending: brakes, service indicator, height adjustment, tire size, lights, automatic transmission fluid, steering
Page 221 of 370
Downloaded from www.Manualslib.com manuals search engine ..I
Problems on me Road
I 220
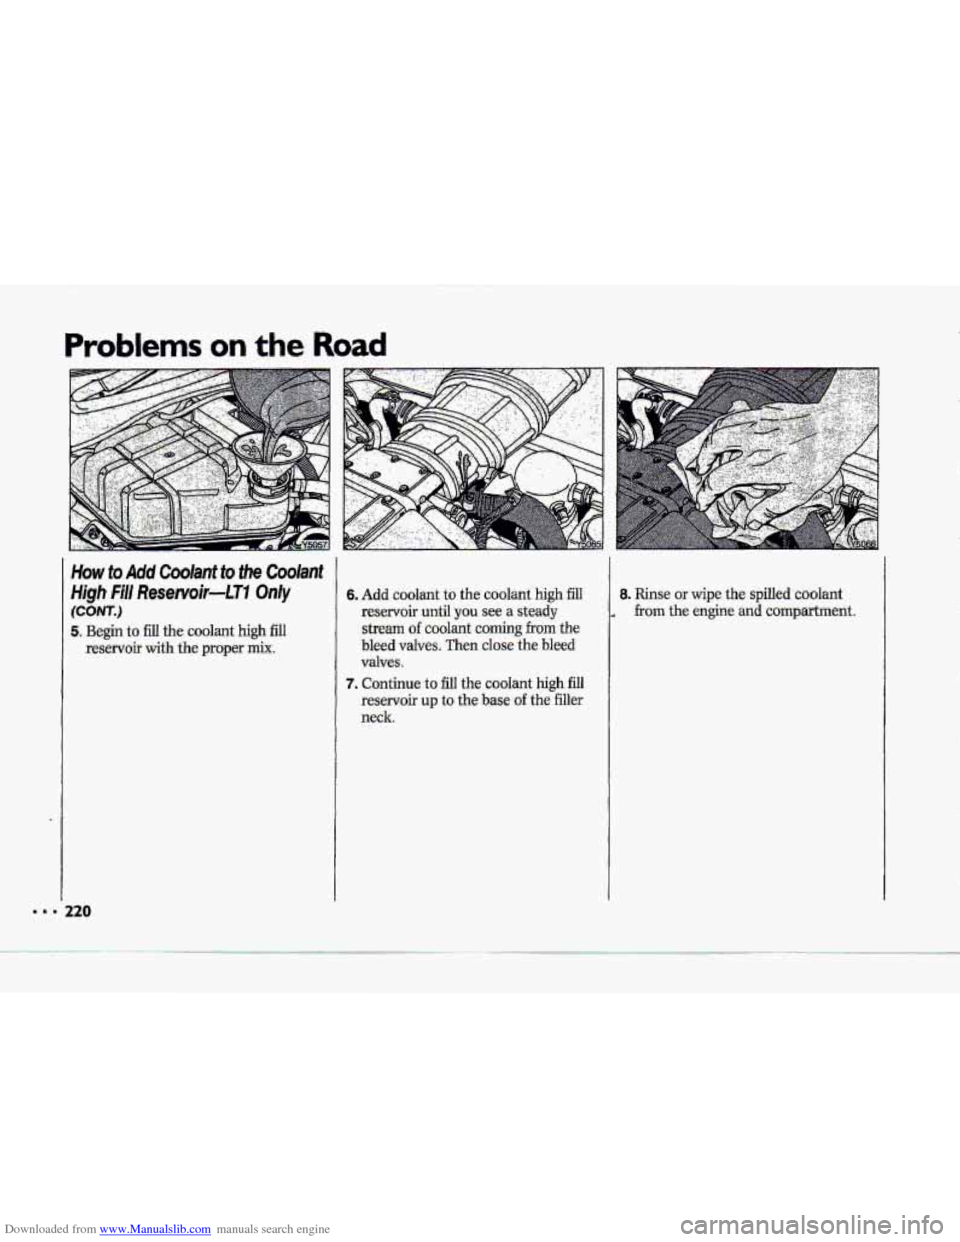
6. Add coolant to the coolant high fill
resgmoir until you see a steady
stream of coalant c:oming from the
bleed valves. Theen close the bleed
valves.
7. Continue to fill the coolant high fill
reservoir up to the -base .of the filler
neck..
8. Rinse or wipe the sp,illed coolant
frori~ the engine ariid curnp-artment.
Page 222 of 370
Downloaded from www.Manualslib.com manuals search engine P
R
.-
c
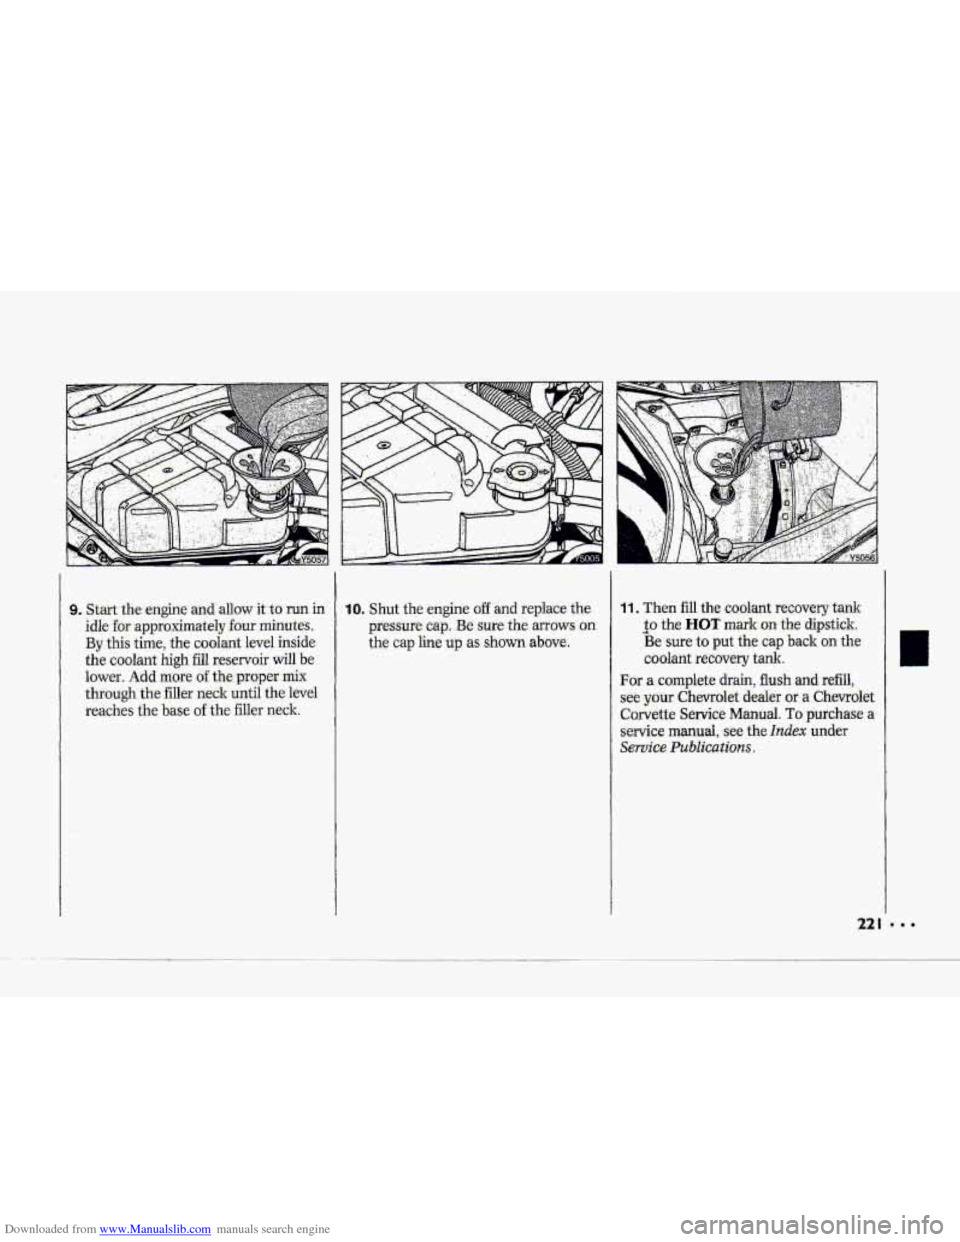
idlefor- approximately four niinutes.
By this-time, the coolant level inside
the coolant high fill reservoir will he
lower.. Add msie of the. proper mix
through the filler neck until the level
reach-es the base of'the filler neck.
10. Shut the engine off and replace the
pressuk cap. Be sure the arrows .oii.
the- cap line up as: shown above.
11. Then fiu the coolant recovery t.ank
Be sure to put the cap back on the
coolant recovery tank.
a to the HOT IIM~~C-OII the dipstick.
For a.complete drain, .flush and refill,
see your ChevroIet de-aler or. a Chevrdet
Corvette SerPice Manual. To purchase a
service manual, see the Index under
Service PuGlicationS.
Page 223 of 370
Downloaded from www.Manualslib.com manuals search engine Problems on the Road
How to Add Coolant to the Coolant
High Fi/l Reservoir-LT5 On/y
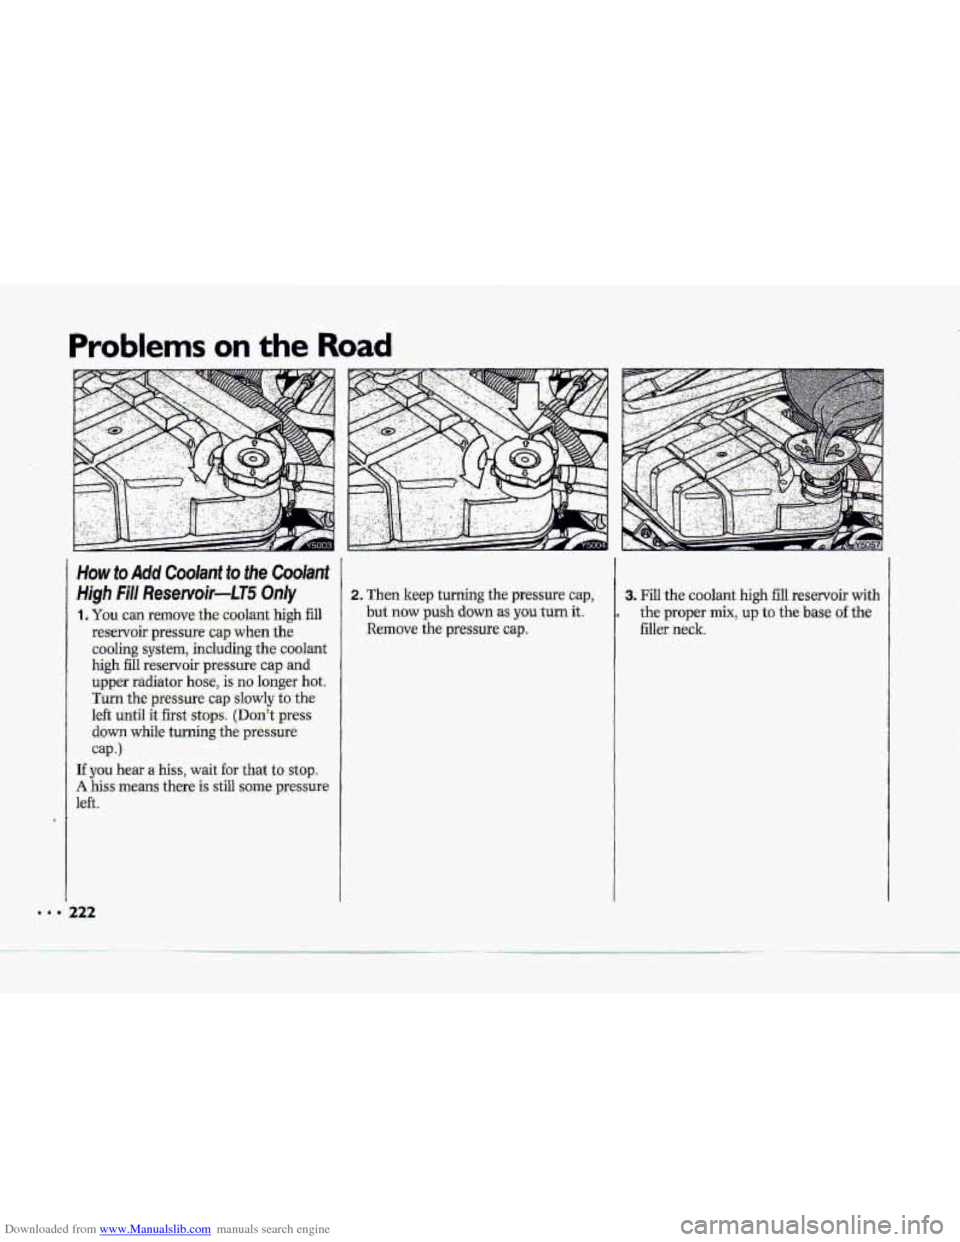
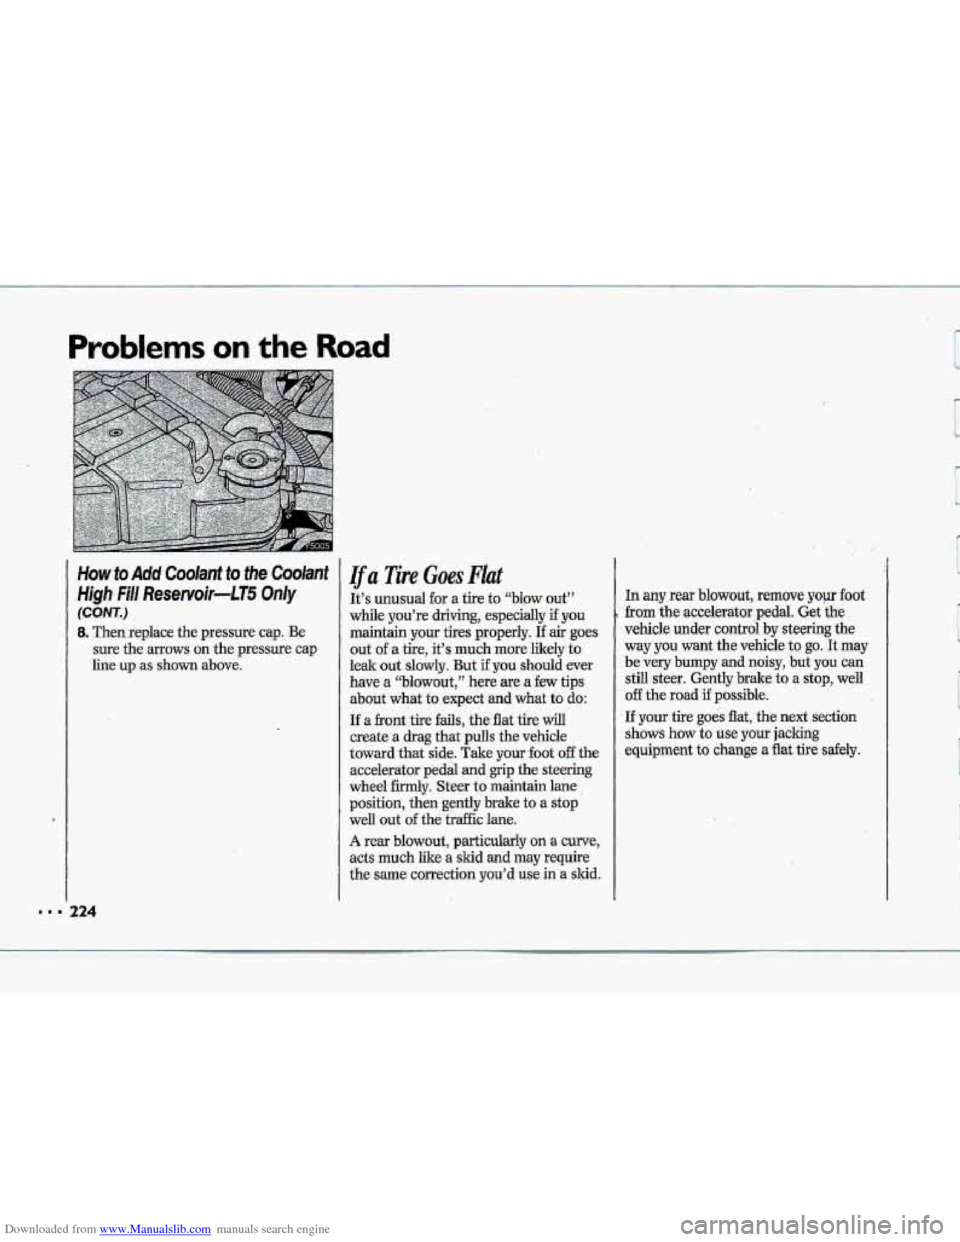
1. YQU can remove, the coolant high fill
reservoir pressure cap when the
cooling system, including.the coolant
high fill reservoir pressure cap and
upper radiator hose, is no longer hot.
Turn the pressure cap slowly to the
left until it first stlaps. (Don't press
down while turning the pressure
cap .)
If you hear a hiss, wait for that to stop.
A hiss- means ther,e is still some pressure
left.
122
2. Then keep turning. the pressure cap,
-but
now push down as you turn it.
Remove the pressure. cap.
3. Fill the coolant high fill reservoir with
the proper mix, .up to the base of the
filler neck.
Page 224 of 370
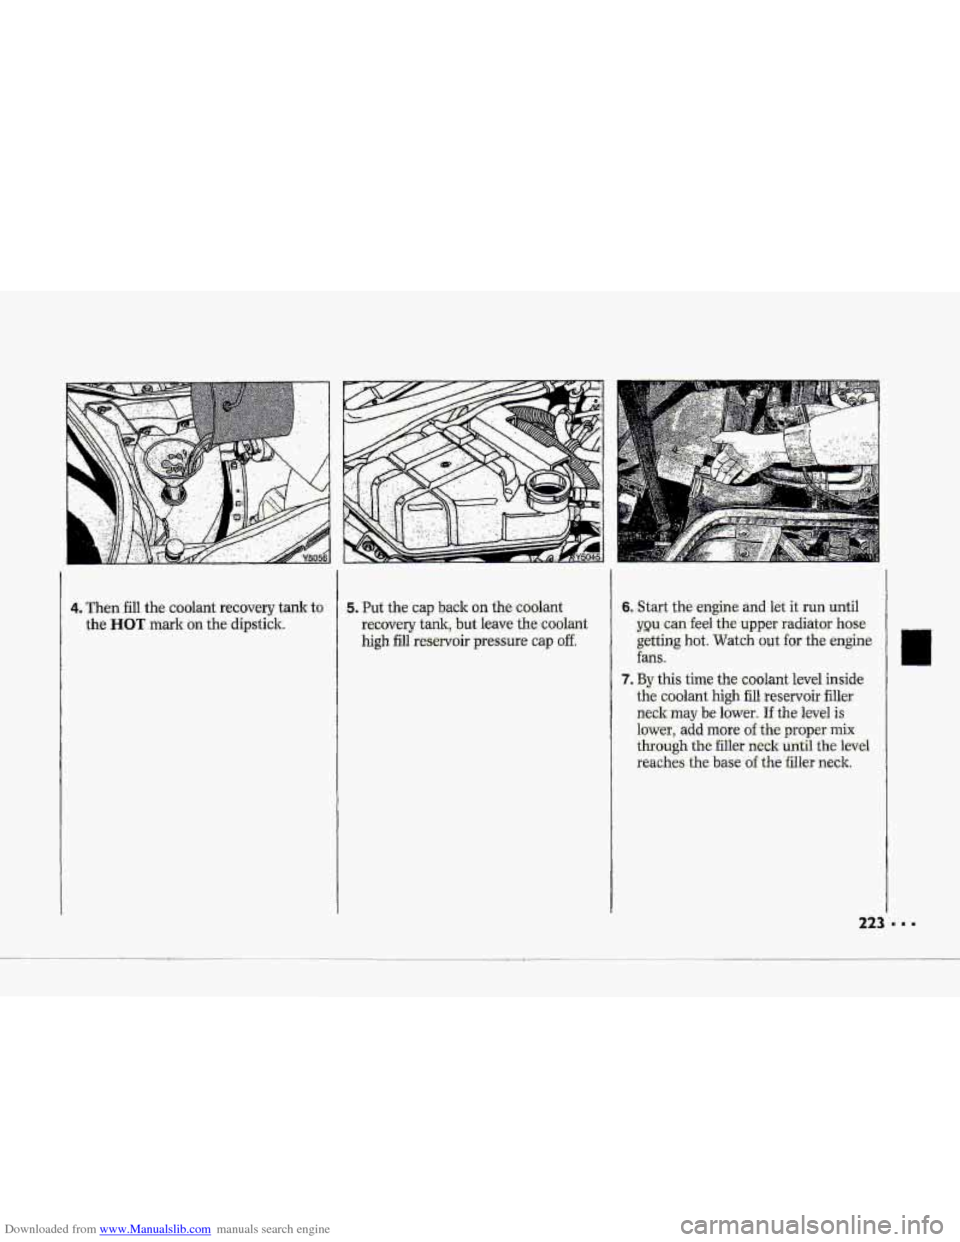
Downloaded from www.Manualslib.com manuals search engine 4. Then fill the coorant recovery tam to
the HOT mark an the.dip$tick..
-5.. Put the cap back on the- coolant.
recovery tank, but leave the coolant
high fill reservoir pressure cap off.
6. Start the engine and let it m until
y~u can feel the upper radiator hose-
getting hot. Watch out for the engine-
fans.
7. By this time the coolant level inside
the coolant high fill reservoir filler
neck may be -lower. if the level is
lower, add more of the proper mix
thxough the filler neck until the level
reaches..the base of the Tiller neck.
Page 225 of 370
Downloaded from www.Manualslib.com manuals search engine Problems on the Road
lJu Tire Goes Flat
It’s unusual for a tire to “blow out”
while you’re driving, especially if-you
maintain
your tires properly. If air goes
out of a tire, it’s much more likely to
leak out
slowly. But if you should ever
have a “blowout,” here are a few tips-
about what to expect
and what to do:
If a front tire fails, the flat tire will
create a drag that pulls the vehicle
toward that side. Take yuur foot 08 the
accelerator pedal
and grip the steering
wheel firmly. Steer to maintain lane
p-osition, then gently brake to -a stop
well out of the. traffic lam.
A rear blowout, particularly on a curve,
acts much like a skid and may require
the
same corre&ion you’d use in a skid.
h any rear bhwout, remove yop foot
from the accelerator pedal. Get the
vehicle under control by steering the
way you want the vehicbto go. It may
be very bumpy and noisy, hut you can
still steer. Gently brake to B stop, well
off’ the road if posiible.
If your tire go& flat, the next section
shows how to use your jacking
equipment to change a flat tire sdely.
e
Page 226 of 370
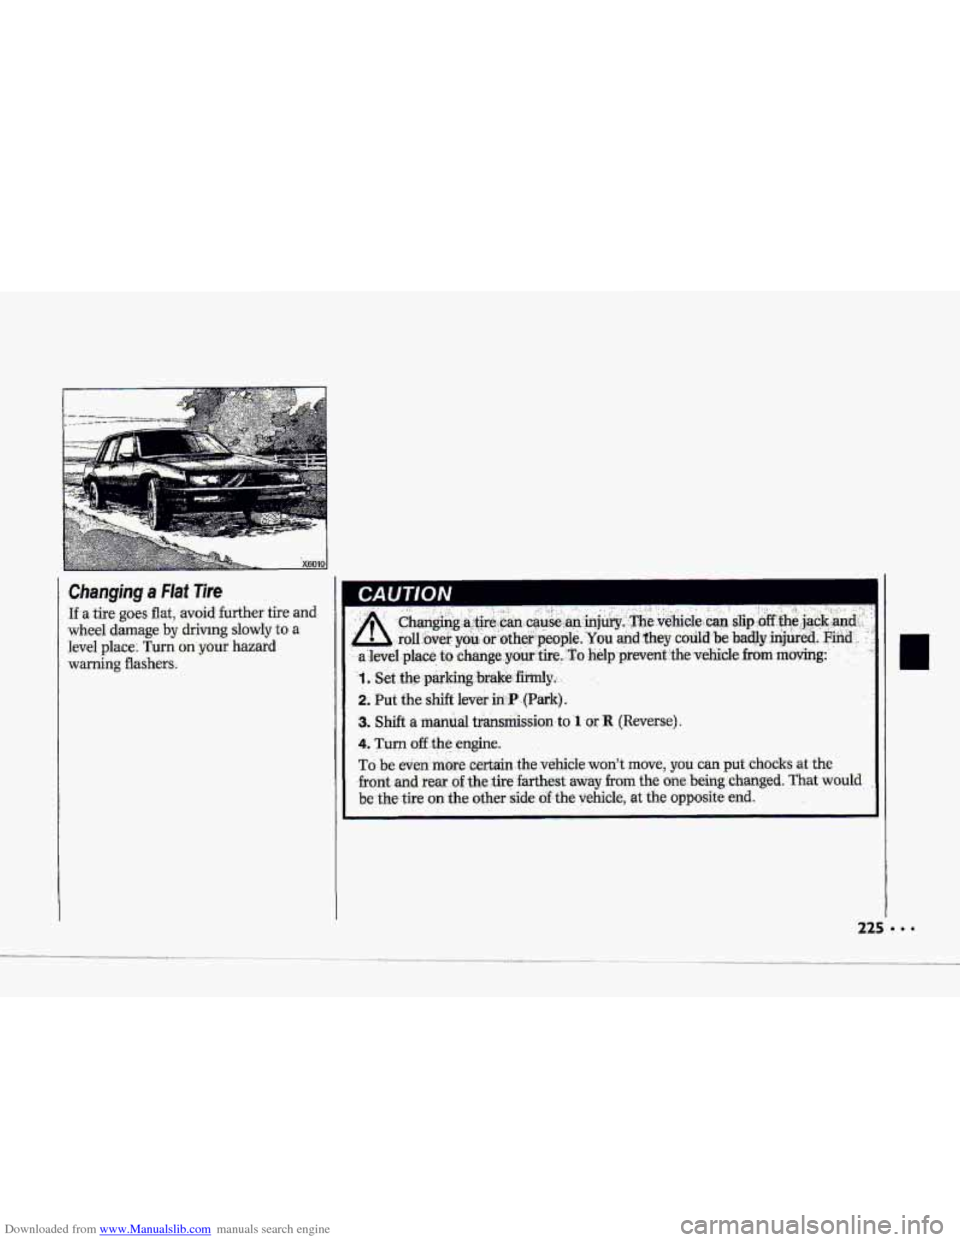
Downloaded from www.Manualslib.com manuals search engine If a tire gaes aat, avoid further tire and
wheel damage by drivmg..slowly.to a
level place: Turn on -your ha-zmd
warning flashers.
II
Page 227 of 370
Downloaded from www.Manualslib.com manuals search engine Problems on thc Road
ucket
I- JI
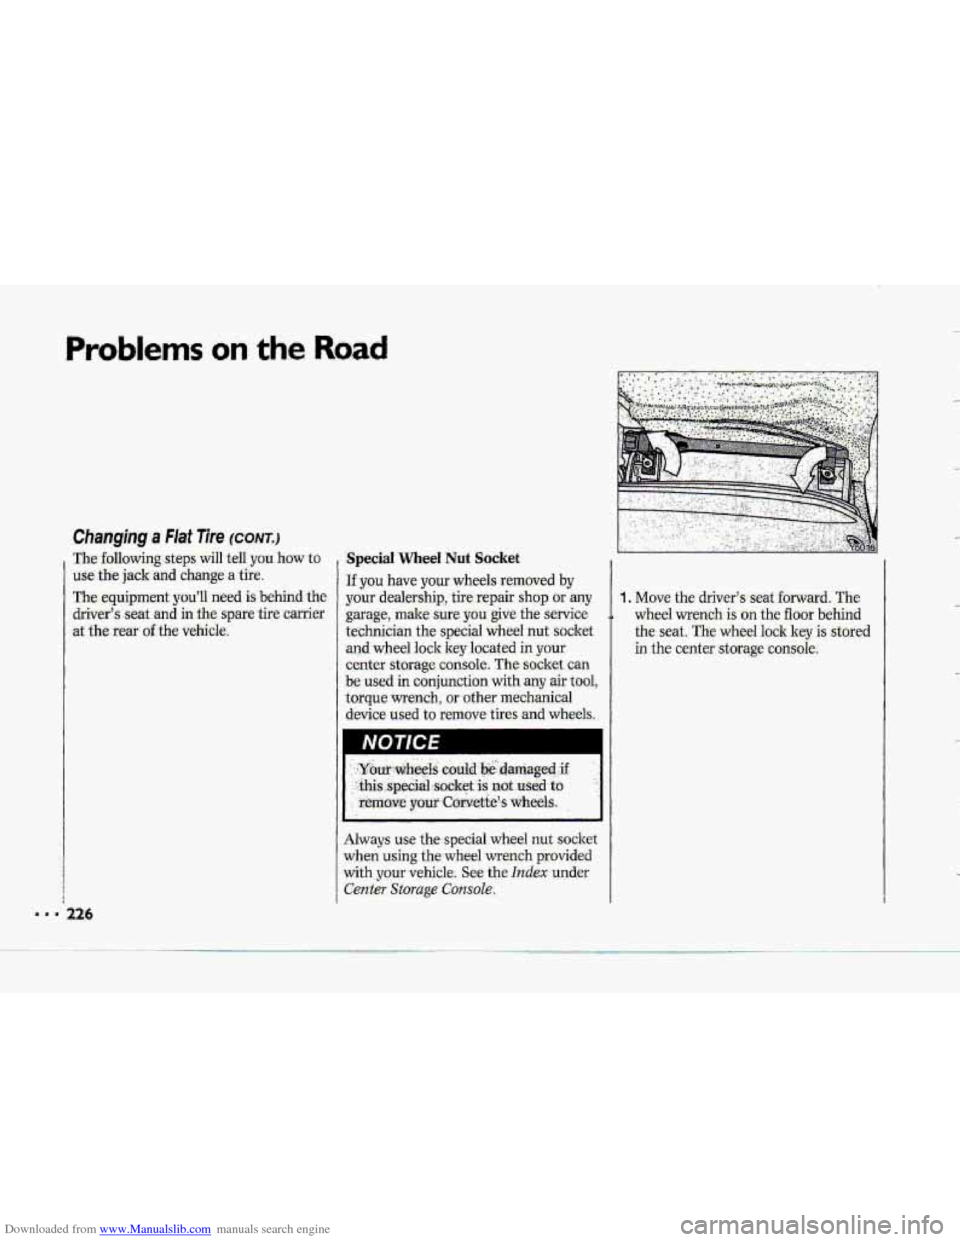
Always use the special wheel nut socket
when using the wheel wrench provided
with your vehicle. See the Index under
Center Storage Console.
I.-
Page 228 of 370
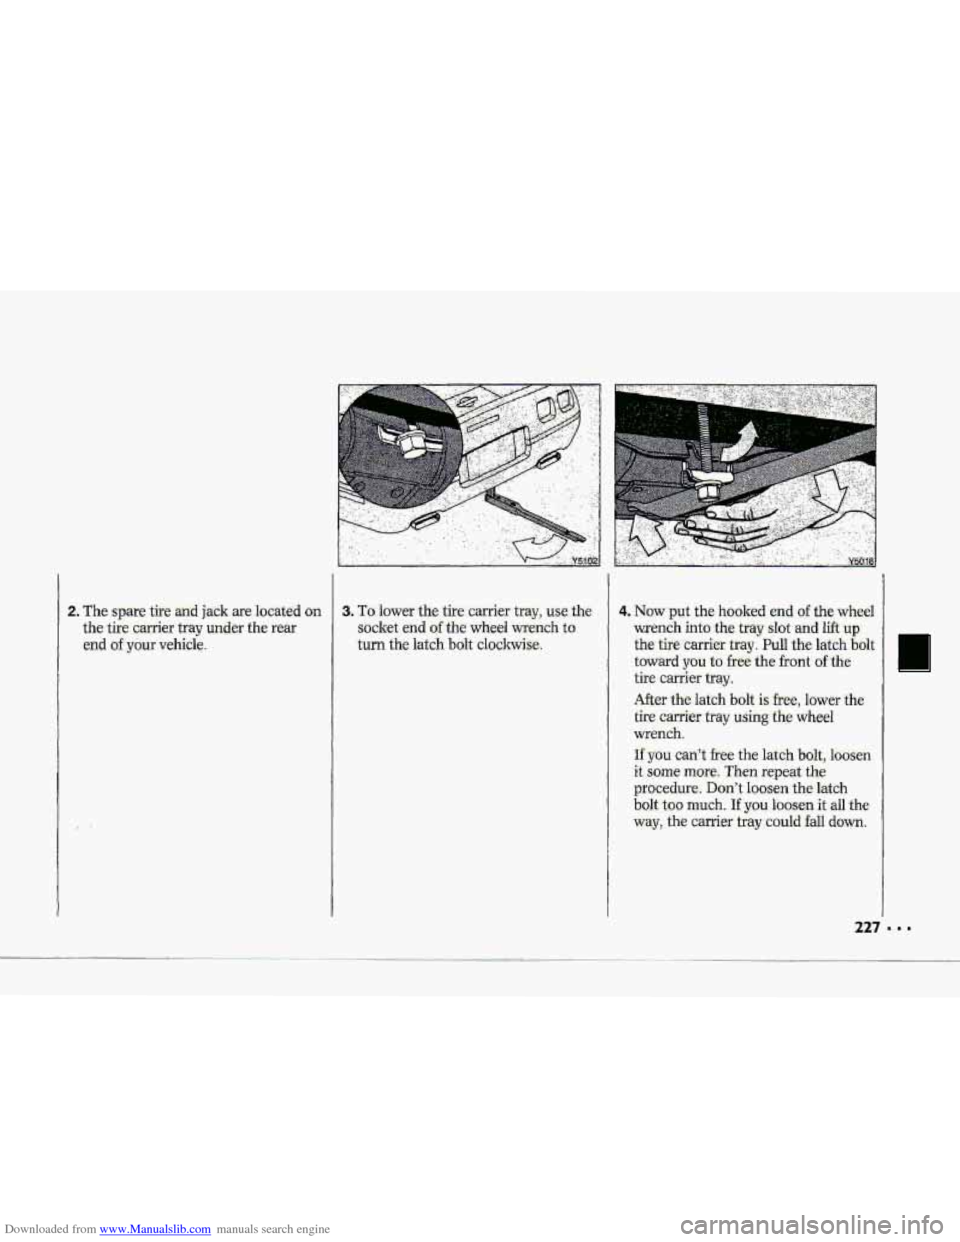
Downloaded from www.Manualslib.com manuals search engine 2. The spare tite an,d jack are located on 3. To.lower the tire c.&er tray, us~the
the tire c.z@er tray under the rear socket end of-the wheel wench t~:
end of your vehicle. turn
the latdh bolt clockmi%
4. Now put the hooked end of the whe.el
me-nch intathe tray sht arid lift up.
the. tire carriex txay . .Pull the latch- bdt
toward you to .free the front ofthe
tire emier bqy.
After the.lat& bolt is. hee, lower the
tire carrier tray using :the wheel
wrench.
If you can? free the latch Mlt, Ibdsen
it sdme more: Then repeai the
procedure. Dgn't loosen the-latch
bo1t.t~~ much. If you loosen it all t.he
way; $#~g .., caxrier tray -euuld. fall down..
227 '
Page 229 of 370
Downloaded from www.Manualslib.com manuals search engine Prc L'- ms on the Road
Changing a FIaf Tire (CONTJ
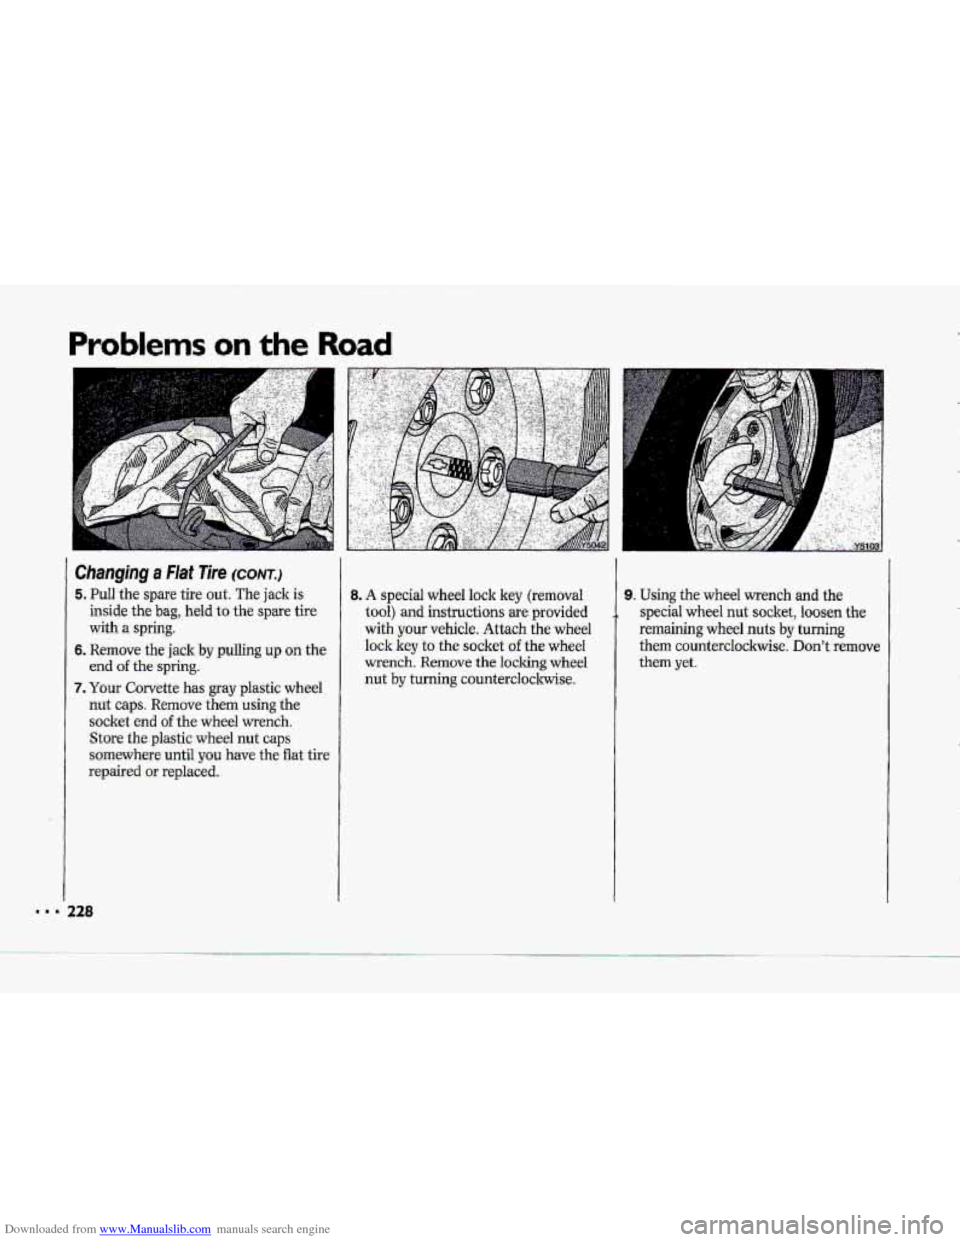
5. Pull the spare tire out. The jack is
inside the bag, held to the spare tire
with
a spring.
6. Remove the jack by pullihg up on the
erid of the spring.
7. Your Corvette has gray plastic wheel
nut caps. Remove them using the
socket
end of the wheel wrench.
Store
the plastic-wheel nut caps
somewhere until you have the flat tire
repaired
or replaced.
228
8. A special wheel lock key (removal
tool)
and instructions are provided
with
your vehicle. Attach the wheel
lock key to the socket of the wheel
wrench. Remove the locking wheel
hut by turning counterclockwise.
9. Using the wheel wrench and the
special
wheel nut socket, loosen the
remaining wheel nuts by turning
them counterclockwise.
Don't remove
them
yet.
Page 230 of 370
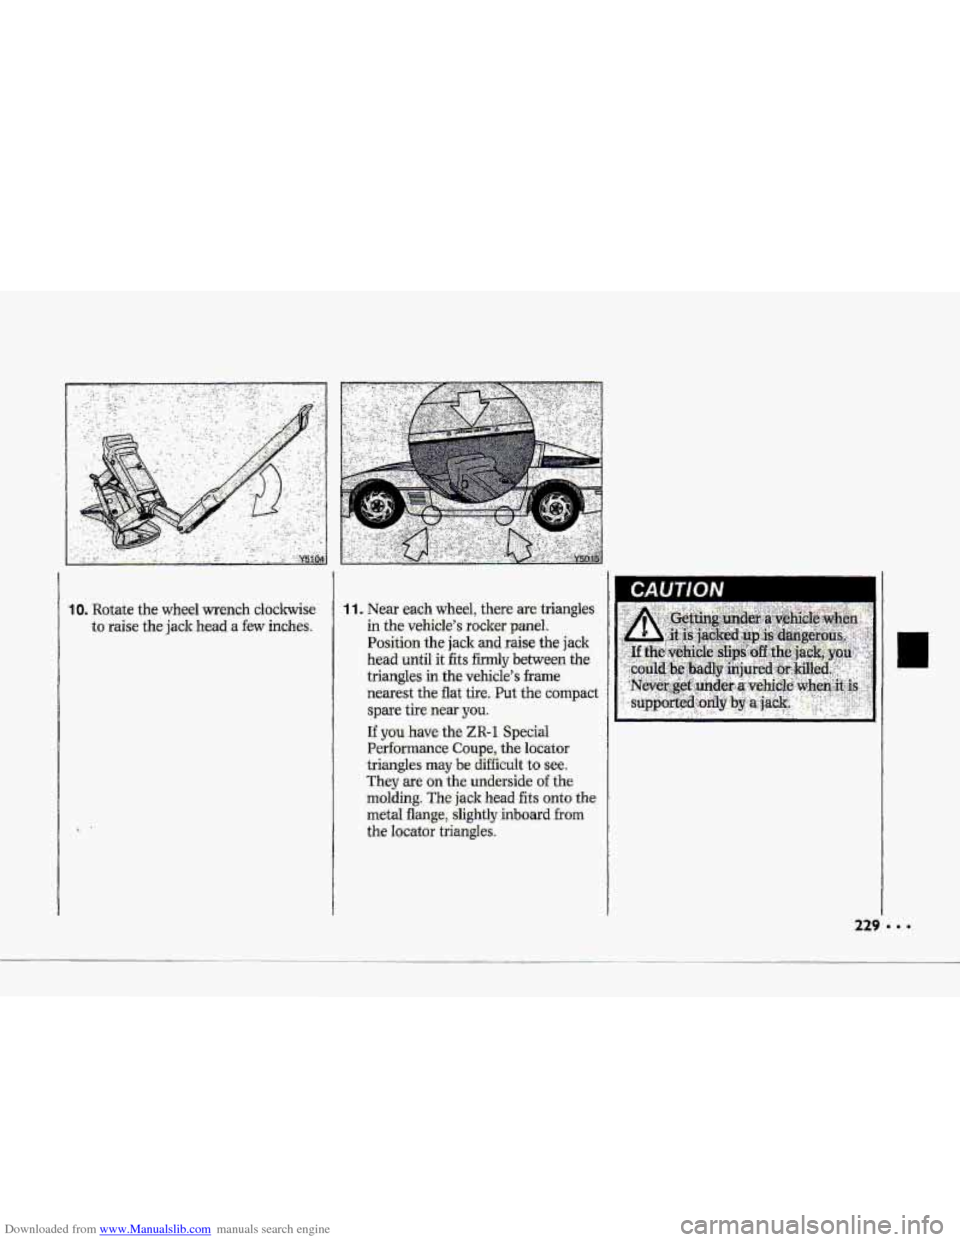
Downloaded from www.Manualslib.com manuals search engine 1 1 .‘Near eadh wheel, there-ae. triangles
in the vehicle’s ro.cl& panel..
Positiorr the jack and raise the jack
head until it fits firmly between the
triangles in the vehitle’s frame
narest the flat tire, Put the compact
spare-tire- newyoui
If you have the ZR-f Special
Performance Coupe, the lo.&itor
-triangles. may .be difficult to see.
.They are on the underside of the
mdding: The- jack head fits onto the
-metal flange, slightly inboard. from
the lacator triangles,.
0
229 . .
Trending: heating, cooling, wiper fluid, dashboard, oil additives, oil capacity, transmission fluid
