lock CHEVROLET CORVETTE 1998 5.G Owners Manual
[x] Cancel search | Manufacturer: CHEVROLET, Model Year: 1998, Model line: CORVETTE, Model: CHEVROLET CORVETTE 1998 5.GPages: 378, PDF Size: 19.91 MB
Page 15 of 378
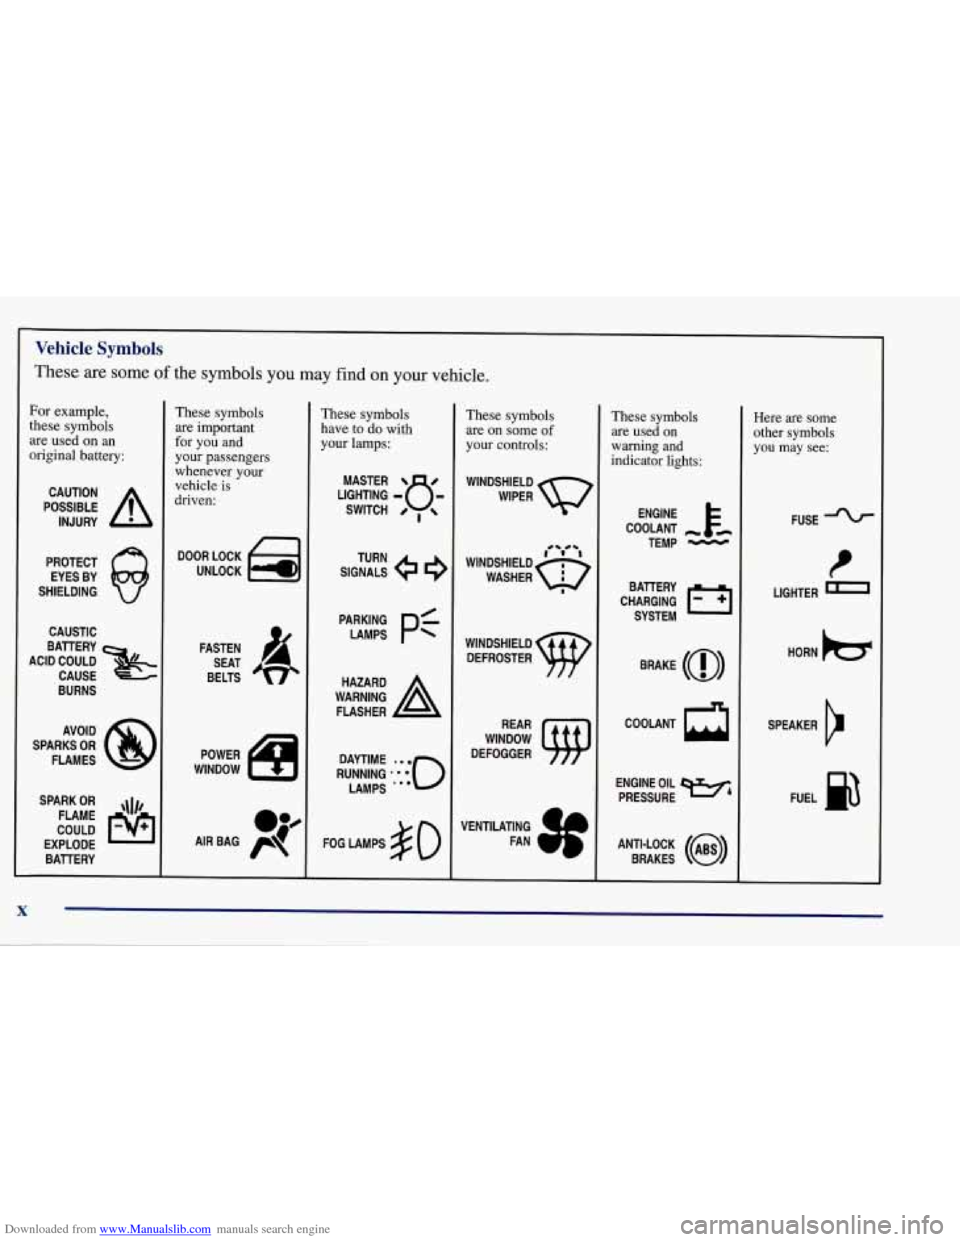
Downloaded from www.Manualslib.com manuals search engine Vehicle Symbols
These are some of the symbols you may find on your vehicle.
For example,
these symbols
are used on
an
original battery:
POSSIBLE A
CAUTION
INJURY
PROTECT EYES BY
SHIELDING
Q
CAUSTIC
These symbols
are important
for you and
your passengers
whenever your
vehicle
is
driven:
DOOR LOCK
UNLOCK
ACID COULD BAlTERY
CAUSE
BURNS
AVOID
SPARKS
OR
FLAMES
SPARK
OR ,\I/,
COULD FLAME
EXPLODE BAllERY FASTEN
SEAT
BELTS
These symbols
have
to do with
your lamps:
SIGNALS TURN
A
FLASHER
FOG LAMPS
$0
These symbols
are on some
of
your controls:
WINDSHIELD
DEFROSTER
WINDOW
DEFOGGER
VENTILATING FAN
These symbols
are used on
warning and
indicator lights:
COOLANT -
TEMP -
CHARGING I-1
BATTERY
SYSTEM
BRAKE
(@)
COOLANT
a
ENGINE OIL
PRESSURE
WA
ANTI-LOCK (@)
BRAKES
Here are some
other symbols
you may see:
FUSE
t
LIGHTER
HORN
b
SPEAKER
b
FUEL p3
X
Page 17 of 378
Downloaded from www.Manualslib.com manuals search engine Seats and Seat Controls Power Seat
This part tells you about the seats -- how to adjust them,
and also about reclining seatbacks and seatback latches.
Manual Front Seat (Option, Passenger Only)
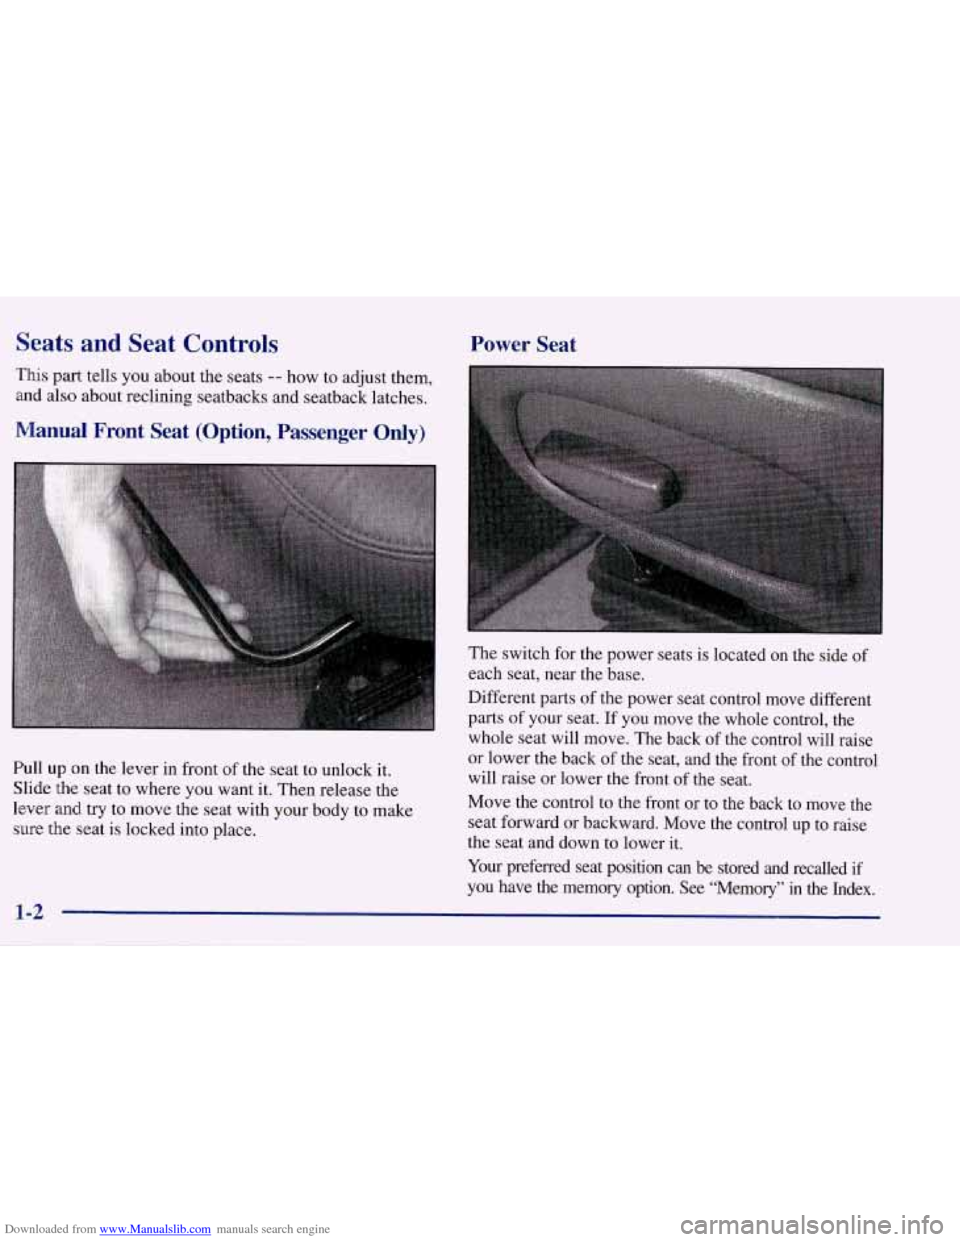
Pull up on the lever in front of the seat to unlock it.
Slide the seat to where you want it. Then release the
lever and
try to move the seat with your body to make
sure the seat
is locked into place.
1-2
The switch for the power seats is located on the side of
each seat, near the base.
Different parts of the power seat control move different
parts
of your seat. If you move the whole control, the
whole seat will move. The back
of the control will raise
or lower the back
of the seat, and the front of the control
will raise or lower the front of the seat.
Move the control to the front or to the back to move the
seat forward or backward. Move the control up to raise
the seat and down to lower it.
Your preferred seat position can be stored and recalled if
you have the memory option.
See “Memory” in the Index.
Page 18 of 378
Downloaded from www.Manualslib.com manuals search engine Sport Seat (Option) Reclining Seatbacks
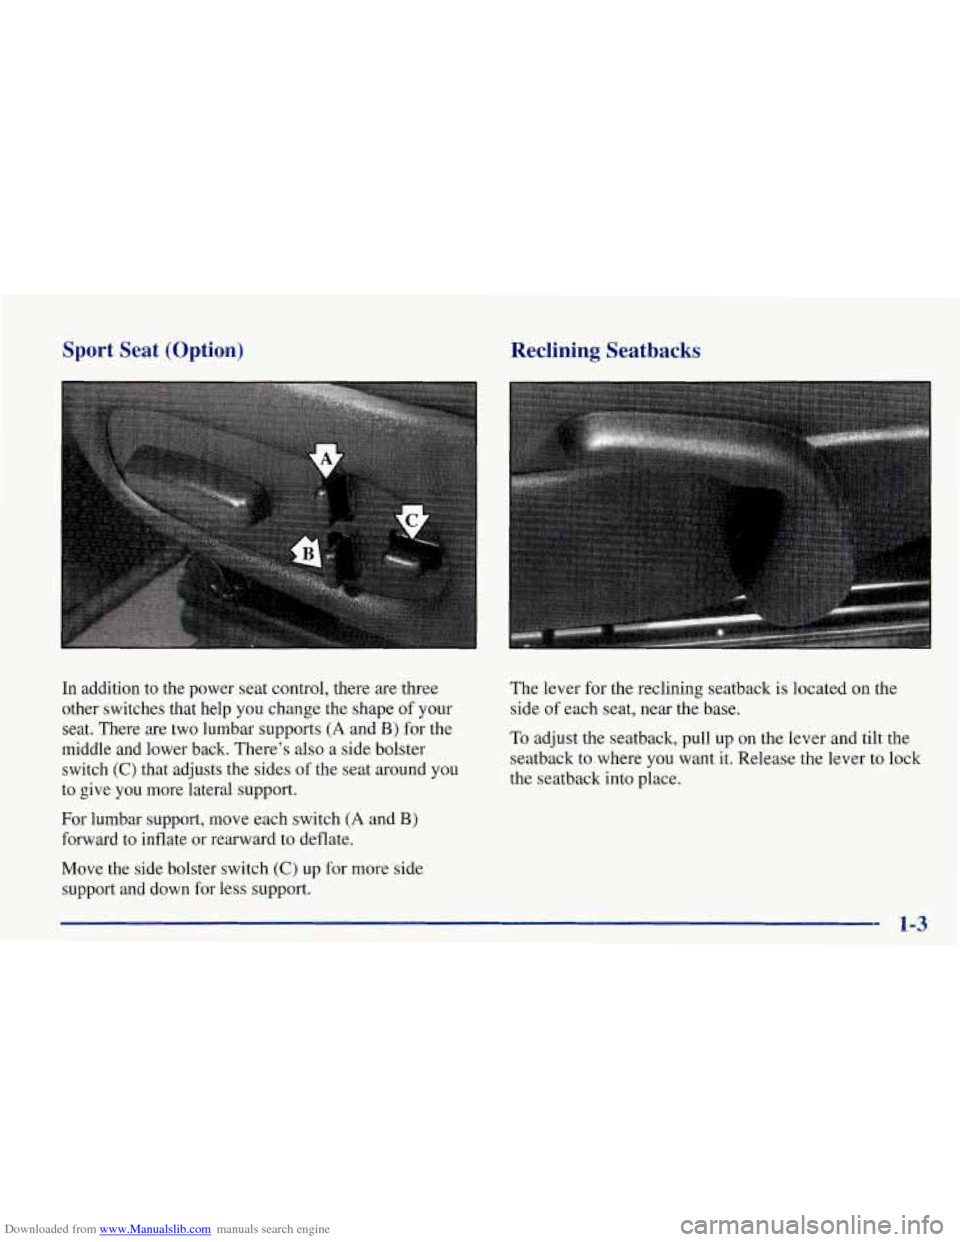
In addition to the power seat control, there are three
other switches that help
you change the shape of your
seat. There are two lumbar supports
(A and B) for the
middle and lower back. There’s also a side bolster
switch
(C) that adjusts the sides of the seat around you
to give you more lateral support.
For lumbar support, move each switch
(A and B)
forward to inflate or rearward to deflate.
Move the side bolster switch
(C) up for more side
support and down for less support. The lever
for the reclining seatback
is located on the
side
of each seat, near the base.
To adjust the seatback, pull up on the lever and tilt the
seatback to where
you want it. Release the lever to lock
the seatback into place.
1-3
Page 20 of 378
Downloaded from www.Manualslib.com manuals search engine Seatback Latches
I A CAUTION:
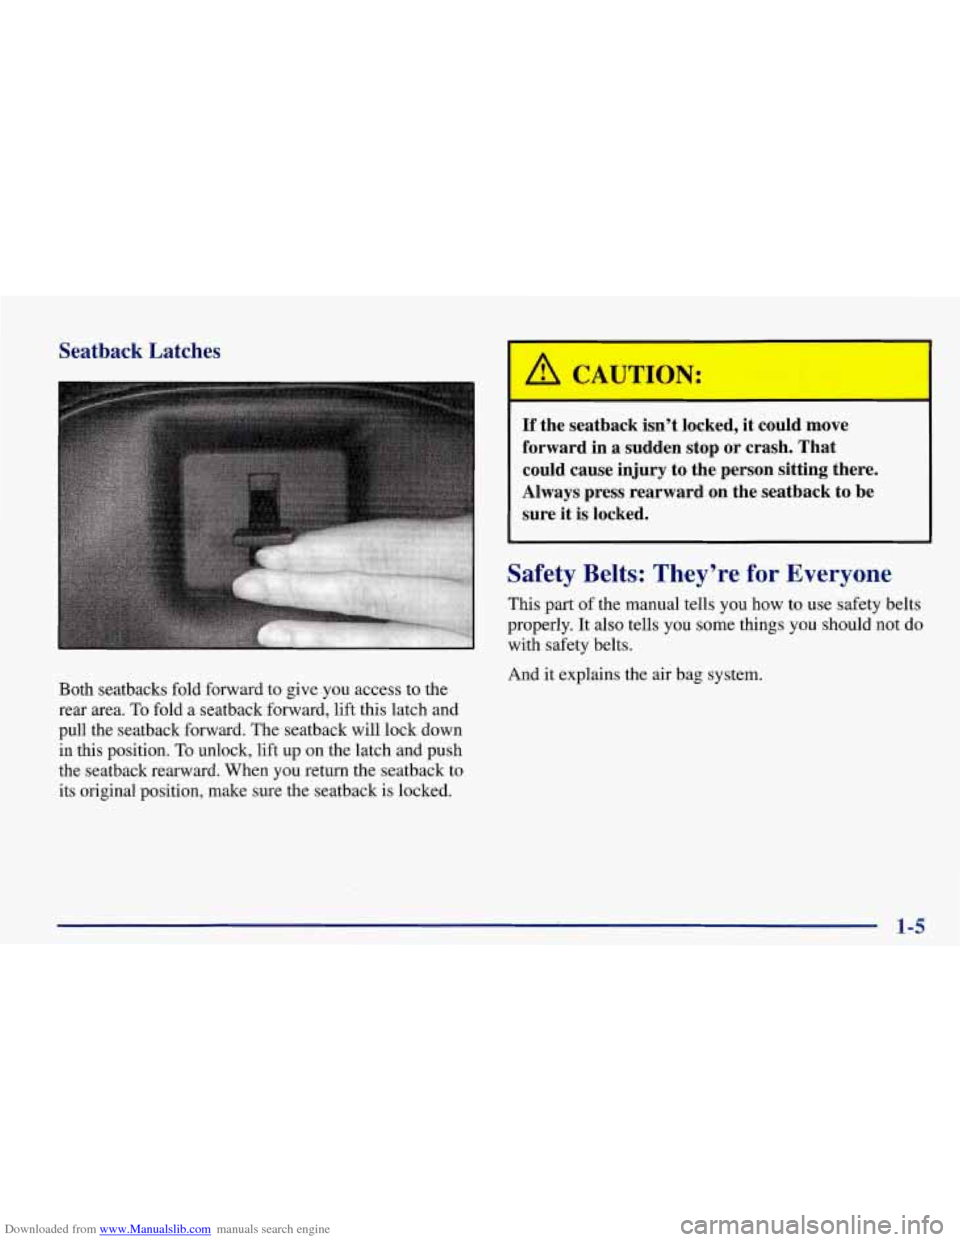
Both seatbacks fold forward to give you access to the
rear area.
To fold a seatback forward, lift this latch and
pull the seatback forward. The seatback will lock down
in this position.
To unlock, lift up on the latch and push
the seatback rearward. When you return the seatback to
its original position, make sure the seatback is locked.
If the seatback isn’t locked, it could move
forward in a sudden stop or crash. That
could cause injury to the person sitting there.
Always press rearward on the seatback to be sure it is locked.
Safety Belts: They’re for Everyone
This part of the manual tells you how to use safety belts
properly. It also tells you some things
you should not do
with safety belts.
And it explains the air bag system.
1-5
Page 26 of 378
Downloaded from www.Manualslib.com manuals search engine How to Wear Safety Belts Properly
Adults
This part is only for people of adult size.
Be aware that there are special things to know about safety
belts and children.
And there are different rules for smaller
children and babies.
If a child will be ridmg in your
vehicle, see the
part of this manual called “Children.”
Follow those rules for everyone’s protection.
First, you’ll want to know which restraint systems your
vehicle has.
We’ll start with the driver position.
Driver Position
This part describes the driver’s restraint system.
Lap-Shoulder Belt
The driver has a lap-shoulder belt. Here’s how to wear
it properly.
1. Close and lock the door.
2. Adjust the seat (to see how, see “Seats” in the Index)
so you can sit up straight.
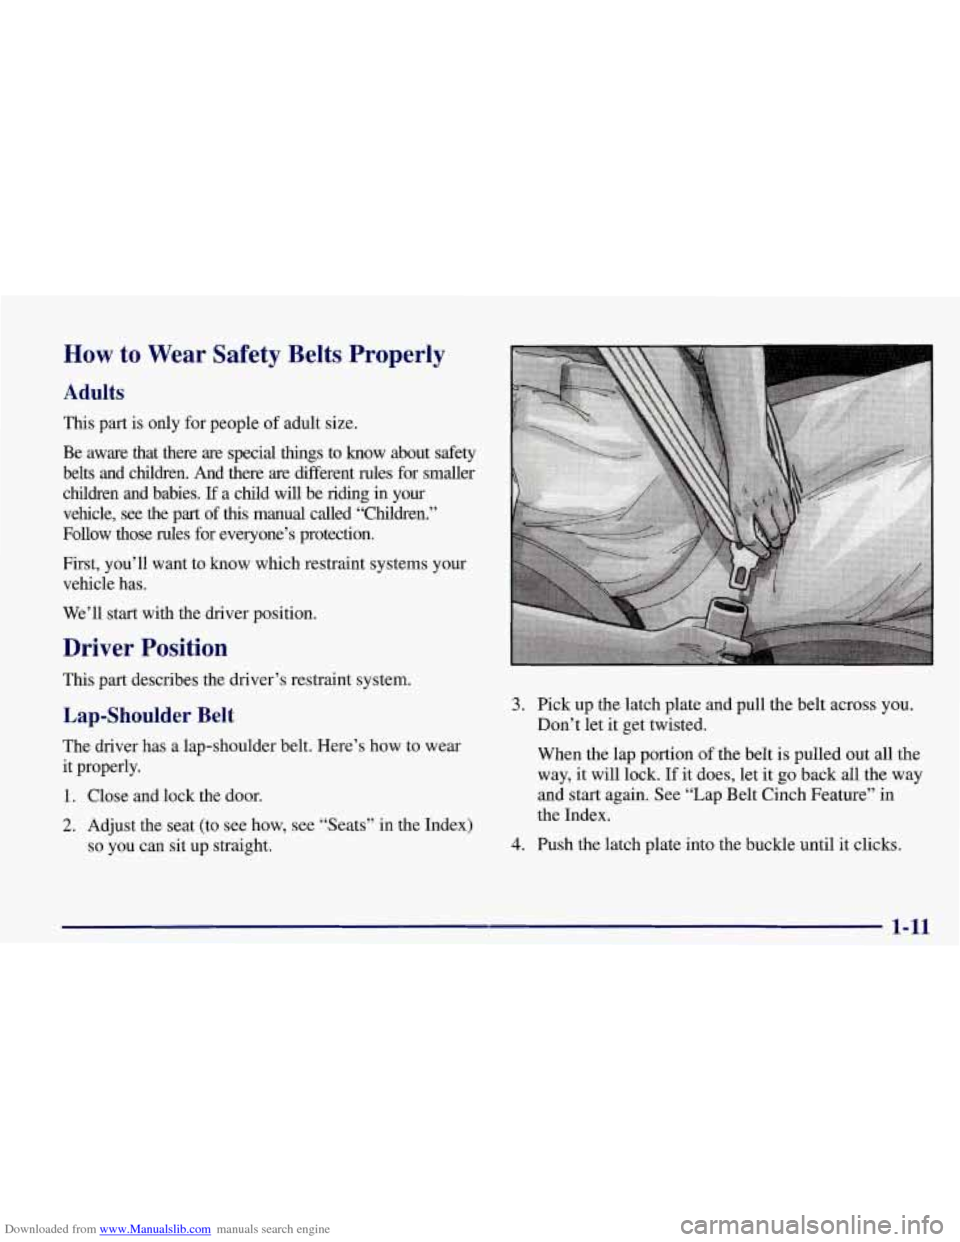
3. Pick up the latch plate and pull the belt across you.
Don’t let it get twisted.
When the lap portion of the belt is pulled out all the
way, it will lock. If it does, let it go back all the way
and start again. See “Lap Belt Cinch Feature” in
the Index.
4. Push the latch plate into the buckle until it clicks.
1-11
Page 27 of 378
Downloaded from www.Manualslib.com manuals search engine Pull up on the latch plate to make sure it is secure. If
the belt isn’t long enough, see “Safety Belt
Extender” at the end of this section.
Make sure the release button on the buckle is
positioned
so you would be able to unbuckle the
safety belt quickly if you ever had to. The
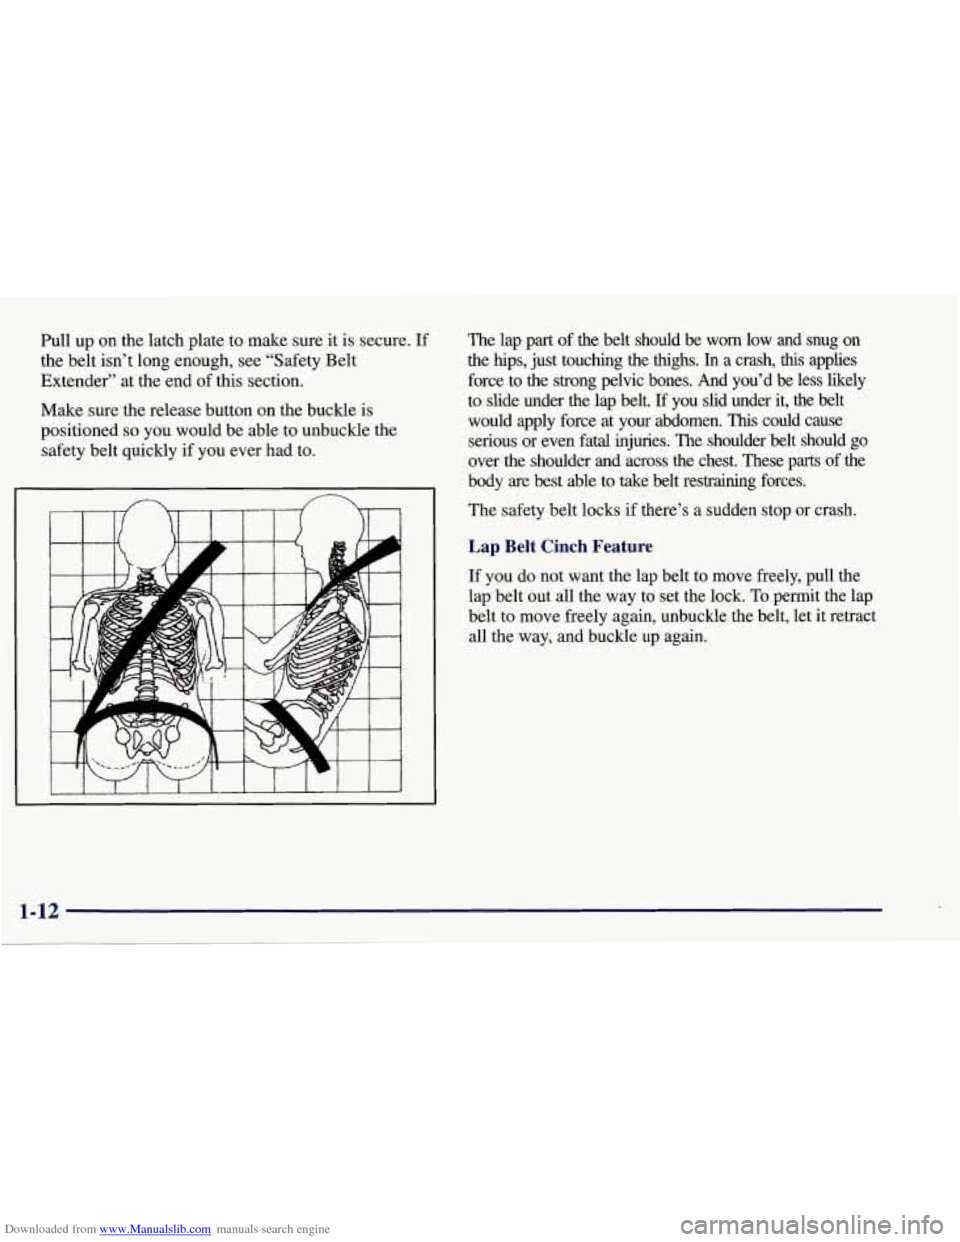
lap part of the belt should be worn low
and snug on
the hips, just touching the thighs. In a crash, this applies
force to the strong pelvic bones. And you’d be less likely
to slide under the lap belt.
If you slid under it, the belt
would apply force at your abdomen.
This could cause
serious or even fatal injuries. The shoulder belt should go
over the shoulder and across the chest. These parts of the
body
are best able to take belt restraining forces.
The safety belt locks if there’s
a sudden stop or crash.
Lap Belt Cinch Feature
If you do not want the lap belt to move freely, pull the
lap belt out all the way to set the lock. To permit the lap
belt to move freely again, unbuckle the belt, let it retract
all the way, and buckle up again.
Page 33 of 378
Downloaded from www.Manualslib.com manuals search engine The best way to protect the fetus is to protect the
mother. When a safety belt
is worn properly, it’s more
likely that the fetus won’t be hurt in a crash. For
pregnant women, as for anyone, the key to making
safety belts effective is wearing them properly.
Passenger Position
To learn how to wear the passenger’s safety belt
properly, see “Driver Position’’ earlier in this section.
The passenger’s safety belt works the same way
as the
driver’s safety belt
-- except for one thing. If you ever pull
the lap portion of the belt out
all the way, you will engage
the child restraint locking feature.
If this happens, just let
the belt
go back all the way and start again.
Air Bag System
This part explains the air bag system.
Your vehicle has two air bags
-- one air bag for the
driver and another air bag for the passenger.
Here are the most important things to know about the air
bag system:
You can be severely injured or killed in a crash if
you aren’t wearing your safety belt
-- even if you
have
air bags. Wearing your safety belt during a
crash helps reduce your chance of hitting things
inside the vehicle or being ejected from it.
Air
bags are “supplemental restraints” to the safety
belts. All air bags are designed to work with
safety belts, but don’t replace them. Air bags are
designed to work only in moderate to severe
crashes where the front of your vehicle hits
something. They aren’t designed to inflate at all
in rollover, rear, side or low-speed frontal
crashes. Everyone in your vehicle should wear a
safety belt properly
-- whether or not there’s an
air bag for that person.
Page 48 of 378
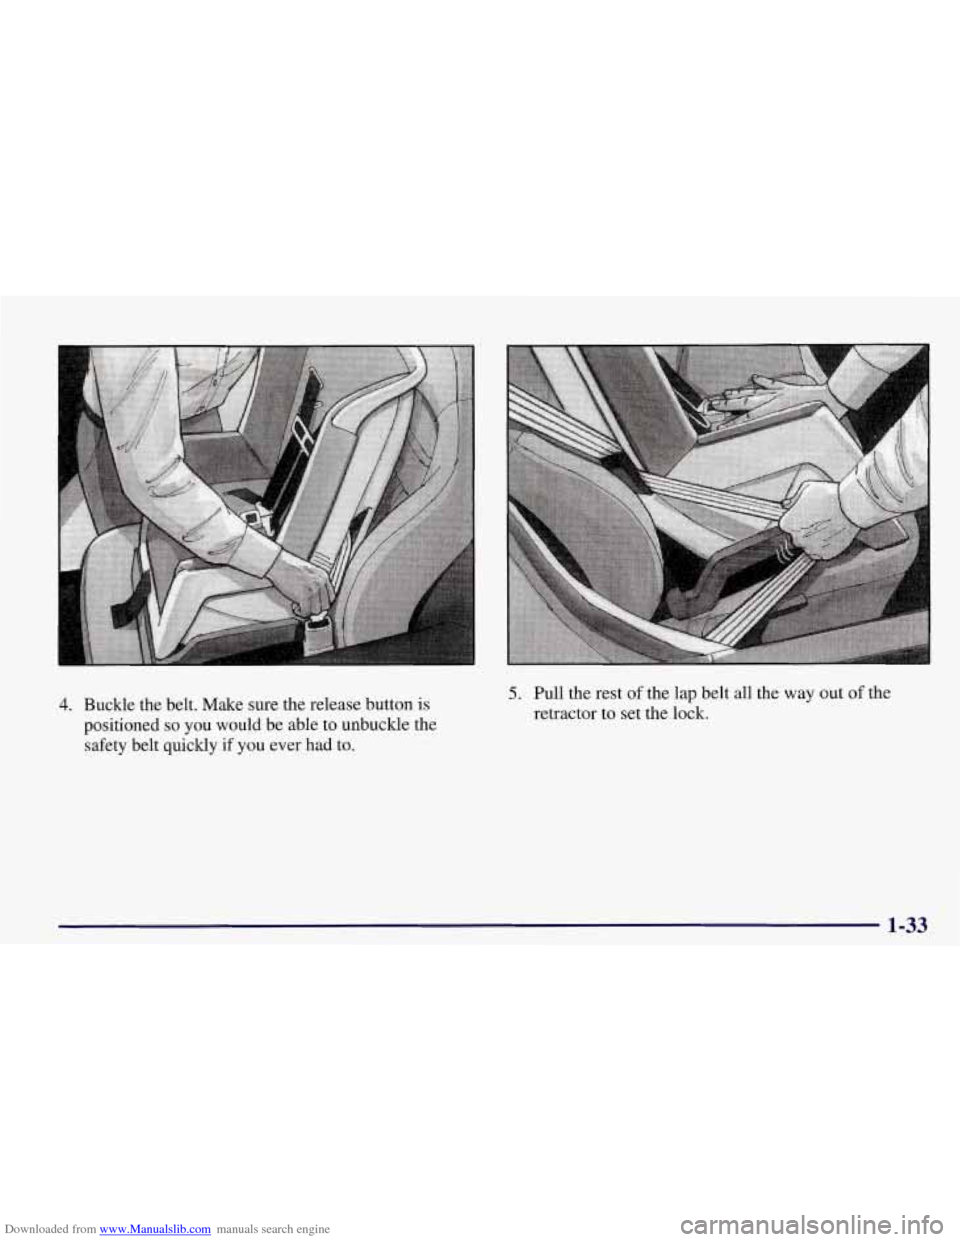
Downloaded from www.Manualslib.com manuals search engine 4. Buckle the belt. Make sure the release button is
positioned so you would be able to unbuckle the
safety belt quickly if you ever had to.
5. Pull the rest of the lap belt all the way out of the
retractor to set the lock.
1-33
Page 54 of 378
Downloaded from www.Manualslib.com manuals search engine Section 2 Features and Controls
Here you can learn about the many standard and optional features on your vehicle, and information on starting,
shifting and braking. Also explained are the instrument panel and the warning systems that tell you
if everything is
working properly
-- and what to do if you have a problem.
2-4
2-5
2-6
2-
14
2- 17 2-18
2-20
2-2 1
2-22
2-24
2-26
2-29
2-32
2-34
2-36
2-36 Door Locks
Memory (Option)
Remote Function Actuation
System
Remote Hatch/Trunk Lid Release
Universal Theft-Deterrent System
PASS-Key@
New Vehicle “Break-In”
Ignition Switch Starting Your Engine
Engine Coolant Heater (Canada Only)
Automatic Transmission Operation
Manual Transmission Operation
Parking Brake Shifting Into PARK (P)
(Automatic Transmission Models Only)
Shifting Out of PARK (P)
(Automatic Transmission)
Parking Your Vehicle (Manual Transmission) 2-37
2-37
2-38
2-39 2-39
2-40
2-42
2-50
2-52
2-53
2-54
2-60
2-68
2-74
2-77
2-87 Parking Over
Things That Burn
Engine Exhaust
Running Your Engine While You’re Parked
(Automatic Transmission)
Limited-Slip Rear Axle
Selective Real Time Damping (Option)
Windows
Turn SignalMultifunction Lever
Exterior Lamps
Interior Lamps
Mirrors
Storage Compartments
Roof Panel (Coupe)
Convertible Top (Option)
Instrument Panel
Warning Lights, Gages and Messages
Driver Information Center (DIC)
2-1
Page 56 of 378
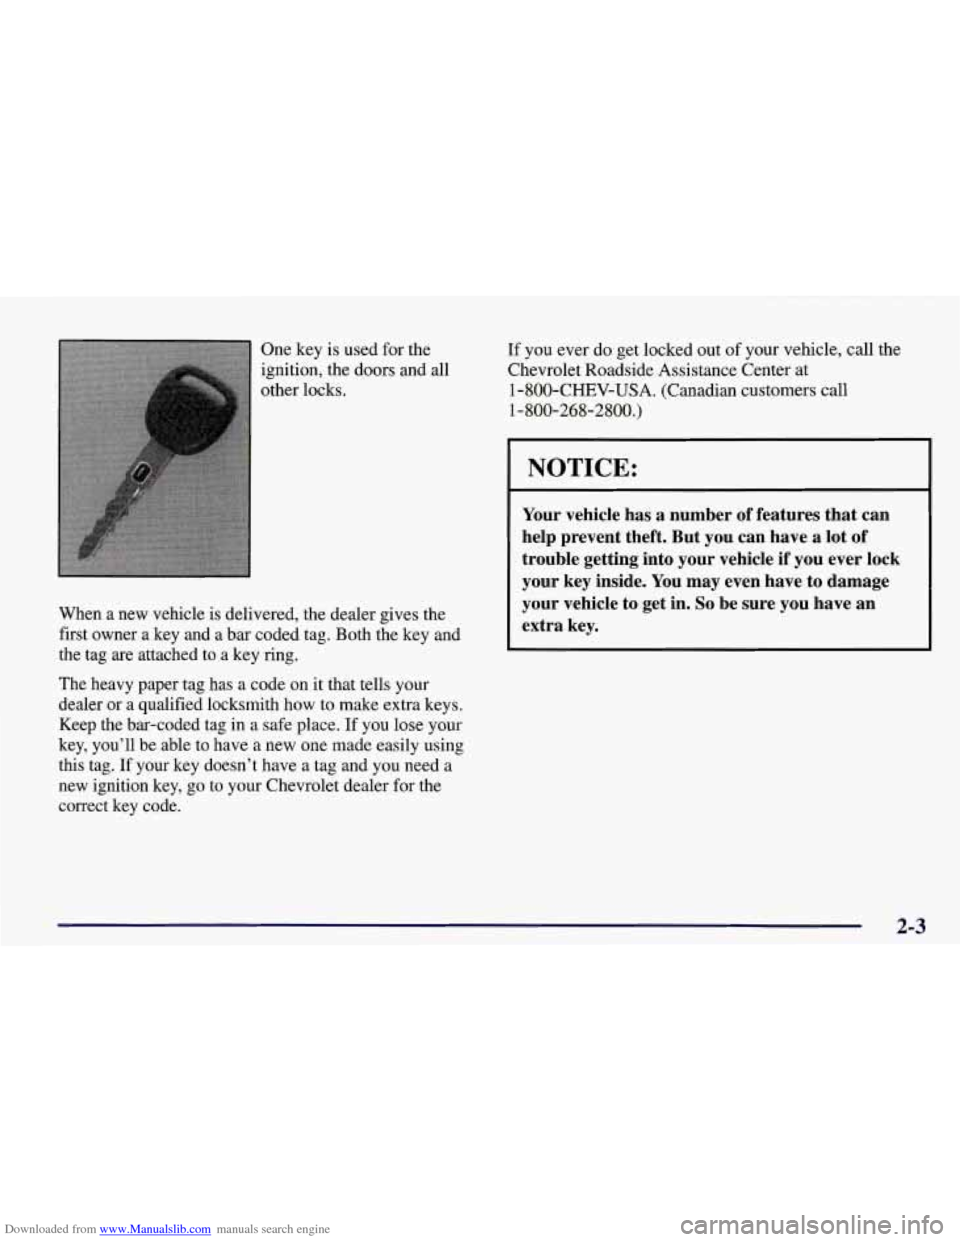
Downloaded from www.Manualslib.com manuals search engine One key is used for the
ignition, the doors and
all
other locks.
When a new vehicle is delivered, the dealer gives the
first owner a key and a bar coded tag. Both the key and
the tag are attached to
a key ring.
The heavy paper tag has a code on it that tells your
dealer
or a qualified locksmith how to make extra keys.
Keep the bar-coded tag in a safe place. If you lose your
key, you’ll be able to have a new one made easily using
this tag. If your key doesn’t have a tag and
you need a
new ignition key, go to your Chevrolet dealer for the
correct key code. If you
ever do get locked out
of your vehicle, call the
Chevrolet Roadside Assistance Center at
1-800-CHEV-USA. (Canadian customers call
1-800-268-2800.)
NOTICE:
Your vehicle has a number of features that can
help prevent theft. But you can have a lot of
trouble getting into your vehicle if you ever lock
your key inside. You may even have to damage
your vehicle to get in.
So be sure you have an
extra key.
2-3