CHEVROLET CORVETTE 2004 5.G Owners Manual
Manufacturer: CHEVROLET, Model Year: 2004, Model line: CORVETTE, Model: CHEVROLET CORVETTE 2004 5.GPages: 384, PDF Size: 2.46 MB
Page 181 of 384
TRAC/ACT HNDLG – OFF:By pressing the Active
Handling System console button briefly, the driver can
turn the Traction Control and Active Handling Systems
off. The message TRAC/ACT HNDLG – OFF will be
displayed in the DIC, the instrument panel cluster light
will be on and a chime will sound. You can acknowledge
this message by pressing the RESET button. The
anti-lock brake systems remains on with the Traction
Control and Active Handling Systems off. You should
adjust your driving accordingly.
TRAC/ACT HNDLG – ON:If the Traction Control and
Active Handling Systems are off, pressing the Active
Handling System console button momentarily will
turn both systems on. The message TRAC/ACT
HNDLG – ON will be displayed temporarily in the DIC,
the instrument panel cluster light will be off and a
chime will sound.TRACTION SYS ACTIVE:When your Traction Control
System is limiting wheel spin, the TRACTION SYS
ACTIVE message will be displayed. Slippery road
conditions may exist if this message is displayed, so
adjust your driving accordingly. The message will
stay on for a few seconds after the Traction Control
System stops limiting wheel spin.
TRACTION SYSTEM – OFF:You will hear a single
quick tone when this message is displayed. This
message comes on and stays on when the Traction
Control System button on the console is pressed to turn
the system off. To acknowledge this message, press
RESET.
TRACTION SYSTEM – ON:This message is displayed
when you decide to turn on the Traction Control
System by pressing the switch on the console. This
message will shut off automatically on its own.
WARM UP COMPLETE:If you receive this message
and hear a chime, the system has completed the
functional check of the Active Handling System.
3-67
Page 182 of 384
Other Messages
Here are more messages that you can receive on your
Driver Information Center (DIC). To acknowledge a
message and read another message that may have
come on at the same time, press the RESET button.
•BRAKE BEFORE SHIFT
(See “Automatic Transmissions Only” under
Automatic Transmission Operation on page 2-25.)
•CHANGE OIL NOW
(See “GM Oil Life System™” underEngine Oil on
page 5-13.)
•CHANGE OIL SOON
(See “GM Oil Life System™” underEngine Oil on
page 5-13andScheduled Maintenance on
page 6-4.)
•CRUISE DISENGAGED
(See “Cruise Control” underTurn
Signal/Multifunction Lever on page 3-6.)
•CRUISE SET_MPH (_km/h)
(See “Cruise Control” underTurn
Signal/Multifunction Lever on page 3-6.)
•DOOR AJAR
•ENGINE PROTECTION REDUCE ENGINE RPM
•HATCH AJAR (Coupe)
•HIGH VOLTAGE
(SeeVoltmeter Gage on page 3-37.)
•LOW BRAKE FLUID
(See “Brake Fluid” underBrakes on page 5-37.)
•LOW FUEL
(SeeFuel Gage on page 3-46.)
•LOW VOLTAGE
(SeeVoltmeter Gage on page 3-37.)
•LOW WASHER FLUID
(SeeWindshield Washer Fluid on page 5-36.)
•RESERVE FUEL
(SeeFuel Gage on page 3-46.)
•TONNEAU AJAR (Convertible)
•TRUNK AJAR (Convertible/Z06)
•UPSHIFT NOW
(SeeManual Transmission Operation on
page 2-28.)
3-68
Page 183 of 384
Audio System(s)
Notice:Before adding any sound equipment to
your vehicle, like a tape player, CB radio, mobile
telephone, or two-way radio, make sure that it can
be added by checking with your dealer. Also,
check federal rules covering mobile radio and
telephone units. If sound equipment can be added,
it is very important to do it properly. Added
sound equipment may interfere with the operation
of your vehicle’s engine, radio, or other systems,
and even damage them. Your vehicle’s systems may
interfere with the operation of sound equipment
that has been added improperly.Figure out which audio system is in your vehicle, find
out what your audio system can do, and how to operate
all of its controls.
Your vehicle may have a feature called Retained
Accessory Power (RAP). With RAP, the audio system
can be played even after the ignition is turned off.
See “Retained Accessory Power (RAP)” underIgnition
Positions on page 2-20.
Setting the Time
Press and hold HR until the correct hour appears on the
display. Press and hold MN until the correct minute
appears on the display.
3-69
Page 184 of 384
Radio with Cassette
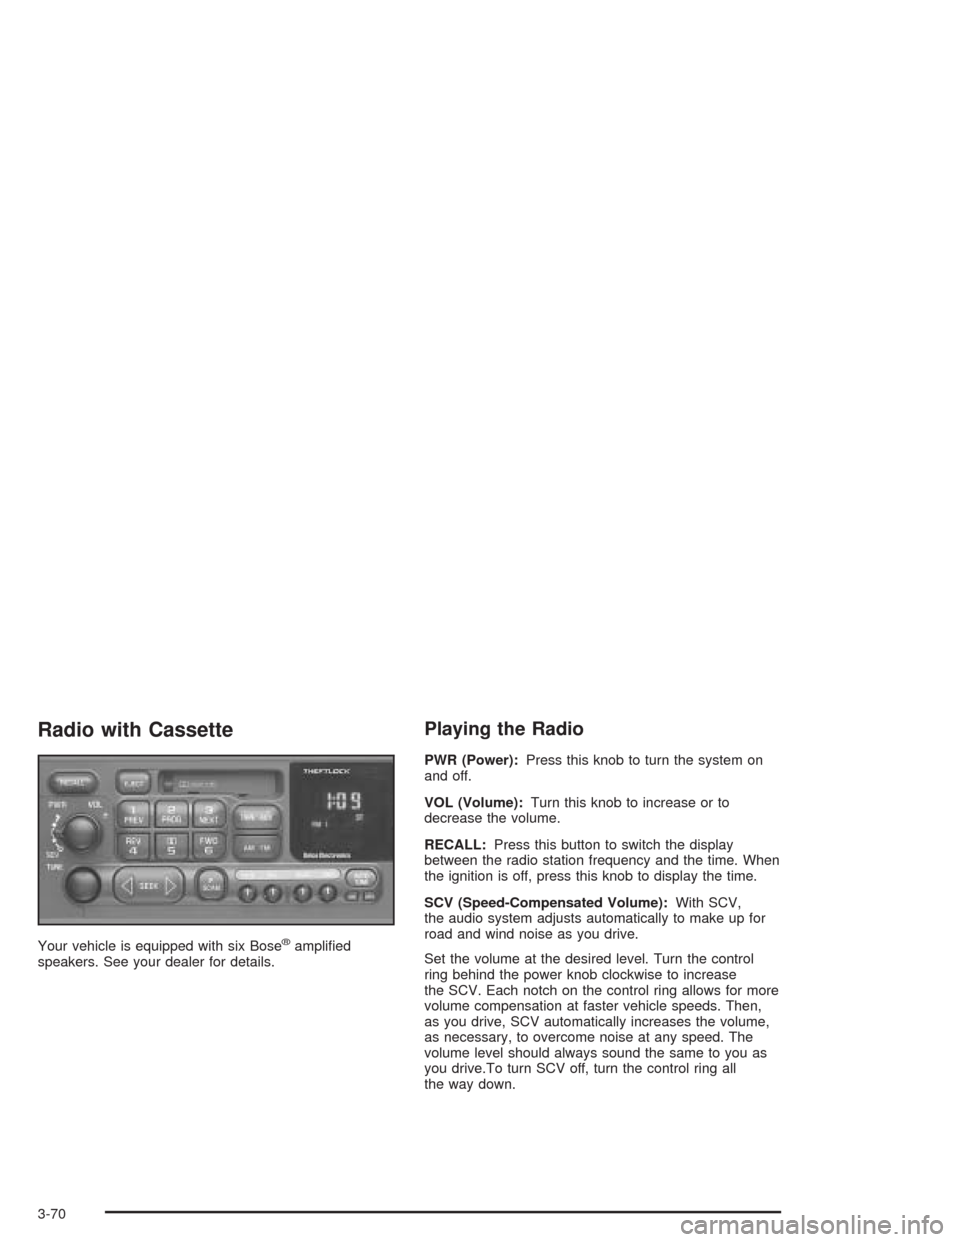
Your vehicle is equipped with six Bose®amplified
speakers. See your dealer for details.
Playing the Radio
PWR (Power):Press this knob to turn the system on
and off.
VOL (Volume):Turn this knob to increase or to
decrease the volume.
RECALL:Press this button to switch the display
between the radio station frequency and the time. When
the ignition is off, press this knob to display the time.
SCV (Speed-Compensated Volume):With SCV,
the audio system adjusts automatically to make up for
road and wind noise as you drive.
Set the volume at the desired level. Turn the control
ring behind the power knob clockwise to increase
the SCV. Each notch on the control ring allows for more
volume compensation at faster vehicle speeds. Then,
as you drive, SCV automatically increases the volume,
as necessary, to overcome noise at any speed. The
volume level should always sound the same to you as
you drive.To turn SCV off, turn the control ring all
the way down.
3-70
Page 185 of 384
Finding a Station
AM FM:Press this button to switch between FM1,
FM2, and AM. The display will show the selection.
TUNE:Press this knob lightly so it extends. Turn it to
select radio stations. Push the knob back into its stored
position when you are not using it.
oSEEKp:Press the right or the left arrow to go to
the next or to the previous station and stay there.
To scan stations, press and hold either SEEK arrow for
two seconds. SCAN will appear on the display. The
radio will go to a station, play for a few seconds, then go
on to the next station. Press either SEEK arrow again
to stop scanning.
The radio will only seek or scan stations with a strong
signal that are in the selected band.
P.SCAN (Preset Scan):Press this button to scan your
preset stations. P.SCAN will appear on the display.
The radio will go to the first preset station stored on the
pushbuttons, play for a few seconds, then go on to
the next preset station. Press P.SCAN again or one of
the pushbuttons to stop scanning presets.
The radio will only scan preset stations with a strong
signal that are in the selected band.
Setting Preset Stations
Up to 18 stations (six FM1, six FM2, and six AM) can be
programmed on the six numbered pushbuttons, by
performing the following steps:
1. Turn the radio on.
2. Press AM FM to select FM1, FM2, or AM.
3. Tune in the desired station.
4. Press AUTO TONE to select the equalization.
5. Press and hold one of the six numbered
pushbuttons. The sound will mute. When the sound
returns, release the pushbutton. Whenever that
numbered pushbutton is pressed, the station that
was set will return and the equalization that
was selected will be stored for that pushbutton.
6. Repeat the steps for each pushbutton.
3-71
Page 186 of 384
Setting the Tone (Bass/Treble)
BASS:To adjust the bass, press this knob lightly so it
extends. Turn the knob to increase or to decrease
the bass.
TREB (Treble):To adjust the treble, press this knob
lightly so it extends. Turn the knob to increase or
to decrease treble. If a station is weak or noisy,
decrease the treble.
Return these knobs to their stored positions when you
are not using them.
AUTO TONE (Automatic Tone):Press this button to
select customized equalization settings designed
for country/western, jazz, talk, pop, rock, and classical.
To return the bass and treble to the manual mode,
either press and release the AUTO TONE button until
the display goes blank or press and release the BASS or
TREB knob and turn it until the display goes blank.
Adjusting the Speakers (Balance/Fade)
BAL (Balance):To adjust the balance between the
right and the left speakers, press this knob lightly so it
extends. Turn the knob to move the sound toward
the right or the left speakers.
FADE:To adjust the fade between the front and the
rear speakers, press this knob lightly so it extends. Turn
the knob to move the sound toward the front or the
rear speakers.
Return these knobs to their stored positions when you
are not using them.
3-72
Page 187 of 384
Playing a Cassette Tape
The tape player is built to work best with tapes that are
up to 30 to 45 minutes long on each side. Tapes
longer than that are so thin they may not work well in
this player. The longer side of the tape visible should
face to the right. If you hear nothing or hear a garbled
sound, it may not be in squarely. Press EJECT to
remove the tape and start over.
If the ignition and radio are off, press the EJECT button
or the RECALL button to insert and to begin play of
a tape. If the ignition is on and the radio is off, the tape
can be inserted and will begin playing. A tape symbol
will appear on the display when a tape is inserted.
While the tape is playing, use the VOL, AUTO TONE,
BAL, FADE, BASS, and TREB controls just as you
do for the radio. Other controls may have different
functions when a tape is inserted. The tape symbol and
an arrow to show which side of the tape is playing
will appear on the display.Cassette tape adapter kits for portable CD players will
work in the cassette tape player. See “CD Adapter Kits”
later for more information.
The tape bias is set automatically when a metal or
chrome tape is inserted.
If an error appears on the display, see “Cassette Tape
Messages” later in this section.
1 PREV (Previous):The tape must have at least three
seconds of silence between each selection for
previous to work. Press this pushbutton to go to the
previous selection on the tape if the current selection
has been playing for less than eight seconds. If pressed
when the current selection has been playing for more
than eight seconds, it will go to the beginning of
the current selection. If this pushbutton is held or
pressed more than once, the player will continue moving
backward through the tape.
2 PROG (Program):Press this pushbutton to play the
other side of the tape.
3-73
Page 188 of 384
3 NEXT:The tape must have at least three seconds of
silence between each selection for next to work.
Press this pushbutton to go to the next selection on the
tape. If this pushbutton is held or pressed more than
once, the player will continue moving forward through
the tape.
4 REV (Reverse):Press this pushbutton to quickly
reverse the tape. The radio will play while the tape
reverses. Press it again to return to playing speed.
W5 (Dolby®):Press this pushbutton to reduce
background noise. The double-D symbol will appear on
the display.
Dolby
®Noise Reduction is manufactured under a
license from Dolby®Laboratories Licensing Corporation.
Dolby®and the double-D symbol are trademarks of
Dolby®Laboratories Licensing Corporation.
FWD 6 (Forward):Press this pushbutton to quickly
advance the tape. The radio will play while the
tape advances. Press it again to return to playing
speed.
oSEEKp:The tape must have at least three
seconds of silence between each selection for seek to
work. The left arrow is the same as the PREV
pushbutton and the right arrow is the same as the
NEXT pushbutton. If either arrow is held or pressed
more than once, the player will continue moving
backward or forward through the tape.
AM FM:Press this button to listen to the radio when a
cassette tape is playing. The inactive tape will remain
safely inside the radio for future listening.
TAPE AUX (Auxiliary):Press this button to play a
cassette tape when listening to the radio. The tape
symbol with an arrow will appear on the display. If the
audio system is equipped with a remote playback
device, pressing this button a second time will allow the
remote device to play.
EJECT:Press this button to eject the tape. Eject may
be activated with the ignition or radio off. Cassette tapes
can be loaded with the ignition and radio off if this
button is pressed first.
3-74
Page 189 of 384
Cassette Tape Messages
The cassette tape player is able to detect a tight or
broken tape, and will eject the tape. The radio will go
back to playing the last station selected. Try a
known good cassette tape.
CLN (Clean):If this message appears on the display,
the cassette tape player needs to be cleaned. It will
still play tapes, but it should be cleaned as soon
as possible to prevent damage to the tapes and player.
SeeCare of Your Cassette Tape Player on page 3-88.
If the cassette is not playing correctly, for any other
reason, try a known good cassette.
If any error occurs repeatedly or if an error cannot be
corrected, contact your dealer. If the radio displays
an error message, write it down and provide it to your
dealer when reporting the problem.
CD Adapter Kits
It is possible to use a portable CD player adapter kit
with the cassette tape player after activating the bypass
feature on the tape player.
To activate the bypass feature, use the following steps:
1. Turn the ignition on.
2. Turn the radio off.
3. Press and hold the TAPE AUX button for five
seconds. The tape symbol will flash for two
seconds, indicating the feature is active.
4. Insert the adapter into the cassette slot. It will
power up the radio and begin playing.
The override feature will remain active until the EJECT
button is pressed.
3-75
Page 190 of 384
Radio with CD
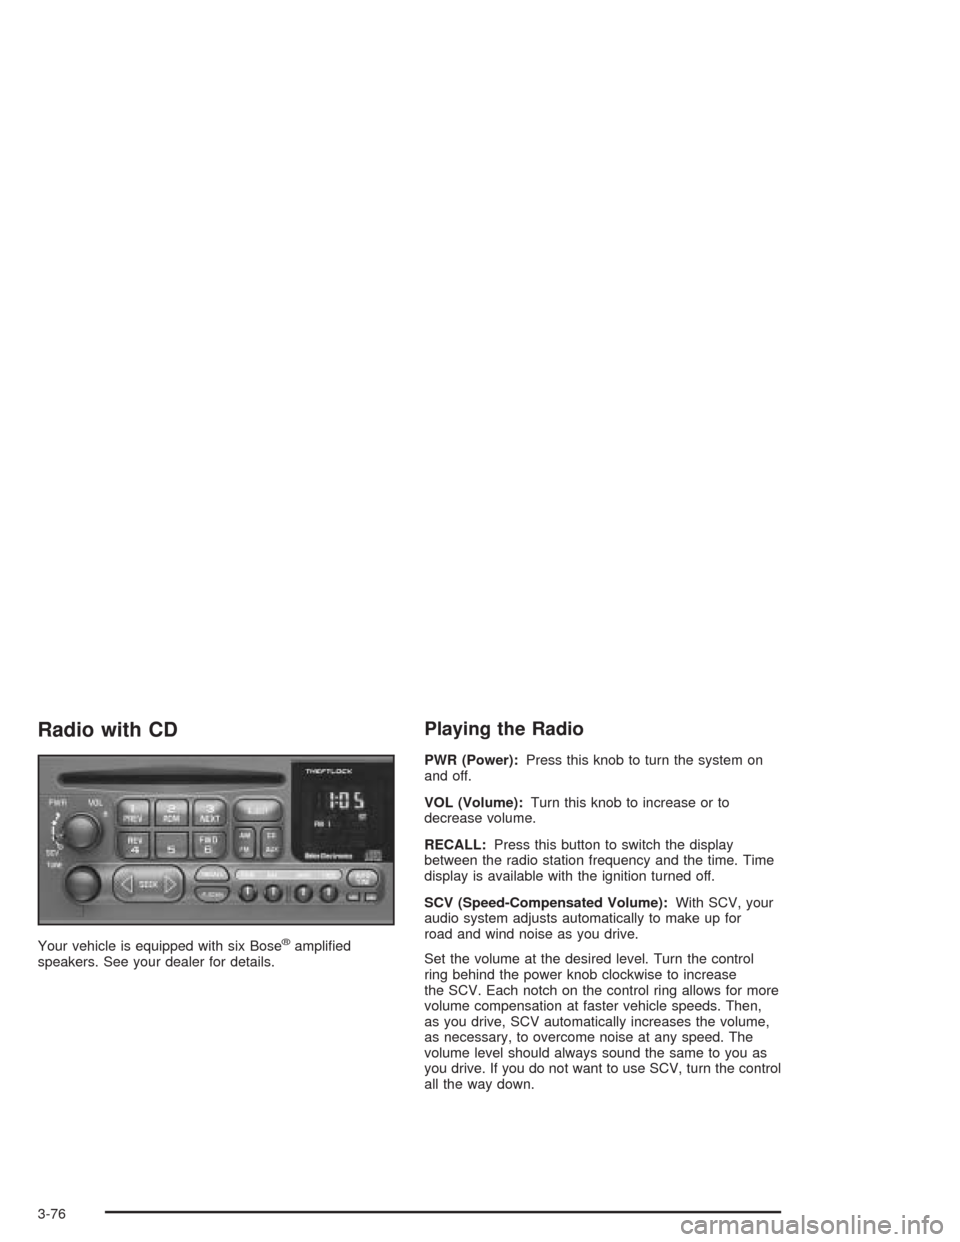
Your vehicle is equipped with six Bose®amplified
speakers. See your dealer for details.
Playing the Radio
PWR (Power):Press this knob to turn the system on
and off.
VOL (Volume):Turn this knob to increase or to
decrease volume.
RECALL:Press this button to switch the display
between the radio station frequency and the time. Time
display is available with the ignition turned off.
SCV (Speed-Compensated Volume):With SCV, your
audio system adjusts automatically to make up for
road and wind noise as you drive.
Set the volume at the desired level. Turn the control
ring behind the power knob clockwise to increase
the SCV. Each notch on the control ring allows for more
volume compensation at faster vehicle speeds. Then,
as you drive, SCV automatically increases the volume,
as necessary, to overcome noise at any speed. The
volume level should always sound the same to you as
you drive. If you do not want to use SCV, turn the control
all the way down.
3-76