ECO mode CHEVROLET CORVETTE 2010 6.G User Guide
[x] Cancel search | Manufacturer: CHEVROLET, Model Year: 2010, Model line: CORVETTE, Model: CHEVROLET CORVETTE 2010 6.GPages: 472, PDF Size: 11.44 MB
Page 140 of 472
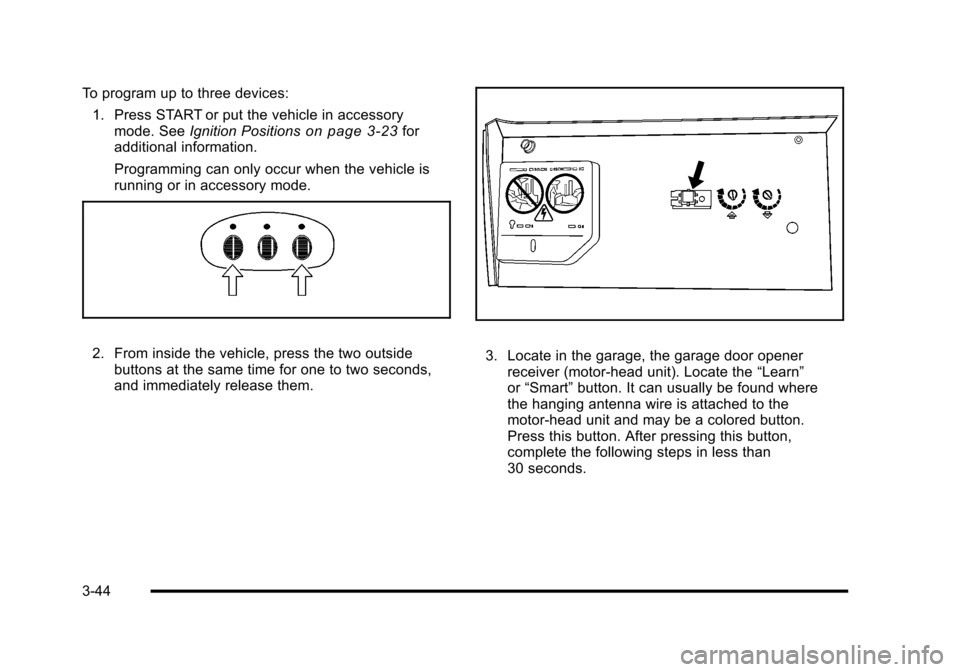
To program up to three devices: 1. Press START or put the vehicle in accessory mode. See Ignition Positions
on page 3‑23for
additional information.
Programming can only occur when the vehicle is
running or in accessory mode.
2. From inside the vehicle, press the two outside buttons at the same time for one to two seconds,
and immediately release them. 3. Locate in the garage, the garage door opener receiver (motor-head unit). Locate the “Learn”
or “Smart” button. It can usually be found where
the hanging antenna wire is attached to the
motor-head unit and may be a colored button.
Press this button. After pressing this button,
complete the following steps in less than
30 seconds.
3-44
Page 141 of 472
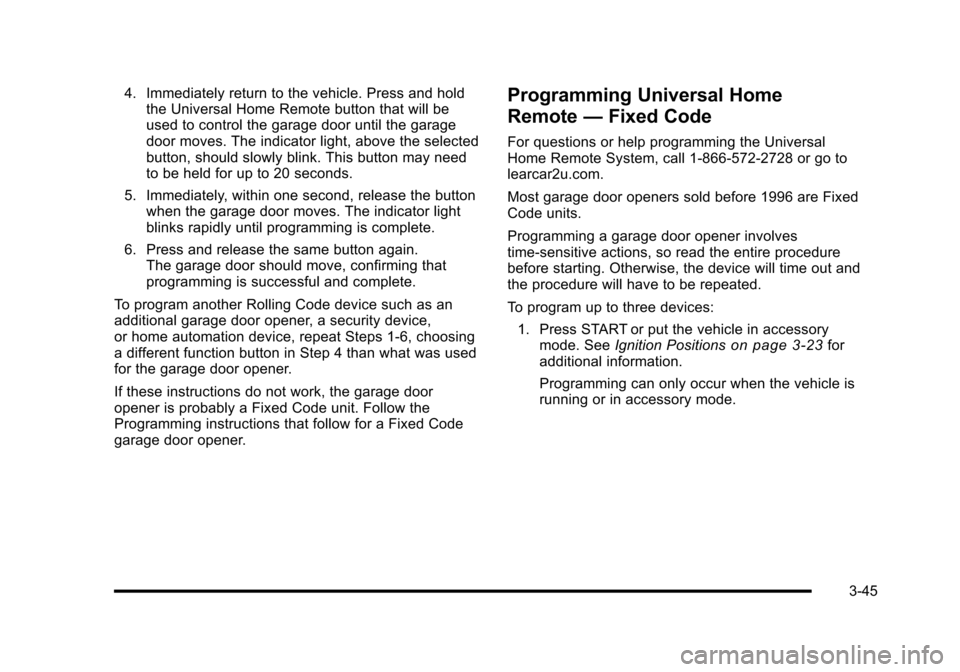
4. Immediately return to the vehicle. Press and hold the Universal Home Remote button that will be
used to control the garage door until the garage
door moves. The indicator light, above the selected
button, should slowly blink. This button may need
to be held for up to 20 seconds.
5. Immediately, within one second, release the button when the garage door moves. The indicator light
blinks rapidly until programming is complete.
6. Press and release the same button again. The garage door should move, confirming that
programming is successful and complete.
To program another Rolling Code device such as an
additional garage door opener, a security device,
or home automation device, repeat Steps 1-6, choosing
a different function button in Step 4 than what was used
for the garage door opener.
If these instructions do not work, the garage door
opener is probably a Fixed Code unit. Follow the
Programming instructions that follow for a Fixed Code
garage door opener.Programming Universal Home
Remote —Fixed Code
For questions or help programming the Universal
Home Remote System, call 1-866-572-2728 or go to
learcar2u.com.
Most garage door openers sold before 1996 are Fixed
Code units.
Programming a garage door opener involves
time-sensitive actions, so read the entire procedure
before starting. Otherwise, the device will time out and
the procedure will have to be repeated.
To program up to three devices:
1. Press START or put the vehicle in accessory mode. See Ignition Positions
on page 3‑23for
additional information.
Programming can only occur when the vehicle is
running or in accessory mode.
3-45
Page 143 of 472
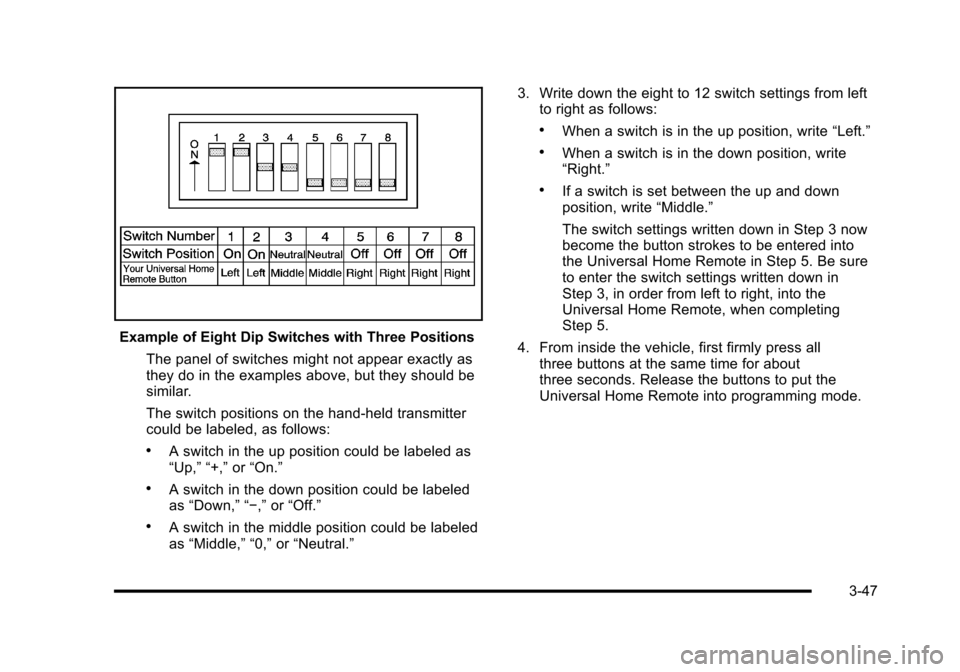
Example of Eight Dip Switches with Three Positions The panel of switches might not appear exactly as
they do in the examples above, but they should be
similar.
The switch positions on the hand-held transmitter
could be labeled, as follows:
.A switch in the up position could be labeled as
“Up,” “+,” or“On.”
.A switch in the down position could be labeled
as “Down,” “−,” or“Off.”
.A switch in the middle position could be labeled
as “Middle,” “0,” or“Neutral.” 3. Write down the eight to 12 switch settings from left
to right as follows:
.When a switch is in the up position, write “Left.”
.When a switch is in the down position, write
“Right.”
.If a switch is set between the up and down
position, write “Middle.”
The switch settings written down in Step 3 now
become the button strokes to be entered into
the Universal Home Remote in Step 5. Be sure
to enter the switch settings written down in
Step 3, in order from left to right, into the
Universal Home Remote, when completing
Step 5.
4. From inside the vehicle, first firmly press all three buttons at the same time for about
three seconds. Release the buttons to put the
Universal Home Remote into programming mode.
3-47
Page 145 of 472
Using Universal Home Remote
Press and hold the appropriate button for at least
half of a second. The indicator light comes on while
the signal is being transmitted.
Operation can occur:
.If the vehicle is in accessory mode.
.If the vehicle is in running.
.If the vehicle is in Retained Accessory Mode
(RAP). See Retained Accessory Power (RAP)on
page 3‑24for more information.
.Up to an additional 10 minutes after RAP finishes.
.Up to 10 minutes after any door is opened.
Reprogramming Universal Home
Remote Buttons
Any of the three buttons can be reprogrammed by
repeating the instructions.
Erasing Universal Home Remote
Buttons
The programmed buttons should be erased when the
vehicle is sold or the lease ends.
To erase either Rolling Code or Fixed Code on the
Universal Home Remote device:
1. Press and hold the two outside buttons at the same time for approximately 20 seconds, until the
indicator lights, located directly above the buttons,
begin to blink rapidly.
2. Once the indicator lights begin to blink, release both buttons. The codes from all buttons are
erased.
For help or information on the Universal Home Remote
System, call the customer assistance phone number
under Customer Assistance Offices on page 8‑6.
3-49
Page 190 of 472

Climate Controls
Dual Automatic Climate
Control System
With this system the heating, cooling, and ventilation
can be controlled.
A. Driver Temperature Controls
B. Display
C. Passenger Temperature Control
D. AUTO E. Recirculation F. Air Conditioning
G. Fan Control H. Air Delivery Mode Control
I. Defrost
J. Rear Window Defogger When the vehicle is first started, the display shows the
driver's temperature setting, the outside temperature,
the fan speed and the air delivery, for about
10 seconds.
The outside temperature is shown in the center of the
display. The digital display will show the readings in
Fahrenheit or Celsius. See
“Personal Options”under
DIC Vehicle Personalization
on page 4‑71for
information on changing your display.
Automatic Operation
AUTO (Automatic) : Press the AUTO button to
place the entire system in the automatic mode. When
automatic operation is active, the system automatically
controls the inside temperature, the air delivery mode,
and the fan speed.
After a ten second display of the current settings,
the word AUTO, the driver's temperature setting
and the outside temperature will be shown.
4-22
Page 193 of 472
You may notice a slight change in engine performance
when the air-conditioning compressor shuts off and
turns on again. This is normal. The system is designed
to make adjustments to help with fuel economy while
still maintaining the selected temperature.
On hot days, open the windows to let hot inside air
escape; then close them. This helps to reduce the time
it takes for the vehicle to cool down. It also helps the
system to operate more efficiently.
For quick cool down on hot days press the AUTO
button and adjust the temperature to a cool, comfortable
setting. To achieve maximum cool down, do the
following: 1. Select
Hmode.
2. Press
?.
3. Select the a/c on.
4. Select the coolest temperature.
5. Select the highest fan speed. Using these settings together for long periods of time
may cause the air inside of your vehicle to become too
dry. To prevent this from happening, after the air in the
vehicle has cooled, turn the recirculation mode off.
The air conditioning system removes moisture from the
air, so a small amount of water might drip under the
vehicle while idling or after turning off the engine.
This is normal.
?
(Recirculation) : Press to turn the recirculation
mode on or off. An indicator light comes on to show
that recirculation is on. This mode prevents outside air
from entering your vehicle. It can be used to prevent
outside air and odors from entering your vehicle and
to help cool the air inside your vehicle more quickly.
Recirculation mode is not available in defrost or
defog mode.
4-25
Page 200 of 472
Speedometer and Odometer
The speedometer shows the speed in either kilometers
per hour (km/h) or miles per hour (mph). For more
information see “Personal Options” underDIC Vehicle
Personalization on page 4‑71.
To read the odometer with the ignition off, turn on the
parking lamps.
If the vehicle needs a new odometer installed, the
mileage total of the new odometer will be set to the
original kilometers (miles) of the old odometer. See your
dealer/retailer if the odometer must be replaced in the
vehicle.
Tachometer
The tachometer displays the engine speed in thousands
of revolutions per minute (rpm).
Notice: Fuel shuts off at about 6500 rpm for
the base model, 7000 rpm for the Z06 model, and
6600 rpm for the ZR1 model. If the vehicle continues
to be driven at the fuel shut off rpm, the engine
could be damaged. Be sure to operate the vehicle
below the fuel shut off rpm or reduce the vehicle's
rpm quickly when the fuel shuts off.
Safety Belt Reminders
Safety Belt Reminder Light
When the engine is started, a chime sounds for several
seconds to remind a driver to fasten the safety belt,
unless the driver safety belt is already buckled.
The safety belt light
comes on and stays on
for several seconds, then
flashes for several more.
This chime and light are repeated if the driver remains
unbuckled and the vehicle is in motion. If the driver
safety belt is already buckled, neither the chime nor
the light comes on.
4-32
Page 211 of 472
If none of the above have made the light turn off, your
dealer/retailer can check the vehicle. The dealer/retailer
has the proper test equipment and diagnostic tools to fix
any mechanical or electrical problems that might have
developed.
Emissions Inspection and Maintenance
Programs
Some state/provincial and local governments have
or might begin programs to inspect the emission
control equipment on the vehicle. Failure to pass this
inspection could prevent getting a vehicle registration.
Here are some things to know to help the vehicle pass
an inspection:
.The vehicle will not pass this inspection if the
check engine light is on with the engine running.
To perform a check engine light bulb check with
the keyless ignition, make sure the transmitter fob
is in the passenger compartment. See Ignition
Positions
on page 3‑23. Press the bottom of the
Acc. button on the instrument panel and hold the button down for five seconds. The instrument
panel, including the check engine light, will light up
and the ignition will be on, but the engine will not
start
—press the bottom of the Acc. button only
briefly, less than five seconds, the accessory
power mode will be turned on, but not the ignition.
After the bulb check, press and release the Acc.
button again to turn the ignition off and avoid
draining the vehicle's battery.
.The vehicle will not pass this inspection if the
OBD II (on-board diagnostic) system determines
that critical emission control systems have not
been completely diagnosed by the system.
The vehicle would be considered not ready for
inspection. This can happen if the battery has
recently been replaced or if the battery has run
down. The diagnostic system is designed to
evaluate critical emission control systems during
normal driving. This can take several days of
routine driving. If this has been done and the
vehicle still does not pass the inspection for lack
of OBD II system readiness, your dealer/retailer
can prepare the vehicle for inspection.
4-43
Page 212 of 472
Engine Oil Pressure Gauge
United StatesCanada
United States—Z06 and
ZR1 Models Canada —Z06 and ZR1
Models
{WARNING:
Do not keep driving if the oil pressure is low.
The engine can become so hot that it catches fire.
Someone could be burned. Check the oil as soon
as possible and have the vehicle serviced.
Notice: Lack of proper engine oil maintenance
can damage the engine. The repairs would not be
covered by the vehicle warranty. Always follow the
maintenance schedule in this manual for changing
engine oil.
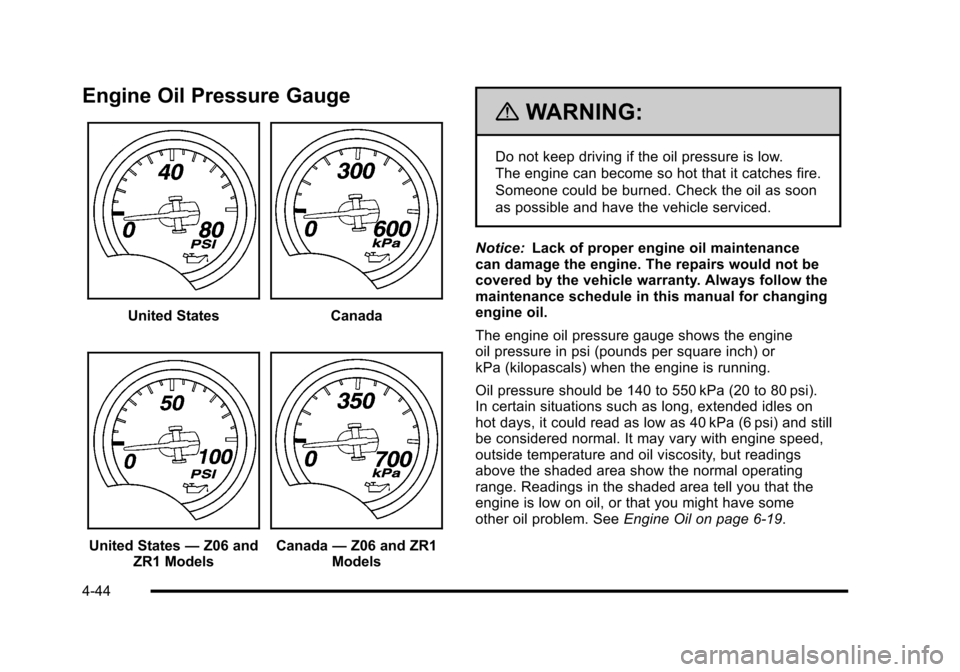
The engine oil pressure gauge shows the engine
oil pressure in psi (pounds per square inch) or
kPa (kilopascals) when the engine is running.
Oil pressure should be 140 to 550 kPa (20 to 80 psi).
In certain situations such as long, extended idles on
hot days, it could read as low as 40 kPa (6 psi) and still
be considered normal. It may vary with engine speed,
outside temperature and oil viscosity, but readings
above the shaded area show the normal operating
range. Readings in the shaded area tell you that the
engine is low on oil, or that you might have some
other oil problem. See Engine Oil on page 6‑19.
4-44
Page 216 of 472
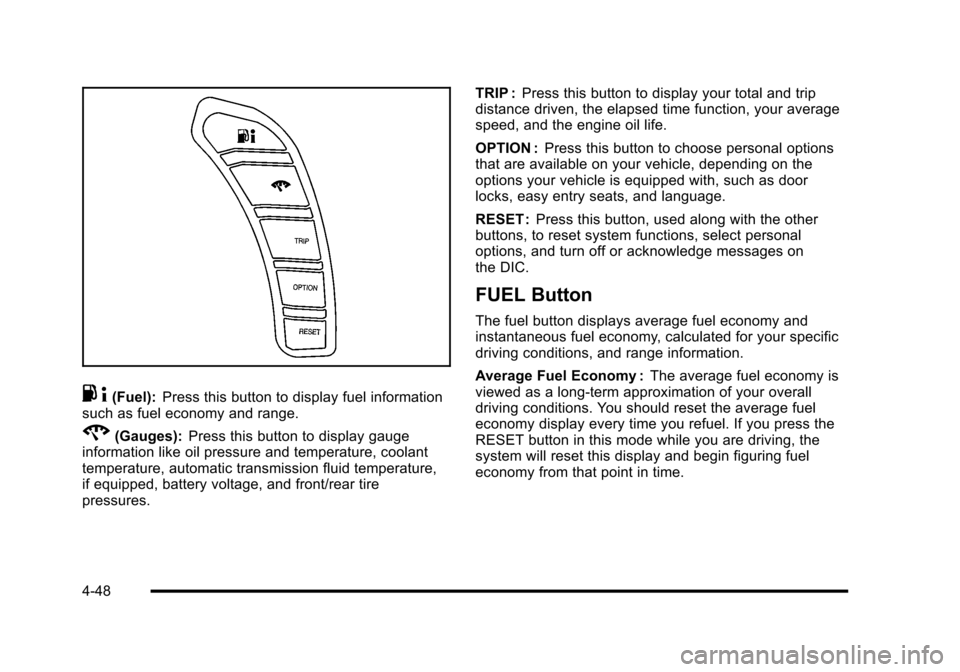
.4(Fuel): Press this button to display fuel information
such as fuel economy and range.
2(Gauges): Press this button to display gauge
information like oil pressure and temperature, coolant
temperature, automatic transmission fluid temperature,
if equipped, battery voltage, and front/rear tire
pressures. TRIP :
Press this button to display your total and trip
distance driven, the elapsed time function, your average
speed, and the engine oil life.
OPTION : Press this button to choose personal options
that are available on your vehicle, depending on the
options your vehicle is equipped with, such as door
locks, easy entry seats, and language.
RESET : Press this button, used along with the other
buttons, to reset system functions, select personal
options, and turn off or acknowledge messages on
the DIC.
FUEL Button
The fuel button displays average fuel economy and
instantaneous fuel economy, calculated for your specific
driving conditions, and range information.
Average Fuel Economy : The average fuel economy is
viewed as a long-term approximation of your overall
driving conditions. You should reset the average fuel
economy display every time you refuel. If you press the
RESET button in this mode while you are driving, the
system will reset this display and begin figuring fuel
economy from that point in time.
4-48