CHEVROLET CORVETTE 2010 6.G Owners Manual
Manufacturer: CHEVROLET, Model Year: 2010, Model line: CORVETTE, Model: CHEVROLET CORVETTE 2010 6.GPages: 472, PDF Size: 11.44 MB
Page 331 of 472
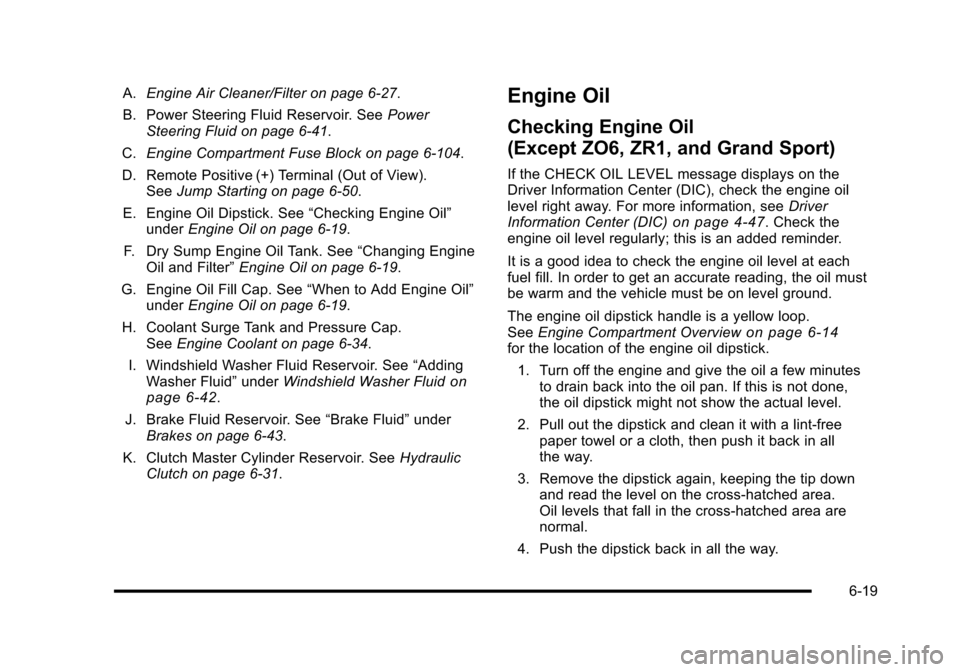
A.Engine Air Cleaner/Filter on page 6‑27.
B. Power Steering Fluid Reservoir. See Power
Steering Fluid on page 6‑41.
C. Engine Compartment Fuse Block on page 6‑104.
D. Remote Positive (+) Terminal (Out of View). See Jump Starting on page 6‑50.
E. Engine Oil Dipstick. See “Checking Engine Oil”
under Engine Oil on page 6‑19.
F. Dry Sump Engine Oil Tank. See “Changing Engine
Oil and Filter” Engine Oil on page 6‑19.
G. Engine Oil Fill Cap. See “When to Add Engine Oil”
under Engine Oil on page 6‑19.
H. Coolant Surge Tank and Pressure Cap. See Engine Coolant on page 6‑34.
I. Windshield Washer Fluid Reservoir. See “Adding
Washer Fluid” underWindshield Washer Fluid
on
page 6‑42.
J. Brake Fluid Reservoir. See “Brake Fluid”under
Brakes on page 6‑43.
K. Clutch Master Cylinder Reservoir. See Hydraulic
Clutch on page 6‑31.
Engine Oil
Checking Engine Oil
(Except ZO6, ZR1, and Grand Sport)
If the CHECK OIL LEVEL message displays on the
Driver Information Center (DIC), check the engine oil
level right away. For more information, see Driver
Information Center (DIC)
on page 4‑47. Check the
engine oil level regularly; this is an added reminder.
It is a good idea to check the engine oil level at each
fuel fill. In order to get an accurate reading, the oil must
be warm and the vehicle must be on level ground.
The engine oil dipstick handle is a yellow loop.
See Engine Compartment Overview
on page 6‑14for the location of the engine oil dipstick.
1. Turn off the engine and give the oil a few minutes to drain back into the oil pan. If this is not done,
the oil dipstick might not show the actual level.
2. Pull out the dipstick and clean it with a lint‐free paper towel or a cloth, then push it back in all
the way.
3. Remove the dipstick again, keeping the tip down and read the level on the cross‐hatched area.
Oil levels that fall in the cross‐hatched area are
normal.
4. Push the dipstick back in all the way.
6-19
Page 332 of 472
When to Add Engine Oil
(Except ZO6, ZR1, and Grand Sport)
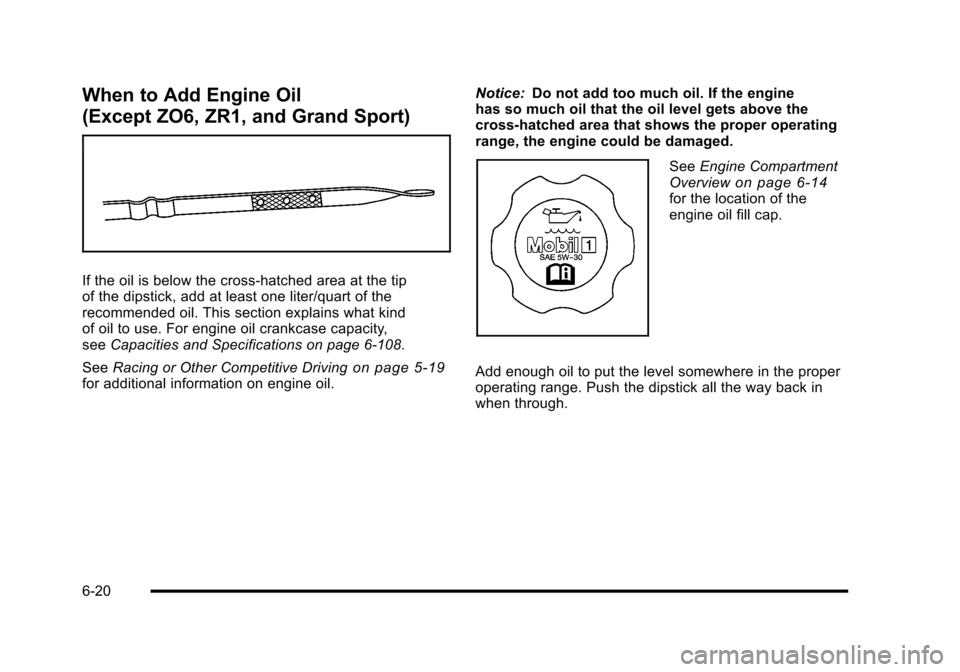
If the oil is below the cross-hatched area at the tip
of the dipstick, add at least one liter/quart of the
recommended oil. This section explains what kind
of oil to use. For engine oil crankcase capacity,
see Capacities and Specifications on page 6‑108.
See Racing or Other Competitive Driving
on page 5‑19for additional information on engine oil. Notice:
Do not add too much oil. If the engine
has so much oil that the oil level gets above the
cross-hatched area that shows the proper operating
range, the engine could be damaged.
See Engine Compartment
Overviewon page 6‑14for the location of the
engine oil fill cap.
Add enough oil to put the level somewhere in the proper
operating range. Push the dipstick all the way back in
when through.
6-20
Page 333 of 472
Checking Engine Oil (ZO6, ZR1, and
Grand Sport)
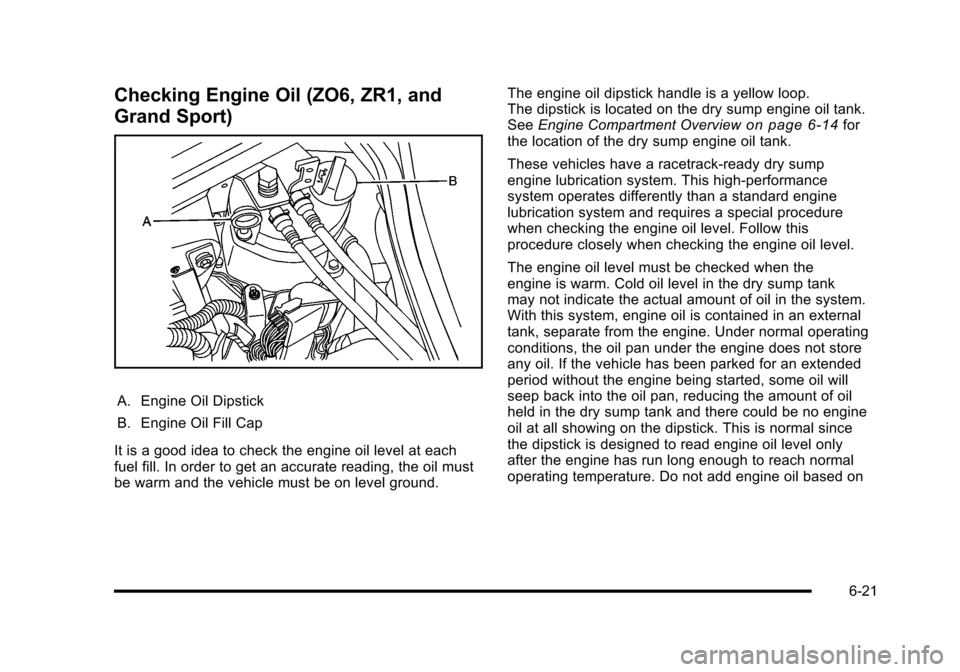
A. Engine Oil Dipstick
B. Engine Oil Fill Cap
It is a good idea to check the engine oil level at each
fuel fill. In order to get an accurate reading, the oil must
be warm and the vehicle must be on level ground. The engine oil dipstick handle is a yellow loop.
The dipstick is located on the dry sump engine oil tank.
See
Engine Compartment Overview
on page 6‑14for
the location of the dry sump engine oil tank.
These vehicles have a racetrack‐ready dry sump
engine lubrication system. This high‐performance
system operates differently than a standard engine
lubrication system and requires a special procedure
when checking the engine oil level. Follow this
procedure closely when checking the engine oil level.
The engine oil level must be checked when the
engine is warm. Cold oil level in the dry sump tank
may not indicate the actual amount of oil in the system.
With this system, engine oil is contained in an external
tank, separate from the engine. Under normal operating
conditions, the oil pan under the engine does not store
any oil. If the vehicle has been parked for an extended
period without the engine being started, some oil will
seep back into the oil pan, reducing the amount of oil
held in the dry sump tank and there could be no engine
oil at all showing on the dipstick. This is normal since
the dipstick is designed to read engine oil level only
after the engine has run long enough to reach normal
operating temperature. Do not add engine oil based on
6-21
Page 334 of 472
cold engine dipstick readings. The engine oil level on
the dipstick will also be inaccurate if checked while the
engine is running. 1. To obtain an accurate engine oil level reading, warm up the engine to at least 80°C (175°F).
Cold oil will not give a correct oil level reading.
2. Once the engine is warm, turn off the engine. Checking the oil while the engine is running will
result in an incorrect oil level reading.
3. Wait at least five minutes (but not more than 20 minutes) to allow oil to drain and settle in the
engine.
4. Remove the dipstick from the external engine oil tank and clean it with a lint‐free paper towel or a
cloth. Re‐insert the dipstick into the external oil
tank, pushing it all the way in until it stops.
5. Remove the dipstick from the oil tank and read the level on the cross‐hatched area. Oil levels that fall
in the cross‐hatched area are normal.When to Add Engine Oil
(ZO6, ZR1, and Grand Sport)
If the oil is below the cross-hatched area at the tip
of the dipstick, add at least one liter/quart of the
recommended oil through the oil fill cap opening in the
oil tank. This section explains what kind of oil to use.
For engine oil crankcase capacity, see Capacities and
Specifications on page 6‑108.
See Racing or Other Competitive Driving
on page 5‑19for additional information on engine oil.
Notice: Do not add too much oil. If the engine
has so much oil that the oil level gets above the
cross-hatched area that shows the proper operating
range, the engine could be damaged.
6-22
Page 335 of 472
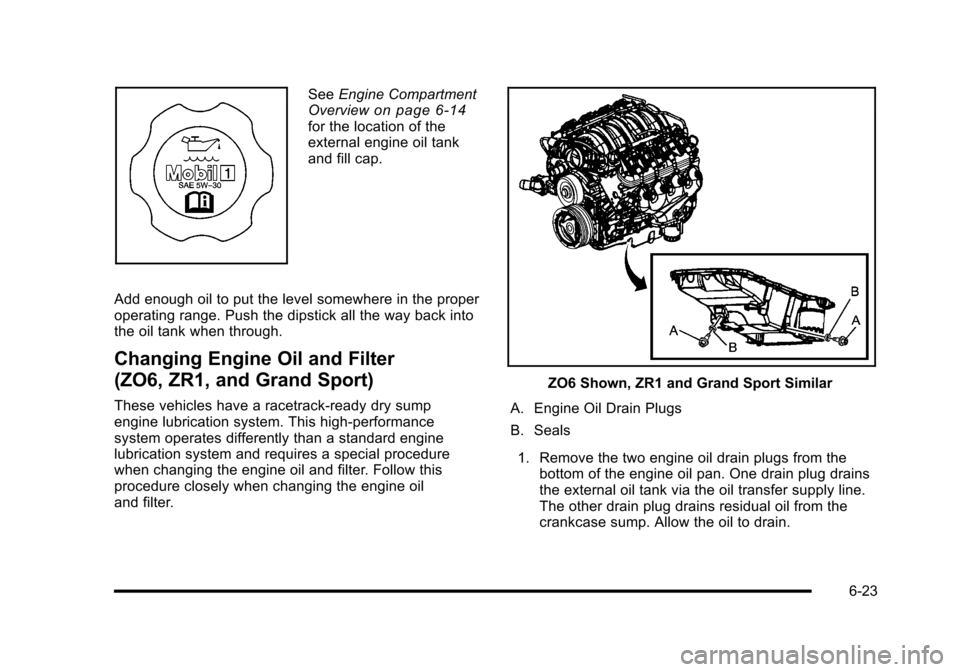
SeeEngine Compartment
Overviewon page 6‑14for the location of the
external engine oil tank
and fill cap.
Add enough oil to put the level somewhere in the proper
operating range. Push the dipstick all the way back into
the oil tank when through.
Changing Engine Oil and Filter
(ZO6, ZR1, and Grand Sport)
These vehicles have a racetrack‐ready dry sump
engine lubrication system. This high‐performance
system operates differently than a standard engine
lubrication system and requires a special procedure
when changing the engine oil and filter. Follow this
procedure closely when changing the engine oil
and filter.
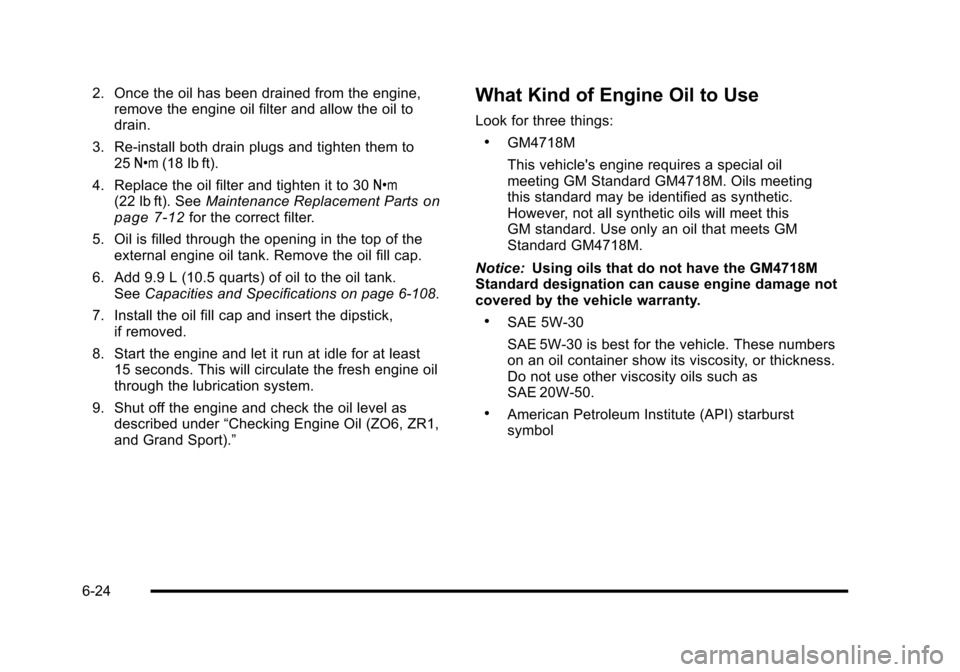
ZO6 Shown, ZR1 and Grand Sport Similar
A. Engine Oil Drain Plugs
B. Seals
1. Remove the two engine oil drain plugs from the bottom of the engine oil pan. One drain plug drains
the external oil tank via the oil transfer supply line.
The other drain plug drains residual oil from the
crankcase sump. Allow the oil to drain.
6-23
Page 336 of 472
2. Once the oil has been drained from the engine, remove the engine oil filter and allow the oil to
drain.
3. Re‐install both drain plugs and tighten them to 25 Y (18 lb ft).
4. Replace the oil filter and tighten it to 30 Y
(22 lb ft). See Maintenance Replacement Parts
on
page 7‑12for the correct filter.
5. Oil is filled through the opening in the top of the external engine oil tank. Remove the oil fill cap.
6. Add 9.9 L (10.5 quarts) of oil to the oil tank. See Capacities and Specifications on page 6‑108.
7. Install the oil fill cap and insert the dipstick, if removed.
8. Start the engine and let it run at idle for at least 15 seconds. This will circulate the fresh engine oil
through the lubrication system.
9. Shut off the engine and check the oil level as described under “Checking Engine Oil (ZO6, ZR1,
and Grand Sport).”
What Kind of Engine Oil to Use
Look for three things:
.GM4718M
This vehicle's engine requires a special oil
meeting GM Standard GM4718M. Oils meeting
this standard may be identified as synthetic.
However, not all synthetic oils will meet this
GM standard. Use only an oil that meets GM
Standard GM4718M.
Notice: Using oils that do not have the GM4718M
Standard designation can cause engine damage not
covered by the vehicle warranty.
.SAE 5W-30
SAE 5W-30 is best for the vehicle. These numbers
on an oil container show its viscosity, or thickness.
Do not use other viscosity oils such as
SAE 20W-50.
.American Petroleum Institute (API) starburst
symbol
6-24
Page 337 of 472
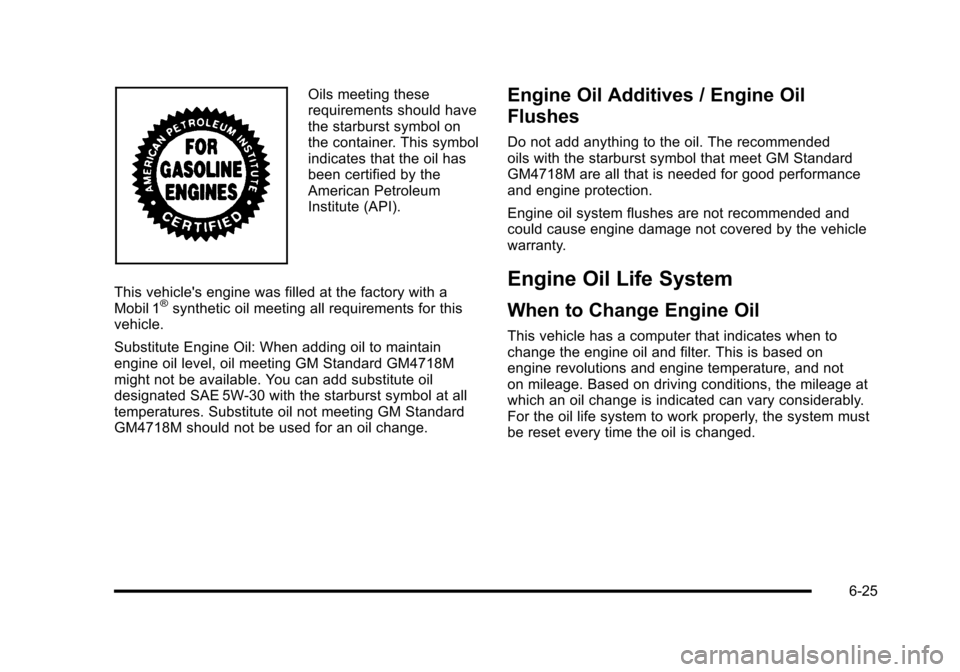
Oils meeting these
requirements should have
the starburst symbol on
the container. This symbol
indicates that the oil has
been certified by the
American Petroleum
Institute (API).
This vehicle's engine was filled at the factory with a
Mobil 1
®synthetic oil meeting all requirements for this
vehicle.
Substitute Engine Oil: When adding oil to maintain
engine oil level, oil meeting GM Standard GM4718M
might not be available. You can add substitute oil
designated SAE 5W-30 with the starburst symbol at all
temperatures. Substitute oil not meeting GM Standard
GM4718M should not be used for an oil change.
Engine Oil Additives / Engine Oil
Flushes
Do not add anything to the oil. The recommended
oils with the starburst symbol that meet GM Standard
GM4718M are all that is needed for good performance
and engine protection.
Engine oil system flushes are not recommended and
could cause engine damage not covered by the vehicle
warranty.
Engine Oil Life System
When to Change Engine Oil
This vehicle has a computer that indicates when to
change the engine oil and filter. This is based on
engine revolutions and engine temperature, and not
on mileage. Based on driving conditions, the mileage at
which an oil change is indicated can vary considerably.
For the oil life system to work properly, the system must
be reset every time the oil is changed.
6-25
Page 338 of 472
Z06, ZR1, and Grand Sport models have a
racetrack‐ready dry sump engine lubrication system.
This high‐performance system operates differently
than a standard engine lubrication system and requires
a special procedure when changing the engine oil and
filter. See Engine Oil on page 6‑19.
When the system has calculated that oil life has been
diminished, it indicates that an oil change is necessary.
A CHANGE ENGINE OIL message comes on. Change
the oil as soon as possible within the next 1 000 km
(600 miles). It is possible that, if driving under the best
conditions, the oil life system might not indicate that
an oil change is necessary for over a year. However,
the engine oil and filter must be changed at least once
a year and at this time the system must be reset.
Your dealer/retailer has trained service people who
will perform this work using genuine parts and reset
the system. It is also important to check the oil regularly
and keep it at the proper level.
If the system is ever reset accidentally, the oil must be
changed at 5 000 km (3,000 miles) since the last oil
change. Remember to reset the oil life system
whenever the oil is changed.How to Reset the Engine Oil Life
System
The Engine Oil Life System calculates when to
change the engine oil and filter based on vehicle use.
Whenever the oil is changed, reset the system so it
can calculate when the next oil change is required.
If a situation occurs where the oil is changed prior to
a CHANGE ENGINE OIL message being turned on,
reset the system.
To reset the CHANGE ENGINE OIL message after an
oil change: 1. Press the TRIP button so the OIL LIFE percentage is displayed.
2. Press RESET and hold for two seconds. OIL LIFE REMAINING 100% will appear.
If the CHANGE ENGINE OIL message comes back on
when the vehicle is started, the engine oil life system
has not reset. Repeat the procedure.
6-26
Page 339 of 472
What to Do with Used Oil
Used engine oil contains certain elements that can be
unhealthy for your skin and could even cause cancer.
Do not let used oil stay on your skin for very long. Clean
your skin and nails with soap and water, or a good hand
cleaner. Wash or properly dispose of clothing or rags
containing used engine oil. See the manufacturer's
warnings about the use and disposal of oil products.
Used oil can be a threat to the environment. If you
change your own oil, be sure to drain all the oil from the
filter before disposal. Never dispose of oil by putting it in
the trash, pouring it on the ground, into sewers, or into
streams or bodies of water. Recycle it by taking it to a
place that collects used oil.
Engine Air Cleaner/Filter
See Engine Compartment Overviewon page 6‑14for
the location of the engine air cleaner/filter.
Notice: If you spray water into the engine air
cleaner/filter intake and water enters the engine
air cleaner/filter housing, you could damage your
vehicle's engine. The repairs would not be covered
by your warranty. Do not spray water into the
engine air cleaner/filter intake and/or housing. If you are cleaning the vehicle with the hood open, take
care not to spray water directly near the filter opening of
the air cleaner, as shown in the illustration, as this could
damage the vehicle's engine.
When to Inspect the Engine Air Cleaner/
Filter
Inspect the air cleaner/filter at the Maintenance
II
intervals and replace them at the first oil change after
each 80 000 km (50,000 mile) interval. See Scheduled
Maintenance
on page 7‑3for more information. If you
are driving in dusty/dirty conditions, inspect the filter at
each engine oil change.
How to Inspect the Engine Air Cleaner/
Filter
To inspect the air cleaner/filter, remove the filter from
the vehicle and lightly shake the filter to release loose
dust and dirt. If the filter remains caked with dirt, a new
filter is required.
6-27
Page 340 of 472
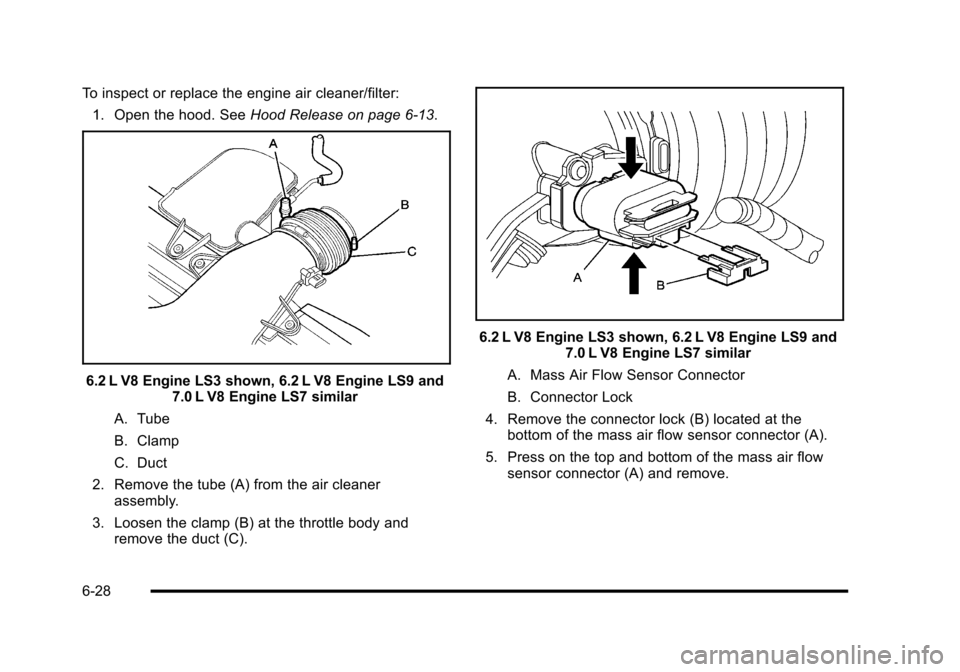
To inspect or replace the engine air cleaner/filter: 1. Open the hood. See Hood Release on page 6‑13.
6.2 L V8 Engine LS3 shown, 6.2 L V8 Engine LS9 and
7.0 L V8 Engine LS7 similar
A. Tube
B. Clamp
C. Duct
2. Remove the tube (A) from the air cleaner assembly.
3. Loosen the clamp (B) at the throttle body and remove the duct (C).
6.2 L V8 Engine LS3 shown, 6.2 L V8 Engine LS9 and 7.0 L V8 Engine LS7 similar
A. Mass Air Flow Sensor Connector
B. Connector Lock
4. Remove the connector lock (B) located at the bottom of the mass air flow sensor connector (A).
5. Press on the top and bottom of the mass air flow sensor connector (A) and remove.
6-28