CHEVROLET CORVETTE 2010 6.G Owners Manual
Manufacturer: CHEVROLET, Model Year: 2010, Model line: CORVETTE, Model: CHEVROLET CORVETTE 2010 6.GPages: 472, PDF Size: 11.44 MB
Page 341 of 472
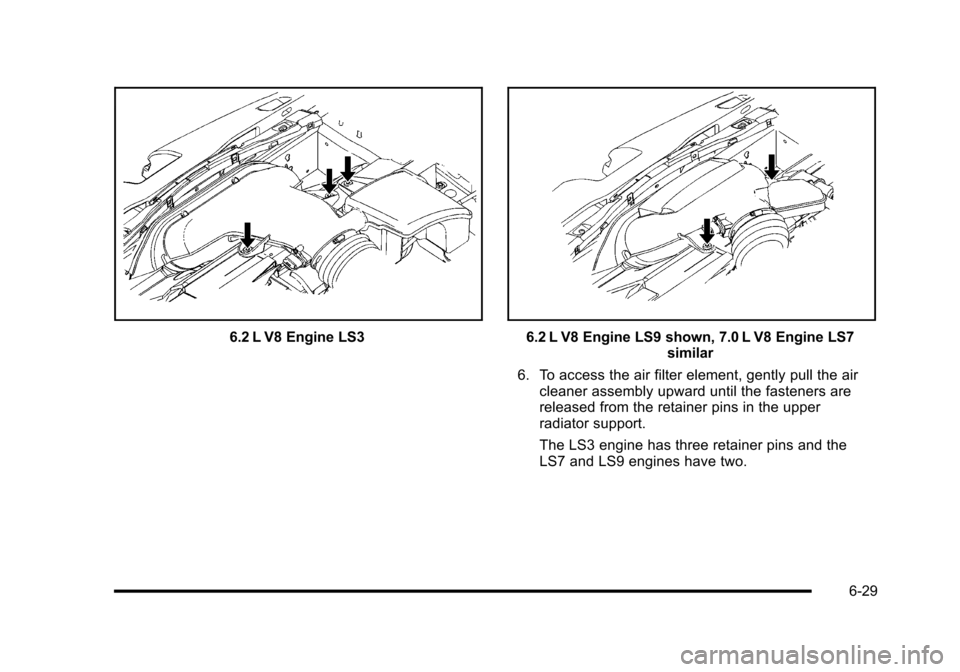
6.2 L V8 Engine LS36.2 L V8 Engine LS9 shown, 7.0 L V8 Engine LS7 similar
6. To access the air filter element, gently pull the air cleaner assembly upward until the fasteners are
released from the retainer pins in the upper
radiator support.
The LS3 engine has three retainer pins and the
LS7 and LS9 engines have two.
6-29
Page 342 of 472
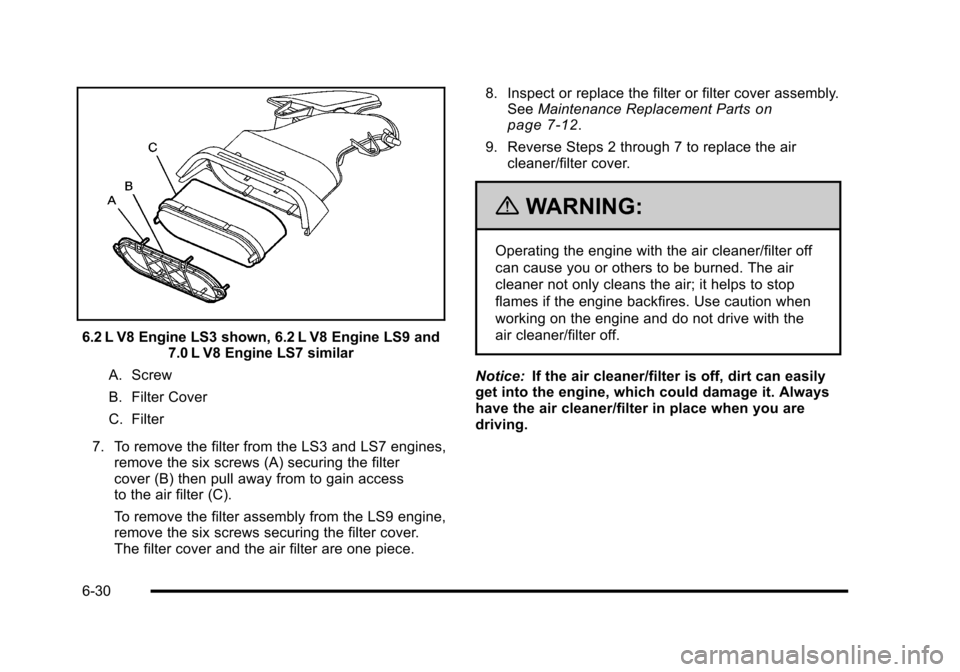
6.2 L V8 Engine LS3 shown, 6.2 L V8 Engine LS9 and 7.0 L V8 Engine LS7 similar
A. Screw
B. Filter Cover
C. Filter
7. To remove the filter from the LS3 and LS7 engines, remove the six screws (A) securing the filter
cover (B) then pull away from to gain access
to the air filter (C).
To remove the filter assembly from the LS9 engine,
remove the six screws securing the filter cover.
The filter cover and the air filter are one piece. 8. Inspect or replace the filter or filter cover assembly.
See Maintenance Replacement Parts
on
page 7‑12.
9. Reverse Steps 2 through 7 to replace the air cleaner/filter cover.
{WARNING:
Operating the engine with the air cleaner/filter off
can cause you or others to be burned. The air
cleaner not only cleans the air; it helps to stop
flames if the engine backfires. Use caution when
working on the engine and do not drive with the
air cleaner/filter off.
Notice: If the air cleaner/filter is off, dirt can easily
get into the engine, which could damage it. Always
have the air cleaner/filter in place when you are
driving.
6-30
Page 343 of 472
Automatic Transmission Fluid
How to Check Automatic Transmission
Fluid
It is not necessary to check the transmission fluid level.
A transmission fluid leak is the only reason for fluid
loss. If a leak occurs, take the vehicle to your dealer/
retailer service department and have it repaired as soon
as possible.
There is a special procedure for checking and changing
the transmission fluid. Because this procedure is
difficult, you should have this done at your dealer/
retailer service department. Contact your dealer/retailer
for additional information or the procedure can be found
in the service manual. To purchase a service manual,
see Service Publications Ordering Information
on
page 8‑16.
Notice: Use of the incorrect automatic transmission
fluid may damage the vehicle, and the damages may
not be covered by the vehicle's warranty. Always
use the automatic transmission fluid listed in
Recommended Fluids and Lubricants on page 7‑10. Change the fluid and filter at the intervals listed in
Scheduled Maintenance
on page 7‑3, and be sure
to use the fluid listed in Recommended Fluids and
Lubricants on page 7‑10.
Manual Transmission Fluid
It is not necessary to check the manual transmission
fluid level. A transmission fluid leak is the only reason
for fluid loss. If a leak occurs, take the vehicle to your
dealer/retailer service department and have it repaired
as soon as possible. See Recommended Fluids and
Lubricants
on page 7‑10for the proper fluid to use.
Hydraulic Clutch
It is not necessary to regularly check clutch fluid unless
you suspect there is a leak in the system. Adding fluid
will not correct a leak. A fluid loss in this system could
indicate a problem. Have the system inspected and
repaired.
6-31
Page 344 of 472
When to Check and What to Use
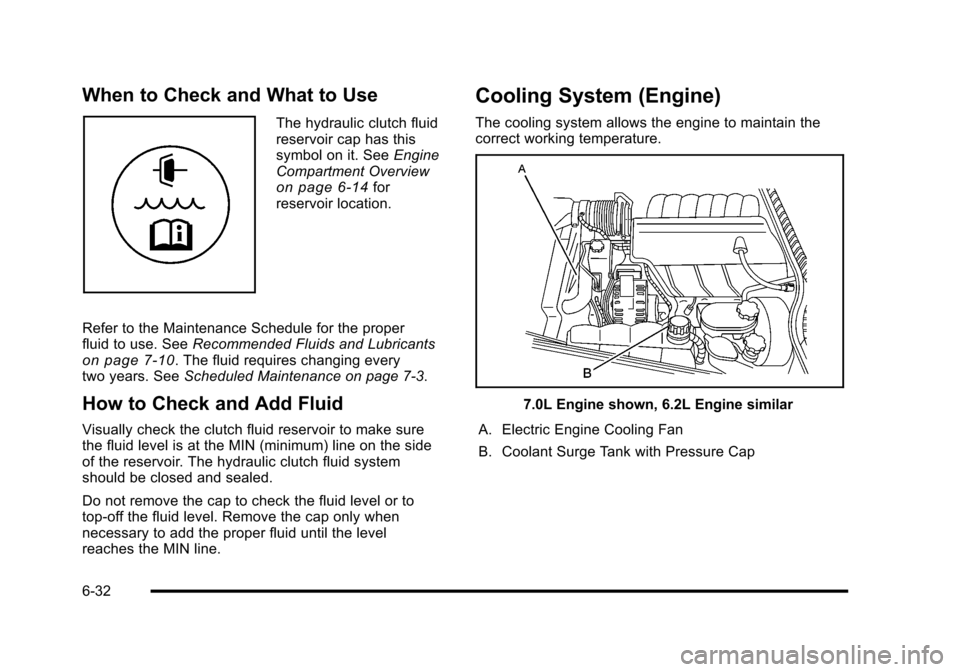
The hydraulic clutch fluid
reservoir cap has this
symbol on it. See Engine
Compartment Overview
on page 6‑14for
reservoir location.
Refer to the Maintenance Schedule for the proper
fluid to use. See Recommended Fluids and Lubricants
on page 7‑10. The fluid requires changing every
two years. See Scheduled Maintenance on page 7‑3.
How to Check and Add Fluid
Visually check the clutch fluid reservoir to make sure
the fluid level is at the MIN (minimum) line on the side
of the reservoir. The hydraulic clutch fluid system
should be closed and sealed.
Do not remove the cap to check the fluid level or to
top‐off the fluid level. Remove the cap only when
necessary to add the proper fluid until the level
reaches the MIN line.
Cooling System (Engine)
The cooling system allows the engine to maintain the
correct working temperature.
7.0L Engine shown, 6.2L Engine similar
A. Electric Engine Cooling Fan
B. Coolant Surge Tank with Pressure Cap
6-32
Page 345 of 472
{WARNING:
An electric engine cooling fan under the hood can
start up even when the engine is not running and
can cause injury. Keep hands, clothing, and tools
away from any underhood electric fan.
{WARNING:
Heater and radiator hoses, and other engine
parts, can be very hot. Do not touch them.
If you do, you can be burned.
Do not run the engine if there is a leak. If you run
the engine, it could lose all coolant. That could
cause an engine fire, and you could be burned.
Get any leak fixed before you drive the vehicle. Notice:
Using coolant other than DEX-COOL
®can
cause premature engine, heater core, or radiator
corrosion. In addition, the engine coolant could
require changing sooner, at 50 000 km (30,000 miles)
or 24 months, whichever occurs first. Any repairs
would not be covered by the vehicle warranty.
Always use DEX-COOL
®(silicate-free) coolant
in the vehicle.
Cooling System (Intercooler)
The 6.2L LS9 supercharged V8 engine has an
intercooler cooling system. See Engine Compartment
Overview
on page 6‑14for location of the intercooler.
The intercooler cooling system has a special procedure
for draining and adding coolant. Because this procedure
is difficult, see your dealer/retailer for service if the
intercooler is low on coolant. The procedure can also
be found in the service manual. To purchase a service
manual, see Service Publications Ordering Information
on page 8‑16.
6-33
Page 346 of 472
Checking Coolant
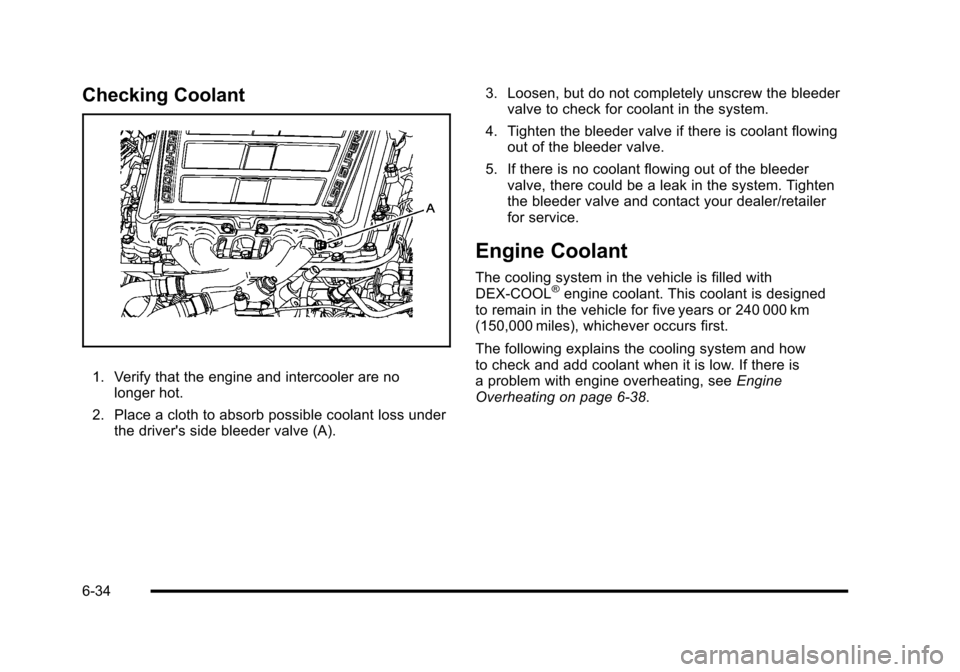
1. Verify that the engine and intercooler are no longer hot.
2. Place a cloth to absorb possible coolant loss under the driver's side bleeder valve (A). 3. Loosen, but do not completely unscrew the bleeder
valve to check for coolant in the system.
4. Tighten the bleeder valve if there is coolant flowing out of the bleeder valve.
5. If there is no coolant flowing out of the bleeder valve, there could be a leak in the system. Tighten
the bleeder valve and contact your dealer/retailer
for service.
Engine Coolant
The cooling system in the vehicle is filled with
DEX-COOL®engine coolant. This coolant is designed
to remain in the vehicle for five years or 240 000 km
(150,000 miles), whichever occurs first.
The following explains the cooling system and how
to check and add coolant when it is low. If there is
a problem with engine overheating, see Engine
Overheating on page 6‑38.
6-34
Page 347 of 472
What to Use
{WARNING:
Adding only plain water to the cooling system
can be dangerous. Plain water, or some other
liquid such as alcohol, can boil before the proper
coolant mixture will. The vehicle's coolant warning
system is set for the proper coolant mixture.
With plain water or the wrong mixture, the engine
could get too hot but would not get the overheat
warning. The engine could catch fire and you or
others could be burned. Use a 50/50 mixture of
clean, drinkable water and DEX-COOL
®coolant.
Use a 50/50 mixture of clean, drinkable water and
DEX-COOL
®coolant. If using this mixture, nothing else
needs to be added. This mixture:
.Gives freezing protection down to −37°C (−34°F),
outside temperature.
.Gives boiling protection up to 129°C (265°F),
engine temperature.
.Protects against rust and corrosion.
.Will not damage aluminum parts.
.Helps keep the proper engine temperature. Notice:
If an improper coolant mixture is used,
the engine could overheat and be badly damaged.
The repair cost would not be covered by the vehicle
warranty. Too much water in the mixture can freeze
and crack the engine, radiator, heater core, and
other parts.
Notice: If extra inhibitors and/or additives are used
in the vehicle's cooling system, the vehicle could be
damaged. Use only the proper mixture of the engine
coolant listed in this manual for the cooling system.
See Recommended Fluids and Lubricants
on
page 7‑10for more information.
Checking Coolant
The vehicle must be on a level surface when checking
the coolant level.
Check to see if coolant is visible in the coolant surge
tank. If the coolant inside the coolant surge tank is
boiling, do not do anything else until it cools down.
If coolant is visible but the coolant level is not at or
above the FULL COLD mark, add a 50/50 mixture of
clean, drinkable water and DEX-COOL coolant at the
coolant recovery tank, but be sure the cooling system
is cool before this is done. See Engine Coolant
on
page 6‑34for more information.
6-35
Page 348 of 472
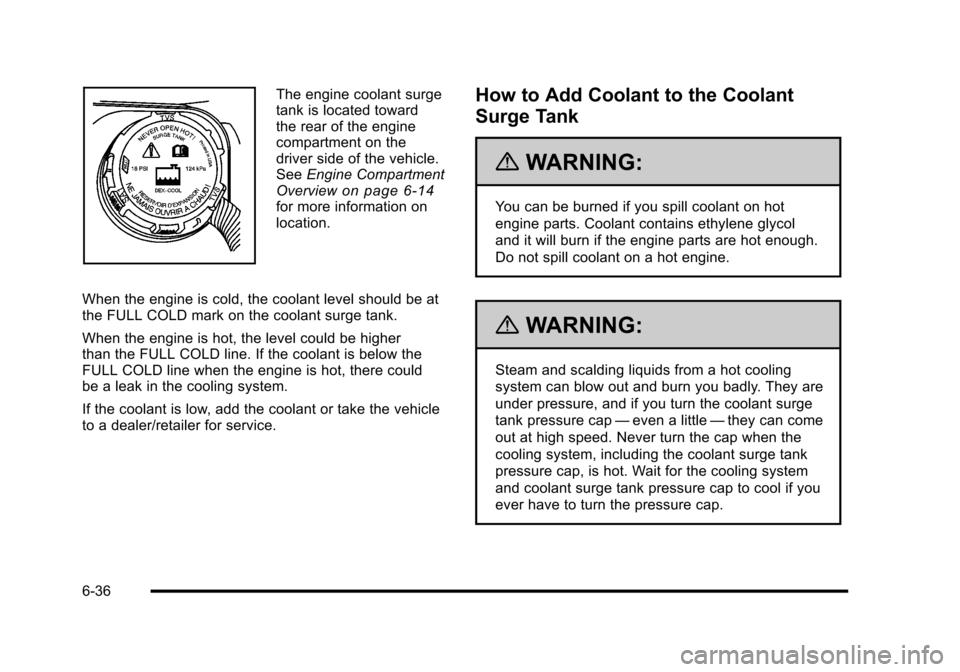
The engine coolant surge
tank is located toward
the rear of the engine
compartment on the
driver side of the vehicle.
See Engine Compartment
Overview
on page 6‑14for more information on
location.
When the engine is cold, the coolant level should be at
the FULL COLD mark on the coolant surge tank.
When the engine is hot, the level could be higher
than the FULL COLD line. If the coolant is below the
FULL COLD line when the engine is hot, there could
be a leak in the cooling system.
If the coolant is low, add the coolant or take the vehicle
to a dealer/retailer for service.
How to Add Coolant to the Coolant
Surge Tank
{WARNING:
You can be burned if you spill coolant on hot
engine parts. Coolant contains ethylene glycol
and it will burn if the engine parts are hot enough.
Do not spill coolant on a hot engine.
{WARNING:
Steam and scalding liquids from a hot cooling
system can blow out and burn you badly. They are
under pressure, and if you turn the coolant surge
tank pressure cap —even a little —they can come
out at high speed. Never turn the cap when the
cooling system, including the coolant surge tank
pressure cap, is hot. Wait for the cooling system
and coolant surge tank pressure cap to cool if you
ever have to turn the pressure cap.
6-36
Page 349 of 472
If coolant is needed, add the proper DEX-COOL®
coolant mixture directly to the surge tank, but be sure
the cooling system is cool before this is done.
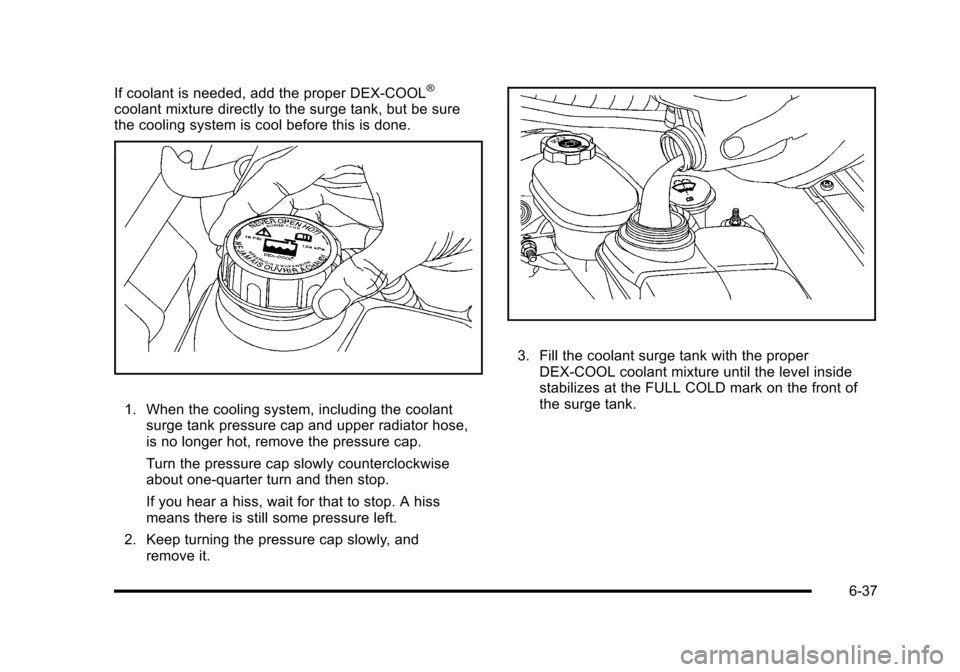
1. When the cooling system, including the coolant surge tank pressure cap and upper radiator hose,
is no longer hot, remove the pressure cap.
Turn the pressure cap slowly counterclockwise
about one-quarter turn and then stop.
If you hear a hiss, wait for that to stop. A hiss
means there is still some pressure left.
2. Keep turning the pressure cap slowly, and remove it.
3. Fill the coolant surge tank with the proper DEX-COOL coolant mixture until the level inside
stabilizes at the FULL COLD mark on the front of
the surge tank.
6-37
Page 350 of 472
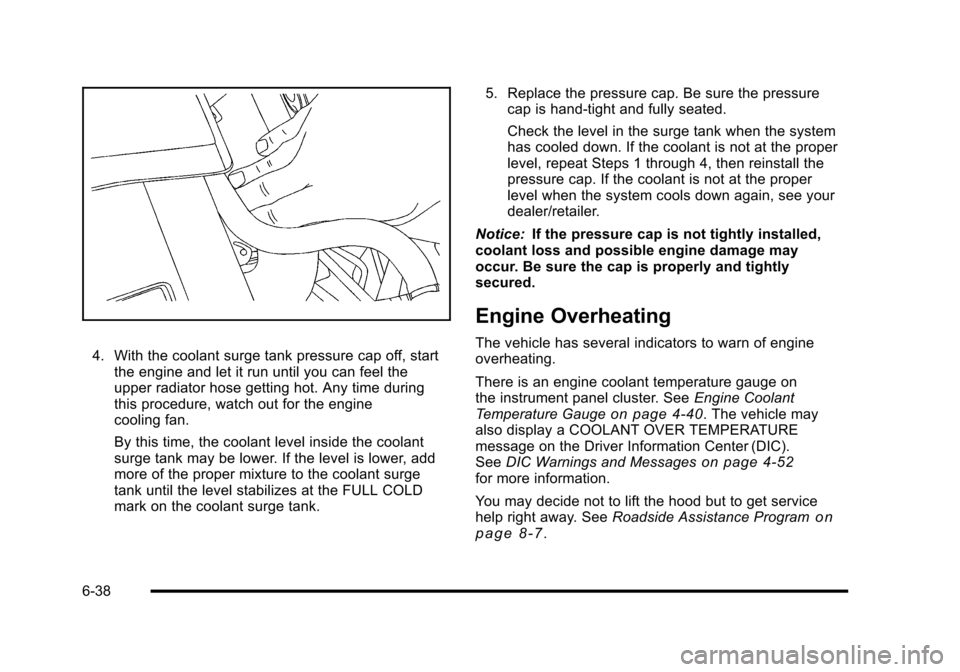
4. With the coolant surge tank pressure cap off, start the engine and let it run until you can feel the
upper radiator hose getting hot. Any time during
this procedure, watch out for the engine
cooling fan.
By this time, the coolant level inside the coolant
surge tank may be lower. If the level is lower, add
more of the proper mixture to the coolant surge
tank until the level stabilizes at the FULL COLD
mark on the coolant surge tank. 5. Replace the pressure cap. Be sure the pressure
cap is hand-tight and fully seated.
Check the level in the surge tank when the system
has cooled down. If the coolant is not at the proper
level, repeat Steps 1 through 4, then reinstall the
pressure cap. If the coolant is not at the proper
level when the system cools down again, see your
dealer/retailer.
Notice: If the pressure cap is not tightly installed,
coolant loss and possible engine damage may
occur. Be sure the cap is properly and tightly
secured.
Engine Overheating
The vehicle has several indicators to warn of engine
overheating.
There is an engine coolant temperature gauge on
the instrument panel cluster. See Engine Coolant
Temperature Gauge
on page 4‑40. The vehicle may
also display a COOLANT OVER TEMPERATURE
message on the Driver Information Center (DIC).
See DIC Warnings and Messages
on page 4‑52for more information.
You may decide not to lift the hood but to get service
help right away. See Roadside Assistance Program
on
page 8‑7.
6-38