ignition CHEVROLET CORVETTE 2010 6.G Owners Manual
[x] Cancel search | Manufacturer: CHEVROLET, Model Year: 2010, Model line: CORVETTE, Model: CHEVROLET CORVETTE 2010 6.GPages: 472, PDF Size: 11.44 MB
Page 9 of 472

A.Outlet Adjustment on page 4‑27.
B. Head-Up Display (HUD)
on page 4‑16(If Equipped).
C. Turn Signal/Multifunction Lever
on page 4‑4.
Cruise Controlon page 4‑7. Fog Lampson
page 4‑13. Exterior Lamps on page 4‑11.
D. Manual Shift Paddles (If Equipped). See Automatic
Transmission Operation on page 3‑26.
E. Driver Information Center (DIC) on page 4‑47.
F. Instrument Panel Cluster on page 4‑30.
G. Windshield Wipers
on page 4‑6and Windshield
Washer on page 4‑6.
H. DIC Operation and Displays on page 4‑47.
I. Hazard Warning Flashers on page 4‑3.
J. Audio System(s) on page 4‑80.
K. Dual Automatic Climate Control System
on
page 4‑22.
L. Fuel Door Release Button. See Filling the
Tank
on page 6‑9. Hatch/Trunk Release Button.
See “Hatch/Trunk Lid Release” underHatchon
page 3‑14.
M. Instrument Panel Brightness on page 4‑15.
N. Power Folding Top Switch (If Equipped). See Convertible Top (Manual)
on page 3‑59orConvertible Top (Power) on page 3‑66. O.
Bluetooth
®on page 4‑96(If Equipped).
Audio Steering Wheel Controlson page 4‑107(If Equipped).
P. Tilt Wheel on page 4‑3.
Q. Horn on page 4‑3.
R. Telescopic Wheel Button (If Equipped). See Tilt Wheel on page 4‑3.
S. Ignition Positions on page 3‑23.
T. Heated Seats
on page 2‑4(If Equipped).
U. Shift Lever (Automatic Shown). See Automatic
Transmission Operation
on page 3‑26or Manual
Transmission Operation on page 3‑32.
V. Active Handling System on page 5‑8.
W. Accessory Power Outlet(s) on page 4‑20.
X. Selective Ride Control on page 5‑14.
Y. Cupholders on page 3‑50.
Z. Ashtray(s) and Cigarette Lighter on page 4‑21.
AA. Parking Brake on page 3‑34.
AB. Glove Box on page 3‑50.
AC. Instrument Panel Fuse Block on page 6‑101.
1-3
Page 15 of 472
Heated Seats
On vehicles with heated seats, the buttons are located
on the center console. The ignition must be on for this
feature to work.
L: Press to turn the seat on at the high setting.
Press again to turn it to the low setting
9: Press to turn the system off.
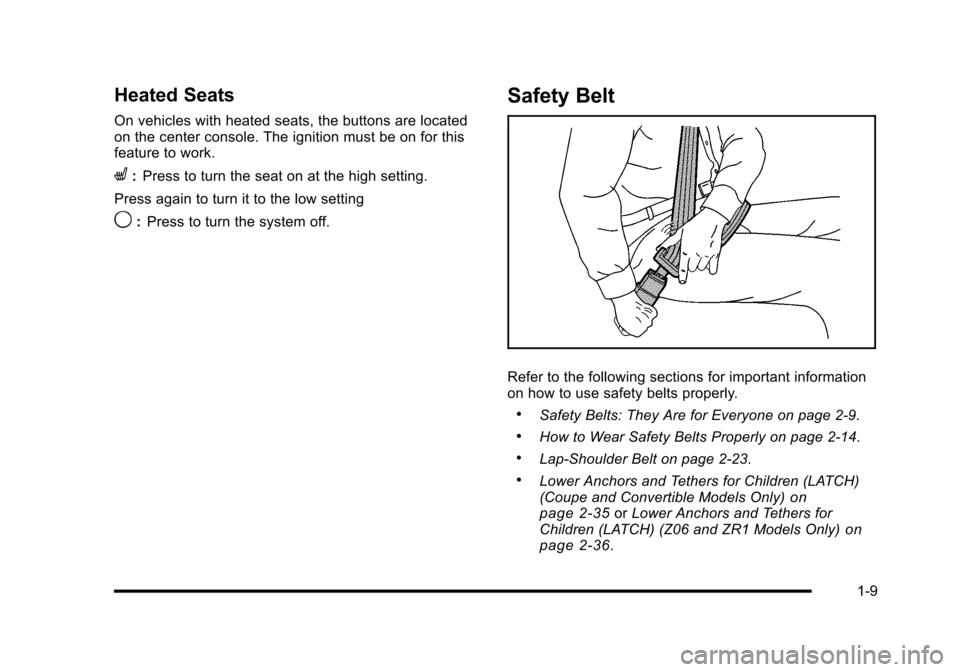
Safety Belt
Refer to the following sections for important information
on how to use safety belts properly.
.Safety Belts: They Are for Everyone on page 2‑9.
.How to Wear Safety Belts Properly on page 2‑14.
.Lap-Shoulder Belt on page 2‑23.
.Lower Anchors and Tethers for Children (LATCH)
(Coupe and Convertible Models Only)on
page 2‑35or Lower Anchors and Tethers for
Children (LATCH) (Z06 and ZR1 Models Only)on
page 2‑36.
1-9
Page 38 of 472
Heated Seats
On vehicles with heated seats, the buttons are located
on the center console.
The ignition must be on for this feature to work.
L: Press to turn the seat on at the high setting.
Press again to turn it to the low setting
9: Press to turn the system off.
Memory Seat, Mirrors and Steering
Wheel
On vehicles with the memory package, the controls are
located on the driver's door.
1 : Saves the seating position for driver 1.
2 : Saves the seating position for driver 2.
B:Recalls the easy exit position. The numbers on the back of the keyless access
transmitters correspond to the numbers on the
memory buttons.
To save seating positions in the memory:
1. Adjust the driver's seat, both outside mirrors, and the telescopic steering column to a comfortable
driving position.
2. Press and hold button 1 until two beeps let you know that the position has been stored in the
memory.
A second seating, mirror, and telescopic steering
column position can be set by repeating the above
steps and pressing button 2.
2-4
Page 92 of 472
A thick layer of additional material, such as a
blanket or cushion, or aftermarket equipment such as
seat covers, seat heaters, and seat massagers can
affect how well the passenger sensing system operates.
We recommend that you not use seat covers or other
aftermarket equipment except when approved by
GM for your specific vehicle. See Adding Equipment to
Your Airbag-Equipped Vehicle
on page 2‑59for more
information about modifications that can affect how the
system operates.
{WARNING:
Stowing of articles under the passenger seat
or between the passenger seat cushion and
seatback may interfere with the proper operation
of the passenger sensing system.
Servicing Your Airbag-Equipped
Vehicle
Airbags affect how the vehicle should be serviced.
There are parts of the airbag system in several places
around the vehicle. Your dealer/retailer and the service
manual have information about servicing the vehicle
and the airbag system. To purchase a service manual,
see Service Publications Ordering Information
on
page 8‑16.
{WARNING:
For up to 10 seconds after the ignition is turned off
and the battery is disconnected, an airbag can still
inflate during improper service. You can be injured
if you are close to an airbag when it inflates. Avoid
yellow connectors. They are probably part of the
airbag system. Be sure to follow proper service
procedures, and make sure the person performing
work for you is qualified to do so.
2-58
Page 97 of 472
Section 3 Features and Controls
Keys. . . . . . . . . . . . . . . . . . . . . . . . . . . . . . . . . . . . . . . . . . . . . . . . 3-3
Keyless Access System . . . . . . . . . . . . . . . . . . . . . . . . . 3-5
Keyless Access System Operation . . . . . . . . . . . . . . 3-5
Doors and Locks . . . . . . . . . . . . . . . . . . . . . . . . . . . . . . . . . 3-10
Door Locks . . . . . . . . . . . . . . . . . . . . . . . . . . . . . . . . . . . . 3-10
Power Door Locks . . . . . . . . . . . . . . . . . . . . . . . . . . . . . 3-12
Automatic Door Lock . . . . . . . . . . . . . . . . . . . . . . . . . . 3-13
Programmable Automatic Door Unlock . . . . . . . . 3-13
Lockout Protection . . . . . . . . . . . . . . . . . . . . . . . . . . . . . 3-13
Hatch . . . . . . . . . . . . . . . . . . . . . . . . . . . . . . . . . . . . . . . . . . 3-14
Windows . . . . . . . . . . . . . . . . . . . . . . . . . . . . . . . . . . . . . . . . . . 3-16
Power Windows . . . . . . . . . . . . . . . . . . . . . . . . . . . . . . . 3-17
Sun Visors . . . . . . . . . . . . . . . . . . . . . . . . . . . . . . . . . . . . . 3-18
Theft-Deterrent Systems . . . . . . . . . . . . . . . . . . . . . . . . . 3-19
Theft-Deterrent System . . . . . . . . . . . . . . . . . . . . . . . . 3-19
Immobilizer . . . . . . . . . . . . . . . . . . . . . . . . . . . . . . . . . . . . 3-20
Immobilizer Operation . . . . . . . . . . . . . . . . . . . . . . . . . 3-20 Starting and Operating Your Vehicle
. . . . . . . . . . . . 3-21
New Vehicle Break-In . . . . . . . . . . . . . . . . . . . . . . . . . . 3-21
Front Air Dam . . . . . . . . . . . . . . . . . . . . . . . . . . . . . . . . . . 3-22
Ignition Positions . . . . . . . . . . . . . . . . . . . . . . . . . . . . . . 3-23
Retained Accessory Power (RAP) . . . . . . . . . . . . . 3-24
Starting the Engine . . . . . . . . . . . . . . . . . . . . . . . . . . . . 3-24
Automatic Transmission Operation . . . . . . . . . . . . . 3-26
Manual Transmission Operation . . . . . . . . . . . . . . . 3-32
Parking Brake . . . . . . . . . . . . . . . . . . . . . . . . . . . . . . . . . 3-34
Shifting Into Park (Automatic Transmission) . . . 3-35
Shifting Out of Park . . . . . . . . . . . . . . . . . . . . . . . . . . . . 3-36
Parking the Vehicle (Manual Transmission) . . . . 3-36
Parking Over Things That Burn . . . . . . . . . . . . . . . . 3-37
Engine Exhaust . . . . . . . . . . . . . . . . . . . . . . . . . . . . . . . . 3-37
Running the Vehicle While Parked . . . . . . . . . . . . . 3-38
Mirrors . . . . . . . . . . . . . . . . . . . . . . . . . . . . . . . . . . . . . . . . . . . . 3-39
Automatic Dimming Rearview Mirror . . . . . . . . . . . 3-39
Compass . . . . . . . . . . . . . . . . . . . . . . . . . . . . . . . . . . . . . . 3-39
Outside Power Mirrors . . . . . . . . . . . . . . . . . . . . . . . . . 3-41
Outside Automatic Dimming Mirror . . . . . . . . . . . . . 3-41
Outside Convex Mirror . . . . . . . . . . . . . . . . . . . . . . . . . 3-42
Outside Heated Mirrors . . . . . . . . . . . . . . . . . . . . . . . . 3-42
3-1
Page 100 of 472
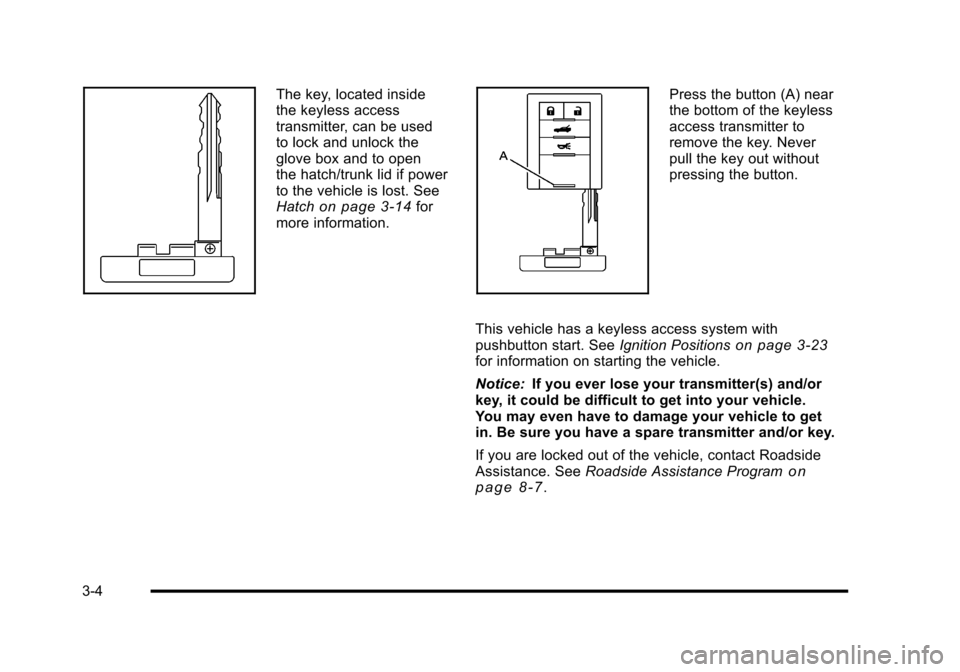
The key, located inside
the keyless access
transmitter, can be used
to lock and unlock the
glove box and to open
the hatch/trunk lid if power
to the vehicle is lost. See
Hatch
on page 3‑14for
more information.
Press the button (A) near
the bottom of the keyless
access transmitter to
remove the key. Never
pull the key out without
pressing the button.
This vehicle has a keyless access system with
pushbutton start. See Ignition Positions
on page 3‑23for information on starting the vehicle.
Notice: If you ever lose your transmitter(s) and/or
key, it could be difficult to get into your vehicle.
You may even have to damage your vehicle to get
in. Be sure you have a spare transmitter and/or key.
If you are locked out of the vehicle, contact Roadside
Assistance. See Roadside Assistance Program
on
page 8‑7.
3-4
Page 103 of 472
Programming Transmitters to the
Vehicle
Only keyless access transmitters programmed to
this vehicle will work. If a transmitter is lost or stolen,
a replacement can be purchased and programmed
through your dealer/retailer. The vehicle can be
reprogrammed so that lost or stolen transmitters
no longer work. Each vehicle can have up to
four transmitters programmed to it.
Programming with a Recognized
Transmitter
A new transmitter can be programmed to the vehicle
when there is one recognized transmitter. For vehicles
sold in Canada, two recognized transmitters are
required to program a new transmitter. 1. The vehicle must be off.
2. Both the recognized and new transmitters must be with you.
3. Insert the vehicle key into the key cylinder located above the license plate.
4. Open the hatch/trunk.
5. Turn the key five times within five seconds.
6. The DIC displays READY FOR FOB #2, 3 or 4.
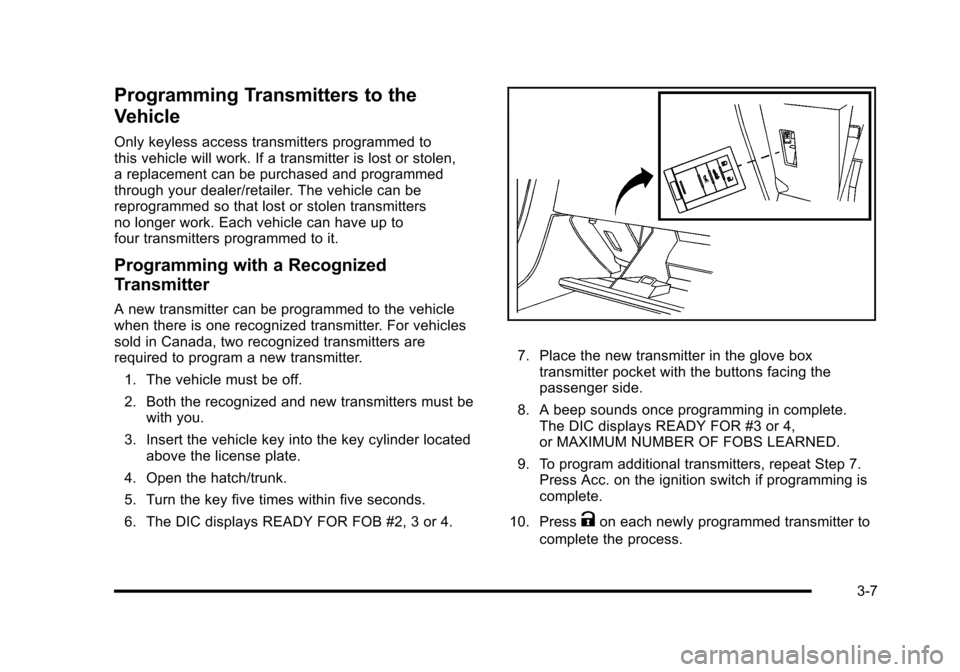
7. Place the new transmitter in the glove box transmitter pocket with the buttons facing the
passenger side.
8. A beep sounds once programming in complete. The DIC displays READY FOR #3 or 4,
or MAXIMUM NUMBER OF FOBS LEARNED.
9. To program additional transmitters, repeat Step 7. Press Acc. on the ignition switch if programming is
complete.
10. Press
Kon each newly programmed transmitter to
complete the process.
3-7
Page 104 of 472
Programming without a Recognized
Transmitter
This procedure requires three ten minutes cycles to
complete the programming process. United States
owners are permitted to program a new transmitter
to their vehicle when a recognized transmitter is not
available. The Canadian immobilizer standard requires
that Canadian owners see their dealer/retailer for
programming new transmitters when two recognized
transmitters are not available. 1. The vehicle must be off.
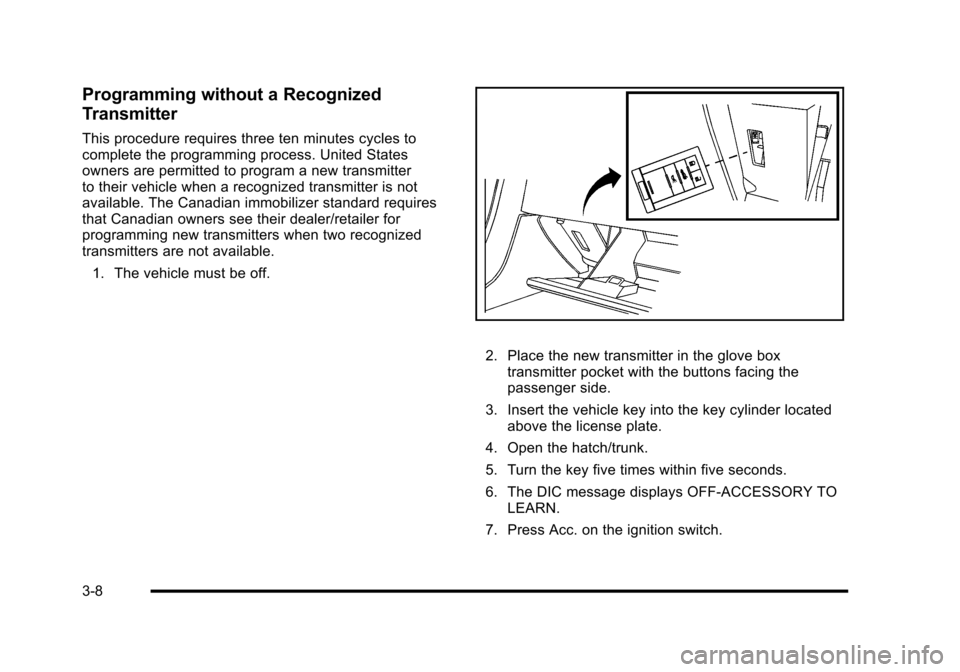
2. Place the new transmitter in the glove box transmitter pocket with the buttons facing the
passenger side.
3. Insert the vehicle key into the key cylinder located above the license plate.
4. Open the hatch/trunk.
5. Turn the key five times within five seconds.
6. The DIC message displays OFF-ACCESSORY TO LEARN.
7. Press Acc. on the ignition switch.
3-8
Page 105 of 472
8. The DIC reads WAIT 10 MINUTES and counts down to zero.
9. The DIC displays OFF-ACCESSORY TO LEARN again.
10. Press Acc. on the ignition switch. 11. Steps 8, 9 and 10 will be repeated two more times.
12. A beep sounds and the DIC reads READY FOR FOB #1. All previously known transmitter
programming has been erased.
13. A beep sounds once programming in complete. The DIC displays READY FOR FOB #2.
To program additional transmitters, take transmitter
1 out of the transmitter pocket and place
transmitter 2 in the pocket. Up to four transmitters
can be programmed. The DIC then displays
MAXIMUM NUMBER OF FOBS LEARNED
and exits the programming mode.
Press Acc. on the ignition switch to complete the
process. 14. Press Acc. on the ignition switch if programming is
complete.
15. Press
Kon each newly programmed transmitter to
complete the process.
Starting the Vehicle with a Low
Transmitter Battery
If the transmitter battery is weak, the DIC may display
NO FOBS DETECTED when trying to start the vehicle.
To start the vehicle, place the transmitter in the glove
box transmitter pocket with the buttons facing the
passenger side. Then, with the vehicle in P (Park)
for an automatic transmission, press the brake pedal
and
/. If the vehicle has a manual transmission, press
the clutch and
/. Replace the transmitter battery as
soon as possible. Change the transmitter battery if the
DIC displays FOB BATTERY LOW.
3-9
Page 109 of 472
Automatic Door Lock
The vehicle is programmed so that, when the doors are
closed, the ignition is on and the shift lever is moved
out of P (Park)for automatic transmissions, or when
vehicle speed becomes faster than 8 mph (13 km/h)
for manual transmissions, both doors will lock.
Use the power door unlock switch to unlock the door
when the vehicle is not in P (Park). When the door is
closed again, the doors will lock either when your foot is
removed from the brake or the vehicle speed becomes
faster than 8 mph (13 km/h).
Programmable Automatic Door
Unlock
The vehicle is programmed so that when the shift lever
is moved into P (Park) for automatic transmission
vehicles or when the ignition is turned OFF or is
in Retained Accessory Power (RAP) for manual
transmission vehicles, both doors will unlock. With the vehicle stopped and the engine running, door
unlocking can be programmed through the Driver
Information Center (DIC). This allows the driver to
choose various unlock settings. For programming
information, see
DIC Vehicle Personalization
on
page 4‑71.
Lockout Protection
Your vehicle can be programmed to sound the horn
three times and unlock the driver door when both doors
are closed and there is a keyless access transmitter
inside the vehicle. When the driver door is opened, a
reminder chime will sound continuously. The vehicle will
remain locked only when at least one transmitter has
been removed from the vehicle and both doors are
closed. See DIC Vehicle Personalization on page 4‑71.
3-13