service CHEVROLET CORVETTE 2019 Owner's Manual
[x] Cancel search | Manufacturer: CHEVROLET, Model Year: 2019, Model line: CORVETTE, Model: CHEVROLET CORVETTE 2019Pages: 367, PDF Size: 6.8 MB
Page 2 of 367
Chevrolet Corvette Owner Manual (GMNA-Localizing-U.S./Canada/Mexico-
12032182) - 2019 - crc - 5/8/18
ContentsIntroduction . . . . . . . . . . . . . . . . . . . . . . 2
In Brief . . . . . . . . . . . . . . . . . . . . . . . . . . . 5
Keys, Doors, and Windows . . . . . 25
Seats and Restraints . . . . . . . . . . . 58
Storage . . . . . . . . . . . . . . . . . . . . . . . . . 94
Instruments and Controls . . . . . . . 98
Lighting . . . . . . . . . . . . . . . . . . . . . . . 139
Infotainment System . . . . . . . . . . 145
Climate Controls . . . . . . . . . . . . . . 151
Driving and Operating . . . . . . . . . 157
Vehicle Care . . . . . . . . . . . . . . . . . . 218
Service and Maintenance . . . . . 310
Technical Data . . . . . . . . . . . . . . . . 325
Customer Information . . . . . . . . . 330
Reporting Safety Defects . . . . . . 340
OnStar . . . . . . . . . . . . . . . . . . . . . . . . 344
Connected Services . . . . . . . . . . . 352
Index . . . . . . . . . . . . . . . . . . . . 356
Page 3 of 367
Chevrolet Corvette Owner Manual (GMNA-Localizing-U.S./Canada/Mexico-
12032182) - 2019 - crc - 4/23/19
2 Introduction
Introduction
The names, logos, emblems,
slogans, vehicle model names, and
vehicle body designs appearing in
this manual including, but not limited
to, GM, the GM logo, CHEVROLET,
the CHEVROLET Emblem,
CORVETTE, the CORVETTE
Emblem, CORVETTE STINGRAY,
and the STINGRAY Emblem are
trademarks and/or service marks of
General Motors LLC, its
subsidiaries, affiliates, or licensors.
For vehicles first sold in Canada,
substitute the name“General
Motors of Canada Company” for
Chevrolet Motor Division wherever it
appears in this manual. This manual describes features that
may or may not be on the vehicle
because of optional equipment that
was not purchased on the vehicle,
model variants, country
specifications, features/applications
that may not be available in your
region, or changes subsequent to
the printing of this owner
’s manual.
Refer to the purchase
documentation relating to your
specific vehicle to confirm the
features.
Keep this manual in the vehicle for
quick reference.
Canadian Vehicle Owners
A French language manual can be
obtained from your dealer, at
www.helminc.com, or from:
Propriétaires Canadiens
On peut obtenir un exemplaire de
ce guide en français auprès du
concessionnaire ou à l'adresse
suivante: Helm, Incorporated
Attention: Customer Service
47911 Halyard Drive
Plymouth, MI 48170
USA
Using this Manual
To quickly locate information about
the vehicle, use the Index in the
back of the manual. It is an
alphabetical list of what is in the
manual and the page number where
it can be found.
Danger, Warning, and
Caution
Warning messages found on vehicle
labels and in this manual describe
hazards and what to do to avoid or
reduce them.
Litho in U.S.A.
Part No. 84149499 D Fourth Printing©2019 General Motors LLC. All Rights Reserved.
Page 4 of 367
Chevrolet Corvette Owner Manual (GMNA-Localizing-U.S./Canada/Mexico-
12032182) - 2019 - crc - 5/8/18
Introduction 3
{Danger
Danger indicates a hazard with a
high level of risk which will result
in serious injury or death.
{Warning
Warning indicates a hazard that
could result in injury or death.
Caution
Caution indicates a hazard that
could result in property or vehicle
damage.
A circle with a slash through it is a
safety symbol which means“Do
Not,” “Do not do this,” or“Do not let
this happen.”
Symbols
The vehicle has components and
labels that use symbols instead of
text. Symbols are shown along with
the text describing the operation or
information relating to a specific
component, control, message,
gauge, or indicator.
M: Shown when the owner ’s
manual has additional instructions
or information.
*: Shown when the service
manual has additional instructions
or information.
0: Shown when there is more
information on another page —
“see page.” Vehicle Symbol Chart
Here are some additional symbols
that may be found on the vehicle
and what they mean. See the
features in this manual for
information.
u:
Air Conditioning System
G:Air Conditioning Refrigerant Oil
9:Airbag Readiness Light
!:Antilock Brake System (ABS)
$:Brake System Warning Light
9:Dispose of Used Components
Properly
P: Do Not Apply High Pressure
Water
B: Engine Coolant Temperature
_: Flame/Fire Prohibited
H:Flammable
[:Forward Collision Alert
R: Fuse Block Cover Lock
Location
+: Fuses
j:ISOFIX/LATCH System Child
Restraints
Page 14 of 367
Chevrolet Corvette Owner Manual (GMNA-Localizing-U.S./Canada/Mexico-
12032182) - 2019 - crc - 5/8/18
In Brief 13
Then immediately press and hold 1,
2, or
B(Exit) until two beeps
sound. To manually recall these
positions, press and hold 1, 2, or
B
until the saved position is reached.
When Auto Memory Recall is
enabled in vehicle personalization,
positions previously saved to
memory buttons 1 and 2 are
recalled when the ignition is
changed from off to on or ACC/
ACCESSORY.
When Easy Exit Options is enabled
in vehicle personalization, the
feature automatically recalls the
previously saved exit position when
exiting the vehicle.
Memory adjustments may not be
available upon delivery or after
service until steps in “Saving
Memory Positions” section are
performed. See Memory Seats060.
Heated and Ventilated
Seats
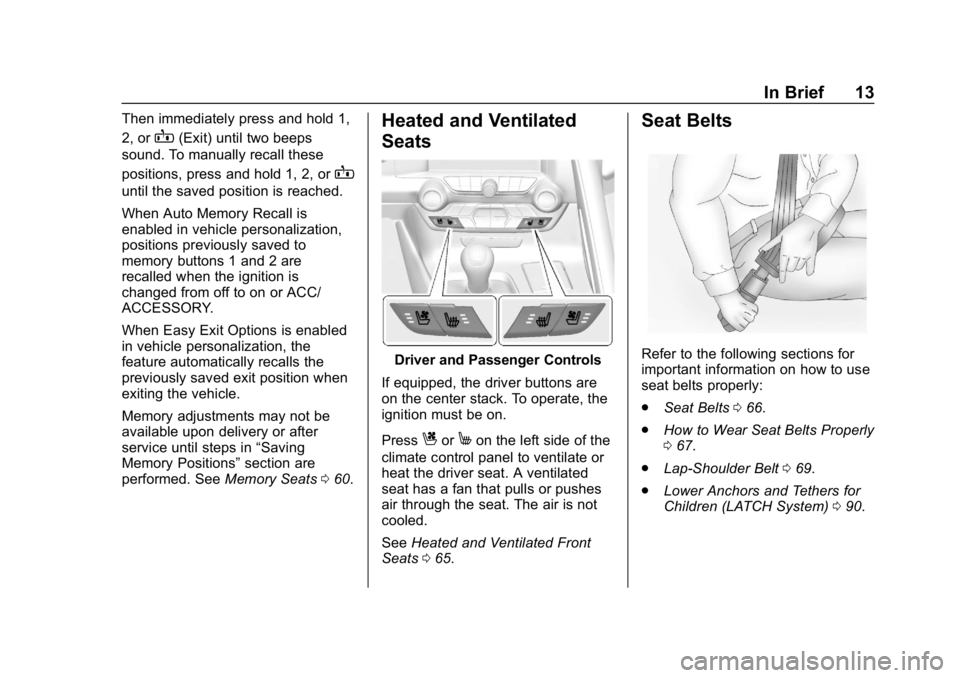
Driver and Passenger Controls
If equipped, the driver buttons are
on the center stack. To operate, the
ignition must be on.
Press
CorMon the left side of the
climate control panel to ventilate or
heat the driver seat. A ventilated
seat has a fan that pulls or pushes
air through the seat. The air is not
cooled.
See Heated and Ventilated Front
Seats 065.
Seat Belts
Refer to the following sections for
important information on how to use
seat belts properly:
.
Seat Belts 066.
. How to Wear Seat Belts Properly
067.
. Lap-Shoulder Belt 069.
. Lower Anchors and Tethers for
Children (LATCH System) 090.
Page 23 of 367
Chevrolet Corvette Owner Manual (GMNA-Localizing-U.S./Canada/Mexico-
12032182) - 2019 - crc - 5/8/18
22 In Brief
The low tire pressure warning light
alerts to a significant loss in
pressure of one of the vehicle's
tires. If the warning light comes on,
stop as soon as possible and inflate
the tires to the recommended
pressure shown on the Tire and
Loading Information label. See
Vehicle Load Limits0175. The
warning light will remain on until the
tire pressure is corrected.
The low tire pressure warning light
may come on in cool weather when
the vehicle is first started, and then
turn off as the vehicle is driven. This
may be an early indicator that the
tire pressures are getting low and
the tires need to be inflated to the
proper pressure.
The TPMS does not replace normal
monthly tire maintenance. Maintain
the correct tire pressures.
See Tire Pressure Monitor System
0 275.Performance Vehicle
Features
Checking Engine Oil
Your vehicle may have a high
performance dry sump lubrication
system. This system operates
differently than a standard engine
lubrication system. See Engine Oil
0 232.
Check the oil level only after the
engine has been thoroughly warmed
up and then check between five and
10 minutes of shutoff. This ensures
that the oil level reading obtained
will be accurate.
Brake Noise
Under certain weather or operating
conditions, occasional brake squeal
may be heard with the vehicle's
performance braking system. This
brake system is designed for
superior fade resistance and
consistent operation using high
performance brake pads. Brake
squeal is normal and does not affect
system performance. Tire Chatter/Hop
When driving at slow speeds and in
very tight turns, the vehicle may
have tire chatter/hop. This condition
is normal and the vehicle does not
require service.
Road Imperfections/Crown Effects
The vehicle's precise steering and
handling make it very responsive to
road surface feedback. A slight pull
may be felt in the steering
depending on the crown of the road
and/or other road surface variations
such as troughs or ruts. This is
normal and the vehicle does not
require service.
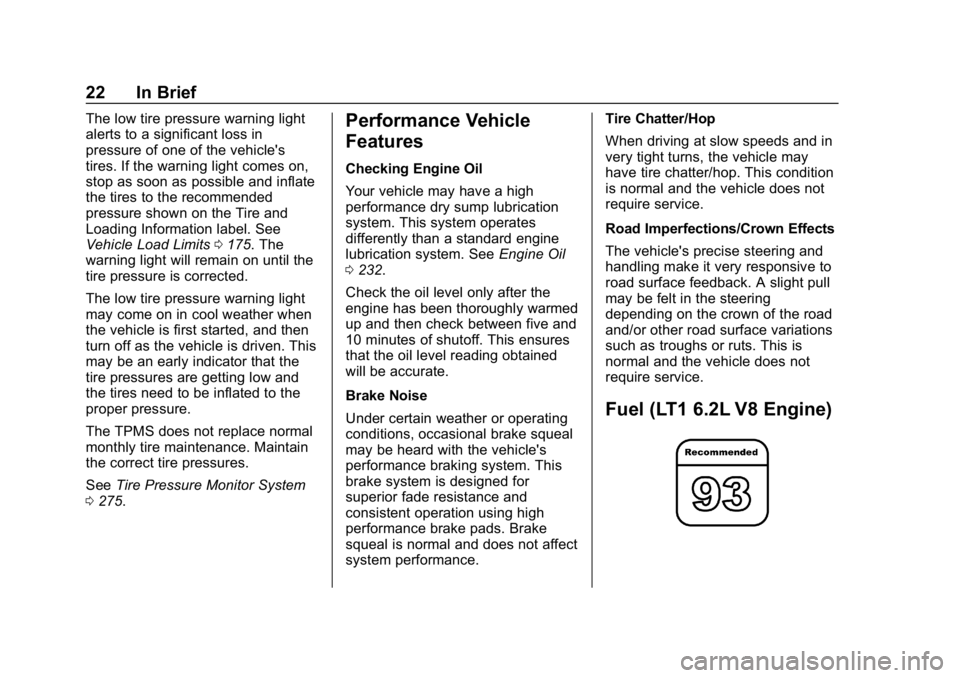
Fuel (LT1 6.2L V8 Engine)
Page 27 of 367
Chevrolet Corvette Owner Manual (GMNA-Localizing-U.S./Canada/Mexico-
12032182) - 2019 - crc - 5/8/18
26 Keys, Doors, and Windows
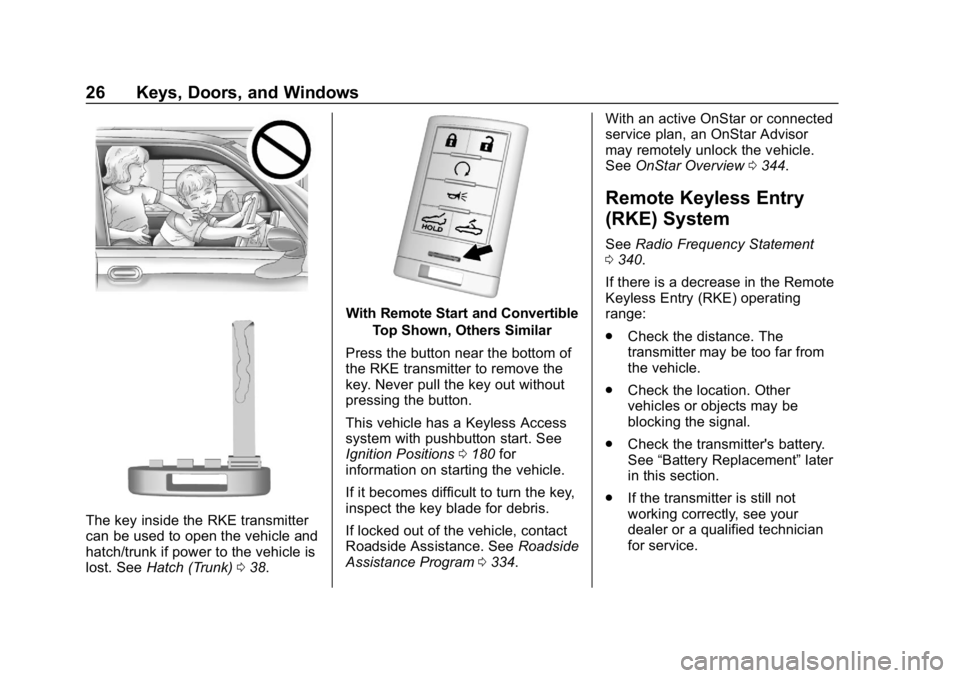
The key inside the RKE transmitter
can be used to open the vehicle and
hatch/trunk if power to the vehicle is
lost. SeeHatch (Trunk) 038.
With Remote Start and Convertible
Top Shown, Others Similar
Press the button near the bottom of
the RKE transmitter to remove the
key. Never pull the key out without
pressing the button.
This vehicle has a Keyless Access
system with pushbutton start. See
Ignition Positions 0180 for
information on starting the vehicle.
If it becomes difficult to turn the key,
inspect the key blade for debris.
If locked out of the vehicle, contact
Roadside Assistance. See Roadside
Assistance Program 0334. With an active OnStar or connected
service plan, an OnStar Advisor
may remotely unlock the vehicle.
See
OnStar Overview 0344.
Remote Keyless Entry
(RKE) System
See Radio Frequency Statement
0 340.
If there is a decrease in the Remote
Keyless Entry (RKE) operating
range:
. Check the distance. The
transmitter may be too far from
the vehicle.
. Check the location. Other
vehicles or objects may be
blocking the signal.
. Check the transmitter's battery.
See “Battery Replacement” later
in this section.
. If the transmitter is still not
working correctly, see your
dealer or a qualified technician
for service.
Page 45 of 367
Chevrolet Corvette Owner Manual (GMNA-Localizing-U.S./Canada/Mexico-
12032182) - 2019 - crc - 5/8/18
44 Keys, Doors, and Windows
needs service. If the engine does
start, the first transmitter may be
faulty. See your dealer or have a
new RKE transmitter programmed to
the vehicle.
The immobilizer system can learn
new or replacement RKE
transmitters. Up to eight RKE
transmitters can be programmed for
the vehicle. To program additional
transmitters, see“Programming
Transmitters to the Vehicle” under
Remote Keyless Entry (RKE)
System Operation 027.
Do not leave the transmitter or
device that disarms or deactivates
the theft-deterrent system in the
vehicle.Exterior Mirrors
Convex Mirrors
{Warning
A convex mirror can make things,
like other vehicles, look farther
away than they really are. If you
cut too sharply into the right lane,
you could hit a vehicle on the
right. Check the inside mirror or
glance over your shoulder before
changing lanes.
The passenger side mirror is convex
shaped. A convex mirror's surface is
curved so more can be seen from
the driver seat.
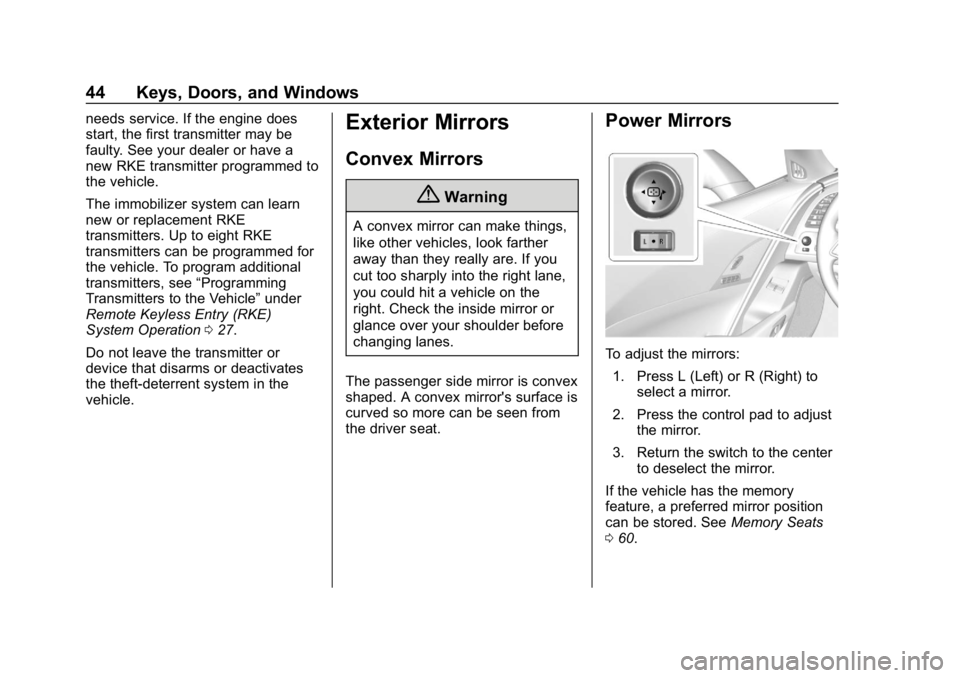
Power Mirrors
To adjust the mirrors: 1. Press L (Left) or R (Right) to select a mirror.
2. Press the control pad to adjust the mirror.
3. Return the switch to the center to deselect the mirror.
If the vehicle has the memory
feature, a preferred mirror position
can be stored. See Memory Seats
0 60.
Page 49 of 367
Chevrolet Corvette Owner Manual (GMNA-Localizing-U.S./Canada/Mexico-
12032182) - 2019 - crc - 5/8/18
48 Keys, Doors, and Windows
Window Indexing
If the window freezes to the door:1. Push the top of the window inward while opening the door.
2. Clear all snow and ice from the door and glass.
3. Open the window completely and then close it.
4. Close the door.
When fully closed, indexing
automatically lowers the window a
small amount when the door is
opened. When the door is closed,
the window will raise to its previous
position. If either window does not
index properly, it could be due to
loss of power. Before seeing your
dealer for service, program the
power windows.
Sun Visors
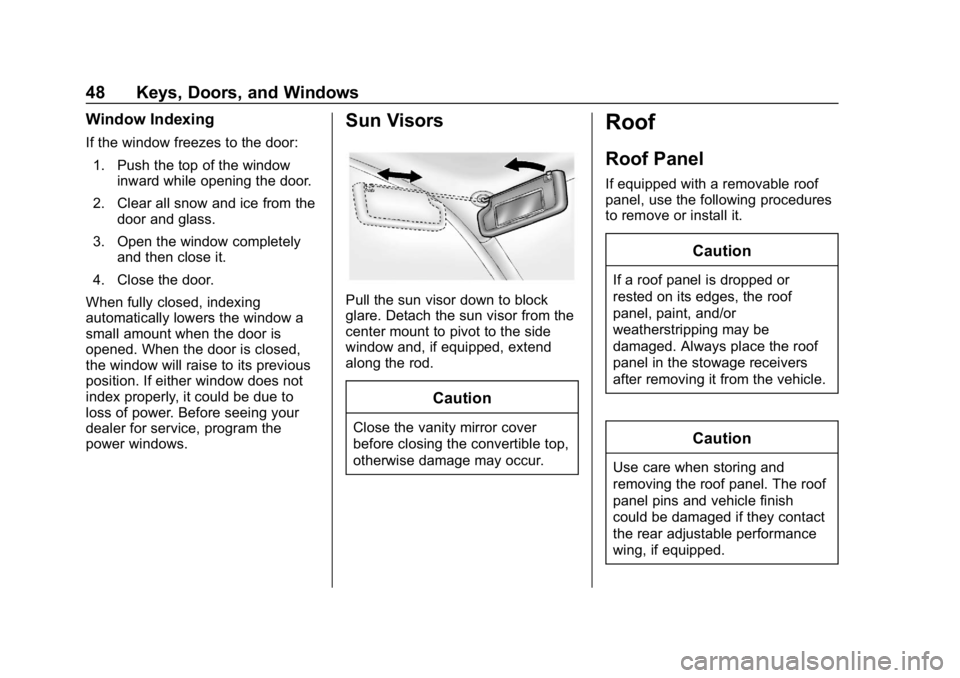
Pull the sun visor down to block
glare. Detach the sun visor from the
center mount to pivot to the side
window and, if equipped, extend
along the rod.
Caution
Close the vanity mirror cover
before closing the convertible top,
otherwise damage may occur.
Roof
Roof Panel
If equipped with a removable roof
panel, use the following procedures
to remove or install it.
Caution
If a roof panel is dropped or
rested on its edges, the roof
panel, paint, and/or
weatherstripping may be
damaged. Always place the roof
panel in the stowage receivers
after removing it from the vehicle.
Caution
Use care when storing and
removing the roof panel. The roof
panel pins and vehicle finish
could be damaged if they contact
the rear adjustable performance
wing, if equipped.
Page 58 of 367
Chevrolet Corvette Owner Manual (GMNA-Localizing-U.S./Canada/Mexico-
12032182) - 2019 - crc - 5/8/18
Keys, Doors, and Windows 57
2. Lift and pivot the convertibletop rearward into the fully
stowed position.
If the convertible top does not
operate after this adjustment, close
the tonneau cover and take it to
your dealer for service.
Cleaning the Convertible Top
The convertible top should be
cleaned often. Do not use
high-pressure car washes as these
may cause water to enter the
vehicle.
Hand wash the convertible top in
partial shade. Use mild soap,
lukewarm water, and a soft sponge.
A chamois or cloth may leave lint on
the top, and a brush can chafe the
threads in the top fabric. Do not use
detergents, harsh cleaners,
solvents, or bleaching agents. Wet the entire top and let the soap
remain on the fabric for a few
minutes. Wash evenly to avoid
spots or rings. When the top is very
dirty, use a mild foam-type cleaner.
Thoroughly rinse the entire vehicle,
then let the top dry in direct sunlight.
To protect the convertible top:
.
Make sure the convertible top is
completely dry before lowering it.
. Do not get any cleaner on the
vehicle's painted finish; it could
leave streaks.
Page 62 of 367
Chevrolet Corvette Owner Manual (GMNA-Localizing-U.S./Canada/Mexico-
12032182) - 2019 - crc - 5/8/18
Seats and Restraints 61
If equipped, memory seats allow two
drivers to save and recall their
unique seat positions for driving the
vehicle, and a shared exit position
for getting out of the vehicle. Other
feature positions may also be
saved, such as power mirrors and
power steering wheel, if equipped.
Memory positions are linked to RKE
transmitter 1 or 2 for automatic
memory recalls.
Before saving, adjust all available
memory feature positions. Turn the
ignition on and then press and
release SET; a beep will sound.
Then immediately press and hold 1,
2, or
B(Exit) until two beeps
sound. To manually recall these
positions, press and hold 1, 2, or
B
until the saved position is reached.
Follow the instructions under
“Saving Memory Positions.”
The vehicle identifies the current
driver ’s RKE transmitter number (1–
8). See Remote Keyless Entry
(RKE) System Operation 027. Only
RKE transmitters 1 and 2 can be
used for automatic memory recalls.
A Driver Information Center (DIC) welcome message indicating the
transmitter number may display for
the first few ignition cycles following
a transmitter change. For Auto
Memory Recall to work properly,
save the positions to the memory
button (1 or 2) matching the RKE
transmitter number displayed in the
DIC welcome message. Carry the
linked RKE transmitter when
entering the vehicle.
Memory adjustments may not be
available upon delivery or after
service until steps in
“Saving
Memory Positions” section are
performed.
Vehicle Personalization Settings
. To have the Auto Memory Recall
movement begin when the
vehicle is started, select the
Settings menu, then Vehicle,
then Comfort and Convenience,
and then Auto Memory Recall.
Select On or Off. See “Auto
Memory Recall” later in this
section. .
To begin Easy Exit Recall
movement when the ignition is
turned off and the driver door is
opened, or when the ignition is
turned off with the driver door
already opened, select the
Settings menu, then Vehicle,
then Comfort and Convenience,
and then Easy Exit Options.
Select On or Off. See “Easy Exit
Recall” later in this section.
. See Vehicle Personalization
0 128 for additional setting
information.
Identifying Driver Number
To identify the driver number: 1. Start the vehicle with a different key or RKE transmitter. The
DIC should display the driver
number; 1 or 2. Turn the
ignition off and remove the key
or RKE transmitter from the
vehicle.
2. Start the vehicle with the initial key or RKE transmitter. The
DIC should display the other
driver number not shown in
Step 1.