center console CHEVROLET CRUZE 2011 1.G Owners Manual
[x] Cancel search | Manufacturer: CHEVROLET, Model Year: 2011, Model line: CRUZE, Model: CHEVROLET CRUZE 2011 1.GPages: 394, PDF Size: 6.89 MB
Page 14 of 394
Black plate (8,1)Chevrolet Cruze Owner Manual - 2011
1-8 In Brief
Power Driver Seat
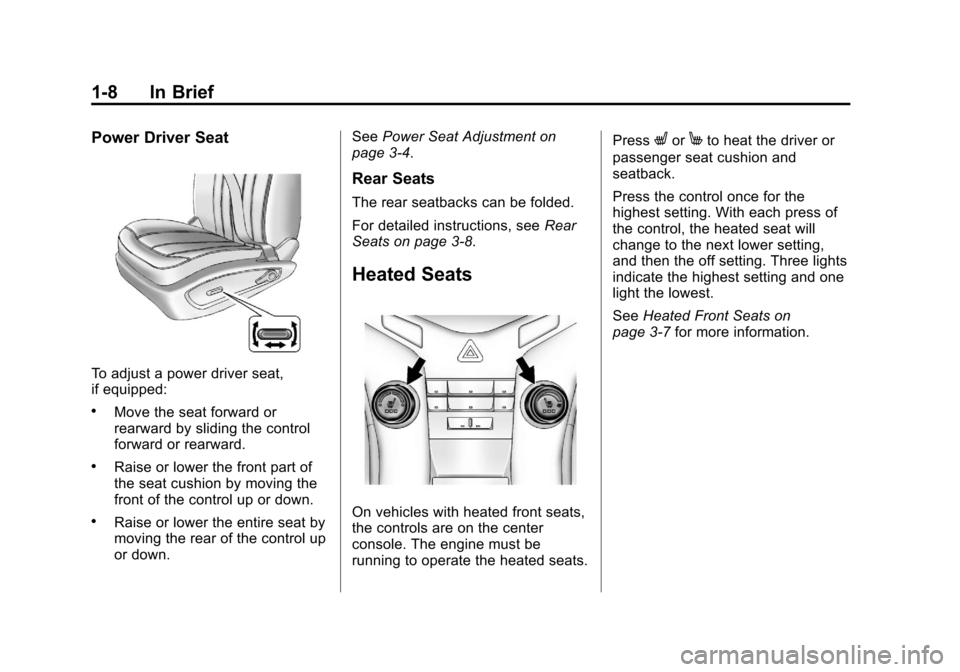
To adjust a power driver seat,
if equipped:
.Move the seat forward or
rearward by sliding the control
forward or rearward.
.Raise or lower the front part of
the seat cushion by moving the
front of the control up or down.
.Raise or lower the entire seat by
moving the rear of the control up
or down.See
Power Seat Adjustment on
page 3‑4.
Rear Seats
The rear seatbacks can be folded.
For detailed instructions, see Rear
Seats on page 3‑8.
Heated Seats
On vehicles with heated front seats,
the controls are on the center
console. The engine must be
running to operate the heated seats. Press
LorMto heat the driver or
passenger seat cushion and
seatback.
Press the control once for the
highest setting. With each press of
the control, the heated seat will
change to the next lower setting,
and then the off setting. Three lights
indicate the highest setting and one
light the lowest.
See Heated Front Seats on
page 3‑7 for more information.
Page 23 of 394
Black plate (17,1)Chevrolet Cruze Owner Manual - 2011
In Brief 1-17
Satellite Radio
Vehicles with an XM™Satellite
Radio tuner and a valid XM Satellite
Radio subscription can receive XM
programming.
XM Satellite Radio Service
XM is a satellite radio service based
in the 48 contiguous United States
and 10 Canadian provinces. XM
Satellite Radio has a wide variety of
programming and commercial-free
music, coast to coast, and in
digital-quality sound. A fee is
required to receive the XM service.
For more information refer to:
.www.xmradio.com or call
1-800-929-2100 (U.S.).
.www.xmradio.ca or call
1-877-438-9677 (Canada).
For more information, see Satellite
Radio on page 7‑13.
Portable Audio Devices
This vehicle may have a 3.5 mm
(1/8 in) auxiliary input and a USB
port located in the center console.
External devices such as iPods
®,
laptop computers, MP3 players, CD
changers, and USB storage devices
may be connected, depending on
the audio system.
For more information, see Auxiliary
Devices on page 7‑20.
Bluetooth®
The Bluetooth®system allows users
with a Bluetooth-enabled cell phone
to make and receive hands-free
calls using the vehicle audio
system, microphone, and controls.
The Bluetooth-enabled cell phone
must be paired with the in-vehicle
Bluetooth system before it can be
used in the vehicle. Not all phones
will support all functions.
See Bluetooth (Overview) on
page 7‑23 orBluetooth
(Infotainment Controls) on
page 7‑24 orBluetooth (Voice
Recognition) on page 7‑28.
Page 25 of 394
Black plate (19,1)Chevrolet Cruze Owner Manual - 2011
In Brief 1-19
SeeCruise Control on page 9‑36.
Navigation System
If the vehicle has a navigation
system, there is a separate
navigation system manual that
includes information on the radio,
audio players, and navigation
system.
The navigation system provides
detailed maps of most major
freeways and roads. After a
destination has been set, the
system provides turn-by-turn
instructions for reaching the
destination. In addition, the system
can help locate a variety of points of
interest (POI), such as banks,
airports, restaurants, and more.
See the Navigation System manual
for more information.
Driver Information
Center (DIC)
The DIC display is located in the
center of the instrument panel
cluster. It shows the status of many
vehicle systems. The controls for
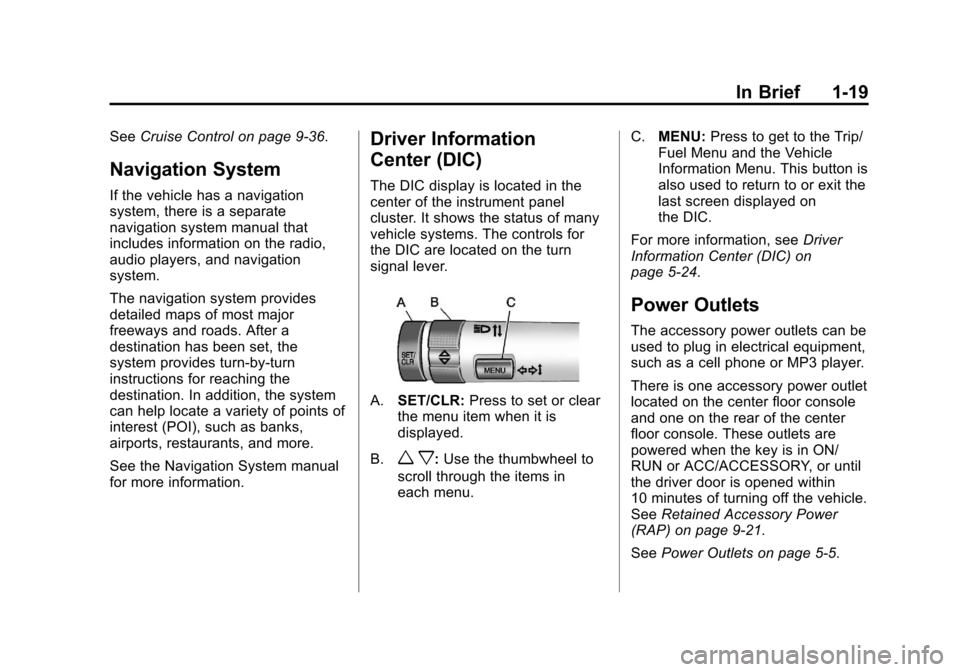
the DIC are located on the turn
signal lever.
A.SET/CLR: Press to set or clear
the menu item when it is
displayed.
B.
w x: Use the thumbwheel to
scroll through the items in
each menu. C.
MENU: Press to get to the Trip/
Fuel Menu and the Vehicle
Information Menu. This button is
also used to return to or exit the
last screen displayed on
the DIC.
For more information, see Driver
Information Center (DIC) on
page 5‑24.
Power Outlets
The accessory power outlets can be
used to plug in electrical equipment,
such as a cell phone or MP3 player.
There is one accessory power outlet
located on the center floor console
and one on the rear of the center
floor console. These outlets are
powered when the key is in ON/
RUN or ACC/ACCESSORY, or until
the driver door is opened within
10 minutes of turning off the vehicle.
See Retained Accessory Power
(RAP) on page 9‑21.
See Power Outlets on page 5‑5.
Page 55 of 394
Black plate (7,1)Chevrolet Cruze Owner Manual - 2011
Seats and Restraints 3-7
Heated Front Seats
{WARNING
If you cannot feel temperature
change or pain to the skin, the
seat heater may cause burns
even at low temperatures. To
reduce the risk of burns, people
with such a condition should use
care when using the seat heater,
especially for long periods of
time. Do not place anything on
the seat that insulates against
heat, such as a blanket, cushion,
cover or similar item. This may
cause the seat heater to
overheat. An overheated seat
heater may cause a burn or may
damage the seat.
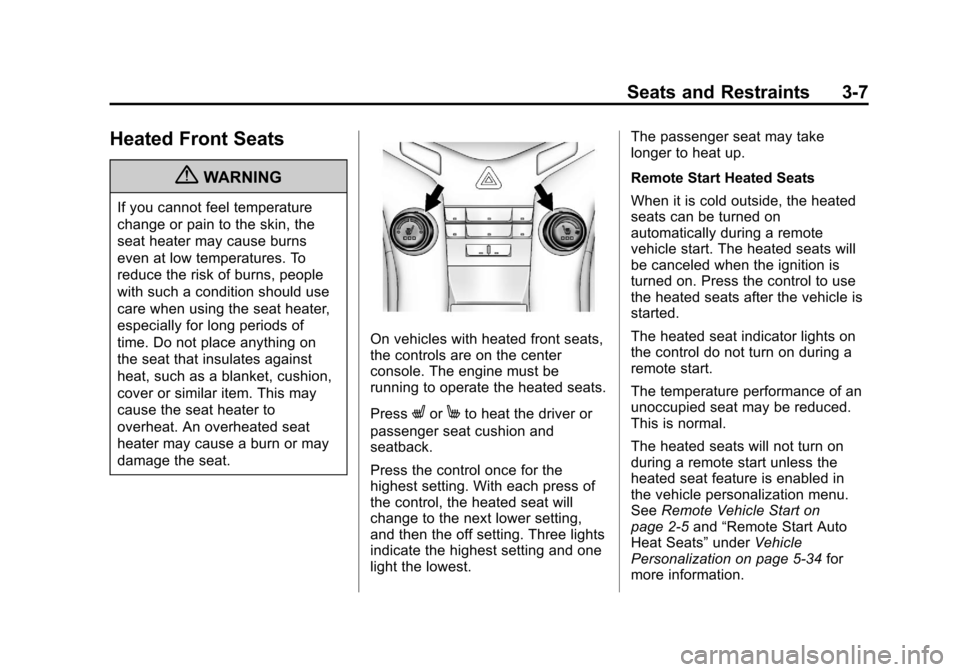
On vehicles with heated front seats,
the controls are on the center
console. The engine must be
running to operate the heated seats.
Press
LorMto heat the driver or
passenger seat cushion and
seatback.
Press the control once for the
highest setting. With each press of
the control, the heated seat will
change to the next lower setting,
and then the off setting. Three lights
indicate the highest setting and one
light the lowest. The passenger seat may take
longer to heat up.
Remote Start Heated Seats
When it is cold outside, the heated
seats can be turned on
automatically during a remote
vehicle start. The heated seats will
be canceled when the ignition is
turned on. Press the control to use
the heated seats after the vehicle is
started.
The heated seat indicator lights on
the control do not turn on during a
remote start.
The temperature performance of an
unoccupied seat may be reduced.
This is normal.
The heated seats will not turn on
during a remote start unless the
heated seat feature is enabled in
the vehicle personalization menu.
See
Remote Vehicle Start on
page 2‑5 and“Remote Start Auto
Heat Seats” underVehicle
Personalization on page 5‑34 for
more information.
Page 111 of 394
Black plate (1,1)Chevrolet Cruze Owner Manual - 2011
Storage 4-1
Storage
Storage Compartments
Instrument Panel Storage . . . . 4-1
Glove Box . . . . . . . . . . . . . . . . . . . . 4-1
Cupholders . . . . . . . . . . . . . . . . . . . 4-1
Center Console Storage . . . . . . 4-2
Additional Storage Features
Cargo Tie Downs . . . . . . . . . . . . . 4-2
Storage
Compartments
Instrument Panel Storage
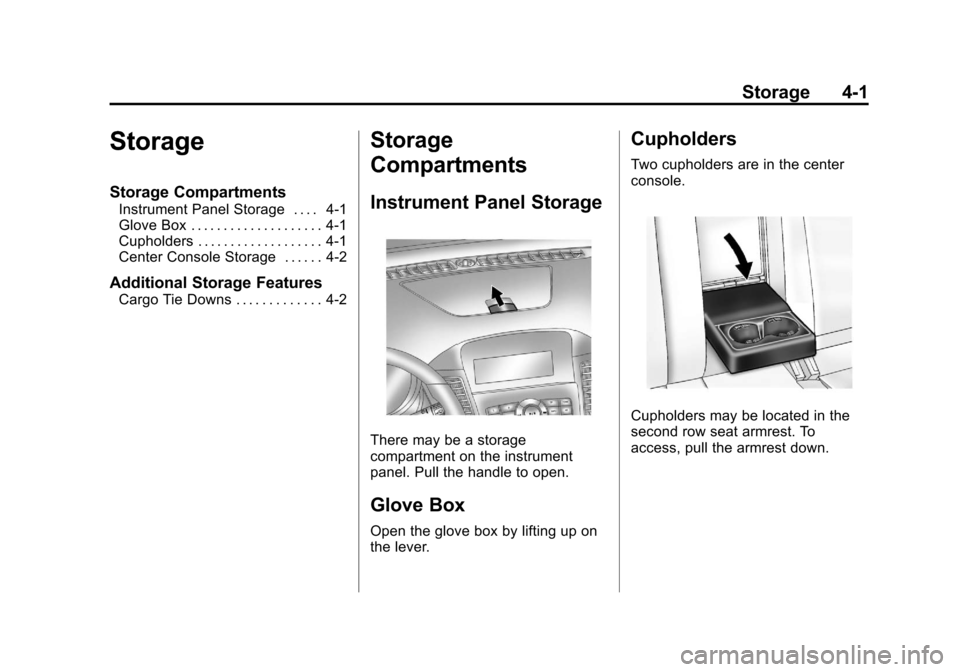
There may be a storage
compartment on the instrument
panel. Pull the handle to open.
Glove Box
Open the glove box by lifting up on
the lever.
Cupholders
Two cupholders are in the center
console.
Cupholders may be located in the
second row seat armrest. To
access, pull the armrest down.
Page 112 of 394
Black plate (2,1)Chevrolet Cruze Owner Manual - 2011
4-2 Storage
Center Console Storage
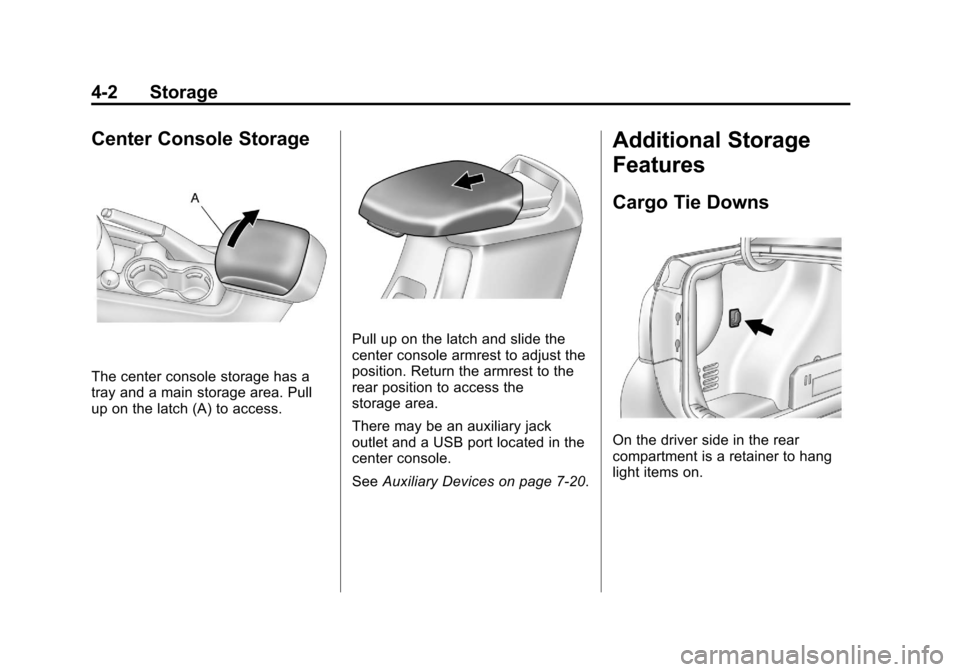
The center console storage has a
tray and a main storage area. Pull
up on the latch (A) to access.
Pull up on the latch and slide the
center console armrest to adjust the
position. Return the armrest to the
rear position to access the
storage area.
There may be an auxiliary jack
outlet and a USB port located in the
center console.
SeeAuxiliary Devices on page 7‑20.
Additional Storage
Features
Cargo Tie Downs
On the driver side in the rear
compartment is a retainer to hang
light items on.
Page 117 of 394
Black plate (5,1)Chevrolet Cruze Owner Manual - 2011
Instruments and Controls 5-5
for more information on the
messages that may be displayed for
the compass.
Clock
The infotainment system controls
are used to access the time and
date settings through the menu
system. SeeOperation on page 7‑6
for information about how to use the
menu system. For vehicles with a
Navigation System, see the
separate Navigation System
Manual.
Setting the Time
1. Press the CONFIG button and select Time Settings.
2. Select Set Time.
3. Turn the MENU or MENU/SEL knob to adjust the highlighted
number. 4. Press the MENU or MENU/SEL
knob to select the next number.
5. To save the time and return to the Time Settings menu, press
the BACK button at any time or
press the MENU or MENU/SEL
knob after adjusting the minutes.
Setting the 12/24 Hour Format
1. Press the CONFIG button andselect Time Settings.
2. Highlight 12/24 Hour Format.
3. Press the MENU or MENU/SEL knob to select the 12 hour or
24 hour display format.
Power Outlets
The accessory power outlets can be
used to plug in electrical equipment,
such as a cell phone or MP3 player.
There is one accessory power outlet
located on the center floor console
and one on the rear of the center
floor console. These outlets are
powered when the key is in ON/
RUN or ACC/ACCESSORY, or until
the driver door is opened within
10 minutes of turning off the vehicle.
See Retained Accessory Power
(RAP) on page 9‑21.
Remove the cover to access and
replace when not in use.
Notice: Leaving electrical
equipment plugged in for an
extended period of time while the
vehicle is off will drain the
battery. Always unplug electrical
equipment when not in use and
do not plug in equipment that
exceeds the maximum 20 ampere
rating.
Page 178 of 394
Black plate (20,1)Chevrolet Cruze Owner Manual - 2011
7-20 Infotainment System
Tracks can be searched by:
.Playlists
.Artists
.Albums
.Song Titles
.Genres
.Folder View
To search for tracks:
1. Turn the MENU or MENU/ SEL knob.
2. Select Search.
3. Select: Playlists, Artists, Albums, Song Titles, Genres,
or Folder View.
4. Select the track.
Auxiliary Devices
The optional AUX input allows
portable devices to connect to the
vehicle using the 3.5 mm (1/8 in)
auxiliary jack or USB port.
Portable devices are controlled by
using the menu system described in
Operation on page 7‑6.
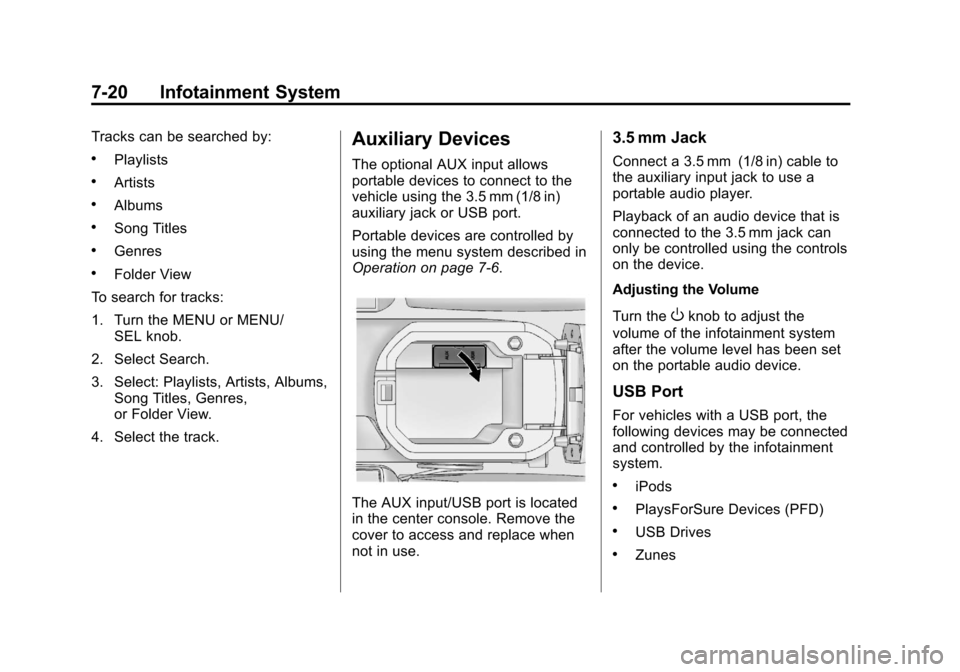
The AUX input/USB port is located
in the center console. Remove the
cover to access and replace when
not in use.
3.5 mm Jack
Connect a 3.5 mm (1/8 in) cable to
the auxiliary input jack to use a
portable audio player.
Playback of an audio device that is
connected to the 3.5 mm jack can
only be controlled using the controls
on the device.
Adjusting the Volume
Turn the
Oknob to adjust the
volume of the infotainment system
after the volume level has been set
on the portable audio device.
USB Port
For vehicles with a USB port, the
following devices may be connected
and controlled by the infotainment
system.
.iPods
.PlaysForSure Devices (PFD)
.USB Drives
.Zunes
Page 235 of 394
Black plate (35,1)Chevrolet Cruze Owner Manual - 2011
Driving and Operating 9-35
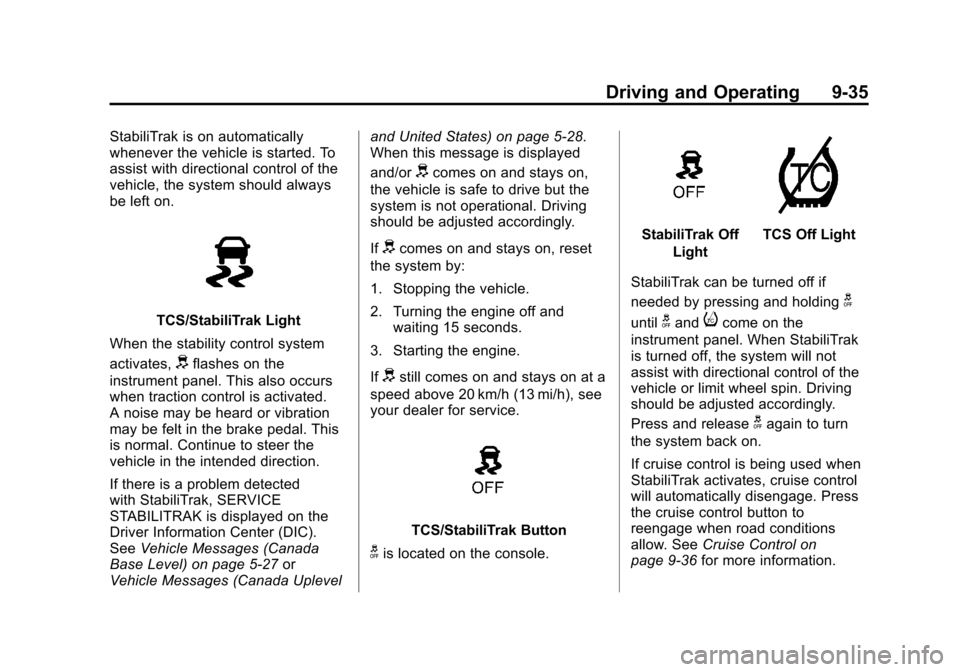
StabiliTrak is on automatically
whenever the vehicle is started. To
assist with directional control of the
vehicle, the system should always
be left on.
TCS/StabiliTrak Light
When the stability control system
activates,
dflashes on the
instrument panel. This also occurs
when traction control is activated.
A noise may be heard or vibration
may be felt in the brake pedal. This
is normal. Continue to steer the
vehicle in the intended direction.
If there is a problem detected
with StabiliTrak, SERVICE
STABILITRAK is displayed on the
Driver Information Center (DIC).
See Vehicle Messages (Canada
Base Level) on page 5‑27 or
Vehicle Messages (Canada Uplevel and United States) on page 5‑28.
When this message is displayed
and/or
dcomes on and stays on,
the vehicle is safe to drive but the
system is not operational. Driving
should be adjusted accordingly.
If
dcomes on and stays on, reset
the system by:
1. Stopping the vehicle.
2. Turning the engine off and waiting 15 seconds.
3. Starting the engine.
If
dstill comes on and stays on at a
speed above 20 km/h (13 mi/h), see
your dealer for service.
TCS/StabiliTrak Button
gis located on the console.
StabiliTrak Off
LightTCS Off Light
StabiliTrak can be turned off if
needed by pressing and holding
g
untilgandicome on the
instrument panel. When StabiliTrak
is turned off, the system will not
assist with directional control of the
vehicle or limit wheel spin. Driving
should be adjusted accordingly.
Press and release
gagain to turn
the system back on.
If cruise control is being used when
StabiliTrak activates, cruise control
will automatically disengage. Press
the cruise control button to
reengage when road conditions
allow. See Cruise Control on
page 9‑36 for more information.
Page 384 of 394

Black plate (2,1)Chevrolet Cruze Owner Manual - 2011
i-2 INDEX
Bluetooth . . . . . . . . . . 7-23, 7-24, 7-28
Brake System Warning Light . . . 5-16
Brakes . . . . . . . . . . . . . . . . . . . . . . . . 10-23Antilock . . . . . . . . . . . . . . . . . . . . . . . 9-31
Assist . . . . . . . . . . . . . . . . . . . . . . . . . 9-33
Fluid . . . . . . . . . . . . . . . . . . . . . . . . 10-24
Parking . . . . . . . . . . . . . . . . . . . . . . . 9-32
System Messages . . . . . . . . . . . . 5-29
Braking . . . . . . . . . . . . . . . . . . . . . . . . . 9-3
Break-In, New Vehicle . . . . . . . . . 9-17
Bulb Replacement . . . . . . . . . . . . 10-36 Headlamp Aiming . . . . . . . . . . . 10-30
Headlamps . . . . . . . . . . . . . . . . . 10-30
Headlamps, Front TurnSignal, Sidemarker, and
Parking Lamps . . . . . . . . . . . . 10-30
License Plate Lamps . . . . . . . 10-35
Taillamps, Turn Signal, Sidemarker, Stoplamps,
and Backup Lamps . . . . . . . . 10-32
Buying New Tires . . . . . . . . . . . . . 10-59C
Calibration . . . . . . . . . . . . . . . . . . . . . . 5-4
California
Fuel Requirements . . . . . . . . . . . 9-41
Perchlorate MaterialsRequirements . . . . . . . . . . . . . . . 10-3
Warning . . . . . . . . . . . . . . . . . . . . . . 10-3
Canadian Vehicle Owners . . . . . . . . iii
Capacities and Specifications . . . . . . . . . . . . . . . . 12-2
Carbon Monoxide
Engine Exhaust . . . . . . . . . . . . . . . 9-24
Trunk . . . . . . . . . . . . . . . . . . . . . . . . . . 2-8
Winter Driving . . . . . . . . . . . . . . . . . 9-9
Cargo Tie Downs . . . . . . . . . . . . . . . . . . . . . 4-2
Cautions, Danger, and Warnings . . . . . . . . . . . . . . . . . . . . . . . . iv
CD Player . . . . . . . . . . . . . . . . . . . . . 7-18
Center Console Storage . . . . . . . . 4-2
Chains, Tire . . . . . . . . . . . . . . . . . . 10-65
Charging System Light . . . . . . . . . . . . . . . . . 5-13 Check
Engine Light . . . . . . . . . . . . . . . . . . 5-13
Ignition
Transmission Lock . . . . . . . . 10-28
Child Restraints Infants and YoungChildren . . . . . . . . . . . . . . . . . . . . . 3-43
Lower Anchors and Tethers for Children . . . . . . . . . 3-49
Older Children . . . . . . . . . . . . . . . . 3-40
Securing . . . . . . . . . . . . . . . . 3-56, 3-58
Systems . . . . . . . . . . . . . . . . . . . . . . 3-45
Cigarette Lighter . . . . . . . . . . . . . . . . 5-6
Circuit Breakers . . . . . . . . . . . . . . 10-37
Cleaning Exterior Care . . . . . . . . . . . . . . . 10-90
Interior Care . . . . . . . . . . . . . . . . 10-94
Climate Control Systems . . . . . . . 8-1 Air Conditioning . . . . . . . . . . . . . . . 8-1
Automatic . . . . . . . . . . . . . . . . . . . . . . 8-3
Heating . . . . . . . . . . . . . . . . . . . . . . . . 8-1
Clock . . . . . . . . . . . . . . . . . . . . . . . . . . . 5-5
Cluster, Instrument . . . . . . . . . . . . . 5-8