steering wheel CHEVROLET CRUZE 2014 1.G Owner's Guide
[x] Cancel search | Manufacturer: CHEVROLET, Model Year: 2014, Model line: CRUZE, Model: CHEVROLET CRUZE 2014 1.GPages: 420, PDF Size: 5.92 MB
Page 326 of 420
Black plate (64,1)Chevrolet Cruze Owner Manual (GMNA-Localizing-U.S./Canada-6007168) -
2014 - 2nd Edition - 7/15/13
10-64 Vehicle Care
Tire Chains
{Warning
Do not use tire chains. There is
not enough clearance. Tire chains
used on a vehicle without the
proper amount of clearance can
cause damage to the brakes,
suspension, or other vehicle
parts. The area damaged by the
tire chains could cause loss of
control and a crash.
Use another type of traction
device only if its manufacturer
recommends it for the vehicle's
tire size combination and road
conditions. Follow that
manufacturer's instructions. To
avoid vehicle damage, drive slow
and readjust or remove the
traction device if it contacts the
vehicle. Do not spin the wheels.
If traction devices are used, install
them on the front tires.
If a Tire Goes Flat
It is unusual for a tire to blowout
while driving, especially if the tires
are maintained properly. SeeTires
on page 10-43. If air goes out of a
tire, it is much more likely to leak
out slowly. But if there ever is a
blowout, here are a few tips about
what to expect and what to do:
If a front tire fails, the flat tire
creates a drag that pulls the vehicle
toward that side. Take your foot off
the accelerator pedal and grip the
steering wheel firmly. Steer to
maintain lane position, and then
gently brake to a stop, well off the
road, if possible.
A rear blowout, particularly on a
curve, acts much like a skid and
may require the same correction as
used in a skid. Stop pressing the
accelerator pedal and steer to
straighten the vehicle. It may be
very bumpy and noisy. Gently brake
to a stop, well off the road,
if possible.{Warning
Driving on a flat tire will cause
permanent damage to the tire.
Re-inflating a tire after it has been
driven on while severely
underinflated or flat may cause a
blowout and a serious crash.
Never attempt to re-inflate a tire
that has been driven on while
severely underinflated or flat.
Have your dealer or an authorized
tire service center repair or
replace the flat tire as soon as
possible.
{Warning
Lifting a vehicle and getting under
it to do maintenance or repairs is
dangerous without the
appropriate safety equipment and
training. If a jack is provided with
the vehicle, it is designed only for
(Continued)
Page 349 of 420
Black plate (87,1)Chevrolet Cruze Owner Manual (GMNA-Localizing-U.S./Canada-6007168) -
2014 - 2nd Edition - 7/15/13
Vehicle Care 10-87
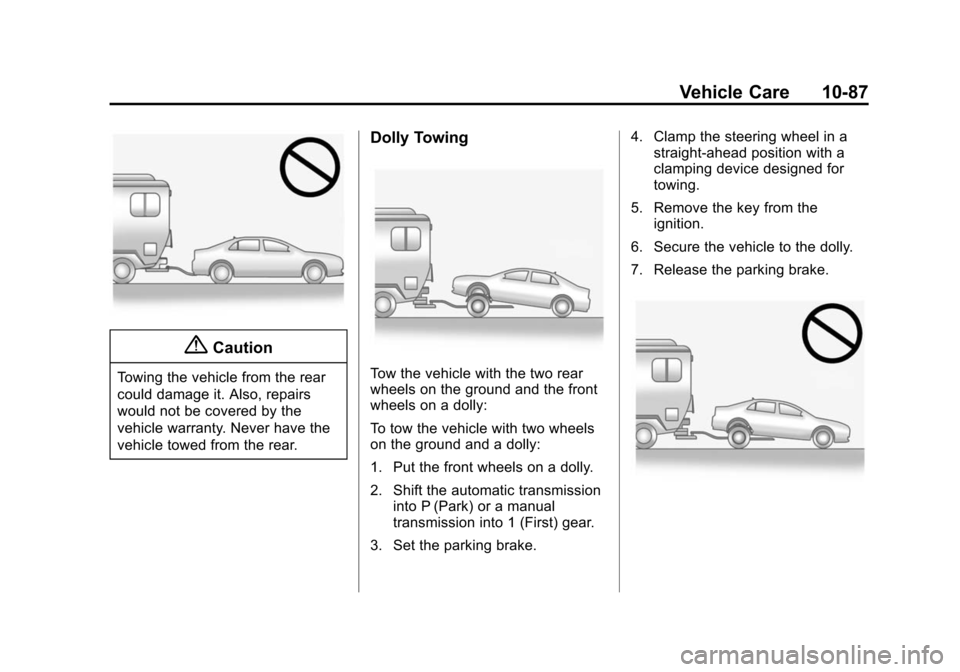
{Caution
Towing the vehicle from the rear
could damage it. Also, repairs
would not be covered by the
vehicle warranty. Never have the
vehicle towed from the rear.
Dolly Towing
Tow the vehicle with the two rear
wheels on the ground and the front
wheels on a dolly:
To tow the vehicle with two wheels
on the ground and a dolly:
1. Put the front wheels on a dolly.
2. Shift the automatic transmissioninto P (Park) or a manual
transmission into 1 (First) gear.
3. Set the parking brake. 4. Clamp the steering wheel in a
straight-ahead position with a
clamping device designed for
towing.
5. Remove the key from the ignition.
6. Secure the vehicle to the dolly.
7. Release the parking brake.
Page 354 of 420
Black plate (92,1)Chevrolet Cruze Owner Manual (GMNA-Localizing-U.S./Canada-6007168) -
2014 - 2nd Edition - 7/15/13
10-92 Vehicle Care
Tires
Use a stiff brush with tire cleaner to
clean the tires.
{Caution
Using petroleum-based tire
dressing products on the vehicle
may damage the paint finish and/
or tires. When applying a tire
dressing, always wipe off any
overspray from all painted
surfaces on the vehicle.
Wheels and Trim—Aluminum
or Chrome
Use a soft, clean cloth with mild
soap and water to clean the wheels.
After rinsing thoroughly with clean
water, dry with a soft, clean towel.
A wax may then be applied.
{Caution
Chrome wheels and other chrome
trim may be damaged if the
vehicle is not washed after driving
on roads that have been sprayed
with magnesium, calcium,
or sodium chloride. These
chlorides are used on roads for
conditions such as ice and dust.
Always wash the chrome with
soap and water after exposure.
{Caution
To avoid surface damage, do not
use strong soaps, chemicals,
abrasive polishes, cleaners,
brushes, or cleaners that contain
acid on aluminum or
chrome-plated wheels. Use only
approved cleaners. Also, never
drive a vehicle with aluminum or
chrome-plated wheels through an
(Continued)
Caution (Continued)
automatic car wash that uses
silicone carbide tire cleaning
brushes. Damage could occur
and the repairs would not be
covered by the vehicle warranty.
Steering, Suspension, and
Chassis Components
Visually inspect the front and rear
suspension and steering system for
damaged, loose, or missing parts or
signs of wear. If equipped, inspect
the hydraulic power steering for
proper hook-up, binding, leaks,
cracks, chafing, etc. Visually check
constant velocity joints, rubber
boots, and axle seals for leaks.
Body Component Lubrication
Lubricate all key lock cylinders,
hood hinges, liftgate hinges, and
steel fuel door hinge unless the
components are plastic. Applying
silicone grease on weatherstrips
Page 370 of 420
Black plate (10,1)Chevrolet Cruze Owner Manual (GMNA-Localizing-U.S./Canada-6007168) -
2014 - 2nd Edition - 7/15/13
11-10 Service and Maintenance
Hoses
Hoses transport fluids and should
be regularly inspected to ensure
that there are no cracks or leaks.
With a multi-point inspection, your
dealer can inspect the hoses and
advise if replacement is needed.
Lamps
Properly working headlamps,
taillamps, and brake lamps are
important to see and be seen on
the road.
.Signs that the headlamps need
attention include dimming, failure
to light, cracking, or damage.
The brake lamps need to be
checked periodically to ensure
that they light when braking.
.With a multi-point inspection,
your dealer can check the lamps
and note any concerns.Shocks and Struts
Shocks and struts help aid in control
for a smoother ride.
.Signs of wear may include
steering wheel vibration, bounce/
sway while braking, longer
stopping distance, or uneven
tire wear.
.As part of the multi-point
inspection, trained dealer
technicians can visually inspect
the shocks and struts for signs
of leaking, blown seals,
or damage, and can advise
when service is needed.
Tires
Tires need to be properly inflated,
rotated, and balanced. Maintaining
the tires can save money and fuel,
and can reduce the risk of tire
failure.
.Signs that the tires need to be
replaced include three or more
visible treadwear indicators; cord
or fabric showing through the rubber; cracks or cuts in the
tread or sidewall; or a bulge or
split in the tire.
.Trained dealer technicians can
inspect and recommend the right
tires. Your dealer can also
provide tire/wheel balancing
services to ensure smooth
vehicle operation at all speeds.
Your dealer sells and services
name brand tires.
Vehicle Care
To help keep the vehicle looking like
new, vehicle care products are
available from your dealer. For
information on how to clean and
protect the vehicle’s interior and
exterior, see Interior Care on
page 10-93 andExterior Care on
page 10-88.
Page 418 of 420
Black plate (10,1)Chevrolet Cruze Owner Manual (GMNA-Localizing-U.S./Canada-6007168) -
2014 - 2nd Edition - 7/15/13
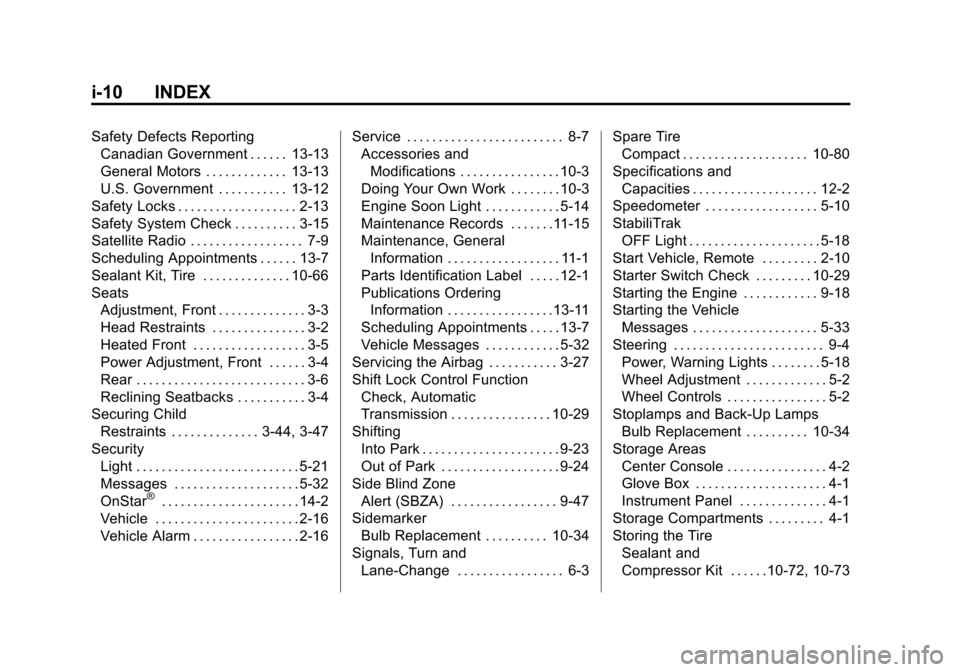
i-10 INDEX
Safety Defects ReportingCanadian Government . . . . . . 13-13
General Motors . . . . . . . . . . . . . 13-13
U.S. Government . . . . . . . . . . . 13-12
Safety Locks . . . . . . . . . . . . . . . . . . . 2-13
Safety System Check . . . . . . . . . . 3-15
Satellite Radio . . . . . . . . . . . . . . . . . . 7-9
Scheduling Appointments . . . . . . 13-7
Sealant Kit, Tire . . . . . . . . . . . . . . 10-66
Seats Adjustment, Front . . . . . . . . . . . . . . 3-3
Head Restraints . . . . . . . . . . . . . . . 3-2
Heated Front . . . . . . . . . . . . . . . . . . 3-5
Power Adjustment, Front . . . . . . 3-4
Rear . . . . . . . . . . . . . . . . . . . . . . . . . . . 3-6
Reclining Seatbacks . . . . . . . . . . . 3-4
Securing Child Restraints . . . . . . . . . . . . . . 3-44, 3-47
Security Light . . . . . . . . . . . . . . . . . . . . . . . . . . 5-21
Messages . . . . . . . . . . . . . . . . . . . . 5-32
OnStar
®. . . . . . . . . . . . . . . . . . . . . . 14-2
Vehicle . . . . . . . . . . . . . . . . . . . . . . . 2-16
Vehicle Alarm . . . . . . . . . . . . . . . . . 2-16 Service . . . . . . . . . . . . . . . . . . . . . . . . . 8-7
Accessories and
Modifications . . . . . . . . . . . . . . . . 10-3
Doing Your Own Work . . . . . . . . 10-3
Engine Soon Light . . . . . . . . . . . . 5-14
Maintenance Records . . . . . . .11-15
Maintenance, General Information . . . . . . . . . . . . . . . . . . 11-1
Parts Identification Label . . . . . 12-1
Publications Ordering Information . . . . . . . . . . . . . . . . .13-11
Scheduling Appointments . . . . . 13-7
Vehicle Messages . . . . . . . . . . . . 5-32
Servicing the Airbag . . . . . . . . . . . 3-27
Shift Lock Control Function Check, Automatic
Transmission . . . . . . . . . . . . . . . . 10-29
Shifting Into Park . . . . . . . . . . . . . . . . . . . . . . 9-23
Out of Park . . . . . . . . . . . . . . . . . . . 9-24
Side Blind Zone
Alert (SBZA) . . . . . . . . . . . . . . . . . 9-47
Sidemarker Bulb Replacement . . . . . . . . . . 10-34
Signals, Turn and
Lane-Change . . . . . . . . . . . . . . . . . 6-3 Spare Tire
Compact . . . . . . . . . . . . . . . . . . . . 10-80
Specifications and Capacities . . . . . . . . . . . . . . . . . . . . 12-2
Speedometer . . . . . . . . . . . . . . . . . . 5-10
StabiliTrak OFF Light . . . . . . . . . . . . . . . . . . . . . 5-18
Start Vehicle, Remote . . . . . . . . . 2-10
Starter Switch Check . . . . . . . . . 10-29
Starting the Engine . . . . . . . . . . . . 9-18
Starting the Vehicle Messages . . . . . . . . . . . . . . . . . . . . 5-33
Steering . . . . . . . . . . . . . . . . . . . . . . . . 9-4 Power, Warning Lights . . . . . . . . 5-18
Wheel Adjustment . . . . . . . . . . . . . 5-2
Wheel Controls . . . . . . . . . . . . . . . . 5-2
Stoplamps and Back-Up Lamps Bulb Replacement . . . . . . . . . . 10-34
Storage Areas Center Console . . . . . . . . . . . . . . . . 4-2
Glove Box . . . . . . . . . . . . . . . . . . . . . 4-1
Instrument Panel . . . . . . . . . . . . . . 4-1
Storage Compartments . . . . . . . . . 4-1
Storing the Tire Sealant and
Compressor Kit . . . . . .10-72, 10-73