clutch CHEVROLET CRUZE 2016 1.G Owners Manual
[x] Cancel search | Manufacturer: CHEVROLET, Model Year: 2016, Model line: CRUZE, Model: CHEVROLET CRUZE 2016 1.GPages: 377, PDF Size: 6.35 MB
Page 140 of 377
Chevrolet Cruze Owner Manual (GMNA-Localizing-U.S./Canada/Mexico-
9234744) - 2016 - CRC - 3/9/16
Instruments and Controls 139
NO REMOTE KEY WAS
DETECTED PLACE KEY IN
TRANSMITTER POCKET THEN
START YOUR VEHICLE
This message displays when trying
to start the vehicle if an RKE
transmitter is not detected. The
transmitter battery may be weak.
See“Starting the Vehicle with a Low
Transmitter Battery” underRemote
Keyless Entry (RKE) System
Operation (Keyless Access) 033 or
Remote Keyless Entry (RKE)
System Operation (Key
Access) 031.
NO REMOTE DETECTED
PRESS BRAKE TO RESTART
or NO REMOTE DETECTED
PRESS CLUTCH TO RESTART
This message displays if the RKE
transmitter is no longer detected in
the vehicle. Press the brake pedal
or clutch and the engine start/stop
button to restart the vehicle.
REMOTE LEFT IN VEHICLE
This message displays when
leaving the vehicle with the RKE
transmitter still inside.
REPLACE BATTERY IN
REMOTE KEY
This message displays when the
battery in the RKE transmitter needs
to be replaced.
Lamp Messages
AUTOMATIC LIGHT
CONTROL ON
This message is displayed when the
automatic light control has been
turned on. See Automatic Headlamp
System 0153.
AUTOMATIC LIGHT
CONTROL OFF
This message is displayed when the
automatic light control has been
turned off. See Automatic Headlamp
System 0153.
XXX TURN INDICATOR
FAILURE
When one of the turn signals is out,
this message displays to show
which bulb needs to be replaced.
See Bulb Replacement 0263 and
Replacement Bulbs 0267 for more
information on turn signal bulb
replacement.
TURN SIGNAL ON
This message is displayed if the
turn signal has been left on. Turn off
the turn signal.
Object Detection System
Messages
FORWARD COLLISION
ALERT OFF
This message displays when the
Forward Collision Alert has been
turned off.
FRONT CAMERA BLOCKED
CLEAN WINDSHIELD
This message displays when the
camera is blocked. Cleaning the
outside of the windshield behind the
Page 143 of 377
Chevrolet Cruze Owner Manual (GMNA-Localizing-U.S./Canada/Mexico-
9234744) - 2016 - CRC - 3/9/16
142 Instruments and Controls
Service Vehicle Messages
SERVICE KEYLESS START
SYSTEM
This message is displayed if there is
a problem with the pushbutton start
system. Take the vehicle to your
dealer for service.
SERVICE POWER STEERING
This message displays and a chime
may sound when there may be a
problem with the power steering
system. If this message displays
and a reduction in steering
performance or loss of power
steering assistance is noticed, see
your dealer.
SERVICE STEERING
COLUMN LOCK
This message displays if there is a
problem with the steering column
lock. Take the vehicle to your dealer
for service.
SERVICE VEHICLE SOON
This message displays if there is a
problem with the vehicle. Take the
vehicle to your dealer for service.
Starting the Vehicle
Messages
PRESS BRAKE TO START or
PRESS CLUTCH TO START
This message displays when
attempting to start the vehicle
without first pressing the brake or
clutch pedal.
TURN STEERING WHEEL
START VEHICLE AGAIN
This message displays when you try
to start the vehicle, but the column
remains locked. Try turning the
steering wheel while starting the
vehicle to unlock the steering
column. If the vehicle still does not
start, turn the steering wheel the
other way, and try starting the
vehicle again.
Tire Messages
SERVICE TIRE MONITOR
SYSTEM
This message displays if there is a
problem with the Tire Pressure
Monitor System (TPMS). SeeTire
Pressure Monitor Operation 0285.
TIRE LEARNING ACTIVE
This message displays when the
system is learning new tires. See
Tire Pressure Monitor
Operation 0285.
TIRE PRESSURE LOW ADD
AIR TO TIRE
On vehicles with the Tire Pressure
Monitor System (TPMS), this
message displays when the
pressure in one or more of the
vehicle's tires is low.
The low tire pressure warning light
will also come on. See Tire
Pressure Light 0127.
Page 209 of 377
Chevrolet Cruze Owner Manual (GMNA-Localizing-U.S./Canada/Mexico-
9234744) - 2016 - CRC - 3/9/16
208 Driving and Operating
Caution
Do not try to shift to P (Park) if the
vehicle is moving. If you do, you
could damage the transmission.
Shift to P (Park) only when the
vehicle is stopped.
Manual Transmission
The shift lever should be in Neutral
and the parking brake engaged.
Hold the clutch pedal down to the
floor and start the engine.
Engine Starting Procedure (Key
Access) 1. With your foot off the accelerator pedal, turn the
ignition key to START. When
the engine starts, let go of the
key. The idle speed will go
down as the engine warms. Do
not race the engine
immediately after starting it.
Allow the oil to warm up and
lubricate all moving parts.
Caution
Cranking the engine for long
periods of time, by returning the
ignition to the START position
immediately after cranking has
ended, can overheat and damage
the cranking motor, and drain the
battery. Wait at least 15 seconds
between each try, to let the
cranking motor cool down.
2. If the engine does not start after five to 10 seconds,
especially in very cold weather
(below −18 °C or 0 °F), it could
be flooded with too much
gasoline. Push the accelerator
pedal all the way to the floor
and hold it there as you hold
the key in START for a
maximum of 15 seconds. Wait
at least 15 seconds between
each try, to allow the cranking
motor to cool. When the engine starts, let go of the key and
accelerator. If the vehicle starts
briefly but then stops again,
repeat the procedure. This
clears the extra gasoline from
the engine. Do not race the
engine immediately after
starting it. Operate the engine
and transmission gently until
the oil warms up and lubricates
all moving parts.
Engine Starting Procedure
(Keyless Access) 1. With the Keyless Access system, the RKE transmitter
must be in the vehicle. Press
ENGINE START/STOP with the
brake pedal applied. When the
engine begins cranking, let go
of the button.
The idle speed will go down as
the engine gets warm. Do not
race the engine immediately
after starting it.
Page 214 of 377
Chevrolet Cruze Owner Manual (GMNA-Localizing-U.S./Canada/Mexico-
9234744) - 2016 - CRC - 3/9/16
Driving and Operating 213
To shift out of P (Park):1. Apply the brake pedal.
2. Turn the ignition to ON/RUN.
3. Press the shift lever button.
4. Move the shift lever to the desired position.
If still unable to shift out of P (Park): 1. Fully release the shift lever button.
2. Hold the brake pedal down and press the shift lever button
again.
3. Move the shift lever to the desired position.
If the shift lever still cannot be
moved from P (Park), see your
dealer.
This vehicle may have the Safety
Belt Assurance System, which may
prevent the vehicle from shifting out
of P (Park). See Safety Belt
Messages 0141.Parking
If the vehicle has a manual
transmission, before getting out of
the vehicle, move the shift lever into
R (Reverse) if parking on a downhill
slope. On a level surface or an
uphill slope, use 1 (First) gear.
Firmly apply the parking brake. See
Parking Brake 0220. Turn the
wheels toward the curb for a
downhill slope, or away from the
curb for an uphill slope. Once the
shift lever has been placed into gear
with the clutch pedal pressed in,
turn the ignition to LOCK/OFF, and
release the clutch.
Parking over Things
That Burn
{Warning
Things that can burn could touch
hot exhaust parts under the
vehicle and ignite. Do not park
over papers, leaves, dry grass,
or other things that can burn.
Engine Exhaust
{Warning
Engine exhaust contains carbon
monoxide (CO), which cannot be
seen or smelled. Exposure to CO
can cause unconsciousness and
even death.
Exhaust may enter the vehicle if:
. The vehicle idles in areas
with poor ventilation
(parking garages, tunnels,
deep snow that may block
underbody airflow or tail
pipes).
. The exhaust smells or
sounds strange or different.
. The exhaust system leaks
due to corrosion or damage.
. The vehicle exhaust system
has been modified,
damaged, or improperly
repaired.
(Continued)
Page 218 of 377
Chevrolet Cruze Owner Manual (GMNA-Localizing-U.S./Canada/Mexico-
9234744) - 2016 - CRC - 3/9/16
Driving and Operating 217
Second Gear Start Feature
When accelerating the vehicle from
a stop in snowy and icy conditions,
you may want to shift into
2 (Second) gear. A higher gear
allows you to gain more traction on
slippery surfaces.
With the DSC feature, the vehicle
can be set to pull away in
2 (Second) gear.1. Move the shift lever from D (Drive) to L (Low).
2. With the vehicle stopped, press the + (plus) end of the button to
select 2 (Second) gear. The
vehicle will start from a stop
position in 2 (Second) gear.
3. Once moving, select the desired drive gear.Manual Transmission
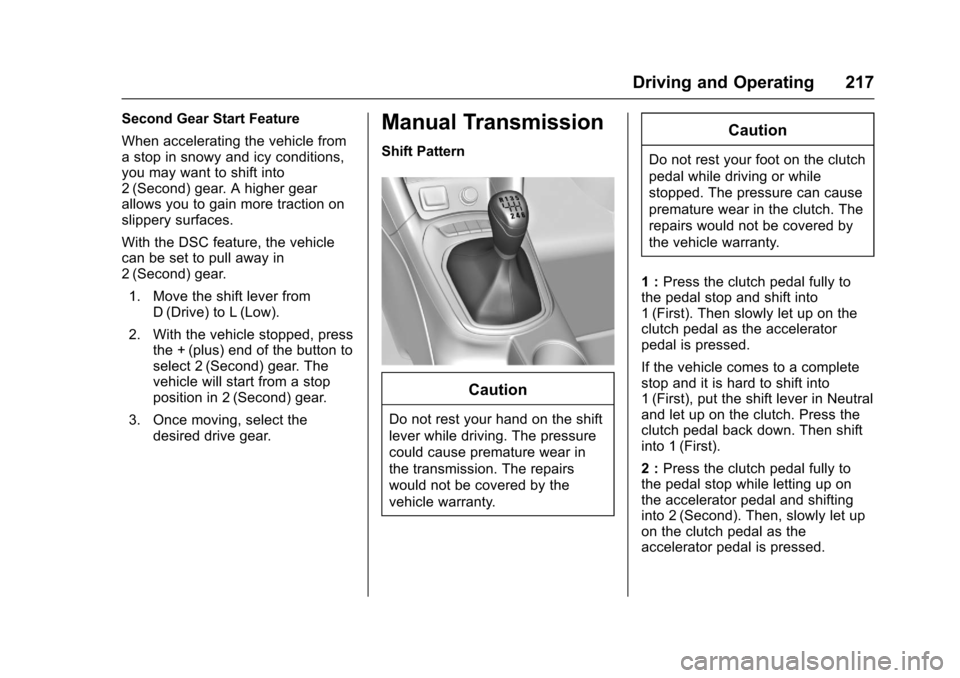
Shift Pattern
Caution
Do not rest your hand on the shift
lever while driving. The pressure
could cause premature wear in
the transmission. The repairs
would not be covered by the
vehicle warranty.
Caution
Do not rest your foot on the clutch
pedal while driving or while
stopped. The pressure can cause
premature wear in the clutch. The
repairs would not be covered by
the vehicle warranty.
1 : Press the clutch pedal fully to
the pedal stop and shift into
1 (First). Then slowly let up on the
clutch pedal as the accelerator
pedal is pressed.
If the vehicle comes to a complete
stop and it is hard to shift into
1 (First), put the shift lever in Neutral
and let up on the clutch. Press the
clutch pedal back down. Then shift
into 1 (First).
2 : Press the clutch pedal fully to
the pedal stop while letting up on
the accelerator pedal and shifting
into 2 (Second). Then, slowly let up
on the clutch pedal as the
accelerator pedal is pressed.
Page 219 of 377
Chevrolet Cruze Owner Manual (GMNA-Localizing-U.S./Canada/Mexico-
9234744) - 2016 - CRC - 3/9/16
218 Driving and Operating
3, 4, 5, and 6 :Shift into 3 (Third),
4 (Fourth), 5 (Fifth), and 6 (Sixth) the
same way as for 2 (Second). Slowly
let up on the clutch pedal as the
accelerator pedal Is pressed.
For the best fuel economy, use
6 (Sixth) gear whenever vehicle
speed and driving conditions allow.
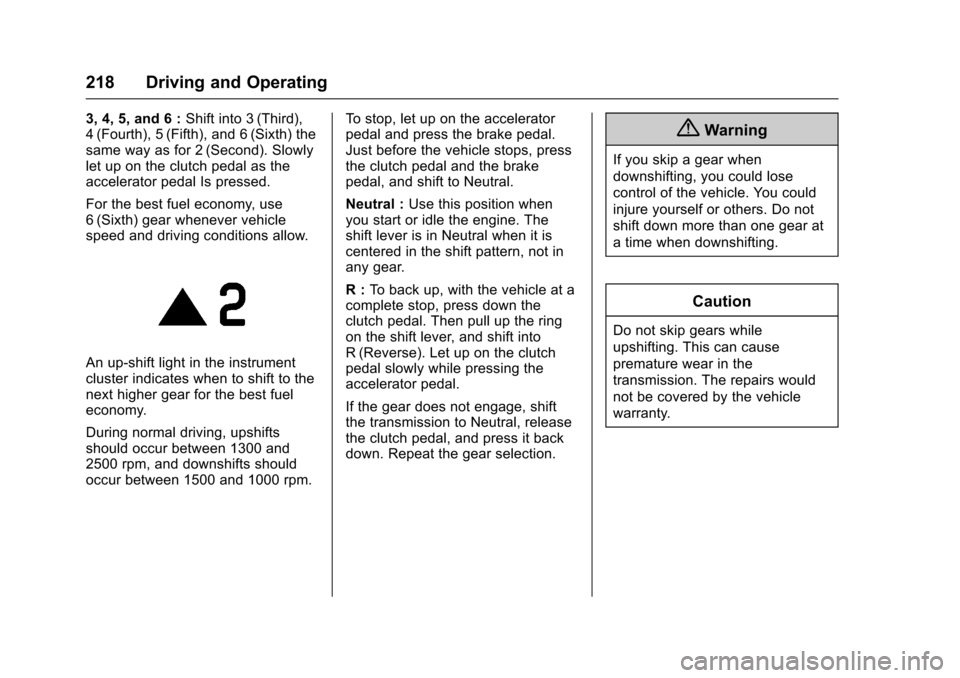
An up-shift light in the instrument
cluster indicates when to shift to the
next higher gear for the best fuel
economy.
During normal driving, upshifts
should occur between 1300 and
2500 rpm, and downshifts should
occur between 1500 and 1000 rpm. To stop, let up on the accelerator
pedal and press the brake pedal.
Just before the vehicle stops, press
the clutch pedal and the brake
pedal, and shift to Neutral.
Neutral :
Use this position when
you start or idle the engine. The
shift lever is in Neutral when it is
centered in the shift pattern, not in
any gear.
R : To back up, with the vehicle at a
complete stop, press down the
clutch pedal. Then pull up the ring
on the shift lever, and shift into
R (Reverse). Let up on the clutch
pedal slowly while pressing the
accelerator pedal.
If the gear does not engage, shift
the transmission to Neutral, release
the clutch pedal, and press it back
down. Repeat the gear selection.
{Warning
If you skip a gear when
downshifting, you could lose
control of the vehicle. You could
injure yourself or others. Do not
shift down more than one gear at
a time when downshifting.
Caution
Do not skip gears while
upshifting. This can cause
premature wear in the
transmission. The repairs would
not be covered by the vehicle
warranty.
Page 224 of 377
Chevrolet Cruze Owner Manual (GMNA-Localizing-U.S./Canada/Mexico-
9234744) - 2016 - CRC - 3/9/16
Driving and Operating 223
To turn off only TCS, press and
release
g. The traction off lighti
displays in the instrument cluster. To
turn TCS on again, press and
release
g. The traction off lighti
displayed in the instrument cluster
will turn off.
If TCS is limiting wheel spin when
g
is pressed, the system will not turn
off until the wheels stop spinning.
To turn off both TCS and StabiliTrak,
press and hold
guntil the traction
off light
iand StabiliTrak OFF light
gcome on and stay on in the
instrument cluster. To turn TCS and
StabiliTrak on again, press and
release
g. The traction off lighti
and StabiliTrak OFF lightgin the
instrument cluster turn off.
Adding accessories can affect the
vehicle performance. See
Accessories and
Modifications 0242.
Cruise Control
The cruise control lets the vehicle
maintain a speed of about 40 km/h
(25 mph) or more without keeping
your foot on the accelerator. Cruise
control does not work at speeds
below 40 km/h (25 mph).
{Warning
Cruise control can be dangerous
where you cannot drive safely at
a steady speed. Do not use
cruise control on winding roads or
in heavy traffic.
Cruise control can be dangerous
on slippery roads. On such roads,
fast changes in tire traction can
cause excessive wheel slip, and
you could lose control. Do not use
cruise control on slippery roads.
If equipped with a manual
transmission, the cruise control will
remain active when the gears are
shifted. The cruise is deactivated if
the clutch is pressed for several
seconds. With the Traction Control System
(TCS) or Electronic Stability Control
(ESC), the system may begin to
limit wheel spin while you are using
cruise control. If this happens, the
cruise control will automatically
disengage. See
Traction Control/
Electronic Stability Control 0221.
If a collision alert occurs when
cruise control is activated, cruise
control is disengaged. See Forward
Collision Alert (FCA) System 0229.
When road conditions allow you to
safely use it again, cruise control
can be turned back on.
If the brakes are applied, cruise
control disengages.
Page 226 of 377
Chevrolet Cruze Owner Manual (GMNA-Localizing-U.S./Canada/Mexico-
9234744) - 2016 - CRC - 3/9/16
Driving and Operating 225
.To slow down in small
increments, briefly press -SET.
For each press, the vehicle goes
about 1 km/h (1 mph) slower.
The speedometer reading can be
displayed in either English or metric
units. See Instrument Cluster (Base
Level) 0112 orInstrument Cluster
(Uplevel) 0114. The increment
value used depends on the units
displayed.
Passing Another Vehicle While
Using Cruise Control
Use the accelerator pedal to
increase the vehicle speed. When
you take your foot off the pedal, the
vehicle will slow down to the
previous set cruise speed. While
pressing the accelerator pedal or
shortly following the release to
override cruise control, briefly
pressing -SET will result in cruise
control set to the current vehicle
speed.
Using Cruise Control on Hills
How well the cruise control works
on hills depends upon the vehicle
speed, load, and the steepness of the hills. When going up steep hills,
you might have to step on the
accelerator pedal to maintain the
vehicle speed. When going
downhill, you might have to brake or
shift to a lower gear to keep your
speed down. If the brake pedal is
applied, cruise control will
disengage.
Ending Cruise Control
There are four ways to end cruise
control:
.
Step lightly on the brake pedal.
. Press the clutch pedal for
several seconds or shift to
Neutral (manual transmissions).
. Shift the transmission to
N (Neutral).
. Press
*.
. Press
5.
Erasing Speed Memory
The cruise control set speed is
erased from memory if
5is pressed
or if the vehicle is turned off.
Driver Assistance
Systems
This vehicle may have features that
work together to help avoid crashes
or reduce crash damage while
driving, backing, and parking. Read
this entire section before using
these systems.
{Warning
Do not rely on the Driver
Assistance Systems. These
systems do not replace the need
for paying attention and driving
safely. You may not hear or see
alerts or warnings provided by
these systems. Failure to use
proper care when driving may
result in injury, death, or vehicle
damage. See Defensive
Driving 0194.
(Continued)
Page 241 of 377
Chevrolet Cruze Owner Manual (GMNA-Localizing-U.S./Canada/Mexico-
9234744) - 2016 - CRC - 3/9/16
240 Vehicle Care
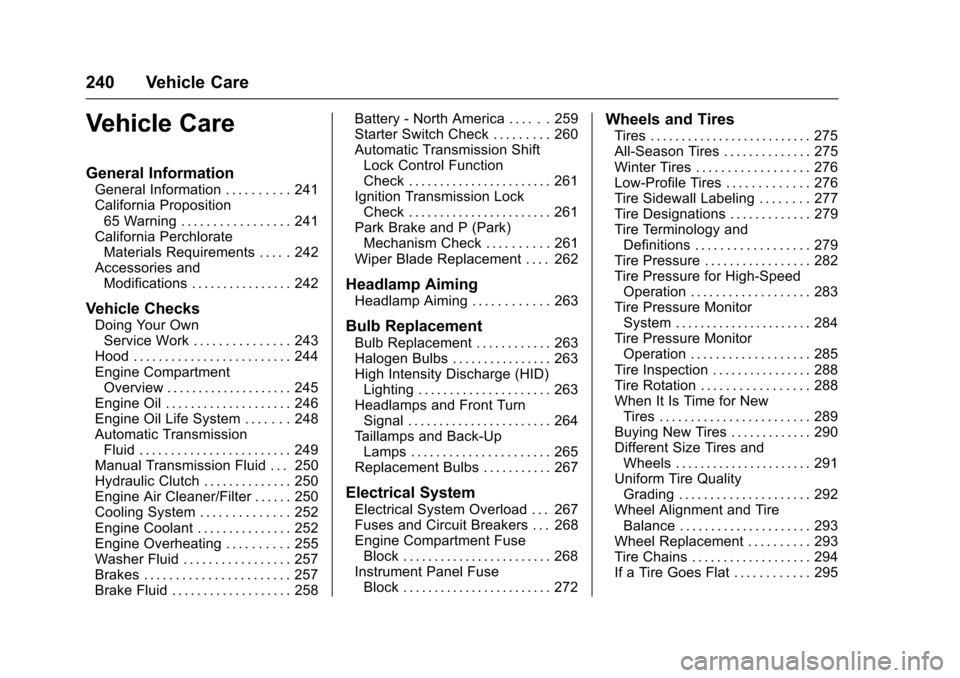
Vehicle Care
General Information
General Information . . . . . . . . . . 241
California Proposition65 Warning . . . . . . . . . . . . . . . . . 241
California Perchlorate Materials Requirements . . . . . 242
Accessories and Modifications . . . . . . . . . . . . . . . . 242
Vehicle Checks
Doing Your OwnService Work . . . . . . . . . . . . . . . 243
Hood . . . . . . . . . . . . . . . . . . . . . . . . . 244
Engine Compartment Overview . . . . . . . . . . . . . . . . . . . . 245
Engine Oil . . . . . . . . . . . . . . . . . . . . 246
Engine Oil Life System . . . . . . . 248
Automatic Transmission Fluid . . . . . . . . . . . . . . . . . . . . . . . . 249
Manual Transmission Fluid . . . 250
Hydraulic Clutch . . . . . . . . . . . . . . 250
Engine Air Cleaner/Filter . . . . . . 250
Cooling System . . . . . . . . . . . . . . 252
Engine Coolant . . . . . . . . . . . . . . . 252
Engine Overheating . . . . . . . . . . 255
Washer Fluid . . . . . . . . . . . . . . . . . 257
Brakes . . . . . . . . . . . . . . . . . . . . . . . 257
Brake Fluid . . . . . . . . . . . . . . . . . . . 258 Battery - North America . . . . . . 259
Starter Switch Check . . . . . . . . . 260
Automatic Transmission Shift
Lock Control Function
Check . . . . . . . . . . . . . . . . . . . . . . . 261
Ignition Transmission Lock Check . . . . . . . . . . . . . . . . . . . . . . . 261
Park Brake and P (Park) Mechanism Check . . . . . . . . . . 261
Wiper Blade Replacement . . . . 262
Headlamp Aiming
Headlamp Aiming . . . . . . . . . . . . 263
Bulb Replacement
Bulb Replacement . . . . . . . . . . . . 263
Halogen Bulbs . . . . . . . . . . . . . . . . 263
High Intensity Discharge (HID) Lighting . . . . . . . . . . . . . . . . . . . . . 263
Headlamps and Front Turn Signal . . . . . . . . . . . . . . . . . . . . . . . 264
Taillamps and Back-Up Lamps . . . . . . . . . . . . . . . . . . . . . . 265
Replacement Bulbs . . . . . . . . . . . 267
Electrical System
Electrical System Overload . . . 267
Fuses and Circuit Breakers . . . 268
Engine Compartment Fuse Block . . . . . . . . . . . . . . . . . . . . . . . . 268
Instrument Panel Fuse Block . . . . . . . . . . . . . . . . . . . . . . . . 272
Wheels and Tires
Tires . . . . . . . . . . . . . . . . . . . . . . . . . . 275
All-Season Tires . . . . . . . . . . . . . . 275
Winter Tires . . . . . . . . . . . . . . . . . . 276
Low-Profile Tires . . . . . . . . . . . . . 276
Tire Sidewall Labeling . . . . . . . . 277
Tire Designations . . . . . . . . . . . . . 279
Tire Terminology andDefinitions . . . . . . . . . . . . . . . . . . 279
Tire Pressure . . . . . . . . . . . . . . . . . 282
Tire Pressure for High-Speed Operation . . . . . . . . . . . . . . . . . . . 283
Tire Pressure Monitor System . . . . . . . . . . . . . . . . . . . . . . 284
Tire Pressure Monitor Operation . . . . . . . . . . . . . . . . . . . 285
Tire Inspection . . . . . . . . . . . . . . . . 288
Tire Rotation . . . . . . . . . . . . . . . . . 288
When It Is Time for New Tires . . . . . . . . . . . . . . . . . . . . . . . . 289
Buying New Tires . . . . . . . . . . . . . 290
Different Size Tires and Wheels . . . . . . . . . . . . . . . . . . . . . . 291
Uniform Tire Quality Grading . . . . . . . . . . . . . . . . . . . . . 292
Wheel Alignment and Tire Balance . . . . . . . . . . . . . . . . . . . . . 293
Wheel Replacement . . . . . . . . . . 293
Tire Chains . . . . . . . . . . . . . . . . . . . 294
If a Tire Goes Flat . . . . . . . . . . . . 295
Page 247 of 377
Chevrolet Cruze Owner Manual (GMNA-Localizing-U.S./Canada/Mexico-
9234744) - 2016 - CRC - 3/9/16
246 Vehicle Care
1.Engine Air Cleaner/
Filter0250.
2. Engine Oil Fill Cap. See “When to Add Engine Oil”
under
Engine Oil 0246.
3. Engine Oil Dipstick. See “Checking Engine Oil” under
Engine Oil0246.
4. Engine Cooling Fan (Out of View). See
Cooling
System 0252.
5. Brake/Clutch Fluid Reservoir. See
Brake Fluid
0 258andHydraulic
Clutch 0250.
6. Engine Coolant Surge Tank and Pressure Cap. See
Engine Coolant 0252.
7. Windshield Washer Fluid Reservoir. See “Adding
Washer Fluid” under
Washer Fluid0257.
8.
Engine Compartment Fuse
Block 0268.
Engine Oil
To ensure proper engine
performance and long life, careful
attention must be paid to engine oil. Following these simple, but
important steps will help protect
your investment:
.
Use engine oil approved to the
proper specification and of the
proper viscosity grade. See
“Selecting the Right Engine Oil”
in this section.
. Check the engine oil level
regularly and maintain the
proper oil level. See “Checking
Engine Oil” and“When to Add
Engine Oil” in this section.
. Change the engine oil at the
appropriate time. See Engine Oil
Life System 0248.
. Always dispose of engine oil
properly. See “What to Do with
Used Oil” in this section.
Checking Engine Oil
It is a good idea to check the engine
oil level at each fuel fill. In order to
get an accurate reading, the vehicle
must be on level ground. The
engine oil dipstick handle is a loop.
SeeEngine Compartment Overview
0 245 for the location of the engine
oil dipstick. Obtaining an accurate oil level
reading is essential:
1. If the engine has been running recently, turn off the engine and
allow several minutes for the oil
to drain back into the oil pan.
Checking the oil level too soon
after engine shutoff will not
provide an accurate oil level
reading.
{Warning
The engine oil dipstick handle
may be hot; it could burn you.
Use a towel or glove to touch the
dipstick handle.
2. Pull out the dipstick and wipe it with a clean paper towel or
cloth, then push it back in all
the way. Remove it again,
keeping the tip down, and
check the level.