bulb CHEVROLET EPICA 2005 1.G Owners Manual
[x] Cancel search | Manufacturer: CHEVROLET, Model Year: 2005, Model line: EPICA, Model: CHEVROLET EPICA 2005 1.GPages: 340, PDF Size: 2.19 MB
Page 1 of 340
Seats and Restraint Systems........................... 1-1
Front Seats
............................................... 1-2
Rear Seats
............................................... 1-8
Safety Belts
.............................................1-10
Child Restraints
.......................................1-28
Airbag System
.........................................1-49
Restraint System Check
............................1-63
Features and Controls..................................... 2-1
Keys
........................................................ 2-2
Doors and Locks
....................................... 2-7
Windows
.................................................2-12
Theft-Deterrent Systems
............................2-14
Starting and Operating Your Vehicle
...........2-17
Mirrors
....................................................2-29
Storage Areas
.........................................2-31
Sunroof
..................................................2-33
Instrument Panel............................................. 3-1
Instrument Panel Overview
.......................... 3-4
Climate Controls
......................................3-19
Warning Lights, Gages, and Indicators
........3-30
Audio System(s)
.......................................3-47Driving Your Vehicle....................................... 4-1
Your Driving, the Road, and Your Vehicle
..... 4-2
Towing
...................................................4-33
Service and Appearance Care.......................... 5-1
Service
..................................................... 5-3
Fuel
......................................................... 5-5
Checking Things Under the Hood
...............5-11
Headlamp Aiming
.....................................5-39
Bulb Replacement
....................................5-39
Windshield Wiper Blade Replacement
.........5-45
Tires
......................................................5-46
Appearance Care
.....................................5-68
Vehicle Identification
.................................5-75
Electrical System
......................................5-76
Capacities and Specifications
.....................5-83
Normal Maintenance Replacement Parts
......5-84
Maintenance Schedule..................................... 6-1
Maintenance Schedule
................................ 6-2
Customer Assistance and Information.............. 7-1
Customer Assistance and Information
........... 7-2
Reporting Safety Defects
...........................7-10
Index................................................................ 1
2005 Chevrolet Epica Owner ManualM
Page 111 of 340
Turn and Lane-Change Signals
The turn signal has two upward (for right) and
two downward (for left) positions. These positions
allow you to signal a turn or a lane change.
To signal a turn, move the lever all the way up
or down. When the turn is finished, the lever will
return automatically.
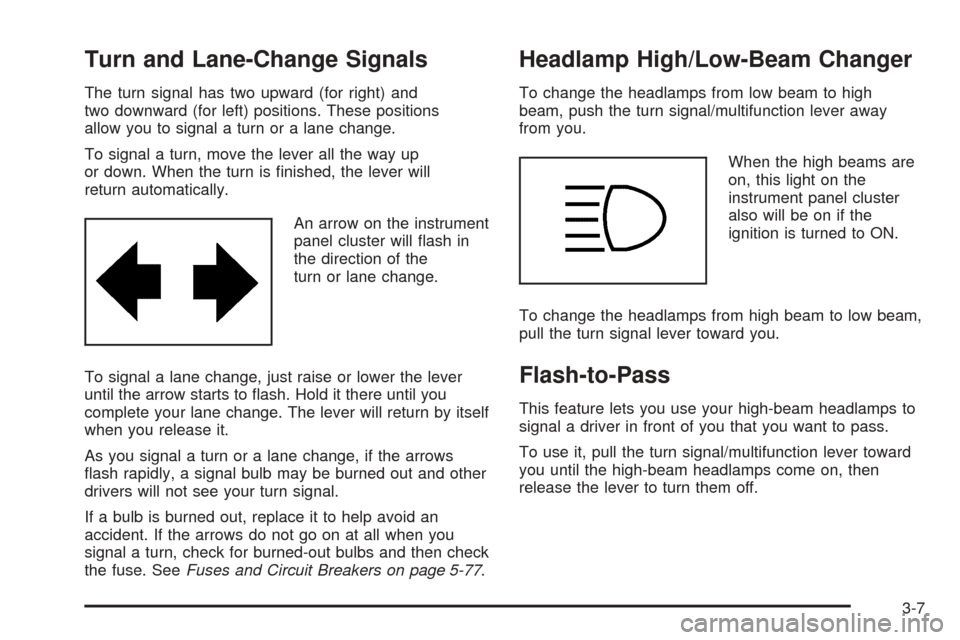
An arrow on the instrument
panel cluster will flash in
the direction of the
turn or lane change.
To signal a lane change, just raise or lower the lever
until the arrow starts to flash. Hold it there until you
complete your lane change. The lever will return by itself
when you release it.
As you signal a turn or a lane change, if the arrows
flash rapidly, a signal bulb may be burned out and other
drivers will not see your turn signal.
If a bulb is burned out, replace it to help avoid an
accident. If the arrows do not go on at all when you
signal a turn, check for burned-out bulbs and then check
the fuse. SeeFuses and Circuit Breakers on page 5-77.
Headlamp High/Low-Beam Changer
To change the headlamps from low beam to high
beam, push the turn signal/multifunction lever away
from you.
When the high beams are
on, this light on the
instrument panel cluster
also will be on if the
ignition is turned to ON.
To change the headlamps from high beam to low beam,
pull the turn signal lever toward you.
Flash-to-Pass
This feature lets you use your high-beam headlamps to
signal a driver in front of you that you want to pass.
To use it, pull the turn signal/multifunction lever toward
you until the high-beam headlamps come on, then
release the lever to turn them off.
3-7
Page 144 of 340
Engine Coolant Temperature Gage
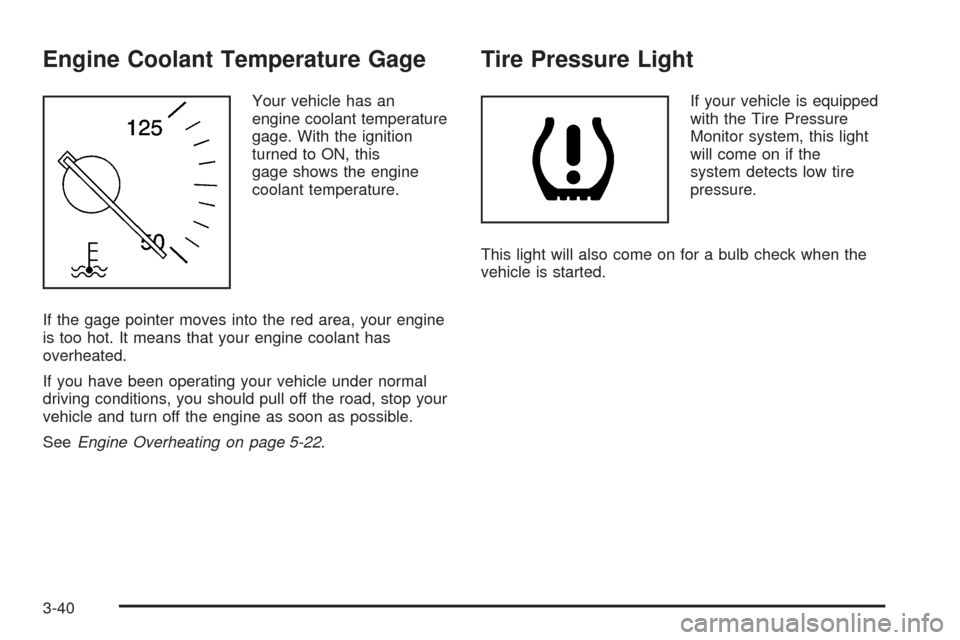
Your vehicle has an
engine coolant temperature
gage. With the ignition
turned to ON, this
gage shows the engine
coolant temperature.
If the gage pointer moves into the red area, your engine
is too hot. It means that your engine coolant has
overheated.
If you have been operating your vehicle under normal
driving conditions, you should pull off the road, stop your
vehicle and turn off the engine as soon as possible.
SeeEngine Overheating on page 5-22.
Tire Pressure Light
If your vehicle is equipped
with the Tire Pressure
Monitor system, this light
will come on if the
system detects low tire
pressure.
This light will also come on for a bulb check when the
vehicle is started.
3-40
Page 148 of 340
Oil Pressure Light
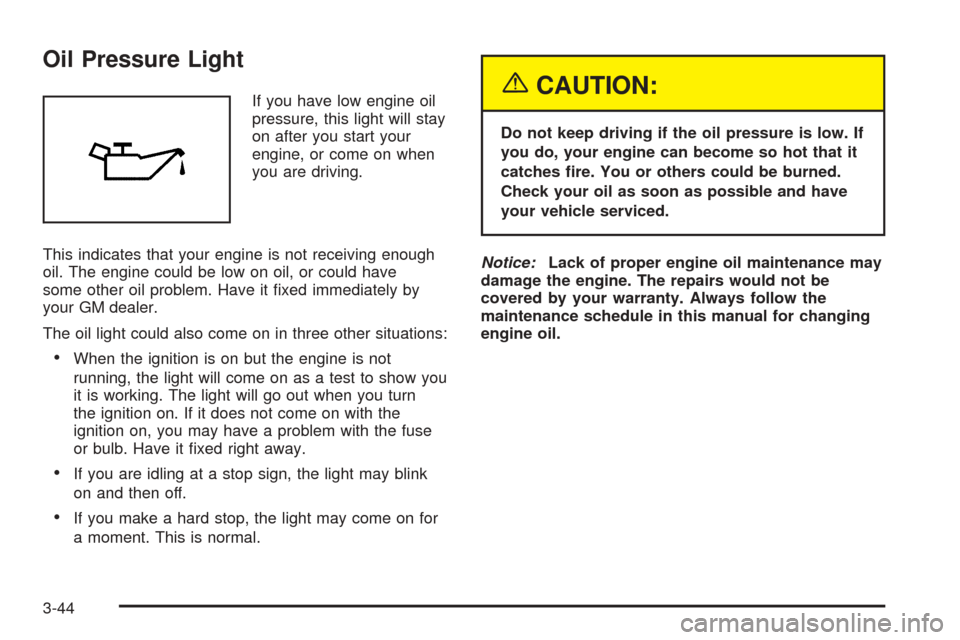
If you have low engine oil
pressure, this light will stay
on after you start your
engine, or come on when
you are driving.
This indicates that your engine is not receiving enough
oil. The engine could be low on oil, or could have
some other oil problem. Have it fixed immediately by
your GM dealer.
The oil light could also come on in three other situations:
•When the ignition is on but the engine is not
running, the light will come on as a test to show you
it is working. The light will go out when you turn
the ignition on. If it does not come on with the
ignition on, you may have a problem with the fuse
or bulb. Have it fixed right away.
•If you are idling at a stop sign, the light may blink
on and then off.
•If you make a hard stop, the light may come on for
a moment. This is normal.
{CAUTION:
Do not keep driving if the oil pressure is low. If
you do, your engine can become so hot that it
catches �re. You or others could be burned.
Check your oil as soon as possible and have
your vehicle serviced.
Notice:Lack of proper engine oil maintenance may
damage the engine. The repairs would not be
covered by your warranty. Always follow the
maintenance schedule in this manual for changing
engine oil.
3-44
Page 203 of 340
Service............................................................5-3
Doing Your Own Service Work.........................5-4
Adding Equipment to the Outside of
Your Vehicle..............................................5-5
Fuel................................................................5-5
Gasoline Octane............................................5-5
Gasoline Specifications....................................5-6
California Fuel...............................................5-6
Additives.......................................................5-7
Fuels in Foreign Countries...............................5-7
Filling Your Tank............................................5-8
Filling a Portable Fuel Container.....................5-10
Checking Things Under the Hood....................5-11
Hood Release..............................................5-11
Engine Compartment Overview.......................5-12
Engine Oil...................................................5-13
Engine Air Cleaner/Filter................................5-17
Automatic Transaxle Fluid..............................5-19
Engine Coolant.............................................5-19
Coolant Surge Tank Pressure Cap..................5-22Engine Overheating.......................................5-22
Cooling System............................................5-24
Power Steering Fluid.....................................5-29
Windshield Washer Fluid................................5-30
Brakes........................................................5-31
Battery........................................................5-34
Jump Starting...............................................5-35
Headlamp Aiming...........................................5-39
Bulb Replacement..........................................5-39
Halogen Bulbs..............................................5-39
Headlamps..................................................5-40
Front Turn Signal Lamps...............................5-41
Center High-Mounted Stoplamp (CHMSL).........5-42
Parking Lamps.............................................5-43
Taillamps, Turn Signal, Stoplamps and
Back-up Lamps.........................................5-44
Replacement Bulbs.......................................5-44
Windshield Wiper Blade Replacement..............5-45
Section 5 Service and Appearance Care
5-1
Page 241 of 340
Headlamp Aiming
Headlamp aim has been preset at the factory and
should need no further adjustment.
If your vehicle is damaged in an accident, the headlamp
aim may be affected. Aim adjustment to the low-beam
headlamps may be necessary if it is difficult to see
the lane markers (for horizontal aim), or if oncoming
drivers flash their high-beam headlamps at you
(for vertical aim). If you believe your headlamps need to
be re-aimed, we recommend that you take your
vehicle to your dealer for service.
Bulb Replacement
For the proper type of replacement bulbs, see
Replacement Bulbs on page 5-44.
For any bulb changing procedure not listed in this
section, contact your dealer.
Halogen Bulbs
{CAUTION:
Halogen bulbs have pressurized gas inside and
can burst if you drop or scratch the bulb. You or
others could be injured. Be sure to read and
follow the instructions on the bulb package.
5-39
Page 242 of 340
Headlamps
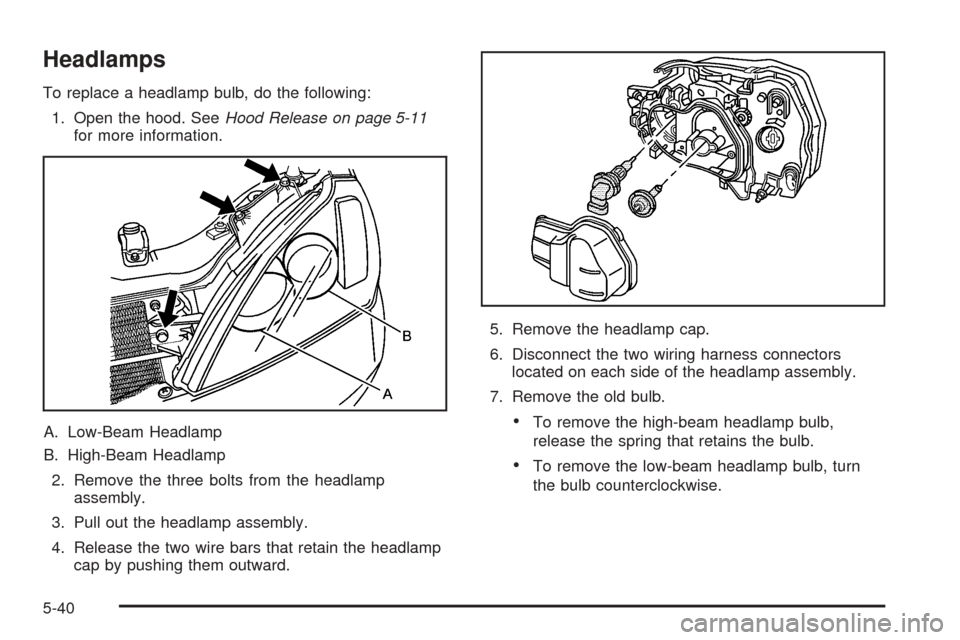
To replace a headlamp bulb, do the following:
1. Open the hood. SeeHood Release on page 5-11
for more information.
A. Low-Beam Headlamp
B. High-Beam Headlamp
2. Remove the three bolts from the headlamp
assembly.
3. Pull out the headlamp assembly.
4. Release the two wire bars that retain the headlamp
cap by pushing them outward.5. Remove the headlamp cap.
6. Disconnect the two wiring harness connectors
located on each side of the headlamp assembly.
7. Remove the old bulb.
•To remove the high-beam headlamp bulb,
release the spring that retains the bulb.
•To remove the low-beam headlamp bulb, turn
the bulb counterclockwise.
5-40
Page 243 of 340
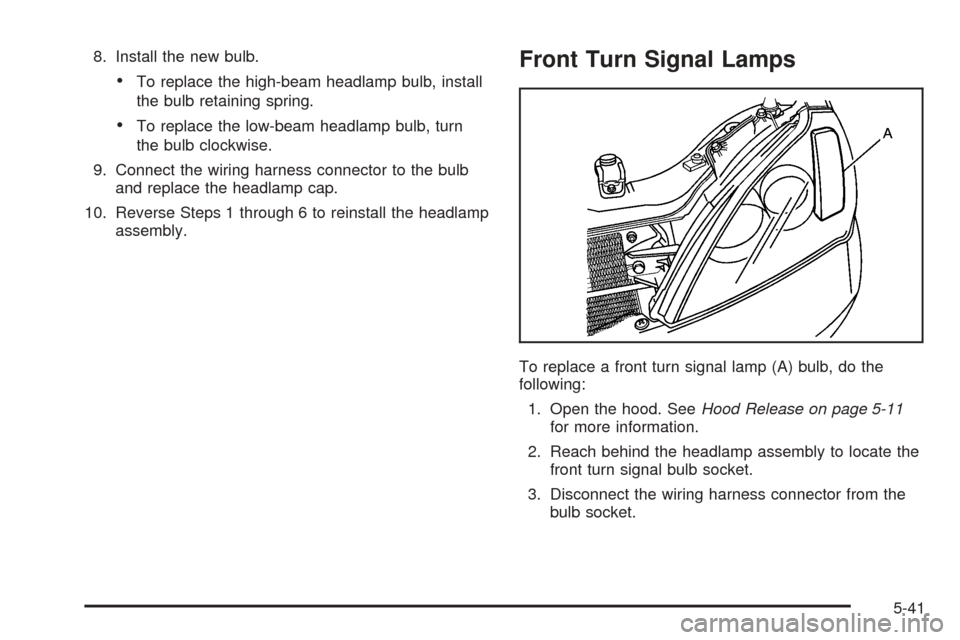
8. Install the new bulb.
•To replace the high-beam headlamp bulb, install
the bulb retaining spring.
•To replace the low-beam headlamp bulb, turn
the bulb clockwise.
9. Connect the wiring harness connector to the bulb
and replace the headlamp cap.
10. Reverse Steps 1 through 6 to reinstall the headlamp
assembly.
Front Turn Signal Lamps
To replace a front turn signal lamp (A) bulb, do the
following:
1. Open the hood. SeeHood Release on page 5-11
for more information.
2. Reach behind the headlamp assembly to locate the
front turn signal bulb socket.
3. Disconnect the wiring harness connector from the
bulb socket.
5-41
Page 244 of 340
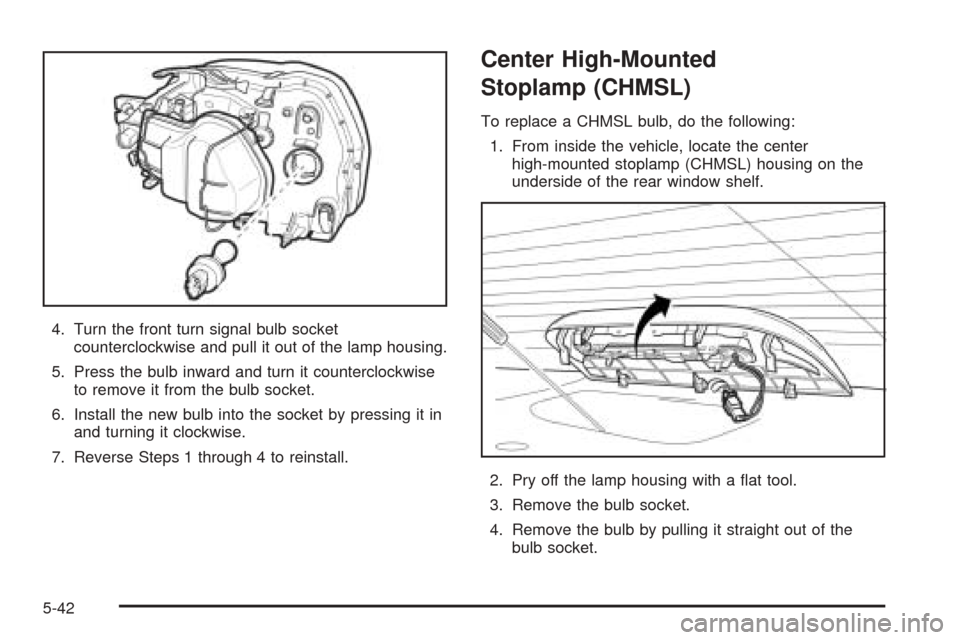
4. Turn the front turn signal bulb socket
counterclockwise and pull it out of the lamp housing.
5. Press the bulb inward and turn it counterclockwise
to remove it from the bulb socket.
6. Install the new bulb into the socket by pressing it in
and turning it clockwise.
7. Reverse Steps 1 through 4 to reinstall.
Center High-Mounted
Stoplamp (CHMSL)
To replace a CHMSL bulb, do the following:
1. From inside the vehicle, locate the center
high-mounted stoplamp (CHMSL) housing on the
underside of the rear window shelf.
2. Pry off the lamp housing with a flat tool.
3. Remove the bulb socket.
4. Remove the bulb by pulling it straight out of the
bulb socket.
5-42
Page 245 of 340
5. Install the new bulb.
6. Install the bulb socket into the CHMSL.
7. Push the CHMSL housing back into its original
position.
Parking Lamps
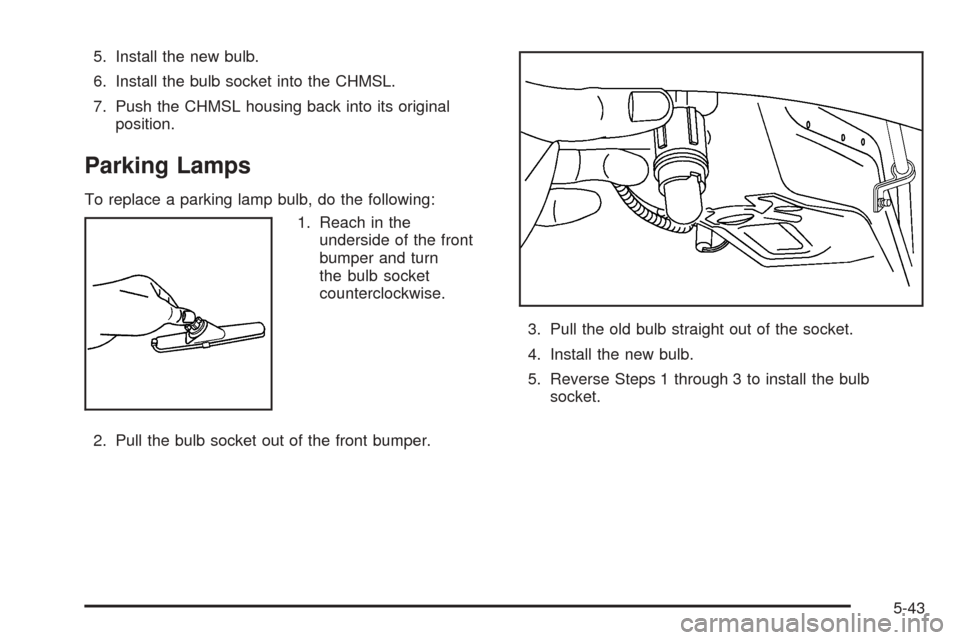
To replace a parking lamp bulb, do the following:
1. Reach in the
underside of the front
bumper and turn
the bulb socket
counterclockwise.
2. Pull the bulb socket out of the front bumper.3. Pull the old bulb straight out of the socket.
4. Install the new bulb.
5. Reverse Steps 1 through 3 to install the bulb
socket.
5-43