Oil light CHEVROLET EXPRESS 1997 1.G Owners Manual
[x] Cancel search | Manufacturer: CHEVROLET, Model Year: 1997, Model line: EXPRESS, Model: CHEVROLET EXPRESS 1997 1.GPages: 386, PDF Size: 20.32 MB
Page 6 of 386
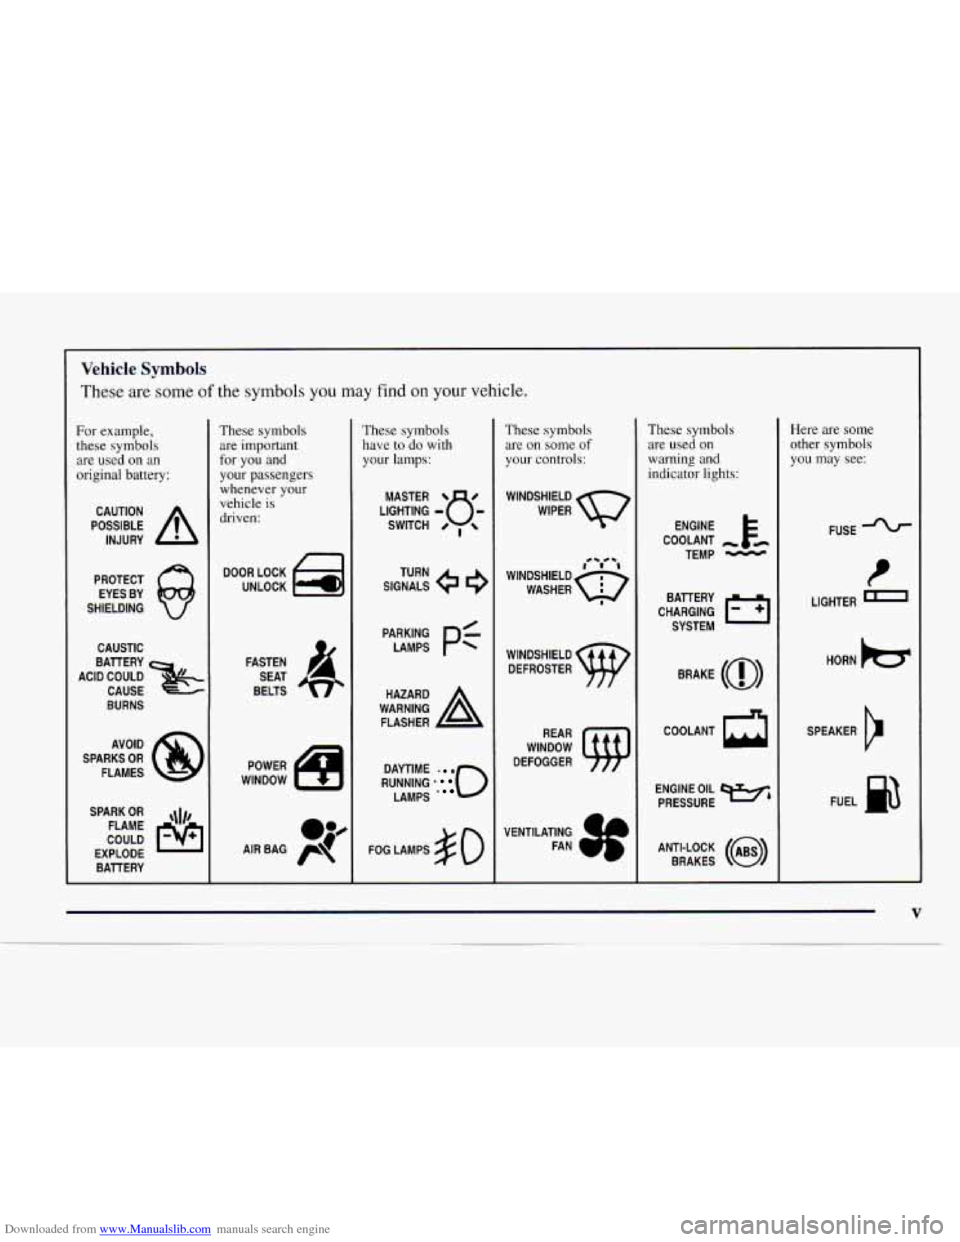
Downloaded from www.Manualslib.com manuals search engine Vehicle Symbols
These are some of the symbols you may find on your vehicle.
For example, these symbols
are used on an
original battery:
POSSIBLE A
CAUTION
INJURY
PROTECT EYES BY
SHIELDING
CAUSTIC
BURNS
SPARK
OR ,\I/,
COULD FLAME
EXPLODE BATTERY
These symbols are important
for you and
your passengers
whenever your
vehicle is
driven:
UNLOCK Pa
FASTEN
SEAT
BELTS
These symbols
have to do with
your lamps:
SIGNALS e
TURN
RUNNING
* 0
DAYTIME . a
LAMPS .
FOG LAMPS # 0
These symbols
are on some
of
your controls:
WINDSHIELD
WIPER
WINDSHIELD DEFROSTER
VENTILATING FAN
These symbols
are used on
warning and
indicator lights:
COOLANT -
TEMP -
CHARGING BATTERY
SYSTEM
BRAKE
(a)
COOLANT a
ENGINE OIL e,
PRESSURE
ANTI-LOCK
(@)
BRAKES
Here are some
other symbols
you may see:
FUSE
P
LIGHTER -
HORN )tr
SPEAKER
b
FUEL m
Page 119 of 386
Downloaded from www.Manualslib.com manuals search engine Check Gages Light
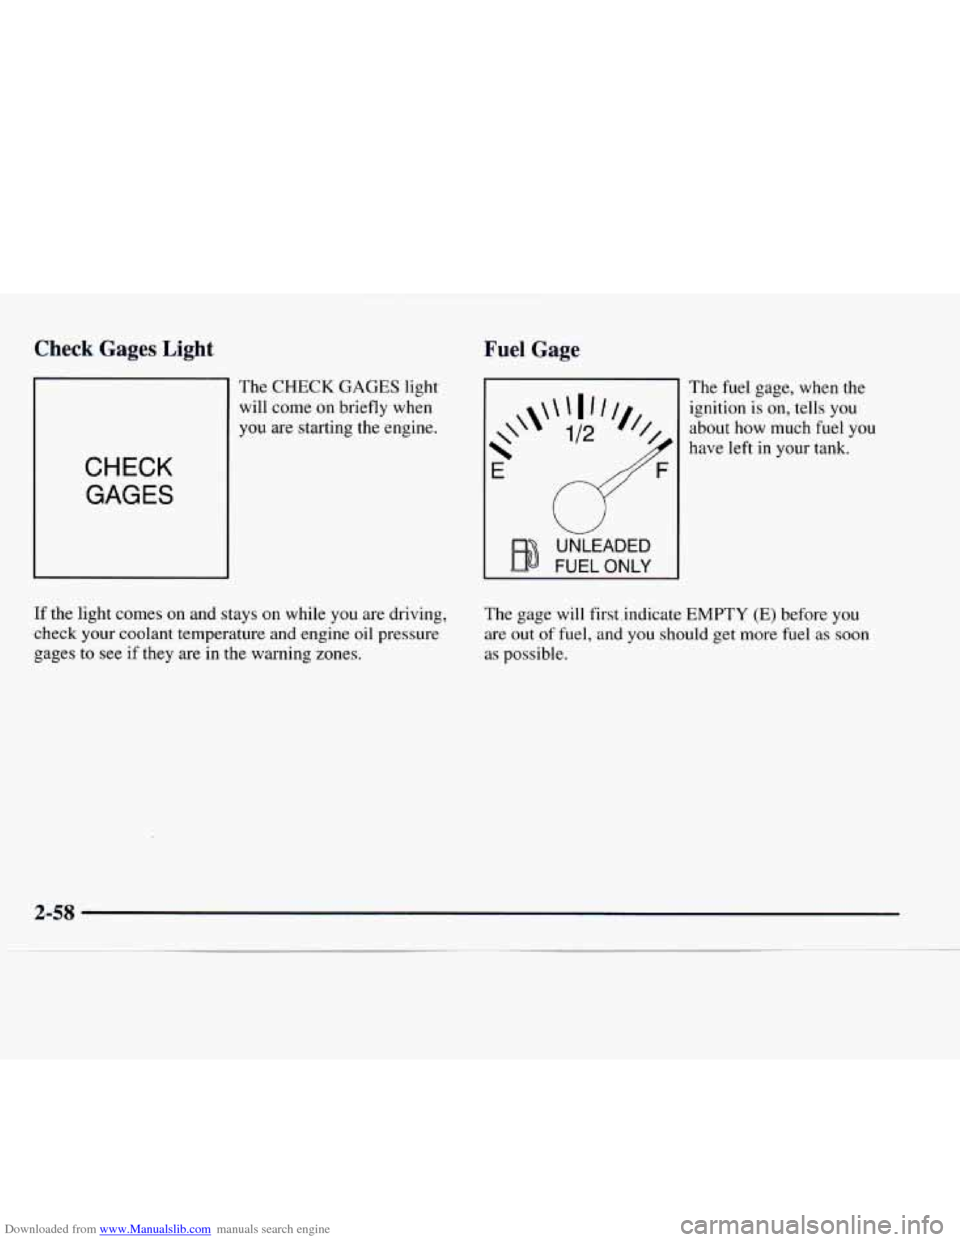
The CHECK GAGES light
will come on briefly when
you are starting the engine.
CHECK
GAGES
Fuel Gage
UNLEADED
FUEL ONLY
The fuel gage, when the
ignition
is on, tells you
about how much fuel you
have
left in your tank.
If the light comes on and stays on while you are driving,
check your coolant temperature and engine oil pressure
gages to see if they are in
the warning zones. The gage
will first.indicate EMPTY
(E) before you
are out of fuel, and you should get more fuel as soon
as possible.
Page 152 of 386
Downloaded from www.Manualslib.com manuals search engine Care of Your Cassette Tape Player
A tape player that is not cleaned regularly can cause
reduced sound quality, ruined cassettes or a damaged
mechanism. Cassette tapes should be stored in their
cases away from contaminants, direct sunlight and
extreme heat. If they aren’t, they may not operate
properly or may cause failure
of the tape player.
Your tape player should be cleaned regularly after every
50 hours of use. Your radio may display CLN to indicate
that you have used your tape player for
50 hours without
resetting the tape clean timer. If this message appears
on the display, your cassette tape player needs to be
cleaned. It will still play tapes, but you should clean it
as soon as possible to prevent damage to your tapes and
player. If you notice a reduction in sound quality, try a
known good cassette
to see if it is the tape or the tape
player at fault.
If this other cassette has no improvement
in sound quality, clean the tape player.
Cleaning may be dc
: with a scrubbing action,
non-abrasive cleaning cassette with pads which scrub
the tape head as the hubs
of the cleaner cassette turn. It
is normal for the cassette to eject while cleaning. Insert
the cassette at least three times to ensure thorough
cleaning. A scrubbing action cleaning cassette is
available through your
GM dealership. You
may also choose a non-scrubbing action, wet-type
cleaner which uses a cassette with a fabric belt to clean
the tape head. This type of cleaning cassette will not
eject and, it may not clean as thoroughly as the
scrubbing type cleaner.
After you clean the player, press and hold EJECT for
five seconds
to reset the CLN indicator. The radio
will display
--- to show the indicator was reset.
Cassettes are subject
to wear and the sound quality
may degrade over time. Always make sure the cassette
tape is in good condition before you have your tape
player serviced.
Care of Your Compact Discs
Handle discs carefully. Store them in their original cases
or other protective cases and away from direct sunlight
and dust.
If the surface of a disc is soiled, dampen a
clean,
soft cloth in a mild, neutral detergent solution
and clean it, wiping from the center to the edge.
Be sure never
to touch the signal surface when handling
discs. Pick up discs by grasping the outer edges or the
edge
of the hole and the outer edge.
3-27
Page 174 of 386
Downloaded from www.Manualslib.com manuals search engine Once you are moving on the freeway, make certain you
allow a reasonable following distance. Expect to move
slightly slower at night.
When
you want to leave the freeway, move to the proper
lane well in advance. If you miss your exit, do not,
under any circumstances, stop and back
up. Drive on to
the next exit.
The exit ramp can be curved, sometimes quite sharply.
The exit speed is usually posted.
Reduce your speed according to your speedometer,
not
to your sense of motion. After driving for any distance
at higher speeds, you may tend
to think you are going
slower than you actually are.
Before Leaving on a
Long Trip
Make sure you’re ready. Try to be well rested. If you
must start when
you’re not fresh -- such as after a day’s
work
-- don’t plan to make too many miles that first part
of
the journey. Wear comfortable clothing and shoes you
can easily drive in.
Is your vehicle ready for a long trip? If you keep it
serviced and maintained, it’s ready
to go. If it needs
service, have
it done before starting out. Of course,
you’ll find experienced and able service experts in
GM dealerships all across North America. They’ll be
ready and willing to help
if you need it.
Here are some things
you can check before a trip:
0
0
0
0
0
0
0
Windsh.ield Washer Fluid: Is the reservoir full?
Are all windows clean inside and outside?
Wiper Blades: Are they in good shape?
Fuel, Engine Oil, Other Fluids: Have you checked
all levels?
Lamps: Are they all working? Are the lenses clean?
Tires: They are vitally important to a safe,
trouble-free trip.
Is the tread good enough for
long-distance driving? Are the tires all inflated to the
recommended pressure?
Weuther Forecasts: What’s the weather outlook
along your route? Should you delay your trip a
short
time to avoid a major storm system?
Maps: Do you have up-to-date maps?
4-21
Page 255 of 386
Downloaded from www.Manualslib.com manuals search engine Rear Axle Engine Coolant
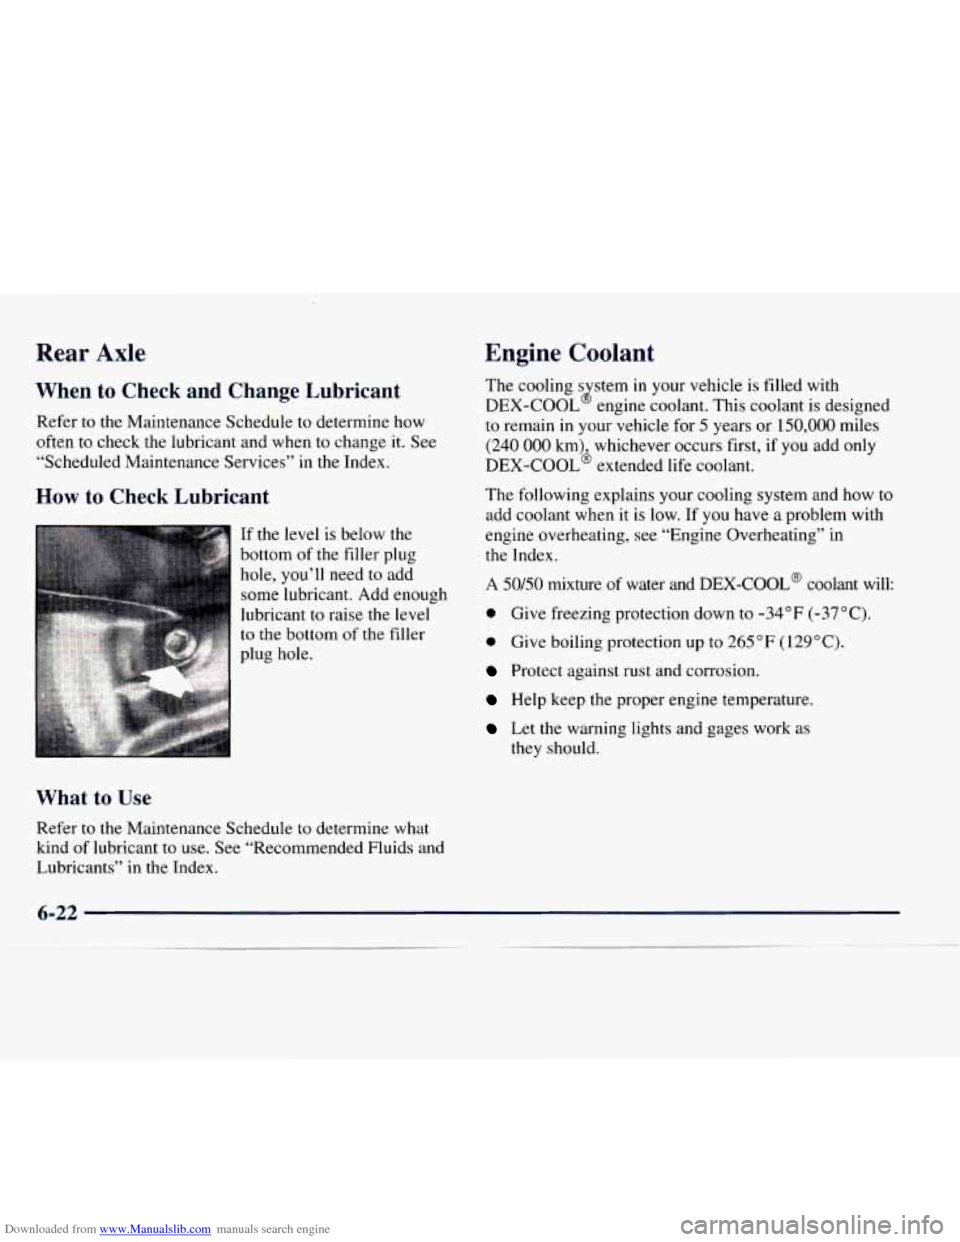
When to Check and Change Lubricant
Refer to the Maintenance Schedule to determine how
often to check the lubricant and when to change it. See
“Scheduled Maintenance Services” in the Index.
How to Check Lubricant
What to
Use
Refer to the Maintenance Schedule to determine what
kind of lubricant to use. See “Recommended Fluids and
Lubricants”
in the Index. The cooling
s stem
in your vehicle is filled with
DEX-COOL
8 engine coolant. This coolant is designed
to remain in your vehicle for
5 years or 150,000 miles
(240
000 km) whichever occurs first, if you add only
DEX-COOL’ extended life coolant.
The following explains your cooling system
and how to
add coolant when it is low. If you have a problem with
engine overheating,
see “Engine Overheating” in
the Index.
A 50/50 mixture of water and DEX-COOL@ coolant will:
0 Give freezing protection down to -34°F (-37°C).
0 Give boiling protection up to 265 “F (129°C).
Protect against rust and corrosion.
Help keep the proper engine temperature.
Let the warning lights and gages work as
they should .
Page 284 of 386
Downloaded from www.Manualslib.com manuals search engine Using Solvent-Type Cleaner on Fabric
First, see if you have to use solvent-type cleaner at all.
Some
spots and stains will clean off better with just
water and mild soap.
If
you need to use a solvent:
1. Gently scrape excess soil from the trim material with
a clean, dull knife or scraper.
2. Use very little cleaner, light pressure and clean cloths
(preferably cheesecloth). Cleaning should start at the
outside
of the stain, “feathering” toward the center.
3. Keep changing to
a clean section of the cloth.
4. When you clean a stain from fabric, immediately
dry the area with a blow dryer to help prevent a
cleaning ring.
Fabric Protection
Your vehicle has upholstery and carpet that has been
treated with Scotchgard
TM Fabric Protector, a 3M
product. It protects fabrics by repelling oil and water,
which are the carriers of most stains. Even with this
protection, you
still need to clean your upholstery and
carpet often to keep
it looking new.
Further information
on cleaning is available by calling
1-800-433-3296
(in Minnesota, 1-800-642-6 167).
Special Cleaning Problems
Greasy or Oily Stains
Stains caused by grease, oil, butter, margarine, shoe
polish, coffee with cream, chewing gum, cosmetic
creams, vegetable oils, wax crayon, tar and asphalt can
be removed as follows:
1. Carefully scrape off excess stain.
2. Follow the solvent-type instructions described earlier.
Shoe polish, wax crayon, tar and asphalt will stain if left
on a vehicle’s seat fabric. They should be removed as
soon as possible. Be careful, because the cleaner will
dissolve them and may cause them to spread.
Non-Greasy Stains
Stains caused by catsup, coffee (black), egg, fruit, fruit
juice, milk, soft drinks, wine, vomit, urine and
blood can
be removed as follows:
1. Carefully scrape off excess stain, then sponge the
soiled area with cool water.
2. If a stain remains, follow the foam-type instructions
described earlier.
Page 285 of 386
Downloaded from www.Manualslib.com manuals search engine 3. If an odor lingers after cleaning vomit or urine,
treat the area with
a waterhaking soda solution:
1 teaspoon (5 ml) of baking soda to I cup (250 ml)
of lukewarm water.
4. If needed, clean lightly with solvent-type cleaner.
Combination Stains
Stains caused by candy, ice cream, mayonnaise, chili
sauce and unknown stains can be removed
as follows:
1. Carefully scrape off excess stain.
2. Clean with cool water and allow to dry.
3. If a stain remains, clean it with solvent-type cleaner.
Cleaning Vinyl
use warm water and a clean cloth.
0 Rub with a clean, damp cloth to remove dirt. You
may have to do it more than once.
0 Things like tar, asphalt and shoe polish will stain if you
don’t get them
off quickly. Use a clean cloth and a
vinylheather cleaner. See your dealer for this product.
Cleaning Leather
Use a soft cloth with lukewarm water and a mild soap or
saddle soap and wipe dry with a soft cloth. Then, let the
leather dry naturally.
Do not use heat to dry.
0 For stubborn stains, use a leather cleaner. See your
dealer for this product.
Never use oils, varnishes, solvent-based or abrasive
cleaners, furniture polish or shoe polish on leather.
Soiled or stained leather should be cleaned
immediately.
If dirt is allowed to work into the
finish, it can harm the leather.
Cleaning the Top of the Instrument Panel
Use only mild soap and water to clean the top surfaces
of the instrument panel. Sprays containing silicones or
waxes may cause annoying reflections
in the windshield
and even make
it difficult to see through the windshield
under certain conditions.
Page 379 of 386
Downloaded from www.Manualslib.com manuals search engine Lights Air Bag Readiness
....................... 1.27. 2.5 1
Anti-Lock Brake System Warning ............ 2.53. 4.7
Brake System Warning
......................... 2-52
Daytime Running Lamps Indicator
............... 2-54
Interior
..................................... 2-40
Safety Belt Reminder
..................... 1 . I 1. 2.50
Service Engine Soon
.......................... 2-54
Loading Your Vehicle
........................... 4-27
Locks
......................................... 2-4
Door
........................................ 2-4
Ignition Transmission Lock Check
............... 7-47
PowerDoor
.................................. 2-5
Rear Door Security
............................. 2-5
Sliding Door Child Security
...................... 2-5
LossofControl
................................ 4-13
Lubricants and Fluids ............................ 7-5 1
Lubrication Service. Body ........................ 7-46
Maintenance. Normal Replacement
Parts ........... 6-67
Maintenance Record
............................ 7-53
Maintenance Schedule
............................ 7- 1
Long Tripmighway Definition ................... 7-6
Long Tripmighway Intervals
..................... 7-7
Owner Checks and Services
..................... 7-45
Periodic Maintenance Inspections
................ 7-49
Recommended Fluids and Lubricants
............. 7-5 1
Scheduled Maintenance Services .................. 7-4 Short
Trip/City Definition
....................... 7-5
Short Trip/City Intervals
........................ 7-5
Maintenance. Underbody
......................... 6-56
Maintenance When Trailer Towing
................. 4-37
Malfunction Indicator Lamp
...................... 2-54
ManualFrontSeat
............................... 1-2
Mirrors
....................................... 2-43
Convex Outside
.............................. 2-44
Inside Daymight Rearview
..................... 2-43
Power Remote Control
......................... 2-43
Visor Vanity
................................. 2-46
MMT
......................................... 6-4
Model Reference
................................. vi
Mountain Roads
................................ 4-22
Multifunction Lever
............................. 2-33
Neutral. Automatic Transmission ................. 2-21
New Vehicle Break-In ........................... 2-16
NightVision
................................... 4-15
Noise Control System
........................... 6-11
Odometer
.................................... 2-49
Odometer. Trip
................................. 2-49
Overheating Engine
............................. 5-12
Off-Road Recovery
............................. 4-11
Oil. Engine
.................................... 6-12
Owner Checks and Services
....................... 7-45
Owner Publications. Ordering
..................... 8-11