recommended CHEVROLET EXPRESS 2016 User Guide
[x] Cancel search | Manufacturer: CHEVROLET, Model Year: 2016, Model line: EXPRESS, Model: CHEVROLET EXPRESS 2016Pages: 289, PDF Size: 11.46 MB
Page 154 of 289
Chevrolet Express Owner Manual (GMNA-Localizing-U.S./Canada/Mexico-
15555951) - 2022 - CRC - 1/27/22
Driving and Operating 153
if the turn signal is active in the direction of
lane departure, or if LDW detects that you
are accelerating, braking or actively steering.
Fuel
Top Tier Fuel
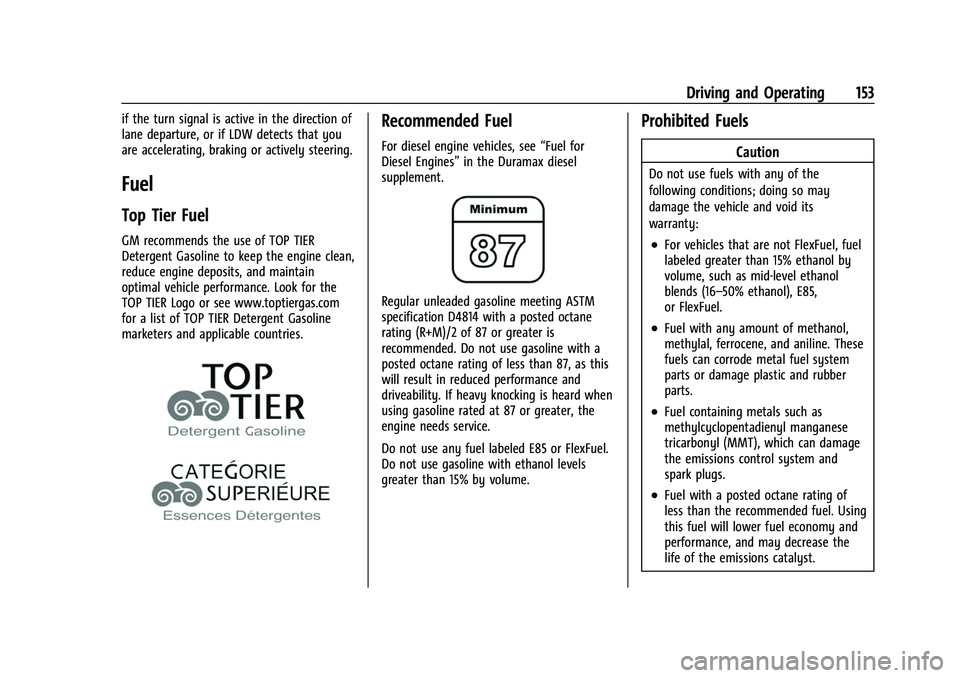
GM recommends the use of TOP TIER
Detergent Gasoline to keep the engine clean,
reduce engine deposits, and maintain
optimal vehicle performance. Look for the
TOP TIER Logo or see www.toptiergas.com
for a list of TOP TIER Detergent Gasoline
marketers and applicable countries.
Recommended Fuel
For diesel engine vehicles, see“Fuel for
Diesel Engines” in the Duramax diesel
supplement.
Regular unleaded gasoline meeting ASTM
specification D4814 with a posted octane
rating (R+M)/2 of 87 or greater is
recommended. Do not use gasoline with a
posted octane rating of less than 87, as this
will result in reduced performance and
driveability. If heavy knocking is heard when
using gasoline rated at 87 or greater, the
engine needs service.
Do not use any fuel labeled E85 or FlexFuel.
Do not use gasoline with ethanol levels
greater than 15% by volume.
Prohibited Fuels
Caution
Do not use fuels with any of the
following conditions; doing so may
damage the vehicle and void its
warranty:
.For vehicles that are not FlexFuel, fuel
labeled greater than 15% ethanol by
volume, such as mid-level ethanol
blends (16–50% ethanol), E85,
or FlexFuel.
.Fuel with any amount of methanol,
methylal, ferrocene, and aniline. These
fuels can corrode metal fuel system
parts or damage plastic and rubber
parts.
.Fuel containing metals such as
methylcyclopentadienyl manganese
tricarbonyl (MMT), which can damage
the emissions control system and
spark plugs.
.Fuel with a posted octane rating of
less than the recommended fuel. Using
this fuel will lower fuel economy and
performance, and may decrease the
life of the emissions catalyst.
Page 155 of 289
Chevrolet Express Owner Manual (GMNA-Localizing-U.S./Canada/Mexico-
15555951) - 2022 - CRC - 1/27/22
154 Driving and Operating
Fuels in Foreign Countries
The U.S., Canada, and Mexico post fuel
octane ratings in anti-knock index (AKI). For
fuel not to use in a foreign country, see
Prohibited Fuels0153.
Fuel Additives
TOP TIER Detergent Gasoline is highly
recommended for use with your vehicle.
If your country does not have TOP TIER
Detergent Gasoline, add ACDelco Fuel
System Treatment Plus−Gasoline to the
vehicle’s gasoline fuel tank at every oil
change or 15 000 km (9,000 mi), whichever
occurs first. TOP TIER Detergent Gasoline and
ACDelco Fuel System Treatment Plus
−Gasoline will help keep your vehicle’s
engine fuel deposit free and performing
optimally.
Filling the Tank
If the vehicle has a diesel engine, see the
Duramax diesel supplement.
An arrow on the fuel gauge indicates which
side of the vehicle the fuel door is on. See
Fuel Gauge 072.
{Warning
Fuel vapors and fuel fires burn violently
and can cause injury or death.
Follow these guidelines to help avoid
injuries to you and others:
.Read and follow all the instructions on
the fuel pump island.
.Turn off the engine when refueling.
.Keep sparks, flames, and smoking
materials away from fuel.
.Do not leave the fuel pump
unattended.
.Avoid using electronic devices while
refueling.
.Do not re-enter the vehicle while
pumping fuel.
.Keep children away from the fuel
pump and never let children
pump fuel.
.Before touching the fill nozzle, touch a
metallic object to discharge static
electricity from your body.
(Continued)
Warning (Continued)
.Fuel can spray out if the fuel cap is
opened too quickly. This spray can
happen if the tank is nearly full, and is
more likely in hot weather. Open the
fuel cap slowly and wait for any hiss
noise to stop, then unscrew the cap all
the way.
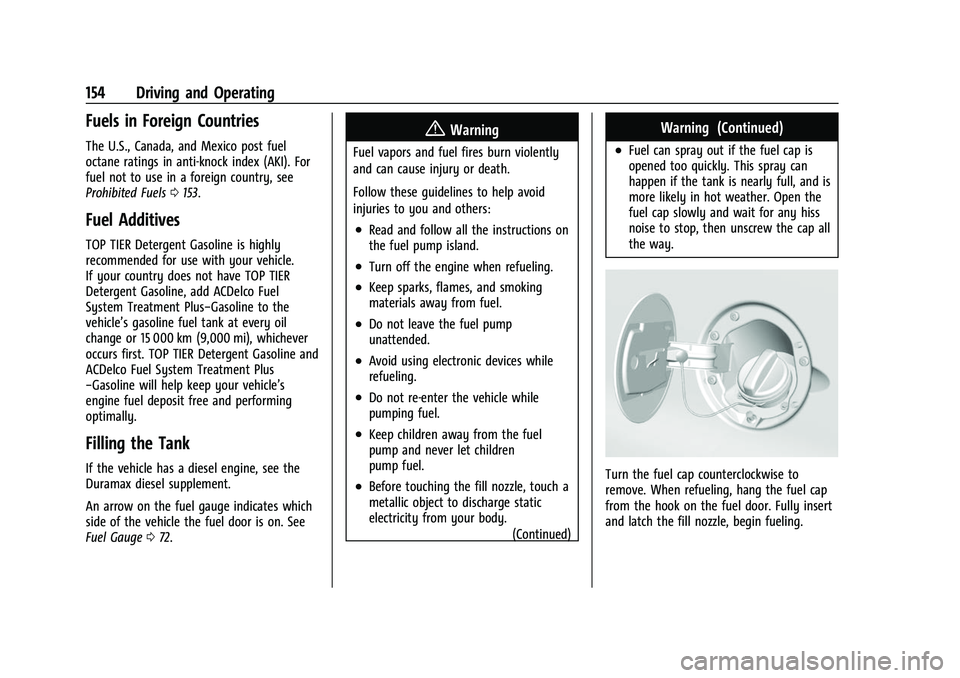
Turn the fuel cap counterclockwise to
remove. When refueling, hang the fuel cap
from the hook on the fuel door. Fully insert
and latch the fill nozzle, begin fueling.
Page 157 of 289

Chevrolet Express Owner Manual (GMNA-Localizing-U.S./Canada/Mexico-
15555951) - 2022 - CRC - 1/27/22
156 Driving and Operating
Driving Characteristics and
Towing Tips
{Warning
You can lose control when towing a
trailer if the correct equipment is not
used or the vehicle is not driven properly.
For example, if the trailer is too heavy or
the trailer brakes are inadequate for the
load, the vehicle may not stop as
expected. You and others could be
seriously injured. The vehicle may also be
damaged, and the repairs would not be
covered by the vehicle warranty. Pull a
trailer only if all the steps in this section
have been followed. Ask your dealer for
advice and information about towing a
trailer with the vehicle.
Driving with a Trailer
Trailering is different than just driving the
vehicle by itself. Trailering means changes in
handling, acceleration, braking, durability,
and fuel economy. Successful, safe trailering
takes correct equipment, and it has to be
used properly.The following information has many
time-tested, important trailering tips and
safety rules. Many of these are important
for your safety and that of your passengers.
Read this section carefully before pulling a
trailer.
When towing a trailer:
.Become familiar with and follow all state
and local laws that apply to trailer
towing. These requirements vary from
state to state.
.State laws may require the use of
extended side view mirrors. Even if not
required, you should install extended side
view mirrors if your visibility is limited or
restricted while towing.
.Do not tow a trailer during the first
800 km (500 mi) of vehicle use to prevent
damage to the engine, axle, or other
parts.
.It is recommended to perform the first oil
change before heavy towing.
.During the first 800 km (500 mi) of trailer
towing, do not drive over 80 km/h
(50 mph) and do not make starts at full
throttle.
.Vehicles can tow in D (Drive). Tow/Haul
Mode is recommended for heavier trailers.
See
Tow/Haul Mode 0140. If the transmission downshifts too often, a
lower gear may be selected using Manual
Mode. See
Manual Mode 0139.
If equipped, the following driver assistance
features should be turned off when towing
a trailer:
.Adaptive Cruise Control (ACC)
.Super Cruise Control
.Lane Keep Assist (LKA)
.Park Assist
.Automatic Parking Assist (APA)
.Reverse Automatic Braking (RAB)
If equipped, the following driver assistance
features should be turned to alert or off
when towing a trailer:
.Automatic Emergency Braking (AEB)
.Intelligent Brake Assist (IBA)
.Front Pedestrian Braking (FPB)
If equipped with Lane Change Alert (LCA),
the LCA detection zones that extend back
from the side of the vehicle do not move
further back when a trailer is towed. Use
caution while changing lanes when towing a
trailer.
If equipped with Rear Cross Traffic Alert
(RCTA), use caution while backing up when
towing a trailer, as the RCTA detection zones
Page 167 of 289

Chevrolet Express Owner Manual (GMNA-Localizing-U.S./Canada/Mexico-
15555951) - 2022 - CRC - 1/27/22
166 Driving and Operating
Vehicle SeriesHitch TypeMaximum Tongue Weight
2500/3500 Weight - Carrying181 kg (400 lb)
2500/3500 Weight -
Distributing 454 kg (1,000 lb)
The trailer tongue weight contributes to the
Gross Vehicle Weight (GVW). GVW includes
the curb weight of your vehicle, any
passengers, cargo, equipment, and the trailer
tongue weight. Vehicle options, passengers,
cargo, and equipment reduce the maximum
allowable tongue weight the vehicle can
carry, which also reduces the maximum
allowable trailer weight.
Trailer Load Balance
The correct trailer load balance must be
maintained to ensure trailer stability.
Incorrect load balance is a leading cause of
trailer sway.
The trailer tongue weight (1) should be 10–
15% of the loaded trailer weight (2). Some
specific trailer types, such as boat trailers,
fall outside of this range. Always refer to
the trailer owner’s manual for the
recommended trailer tongue weight for each
trailer. Never exceed the maximum loads for
your vehicle, hitch, and trailer. After loading the trailer, separately weigh
the trailer and then the trailer tongue and
calculate the trailer load balance percentage
to see if the weights and distribution are
appropriate for your vehicle. If the trailer
weight is too high, it may be possible to
transfer some of the cargo into your vehicle.
If the trailer tongue weight is too high or
too low, it may be possible to rearrange
some of the cargo inside of the trailer.
Do not exceed the maximum allowable
tongue weight for your vehicle. Use the
shortest hitch extension available to position
the hitch ball closer to your vehicle. This will
help reduce the effect of the trailer tongue
weight on the trailer hitch and the rear axle.
If a cargo carrier is used in the trailer hitch
receiver, choose a carrier that positions the
load as close to the vehicle as possible.
Make sure the total weight, including the
Page 169 of 289

Chevrolet Express Owner Manual (GMNA-Localizing-U.S./Canada/Mexico-
15555951) - 2022 - CRC - 1/27/22
168 Driving and Operating
Tires
.Do not tow a trailer while using a
compact spare tire on the vehicle.
.Tires must be properly inflated to support
loads while towing a trailer. SeeTires
0 204 for instructions on proper tire
inflation.
Safety Chains
Always attach chains between the vehicle
and the trailer, and attach the chains to the
holes on the trailer hitch platform.
Instructions about safety chains may be
provided by the hitch manufacturer or by
the trailer manufacturer.
Cross the safety chains under the tongue of
the trailer to help prevent the tongue from
contacting the road if it becomes separated
from the hitch. Always leave just enough
slack so the combination can turn. Never
allow safety chains to drag on the ground.
Trailer Brakes
Loaded trailers over 675 kg (1,500 lb) must
be equipped with brake systems and with
brakes for each axle. Trailer braking
equipment conforming to Canadian Standards Association (CSA) requirement
CAN3-D313, or its equivalent, is
recommended.
State or local regulations may require the
trailer to have its own braking system if the
loaded weight of the trailer exceeds certain
minimums. These requirements vary from
state to state. Read and follow the
instructions for the trailer brakes so they are
installed, adjusted, and maintained properly.
Never attempt to tap into your vehicle's
hydraulic brake system. If you do, both the
vehicle anti-lock brakes and the trailer
brakes may not function, which could result
in a crash.
Trailer Wiring Harness
Basic Trailer Wiring
If the vehicle is not equipped with a trailer
connector on the rear bumper, a seven-wire
trailering harness is tied to the vehicle’s
frame. The harness requires the installation
of a trailer connector, which is available
through your dealer.
Use only a round, seven-wire connector with
flat blade terminals meeting SAE J2863
specifications for proper electrical
connectivity.The seven-wire harness connector contains
the following trailer circuits:
.Yellow: Stop/Turn Signal Left*
.Dark Green: Stop/Turn Signal Right*
.Brown: Tail/Parking Lamps**
.Light Green: Reverse Lamps**
.Red/Black: Battery Feed
.White: Ground
.Dark Blue: Electric Trailer Brake
* If the vehicle is a cutaway with trailer
provisions, each stop/turn signal has a
15 amp fuse. However, the cutaway lighting
connector will have a 10 amp fuse for each
signal.
**If the vehicle is a cutaway with trailer
provisions, there is a 15 amp fuse for the
trailer park lamps and a 15 amp fuse for the
cutaway rear lighting connector park lamps.
Also, a 10 amp fuse will be shared for trailer
back-up lamps and cutaway rear lighting
connector back-up lamps.
Heavy-Duty Trailer Wiring Harness Package
lf equipped, the trailer wiring harness, with
a seven-pin connector is mounted on the
trailer hitch.
Page 171 of 289

Chevrolet Express Owner Manual (GMNA-Localizing-U.S./Canada/Mexico-
15555951) - 2022 - CRC - 1/27/22
170 Driving and Operating
Operating the vehicle in Tow/Haul Mode
when lightly loaded or not towing will not
cause damage; however, it is not
recommended and may result in unpleasant
engine and transmission driving
characteristics and reduced fuel economy.
Trailer Sway Control (TSC)
Vehicles with StabiliTrak/Electronic Stability
Control (ESC) have a Trailer Sway Control
(TSC) feature. Trailer sway is unintended
side-to-side motion of a trailer while towing.
If the vehicle is towing a trailer and the TSC
detects that sway is increasing, the vehicle
brakes are selectively applied at each wheel,
to help reduce excessive trailer sway.
If TSC is enabled, the Traction Control
System (TCS)/StabiliTrak/ESC warning light
will flash on the instrument cluster. Reduce
vehicle speed by gradually removing your
foot from the accelerator. If trailer sway
continues, StabiliTrak/ESC can reduce engine
torque to help slow the vehicle. TSC will notfunction if StabiliTrak/ESC is turned off. See
Traction Control/Electronic Stability Control
0
142.
{Warning
Trailer sway can result in a crash and in
serious injury or death, even if the
vehicle is equipped with TSC.
If the trailer begins to sway, reduce
vehicle speed by gradually removing your
foot from the accelerator. Then pull over
to check the trailer and vehicle to help
correct possible causes, including an
improperly or overloaded trailer,
unrestrained cargo, improper trailer hitch
configuration, or improperly inflated or
incorrect vehicle or trailer tires. See
Towing Equipment 0167 for trailer
ratings and hitch setup recommendations.
Trailer Tires
Special Trailer (ST) tires differ from vehicle
tires. Trailer tires are designed with stiff
sidewalls to help prevent sway and to
support heavy loads. These features can
make it difficult to determine if the trailer
tire pressures are low only based on a visual
inspection. Always check all trailer tire pressures before
each trip when the tires are cool. Low trailer
tire pressure is a leading cause of trailer tire
blow-outs.
Trailer tires deteriorate over time. The trailer
tire sidewall will show the week and year
the tire was manufactured. Many trailer tire
manufacturers recommend replacing tires
more than six years old.
Overloading is another leading cause of
trailer tire blow-outs. Never load your trailer
with more weight than the tires are
designed to support. The load rating is
located on the trailer tire sidewall.
Always know the maximum speed rating for
the trailer tires before driving. This may be
significantly lower than the vehicle tire
speed rating. The speed rating may be on
the trailer tire sidewall. If the speed rating is
not shown, the default trailer tire speed
rating is 105 km/h (65 mph).
Page 180 of 289
Chevrolet Express Owner Manual (GMNA-Localizing-U.S./Canada/Mexico-
15555951) - 2022 - CRC - 1/27/22
Vehicle Care 179
10. Brake Master Cylinder Reservoir. SeeBrake Fluid 0190.
11. Windshield Washer Fluid Reservoir. See “Adding Washer Fluid” underWasher
Fluid 0189.
Engine Oil
For diesel engine vehicles, see “Engine Oil”
in the Duramax diesel supplement.
To ensure proper engine performance and
long life, careful attention must be paid to
engine oil. Following these simple, but
important steps will help protect your
investment:
.Use engine oil approved to the proper
specification and of the proper viscosity
grade. See “Selecting the Right Engine
Oil” in this section.
.Check the engine oil level regularly and
maintain the proper oil level. See
“Checking Engine Oil” and“When to Add
Engine Oil” in this section.
.Change the engine oil at the appropriate
time. SeeEngine Oil Life System 0181.
.Always dispose of engine oil properly. See
“What to Do with Used Oil” in this
section.
Checking Engine Oil
Check the engine oil level regularly, every
650 km (400 mi), especially prior to a long
trip. The engine oil dipstick handle is a loop.
See Engine Compartment Overview 0176 for
the location.
{Warning
The engine oil dipstick handle may be
hot; it could burn you. Use a towel or
glove to touch the dipstick handle.
If a low oil Driver Information Center (DIC)
message displays, check the oil level.
Follow these guidelines:
.To get an accurate reading, park the
vehicle on level ground. Check the engine
oil level after the engine has been off for
at least two hours. Checking the engine
oil level on steep grades or too soon after
engine shutoff can result in incorrect
readings. Accuracy improves when
checking a cold engine prior to starting.
Remove the dipstick and check the level.
.If unable to wait two hours, the engine
must be off for at least 15 minutes if the
engine is warm, or at least 30 minutes if
the engine is not warm. Pull out the dipstick, wipe it with a clean paper towel
or cloth, then push it back in all the way.
Remove it again, keeping the tip down,
and check the level.
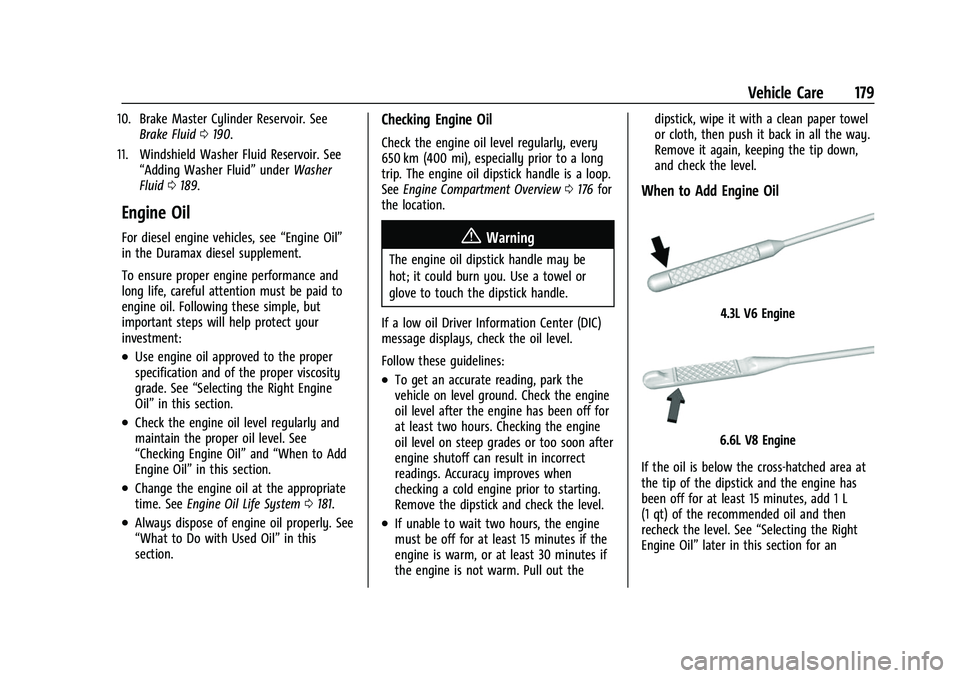
When to Add Engine Oil
4.3L V6 Engine
6.6L V8 Engine
If the oil is below the cross-hatched area at
the tip of the dipstick and the engine has
been off for at least 15 minutes, add 1 L
(1 qt) of the recommended oil and then
recheck the level. See “Selecting the Right
Engine Oil” later in this section for an
Page 181 of 289

Chevrolet Express Owner Manual (GMNA-Localizing-U.S./Canada/Mexico-
15555951) - 2022 - CRC - 1/27/22
180 Vehicle Care
explanation of what kind of oil to use. For
engine oil crankcase capacity, seeCapacities
and Specifications 0255.
Caution
Do not add too much oil. Oil levels above
or below the acceptable operating range
shown on the dipstick are harmful to the
engine. If the oil level is above the
operating range (i.e., the engine has so
much oil that the oil level gets above the
cross-hatched area that shows the proper
operating range), the engine could be
damaged. Drain the excess oil or limit
driving of the vehicle, and seek a service
professional to remove the excess oil.
See Engine Compartment Overview 0176 for
the location of the engine oil fill cap.
Add enough oil to put the level somewhere
in the proper operating range. Push the
dipstick all the way back in when through.
Selecting the Right Engine Oil
Selecting the right engine oil depends on
both the proper oil specification and
viscosity grade. See Recommended Fluids
and Lubricants 0251. Specification
Use full synthetic engine oils that meet the
dexos1 specification. Engine oils that have
been approved by GM as meeting the
dexos1 specification are marked with the
dexos1 approved logo. See
www.gmdexos.com.
Caution
Failure to use the recommended engine
oil or equivalent can result in engine
damage not covered by the vehicle
warranty.
Viscosity Grade
Use SAE 5W-30 viscosity grade engine oil.
Cold Temperature Operation: In an area of
extreme cold, where the temperature falls
below −29 °C (−20 °F), an SAE 0W-30 oil may
be used. An oil of this viscosity grade will
provide easier cold starting for the engine at
extremely low temperatures. When selecting an oil of the appropriate viscosity grade, it
is recommended to select an oil of the
correct specification. See
“Specification”
earlier in this section.
Engine Oil Additives/Engine Oil Flushes
Do not add anything to the oil. The
recommended oils meeting the dexos1
specification are all that is needed for good
performance and engine protection.
Engine oil system flushes are not
recommended and could cause engine
damage not covered by the vehicle
warranty.
What to Do with Used Oil
Used engine oil contains certain elements
that can be unhealthy for your skin and
could even cause cancer. Do not let used oil
stay on your skin for very long. Clean your
skin and nails with soap and water, or a
good hand cleaner. Wash or properly
dispose of clothing or rags containing used
engine oil. See the manufacturer's warnings
about the use and disposal of oil products.
Used oil can be a threat to the environment.
If you change your own oil, be sure to drain
all the oil from the filter before disposal.
Never dispose of oil by putting it in the
Page 183 of 289
Chevrolet Express Owner Manual (GMNA-Localizing-U.S./Canada/Mexico-
15555951) - 2022 - CRC - 1/27/22
182 Vehicle Care
Caution (Continued)
covered by the vehicle warranty. Always
use the correct automatic transmission
fluid. SeeRecommended Fluids and
Lubricants 0251.
Change the fluid and filter at the intervals
listed in Maintenance Schedule 0245, and
be sure to use the fluid listed in
Recommended Fluids and Lubricants 0251.
Engine Air Cleaner/Filter
The air cleaner/filter assembly is on the
front of the engine compartment on the
driver side of the vehicle. See Engine
Compartment Overview 0176.
When to Inspect the Engine Air Cleaner/Filter
For intervals on changing and inspecting the
engine air filter, see Maintenance Schedule
0 245.
How to Inspect/Replace the Engine Air
Cleaner/Filter
Do not start the engine or have the engine
running with the engine air filter housing
open. Before removing the engine air filter,
make sure that the engine air filter housing and nearby components are free of dirt and
debris. Do not clean the engine air filter or
components with water or compressed air.
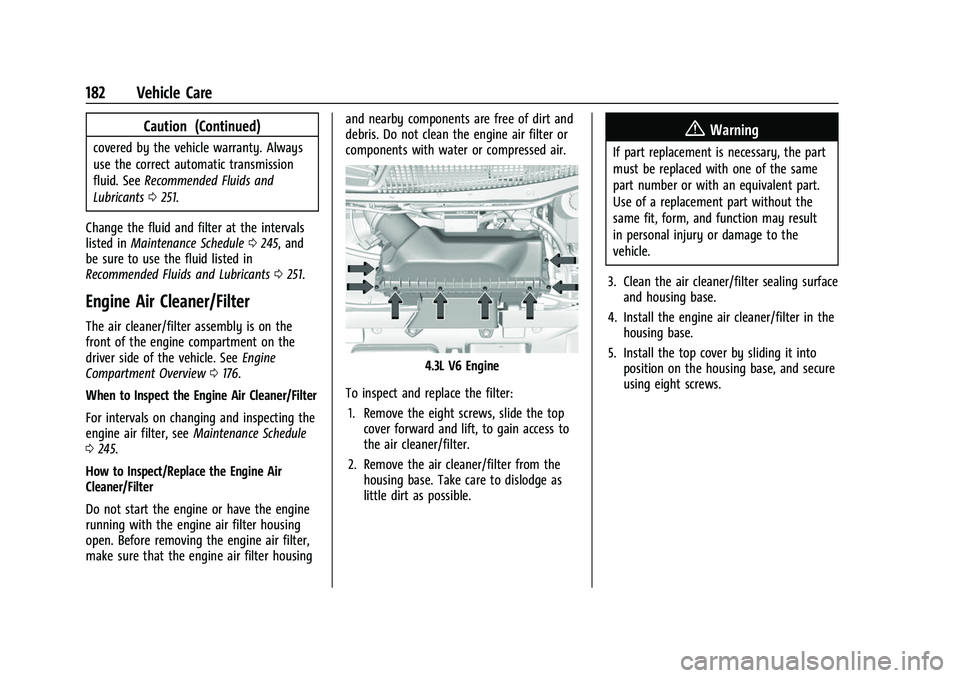
4.3L V6 Engine
To inspect and replace the filter: 1. Remove the eight screws, slide the top cover forward and lift, to gain access to
the air cleaner/filter.
2. Remove the air cleaner/filter from the housing base. Take care to dislodge as
little dirt as possible.
{Warning
If part replacement is necessary, the part
must be replaced with one of the same
part number or with an equivalent part.
Use of a replacement part without the
same fit, form, and function may result
in personal injury or damage to the
vehicle.
3. Clean the air cleaner/filter sealing surface and housing base.
4. Install the engine air cleaner/filter in the housing base.
5. Install the top cover by sliding it into position on the housing base, and secure
using eight screws.
Page 187 of 289
Chevrolet Express Owner Manual (GMNA-Localizing-U.S./Canada/Mexico-
15555951) - 2022 - CRC - 1/27/22
186 Vehicle Care
Warning (Continued)
including the pressure cap, is hot. Wait
for the cooling system and pressure cap
to cool.
Caution
Failure to follow the specific coolant fill
procedure could cause the engine to
overheat and could cause system
damage. If coolant is not visible in the
surge tank, contact your dealer.
If coolant is needed, add the proper
DEX-COOL coolant mixture at the coolant
recovery tank.
How to Add Coolant to the Radiator
{Warning
Steam and scalding liquids from a hot
cooling system are under pressure.
Turning the pressure cap, even a little,
can cause them to come out at high
speed and you could be burned. Never
turn the cap when the cooling system, (Continued)
Warning (Continued)
including the pressure cap, is hot. Wait
for the cooling system and pressure cap
to cool.
If coolant is needed, add the proper mixture
directly to the radiator, but be sure the
cooling system is cool before this is done.
1. Remove the radiator pressure cap when the cooling system, including the
radiator pressure cap and upper radiator
hose, is no longer hot. Turn the pressure
cap slowly counterclockwise until it first
stops. Do not press down while turning
the pressure cap.
If a hiss is heard, wait for that to stop.
A hiss means there is still some
pressure left.
2. Keep turning the pressure cap, but now push down as you turn it. Remove the
pressure cap. 3. Fill the radiator with the proper mixture,
up to the base of the filler neck. See
Recommended Fluids and Lubricants
0251 for more information about the
proper coolant mixture.
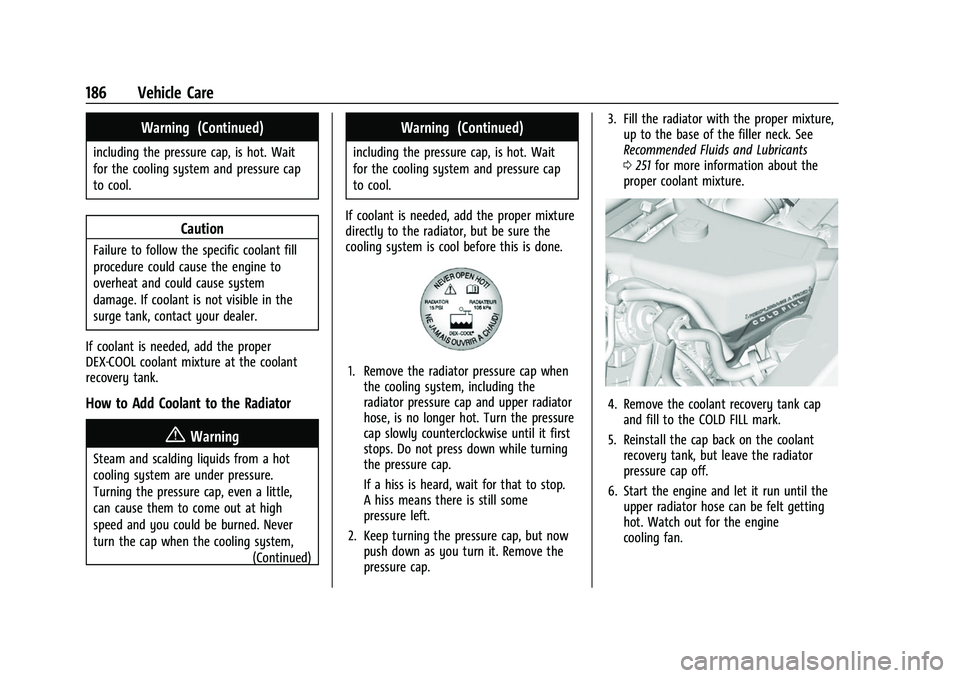
4. Remove the coolant recovery tank cap
and fill to the COLD FILL mark.
5. Reinstall the cap back on the coolant recovery tank, but leave the radiator
pressure cap off.
6. Start the engine and let it run until the upper radiator hose can be felt getting
hot. Watch out for the engine
cooling fan.