Tow button CHEVROLET EXPRESS 2017 Owners Manual
[x] Cancel search | Manufacturer: CHEVROLET, Model Year: 2017, Model line: EXPRESS, Model: CHEVROLET EXPRESS 2017Pages: 289, PDF Size: 11.46 MB
Page 6 of 289
Chevrolet Express Owner Manual (GMNA-Localizing-U.S./Canada/Mexico-
15555951) - 2022 - CRC - 1/27/22
Introduction 5
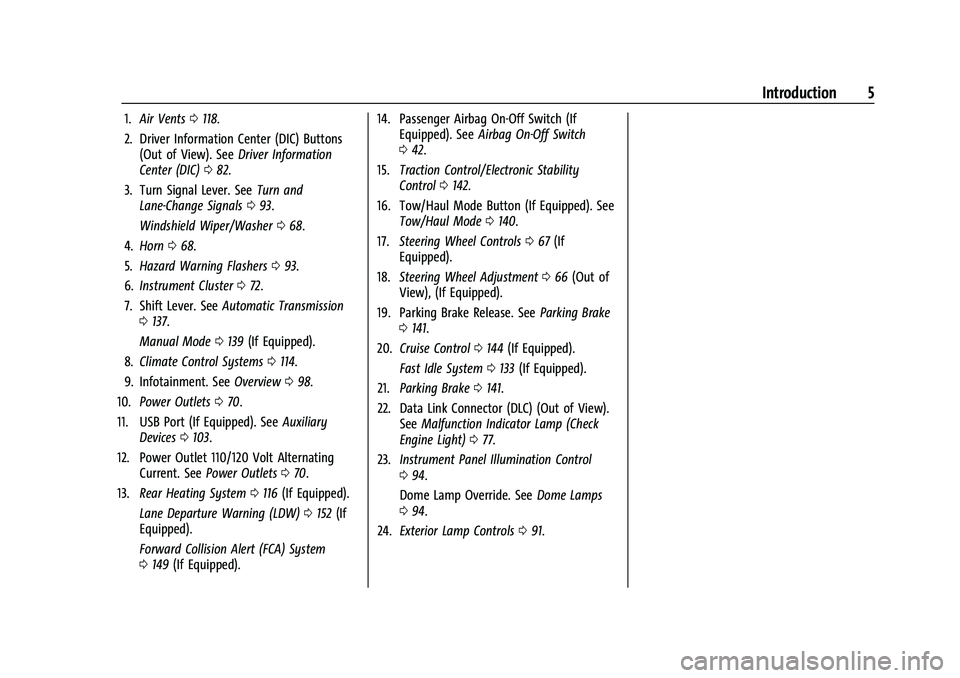
1.Air Vents 0118.
2. Driver Information Center (DIC) Buttons (Out of View). See Driver Information
Center (DIC) 082.
3. Turn Signal Lever. See Turn and
Lane-Change Signals 093.
Windshield Wiper/Washer 068.
4. Horn 068.
5. Hazard Warning Flashers 093.
6. Instrument Cluster 072.
7. Shift Lever. See Automatic Transmission
0 137.
Manual Mode 0139 (If Equipped).
8. Climate Control Systems 0114.
9. Infotainment. See Overview098.
10. Power Outlets 070.
11. USB Port (If Equipped). See Auxiliary
Devices 0103.
12. Power Outlet 110/120 Volt Alternating Current. See Power Outlets 070.
13. Rear Heating System 0116 (If Equipped).
Lane Departure Warning (LDW) 0152 (If
Equipped).
Forward Collision Alert (FCA) System
0 149 (If Equipped). 14. Passenger Airbag On-Off Switch (If
Equipped). See Airbag On-Off Switch
0 42.
15. Traction Control/Electronic Stability
Control 0142.
16. Tow/Haul Mode Button (If Equipped). See Tow/Haul Mode 0140.
17. Steering Wheel Controls 067 (If
Equipped).
18. Steering Wheel Adjustment 066 (Out of
View), (If Equipped).
19. Parking Brake Release. See Parking Brake
0 141.
20. Cruise Control 0144 (If Equipped).
Fast Idle System 0133 (If Equipped).
21. Parking Brake 0141.
22. Data Link Connector (DLC) (Out of View). SeeMalfunction Indicator Lamp (Check
Engine Light) 077.
23. Instrument Panel Illumination Control
094.
Dome Lamp Override. See Dome Lamps
0 94.
24. Exterior Lamp Controls 091.
Page 14 of 289
Chevrolet Express Owner Manual (GMNA-Localizing-U.S./Canada/Mexico-
15555951) - 2022 - CRC - 1/27/22
Keys, Doors, and Windows 13
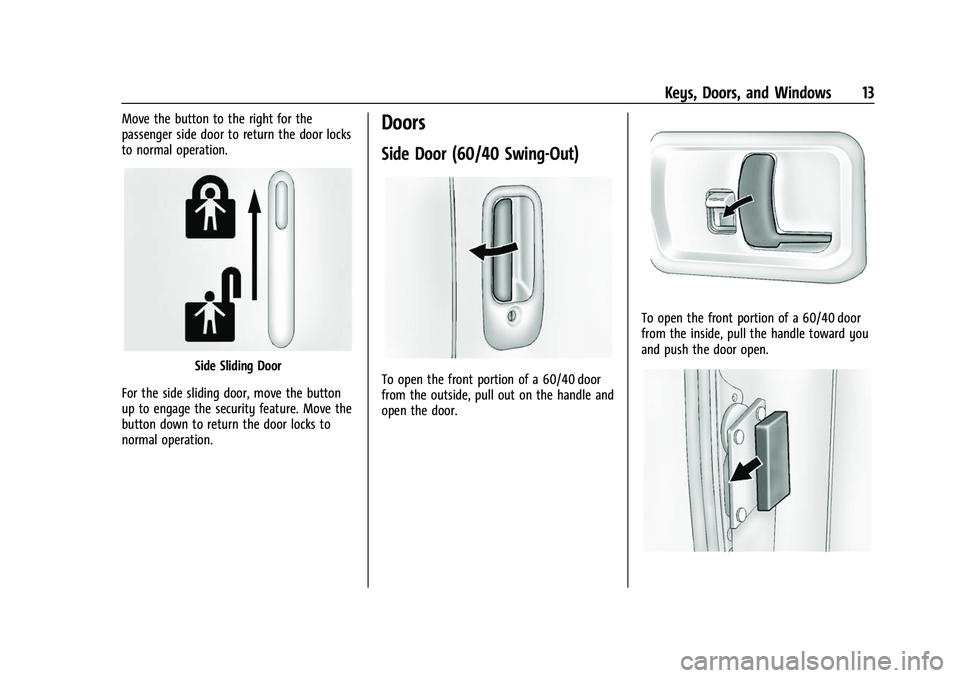
Move the button to the right for the
passenger side door to return the door locks
to normal operation.
Side Sliding Door
For the side sliding door, move the button
up to engage the security feature. Move the
button down to return the door locks to
normal operation.
Doors
Side Door (60/40 Swing-Out)
To open the front portion of a 60/40 door
from the outside, pull out on the handle and
open the door.
To open the front portion of a 60/40 door
from the inside, pull the handle toward you
and push the door open.
Page 19 of 289
Chevrolet Express Owner Manual (GMNA-Localizing-U.S./Canada/Mexico-
15555951) - 2022 - CRC - 1/27/22
18 Keys, Doors, and Windows
Trailer-Tow Mirrors
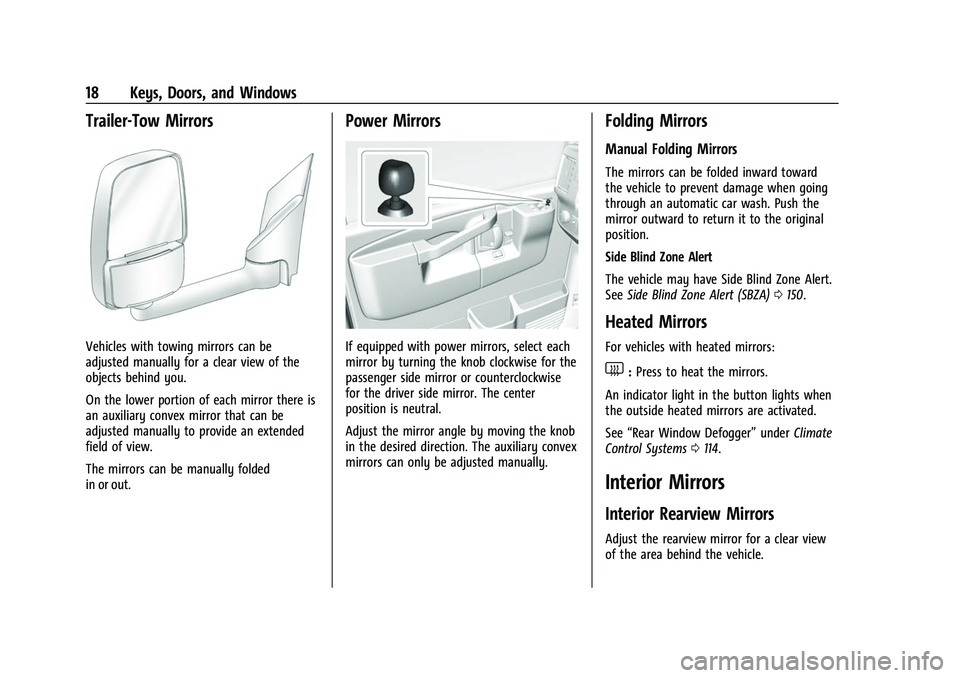
Vehicles with towing mirrors can be
adjusted manually for a clear view of the
objects behind you.
On the lower portion of each mirror there is
an auxiliary convex mirror that can be
adjusted manually to provide an extended
field of view.
The mirrors can be manually folded
in or out.
Power Mirrors
If equipped with power mirrors, select each
mirror by turning the knob clockwise for the
passenger side mirror or counterclockwise
for the driver side mirror. The center
position is neutral.
Adjust the mirror angle by moving the knob
in the desired direction. The auxiliary convex
mirrors can only be adjusted manually.
Folding Mirrors
Manual Folding Mirrors
The mirrors can be folded inward toward
the vehicle to prevent damage when going
through an automatic car wash. Push the
mirror outward to return it to the original
position.
Side Blind Zone Alert
The vehicle may have Side Blind Zone Alert.
SeeSide Blind Zone Alert (SBZA) 0150.
Heated Mirrors
For vehicles with heated mirrors:
1:Press to heat the mirrors.
An indicator light in the button lights when
the outside heated mirrors are activated.
See “Rear Window Defogger” underClimate
Control Systems 0114.
Interior Mirrors
Interior Rearview Mirrors
Adjust the rearview mirror for a clear view
of the area behind the vehicle.
Page 32 of 289
Chevrolet Express Owner Manual (GMNA-Localizing-U.S./Canada/Mexico-
15555951) - 2022 - CRC - 1/27/22
Seats and Restraints 31
{Warning
You can be seriously injured or killed if
the shoulder belt is worn behind your
back, under your legs, or wrapped around
your neck. The shoulder belt can tighten
but cannot be loosened if it is locked. The
shoulder belt locks when it is pulled all
the way out of the retractor. It unlocks
when the shoulder belt is allowed to go
all the way back into the retractor, but it
cannot do this if it is wrapped around
you. You may have to cut the seat belt if
it is locked and tightened around you.
Lap-Shoulder Belt
All seating positions in the vehicle have a
lap-shoulder belt. If you are using a rear
seating position with a detachable seat belt
and the seat belt is not attached, see
“Reinstalling the Rear Seats”underRear
Seats 024 for instructions on reconnecting
the seat belt to the mini-buckle. The following instructions explain how to
wear a lap-shoulder belt properly.
1. Adjust the seat, if the seat is adjustable, so you can sit up straight. To see how,
see “Seats” in the Index.
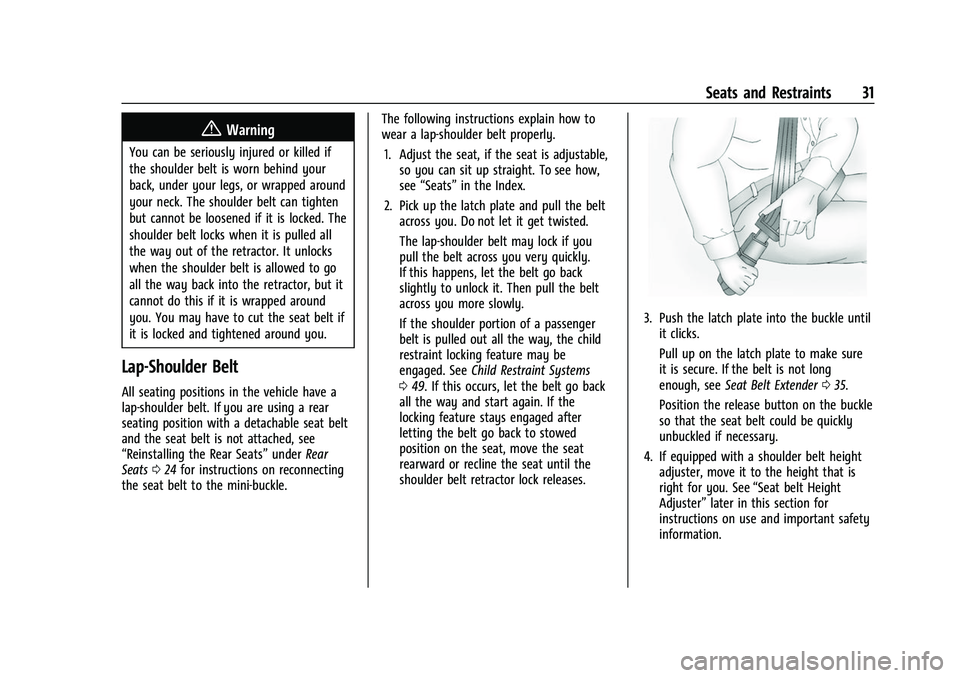
2. Pick up the latch plate and pull the belt across you. Do not let it get twisted.
The lap-shoulder belt may lock if you
pull the belt across you very quickly.
If this happens, let the belt go back
slightly to unlock it. Then pull the belt
across you more slowly.
If the shoulder portion of a passenger
belt is pulled out all the way, the child
restraint locking feature may be
engaged. See Child Restraint Systems
0 49. If this occurs, let the belt go back
all the way and start again. If the
locking feature stays engaged after
letting the belt go back to stowed
position on the seat, move the seat
rearward or recline the seat until the
shoulder belt retractor lock releases.
3. Push the latch plate into the buckle until it clicks.
Pull up on the latch plate to make sure
it is secure. If the belt is not long
enough, see Seat Belt Extender 035.
Position the release button on the buckle
so that the seat belt could be quickly
unbuckled if necessary.
4. If equipped with a shoulder belt height adjuster, move it to the height that is
right for you. See “Seat belt Height
Adjuster” later in this section for
instructions on use and important safety
information.
Page 33 of 289
Chevrolet Express Owner Manual (GMNA-Localizing-U.S./Canada/Mexico-
15555951) - 2022 - CRC - 1/27/22
32 Seats and Restraints
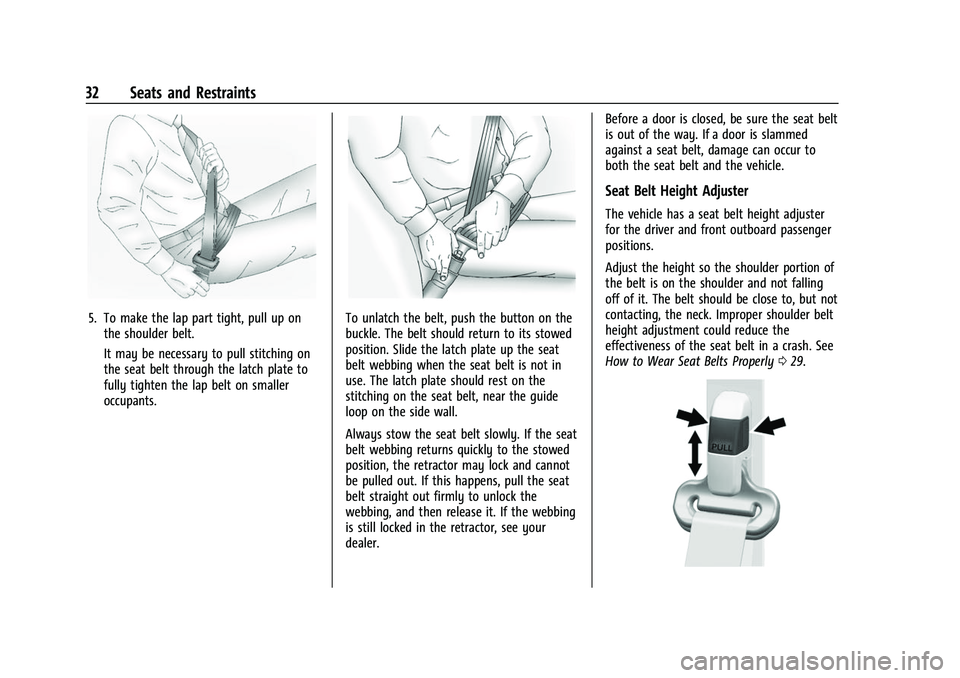
5. To make the lap part tight, pull up onthe shoulder belt.
It may be necessary to pull stitching on
the seat belt through the latch plate to
fully tighten the lap belt on smaller
occupants.To unlatch the belt, push the button on the
buckle. The belt should return to its stowed
position. Slide the latch plate up the seat
belt webbing when the seat belt is not in
use. The latch plate should rest on the
stitching on the seat belt, near the guide
loop on the side wall.
Always stow the seat belt slowly. If the seat
belt webbing returns quickly to the stowed
position, the retractor may lock and cannot
be pulled out. If this happens, pull the seat
belt straight out firmly to unlock the
webbing, and then release it. If the webbing
is still locked in the retractor, see your
dealer. Before a door is closed, be sure the seat belt
is out of the way. If a door is slammed
against a seat belt, damage can occur to
both the seat belt and the vehicle.
Seat Belt Height Adjuster
The vehicle has a seat belt height adjuster
for the driver and front outboard passenger
positions.
Adjust the height so the shoulder portion of
the belt is on the shoulder and not falling
off of it. The belt should be close to, but not
contacting, the neck. Improper shoulder belt
height adjustment could reduce the
effectiveness of the seat belt in a crash. See
How to Wear Seat Belts Properly
029.
Page 116 of 289

Chevrolet Express Owner Manual (GMNA-Localizing-U.S./Canada/Mexico-
15555951) - 2022 - CRC - 1/27/22
Climate Controls 115
):Air is divided between the instrument
panel and floor outlets, with some air
directed toward the windshield.
6: Air is directed to the floor outlets with
some air directed to the windshield and side
windows.
-: This mode clears the windows of fog or
moisture. Outside air is directed to the floor
and defroster outlets. Adjust the
temperature knob for warmer or cooler air.
The air conditioning compressor might turn
on in this setting to dehumidify the air.
1: This mode clears the windshield of fog
or frost more quickly. Air is directed to the
windshield, with some to the floor outlets
and front side windows. The air conditioning
compressor might turn on in this setting to
dehumidify the air.
Do not drive the vehicle until all the
windows are clear.
Vehicles with Air Conditioning
1. Fan Control
2. Temperature Control
3. Air Delivery Mode Control
4. Rear Window Defogger (If Equipped)
On hot days, open the windows to let hot
inside air escape; then close them. This
helps to reduce the time needed for the
vehicle to cool down and the system
operates more efficiently.
#: Cools and dehumidifies the air inside
of the vehicle.
V: Cools the air inside the vehicle faster,
by recirculating the inside air.
Rear Window Defogger
If equipped with a rear window defogger, a
warming grid is used to remove fog or frost
from the rear window.
1: Press to turn the rear window
defogger on or off. An indicator light on the
button comes on to show that the rear
window defogger is on.
The defogger only works when the ignition
is on. The defogger turns off if the ignition
is turned off or to ACC/ACCESSORY.
Page 140 of 289
Chevrolet Express Owner Manual (GMNA-Localizing-U.S./Canada/Mexico-
15555951) - 2022 - CRC - 1/27/22
Driving and Operating 139
The transmission uses adaptive shift
controls. Adaptive shift controls continually
compare key shift parameters to
pre-programmed ideal shifts stored in the
transmission’s computer. The transmission
constantly makes adjustments to improve
vehicle performance according to how the
vehicle is being used, such as with a heavy
load or when the temperature changes.
During this adaptive shift control process,
shifting might feel different as the
transmission determines the best settings.
The shift quality of a new vehicle may not
be ideal because the adaptive shift control
process may not have determined the best
settings for a particular shift or condition.
Shift quality will improve with continued
driving.
When temperatures are very cold, the
transmission's gear shifting could be
delayed, providing more stable shifts until
the engine warms up. Shifts could be more
noticeable with a cold transmission. This
difference in shifting is normal.
M :This position lets drivers select the
range of gears appropriate for current
driving conditions. If the vehicle has this
feature, see “Range Selection Mode” under
Manual Mode 0139. 1 :
This position reduces vehicle speed
without using the brakes. You can use it for
major/severe downgrades where the vehicle
would otherwise accelerate due to steepness
of grade. When you shift to 1 (First) it
provides the lowest gear appropriate to
current road speed and continues to
downshift as the vehicle slows, eventually
downshifting to 1 (First) gear. The
transmission can be held in 1 (First) gear
using Range Selection Mode or the shift
lever. See “Range Selection Mode” under
Manual Mode 0139.
Caution
Spinning the tires or holding the vehicle
in one place on a hill using only the
accelerator pedal may damage the
transmission. The repair will not be
covered by the vehicle warranty. If the
vehicle is stuck, do not spin the tires.
When stopping on a hill, use the brakes
to hold the vehicle in place.
Normal Mode Grade Braking
This mode is enabled when the vehicle is
started, but is not enabled in Range
Selection Mode. It assists in maintaining
desired vehicle speeds when driving on downhill grades by using the engine and
transmission to slow the vehicle. The first
time the system activates for each ignition
key cycle.
To disable or enable Normal Mode Grade
Braking within the current ignition key cycle,
press and hold the Tow/Haul button for
three seconds.
For other forms of grade braking,
see
Tow/Haul Mode 0140 and
Cruise Control 0144.
Manual Mode
Range Selection Mode
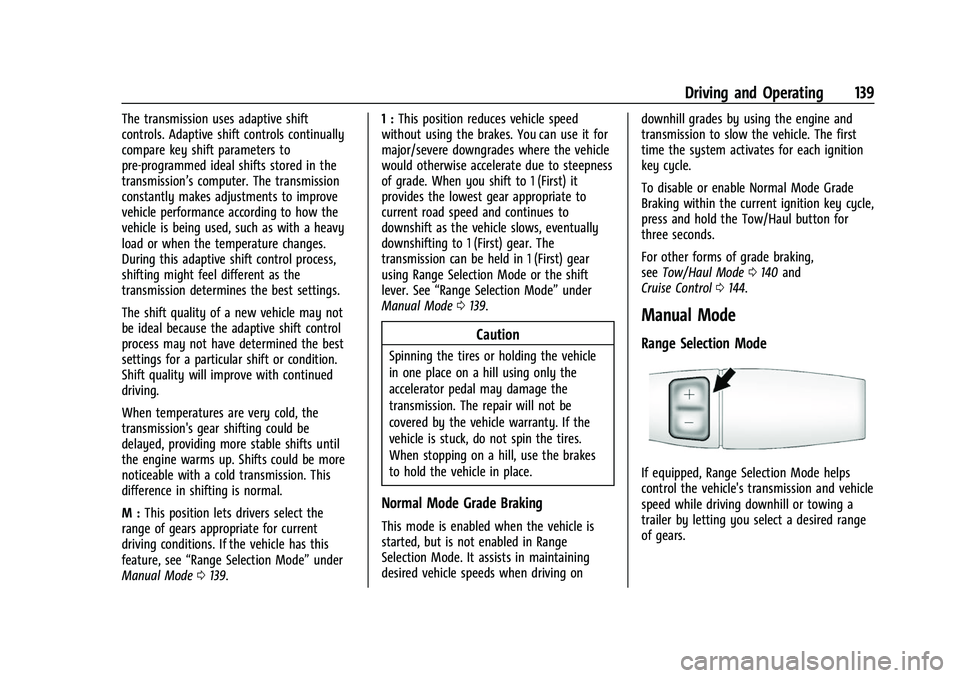
If equipped, Range Selection Mode helps
control the vehicle's transmission and vehicle
speed while driving downhill or towing a
trailer by letting you select a desired range
of gears.
Page 141 of 289
Chevrolet Express Owner Manual (GMNA-Localizing-U.S./Canada/Mexico-
15555951) - 2022 - CRC - 1/27/22
140 Driving and Operating
To use this feature:1. Move the shift lever to M (Manual Mode).
2. Press the +/− buttons on the shift lever
to select the desired range of gears for
current driving conditions.
When M (Manual Mode) is selected, the
transmission will downshift and a number
displays in the Driver Information
Center (DIC) next to the M indicating the
current gear.
This number is the highest gear that can be
used. However, the vehicle can automatically
shift to lower gears as it adjusts to driving
conditions. This means that all gears below
that number are available. When 5 (Fifth) is
selected, 1 (First) through 5 (Fifth) gears are
automatically shifted by the vehicle, but
6 (Sixth) cannot be used until the +/−
button on the shift lever is used to change
to the gear.
Grade Braking is not available when Range
Selection Mode is active. See Tow/Haul
Mode 0140.
While using Range Selection Mode, cruise
control and the Tow/Haul Mode can
be used.Caution
Spinning the tires or holding the vehicle
in one place on a hill using only the
accelerator pedal may damage the
transmission. The repair will not be
covered by the vehicle warranty. If the
vehicle is stuck, do not spin the tires.
When stopping on a hill, use the brakes
to hold the vehicle in place.
Tow/Haul Mode
If equipped, Tow/Haul Mode adjusts the
transmission shift pattern to reduce shift
cycling, providing increased performance,
vehicle control, and transmission cooling
when towing or hauling heavy loads.
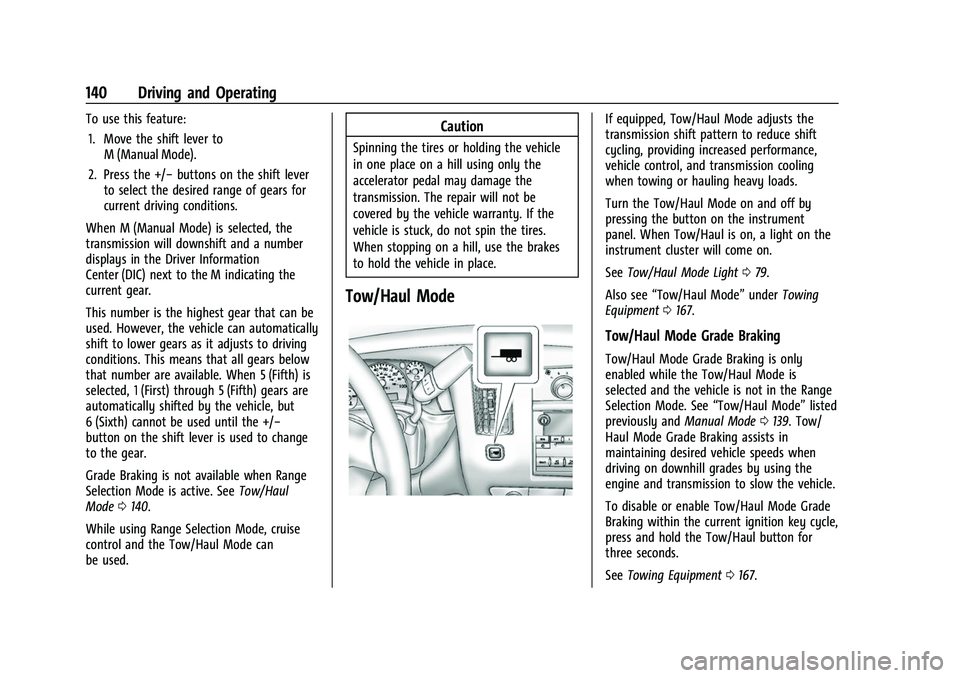
Turn the Tow/Haul Mode on and off by
pressing the button on the instrument
panel. When Tow/Haul is on, a light on the
instrument cluster will come on.
See Tow/Haul Mode Light 079.
Also see “Tow/Haul Mode” underTowing
Equipment 0167.
Tow/Haul Mode Grade Braking
Tow/Haul Mode Grade Braking is only
enabled while the Tow/Haul Mode is
selected and the vehicle is not in the Range
Selection Mode. See “Tow/Haul Mode”listed
previously and Manual Mode0139. Tow/
Haul Mode Grade Braking assists in
maintaining desired vehicle speeds when
driving on downhill grades by using the
engine and transmission to slow the vehicle.
To disable or enable Tow/Haul Mode Grade
Braking within the current ignition key cycle,
press and hold the Tow/Haul button for
three seconds.
See Towing Equipment 0167.
Page 150 of 289
Chevrolet Express Owner Manual (GMNA-Localizing-U.S./Canada/Mexico-
15555951) - 2022 - CRC - 1/27/22
Driving and Operating 149
PARK ASSIST OFF :This message occurs if
the driver disables the system or if the
vehicle is driven above 8 km/h (5 mph) in
R (Reverse).
PARK ASST BLOCKED SEE OWNERS
MANUAL : This message can occur under the
following conditions:
.The sensors are not clean. Keep the rear
bumper free of mud, dirt, snow, ice, slush,
and frost. The message may not clear
until frost or ice has melted all around
and inside the sensor.
.A trailer is attached to the vehicle, or a
bicycle or an object hanging out of the
rear door during the current or last drive
cycle. RPA will return to normal operation
after it is determined the object is
removed. This could take a few drive
cycles.
.A tow bar is attached to the vehicle.
Other conditions may affect system
performance, such as vibrations from a
jackhammer or the compression of air
brakes on a very large truck.
Forward Collision Alert (FCA)
System
If equipped, the FCA system may help to
avoid or reduce the harm caused by
front-end crashes. When approaching a
vehicle ahead too quickly, FCA provides a
red flashing alert on the windshield and
rapidly beeps. FCA also lights an amber
visual alert if following another vehicle
much too closely.
FCA detects vehicles within a distance of
approximately 60 m (197 ft) and operates at
speeds above 40 km/h (25 mph).
{Warning
FCA is a warning system and does not
apply the brakes. When approaching a
slower-moving or stopped vehicle ahead
too rapidly, or when following a vehicle
too closely, FCA may not provide a
warning with enough time to help avoid
a crash. It also may not provide any
warning at all. FCA does not warn of
pedestrians, animals, signs, guardrails,
bridges, construction barrels, or other (Continued)
Warning (Continued)
objects. Be ready to take action and
apply the brakes. SeeDefensive Driving
0 121.
FCA can be disabled with the
[button on
the center stack.
Detecting the Vehicle Ahead
FCA warnings will not occur unless the FCA
system detects a vehicle ahead. When a
vehicle is detected, the vehicle ahead
indicator will display green. Vehicles may
not be detected on curves, highway exit
ramps, or hills, due to poor visibility; or if a
vehicle ahead is partially blocked by
pedestrians or other objects. FCA will not
detect another vehicle ahead until it is
completely in the driving lane.