change CHEVROLET EXPRESS 2020 Get To Know Guide
[x] Cancel search | Manufacturer: CHEVROLET, Model Year: 2020, Model line: EXPRESS, Model: CHEVROLET EXPRESS 2020Pages: 356, PDF Size: 5.7 MB
Page 112 of 356
Chevrolet Express Owner Manual (GMNA-Localizing-U.S./Canada/Mexico-
13882570) - 2020 - CRC - 11/1/19
Lighting 111
AUTO :Automatically turns the
exterior lamps on and off,
depending on outside lighting.
;: Turns on the parking lamps
including all lamps, except the
headlamps.
2: Turns on the headlamps
together with the parking lamps and
instrument panel lights.
If the headlamps are turned on
while the vehicle is on, the
headlamps turn off automatically
10 minutes after the ignition is
turned off. If the headlamps are
turned on while the vehicle is off,
the headlamps will continue to stay
on. To prevent the battery from
being drained, turn the control to the
Oposition.
A warning chime sounds if the driver
door is opened while the ignition
switch is off and the headlamps
are on.
To change the headlamps from low
beam to high beam, pull the turn
signal lever all the way toward you.
Then release it.
Exterior Lamps Off
Reminder
If a door is open, a reminder chime
sounds when the headlamps or
parking lamps are manually turned
on and the key is out of the ignition.
To turn off the chime, turn the
headlamp switch to
Oor AUTO and
then back on, or close and re-open
the door. In the auto mode, the
headlamps turn off once the ignition
is off or may remain on until the
headlamp delay ends, if enabled in
the Driver Information Center (DIC).
See “Exit Lighting” underVehicle
Personalization 0105.
Headlamp High/
Low-Beam Changer
2 3:Pull the turn signal lever all
the way toward you to change the
headlamps from low to high beam.
Then release it.
Pull the turn signal lever all the way
toward you again and release it to
change the headlamps back to
low beam.
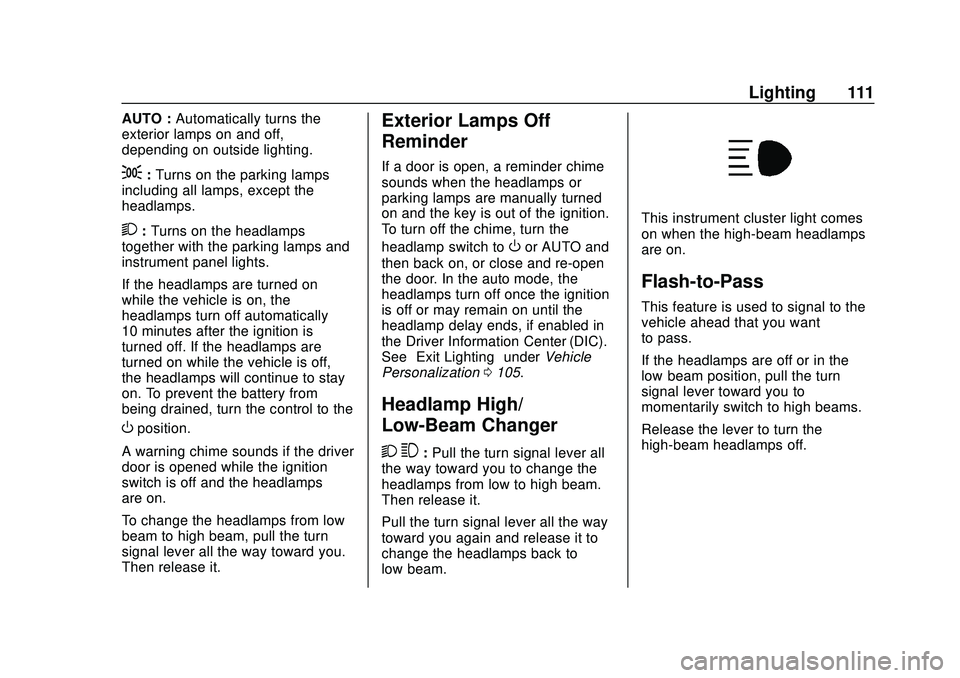
This instrument cluster light comes
on when the high-beam headlamps
are on.
Flash-to-Pass
This feature is used to signal to the
vehicle ahead that you want
to pass.
If the headlamps are off or in the
low‐beam position, pull the turn
signal lever toward you to
momentarily switch to high beams.
Release the lever to turn the
high-beam headlamps off.
Page 113 of 356
Chevrolet Express Owner Manual (GMNA-Localizing-U.S./Canada/Mexico-
13882570) - 2020 - CRC - 11/1/19
112 Lighting
Daytime Running
Lamps (DRL)
DRL can make it easier for others to
see the front of the vehicle during
the day. Fully functional DRL are
required on all vehicles first sold in
Canada.
The DRL system comes on in
daylight when the following
conditions are met:
.The ignition is on.
. The exterior lamp control is in
the AUTO position.
. The shift lever is not in P (Park).
. The light sensor determines it is
daytime.
When the DRL are on, the taillamps,
sidemarker, instrument panel lights,
and other lamps will not be on.
The automatic headlamp system
automatically switches from DRL to
the headlamps depending on the
darkness of the surroundings. To turn off the DRL, turn the exterior
lamp control to
Oand then release
it. For vehicles first sold in Canada,
the DRL can only be turned off
when the vehicle is parked.
Automatic Headlamp
System
When it is dark enough outside and
the headlamp switch is in AUTO,
the automatic headlamp system
turns on the headlamps, along with
the taillamps, sidemarker lamps,
parking lamps, and the instrument
panel lights. The radio lights will
also be dim.
To turn off the automatic headlamp
system, turn the exterior lamp
control to the off position and then
release. For vehicles first sold in
Canada, the transmission must be
in the P (Park) position, before the
automatic headlamp system can be
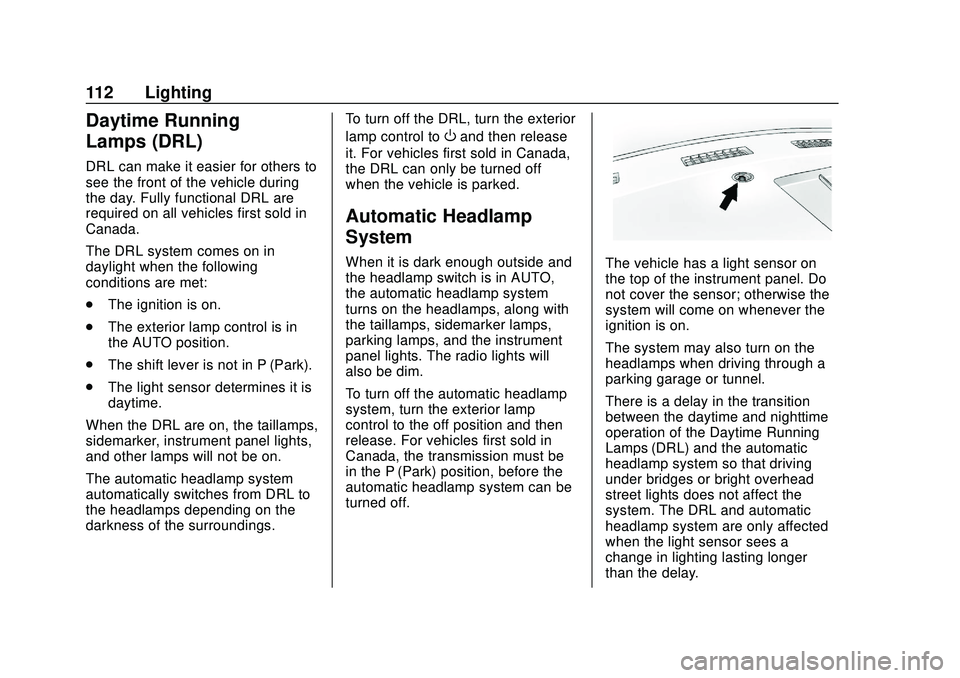
turned off.The vehicle has a light sensor on
the top of the instrument panel. Do
not cover the sensor; otherwise the
system will come on whenever the
ignition is on.
The system may also turn on the
headlamps when driving through a
parking garage or tunnel.
There is a delay in the transition
between the daytime and nighttime
operation of the Daytime Running
Lamps (DRL) and the automatic
headlamp system so that driving
under bridges or bright overhead
street lights does not affect the
system. The DRL and automatic
headlamp system are only affected
when the light sensor sees a
change in lighting lasting longer
than the delay.
Page 114 of 356
Chevrolet Express Owner Manual (GMNA-Localizing-U.S./Canada/Mexico-
13882570) - 2020 - CRC - 11/1/19
Lighting 113
If the vehicle is started in a dark
garage, the automatic headlamp
system comes on immediately.
Once the vehicle leaves the garage,
it takes approximately 30 seconds
for the automatic headlamp system
to change to DRL if it is light
outside. During that delay, the
instrument cluster may not be as
bright as usual. Make sure the
instrument panel brightness control
is in the full bright position. See
Instrument Panel Illumination
Control0114.
To idle the vehicle with the
automatic headlamp system off, turn
the control off.
The headlamps will also stay on
after exiting the vehicle. This feature
may be programmable. See Vehicle
Personalization 0105.
If the feature is not programmable,
exit lighting is automatic. When it is
dark enough outside, the exterior
lamps remain on for 30 seconds
after the ignition is turned off.Lights On with Wipers
If the windshield wipers are
activated in daylight with the engine
on, and the exterior lamp control is
in AUTO, the headlamps, parking
lamps, and other exterior lamps
come on. The transition time for the
lamps coming on varies based on
wiper speed. When the wipers are
not operating, these lamps turn off.
Move the exterior lamp control to
P
or;to disable this feature.
Hazard Warning Flashers
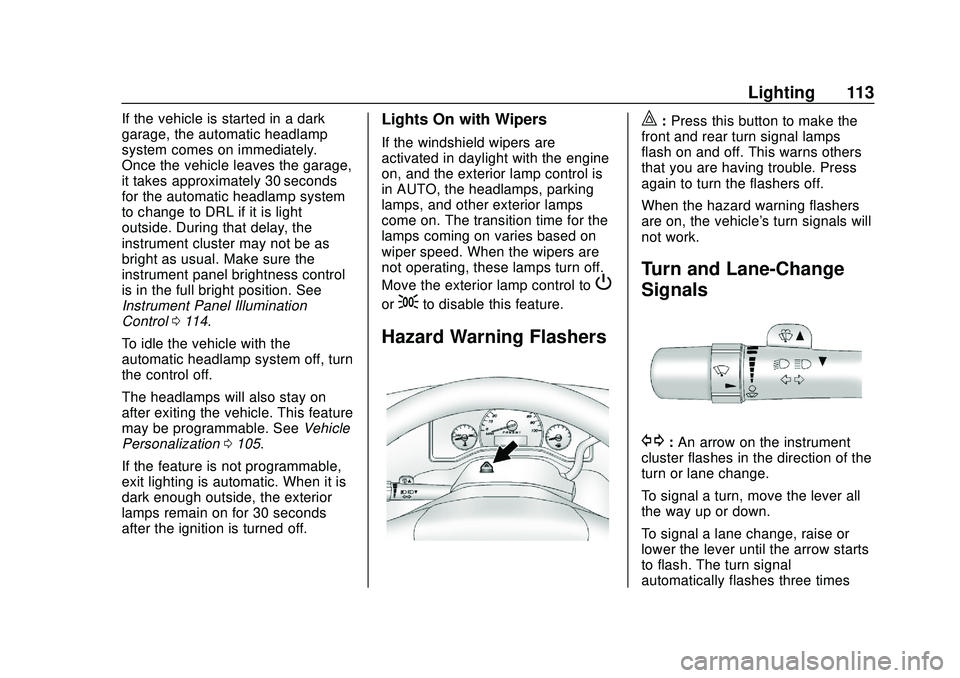
|: Press this button to make the
front and rear turn signal lamps
flash on and off. This warns others
that you are having trouble. Press
again to turn the flashers off.
When the hazard warning flashers
are on, the vehicle's turn signals will
not work.
Turn and Lane-Change
Signals
G: An arrow on the instrument
cluster flashes in the direction of the
turn or lane change.
To signal a turn, move the lever all
the way up or down.
To signal a lane change, raise or
lower the lever until the arrow starts
to flash. The turn signal
automatically flashes three times
Page 115 of 356
Chevrolet Express Owner Manual (GMNA-Localizing-U.S./Canada/Mexico-
13882570) - 2020 - CRC - 11/1/19
114 Lighting
and if the Tow/Haul Mode is active it
flashes six times. Holding the turn
signal lever for more than
one second causes the turn signals
to flash continually until the lever is
released.
The lever returns to its starting
position when released.
If after signaling a turn or lane
change the arrow flashes rapidly or
does not come on, a signal bulb
may be burned out.
Have any burned out bulbs
replaced. If a bulb is not burned out,
check the fuse. SeeFuses and
Circuit Breakers 0249.
Turn Signal On Chime
If the turn signal is left on for more
than 1.2 km (0.75 mi), a chime
sounds at each flash of the turn
signal and the message TURN
SIGNAL ON also appears in the
Driver Information Center (DIC). To
turn off the chime and message,
move the turn signal lever to the off
position.
Interior Lighting
Instrument Panel
Illumination Control
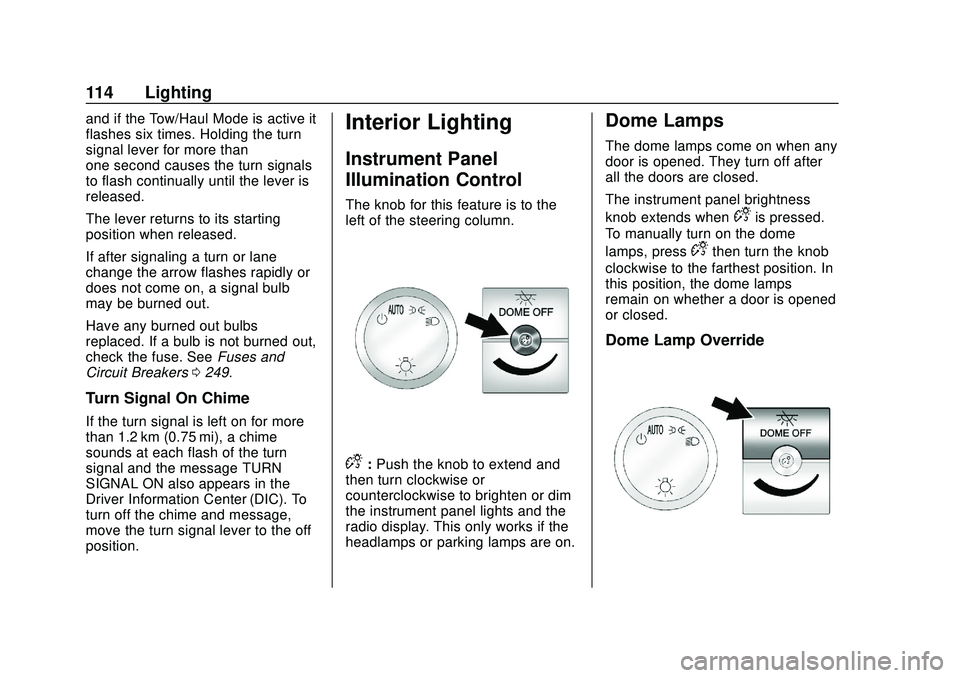
The knob for this feature is to the
left of the steering column.
D:Push the knob to extend and
then turn clockwise or
counterclockwise to brighten or dim
the instrument panel lights and the
radio display. This only works if the
headlamps or parking lamps are on.
Dome Lamps
The dome lamps come on when any
door is opened. They turn off after
all the doors are closed.
The instrument panel brightness
knob extends when
Dis pressed.
To manually turn on the dome
lamps, press
Dthen turn the knob
clockwise to the farthest position. In
this position, the dome lamps
remain on whether a door is opened
or closed.
Dome Lamp Override
Page 122 of 356
Chevrolet Express Owner Manual (GMNA-Localizing-U.S./Canada/Mexico-
13882570) - 2020 - CRC - 11/1/19
Infotainment System 121
10. CD/AUX.Press to scroll through
selecting the CD or an
auxiliary device.
11.
\FWD
. Press and hold to fast
forward through a track.
12.
sREV
. Press and hold to go
backward fast through a
track.
13.
P
. Press to turn the
infotainment system on
or off.
. Turn to adjust the volume.
14.
¨SEEK
. Seeks or scans to the next
station.
15.
©SEEK
. Seeks or scans to the
previous station. 16. BAND
.Press to scroll through the
available bands FM1, FM2,
AM, or SXM if equipped.
17.
H
. Press to set the clock
and date.
Operation
Using the Radio
O:Press to turn the system on
and off.
Turn clockwise or counterclockwise
to increase or decrease the volume.
4: Press to switch the display
between the radio station frequency
and the time. While the ignition is
off, press this button to display the
time. Press to display additional text
information related to the current
FM-RDS station or MP3 song.
A choice of additional information
such as Channel, Song, Artist, and
CAT (category) can display.
Continue pressing to highlight the desired tab, or press the softkey
under any one of the tabs and the
information about that tab displays.
Speed Compensated Volume
(SCV) :
SCV automatically adjusts
the radio volume to compensate for
road and wind noise as the vehicle
speed changes while driving, so that
the volume level stays consistent.
To activate SCV:
1. Set the radio volume to the desired level.
2. Press the MENU button to display the radio setup menu.
3. Press the softkey under the AUTO VOLUM (automatic
volume) tab on the infotainment
display.
4. Press the softkey under the desired SCV setting (OFF, Low,
Med, or High) to select the
level of radio volume
compensation. The display
times out after approximately
10 seconds. Each higher
setting allows for more radio
volume compensation at faster
vehicle speeds.
Page 130 of 356
Chevrolet Express Owner Manual (GMNA-Localizing-U.S./Canada/Mexico-
13882570) - 2020 - CRC - 11/1/19
Infotainment System 129
Root Directory
The root directory is treated as a
folder. Files are stored in the root
directory when the disc or storage
device does not contain folders.
Files accessed from the root
directory of a CD display as
F1 ROOT.
Empty Folder
Folders that do not contain files are
skipped, and the player advances to
the next folder that contains files.
Order of Play
Compressed audio files are
accessed in the following order:
.Playlists (Px).
. Files stored in the root directory.
. Files stored in folders in the root
directory.
Tracks are played in the following
order:
. Play begins from the first track in
the first playlist and continues
sequentially through all tracks in
each playlist. When the last track of the last playlist has
played, play continues from the
first track of the first playlist.
. Play begins from the first track in
the first folder and continues
sequentially through all tracks in
each folder. When the last track
of the last folder has played,
play continues from the first
track of the first folder.
File System and Naming
The song name that displays is the
song name contained in the ID3 tag.
If the song name is not present in
the ID3 tag, then the radio displays
the file name without the extension
(such as .mp3) as the track name.
Track names longer than 32
characters or four pages are
shortened. The display does not
show parts of words on the last
page of text, and the extension of
the file name is not displayed.
Preprogrammed Playlists
CDs that have preprogrammed
playlists created using WinAmp
®,
MusicMatch®, or RealPlayer®
software can be accessed; however,
there is no playlist-editing capability
using the radio. These playlists are
treated as special folders containing
compressed audio song files.
Playlists that have an .m3u or .pls
file extension and are stored on a
USB device may be supported by
the radio with a USB port.
Playlists can be changed by using
the softkeys below the
S cand
c Ttabs, thefknob, the©SEEK
button, or the
¨SEEK button. An
MP3 CD-R or CD-RW that has been
recorded without using file folders
can be played. If a CD-R or CD-RW
contains more than the maximum of
50 folders, 15 playlists, and
512 folders and files, the player
allows access and navigates up to
the maximum, but all items over the
maximum are not accessible.
Playing an MP3
4: Press to display additional text
information related to the current
song. If information is available, the
song title information displays on
the top line of the display and artist
Page 131 of 356
Chevrolet Express Owner Manual (GMNA-Localizing-U.S./Canada/Mexico-
13882570) - 2020 - CRC - 11/1/19
130 Infotainment System
information displays on the bottom
line. When information is not
available, NO INFO displays.
f:Turn to select MP3s on the CD
currently playing.
©SEEK : Press to go to the start of
the track, if more than 10 seconds
have played. Press and hold or
press multiple times to continue
moving backward through tracks.
¨SEEK : Press to go to the next
track. Press and hold or press
multiple times to continue moving
forward through tracks.
sREV : Press and hold to reverse
playback quickly. Sound is heard at
a reduced volume and the elapsed
time of the file displays. Release
s
REV to resume playing.
\FWD : Press and hold to
advance playback quickly. Sound is
heard at a reduced volume and the
elapsed time of the file displays.
Release
\FWD to resume playing.
The elapsed time of the file
displays.
S c:Press the softkey below the
S ctab to go to the first track in
the previous folder.
c T:Press the softkey below the
c Ttab to go to the first track in
the next folder.
RDM : For Radios with CD/MP3.
Press to listen to tracks in random,
rather than sequential order.
To use random:
1. Press the softkey under the RDM tab until Random Current
Disc displays.
2. Press the softkey again to turn off random play.
h:Press the softkey below the
htab to play the files in order by
artist or album.
The player scans the disc to sort the
files by artist and album ID3 tag
information. It can take several
minutes to scan the disc depending
on the number of files on the disc.
The radio may begin playing while it
is scanning in the background. When the scan is finished, the disc
begins playing files in order by
artist. The current artist playing is
shown on the second line of the
display. Once all songs by that artist
are played, the player moves to the
next artist in alphabetical order and
begins playing files by that artist.
To listen to files by another artist,
press the softkey below either arrow
tab. The disc goes to the next or
previous artist in alphabetical order.
Continue pressing either softkey
below the arrow tab until the desired
artist displays.
To change from playback by artist to
playback by album:
1. Press the softkey below the Sort By tab.
2. Press one of the softkeys below the Album tab from the
sort screen.
3. Press the softkey below the Back tab to return to the main
music navigator screen.
The album name displays on the
second line between the arrows,
and songs from the current album
Page 138 of 356
Chevrolet Express Owner Manual (GMNA-Localizing-U.S./Canada/Mexico-
13882570) - 2020 - CRC - 11/1/19
Infotainment System 137
.Pair cell phone(s) to the vehicle.
The system may not work with
all cell phones. See “Pairing”in
this section for more information.
. If the cell phone has voice
dialing capability, learn to use
that feature to access the
address book or contact list. See
“Voice Pass-Thru” in this section
for more information.
. See “Storing and Deleting Phone
Numbers” in this section for
more information.
{Warning
When using a cell phone, it can
be distracting to look too long or
too often at the screen of the
phone or the infotainment system.
Taking your eyes off the road too
long or too often could cause a
crash resulting in injury or death.
Focus your attention on driving.
A Bluetooth system can use a
Bluetooth-capable cell phone with a
Hands-Free Profile to make and receive phone calls. The system
can be used while the ignition is on
or in ACC/ACCESSORY. The range
of the Bluetooth system can be up
to 9.1 m (30 ft). Not all phones
support all functions, and not all
phones work with the in-vehicle
Bluetooth system. See
www.gm.com/bluetooth for more
information on compatible phones in
U.S. and Canada only.
Voice Recognition
The Bluetooth system uses voice
recognition to interpret voice
commands to dial phone numbers
and name tags.
For additional information, say
“Help”
while you are in a voice
recognition menu.
Noise : Keep interior noise levels to
a minimum. The system may not
recognize voice commands if there
is too much background noise.
When to Speak : A short tone
sounds after the system responds
indicating when it is waiting for a
voice command. Wait until the tone
and then speak. How to Speak :
Speak clearly in a
calm and natural voice.
Audio System
When using the in-vehicle Bluetooth
system, sound comes through the
vehicle's front audio system
speakers and overrides the audio
system. Use the audio system
volume knob, during a call, to
change the volume level. The
adjusted volume level remains in
memory for later calls. To prevent
missed calls, a minimum volume
level is used if the volume is turned
down too low.
Bluetooth Controls
Use the buttons on the steering
wheel to operate the in-vehicle
Bluetooth system. See Steering
Wheel Controls 079.
b/g:Press to answer incoming
calls, confirm system information,
and start speech recognition.
c/x: Press to end a call, reject
a call, or cancel an operation.
Page 139 of 356
Chevrolet Express Owner Manual (GMNA-Localizing-U.S./Canada/Mexico-
13882570) - 2020 - CRC - 11/1/19
138 Infotainment System
Pairing
A Bluetooth-enabled cell phone
must be paired to the Bluetooth
system and then connected to the
vehicle before it can be used. See
the cell phone manufacturer's user
guide for Bluetooth functions before
pairing the cell phone.
Pairing Information
.A Bluetooth phone with MP3
capability cannot be paired to
the vehicle as a phone and an
MP3 player at the same time.
. Up to five cell phones can be
paired to the Bluetooth system.
. The pairing process is disabled
when the vehicle is moving.
. Pairing only needs to be
completed once, unless the
pairing information on the cell
phone changes or the cell phone
is deleted from the system.
. Only one paired cell phone can
be connected to the Bluetooth
system at a time. .
If multiple paired cell phones are
within range of the system, the
system connects to the first
available paired cell phone in the
order that they were first paired
to the system. To connect to a
different paired phone, see
“Connecting to a Different
Phone” later in this section.
Pairing a Phone
1. Press and hold
b/gfor
two seconds.
2. Say “Bluetooth.” This command
can be skipped.
3. Say “Pair.”The system
responds with instructions and
a four-digit Personal
Identification Number (PIN).
The PIN is used in Step 5.
4. Start the pairing process on the cell phone that you want to
pair. For help with this process,
see the cell phone
manufacturer's user guide.
5. Locate the device named “Your
Vehicle” in the list on the cell
phone. Follow the instructions on the cell phone to enter the
PIN provided in Step 3. After
the PIN is successfully entered,
the system prompts you to
provide a name for the paired
cell phone. This name will be
used to indicate which phones
are paired and connected to
the vehicle. The system
responds with
“
has been successfully paired”
after the pairing process is
complete.
6. Repeat Steps 1–5 to pair additional phones.
Listing All Paired and Connected
Phones
The system can list all cell phones
paired to it. If a paired cell phone is
also connected to the vehicle, the
system responds with “is connected”
after that phone name.
1. Press and hold
b/gfor
two seconds.
2. Say “Bluetooth.”
3. Say “List.”
Page 140 of 356
Chevrolet Express Owner Manual (GMNA-Localizing-U.S./Canada/Mexico-
13882570) - 2020 - CRC - 11/1/19
Infotainment System 139
Deleting a Paired Phone
If the phone name you want to
delete is unknown, see“Listing All
Paired and Connected Phones.”
1. Press and hold
b/gfor
two seconds.
2. Say “Bluetooth.”
3. Say “Delete.” The system asks
which phone to delete.
4. Say the name of the phone you want to delete.
Connecting to a Different Phone
To connect to a different cell phone,
the Bluetooth system looks for the
next available cell phone in the
order in which all the available cell
phones were paired. Depending on
which cell phone you want to
connect to, you may have to use
this command several times.
1. Press and hold
b/gfor
two seconds.
2. Say “Bluetooth.” 3. Say
“Change phone.”
. If another cell phone is
found, the response will be
“
connected.”
. If another cell phone is not
found, the original phone
remains connected.
Storing and Deleting Phone
Numbers
The system can store up to 30
phone numbers as name tags in the
Hands-Free Directory for Bluetooth.
The following commands are used
to delete and store phone numbers.
Store : This command will store a
phone number, or a group of
numbers as a name tag.
Digit Store : This command allows
a phone number to be stored as a
name tag by entering the digits one
at a time.
Delete : This command is used to
delete individual name tags. Delete All Name Tags :
This
command deletes all stored name
tags in the Hands-Free Calling
Directory.
Using the “Store”Command
1. Press and hold
b/gfor
two seconds.
2. Say “Store.”
3. Say the phone number or group of numbers you want to
store all at once with no
pauses, then follow the
directions given by the system
to save a name tag for this
number.
Using the “Digit Store” Command
If an unwanted number is
recognized by the system, say
“Clear” at any time to clear the last
number.
To hear all of the numbers
recognized by the system, say
“Verify” at any time.
1. Press and hold
b/gfor
two seconds.
2. Say “Digit Store.”