steering wheel CHEVROLET EXPRESS 2020 Get To Know Guide
[x] Cancel search | Manufacturer: CHEVROLET, Model Year: 2020, Model line: EXPRESS, Model: CHEVROLET EXPRESS 2020Pages: 356, PDF Size: 5.7 MB
Page 164 of 356

Chevrolet Express Owner Manual (GMNA-Localizing-U.S./Canada/Mexico-
13882570) - 2020 - CRC - 11/1/19
Driving and Operating 163
Ignition Positions
0. Stopping the Engine/LOCK/OFF
1. ACC/ACCESSORY
2. ON/RUN
3. START
The ignition switch has four
positions.
To shift out of P (Park), the ignition
must be in ON/RUN and the brake
pedal must be applied.0 (Stopping the Engine/LOCK/
OFF) :
This position turns off the
vehicle. It also locks the ignition, the
transmission, and the steering
column, if equipped with a locking
steering column.
To turn off the vehicle:
1. Make sure that the vehicle is stopped.
2. Shift to P (Park).
3. Continue to hold the brake pedal, then set the parking
brake. See Parking Brake
0 177. 4. Push the key all the way in
toward the steering column (1),
then turn the key to
LOCK/OFF (2).
5. Remove the key.
6. Release the brake pedal.
See your dealer if the key can be
removed in any other position.
Retained Accessory Power (RAP)
will remain active. See Retained
Accessory Power (RAP) 0167.
A warning chime will sound when
the driver door is opened and the
key is in the ignition.
If equipped with a locking steering
column, the steering can bind with
the front wheels turned off center,
which may prevent key rotation out
of LOCK/OFF. If this happens, move
the steering wheel from right to left
while turning the key to ACC/
ACCESSORY. If this does not work,
then the vehicle needs service.
Page 166 of 356

Chevrolet Express Owner Manual (GMNA-Localizing-U.S./Canada/Mexico-
13882570) - 2020 - CRC - 11/1/19
Driving and Operating 165
If the key is left in ON/RUN with the
engine off, the battery could drain
and the vehicle may not start.
3 (START) :This is the position that
starts the engine. When the engine
starts, release the key. The ignition
returns to ON/RUN for driving.
Starting the Engine
If the vehicle has a diesel engine,
see the Duramax diesel
supplement.
To place the transmission in the
proper gear:
Move the shift lever to P (Park) or
N (Neutral). The engine will not start
in any other position. To restart the
engine when the vehicle is already
moving, use N (Neutral) only.
Caution
If you add electrical parts or
accessories, you could change
the way the engine operates. Any
resulting damage would not be
(Continued)
Caution (Continued)
covered by the vehicle warranty.
SeeAdd-On Electrical Equipment
0 213.
Caution
Do not try to shift to P (Park) if the
vehicle is moving. If you do, you
could damage the transmission.
Shift to P (Park) only when the
vehicle is stopped.
Caution
If the steering wheel is turned
until it reaches the end of its
travel, and is held in that position
while starting the vehicle, damage
may occur to the hydraulic power
steering system and there may be
loss of power steering assist. Starting Procedure
1. With your foot off the accelerator pedal, turn the
ignition key to START. When
the engine starts, let go of the
key. The idle speed will go
down as your engine gets
warm. Do not race the engine
immediately after starting it.
Operate the engine and
transmission gently to allow the
oil to warm up and lubricate all
moving parts.
When the low fuel warning light
is on and the FUEL LEVEL
LOW message is displayed in
the Driver Information Center
(DIC), the Computer-Controlled
Cranking System is disabled to
prevent possible vehicle
component damage. When this
happens, hold the ignition
switch in the START position to
continue engine cranking.
Page 167 of 356

Chevrolet Express Owner Manual (GMNA-Localizing-U.S./Canada/Mexico-
13882570) - 2020 - CRC - 11/1/19
166 Driving and Operating
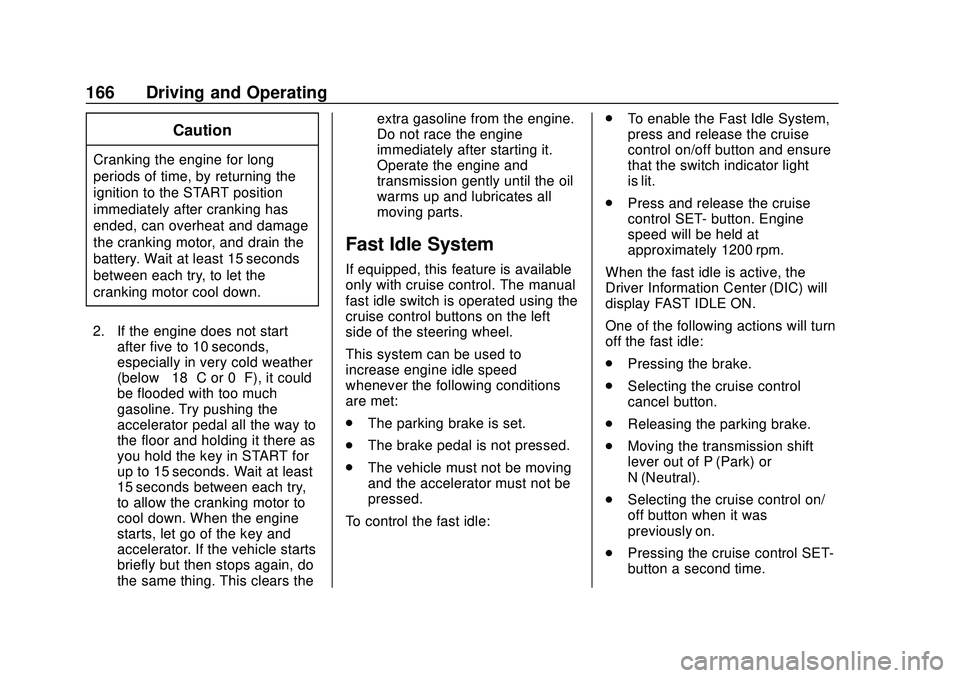
Caution
Cranking the engine for long
periods of time, by returning the
ignition to the START position
immediately after cranking has
ended, can overheat and damage
the cranking motor, and drain the
battery. Wait at least 15 seconds
between each try, to let the
cranking motor cool down.
2. If the engine does not start after five to 10 seconds,
especially in very cold weather
(below −18 °C or 0 °F), it could
be flooded with too much
gasoline. Try pushing the
accelerator pedal all the way to
the floor and holding it there as
you hold the key in START for
up to 15 seconds. Wait at least
15 seconds between each try,
to allow the cranking motor to
cool down. When the engine
starts, let go of the key and
accelerator. If the vehicle starts
briefly but then stops again, do
the same thing. This clears the extra gasoline from the engine.
Do not race the engine
immediately after starting it.
Operate the engine and
transmission gently until the oil
warms up and lubricates all
moving parts.
Fast Idle System
If equipped, this feature is available
only with cruise control. The manual
fast idle switch is operated using the
cruise control buttons on the left
side of the steering wheel.
This system can be used to
increase engine idle speed
whenever the following conditions
are met:
.
The parking brake is set.
. The brake pedal is not pressed.
. The vehicle must not be moving
and the accelerator must not be
pressed.
To control the fast idle: .
To enable the Fast Idle System,
press and release the cruise
control on/off button and ensure
that the switch indicator light
is lit.
. Press and release the cruise
control SET- button. Engine
speed will be held at
approximately 1200 rpm.
When the fast idle is active, the
Driver Information Center (DIC) will
display FAST IDLE ON.
One of the following actions will turn
off the fast idle:
. Pressing the brake.
. Selecting the cruise control
cancel button.
. Releasing the parking brake.
. Moving the transmission shift
lever out of P (Park) or
N (Neutral).
. Selecting the cruise control on/
off button when it was
previously on.
. Pressing the cruise control SET-
button a second time.
Page 192 of 356

Chevrolet Express Owner Manual (GMNA-Localizing-U.S./Canada/Mexico-
13882570) - 2020 - CRC - 11/1/19
Driving and Operating 191
How the System Works
LDW utilizes a camera sensor
installed on the windshield ahead of
the rearview mirror to detect lane
markings.
To turn LDW on and off, press
@on
the instrument panel to the left of
the steering wheel. The control
indicator will light when LDW is on.
When LDW is on,
@is green if LDW
is available to warn of a lane
departure. If the vehicle crosses a
detected lane marking without using
the turn signal in that direction,
@
changes to amber and flashes.
Additionally, there will be three
beeps on the right or left, depending
on the lane departure direction.
LDW will not alert if the turn signal
is active in the direction of lane
departure, or if LDW detects that
you are accelerating, braking or
actively steering.
When the System Does Not
Seem to Work Properly
The system may not detect lanes as
well when there are: .
Close vehicles ahead.
. Sudden lighting changes, such
as when driving through tunnels.
. Banked roads.
If the LDW system is not functioning
properly when lane markings are
clearly visible, cleaning the
windshield may help.
LDW alerts may occur due to tar
marks, shadows, cracks in the road,
temporary or construction lane
markings, or other road
imperfections. This is normal system
operation; the vehicle does not need
service. Turn LDW off if these
conditions continue.
Fuel
Top Tier Fuel
GM recommends the use of TOP
TIER Detergent Gasoline to keep
the engine clean, reduce engine
deposits, and maintain optimal
vehicle performance. Look for the
TOP TIER Logo or see
www.toptiergas.com for a list of TOP
TIER Detergent Gasoline marketers
and applicable countries.
Page 199 of 356

Chevrolet Express Owner Manual (GMNA-Localizing-U.S./Canada/Mexico-
13882570) - 2020 - CRC - 11/1/19
198 Driving and Operating
tires, and mirrors. SeeTowing
Equipment 0208. If the trailer has
electric brakes, start the
combination moving and then
manually apply the trailer brake
controller to check the trailer brakes
work. During the trip, occasionally
check that the cargo and trailer are
secure and that the lamps and any
trailer brakes are working.
Towing with a Stability Control
System
When towing, the stability control
system might be heard. The system
reacts to vehicle movement caused
by the trailer, which mainly occurs
during cornering. This is normal
when towing heavier trailers.
Following Distance
Stay at least twice as far behind the
vehicle ahead as you would when
driving without a trailer. This can
help to avoid heavy braking and
sudden turns.
Passing
More passing distance is needed
when towing a trailer. The
combination of the vehicle and
trailer will not accelerate as quickly
and is much longer than the vehicle
alone. It is necessary to go much
farther beyond the passed vehicle
before returning to the lane. Pass
on level roadways. Avoid passing
on hills if possible.
Backing Up
Hold the bottom of the steering
wheel with one hand. To move the
trailer to the left, move that hand to
the left. To move the trailer to the
right, move that hand to the right.
Always back up slowly and,
if possible, have someone
guide you.
Making Turns
Caution
Turn more slowly and make wider
arcs when towing a trailer to
prevent damage to your vehicle.
Making very sharp turns could
cause the trailer to contact the
vehicle.
Make wider turns than normal when
towing, so trailer will not go over soft
shoulders, over curbs, or strike road
signs, trees, or other objects.
Always signal turns well in advance.
Do not steer or brake suddenly.
Driving on Grades
Reduce speed and shift to a lower
gear before starting down a long or
steep downhill grade. If the
transmission is not shifted down, the
brakes may overheat and result in
reduced braking efficiency.
Page 215 of 356

Chevrolet Express Owner Manual (GMNA-Localizing-U.S./Canada/Mexico-
13882570) - 2020 - CRC - 11/1/19
214 Vehicle Care
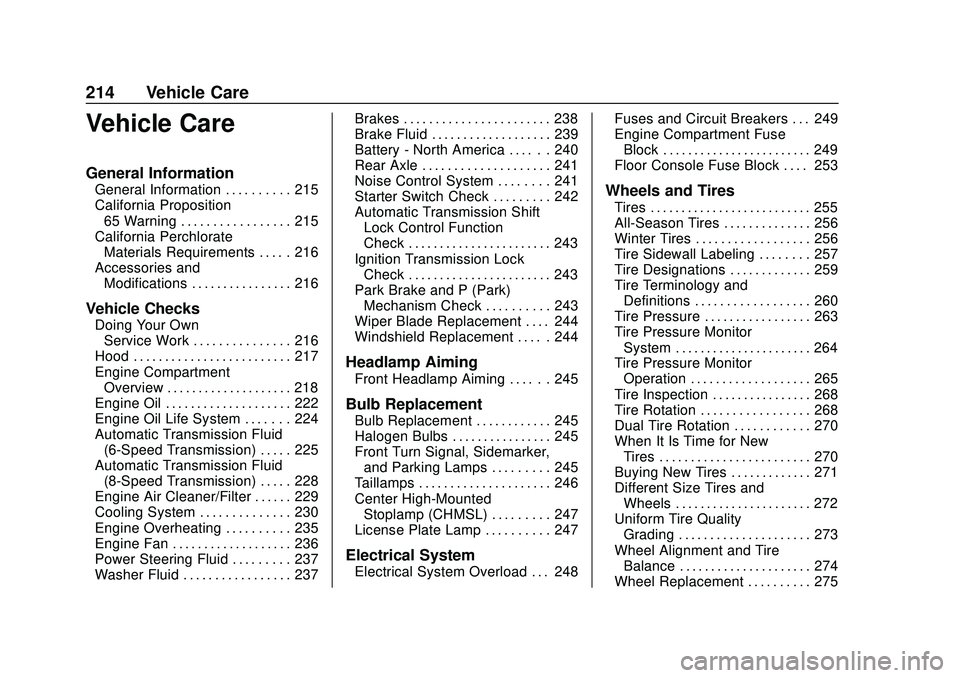
Vehicle Care
General Information
General Information . . . . . . . . . . 215
California Proposition65 Warning . . . . . . . . . . . . . . . . . 215
California Perchlorate Materials Requirements . . . . . 216
Accessories and Modifications . . . . . . . . . . . . . . . . 216
Vehicle Checks
Doing Your OwnService Work . . . . . . . . . . . . . . . 216
Hood . . . . . . . . . . . . . . . . . . . . . . . . . 217
Engine Compartment Overview . . . . . . . . . . . . . . . . . . . . 218
Engine Oil . . . . . . . . . . . . . . . . . . . . 222
Engine Oil Life System . . . . . . . 224
Automatic Transmission Fluid (6-Speed Transmission) . . . . . 225
Automatic Transmission Fluid (8-Speed Transmission) . . . . . 228
Engine Air Cleaner/Filter . . . . . . 229
Cooling System . . . . . . . . . . . . . . 230
Engine Overheating . . . . . . . . . . 235
Engine Fan . . . . . . . . . . . . . . . . . . . 236
Power Steering Fluid . . . . . . . . . 237
Washer Fluid . . . . . . . . . . . . . . . . . 237 Brakes . . . . . . . . . . . . . . . . . . . . . . . 238
Brake Fluid . . . . . . . . . . . . . . . . . . . 239
Battery - North America . . . . . . 240
Rear Axle . . . . . . . . . . . . . . . . . . . . 241
Noise Control System . . . . . . . . 241
Starter Switch Check . . . . . . . . . 242
Automatic Transmission Shift
Lock Control Function
Check . . . . . . . . . . . . . . . . . . . . . . . 243
Ignition Transmission Lock Check . . . . . . . . . . . . . . . . . . . . . . . 243
Park Brake and P (Park) Mechanism Check . . . . . . . . . . 243
Wiper Blade Replacement . . . . 244
Windshield Replacement . . . . . 244
Headlamp Aiming
Front Headlamp Aiming . . . . . . 245
Bulb Replacement
Bulb Replacement . . . . . . . . . . . . 245
Halogen Bulbs . . . . . . . . . . . . . . . . 245
Front Turn Signal, Sidemarker, and Parking Lamps . . . . . . . . . 245
Taillamps . . . . . . . . . . . . . . . . . . . . . 246
Center High-Mounted Stoplamp (CHMSL) . . . . . . . . . 247
License Plate Lamp . . . . . . . . . . 247
Electrical System
Electrical System Overload . . . 248 Fuses and Circuit Breakers . . . 249
Engine Compartment Fuse
Block . . . . . . . . . . . . . . . . . . . . . . . . 249
Floor Console Fuse Block . . . . 253
Wheels and Tires
Tires . . . . . . . . . . . . . . . . . . . . . . . . . . 255
All-Season Tires . . . . . . . . . . . . . . 256
Winter Tires . . . . . . . . . . . . . . . . . . 256
Tire Sidewall Labeling . . . . . . . . 257
Tire Designations . . . . . . . . . . . . . 259
Tire Terminology and Definitions . . . . . . . . . . . . . . . . . . 260
Tire Pressure . . . . . . . . . . . . . . . . . 263
Tire Pressure Monitor System . . . . . . . . . . . . . . . . . . . . . . 264
Tire Pressure Monitor
Operation . . . . . . . . . . . . . . . . . . . 265
Tire Inspection . . . . . . . . . . . . . . . . 268
Tire Rotation . . . . . . . . . . . . . . . . . 268
Dual Tire Rotation . . . . . . . . . . . . 270
When It Is Time for New Tires . . . . . . . . . . . . . . . . . . . . . . . . 270
Buying New Tires . . . . . . . . . . . . . 271
Different Size Tires and Wheels . . . . . . . . . . . . . . . . . . . . . . 272
Uniform Tire Quality Grading . . . . . . . . . . . . . . . . . . . . . 273
Wheel Alignment and Tire Balance . . . . . . . . . . . . . . . . . . . . . 274
Wheel Replacement . . . . . . . . . . 275
Page 252 of 356

Chevrolet Express Owner Manual (GMNA-Localizing-U.S./Canada/Mexico-
13882570) - 2020 - CRC - 11/1/19
Vehicle Care 251
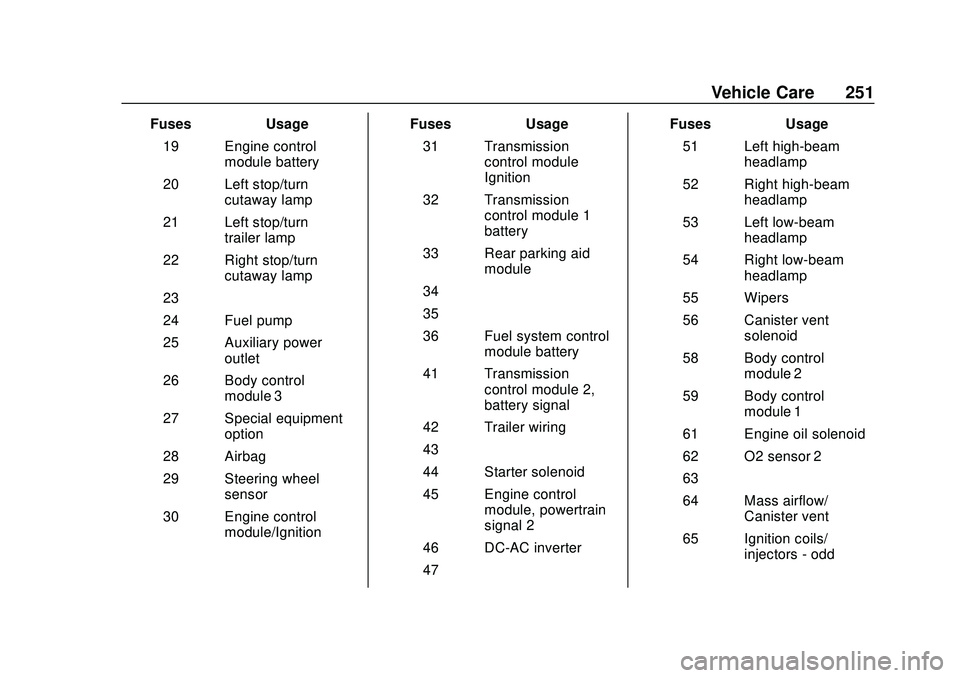
FusesUsage
19 Engine control module battery
20 Left stop/turn cutaway lamp
21 Left stop/turn trailer lamp
22 Right stop/turn cutaway lamp
23 –
24 Fuel pump
25 Auxiliary power outlet
26 Body control module 3
27 Special equipment option
28 Airbag
29 Steering wheel sensor
30 Engine control module/Ignition Fuses
Usage
31 Transmission control module
Ignition
32 Transmission control module 1
battery
33 Rear parking aid module
34 –
35 –
36 Fuel system control module battery
41 Transmission control module 2,
battery signal
42 Trailer wiring
43 –
44 Starter solenoid
45 Engine control module, powertrain
signal 2
46 DC-AC inverter
47 – Fuses
Usage
51 Left high-beam headlamp
52 Right high-beam headlamp
53 Left low-beam headlamp
54 Right low-beam headlamp
55 Wipers
56 Canister vent solenoid
58 Body control module 2
59 Body control module 1
61 Engine oil solenoid
62 O2 sensor 2
63 –
64 Mass airflow/ Canister vent
65 Ignition coils/ injectors - odd
Page 255 of 356

Chevrolet Express Owner Manual (GMNA-Localizing-U.S./Canada/Mexico-
13882570) - 2020 - CRC - 11/1/19
254 Vehicle Care
The vehicle may not be equipped
with all of the fuses, relays, and
features shown.Mini-Fuses Usage
F1 –
F2 Steering wheel sensor
F3 Auxiliary parking lamps
F4 Front parking lamps
F5 Trailer parking lamps
F6 Upfitter/Parking lamps
F7 Right rear parking lamp
F8 Left rear parking lamp
F9 Exterior rear mirror switch/ Door
lock-unlock control
upfitter/Front
camera module Mini-Fuses Usage
F10 Airbag/Automatic occupant sensing
F11 –/OnStar
F12 ECM batt V6 gas
F13 HVAC 2
F14 HVAC 1
F15 Reflected LED display
F16 Upfitter aux 1/Gas ambulance
F17 Heated outside mirrors
F18 Rear window defogger
F19 Compass
F20 Radio/Chime/ SiriusXM satellite
radio
F21 Remote function actuator/Tire
pressure monitor Mini-Fuses Usage
F22 Ignition switch/ Discrete logic
ignition sensor
F23 Instrument cluster
F24 –
F25 HVAC control
F26 Auxiliary/Trailer reverse lamps
F27 Reverse tail lamps
F28 Upfitter 2/Reading lamps/Ambulance
F29 Rear blower
F30 Upfitter/Courtesy lamps
F31 Front door lock
F32 Rear door lock
F33 Cargo door unlock
F34 Passenger door unlock
F35 Rear passenger door unlock
F36 Driver door lock
Page 277 of 356

Chevrolet Express Owner Manual (GMNA-Localizing-U.S./Canada/Mexico-
13882570) - 2020 - CRC - 11/1/19
276 Vehicle Care
Warning (Continued)
the vehicle, drive slowly, readjust,
or remove the device if it is
contacting the vehicle. Do not
spin the vehicle's tires. Follow the
manufacturer's instructions.
Caution
Use tire chains only where legal
and only when necessary. Use
chains that are the proper size for
the tires. Install them on the tires
of the rear axle. Do not use
chains on the tires of the front
axle. Tighten them as tightly as
possible with the ends securely
fastened. Drive slowly and follow
the chain manufacturer's
instructions. If the chains contact
the vehicle, stop and retighten
them. If the contact continues,
slow down until it stops. Driving(Continued)
Caution (Continued)
too fast or spinning the wheels
with chains on will damage the
vehicle.
For Cutaway models with LT245/
75R16 or LT225/75R16 size single
or dual rear tires, use Low Profile
Z-Chain or SAE Class S cables.
For Cargo or Passenger models
with LT225/75R16 or LT245/75R16
size tires, use Low Profile Z-Chain
cables. SAE Class S chains are not
recommended.
If the vehicle has dual rear tires, do
not use individual tire chains. Use
tire chains that fit across both dual
tires.
If a Tire Goes Flat
It is unusual for a tire to blow out
while driving, especially if the tires
are maintained properly. See Tires
0 255. If air goes out of a tire, it is
much more likely to leak out slowly. But if there ever is a blowout, here
are a few tips about what to expect
and what to do:
If a front tire fails, the flat tire
creates a drag that pulls the vehicle
toward that side. Take your foot off
the accelerator pedal and grip the
steering wheel firmly. Steer to
maintain lane position, and then
gently brake to a stop, well off the
road, if possible.
A rear blowout, particularly on a
curve, acts much like a skid and
may require the same correction as
used in a skid. Stop pressing the
accelerator pedal and steer to
straighten the vehicle. It may be
very bumpy and noisy. Gently brake
to a stop, well off the road,
if possible.
{Warning
Driving on a flat tire will cause
permanent damage to the tire.
Re-inflating a tire after it has been
driven on while severely
(Continued)
Page 312 of 356

Chevrolet Express Owner Manual (GMNA-Localizing-U.S./Canada/Mexico-
13882570) - 2020 - CRC - 11/1/19
Service and Maintenance 311
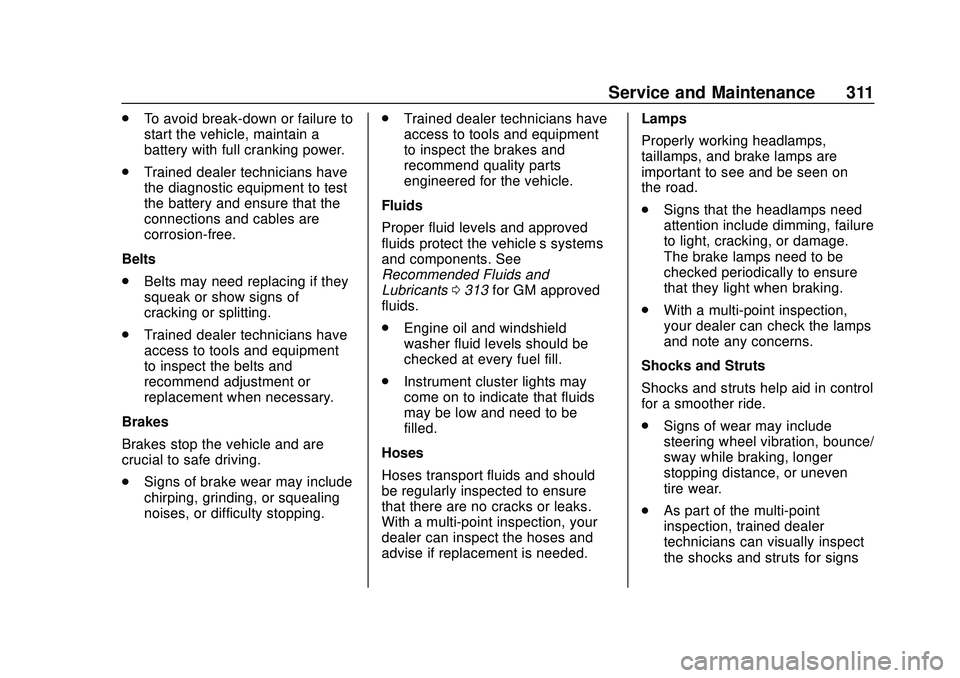
.To avoid break-down or failure to
start the vehicle, maintain a
battery with full cranking power.
. Trained dealer technicians have
the diagnostic equipment to test
the battery and ensure that the
connections and cables are
corrosion-free.
Belts
. Belts may need replacing if they
squeak or show signs of
cracking or splitting.
. Trained dealer technicians have
access to tools and equipment
to inspect the belts and
recommend adjustment or
replacement when necessary.
Brakes
Brakes stop the vehicle and are
crucial to safe driving.
. Signs of brake wear may include
chirping, grinding, or squealing
noises, or difficulty stopping. .
Trained dealer technicians have
access to tools and equipment
to inspect the brakes and
recommend quality parts
engineered for the vehicle.
Fluids
Proper fluid levels and approved
fluids protect the vehicle’s systems
and components. See
Recommended Fluids and
Lubricants 0313 for GM approved
fluids.
. Engine oil and windshield
washer fluid levels should be
checked at every fuel fill.
. Instrument cluster lights may
come on to indicate that fluids
may be low and need to be
filled.
Hoses
Hoses transport fluids and should
be regularly inspected to ensure
that there are no cracks or leaks.
With a multi-point inspection, your
dealer can inspect the hoses and
advise if replacement is needed. Lamps
Properly working headlamps,
taillamps, and brake lamps are
important to see and be seen on
the road.
.
Signs that the headlamps need
attention include dimming, failure
to light, cracking, or damage.
The brake lamps need to be
checked periodically to ensure
that they light when braking.
. With a multi-point inspection,
your dealer can check the lamps
and note any concerns.
Shocks and Struts
Shocks and struts help aid in control
for a smoother ride.
. Signs of wear may include
steering wheel vibration, bounce/
sway while braking, longer
stopping distance, or uneven
tire wear.
. As part of the multi-point
inspection, trained dealer
technicians can visually inspect
the shocks and struts for signs