lights CHEVROLET EXPRESS 2020 Get To Know Guide
[x] Cancel search | Manufacturer: CHEVROLET, Model Year: 2020, Model line: EXPRESS, Model: CHEVROLET EXPRESS 2020Pages: 356, PDF Size: 5.7 MB
Page 20 of 356
Chevrolet Express Owner Manual (GMNA-Localizing-U.S./Canada/Mexico-
13882570) - 2020 - CRC - 11/1/19
Keys, Doors, and Windows 19
Vehicle Security
This vehicle has theft-deterrent
features; however, they do not make
the vehicle impossible to steal.
Vehicle Alarm System
This vehicle has an anti-theft alarm
system.
Arming the Alarm System
1. Close the side door/rear doorsand the hood. Turn off the
vehicle.
2. Lock the vehicle in one of two ways:
.Use the RKE transmitter.
. With a door open, press the
inside
Q.
3. After 30 seconds the alarm system will arm. Pressing
Qon
the RKE transmitter a second
time will bypass the 30-second
delay and immediately arm the
alarm system. The vehicle alarm system will not
arm if the doors are locked with the
key or the manual door lock.
The alarm will also be activated if a
passenger door, side door, rear
door, or the hood is opened without
first disarming the system. When the
alarm is activated, the turn signals
flash and the horn sounds for about
30 seconds. The alarm system will
then re-arm to monitor for the next
unauthorized event.
Disarming the Alarm System
To disarm the alarm system or turn
off the alarm if it has been activated:
.
Press
Kon the RKE transmitter.
. Start the vehicle.
To avoid setting off the alarm by
accident:
. Lock the vehicle after all
occupants have left the vehicle
and all doors are closed.
. Always unlock a door with the
RKE transmitter. Unlocking the driver door with the
key will not disarm the system or
turn off the alarm.
How to Detect a Tamper
Condition
IfKis pressed and the horn chirps
and the lights flash three times, the
alarm was activated while the alarm
system was armed.
If the alarm system has been
activated, and allowed to complete
an event (approximately
one minute), a message will appear
on the Driver Information Center
(DIC) the next time the vehicle is
started.
Theft Alarm Notification
To enable e-mail or text notification,
see “Theft Alarm Notification” in
OnStar Security 0337.
Testing the Alarm
To test the alarm:
1. Lower the driver window and open the driver door.
Page 23 of 356
Chevrolet Express Owner Manual (GMNA-Localizing-U.S./Canada/Mexico-
13882570) - 2020 - CRC - 11/1/19
22 Keys, Doors, and Windows
On the lower portion of each mirror
there is an auxiliary convex mirror
that can be adjusted manually to
provide an extended field of view.
The mirrors can be manually folded
in or out.
Power Mirrors
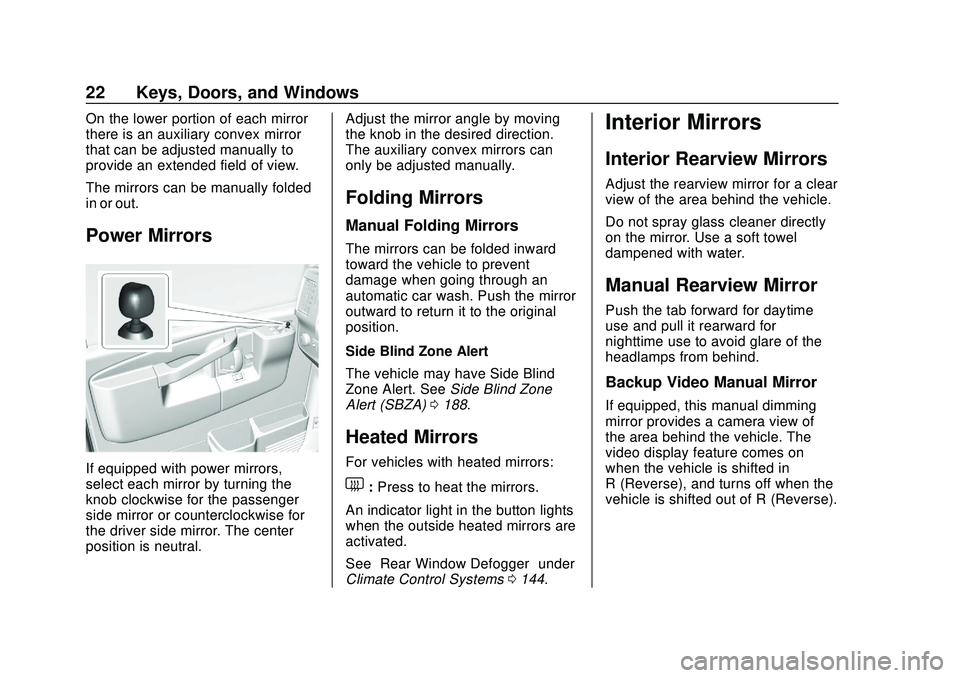
If equipped with power mirrors,
select each mirror by turning the
knob clockwise for the passenger
side mirror or counterclockwise for
the driver side mirror. The center
position is neutral.Adjust the mirror angle by moving
the knob in the desired direction.
The auxiliary convex mirrors can
only be adjusted manually.
Folding Mirrors
Manual Folding Mirrors
The mirrors can be folded inward
toward the vehicle to prevent
damage when going through an
automatic car wash. Push the mirror
outward to return it to the original
position.
Side Blind Zone Alert
The vehicle may have Side Blind
Zone Alert. See
Side Blind Zone
Alert (SBZA) 0188.
Heated Mirrors
For vehicles with heated mirrors:
1:Press to heat the mirrors.
An indicator light in the button lights
when the outside heated mirrors are
activated.
See “Rear Window Defogger” under
Climate Control Systems 0144.
Interior Mirrors
Interior Rearview Mirrors
Adjust the rearview mirror for a clear
view of the area behind the vehicle.
Do not spray glass cleaner directly
on the mirror. Use a soft towel
dampened with water.
Manual Rearview Mirror
Push the tab forward for daytime
use and pull it rearward for
nighttime use to avoid glare of the
headlamps from behind.
Backup Video Manual Mirror
If equipped, this manual dimming
mirror provides a camera view of
the area behind the vehicle. The
video display feature comes on
when the vehicle is shifted in
R (Reverse), and turns off when the
vehicle is shifted out of R (Reverse).
Page 79 of 356
Chevrolet Express Owner Manual (GMNA-Localizing-U.S./Canada/Mexico-
13882570) - 2020 - CRC - 11/1/19
78 Instruments and Controls
Instruments and
Controls
Controls
Steering Wheel Adjustment . . . . 79
Steering Wheel Controls . . . . . . . 79
Horn . . . . . . . . . . . . . . . . . . . . . . . . . . . 80
Windshield Wiper/Washer . . . . . . 80
Compass . . . . . . . . . . . . . . . . . . . . . . 81
Clock . . . . . . . . . . . . . . . . . . . . . . . . . . 83
Power Outlets . . . . . . . . . . . . . . . . . 83
Cigarette Lighter . . . . . . . . . . . . . . . 84
Ashtrays . . . . . . . . . . . . . . . . . . . . . . . 85
Warning Lights, Gauges, and
Indicators
Warning Lights, Gauges, andIndicators . . . . . . . . . . . . . . . . . . . . 85
Instrument Cluster . . . . . . . . . . . . . 86
Speedometer . . . . . . . . . . . . . . . . . . 87
Odometer . . . . . . . . . . . . . . . . . . . . . . 87
Trip Odometer . . . . . . . . . . . . . . . . . 87
Fuel Gauge . . . . . . . . . . . . . . . . . . . . 87
Engine Oil Pressure Gauge . . . . 88
Engine Coolant Temperature Gauge . . . . . . . . . . . . . . . . . . . . . . . . 89
Voltmeter Gauge . . . . . . . . . . . . . . . 90
Seat Belt Reminders . . . . . . . . . . . 90 Airbag Readiness Light . . . . . . . . 90
Airbag On-Off Light . . . . . . . . . . . . 91
Charging System Light . . . . . . . . . 92
Malfunction Indicator Lamp
(Check Engine Light) . . . . . . . . . 93
Brake System Warning Light . . . 94
Antilock Brake System (ABS) Warning Light . . . . . . . . . . . . . . . . 95
Tow/Haul Mode Light . . . . . . . . . . 96
Lane Departure Warning (LDW) Light . . . . . . . . . . . . . . . . . . . . . . . . . 96
Vehicle Ahead Indicator . . . . . . . . 96
StabiliTrak OFF Light . . . . . . . . . . 96
Traction Control System (TCS)/ StabiliTrak Light . . . . . . . . . . . . . . 97
Tire Pressure Light . . . . . . . . . . . . 97
Engine Oil Pressure Light . . . . . . 97
Low Fuel Warning Light . . . . . . . . 98
Security Light . . . . . . . . . . . . . . . . . . 98
High-Beam On Light . . . . . . . . . . . 98
Cruise Control Light . . . . . . . . . . . 99
Information Displays
Driver Information Center (DIC) . . . . . . . . . . . . . . . . . 99
Vehicle Messages
Vehicle Messages . . . . . . . . . . . . 104
Engine Power Messages . . . . . 104
Vehicle Speed Messages . . . . . 104
Vehicle Personalization
Vehicle Personalization . . . . . . . 105
Page 86 of 356

Chevrolet Express Owner Manual (GMNA-Localizing-U.S./Canada/Mexico-
13882570) - 2020 - CRC - 11/1/19
Instruments and Controls 85
Caution (Continued)
heating element when it is hot.
Damage from overheating can
occur to the lighter or heating
element, or a fuse could be
blown. Do not hold a cigarette
lighter in while it is heating.
Ashtrays
If equipped with a removable
ashtray, it can be placed into the
front floor console cupholder. Open
the cover to use.
Caution
If papers, pins, or other
flammable items are put in the
ashtray, hot cigarettes or other
smoking materials could ignite
them and possibly damage the
vehicle. Never put flammable
items in the ashtray.
Warning Lights,
Gauges, and
Indicators
Warning lights and gauges can
signal that something is wrong
before it becomes serious enough
to cause an expensive repair or
replacement. Paying attention to the
warning lights and gauges could
prevent injury.
Some warning lights come on briefly
when the engine is started to
indicate they are working. When
one of the warning lights comes on
and stays on while driving, or when
one of the gauges shows there may
be a problem, check the section that
explains what to do. Waiting to do
repairs can be costly and even
dangerous.
Page 108 of 356

Chevrolet Express Owner Manual (GMNA-Localizing-U.S./Canada/Mexico-
13882570) - 2020 - CRC - 11/1/19
Instruments and Controls 107
OFF :There will be no feedback
when you press
Qon the RKE
transmitter.
LIGHTS ONLY : The exterior lamps
will flash when you press
Qon the
RKE transmitter.
HORN ONLY : The horn will sound
on the second press of
Qon the
RKE transmitter.
HORN & LIGHTS (default) : The
exterior lamps will flash when you
press
Qon the RKE transmitter, and
the horn will sound when
Qis
pressed again within five seconds of
the previous command.
NO CHANGE : No change will be
made to this feature. The current
setting will remain.
To select a setting, press
Vwhile
the desired setting is displayed on
the DIC.
REMOTE DOOR UNLOCK
This feature allows you to select the
type of feedback you will receive
when unlocking the vehicle with the
Remote Keyless Entry (RKE) transmitter. You will not receive
feedback when unlocking the
vehicle with the RKE transmitter if
the doors are open. See
Remote
Keyless Entry (RKE) System
Operation 09.
Press
Uuntil REMOTE DOOR
UNLOCK appears on the DIC
display. Press
Vonce to access the
settings for this feature. Then press
Uto scroll through the following
settings:
LIGHTS OFF : The exterior lamps
will not flash when you press
Kon
the RKE transmitter.
LIGHTS ON (default) : The exterior
lamps will flash when you press
K
on the RKE transmitter.
NO CHANGE : No change will be
made to this feature. The current
setting will remain.
To select a setting, press
Vwhile
the desired setting is displayed on
the DIC. DELAY DOOR LOCK
This feature allows you to select
whether or not the locking of the
doors will be delayed. When locking
the doors with the power door lock
switch and a door is open, this
feature will delay locking the doors
until five seconds after the last door
is closed. You will hear three chimes
to signal that the delayed locking
feature is in use. The key must be
out of the ignition for this feature to
work. You can temporarily override
delayed locking by pressing the
power door lock switch twice or
Q
on the RKE transmitter twice. See
Delayed Locking
014.
Press
Uuntil DELAY DOOR LOCK
appears on the DIC display. Press
Vonce to access the settings for
this feature. Then press
Uto scroll
through the following settings:
OFF : There will be no delayed
locking of the vehicle's doors.
ON (default) : The doors will not
lock until five seconds after the last
door is closed.
Page 112 of 356
Chevrolet Express Owner Manual (GMNA-Localizing-U.S./Canada/Mexico-
13882570) - 2020 - CRC - 11/1/19
Lighting 111
AUTO :Automatically turns the
exterior lamps on and off,
depending on outside lighting.
;: Turns on the parking lamps
including all lamps, except the
headlamps.
2: Turns on the headlamps
together with the parking lamps and
instrument panel lights.
If the headlamps are turned on
while the vehicle is on, the
headlamps turn off automatically
10 minutes after the ignition is
turned off. If the headlamps are
turned on while the vehicle is off,
the headlamps will continue to stay
on. To prevent the battery from
being drained, turn the control to the
Oposition.
A warning chime sounds if the driver
door is opened while the ignition
switch is off and the headlamps
are on.
To change the headlamps from low
beam to high beam, pull the turn
signal lever all the way toward you.
Then release it.
Exterior Lamps Off
Reminder
If a door is open, a reminder chime
sounds when the headlamps or
parking lamps are manually turned
on and the key is out of the ignition.
To turn off the chime, turn the
headlamp switch to
Oor AUTO and
then back on, or close and re-open
the door. In the auto mode, the
headlamps turn off once the ignition
is off or may remain on until the
headlamp delay ends, if enabled in
the Driver Information Center (DIC).
See “Exit Lighting” underVehicle
Personalization 0105.
Headlamp High/
Low-Beam Changer
2 3:Pull the turn signal lever all
the way toward you to change the
headlamps from low to high beam.
Then release it.
Pull the turn signal lever all the way
toward you again and release it to
change the headlamps back to
low beam.
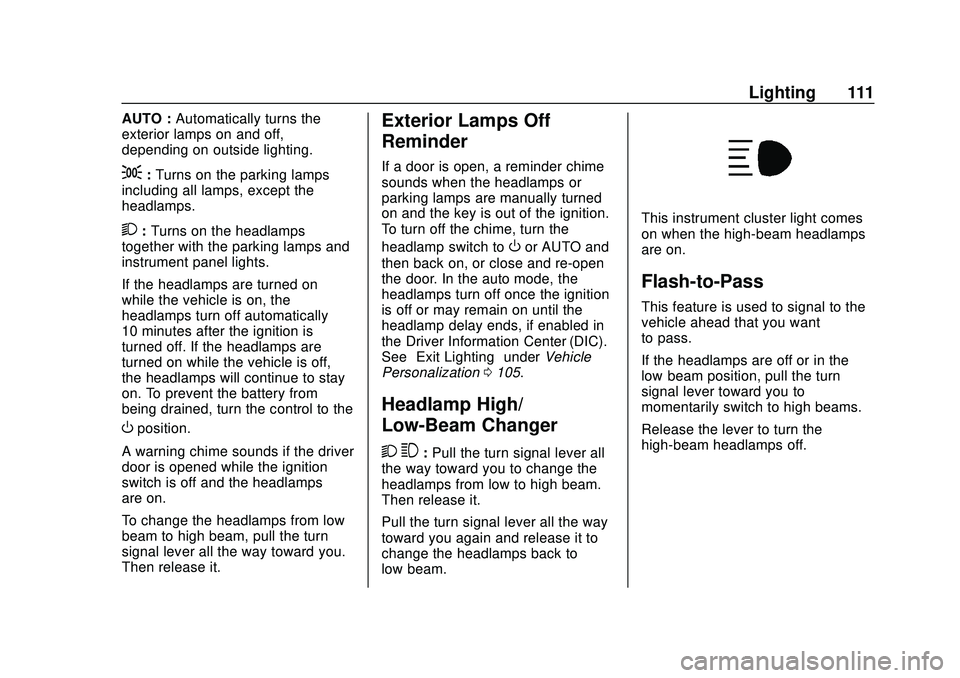
This instrument cluster light comes
on when the high-beam headlamps
are on.
Flash-to-Pass
This feature is used to signal to the
vehicle ahead that you want
to pass.
If the headlamps are off or in the
low‐beam position, pull the turn
signal lever toward you to
momentarily switch to high beams.
Release the lever to turn the
high-beam headlamps off.
Page 113 of 356
Chevrolet Express Owner Manual (GMNA-Localizing-U.S./Canada/Mexico-
13882570) - 2020 - CRC - 11/1/19
112 Lighting
Daytime Running
Lamps (DRL)
DRL can make it easier for others to
see the front of the vehicle during
the day. Fully functional DRL are
required on all vehicles first sold in
Canada.
The DRL system comes on in
daylight when the following
conditions are met:
.The ignition is on.
. The exterior lamp control is in
the AUTO position.
. The shift lever is not in P (Park).
. The light sensor determines it is
daytime.
When the DRL are on, the taillamps,
sidemarker, instrument panel lights,
and other lamps will not be on.
The automatic headlamp system
automatically switches from DRL to
the headlamps depending on the
darkness of the surroundings. To turn off the DRL, turn the exterior
lamp control to
Oand then release
it. For vehicles first sold in Canada,
the DRL can only be turned off
when the vehicle is parked.
Automatic Headlamp
System
When it is dark enough outside and
the headlamp switch is in AUTO,
the automatic headlamp system
turns on the headlamps, along with
the taillamps, sidemarker lamps,
parking lamps, and the instrument
panel lights. The radio lights will
also be dim.
To turn off the automatic headlamp
system, turn the exterior lamp
control to the off position and then
release. For vehicles first sold in
Canada, the transmission must be
in the P (Park) position, before the
automatic headlamp system can be
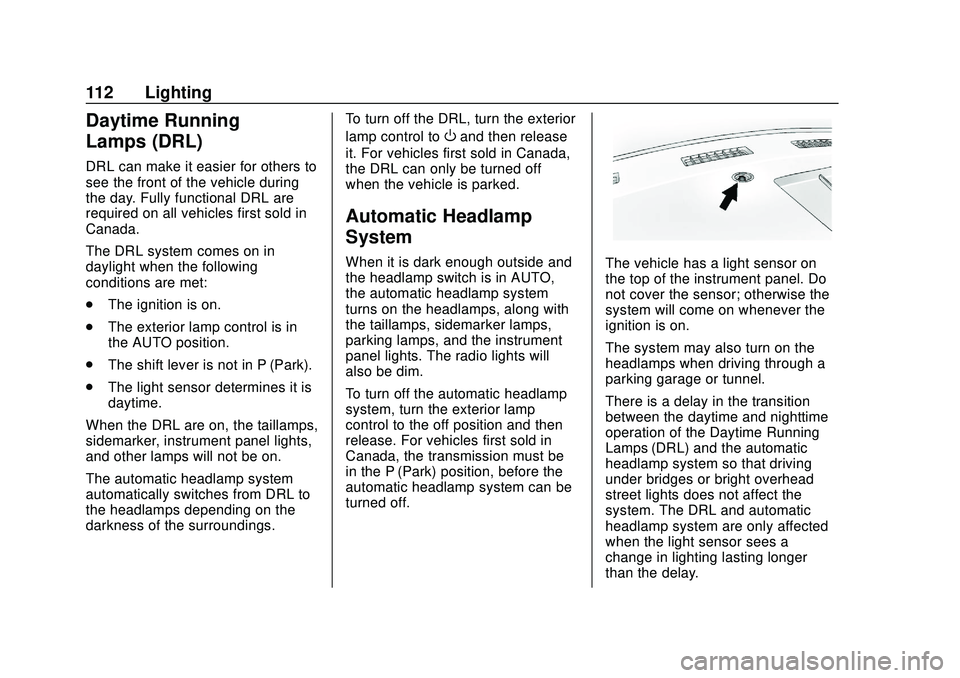
turned off.The vehicle has a light sensor on
the top of the instrument panel. Do
not cover the sensor; otherwise the
system will come on whenever the
ignition is on.
The system may also turn on the
headlamps when driving through a
parking garage or tunnel.
There is a delay in the transition
between the daytime and nighttime
operation of the Daytime Running
Lamps (DRL) and the automatic
headlamp system so that driving
under bridges or bright overhead
street lights does not affect the
system. The DRL and automatic
headlamp system are only affected
when the light sensor sees a
change in lighting lasting longer
than the delay.
Page 114 of 356
Chevrolet Express Owner Manual (GMNA-Localizing-U.S./Canada/Mexico-
13882570) - 2020 - CRC - 11/1/19
Lighting 113
If the vehicle is started in a dark
garage, the automatic headlamp
system comes on immediately.
Once the vehicle leaves the garage,
it takes approximately 30 seconds
for the automatic headlamp system
to change to DRL if it is light
outside. During that delay, the
instrument cluster may not be as
bright as usual. Make sure the
instrument panel brightness control
is in the full bright position. See
Instrument Panel Illumination
Control0114.
To idle the vehicle with the
automatic headlamp system off, turn
the control off.
The headlamps will also stay on
after exiting the vehicle. This feature
may be programmable. See Vehicle
Personalization 0105.
If the feature is not programmable,
exit lighting is automatic. When it is
dark enough outside, the exterior
lamps remain on for 30 seconds
after the ignition is turned off.Lights On with Wipers
If the windshield wipers are
activated in daylight with the engine
on, and the exterior lamp control is
in AUTO, the headlamps, parking
lamps, and other exterior lamps
come on. The transition time for the
lamps coming on varies based on
wiper speed. When the wipers are
not operating, these lamps turn off.
Move the exterior lamp control to
P
or;to disable this feature.
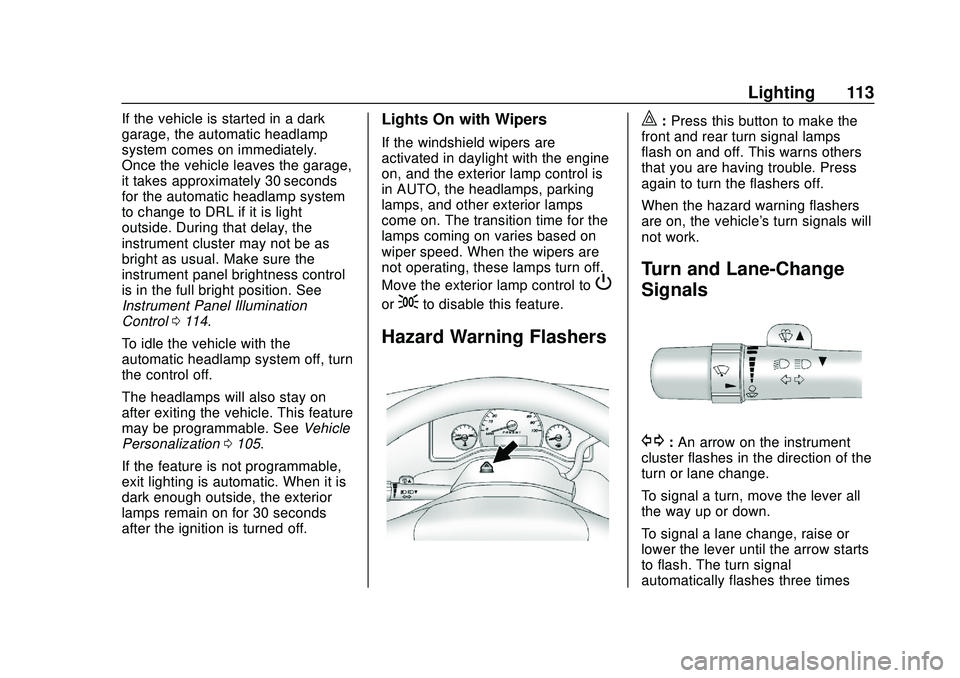
Hazard Warning Flashers
|: Press this button to make the
front and rear turn signal lamps
flash on and off. This warns others
that you are having trouble. Press
again to turn the flashers off.
When the hazard warning flashers
are on, the vehicle's turn signals will
not work.
Turn and Lane-Change
Signals
G: An arrow on the instrument
cluster flashes in the direction of the
turn or lane change.
To signal a turn, move the lever all
the way up or down.
To signal a lane change, raise or
lower the lever until the arrow starts
to flash. The turn signal
automatically flashes three times
Page 115 of 356
Chevrolet Express Owner Manual (GMNA-Localizing-U.S./Canada/Mexico-
13882570) - 2020 - CRC - 11/1/19
114 Lighting
and if the Tow/Haul Mode is active it
flashes six times. Holding the turn
signal lever for more than
one second causes the turn signals
to flash continually until the lever is
released.
The lever returns to its starting
position when released.
If after signaling a turn or lane
change the arrow flashes rapidly or
does not come on, a signal bulb
may be burned out.
Have any burned out bulbs
replaced. If a bulb is not burned out,
check the fuse. SeeFuses and
Circuit Breakers 0249.
Turn Signal On Chime
If the turn signal is left on for more
than 1.2 km (0.75 mi), a chime
sounds at each flash of the turn
signal and the message TURN
SIGNAL ON also appears in the
Driver Information Center (DIC). To
turn off the chime and message,
move the turn signal lever to the off
position.
Interior Lighting
Instrument Panel
Illumination Control
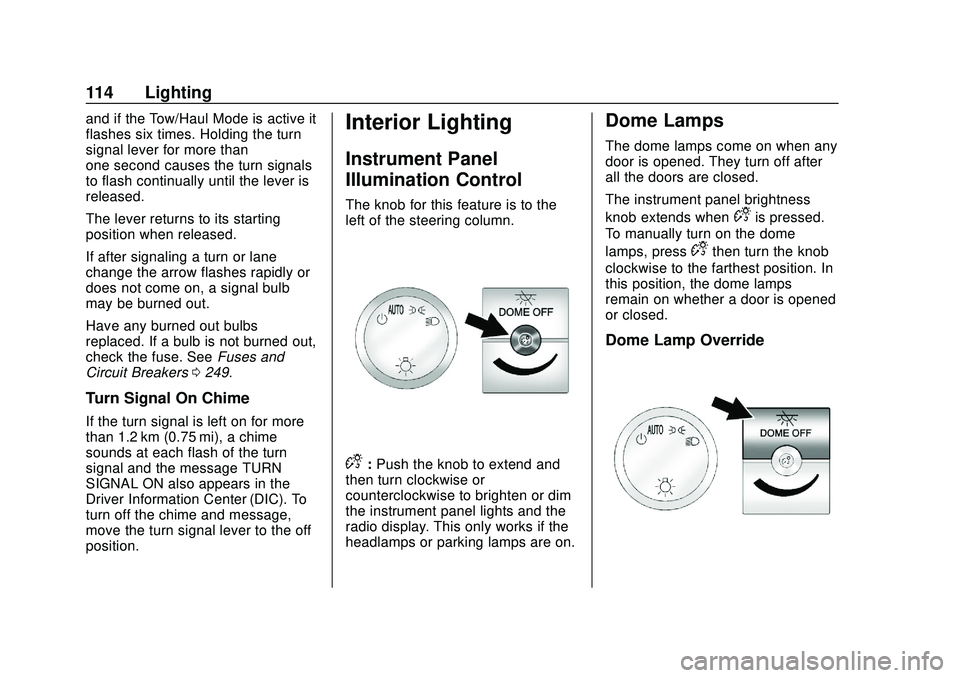
The knob for this feature is to the
left of the steering column.
D:Push the knob to extend and
then turn clockwise or
counterclockwise to brighten or dim
the instrument panel lights and the
radio display. This only works if the
headlamps or parking lamps are on.
Dome Lamps
The dome lamps come on when any
door is opened. They turn off after
all the doors are closed.
The instrument panel brightness
knob extends when
Dis pressed.
To manually turn on the dome
lamps, press
Dthen turn the knob
clockwise to the farthest position. In
this position, the dome lamps
remain on whether a door is opened
or closed.
Dome Lamp Override
Page 165 of 356
Chevrolet Express Owner Manual (GMNA-Localizing-U.S./Canada/Mexico-
13882570) - 2020 - CRC - 11/1/19
164 Driving and Operating
{Warning
Turning off the vehicle while
moving may cause loss of power
assist in the brake and steering
systems and disable the airbags.
While driving, turn off the vehicle
only in an emergency.
In an emergency, if the vehicle
cannot be pulled over and must be
turned off while driving: 1. Push the key all the way in toward the steering column,
then turn the key to ACC/
ACCESSORY.
2. Brake using firm and steady pressure. Do not pump the
brakes repeatedly. This may
deplete power assist, requiring
increased brake pedal force.
3. Shift the vehicle to N (Neutral). This can be done while the
vehicle is moving. Continue
braking and steer the vehicle to
a safe location.
4. Come to a complete stop. 5. Shift to P (Park).
6. Continue to hold the brake
pedal, then set the parking
brake. See Parking Brake
0 177.
7. Push the key all the way in toward the steering column,
then turn the ignition to
LOCK/OFF.
8. Remove the key.
9. Release the brake pedal.
Caution
Use the correct key, make sure it
is all the way in —or pushed all
the way in toward the steering
column when turning off the
vehicle —and turn it only with
your hand.
1 (ACC/ACCESSORY) : This
position allows features such as the
infotainment system to operate
while the vehicle is off. It also
unlocks the steering column,
if equipped with a locking steering
column. Use this position if the vehicle must be pushed or towed.
See
Retained Accessory Power
(RAP) 0167.
From ON/RUN, push the key all the
way in toward the steering column,
then turn the key to ACC/
ACCESSORY.
If the key is left in ACC/
ACCESSORY with the engine off,
the battery could drain and the
vehicle may not start.
A warning chime will sound when
the driver door is opened and the
key is in the ignition.
2 (ON/RUN) : This position can be
used to operate the electrical
accessories and to display some
instrument cluster warning and
indicator lights. This position can
also be used for service and
diagnostics, and to verify the proper
operation of the malfunction
indicator lamp as may be required
for emission inspection purposes.
The switch stays in this position
when the engine is running. The
transmission is also unlocked in this
position.