CHEVROLET EXPRESS CARGO VAN 2003 1.G Owners Manual
Manufacturer: CHEVROLET, Model Year: 2003, Model line: EXPRESS CARGO VAN, Model: CHEVROLET EXPRESS CARGO VAN 2003 1.GPages: 386, PDF Size: 2.73 MB
Page 131 of 386
Using Cruise Control on Hills
How well your cruise control will work on hills depends
upon your speed, load and the steepness of the
hills. When going up steep hills, you may want to step
on the accelerator pedal to maintain your speed.
When going downhill, you may have to brake or shift to
a lower gear to keep your speed down. Of course,
applying the brake takes you out of cruise control. Many
drivers ®nd this to be too much trouble and don't use
cruise control on steep hills.
Ending Cruise Control
There are two ways to turn off the cruise control:
·Step lightly on the brake pedal,
·or move the cruise control switch to off.
Erasing Speed Memory
When you turn off the cruise control or the ignition, your
cruise control set speed memory is erased.
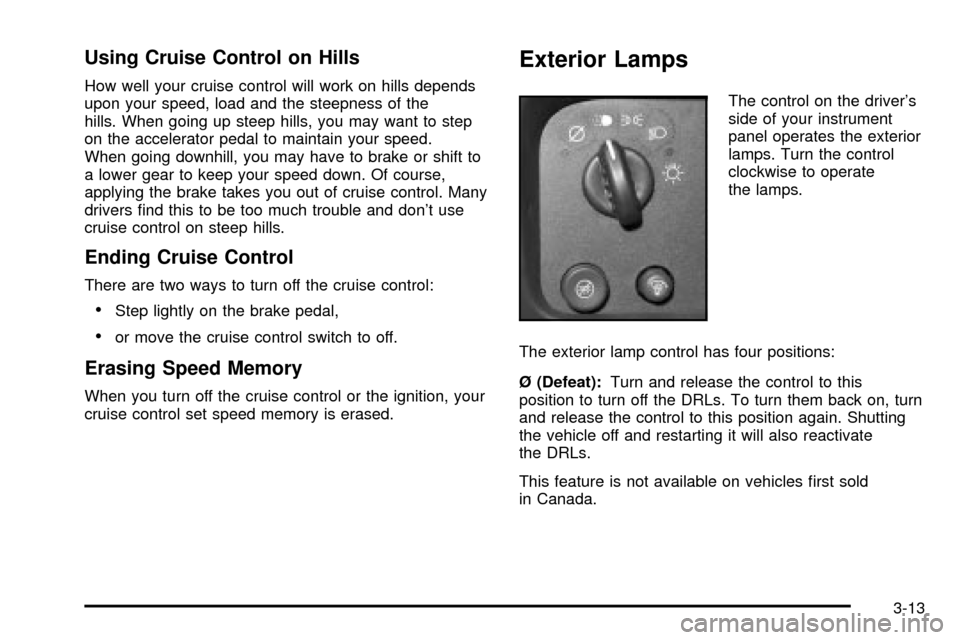
Exterior Lamps
The control on the driver's
side of your instrument
panel operates the exterior
lamps. Turn the control
clockwise to operate
the lamps.
The exterior lamp control has four positions:
é (Defeat):Turn and release the control to this
position to turn off the DRLs. To turn them back on, turn
and release the control to this position again. Shutting
the vehicle off and restarting it will also reactivate
the DRLs.
This feature is not available on vehicles ®rst sold
in Canada.
3-13
Page 132 of 386

i(Daytime Running Lamps (DRL)):Turning the
control to this position selects the DRLs. When the
vehicle is shifted out of PARK (P), the instrument panel
lamps will illuminate and the DRLs will turn on, unless
defeated. When the DRLs are active, the DRL indicator
will illuminate.
;(Parking Lamps):Turn the control to this position
to turn on the parking lamps, together with the
following:
·Instrument Panel Lights
·Daytime Running Lamps
·Sidemarker Lamps
·Taillamps
·License Plate Lamps
·Ashtray Lamp
If the DRLs are active when the control is turned to this
position, the DRLs will turn off.
For vehicles ®rst sold in Canada, the DRLs will remain
active along with the lamps mentioned above.
5(Headlamps):Turn the control to this position to
turn on the headlamps together with the parking
lamps and turn off the daytime running lamps.
You can switch your headlamps from high to
low-beam by pulling the turn signal/high-beam lever
toward you.
A circuit breaker protects your headlamps. If you have
an electrical overload, your headlamps will ¯icker on and
off. Have your headlamp wiring checked right away if
this happens.
Lamps On Reminder
A reminder chime will sound when your control is turned
to the headlamps or parking lamps position, your key
is out of the ignition, and your driver's door is open. To
disable the chime, turn the control to the Daytime
Running Lamp (DRL) position and then back to the
parking lamps or headlamps position.
3-14
Page 133 of 386
Daytime Running Lamps
Daytime Running Lamps (DRL) can make it easier for
others to see the front of your vehicle during the
day. DRL can be helpful in many different driving
conditions, but they can be especially helpful in the short
periods after dawn and before sunset. Fully functional
daytime running lamps are required on all vehicles
®rst sold in Canada.
The DRL system will come on when the following
conditions are met:
·the ignition is on,
·the exterior lamps control in DRL mode and not in
the defeat position.
When the DRL are on, only your headlamps will be on.
The taillamps, sidemarker and other lamps won't be
on. The instrument panel will be lit.
When you turn the headlamp switch off, the headlamps
will go off, and your DRL lamps will illuminate.
Turn the exterior lamp control to the defeat position or
shift into PARK (P). The DRLs will stay off until the
control is toggled again or the vehicle is shifted out
of PARK (P).
This procedure applies only to vehicles ®rst sold in the
United States.
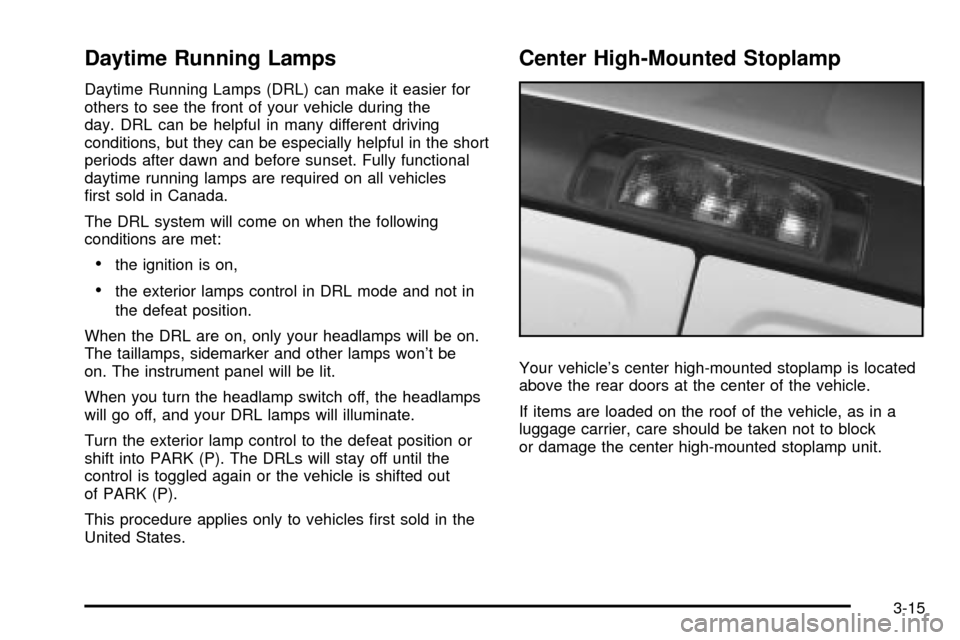
Center High-Mounted Stoplamp
Your vehicle's center high-mounted stoplamp is located
above the rear doors at the center of the vehicle.
If items are loaded on the roof of the vehicle, as in a
luggage carrier, care should be taken not to block
or damage the center high-mounted stoplamp unit.
3-15
Page 134 of 386
Interior Lamps
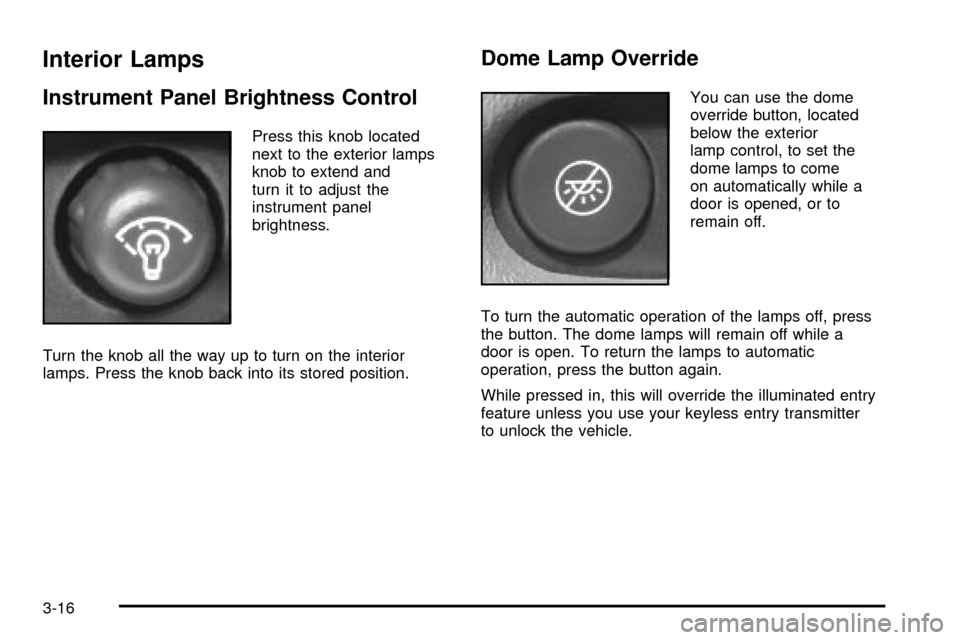
Instrument Panel Brightness Control
Press this knob located
next to the exterior lamps
knob to extend and
turn it to adjust the
instrument panel
brightness.
Turn the knob all the way up to turn on the interior
lamps. Press the knob back into its stored position.
Dome Lamp Override
You can use the dome
override button, located
below the exterior
lamp control, to set the
dome lamps to come
on automatically while a
door is opened, or to
remain off.
To turn the automatic operation of the lamps off, press
the button. The dome lamps will remain off while a
door is open. To return the lamps to automatic
operation, press the button again.
While pressed in, this will override the illuminated entry
feature unless you use your keyless entry transmitter
to unlock the vehicle.
3-16
Page 135 of 386

Exit Lighting
With exit lighting, the interior lamps will come on for a
period of forty seconds when you remove the key
from the ignition. The lights will not come on if the dome
override button is pressed in.
Entry Lighting
Your vehicle is equipped with an illuminated entry
feature.
When a door is opened, the dome lamps will come on if
the dome override button is in the out position. If the
dome override button is pressed in, the lamps will
not come on. When the door is closed, the interior lamps
will remain on for a period of ®fteen seconds or until
the vehicle is started.
Reading Lamps
To turn on the reading lamps, press the button
located next to each lamp. To turn them off, press
the button again.
Dome Lamps
The dome lamps will come on when you open a door.
See ªDome Lamp Overrideº in this part for more
information.
Battery Run-Down Protection
This feature shuts off the exterior and interior lamps if
they are left on after the ignition is turned off. All exterior
lamps will shut off after ten minutes. Interior cargo
lamps will shut down after twenty minutes and all other
interior lamps after ten minutes.
3-17
Page 136 of 386

Accessory Power Outlets
Your vehicle may have accessory power outlets.
You can plug accessory electrical equipment into an
accessory power outlet. Just pull on the outlet cover to
remove it and follow the proper installation instructions
that are included with any electrical equipment that
you install.
The accessory power outlets are located on the driver's
and passenger's side of the front storage compartment.
These circuits are protected by a fuse and have
maximum current levels.
Certain power accessory plugs may not be compatible
to the power accessory outlet and could result in
blown vehicle or adapter fuses. If you experience a
problem, see your dealer for additional information on
the power accessory plugs.
Notice:When using an accessory power outlet,
maximum electrical load must not exceed 20 amps.
Always turn off any electrical equipment when
not in use. Leaving electrical equipment on for
extended periods will drain your battery.
Notice:Power outlets are designed for accessory
plugs only. Do not hang any type of accessory
or accessory bracket from the plug. Improper use of
the power outlet can cause damage not covered
by your warranty.
Ashtrays and Cigarette Lighter
Your vehicle may have this feature.The front ashtray
can be placed in the instrument panel extension at the
center of the instrument panel. Lift up on the ashtray
door to open it.
Notice:Don't put papers or other ¯ammable
items into your ashtrays. Hot cigarettes or other
smoking materials could ignite them, causing
a damaging ®re.
To use the cigarette lighter, push it in all the way and let
go. When it's ready, it will pop back out by itself.
Notice:Don't hold a cigarette lighter in with your
hand while it is heating. If you do, it won't be able to
back away from the heating element when it's
ready. That can make it overheat, damaging the
lighter and the heating element.
3-18
Page 137 of 386
Climate Controls
Climate Control System
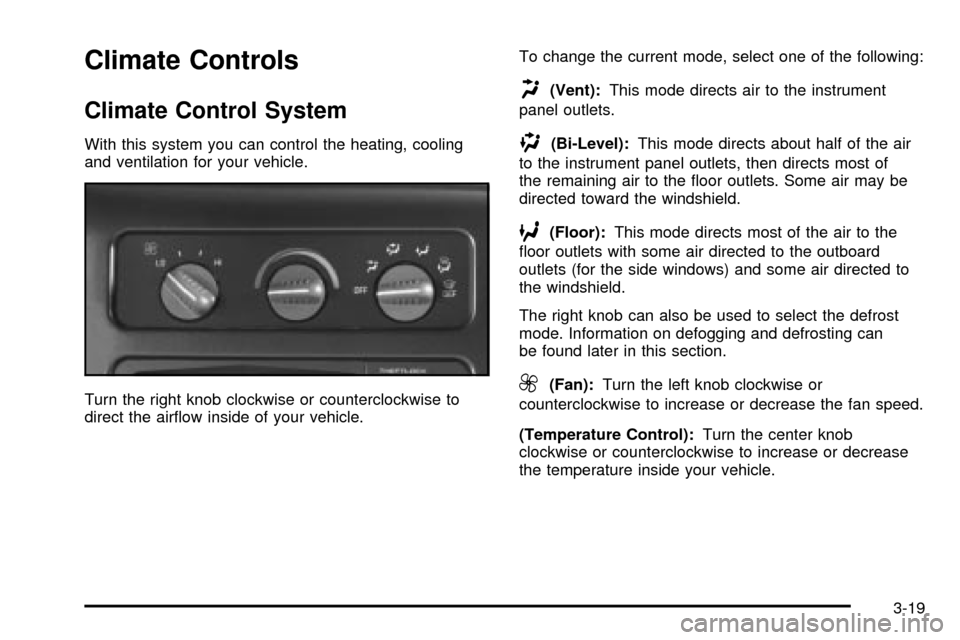
With this system you can control the heating, cooling
and ventilation for your vehicle.
Turn the right knob clockwise or counterclockwise to
direct the air¯ow inside of your vehicle.To change the current mode, select one of the following:
H(Vent):This mode directs air to the instrument
panel outlets.
)(Bi-Level):This mode directs about half of the air
to the instrument panel outlets, then directs most of
the remaining air to the ¯oor outlets. Some air may be
directed toward the windshield.
6(Floor):This mode directs most of the air to the
¯oor outlets with some air directed to the outboard
outlets (for the side windows) and some air directed to
the windshield.
The right knob can also be used to select the defrost
mode. Information on defogging and defrosting can
be found later in this section.
9(Fan):Turn the left knob clockwise or
counterclockwise to increase or decrease the fan speed.
(Temperature Control):Turn the center knob
clockwise or counterclockwise to increase or decrease
the temperature inside your vehicle.
3-19
Page 138 of 386
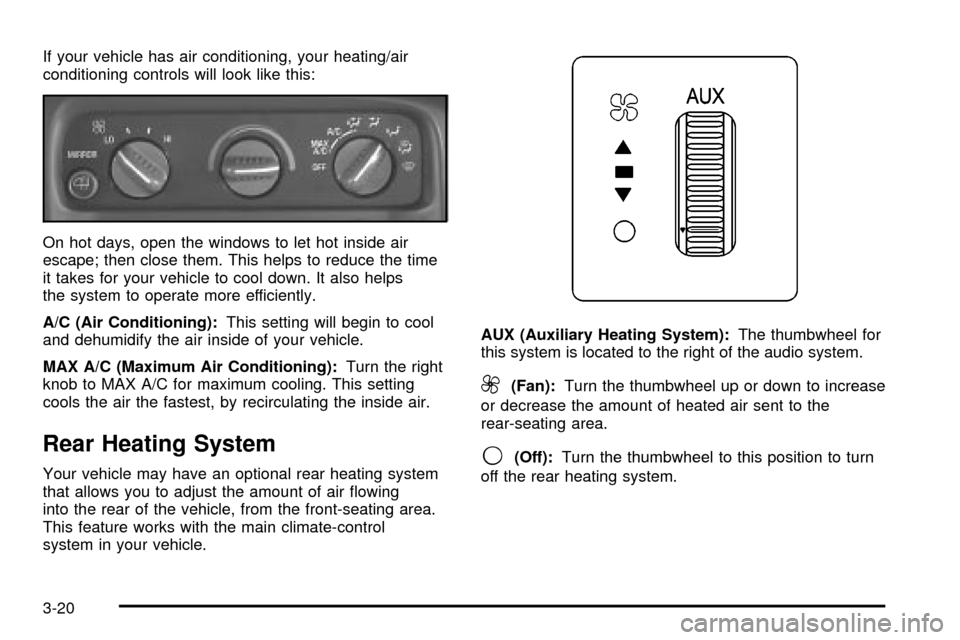
If your vehicle has air conditioning, your heating/air
conditioning controls will look like this:
On hot days, open the windows to let hot inside air
escape; then close them. This helps to reduce the time
it takes for your vehicle to cool down. It also helps
the system to operate more efficiently.
A/C (Air Conditioning):This setting will begin to cool
and dehumidify the air inside of your vehicle.
MAX A/C (Maximum Air Conditioning):Turn the right
knob to MAX A/C for maximum cooling. This setting
cools the air the fastest, by recirculating the inside air.
Rear Heating System
Your vehicle may have an optional rear heating system
that allows you to adjust the amount of air ¯owing
into the rear of the vehicle, from the front-seating area.
This feature works with the main climate-control
system in your vehicle.AUX (Auxiliary Heating System):The thumbwheel for
this system is located to the right of the audio system.
9(Fan):Turn the thumbwheel up or down to increase
or decrease the amount of heated air sent to the
rear-seating area.
9(Off):Turn the thumbwheel to this position to turn
off the rear heating system.
3-20
Page 139 of 386
Rear Air Conditioning and Heating
System
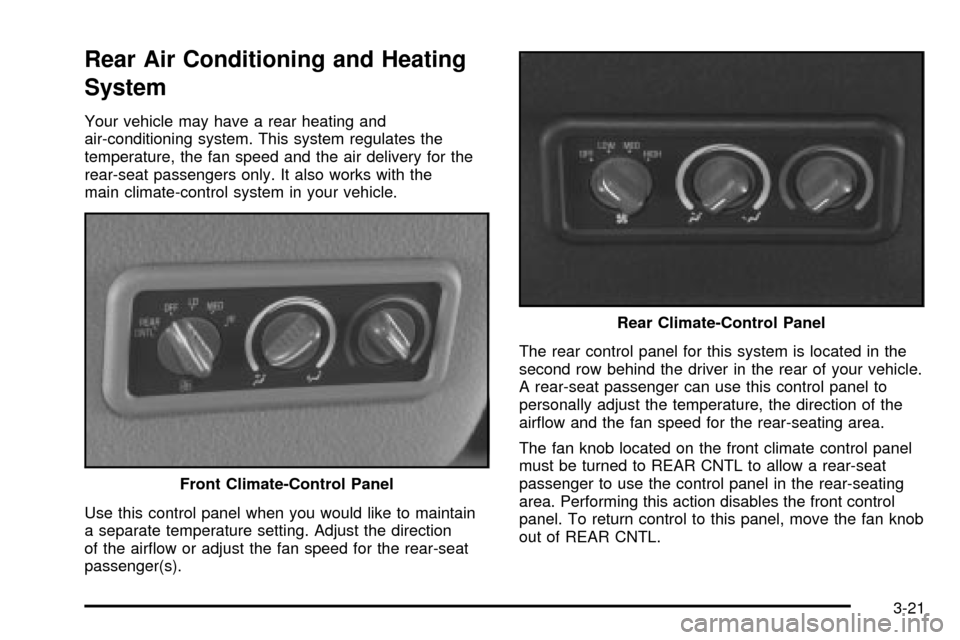
Your vehicle may have a rear heating and
air-conditioning system. This system regulates the
temperature, the fan speed and the air delivery for the
rear-seat passengers only. It also works with the
main climate-control system in your vehicle.
Use this control panel when you would like to maintain
a separate temperature setting. Adjust the direction
of the air¯ow or adjust the fan speed for the rear-seat
passenger(s).The rear control panel for this system is located in the
second row behind the driver in the rear of your vehicle.
A rear-seat passenger can use this control panel to
personally adjust the temperature, the direction of the
air¯ow and the fan speed for the rear-seating area.
The fan knob located on the front climate control panel
must be turned to REAR CNTL to allow a rear-seat
passenger to use the control panel in the rear-seating
area. Performing this action disables the front control
panel. To return control to this panel, move the fan knob
out of REAR CNTL. Front Climate-Control Panel
Rear Climate-Control Panel
3-21
Page 140 of 386

Turn the center knob clockwise or counterclockwise
to change the direction of the air¯ow in the
rear-seating area.
To change the current mode, select one of the following:
D(Vent):Use this mode to direct air to the upper
outlets, with a little air directed to the ¯oor outlets.
2(Floor):Use this mode to direct most of the air to
the ¯oor outlets.
9(Fan):Turn the left knob clockwise or
counterclockwise to HIGH, MED (Medium) or LOW to
increase or decrease the fan speed in the rear-seating
area. Turn the knob to OFF to turn off the fan.
(Temperature Control):To increase or decrease the
temperature for the rear of the vehicle, turn the right
knob located on the climate-control panel.
The air-conditioning system on the main climate-control
panel must be turned on to direct cooled air to the
rear of the vehicle. If it is not on, then the temperature
in the rear of the vehicle will remain at cabin
temperature.
Be sure to keep the area under the front seats clear of
any objects so that the air inside of your vehicle can
circulate effectively.For information on how to use the main climate-control
system, see
Climate Control System on page 3-19listed previously in this section. For information
on ventilation, see ªOutlet Adjustmentº earlier in this
section.
Defogging and Defrosting
Fog on the inside of windows is a result of high humidity
(moisture) condensing on the cool window glass. This
can be minimized if the climate control is used properly.
There are two modes to clear fog or frost from your
windshield and side windows.
Use the defog mode to clear the windows of fog or
moisture and warm the passengers. Use the defrost
mode to remove fog or frost from the windshield more
quickly. For best results, clear all snow and ice from the
windshield before defrosting.
Turn the knob on the right of the climate control panel
to select the defog or defrost mode.
-(Blend):With this setting, the outside air comes out
of both the ¯oor and defroster outlets. Adjust the
temperature knob for warmer or cooler air. The air
conditioning compressor may operate in this setting to
dehumidify the air.
1(Defrost):This setting operates the defroster.
Most of the air comes out near the windshield, with
some going to the ¯oor outlets and front side windows.
3-22