steering CHEVROLET EXPRESS CARGO VAN 2014 1.G Owner's Guide
[x] Cancel search | Manufacturer: CHEVROLET, Model Year: 2014, Model line: EXPRESS CARGO VAN, Model: CHEVROLET EXPRESS CARGO VAN 2014 1.GPages: 406, PDF Size: 5.29 MB
Page 207 of 406
Black plate (17,1)Chevrolet Express Owner Manual (GMNA-Localizing-U.S./Canada/Mexico-
6014662) - 2014 - crc - 8/26/13
Driving and Operating 9-17
Starting the Engine
If the vehicle has a diesel engine,
see the Duramax diesel
supplement.
To place the transmission in the
proper gear:
Move the shift lever to P (Park) or
N (Neutral). The engine will not start
in any other position. To restart the
engine when the vehicle is already
moving, use N (Neutral) only.
{Caution
If the steering wheel is turned
until it reaches the end of its
travel, and is held in that position
while starting the vehicle, damage
may occur to the hydraulic power
steering system and there may be
loss of power steering assist.Starting Procedure
1. With your foot off the accelerator
pedal, turn the ignition key to
START. When the engine starts,
let go of the key. The idle speed
will go down as your engine gets
warm. Do not race the engine
immediately after starting it.
Operate the engine and
transmission gently to allow the
oil to warm up and lubricate all
moving parts.
The vehicle has a
Computer-Controlled Cranking
System. This feature assists in
starting the engine and protects
components. If the ignition key is
turned to the START position,
and then released when the
engine begins cranking, the
engine will continue cranking for
a few seconds or until the
vehicle starts. If the engine does
not start and the key is held in
START for many seconds,
cranking will be stopped after
15 seconds to prevent cranking
motor damage. To prevent gear damage, this system also
prevents cranking if the engine
is already running. Engine
cranking can be stopped by
turning the ignition switch to the
ACC/ACCESSORY or LOCK/
OFF position.
When the Low Fuel warning
lamp is on and the FUEL LEVEL
LOW message is displayed in
the Driver Information Center
(DIC), the Computer-Controlled
Cranking System is disabled to
prevent possible vehicle
component damage. When this
happens, hold the ignition switch
in the START position to
continue engine cranking.
{Caution
Cranking the engine for long
periods of time, by returning the
ignition to the START position
immediately after cranking has
ended, can overheat and damage
(Continued)
Page 208 of 406
Black plate (18,1)Chevrolet Express Owner Manual (GMNA-Localizing-U.S./Canada/Mexico-
6014662) - 2014 - crc - 8/26/13
9-18 Driving and Operating
Caution (Continued)
the cranking motor, and drain the
battery. Wait at least 15 seconds
between each try, to let the
cranking motor cool down.
2. If the engine does not start after 5-10 seconds, especially in very
cold weather (below −18°C or
0°F), it could be flooded with too
much gasoline. Try pushing the
accelerator pedal all the way to
the floor and holding it there as
you hold the key in START for
up to 15 seconds. Wait at least
15 seconds between each try, to
allow the cranking motor to cool
down. When the engine starts,
let go of the key and accelerator.
If the vehicle starts briefly but
then stops again, do the same
thing. This clears the extra
gasoline from the engine. Do not
race the engine immediately
after starting it. Operate the engine and transmission gently
until the oil warms up and
lubricates all moving parts.
{Caution
If you add electrical parts or
accessories, you could change
the way the engine operates. Any
resulting damage would not be
covered by the vehicle warranty.
See
Add-On Electrical Equipment
on page 9-59.
Fast Idle System
If equipped, this feature is available
only with cruise control. The manual
fast idle switch is operated using the
cruise control buttons on the left
side of the steering wheel.
This system can be used to
increase engine idle speed
whenever the following conditions
are met:
.The parking brake is set.
.The brake pedal is not pressed.
.The vehicle must not be moving
and the accelerator must not be
pressed.
To control the fast idle:
.To enable the Fast Idle System,
press and release the cruise
control on/off button and ensure
that the switch indicator light
is lit.
.Press and release the cruise
control SET- button. Engine
speed will be held at
approximately 1200 rpm.
When the fast idle is active, the
Driver Information Center (DIC) will
display FAST IDLE ON.
One of the following actions will turn
off the fast idle:
.Pressing the brake.
.Selecting the cruise control
cancel button.
.Releasing the parking brake.
.Moving the transmission shift
lever out of P (Park) or
N (Neutral).
Page 209 of 406
Black plate (19,1)Chevrolet Express Owner Manual (GMNA-Localizing-U.S./Canada/Mexico-
6014662) - 2014 - crc - 8/26/13
Driving and Operating 9-19
.Selecting the cruise control on/
off button when it was
previously on.
.Pressing the cruise control SET-
button a second time.
.Pressing the accelerator more
than one-quarter of the
way down.
.Turning the ignition switch to the
LOCK/OFF position.
Engine Heater
If the vehicle has a diesel engine,
see the Duramax diesel supplement
for more information.
The engine coolant heater can
provide easier starting and better
fuel economy during engine warm‐
up in cold weather conditions at or
below−18°C (0°F). Vehicles with an
engine coolant heater should be
plugged in at least four hours before
starting. An internal thermostat in
the plug-end of the cord may exist which will prevent engine coolant
heater operation at temperatures
above
−18°C (0°F).
To Use the Engine Coolant
Heater
1. Turn off the engine.
2. Open the hood and unwrap the
electrical cord.
The cord for the engine coolant
heater is located on the driver
side of the engine compartment
and is attached to the hose for
the power steering reservoir.
3. Plug it into a normal, grounded 110-volt AC outlet.
{Warning
Plugging the cord into an
ungrounded outlet could cause an
electrical shock. Also, the wrong
kind of extension cord could
overheat and cause a fire. You
could be seriously injured. Plug
(Continued)
Warning (Continued)
the cord into a properly grounded
three-prong 110-volt AC outlet.
If the cord will not reach, use a
heavy-duty three-prong extension
cord rated for at least 15 amps.
4. Before starting the engine, be sure to unplug and store the
cord as it was before to keep it
away from moving engine parts
and prevent damage.
The length of time the heater should
remain plugged in depends on
several factors. Ask a dealer in the
area where you will be parking the
vehicle for the best advice on this.
Page 219 of 406
Black plate (29,1)Chevrolet Express Owner Manual (GMNA-Localizing-U.S./Canada/Mexico-
6014662) - 2014 - crc - 8/26/13
Driving and Operating 9-29
Manual Mode
Range Selection Mode
If equipped, Range Selection Mode
helps control the vehicle's
transmission and vehicle speed
while driving downhill or towing a
trailer by letting you select a desired
range of gears.
To use this feature:
1. Move the shift lever toM (Manual Mode).
2. Press the +/− buttons on the
shift lever, to select the desired
range of gears for current driving
conditions.
When M (Manual Mode) is selected
a number displays in the DIC next to
the M indicating the current gear. This number is the highest gear that
can be used. However, the vehicle
can automatically shift to lower
gears as it adjusts to driving
conditions. This means that all
gears below that number are
available. When 5 (Fifth) is selected,
1 (First) through 5 (Fifth) gears are
automatically shifted by the vehicle,
but 6 (Sixth) cannot be used until
the +/−
button on the steering
column lever is used to change to
the gear.
Grade Braking is not available when
Range Selection Mode is active.
See Tow/Haul Mode on page 9-30.
While using Range Selection Mode,
cruise control and the Tow/Haul
Mode can be used.
{Caution
Spinning the tires or holding the
vehicle in one place on a hill
using only the accelerator pedal
may damage the transmission. (Continued)
Caution (Continued)
The repair will not be covered by
the vehicle warranty. If you are
stuck, do not spin the tires. When
stopping on a hill, use the brakes
to hold the vehicle in place.
Low Traction Mode
Low Traction Mode can assist in
vehicle acceleration when road
conditions are slippery. While the
vehicle is at a stop, select the
second gear range using Range
Selection Mode. This will limit
torque to the wheels after it detects
wheel slip, preventing the tires from
spinning.
Page 222 of 406
Black plate (32,1)Chevrolet Express Owner Manual (GMNA-Localizing-U.S./Canada/Mexico-
6014662) - 2014 - crc - 8/26/13
9-32 Driving and Operating
suddenly slows or stops. Always
leave enough room up ahead to
stop, even with ABS.
Using ABS
Do not pump the brakes. Just hold
the brake pedal down firmly and let
ABS work. You might hear the ABS
pump or motor operating and feel
the brake pedal pulsate, but this is
normal.
Braking in Emergencies
ABS allows you to steer and brake
at the same time. In many
emergencies, steering can help
more than even the very best
braking.
Parking Brake
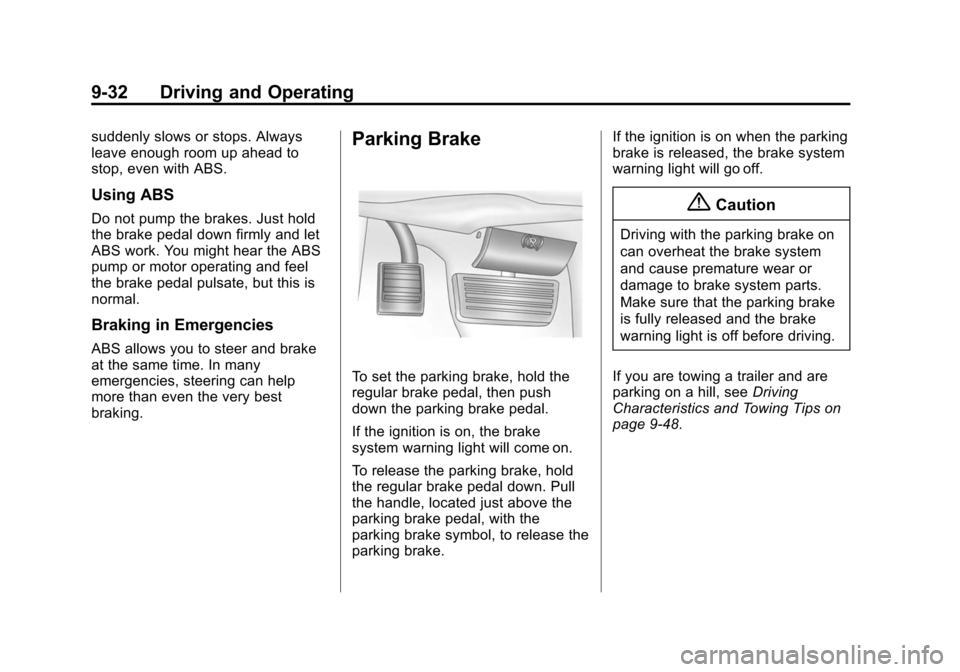
To set the parking brake, hold the
regular brake pedal, then push
down the parking brake pedal.
If the ignition is on, the brake
system warning light will come on.
To release the parking brake, hold
the regular brake pedal down. Pull
the handle, located just above the
parking brake pedal, with the
parking brake symbol, to release the
parking brake.If the ignition is on when the parking
brake is released, the brake system
warning light will go off.
{Caution
Driving with the parking brake on
can overheat the brake system
and cause premature wear or
damage to brake system parts.
Make sure that the parking brake
is fully released and the brake
warning light is off before driving.
If you are towing a trailer and are
parking on a hill, see Driving
Characteristics and Towing Tips on
page 9-48.
Page 226 of 406
Black plate (36,1)Chevrolet Express Owner Manual (GMNA-Localizing-U.S./Canada/Mexico-
6014662) - 2014 - crc - 8/26/13
9-36 Driving and Operating
+RES (Resume/Accelerate):
Press briefly to make the vehicle
resume to a previously set speed,
or press and hold to accelerate.
If cruise control is already active,
use to increase vehicle speed.
SET−(Set/Coast): Press briefly to
set the speed and activate cruise
control, or press and hold to
decelerate. If cruise control is
already active, use to decrease
vehicle speed.
[(Cancel): Press to disengage
cruise control without erasing the
set speed from memory.
Setting Cruise Control
If the cruise button is on when not in
use, it could get bumped and go into
cruise when not desired. Keep the
cruise control switch off when cruise
is not being used. The cruise control light on the
instrument cluster comes on after
the cruise control has been set to
the desired speed.
1. Press the
Ibutton.
2. Get up to the desired speed.
3. Press the SET− button on the
steering wheel and release it.
4. Remove foot from the accelerator.
Resuming a Set Speed
If the cruise control is set at a
desired speed and then the brakes
are applied, the cruise control is
disengaged without erasing the set
speed from memory.
Once the vehicle speed reaches
about 40 km/h (25 mph) or more,
briefly press the +RES button on the
steering wheel. The vehicle returns
to the previous set speed. Increasing Speed While Using
Cruise Control
If the cruise control system is
already activated,.Press and hold the +RES button
on the steering wheel until the
desired speed is reached, then
release it.
.To increase vehicle speed in
small increments, briefly press
the +RES button. Each time this
is done, the vehicle goes about
1.6 km/h (1 mph) faster.
Reducing Speed While Using
Cruise Control
If the cruise control system is
already activated:
.Press and hold the SET– button
on the steering wheel until the
desired lower speed is reached,
then release it.
.To slow down in small
increments, briefly press the
SET– button on the steering
Page 227 of 406
Black plate (37,1)Chevrolet Express Owner Manual (GMNA-Localizing-U.S./Canada/Mexico-
6014662) - 2014 - crc - 8/26/13
Driving and Operating 9-37
wheel briefly. Each time this is
done, the vehicle goes about
1.6 km/h (1 mph) slower.
Passing Another Vehicle While
Using Cruise Control
Use the accelerator pedal to
increase the vehicle speed. When
you take your foot off the pedal, the
vehicle will slow down to the
previous set cruise speed. While
pressing the accelerator pedal or
shortly following the release to
override cruise control, briefly
applying the SET– button will result
in cruise control set to the current
vehicle speed.
Using Cruise Control on Hills
How well the cruise control works
on hills depends on the vehicle
speed, the load, and the steepness
of the hills. When going up steep
hills, pushing the accelerator pedal
may be necessary to maintain
vehicle speed. While going downhill:
.Vehicles with a 4-speed
automatic transmission may
need to have the brakes applied
or the transmission shifted to a
lower gear to help maintain
driver selected speed.
.Vehicles with a 6-speed
automatic transmission have
Cruise Grade Braking to help
maintain driver selected speed.
Cruise Grade Braking is enabled
when the vehicle is started and
Cruise Control is active. It is not
enabled in Range Selection Mode.
It assists in maintaining driver
selected speed when driving on
downhill grades by using the engine
and transmission to slow the
vehicle.
To disable and enable Cruise Grade
Braking for the current ignition key
cycle, press and hold the Tow/Haul
button for three seconds. A DIC
message displays. See
Transmission Messages on
page 5-38. When the brakes are manually
applied the cruise control is
disengaged.
Ending Cruise Control
There are three ways to end cruise
control:.To disengage cruise control,
step lightly on the brake pedal.
.Press the[on the steering
wheel.
.To turn off the cruise control,
press
Ion the steering wheel.
Erasing Speed Memory
The cruise control set speed is
erased from memory if
Iis
pressed or if the vehicle is
turned off.
Page 239 of 406
Black plate (49,1)Chevrolet Express Owner Manual (GMNA-Localizing-U.S./Canada/Mexico-
6014662) - 2014 - crc - 8/26/13
Driving and Operating 9-49
Towing a trailer requires a certain
amount of experience. The
combination you are driving is
longer and not as responsive as the
vehicle itself. Get acquainted with
the handling and braking of the rig
before setting out for the open road.
Before starting, check all trailer hitch
parts and attachments, safety
chains, electrical connectors, lamps,
tires, and mirrors. If the trailer has
electric brakes, start the
combination moving and then apply
the trailer brake controller by hand
to be sure the brakes work.
During the trip, check occasionally
to be sure that the load is secure
and the lamps and any trailer
brakes still work.
Following Distance
Stay at least twice as far behind the
vehicle ahead as you would when
driving the vehicle without a trailer.
This can help to avoid heavy
braking and sudden turns.
Passing
More passing distance is needed
when towing a trailer. The
combination will not accelerate as
quickly and is longer so it is
necessary to go much farther
beyond the passed vehicle before
returning to the lane.
Backing Up
Hold the bottom of the steering
wheel with one hand. To move the
trailer to the left, move that hand to
the left. To move the trailer to the
right, move your hand to the right.
Always back up slowly and,
if possible, have someone
guide you.
Making Turns
{Caution
Making very sharp turns while
trailering could cause the trailer to
come in contact with the vehicle.
The vehicle could be damaged.
Avoid making very sharp turns
while trailering.
When turning with a trailer, make
wider turns than normal. Do this so
the trailer will not strike soft
shoulders, curbs, road signs, trees,
or other objects. Avoid jerky or
sudden maneuvers. Signal well in
advance.
If the trailer turn signal bulbs burn
out, the arrows on the instrument
cluster will still flash for turns. It is
important to check occasionally to
be sure the trailer bulbs are still
working.
Page 248 of 406
Black plate (58,1)Chevrolet Express Owner Manual (GMNA-Localizing-U.S./Canada/Mexico-
6014662) - 2014 - crc - 8/26/13
9-58 Driving and Operating
If the vehicle has a trailer hitch, the
seven-wire harness assembly with
connector is attached to a bracket
on the hitch platform. In both cases,
the seven-wire harness has a
connector and includes a 30-amp
feed wire.
The seven-wire harness connector
contains the following trailer circuits:
.Light Green: Back-up Lamps
(10A fuse)**
.White: Ground
.Dark Blue: Trailer Brake Signal
.Dark Green: Right Rear Stop
and Turn Signal*
.Red/Black Stripe: Battery Feed
(30A Fuse)
.Brown: Trailer Park Lamp
Supply Voltage (15A fuse)**
.Yellow: Left Rear Stop and Turn
Signal *The four-wire harness (without
connector) contains the following
circuits:
.Black: Ground
.Red/White: Battery Feed
.Dark Blue: Trailer Brake Signal
.Light Blue: CHMSL/Stoplamp
Supply Voltage
* If the vehicle is a cutaway with
trailer provisions, a 15 amp fuse will
be shared for both left/stop trailer
turn and right/stop trailer turn
signals. However, the cutaway
lighting connector will have a
10 amp fuse for each signal.
** If the vehicle is a cutaway with
trailer provisions, a 15 amp fuse will
be shared for trailer park lamps and
cutaway rear lighting connector park
lamps. Also, a 10 amp fuse will be
shared for trailer back-up lamps and
cutaway rear lighting connector
back-up lamps.
Tow/Haul Mode
This button is on the instrument
panel, to the right of the steering
wheel.
Pressing this button turns on and off
the Tow/Haul Mode.
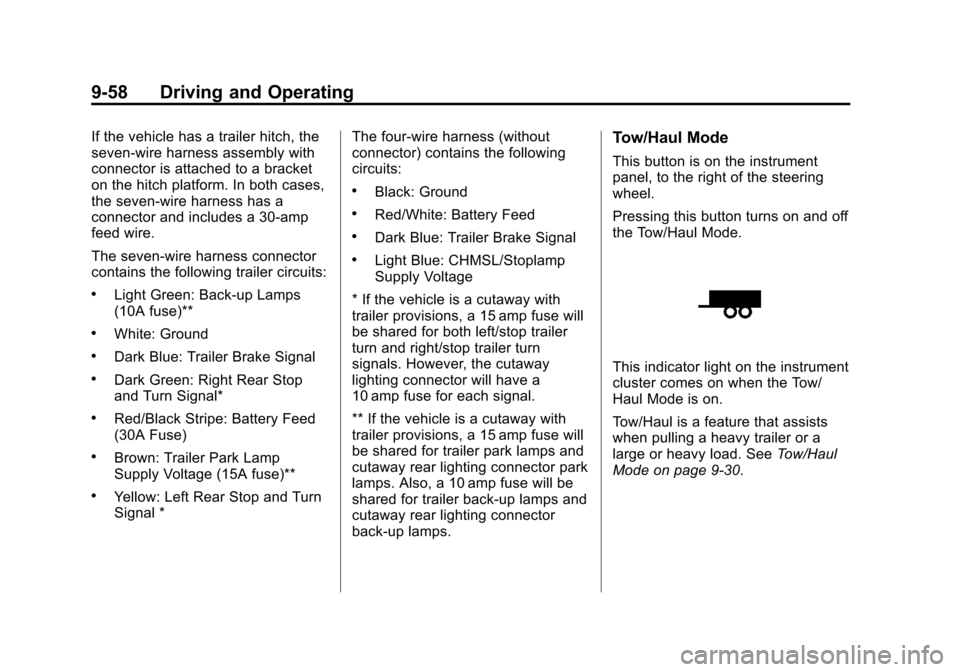
This indicator light on the instrument
cluster comes on when the Tow/
Haul Mode is on.
Tow/Haul is a feature that assists
when pulling a heavy trailer or a
large or heavy load. See Tow/Haul
Mode on page 9-30.
Page 251 of 406
Black plate (1,1)Chevrolet Express Owner Manual (GMNA-Localizing-U.S./Canada/Mexico-
6014662) - 2014 - crc - 8/26/13
Vehicle Care 10-1
Vehicle Care
General Information
General Information . . . . . . . . . . 10-2
California Proposition65 Warning . . . . . . . . . . . . . . . . . 10-3
California Perchlorate Materials Requirements . . . . 10-3
Accessories and Modifications . . . . . . . . . . . . . . . 10-3
Vehicle Checks
Doing Your OwnService Work . . . . . . . . . . . . . . . 10-4
Hood . . . . . . . . . . . . . . . . . . . . . . . . 10-4
Engine Compartment Overview . . . . . . . . . . . . . . . . . . . 10-6
Engine Oil . . . . . . . . . . . . . . . . . . . 10-7
Engine Oil Life System . . . . . 10-10
Automatic Transmission Fluid (4-Speed Transmission) . . . 10-11
Automatic Transmission Fluid (6-Speed
Transmission) . . . . . . . . . . . . . 10-13
Engine Air Cleaner/Filter . . . . 10-16
Cooling System . . . . . . . . . . . . 10-17
Engine Coolant . . . . . . . . . . . . . 10-18
Engine Overheating . . . . . . . . 10-22 Engine Fan . . . . . . . . . . . . . . . . . 10-23
Power Steering Fluid . . . . . . . 10-24
Washer Fluid . . . . . . . . . . . . . . . 10-25
Brakes . . . . . . . . . . . . . . . . . . . . . 10-25
Brake Fluid . . . . . . . . . . . . . . . . . 10-26
Battery . . . . . . . . . . . . . . . . . . . . . 10-28
All-Wheel Drive . . . . . . . . . . . . . 10-29
Front Axle . . . . . . . . . . . . . . . . . . 10-29
Rear Axle . . . . . . . . . . . . . . . . . . 10-30
Noise Control System . . . . . . 10-30
Starter Switch Check . . . . . . . 10-31
Automatic Transmission Shift
Lock Control Function
Check . . . . . . . . . . . . . . . . . . . . . 10-32
Ignition Transmission Lock Check . . . . . . . . . . . . . . . . . . . . . 10-32
Park Brake and P (Park) Mechanism Check . . . . . . . . 10-32
Wiper Blade Replacement . . . . . . . . . . . . . . 10-33
Headlamp Aiming
Headlamp Aiming . . . . . . . . . . 10-33
Bulb Replacement
Bulb Replacement . . . . . . . . . . 10-34
Halogen Bulbs . . . . . . . . . . . . . . 10-34
Headlamps . . . . . . . . . . . . . . . . . 10-34 Front Turn Signal,
Sidemarker, and Parking
Lamps . . . . . . . . . . . . . . . . . . . . 10-36
Taillamps . . . . . . . . . . . . . . . . . . . 10-36
Center High-Mounted Stoplamp (CHMSL) . . . . . . . 10-37
License Plate Lamp . . . . . . . . 10-38
Replacement Bulbs . . . . . . . . . 10-38
Electrical System
Electrical System Overload . . . . . . . . . . . . . . . . . . 10-39
Fuses and Circuit Breakers . . . . . . . . . . . . . . . . . . 10-40
Engine Compartment Fuse Block . . . . . . . . . . . . . . . . . . . . . 10-40
Floor Console Fuse
Block . . . . . . . . . . . . . . . . . . . . . 10-43
Wheels and Tires
Tires . . . . . . . . . . . . . . . . . . . . . . . . 10-46
All-Season Tires . . . . . . . . . . . . 10-47
Winter Tires . . . . . . . . . . . . . . . . 10-47
All-Terrain Tires . . . . . . . . . . . . 10-48
Tire Sidewall Labeling . . . . . . 10-48
Tire Designations . . . . . . . . . . . 10-51
Tire Terminology andDefinitions . . . . . . . . . . . . . . . . 10-52
Tire Pressure . . . . . . . . . . . . . . . 10-55