instrument panel CHEVROLET EXPRESS PASSANGER 2007 1.G Owner's Guide
[x] Cancel search | Manufacturer: CHEVROLET, Model Year: 2007, Model line: EXPRESS PASSANGER, Model: CHEVROLET EXPRESS PASSANGER 2007 1.GPages: 458, PDF Size: 2.62 MB
Page 169 of 458

Passenger Safety Belt
Reminder Light
If your vehicle has this feature, several seconds
after the key is turned to RUN or START, a chime
will sound for several seconds to remind the front
passenger to buckle their safety belt. This would
only occur if the passenger airbag is enabled. See
Passenger Sensing System on page 89for more
information. The passenger safety belt light will also
come on and stay on for several seconds, then it
will flash for several more.
This light and chime
reminder will be
repeated if the
passenger remains
unbuckled and
the vehicle is in motion.
If the passenger’s safety belt is buckled, neither
the chime nor the light will come on.
Airbag Readiness Light
There is an airbag readiness light on the
instrument panel, which shows the airbag symbol.
The system checks the airbag’s electrical
system for malfunctions. The light tells you if there
is an electrical problem. The system check
includes the airbag sensor, the airbag modules,
the wiring and the crash sensing and diagnostic
module. For more information on the airbag
system, seeAirbag System on page 78.
This light will come on
when you start your
vehicle, and it will flash
for a few seconds.
Then the light should go
out. This means the
system is ready.
169
Page 172 of 458
Passenger Airbag Status Indicator
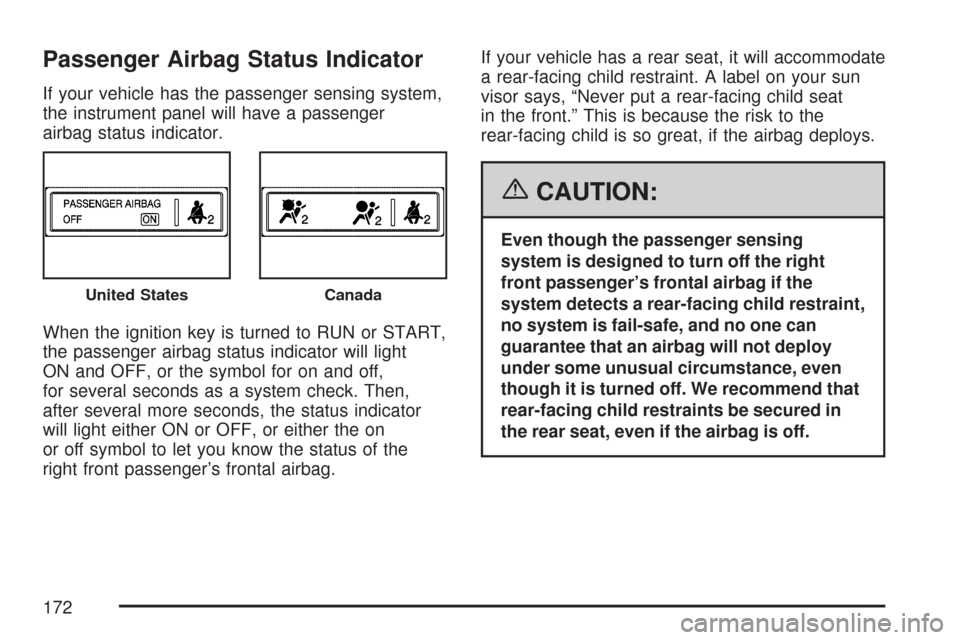
If your vehicle has the passenger sensing system,
the instrument panel will have a passenger
airbag status indicator.
When the ignition key is turned to RUN or START,
the passenger airbag status indicator will light
ON and OFF, or the symbol for on and off,
for several seconds as a system check. Then,
after several more seconds, the status indicator
will light either ON or OFF, or either the on
or off symbol to let you know the status of the
right front passenger’s frontal airbag.If your vehicle has a rear seat, it will accommodate
a rear-facing child restraint. A label on your sun
visor says, “Never put a rear-facing child seat
in the front.” This is because the risk to the
rear-facing child is so great, if the airbag deploys.
{CAUTION:
Even though the passenger sensing
system is designed to turn off the right
front passenger’s frontal airbag if the
system detects a rear-facing child restraint,
no system is fail-safe, and no one can
guarantee that an airbag will not deploy
under some unusual circumstance, even
though it is turned off. We recommend that
rear-facing child restraints be secured in
the rear seat, even if the airbag is off.
United StatesCanada
172
Page 185 of 458
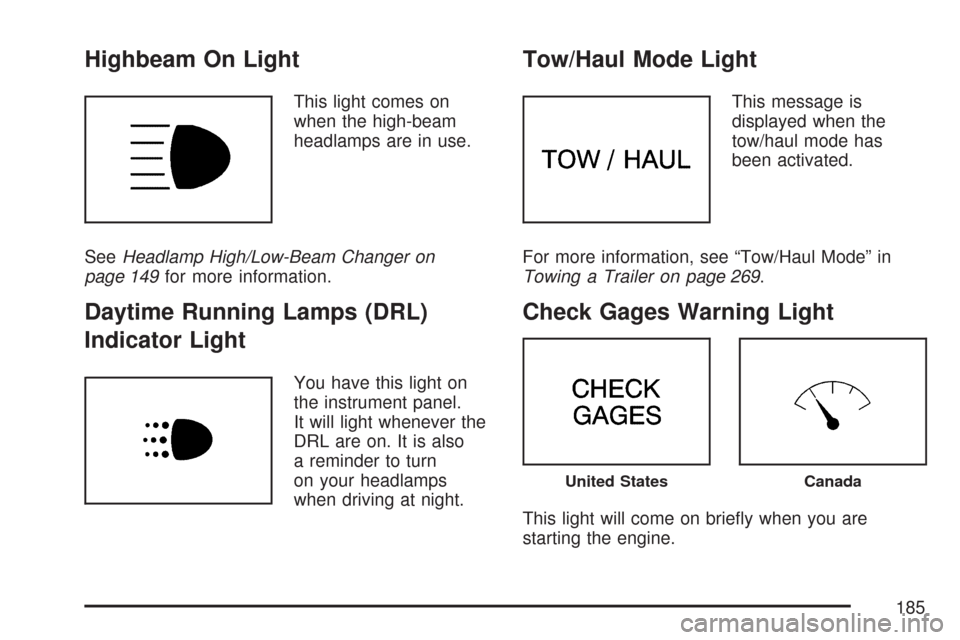
Highbeam On Light
This light comes on
when the high-beam
headlamps are in use.
SeeHeadlamp High/Low-Beam Changer on
page 149for more information.
Daytime Running Lamps (DRL)
Indicator Light
You have this light on
the instrument panel.
It will light whenever the
DRL are on. It is also
a reminder to turn
on your headlamps
when driving at night.
Tow/Haul Mode Light
This message is
displayed when the
tow/haul mode has
been activated.
For more information, see “Tow/Haul Mode” in
Towing a Trailer on page 269.
Check Gages Warning Light
This light will come on briefly when you are
starting the engine.
United StatesCanada
185
Page 237 of 458
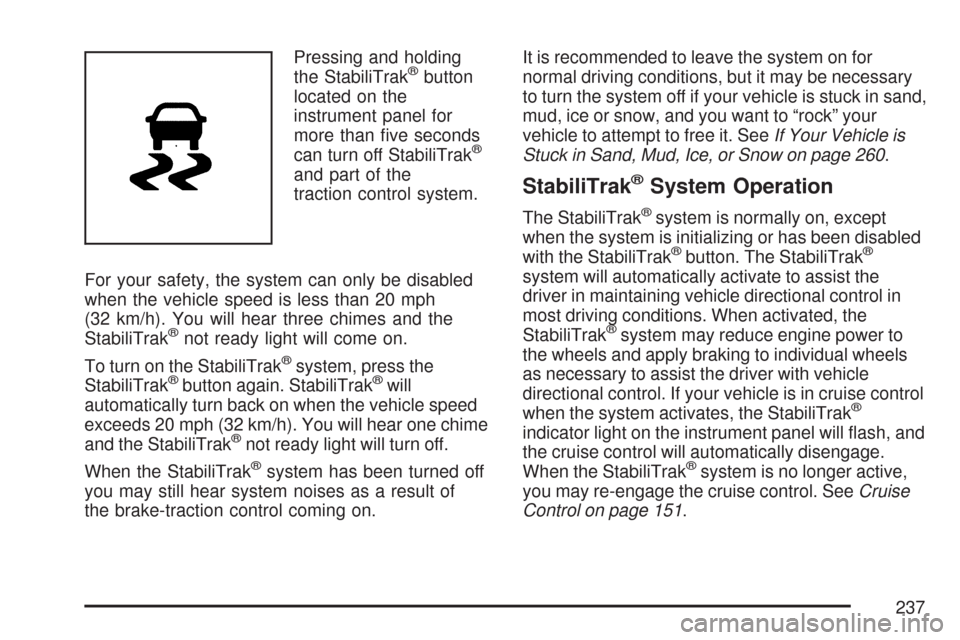
Pressing and holding
the StabiliTrak®button
located on the
instrument panel for
more than five seconds
can turn off StabiliTrak
®
and part of the
traction control system.
For your safety, the system can only be disabled
when the vehicle speed is less than 20 mph
(32 km/h). You will hear three chimes and the
StabiliTrak
®not ready light will come on.
To turn on the StabiliTrak
®system, press the
StabiliTrak®button again. StabiliTrak®will
automatically turn back on when the vehicle speed
exceeds 20 mph (32 km/h). You will hear one chime
and the StabiliTrak
®not ready light will turn off.
When the StabiliTrak
®system has been turned off
you may still hear system noises as a result of
the brake-traction control coming on.It is recommended to leave the system on for
normal driving conditions, but it may be necessary
to turn the system off if your vehicle is stuck in sand,
mud, ice or snow, and you want to “rock” your
vehicle to attempt to free it. SeeIf Your Vehicle is
Stuck in Sand, Mud, Ice, or Snow on page 260.
StabiliTrak®System Operation
The StabiliTrak®system is normally on, except
when the system is initializing or has been disabled
with the StabiliTrak
®button. The StabiliTrak®
system will automatically activate to assist the
driver in maintaining vehicle directional control in
most driving conditions. When activated, the
StabiliTrak
®system may reduce engine power to
the wheels and apply braking to individual wheels
as necessary to assist the driver with vehicle
directional control. If your vehicle is in cruise control
when the system activates, the StabiliTrak
®
indicator light on the instrument panel will flash, and
the cruise control will automatically disengage.
When the StabiliTrak
®system is no longer active,
you may re-engage the cruise control. SeeCruise
Control on page 151.
237
Page 271 of 458
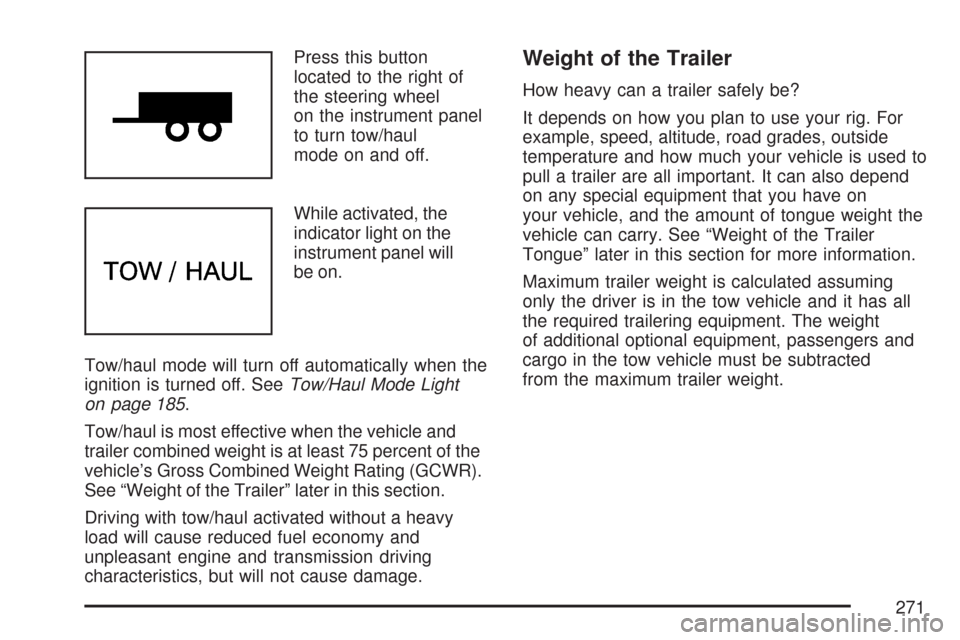
Press this button
located to the right of
the steering wheel
on the instrument panel
to turn tow/haul
mode on and off.
While activated, the
indicator light on the
instrument panel will
be on.
Tow/haul mode will turn off automatically when the
ignition is turned off. SeeTow/Haul Mode Light
on page 185.
Tow/haul is most effective when the vehicle and
trailer combined weight is at least 75 percent of the
vehicle’s Gross Combined Weight Rating (GCWR).
See “Weight of the Trailer” later in this section.
Driving with tow/haul activated without a heavy
load will cause reduced fuel economy and
unpleasant engine and transmission driving
characteristics, but will not cause damage.Weight of the Trailer
How heavy can a trailer safely be?
It depends on how you plan to use your rig. For
example, speed, altitude, road grades, outside
temperature and how much your vehicle is used to
pull a trailer are all important. It can also depend
on any special equipment that you have on
your vehicle, and the amount of tongue weight the
vehicle can carry. See “Weight of the Trailer
Tongue” later in this section for more information.
Maximum trailer weight is calculated assuming
only the driver is in the tow vehicle and it has all
the required trailering equipment. The weight
of additional optional equipment, passengers and
cargo in the tow vehicle must be subtracted
from the maximum trailer weight.
271
Page 284 of 458
Turn Signals When Towing a Trailer
When you tow a trailer, your vehicle has to have
extra wiring and a heavy-duty turn signal
flasher (included in the optional trailering package).
The arrows on your instrument panel will flash
whenever you signal a turn or lane change.
Properly hooked up, the trailer lamps will also
flash, telling other drivers you’re about to
turn, change lanes or stop.
When towing a trailer, the arrows on your
instrument panel will flash for turns even if the bulbs
on the trailer are burned out. Thus, you may think
drivers behind you are seeing your signal when
they are not. It’s important to check occasionally to
be sure the trailer bulbs are still working.
Driving On Grades
Reduce speed and shift to a lower gearbefore
you start down a long or steep downgrade. If you
don’t shift down, you might have to use your
brakes so much that they would get hot and no
longer work well.
You can tow in DRIVE (D). You may want to shift
the transmission to THIRD (3) or a lower gear
under heavy loads and/or hilly conditions.
When towing at high altitude on steep uphill
grades, consider the following: Engine coolant will
boil at a lower temperature than at normal
altitudes. If you turn your engine off immediately
after towing at high altitude on steep uphill grades,
your vehicle may show signs similar to engine
overheating. To avoid this, let the engine run while
parked (preferably on level ground) with the
automatic transmission in PARK (P) for a few
minutes before turning the engine off. If you do get
the overheat warning, seeEngine Overheating
on page 315.
284
Page 286 of 458
Maintenance When Trailer Towing
Your vehicle will need service more often when
you’re pulling a trailer. See the Maintenance
Schedule for more on this. Things that are
especially important in trailer operation are
automatic transmission fluid (don’t overfill), engine
oil, axle lubricant, belt, cooling system and
brake system. Each of these is covered in this
manual, and the Index will help you find them
quickly. If you’re trailering, it’s a good idea
to review these sections before you start your trip.
Check periodically to see that all hitch nuts and
bolts are tight.
Trailer Wiring Harness
The optional heavy-duty trailer wiring package
includes a seven-wire harness assembly at the rear
of the vehicle and a four-wire harness assembly
under the left hand side of the instrument panel.
The seven-wire harness assembly is taped together
and located in a frame pocket at the driver side rear
left corner of the frame. The seven-wire harness
includes a 30-amp feed wire.Both harnesses come without connectors and
should be wired by a qualified electrical technician.
The technician can use the following color code
chart when connecting the wiring harness to your
trailer and trailer brake controller.
Seven-Wire Harness
•Light Green: Back-up lamps
•Brown: Parking lamps
•Yellow: Left stoplamp and turn signal
•Dark Green: Right stoplamp and turn signal
•Dark Blue: Use for electric trailer brakes
•Red/Black Stripe: Trailer accessory
•White (heavy gage): Ground wire
Four-Wire Harness (Trailer Brake Controller)
•Black: Ground
•Red/White Stripe: Fused Battery
•Dark Blue: Trailer Brake Feed
•Light Blue: Fused Stoplamp/CHMSL
286
Page 288 of 458
Windshield Wiper Blade Replacement....... 344
Tires............................................................ 346
Tire Sidewall Labeling............................... 347
Tire Terminology and Definitions............... 351
Inflation - Tire Pressure............................. 354
Dual Tire Operation................................... 355
Tire Inspection and Rotation...................... 356
When It Is Time for New Tires.................. 358
Buying New Tires...................................... 358
Different Size Tires and Wheels................ 360
Uniform Tire Quality Grading..................... 361
Wheel Alignment and Tire Balance............ 362
Wheel Replacement.................................. 362
Tire Chains............................................... 364
If a Tire Goes Flat.................................... 365
Changing a Flat Tire................................. 366
Removing the Spare Tire and Tools.......... 367
Removing the Flat Tire and Installing
the Spare Tire....................................... 370
Secondary Latch System........................... 377
Storing a Flat or Spare Tire and Tools...... 380
Spare Tire................................................. 382Appearance Care........................................ 382
Cleaning the Inside of Your Vehicle.......... 382
Fabric/Carpet............................................. 384
Instrument Panel, Vinyl, and Other
Plastic Surfaces..................................... 385
Care of Safety Belts.................................. 385
Weatherstrips............................................ 385
Washing Your Vehicle............................... 386
Cleaning Exterior Lamps/Lenses................ 386
Finish Care............................................... 386
Windshield and Wiper Blades.................... 387
Aluminum Wheels...................................... 388
Tires......................................................... 389
Sheet Metal Damage................................. 389
Finish Damage.......................................... 389
Underbody Maintenance............................ 390
Chemical Paint Spotting............................ 390
Vehicle Care/Appearance Materials............ 391
Vehicle Identi�cation.................................. 392
Vehicle Identification Number (VIN)........... 392
Service Parts Identification Label............... 392
Section 5 Service and Appearance Care
288
Page 292 of 458
Adding Equipment to the Outside
of Your Vehicle
Things you might add to the outside of your
vehicle can affect the airflow around it. This may
cause wind noise and affect windshield washer
performance. Check with your dealer before
adding equipment to the outside of your vehicle.
Fuel
If your vehicle has a diesel engine, see
“Diesel Fuel Requirements and Fuel System”
in the DURAMAX
®Diesel Supplement.
For vehicles with gasoline engines, please
read this.
Gasoline
Use of the recommended fuel is an important
part of the proper maintenance of your vehicle.
To help keep the engine clean and maintain
optimum vehicle performance, GM recommends
the use of gasoline advertised as TOP TIER
Detergent Gasoline.
The 8th digit of the Vehicle Identification
Number (VIN) shows the code letter or number
that identifies your vehicle’s engine. The VIN
is at the top left of the instrument panel.
SeeVehicle Identi�cation Number (VIN)
on page 392.
If your vehicle has the 5.3L V8 engine
(VIN Code Z), you can use either regular
unleaded gasoline or ethanol fuel containing
up to 85% ethanol (E85); also seeFuel E85
(85% Ethanol) on page 295. In all other gasoline
engines, use only regular unleaded gasoline.
292
Page 295 of 458
Fuel E85 (85% Ethanol)
The 8th digit of the Vehicle Identification
Number (VIN) shows the code letter or number
that identifies your vehicle’s engine. The VIN is
at the top left of the instrument panel. See
Vehicle Identi�cation Number (VIN) on page 392.
If your vehicle has the 5.3L V8 engine (VIN Code Z
only), you can use either regular unleaded gasoline
or ethanol fuel containing up to 85% ethanol (E85);
also seeFuel on page 292. In all other engines,
use only the unleaded gasoline described under
Gasoline Octane on page 293.
Only vehicles that have the 5.3L V8 engine
(VIN Code Z) can use 85% ethanol fuel (E85).
We encourage the use of E85 in vehicles that
are designed to use it. The ethanol in E85
is a “renewable” fuel, meaning it is made from
renewable sources such as corn and other crops.
Many service stations will not have an 85% ethanol
fuel (E85) pump available. The U. S. Department
of Energy has an alternative fuels website
(www.eere.energy.gov/afdc/infrastructure/
locator.html) that can help you find E85 fuel.
Those stations that do have E85 should have a
label indicating ethanol content. Do not use the
fuel if the ethanol content is greater than 85%.At a minimum, E85 should meet ASTM
Specification D 5798. By definition, this means
that fuel labeled E85 will have an ethanol content
between 70% and 85%. Filling the fuel tank
with fuel mixtures that do not meet ASTM
specifications can affect driveability and could
cause the check engine light to come on.
To ensure quick starts in the wintertime, the
E85 fuel must be formulated properly for your
climate according to ASTM specification D 5798.
If you have trouble starting on E85, it could
be because the E85 fuel is not properly formulated
for your climate. If this happens, switching to
gasoline or adding gasoline to the fuel tank can
improve starting. For good starting and heater
efficiency below 32°F (0°C), the fuel mix in the fuel
tank should contain no more than 70% ethanol.
It is best not to alternate repeatedly between
gasoline and E85. If you do switch fuels, it
is recommended that you add as much fuel as
possible — do not add less than three gallons
(11 L) when refueling. You should drive the
vehicle immediately after refueling for at least
seven miles (11 km) to allow the vehicle to adapt
to the change in ethanol concentration.
295