buttons CHEVROLET IMPALA 2007 9.G Owners Manual
[x] Cancel search | Manufacturer: CHEVROLET, Model Year: 2007, Model line: IMPALA, Model: CHEVROLET IMPALA 2007 9.GPages: 460, PDF Size: 2.56 MB
Page 10 of 460
Your driver’s seat may have power reclining
seatbacks. See “Power Reclining Seatbacks”
underReclining Seatbacks on page 11for
more information.
Manual Lumbar
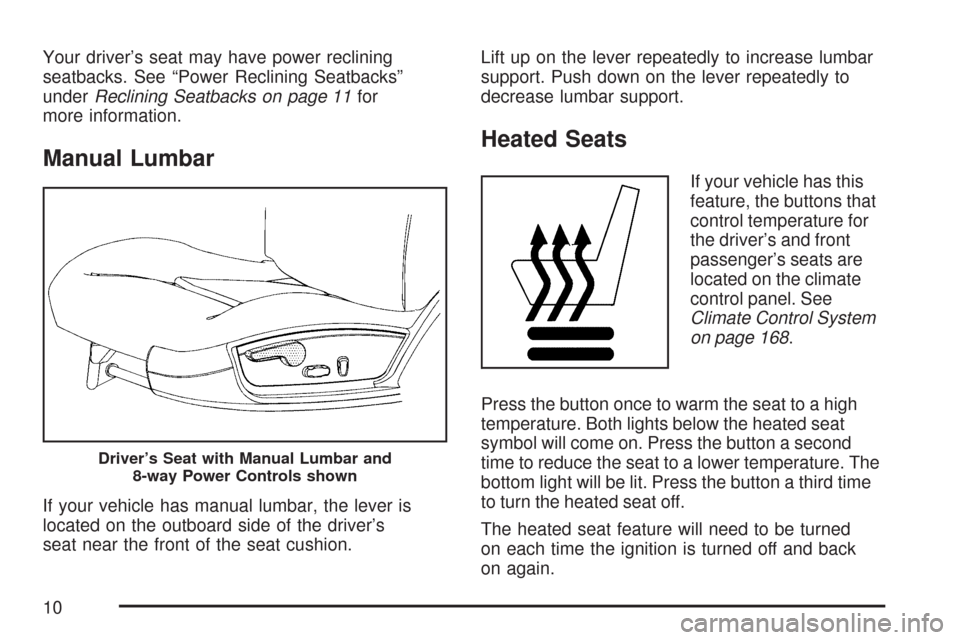
If your vehicle has manual lumbar, the lever is
located on the outboard side of the driver’s
seat near the front of the seat cushion.Lift up on the lever repeatedly to increase lumbar
support. Push down on the lever repeatedly to
decrease lumbar support.
Heated Seats
If your vehicle has this
feature, the buttons that
control temperature for
the driver’s and front
passenger’s seats are
located on the climate
control panel. See
Climate Control System
on page 168.
Press the button once to warm the seat to a high
temperature. Both lights below the heated seat
symbol will come on. Press the button a second
time to reduce the seat to a lower temperature. The
bottom light will be lit. Press the button a third time
to turn the heated seat off.
The heated seat feature will need to be turned
on each time the ignition is turned off and back
on again.
Driver’s Seat with Manual Lumbar and
8-way Power Controls shown
10
Page 32 of 460
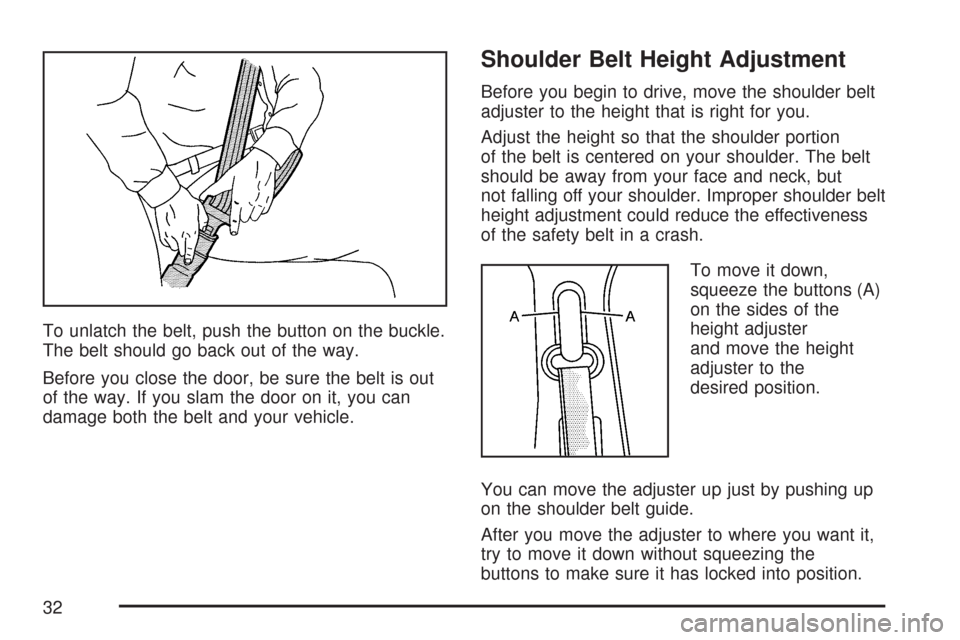
To unlatch the belt, push the button on the buckle.
The belt should go back out of the way.
Before you close the door, be sure the belt is out
of the way. If you slam the door on it, you can
damage both the belt and your vehicle.
Shoulder Belt Height Adjustment
Before you begin to drive, move the shoulder belt
adjuster to the height that is right for you.
Adjust the height so that the shoulder portion
of the belt is centered on your shoulder. The belt
should be away from your face and neck, but
not falling off your shoulder. Improper shoulder belt
height adjustment could reduce the effectiveness
of the safety belt in a crash.
To move it down,
squeeze the buttons (A)
on the sides of the
height adjuster
and move the height
adjuster to the
desired position.
You can move the adjuster up just by pushing up
on the shoulder belt guide.
After you move the adjuster to where you want it,
try to move it down without squeezing the
buttons to make sure it has locked into position.
32
Page 97 of 460
The remote vehicle start feature provides two
separate starts, each with 10 minutes of engine
running, or it provides one start with 10 minutes of
engine running that may be extended with 10 more
minutes. If you press and release the transmitter
lock button and then press and hold the remote
start button, on the remote keyless entry
transmitter, again before the �rst 10 minutes of
engine running time has expired, 10 minutes are
added to the remaining minutes. For example, if the
lock button and then the remote start buttons are
pressed again after �ve minutes of the engine
run time, 10 minutes are added and you now have
15 minutes of engine running. The added
ten minutes are considered a second remote
vehicle start. Once two remote starts or a single
start with a time extension have been provided, the
vehicle must be started normally with the ignition
key to get more remote vehicle starts.
The remote vehicle start feature will not operate if
the key is in the ignition, the hood is not closed
or if there is an emission control system
malfunction.Also, the engine will turn off during a remote
vehicle start if the coolant temperature gets too
high or if the oil pressure gets low.
Vehicles equipped with the remote vehicle start
feature are shipped from the factory with the
remote vehicle start system enabled. The system
may be enabled or disabled through the DIC.
See “REMOTE START” underDIC Vehicle
Customization on page 208for additional
information.
Remote Start Ready
If your vehicle does not have the remote vehicle
start feature, it may have the remote start ready
feature. This feature allows your dealer to add the
manufacturer’s remote vehicle start feature.
If your vehicle has the remote start ready feature,
your remote keyless entry transmitter will have
extended range that will allow you to lock or unlock
your vehicle from about 195 feet (60 m) away.
See your dealer if you would like to add the
manufacturer’s remote vehicle start feature to
your vehicle.
97
Page 126 of 460
Mirrors
Manual Rearview Mirror
If the vehicle has this mirror, it has a lever located at
the bottom of the mirror between the two lamps.
The lever is used to change the mirror from the
day to the night position. To reduce glare from
headlamps behind you while driving at night, pull
the lever toward you. To return the mirror to the day
position, return the lever to its original position.
There are two map lamps located on the bottom of
the mirror. Press the button next to each lamp to
turn it on and off.
Manual Rearview Mirror with
OnStar
®
If the vehicle has this mirror, it has a lever located
at the bottom of the mirror between the two
lamps. The lever is used to change the mirror
from the day to the night position. To reduce glare
from headlamps behind you while driving at
night, pull the lever toward you. To return the
mirror to the day position, return the lever
to its original position.There are two map lamps located on the bottom of
the mirror. Press the button next to each lamp to
turn it on and off.
There are also OnStar
®buttons located at the
bottom of the mirror face. See your dealer for more
information on the system and how to subscribe to
OnStar
®. SeeOnStar®System on page 128for
more information about the services OnStar®
provides.
Automatic Dimming Rearview Mirror
with OnStar
®
The vehicle may have an automatic dimming
rearview mirror with the OnStar®System.
Press the button located below the mirror, on the far
left, for up to three seconds to turn the automatic
dimming feature off and on.
There are two map lamps located on the bottom of
the mirror. Press the button next to each lamp to
turn it on and off.
There are also OnStar
®buttons located at the
bottom of the mirror. See your dealer for more
information on the system and how to subscribe to
OnStar
®. SeeOnStar®System on page 128for
more information about the service OnStar®
provides.
126
Page 131 of 460
OnStar®service cannot work unless your vehicle is
in a place where OnStar®has an agreement with a
wireless service provider for service in that area.
OnStar
®service also cannot work unless you are in
a place where the wireless service provider
OnStar
®has hired for that area has coverage,
network capacity and reception when the service is
needed, and technology that is compatible with the
OnStar
®service. Not all services are available
everywhere, particularly in remote or enclosed
areas, or at all times.
OnStar
®service that involves location information
about your vehicle cannot work unless GPS
satellite signals are unobstructed and available in
that place as well.Your vehicle must have a working electrical
system (including adequate battery power) for the
OnStar
®equipment to operate. There are other
problems OnStar®cannot control that may prevent
OnStar®from providing OnStar®service to you
at any particular time or place. Some examples are
damage to important parts of your vehicle in an
accident, hills, tall buildings, tunnels, weather
or wireless phone network congestion.
Your Responsibility
You may need to increase the volume of your
radio to hear the OnStar®advisor. If the light next
to the OnStar®buttons is red, this means that
your system is not functioning properly and should
be checked by your dealer/retailer. If the light
appears clear (no light is appearing), your OnStar
®
subscription has expired. You can always press
the OnStar®button to con�rm that your OnStar®
equipment is active.
131
Page 132 of 460
Universal Home Remote
System
System Identi�cation
Your vehicle may have a Universal Home Remote
System.
Determine which Universal Home Remote your
vehicle has and then read the pages following for
instructions on programming your speci�c system.
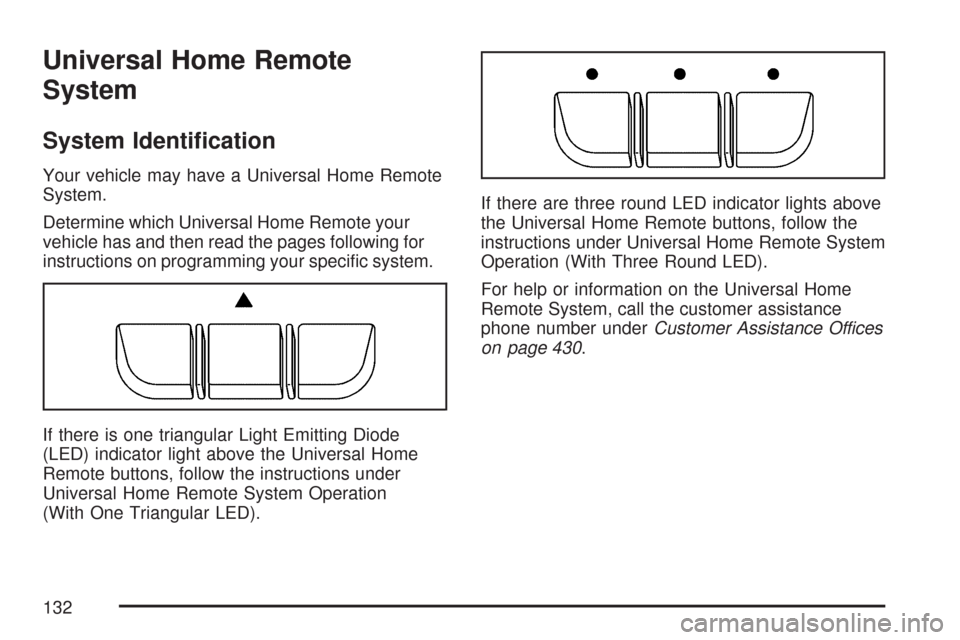
If there is one triangular Light Emitting Diode
(LED) indicator light above the Universal Home
Remote buttons, follow the instructions under
Universal Home Remote System Operation
(With One Triangular LED).If there are three round LED indicator lights above
the Universal Home Remote buttons, follow the
instructions under Universal Home Remote System
Operation (With Three Round LED).
For help or information on the Universal Home
Remote System, call the customer assistance
phone number underCustomer Assistance Offices
on page 430.
132
Page 133 of 460
Universal Home Remote System
The Universal Home Remote System provides
a way to replace up to three hand-held
Radio-Frequency (RF) transmitters used to
activate devices such as garage door openers,
security systems, and home lighting.
This device complies with Part 15 of the FCC
Rules. Operation is subject to the following
two conditions:
1. This device may not cause harmful
interference.
2. This device must accept any interference
received, including interference that may
cause undesired operation.
This device complies with RSS-210 of Industry
Canada. Operation is subject to the following
two conditions:
1. This device may not cause interference.
2. This device must accept any interference
received, including interference that may
cause undesired operation of the device.
Changes or modi�cations to this system by other
than an authorized service facility could void
authorization to use this equipment.
Universal Home Remote System
Operation (With One Triangular LED)
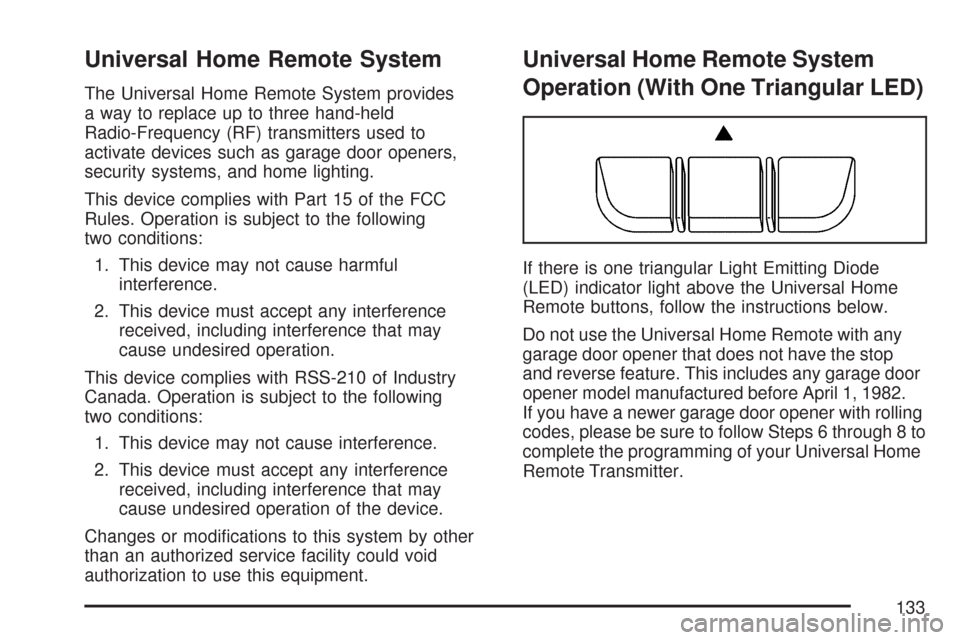
If there is one triangular Light Emitting Diode
(LED) indicator light above the Universal Home
Remote buttons, follow the instructions below.
Do not use the Universal Home Remote with any
garage door opener that does not have the stop
and reverse feature. This includes any garage door
opener model manufactured before April 1, 1982.
If you have a newer garage door opener with rolling
codes, please be sure to follow Steps 6 through 8 to
complete the programming of your Universal Home
Remote Transmitter.
133
Page 134 of 460
Read the instructions completely before attempting
to program the Universal Home Remote. Because
of the steps involved, it may be helpful to have
another person available to assist you in the
programming steps.
Keep the original hand-held transmitter for use in
other vehicles as well as for future Universal Home
Remote programming. It is also recommended that
upon the sale of the vehicle, the programmed
Universal Home Remote buttons should be erased
for security purposes. See “Erasing Universal
Home Remote Buttons” later in section.
When programming a garage door, it is advised to
park outside of the garage. Be sure that people
and objects are clear of the garage door or
gate operator you are programming.
It is recommended that a new battery be installed in
your hand-held transmitter for quicker and more
accurate transmission of the radio-frequency signal.Programming the Universal Home
Remote System
Follow these steps to program up to three
devices:
1. Press and hold down the two outside Universal
Home Remote buttons, releasing only when
the Universal Home Remote indicator light
begins to �ash, after 20 seconds. Do not hold
down the buttons for longer than 30 seconds
and do not repeat this step to program a
second and/or third hand-held transmitter to
the remaining two Universal Home Remote
buttons.
2. Hold the end of your hand-held transmitter
about 1 to 3 inches (3 to 8 cm) away from
the Universal Home Remote buttons
while keeping the indicator light in view.
3. At the same time, press and hold both the
desired Universal Home Remote button and
the hand-held transmitter button. Do not
release the buttons until Step 4 has been
completed.
134
Page 135 of 460
Some entry gates and garage door openers
may require you to substitute Step 3 with
the procedure noted in “Gate Operator and
Canadian Programming” later in this section.
4. The indicator light will �ash slowly at �rst and
then rapidly after Universal Home Remote
successfully receives the frequency signal
from the hand-held transmitter. Release both
buttons.
5. Press and hold the newly-trained Universal
Home Remote button and observe the
indicator light.
If the indicator light stays on continuously,
programming is complete and your device
should activate when the Universal Home
Remote button is pressed and released.
To program the remaining two Universal Home
Remote buttons, begin with Step 2 under
“Programming Universal Home Remote.”
Do not repeat Step 1 as this will erase all of
the programmed channels.
If the indicator light blinks rapidly for
two seconds and then turns to a constant light,
continue with Steps 6 through 8 following to
complete the programming of a rolling-code
device, most commonly, a garage door opener.6. Locate in the garage, the garage door opener
receiver (motor-head unit). Locate the “Learn”
or “Smart” button. This can usually be
found where the hanging antenna wire is
attached to the motor-head unit.
7. Firmly press and release the “Learn” or
“Smart” button. The name and color of
the button may vary by manufacturer.
You will have 30 seconds to start Step 8.
8. Return to the vehicle. Firmly press and hold the
programmed Universal Home Remote button
for two seconds, then release it. Immediately
press and hold the same button a second time
for two seconds, then release it. Immediately,
press and hold the same button a third time for
two seconds, then release.
The Universal Home Remote should now
activate the rolling-code device.
To program the remaining two Universal
Home Remote buttons, begin with Step 2 of
“Programming Universal Home Remote.” You do
not want to repeat Step 1, as this will erase all
previous programming from the Universal Home
Remote buttons.
135
Page 136 of 460
Gate Operator and Canadian
Programming
Canadian radio-frequency laws require transmitter
signals to time out or quit after several seconds
of transmission. This may not be long enough
for Universal Home Remote to pick up the signal
during programming. Similarly, some U.S. gate
operators are manufactured to time out in
the same manner.
If you live in Canada, or you are having difficulty
programming a gate operator or garage door
opener by using the “Programming Universal
Home Remote” procedures, regardless of where
you live, replace Step 3 under “Programming
Universal Home Remote” with the following:
Continue to press and hold the Universal Home
Remote button while you press and release every
two seconds (cycle) the hand-held transmitter
button until the frequency signal has been
successfully accepted by the Universal Home
Remote. The Universal Home Remote indicator
light will �ash slowly at �rst and then rapidly.
Proceed with Step 4 under “Programming
Universal Home Remote” to complete.
Using Universal Home Remote
Press and hold the appropriate Universal Home
Remote button for at least half of a second.
The indicator light will come on while the signal is
being transmitted.
Erasing Universal Home Remote
Buttons
To erase programming from the three Universal
Home Remote buttons do the following:
1. Press and hold down the two outside buttons
until the indicator light begins to �ash, after
20 seconds. Do not hold the two outside
buttons for longer than 30 seconds.
2. Release both buttons.
The Universal Home Remote is now in the training
(learning) mode and can be programmed at any
time beginning with Step 2 under “Programming
Universal Home Remote” shown earlier in
this section.
Individual buttons cannot be erased, but they can
be reprogrammed. See “Reprogramming a
Single Universal Home Remote Button” following
this section.
136