CHEVROLET KODIAK 2004 Owners Manual
Manufacturer: CHEVROLET, Model Year: 2004, Model line: KODIAK, Model: CHEVROLET KODIAK 2004Pages: 366, PDF Size: 6.87 MB
Page 201 of 366
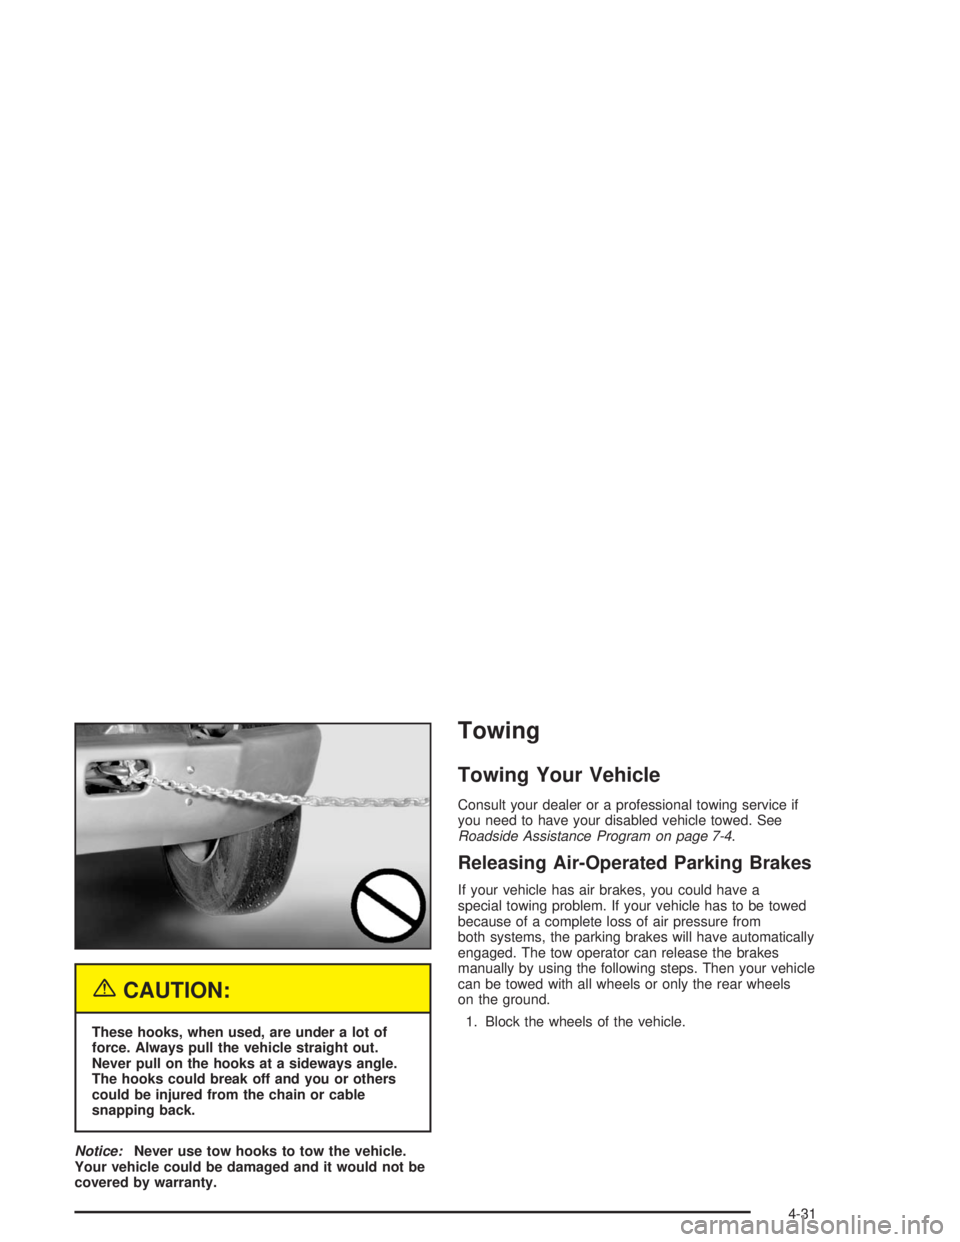
{CAUTION:
These hooks, when used, are under a lot of
force. Always pull the vehicle straight out.
Never pull on the hooks at a sideways angle.
The hooks could break off and you or others
could be injured from the chain or cable
snapping back.
Notice:Never use tow hooks to tow the vehicle.
Your vehicle could be damaged and it would not be
covered by warranty.
Towing
Towing Your Vehicle
Consult your dealer or a professional towing service if
you need to have your disabled vehicle towed. See
Roadside Assistance Program on page 7-4.
Releasing Air-Operated Parking Brakes
If your vehicle has air brakes, you could have a
special towing problem. If your vehicle has to be towed
because of a complete loss of air pressure from
both systems, the parking brakes will have automatically
engaged. The tow operator can release the brakes
manually by using the following steps. Then your vehicle
can be towed with all wheels or only the rear wheels
on the ground.
1. Block the wheels of the vehicle.
4-31
Page 202 of 366
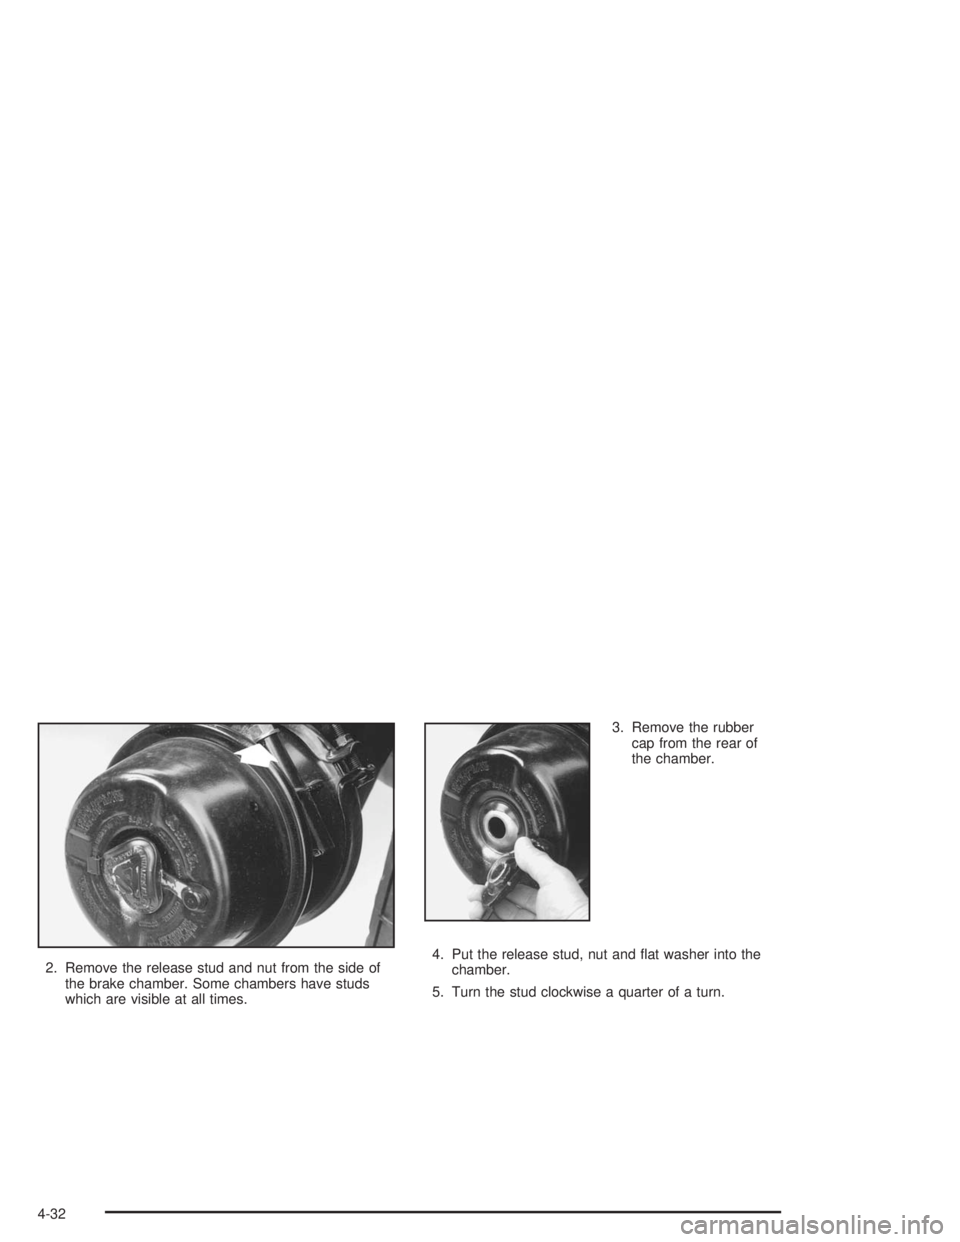
2. Remove the release stud and nut from the side of
the brake chamber. Some chambers have studs
which are visible at all times.3. Remove the rubber
cap from the rear of
the chamber.
4. Put the release stud, nut and flat washer into the
chamber.
5. Turn the stud clockwise a quarter of a turn.
4-32
Page 203 of 366
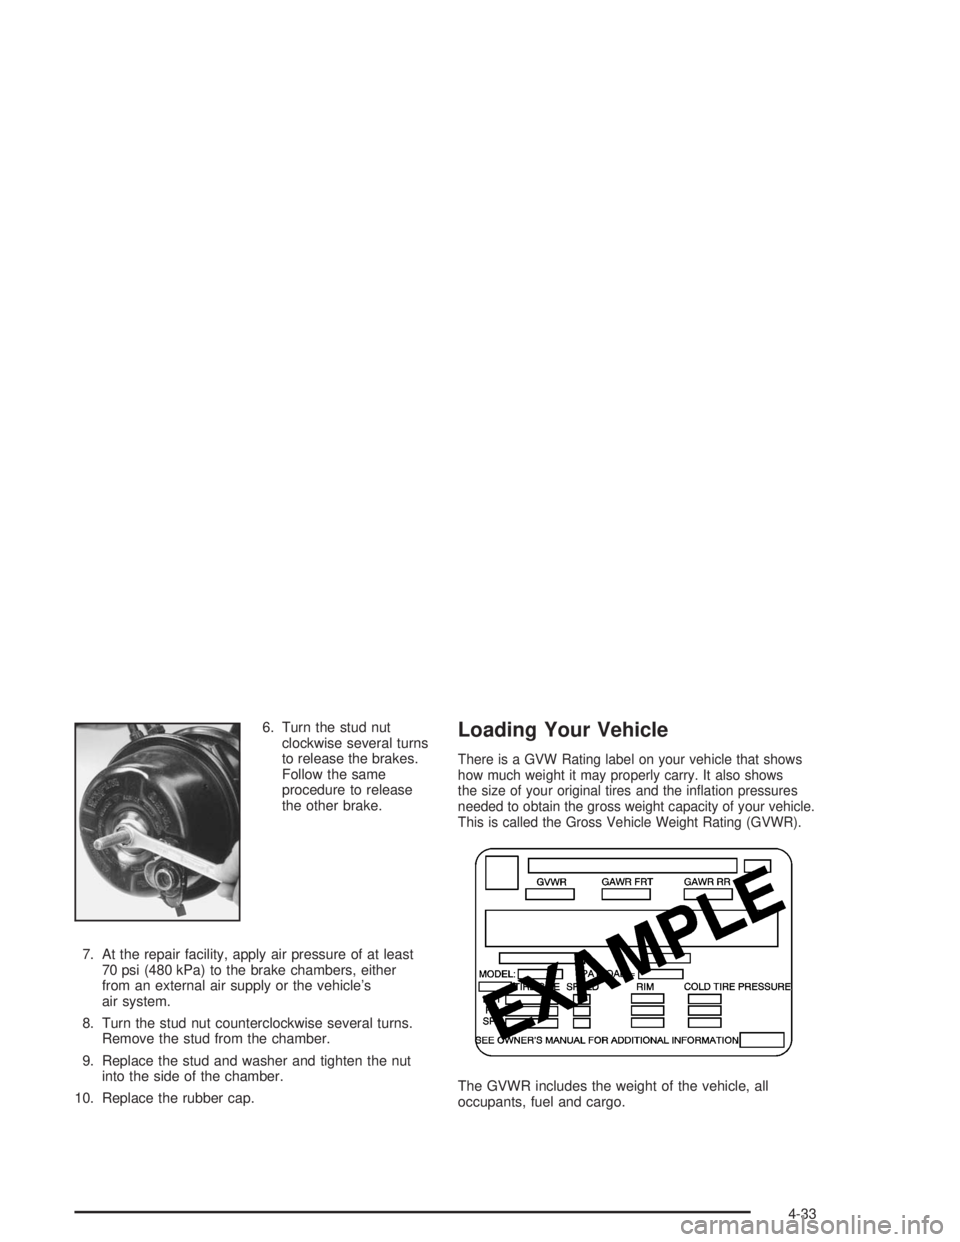
6. Turn the stud nut
clockwise several turns
to release the brakes.
Follow the same
procedure to release
the other brake.
7. At the repair facility, apply air pressure of at least
70 psi (480 kPa) to the brake chambers, either
from an external air supply or the vehicle’s
air system.
8. Turn the stud nut counterclockwise several turns.
Remove the stud from the chamber.
9. Replace the stud and washer and tighten the nut
into the side of the chamber.
10. Replace the rubber cap.Loading Your Vehicle
There is a GVW Rating label on your vehicle that shows
how much weight it may properly carry. It also shows
the size of your original tires and the inflation pressures
needed to obtain the gross weight capacity of your vehicle.
This is called the Gross Vehicle Weight Rating (GVWR).
The GVWR includes the weight of the vehicle, all
occupants, fuel and cargo.
4-33
Page 204 of 366
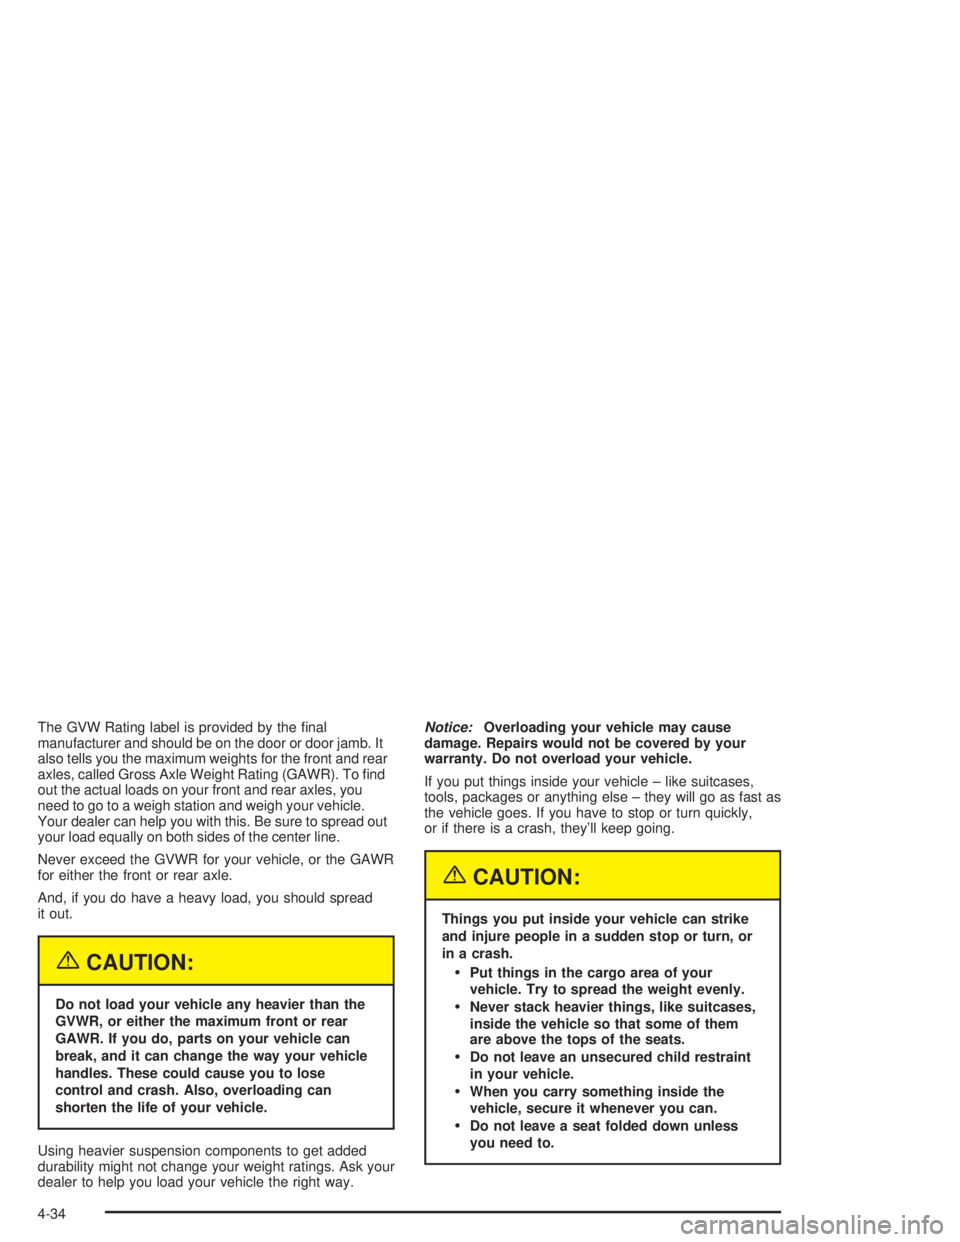
The GVW Rating label is provided by the final
manufacturer and should be on the door or door jamb. It
also tells you the maximum weights for the front and rear
axles, called Gross Axle Weight Rating (GAWR). To find
out the actual loads on your front and rear axles, you
need to go to a weigh station and weigh your vehicle.
Your dealer can help you with this. Be sure to spread out
your load equally on both sides of the center line.
Never exceed the GVWR for your vehicle, or the GAWR
for either the front or rear axle.
And, if you do have a heavy load, you should spread
it out.
{CAUTION:
Do not load your vehicle any heavier than the
GVWR, or either the maximum front or rear
GAWR. If you do, parts on your vehicle can
break, and it can change the way your vehicle
handles. These could cause you to lose
control and crash. Also, overloading can
shorten the life of your vehicle.
Using heavier suspension components to get added
durability might not change your weight ratings. Ask your
dealer to help you load your vehicle the right way.Notice:Overloading your vehicle may cause
damage. Repairs would not be covered by your
warranty. Do not overload your vehicle.
If you put things inside your vehicle – like suitcases,
tools, packages or anything else – they will go as fast as
the vehicle goes. If you have to stop or turn quickly,
or if there is a crash, they’ll keep going.
{CAUTION:
Things you put inside your vehicle can strike
and injure people in a sudden stop or turn, or
in a crash.
Put things in the cargo area of your
vehicle. Try to spread the weight evenly.
Never stack heavier things, like suitcases,
inside the vehicle so that some of them
are above the tops of the seats.
Do not leave an unsecured child restraint
in your vehicle.
When you carry something inside the
vehicle, secure it whenever you can.
Do not leave a seat folded down unless
you need to.
4-34
Page 205 of 366
Trailer Connections
(C4/C5 Models Only)
Heavy-Duty Trailer Wiring Package
Your vehicle may be equipped with an eight-wire trailer
towing harness. This harness, with a seven-pin
universal heavy-duty trailer connector, is attached to a
bracket on the platform hitch.
The Center High-Mounted Stoplamp (CHMSL) wire is
tied next to the trailer wiring harness for use with a
trailer.The eight-wire harness contains the following trailer
circuits:
•Yellow: Left Stop/Turn Signal
•Dark Green: Right Stop/Turn Signal
•Brown: Taillamps
•White: Ground
•Light Green: Back-up Lamps
•Light Blue: CHMSL
•Red: Battery Feed
•Dark Blue: Trailer Brake
4-35
Page 206 of 366
Trailer Connections
(C7/C8 Models Only)
If your vehicle has these trailer connections, they are
located at the rear of the cab for a tractor and at the rear
of the chassis when towing a trailer. There will be an
air connection and an electrical connection.
Be sure that the couplings to the trailer are made
correctly.
Air Connections
If you are not connecting the trailer air line connections
to another piece of equipment, be sure to replace
their protective caps.
Electrical Connections
This system is a seven-wire cable that will connect to
the trailer, supplying power to the trailer’s lighting
system. When not in use, it is stored in the trailer
air-hose storage bracket.
Power Take-Off (PTO)
If your vehicle is equipped
for the addition of a PTO,
this factory installed
switch will be located in
the instrument panel
switchbank.
Before using a PTO, refer to the manufacturer’s or
installer’s instructions.
4-36
Page 207 of 366
Service............................................................5-3
Doing Your Own Service Work.........................5-4
Two Safety Cautions about Engine Fan
Breakage...................................................5-5
Fuel................................................................5-6
Gasoline Octane............................................5-6
Gasoline Specifications....................................5-6
Additives.......................................................5-7
Diesel Engine Fuel.........................................5-8
What Fuel to Use...........................................5-8
Very Cold Weather Operation.........................5-10
Water in Fuel...............................................5-10
Running Out of Fuel.....................................5-15
Fuel Filter Replacement.................................5-15
Fuels in Foreign Countries.............................5-16
Filling Your Tank..........................................5-17
Filling a Portable Fuel Container.....................5-18
Checking Things Under the Hood....................5-18
Hood Latches...............................................5-19
Engine Oil (Caterpillar
®Diesel Engine).............5-20
Engine Oil (Gasoline Engine)..........................5-20
Engine Oil (DURAMAX™ Diesel).....................5-25
Engine Air Cleaner/Filter................................5-30
Automatic Transmission Fluid.........................5-31
Manual Transmission Fluid.............................5-32Engine Coolant (Gas and
DURAMAX™ engines)................................5-32
Engine Coolant (Caterpillar
®Diesel Engines).....5-35
Coolant Surge Tank Pressure Cap..................5-35
Engine Overheating.......................................5-36
Cooling System............................................5-38
Engine Fan Noise.........................................5-43
Power Steering Fluid.....................................5-43
Windshield Washer Fluid................................5-44
Brakes........................................................5-46
Battery........................................................5-55
Jump Starting...............................................5-56
Rear Axle.......................................................5-61
Rear Axle Shift Motor....................................5-61
Noise Control System.....................................5-62
Tampering with Noise Control System
Prohibited.................................................5-62
Bulb Replacement..........................................5-63
Replacement Bulbs.......................................5-63
Windshield Wiper Blade Replacement..............5-63
Other Service Items........................................5-64
Fuel Filter....................................................5-64
Primary Fuel Filter and Water Separator..........5-65
Secondary Fuel Filter and Water
Separator/Heater.......................................5-66
Section 5 Service and Appearance Care
5-1
Page 208 of 366
Automatic Ether Injection System....................5-66
Front Wheel Bearings with Oil-Filled Hubs........5-67
Air Conditioning System.................................5-67
Tires..............................................................5-68
Inflation - Tire Pressure.................................5-68
Rims and Wheels.........................................5-69
Dual Tire Operation.......................................5-69
When It Is Time for New Tires.......................5-70
Wheel Alignment and Tire Balance..................5-70
Tightening the Wheel Nuts.............................5-71
Wheel Replacement......................................5-74
If a Tire Goes Flat........................................5-75
Changing a Flat Tire.....................................5-76
Appearance Care............................................5-76
Cleaning the Inside of Your Vehicle.................5-77
Care of Safety Belts......................................5-79
Weatherstrips...............................................5-79
Cleaning the Outside of Your Vehicle..............5-80
Sheet Metal Damage.....................................5-82Finish Damage.............................................5-83
Underbody Maintenance................................5-83
Chemical Paint Spotting.................................5-83
Vehicle Care/Appearance Materials..................5-84
Vehicle Identi�cation......................................5-85
Vehicle Identification Number (VIN).................5-85
Service Statement.........................................5-85
Service Parts Identification Label.....................5-86
Electrical System............................................5-86
Add-On Electrical Equipment..........................5-86
Headlamp Wiring..........................................5-86
Windshield Wiper Fuses................................5-87
Fusible Links................................................5-87
Power Windows and Other Power Options.......5-87
Fuses and Circuit Breakers............................5-87
Capacities and Speci�cations..........................5-93
Normal Maintenance Replacement Parts.........5-100
Engine Drive Belt Routing............................5-103
Section 5 Service and Appearance Care
5-2
Page 209 of 366
Service
Your dealer knows your vehicle best and wants you to
be happy with it. We hope you will go to your dealer
for all your service needs. You will get genuine GM parts
and GM-trained and supported service people.
We hope you will want to keep your GM vehicle all GM.
Genuine GM parts have one of these marks:
California Proposition 65 Warning
Most motor vehicles, including this one, contain and/or
emit chemicals known to the State of California to
cause cancer and birth defects or other reproductive
harm. Engine exhaust, many parts and systems
(including some inside the vehicle), many fluids, and
some component wear by-products contain and/or emit
these chemicals.
5-3
Page 210 of 366
Doing Your Own Service Work
If you want to do some of your own service work, you
will want to use the proper service manual. It tells
you much more about how to service your vehicle than
this manual can. To order the proper service manual,
seeService Publications Ordering Information on
page 7-7.
Your vehicle has an air bag system. Before attempting
to do your own service work, seeServicing Your Air
Bag-Equipped Vehicle on page 1-60.
You should keep a record with all parts receipts and list
the mileage and the date of any service work you
perform. SeePart D: Maintenance Record on page 6-31.{CAUTION:
You can be injured and your vehicle could be
damaged if you try to do service work on a
vehicle without knowing enough about it.
Be sure you have sufficient knowledge,
experience, the proper replacement parts
and tools before you attempt any vehicle
maintenance task.
Be sure to use the proper nuts, bolts and
other fasteners. “English” and “metric”
fasteners can be easily confused. If you
use the wrong fasteners, parts can later
break or fall off. You could be hurt.
5-4