maintenance CHEVROLET KODIAK 2005 User Guide
[x] Cancel search | Manufacturer: CHEVROLET, Model Year: 2005, Model line: KODIAK, Model: CHEVROLET KODIAK 2005Pages: 374, PDF Size: 5.46 MB
Page 214 of 374
Other Service Items........................................5-66
Fuel Filter....................................................5-66
Primary Fuel Filter and Water Separator..........5-67
Secondary Fuel Filter and Water Separator/
Heater (Caterpillar
®Diesel)..........................5-68
Automatic Ether Injection System
(Caterpillar
®Diesel)....................................5-68
Front Wheel Bearings with Oil-Filled Hubs........5-69
Air Conditioning System.................................5-70
Tires..............................................................5-70
Inflation - Tire Pressure.................................5-71
Wheel Loading.............................................5-71
Dual Tire Operation.......................................5-72
When It Is Time for New Tires.......................5-72
Wheel Alignment and Tire Balance..................5-73
Tightening the Wheel Nuts.............................5-73
Wheel Replacement......................................5-77
If a Tire Goes Flat........................................5-78
Appearance Care............................................5-79
Cleaning the Inside of Your Vehicle.................5-80
Fabric/Carpet...............................................5-81
Instrument Panel, Vinyl, and Other
Plastic Surfaces........................................5-82
Care of Safety Belts......................................5-82
Weatherstrips...............................................5-82Washing Your Vehicle...................................5-83
Cleaning Exterior Lamps/Lenses.....................5-83
Finish Care..................................................5-83
Windshield and Wiper Blades.........................5-84
Aluminum or Chrome-Plated Wheels................5-84
Tires...........................................................5-85
Sheet Metal Damage.....................................5-85
Finish Damage.............................................5-85
Underbody Maintenance................................5-85
Chemical Paint Spotting.................................5-85
Vehicle Identi�cation......................................5-87
Vehicle Identification Number (VIN).................5-87
Service Statement.........................................5-87
Service Parts Identification Label.....................5-88
Electrical System............................................5-88
Add-On Electrical Equipment..........................5-88
Headlamp Wiring..........................................5-88
Windshield Wiper Fuses................................5-88
Fusible Links................................................5-89
Power Windows and Other Power Options.......5-89
Fuses and Circuit Breakers............................5-89
Instrument Panel Fuse Block..........................5-89
Underhood Fuse Block..................................5-92
Capacities and Speci�cations..........................5-95
Normal Maintenance Replacement Parts.........5-100
Section 5 Service and Appearance Care
5-2
Page 216 of 374
Doing Your Own Service Work
If you want to do some of your own service work, you
will want to use the proper service manual. It tells
you much more about how to service your vehicle than
this manual can. To order the proper service manual,
seeService Publications Ordering Information on
page 7-8.
Your vehicle has an airbag system. Before attempting
to do your own service work, seeServicing Your
Airbag-Equipped Vehicle on page 1-59.
You should keep a record with all parts receipts and list
the mileage and the date of any service work you
perform. SeePart D: Maintenance Record on page 6-34.{CAUTION:
You can be injured and your vehicle could be
damaged if you try to do service work on a
vehicle without knowing enough about it.
Be sure you have sufficient knowledge,
experience, the proper replacement parts,
and tools before you attempt any vehicle
maintenance task.
Be sure to use the proper nuts, bolts, and
other fasteners. English and metric
fasteners can be easily confused. If you
use the wrong fasteners, parts can later
break or fall off. You could be hurt.
5-4
Page 219 of 374
Gasolines containing oxygenates, such as ethers and
ethanol, and reformulated gasolines may be available in
your area to contribute to clean air. General Motors
recommends that you use these gasolines, particularly if
they comply with the specifications described earlier.
Notice:Your vehicle was not designed for fuel that
contains methanol. Do not use fuel containing
methanol. It can corrode metal parts in your fuel
system and also damage the plastic and rubber
parts. That damage would not be covered under
your warranty.
Some gasolines that are not reformulated for low
emissions may contain an octane-enhancing additive
called methylcyclopentadienyl manganese tricarbonyl
(MMT); ask the attendant where you buy gasoline
whether the fuel contains MMT. General Motors
does not recommend the use of such gasolines.
Fuels containing MMT can reduce the life of spark plugs
and the performance of the emission control system
may be affected. The malfunction indicator lamp
may turn on. If this occurs, return to your authorized
GM dealer for service.Diesel Engine Fuel
For the Caterpillar®diesel, see the Caterpillar®
Operation & Maintenance Manual for information
concerning fuel usage.
Notice:Diesel fuel or fuel additives not
recommended in this manual could damage your
fuel system and engine. Your warranty would
not cover this damage. And:
Diesel fuel that has been mixed with engine oil
or automatic transmission �uid could damage
your engine and emission controls.
Aftermarket diesel fuel additives are not tested
by General Motors. Some additives, particularly
those which contain alcohol or water emulsi�ers,
may damage your fuel system. If you believe that
unique circumstances call for a fuel additive to
be used, consult your dealer for advice.
If you ever run out of diesel fuel, it can be difficult
to restart your engine. To avoid all this, never let
your tank get empty.
If gasoline is ever accidentally added to the fuel
tank, to avoid severe engine damage, do not run the
engine until the fuel tank can be drained.
If you run out of fuel,Running Out of Fuel on page 5-15
tells you how to restart your engine.
5-7
Page 224 of 374
5. Remove the fuel-resistant container and properly
dispose of the contaminated fuel. To find out how to
properly dispose of contaminated diesel fuel,
seeEngine Oil (Caterpillar
®Diesel Engine) on
page 5-22orEngine Oil (DURAMAX®Diesel)
on page 5-22orEngine Oil (Gasoline Engine) on
page 5-26.
6. Install the fuel cap.
7. Start the engine and let it run for a few minutes.
If the engine stalls, the fuel system may need to be
primed. While draining the water from the fuel filter,
air may enter the fuel system. If air has entered the
fuel system the fuel system will need to be primed.
If the water-in-fuel light comes on again after driving a
short distance or the engine runs rough or stalls, a large
amount of water has probably been pumped into the
fuel tank. The fuel tank should be purged.
Fuel Priming
If your vehicle has a Caterpillar®diesel engine, see the
Caterpillar®Diesel Engine Operation and Maintenance
Manual provided with your vehicle.
If your vehicle has a DURAMAX
®diesel engine, in order
for the fuel system to work properly, the fuel lines
must be full of fuel and contain no air. If air gets into the
fuel lines, it will be necessary to prime the fuel lines
to eliminate air before operating the vehicle.
Air can get into the fuel lines if any of the following happen:
•The vehicle runs out of fuel.
•The fuel filter is removed for servicing or
replacement.
•The fuel lines are removed or disconnected for
servicing.
•The fuel filter water drain valve is opened while the
engine is running.
If one or more of the above occurred, it is very likely that
air has entered your fuel system and that you will need to
prime the fuel system before operating the vehicle.
Air in the fuel lines will not harm the engine or the
vehicle. However, the engine may not be able to start
until the fuel system is primed and the air is removed.
5-12
Page 234 of 374
Engine Oil
(Caterpillar
®Diesel Engine)
See your Caterpillar®Operation & Maintenance Manual
for information on oil quality and viscosities as well
as the temperature range chart.
Engine Oil (DURAMAX®Diesel)
Checking Engine Oil
It is a good idea to check your engine oil level every
time you get fuel.
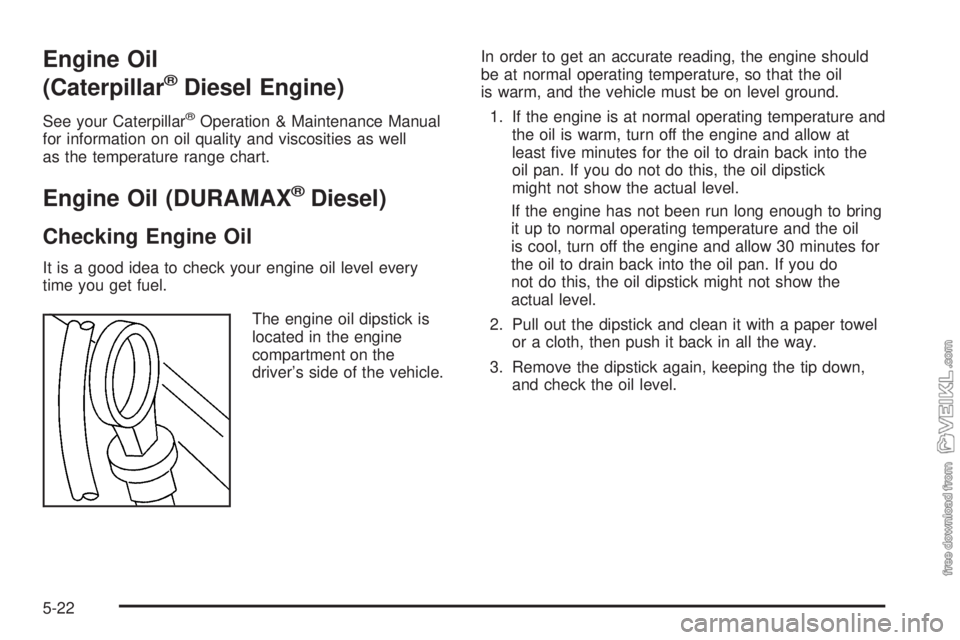
The engine oil dipstick is
located in the engine
compartment on the
driver’s side of the vehicle.In order to get an accurate reading, the engine should
be at normal operating temperature, so that the oil
is warm, and the vehicle must be on level ground.
1. If the engine is at normal operating temperature and
the oil is warm, turn off the engine and allow at
least five minutes for the oil to drain back into the
oil pan. If you do not do this, the oil dipstick
might not show the actual level.
If the engine has not been run long enough to bring
it up to normal operating temperature and the oil
is cool, turn off the engine and allow 30 minutes for
the oil to drain back into the oil pan. If you do
not do this, the oil dipstick might not show the
actual level.
2. Pull out the dipstick and clean it with a paper towel
or a cloth, then push it back in all the way.
3. Remove the dipstick again, keeping the tip down,
and check the oil level.
5-22
Page 237 of 374
•SAE 15W-40
As shown in the viscosity chart, SAE 15W-40 is
best for your vehicle. However, you can use
SAE 10W-30 at temperatures above 0°F (−18°C).
When it is very cold, below 0°F (−18°C), you should
use SAE 5W-40 to improve cold starting.
These numbers on the oil container show its
viscosity, or thickness. Do not use other viscosity
oils such as SAE 10W-40 or SAE 20W-50.
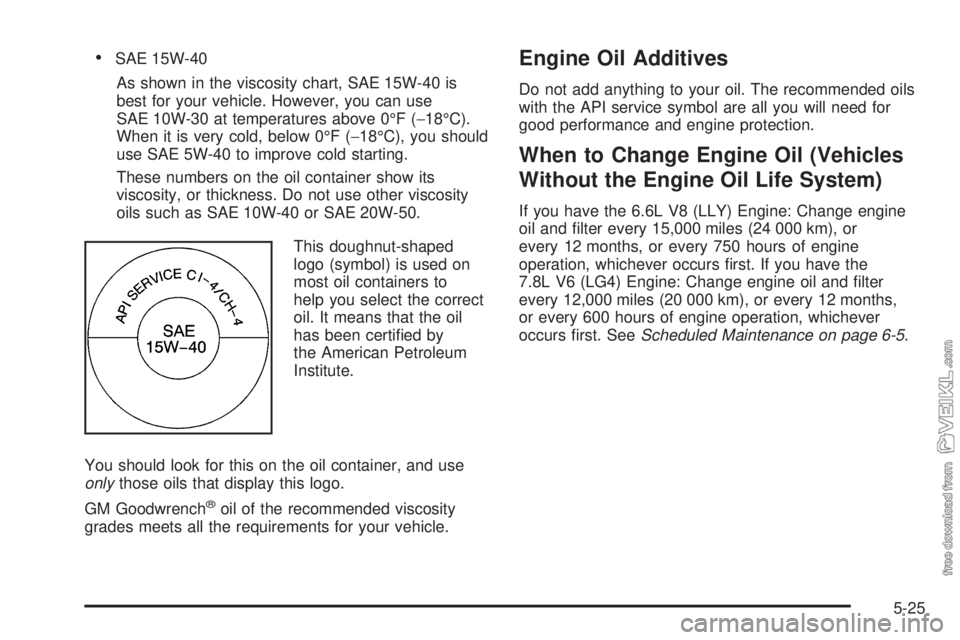
This doughnut-shaped
logo (symbol) is used on
most oil containers to
help you select the correct
oil. It means that the oil
has been certified by
the American Petroleum
Institute.
You should look for this on the oil container, and use
onlythose oils that display this logo.
GM Goodwrench
®oil of the recommended viscosity
grades meets all the requirements for your vehicle.
Engine Oil Additives
Do not add anything to your oil. The recommended oils
with the API service symbol are all you will need for
good performance and engine protection.
When to Change Engine Oil (Vehicles
Without the Engine Oil Life System)
If you have the 6.6L V8 (LLY) Engine: Change engine
oil and filter every 15,000 miles (24 000 km), or
every 12 months, or every 750 hours of engine
operation, whichever occurs first. If you have the
7.8L V6 (LG4) Engine: Change engine oil and filter
every 12,000 miles (20 000 km), or every 12 months,
or every 600 hours of engine operation, whichever
occurs first. SeeScheduled Maintenance on page 6-5.
5-25
Page 247 of 374
Manual Transmission Fluid
When to Check
A good time to have it checked is when the engine oil is
checked. Refer to the Maintenance Schedule to find out
when to check and change your manual transmission
fluid. SeeScheduled Maintenance on page 6-5.
How to Check and What to Use
Check the fluid level only when your engine is off, the
vehicle is parked on a level place, and the transmission
is cool enough for you to rest your fingers on the
transmission case.
To check the transmission fluid level, do the following:
1. Remove the filler plug.
2. Check to be sure that the lubricant level is up to the
bottom of the fill opening. On heavy duty
transmissions, an inch of oil level equals about
one gallon of fluid.
3. If the fluid level is good, reinstall the plug and be
sure it is fully seated. If the fluid level is low, add
more fluid as described in the next steps. Refer to
the Maintenance Schedule to determine what
kind of fluid to use. SeePart C: Recommended
Fluids and Lubricants on page 6-32.
How to Add Fluid
To add transmission fluid, do the following:
1. Remove the filler plug.
2. Add fluid at the filler plug hole. Add only enough
fluid to bring the fluid level up to the bottom of the
fill opening. Refer to the Maintenance Schedule
to determine the proper fluid to use. SeePart C:
Recommended Fluids and Lubricants on page 6-32.
3. Reinstall the filler plug. Be sure the plug is
fully seated.
5-35
Page 250 of 374
Adding Coolant
If you need more coolant, add the proper DEX-COOL®
coolant mixtureat the surge tank, but only when the
engine is cool.
{CAUTION:
You can be burned if you spill coolant on hot
engine parts. Coolant contains ethylene glycol,
and it will burn if the engine parts are hot
enough. Do not spill coolant on a hot engine.
When replacing the pressure cap, make sure it is
hand-tight.
Engine Coolant
(Caterpillar
®Diesel Engines)
If your vehicle has a Caterpillar®diesel engine, see the
Caterpillar®Diesel Engine Operation & Maintenance
Manual provided with your vehicle to find out what
to add, as well as when and how to service your
cooling system.
Coolant Surge Tank Pressure Cap
The coolant surge tank pressure cap is located in
the engine compartment, on the driver’s side of
the vehicle.
Notice:Your vehicle’s surge tank pressure cap is
designed for use with medium-duty cooling systems
only. If the surge tank pressure cap is not tightly
installed, coolant loss and possible engine damage
may occur. Be sure the cap is properly and tightly
secured.
Engine Overheating
You will find an engine coolant temperature gage, as
well as a low coolant warning light, on your vehicle’s
instrument panel. SeeEngine Coolant Temperature
Gage on page 3-35andLow Coolant Warning Light on
page 3-35for more information.
Your vehicle also has a check gages warning light on
the instrument panel. SeeCheck Gages Warning
Light on page 3-42for more information.
5-38
Page 252 of 374
If you no longer have the overheat warning, you can
drive. Just to be safe, drive slower for about 10 minutes.
If the warning does not come back on, you can drive
normally.
If the warning continues and you have not stopped,
pull over, stop, and park your vehicle right away.
If there is still no sign of steam, you can push down the
accelerator until the engine speed is about twice as
fast as normal idle speed for at least three minutes while
you are parked. If you still have the warning,turn off
the engine and get everyone out of the vehicleuntil it
cools down.
You may decide not to lift the hood but to get service
help right away.Cooling System
(Gas and DURAMAX
®Engines)
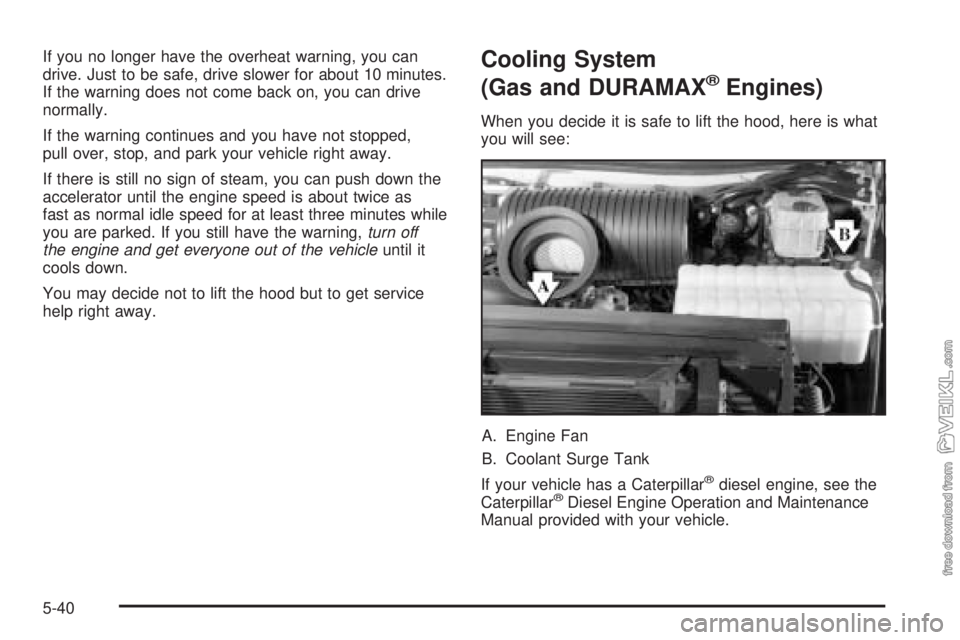
When you decide it is safe to lift the hood, here is what
you will see:
A. Engine Fan
B. Coolant Surge Tank
If your vehicle has a Caterpillar
®diesel engine, see the
Caterpillar®Diesel Engine Operation and Maintenance
Manual provided with your vehicle.
5-40
Page 257 of 374
Engine Fan Noise
Your vehicle has a clutched engine cooling fan. When
the clutch is engaged, the fan spins faster to provide
more air to cool the engine. In most everyday driving
conditions, the clutch is not fully engaged. This improves
fuel economy and reduces fan noise. Under heavy
vehicle loading, trailer towing and/or high outside
temperatures, the fan speed increases when the clutch
engages. So you may hear an increase in fan noise.
This is normal and should not be mistaken as the
transmission slipping or making extra shifts. It is merely
the cooling system functioning properly. The fan will
slow down when additional cooling is not required and
the clutch disengages.
You may also hear this fan noise when you start the
engine. It will go away as the fan clutch disengages.
Power Steering Fluid
SeeScheduled Maintenance on page 6-5to determine
when to check your power steering fluid.
How To Check Power Steering Fluid
Check your power steering fluid only when the engine is
warm. If the engine is not warm, you probably will not
get an accurate reading.
If the fluid level is between the MIN (Minimum) and
MAX (Maximum) marks, you have enough. If you need
fluid, add only enough of the proper fluid to bring it
in between the MIN and MAX marks.
If your power steering fluid level is low, this can cause
the brake or service brakes soon warning lights to come
on. In addition, the steering effort and emergency
brake distance could increase.
If either light remains on after you have added power
steering fluid to the proper level, then shut off the engine
for 10 seconds. This should reset the brake warning
lights. If one or both lights stay on, see “Hydraulic Brake
System Warning Lights” underBrake System Warning
Light on page 3-31for more information.
What to Use
To determine what kind of fluid to use, seePart C:
Recommended Fluids and Lubricants on page 6-32.
Notice:When adding power steering �uid or
making a complete �uid change, always use the
proper �uid. Failure to use the proper �uid can
cause leaks and damage hoses and seals.
5-45