climate CHEVROLET KODIAK 2005 Owners Manual
[x] Cancel search | Manufacturer: CHEVROLET, Model Year: 2005, Model line: KODIAK, Model: CHEVROLET KODIAK 2005Pages: 374, PDF Size: 5.46 MB
Page 1 of 374
Seats and Restraint Systems........................... 1-1
Front Seats
............................................... 1-2
Rear Seats
............................................... 1-8
Safety Belts
.............................................. 1-9
Child Restraints
.......................................1-27
Airbag System
.........................................1-48
Restraint System Check
............................1-60
Features and Controls..................................... 2-1
Keys
........................................................ 2-2
Doors and Locks
....................................... 2-6
Windows
.................................................. 2-8
Starting and Operating Your Vehicle
...........2-11
Mirrors
....................................................2-45
Storage Areas
.........................................2-47
Instrument Panel............................................. 3-1
Instrument Panel Overview
.......................... 3-4
Climate Controls
......................................3-20
Warning Lights, Gages, and Indicators
........3-24
Audio System(s)
.......................................3-44
Driving Your Vehicle....................................... 4-1
Your Driving, the Road, and Your Vehicle
..... 4-2
Towing
...................................................4-35Service and Appearance Care.......................... 5-1
Service
..................................................... 5-3
Fuel
......................................................... 5-6
Checking Things Under the Hood
...............5-20
Rear Axle
...............................................5-60
Four-Wheel Drive
.....................................5-62
Front Axle
...............................................5-63
Noise Control System
...............................5-64
Bulb Replacement
....................................5-65
Windshield Wiper Blade Replacement
.........5-65
Other Service Items
..................................5-66
Tires
......................................................5-70
Appearance Care
.....................................5-79
Vehicle Identification
.................................5-87
Electrical System
......................................5-88
Capacities and Specifications
.....................5-95
Normal Maintenance Replacement Parts
....5-100
Maintenance Schedule..................................... 6-1
Maintenance Schedule
................................ 6-2
Customer Assistance and Information.............. 7-1
Customer Assistance and Information
........... 7-2
Reporting Safety Defects
............................ 7-7
Index................................................................ 1
2005 Chevrolet Kodiak Owner ManualM
Page 4 of 374
Vehicle Damage Warnings
Also, in this manual you will find these notices:
Notice:These mean there is something that could
damage your vehicle.
A notice tells about something that can damage the
vehicle. Many times, this damage would not be covered
by your vehicle’s warranty, and it could be costly. But
the notice will tell what to do to help avoid the damage.
When you read other manuals, you might see
CAUTION and NOTICE warnings in different colors
or in different words.
There are also warning labels on the vehicle. They use
the same words, CAUTION or NOTICE.
Vehicle Symbols
The vehicle has components and labels that use
symbols instead of text. Symbols are shown along with
the text describing the operation or information
relating to a specific component, control, message,
gage, or indicator.
If you need help figuring out a specific name of a
component, gage, or indicator, reference the following
topics:
•Seats and Restraint Systems in Section 1
•Features and Controls in Section 2
•Instrument Panel Overview in Section 3
•Climate Controls in Section 3
•Warning Lights, Gages, and Indicators in Section 3
•Audio System(s) in Section 3
•Engine Compartment Overview in Section 5
iv
Page 110 of 374
Running the Engine While Parked
It is better not to park with the engine running. But if you
ever have to, here are some things to know.
{CAUTION:
Idling the engine with the climate control
system off could allow dangerous exhaust into
your vehicle. See the earlier caution under
Engine Exhaust on page 2-43.
Also, idling in a closed-in place can let deadly
carbon monoxide (CO) into your vehicle even if
the climate control fan is at the highest setting.
One place this can happen is a garage.
Exhaust — with CO — can come in easily.
NEVER park in a garage with the engine
running.
Another closed-in place can be a blizzard.
SeeWinter Driving on page 4-26.
{CAUTION:
It can be dangerous to get out of your vehicle
if the automatic transmission shift lever is not
fully in PARK (P) with the parking brake rmly
set. Your vehicle can roll. Do not leave your
vehicle when the engine is running unless you
have to. If you have left the engine running,
the vehicle can move suddenly. You or others
could be injured. To be sure your vehicle will
not move, even when it is on fairly level
ground, always set the parking brake and
move the automatic transmission shift lever
to PARK (P), or the manual transmission
shift lever to NEUTRAL.
Follow the proper steps to be sure your vehicle
will not move.
2-44
Page 112 of 374
Outside Convex Mirrors
Your vehicle has convex mirrors on the lower quarter of
both the driver’s and passenger’s side rearview mirrors.
A convex mirror’s surface is curved so you can see
more from the driver’s seat.
{CAUTION:
A convex mirror can make things (like other
vehicles) look farther away than they really are.
If you cut too sharply into the right or left lane,
you could hit a vehicle. Check your regular
outside mirrors (or your inside mirror, if you
have one) before changing lanes.
Outside Heated Mirrors
If your vehicle has this feature, your outside rearview
mirrors can be defrosted.
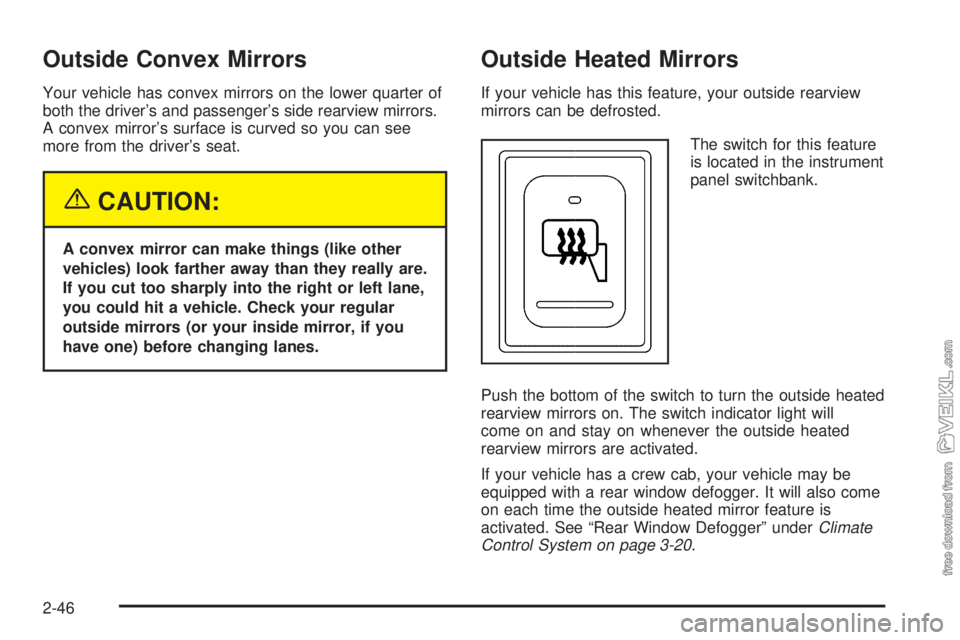
The switch for this feature
is located in the instrument
panel switchbank.
Push the bottom of the switch to turn the outside heated
rearview mirrors on. The switch indicator light will
come on and stay on whenever the outside heated
rearview mirrors are activated.
If your vehicle has a crew cab, your vehicle may be
equipped with a rear window defogger. It will also come
on each time the outside heated mirror feature is
activated. See “Rear Window Defogger” underClimate
Control System on page 3-20.
2-46
Page 115 of 374
Instrument Panel Overview...............................3-4
Hazard Warning Flashers................................3-6
Other Warning Devices...................................3-6
Horn.............................................................3-6
Tilt Wheel.....................................................3-7
Turn Signal/Multifunction Lever.........................3-7
Turn and Lane-Change Signals........................3-8
Headlamp High/Low-Beam Changer..................3-8
Windshield Wipers..........................................3-9
Windshield Washer.......................................3-10
Cruise Control..............................................3-10
Exterior Lamps.............................................3-14
Headlamps on Reminder................................3-15
Daytime Running Lamps (DRL).......................3-15
Marker Lamps..............................................3-16
Instrument Panel Brightness...........................3-16
Dome Lamps...............................................3-16
Entry Lighting...............................................3-17
Reading Lamps............................................3-17
Instrument Panel Switchbank..........................3-18
Accessory Power Outlets...............................3-19
Ashtrays and Cigarette Lighter........................3-20
Climate Controls............................................3-20
Climate Control System.................................3-20
Outlet Adjustment.........................................3-23
Rear Heating System....................................3-24Warning Lights, Gages, and Indicators............3-24
Instrument Panel Cluster................................3-25
Speedometer and Odometer...........................3-26
Trip Odometer..............................................3-26
Tachometer.................................................3-26
Engine Speed Limiter....................................3-26
Safety Belt Reminder Light.............................3-27
Safety Belt Reminder Tone............................3-27
Airbag Readiness Light..................................3-27
Airbag Off Light............................................3-28
Charging System Light..................................3-30
Voltmeter Gage............................................3-30
Service Transmission Warning Light................3-31
Range Inhibit Warning Indicator......................3-31
Brake System Warning Light..........................3-31
Anti-Lock Brake System Warning Light.............3-34
Trailer Anti-Lock Brake System Warning Light.....3-34
Engine Coolant Temperature Gage..................3-35
Low Coolant Warning Light............................3-35
Wait to Start Indicator (Diesel Engine).............3-36
Malfunction Indicator Lamp.............................3-36
Oil Pressure Gage........................................3-37
Low Oil Level Light.......................................3-38
Change Engine Oil Light................................3-38
Engine Overspeed Warning Light....................3-39
Engine Shutdown Warning Light.....................3-39
Section 3 Instrument Panel
3-1
Page 119 of 374
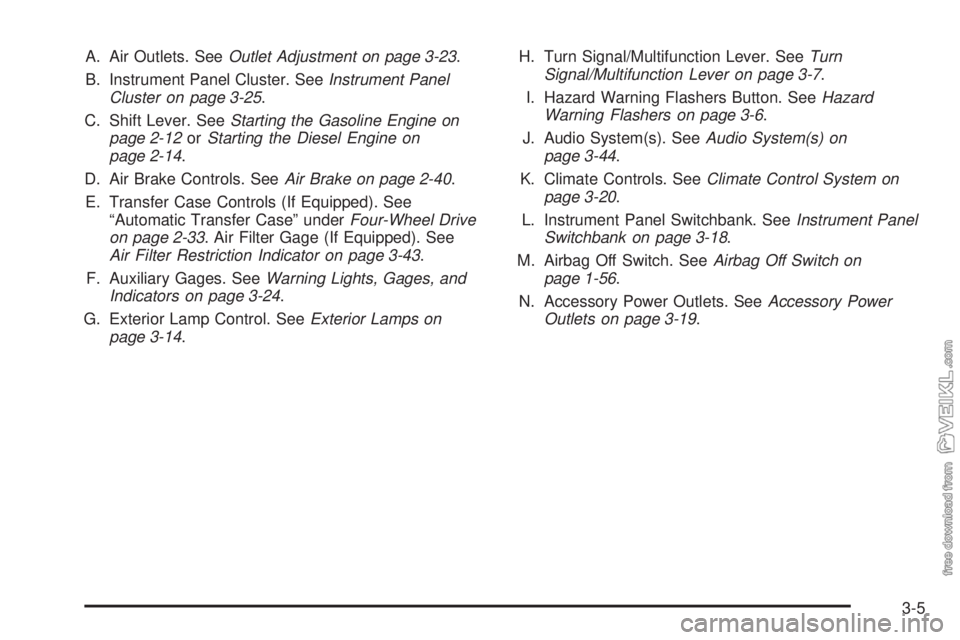
A. Air Outlets. SeeOutlet Adjustment on page 3-23.
B. Instrument Panel Cluster. SeeInstrument Panel
Cluster on page 3-25.
C. Shift Lever. SeeStarting the Gasoline Engine on
page 2-12orStarting the Diesel Engine on
page 2-14.
D. Air Brake Controls. SeeAir Brake on page 2-40.
E. Transfer Case Controls (If Equipped). See
“Automatic Transfer Case” underFour-Wheel Drive
on page 2-33. Air Filter Gage (If Equipped). See
Air Filter Restriction Indicator on page 3-43.
F. Auxiliary Gages. SeeWarning Lights, Gages, and
Indicators on page 3-24.
G. Exterior Lamp Control. SeeExterior Lamps on
page 3-14.H. Turn Signal/Multifunction Lever. SeeTurn
Signal/Multifunction Lever on page 3-7.
I. Hazard Warning Flashers Button. SeeHazard
Warning Flashers on page 3-6.
J. Audio System(s). SeeAudio System(s) on
page 3-44.
K. Climate Controls. SeeClimate Control System on
page 3-20.
L. Instrument Panel Switchbank. SeeInstrument Panel
Switchbank on page 3-18.
M. Airbag Off Switch. SeeAirbag Off Switch on
page 1-56.
N. Accessory Power Outlets. SeeAccessory Power
Outlets on page 3-19.
3-5
Page 134 of 374
Ashtrays and Cigarette Lighter
Your vehicle may have an ashtray and a cigarette
lighter located in the center floor console. See
Instrument Panel Overview on page 3-4. To open the
removable ashtray, flip open the top.
Notice:If you put papers, pins, or other ammable
items in the ashtray, hot cigarettes or other
smoking materials could ignite them and possibly
damage your vehicle. Never put ammable items in
the ashtray.
To use the cigarette lighter, push it in all the way and let
it go. When it’s ready, it will pop back out by itself.
Notice:Holding a cigarette lighter in while it
is heating will not allow the lighter to back away
from the heating element when it is hot. Damage
from overheating may occur to the lighter or heating
element, or a fuse could be blown. Do not hold a
cigarette lighter in while it is heating.
Climate Controls
Climate Control System
With these systems, you can control the heating,
cooling and ventilation for your vehicle.
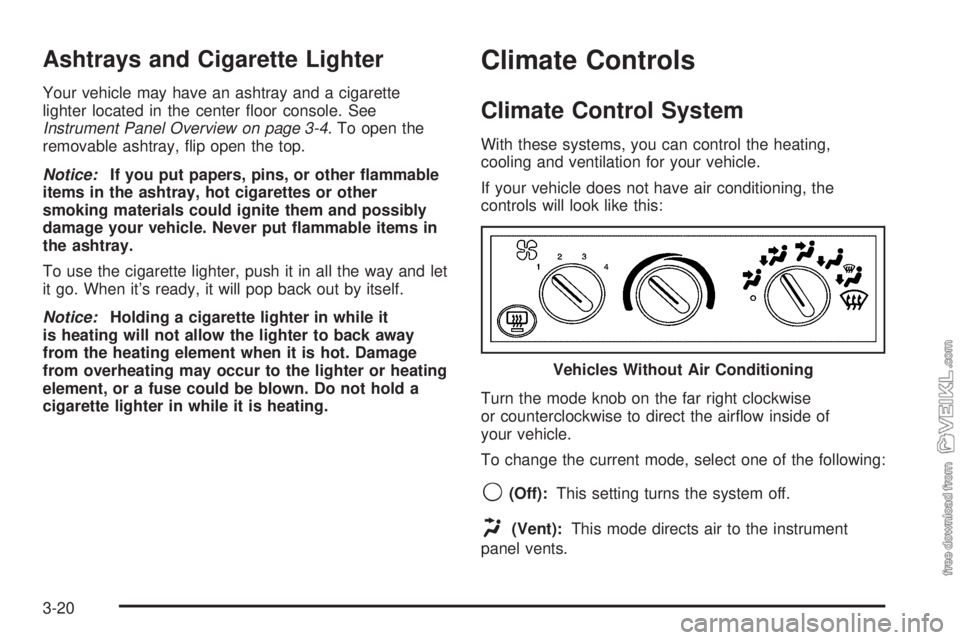
If your vehicle does not have air conditioning, the
controls will look like this:
Turn the mode knob on the far right clockwise
or counterclockwise to direct the airflow inside of
your vehicle.
To change the current mode, select one of the following:
9(Off):This setting turns the system off.
H(Vent):This mode directs air to the instrument
panel vents.Vehicles Without Air Conditioning
3-20
Page 136 of 374
Defogging and Defrosting
Fog on the inside of windows is a result of high humidity
(moisture) condensing on the cool window glass. This
can be minimized if the climate control is used properly.
There are two modes to clear fog or frost from your
windshield and side windows.
Use the defog mode to clear the windows of fog or
moisture and warm the passengers. Use the defrost
mode to remove fog or frost from the windshield more
quickly. For best results, clear all snow and ice from the
windshield before defrosting.
Turn the mode knob on the right of the climate control
panel to select the defog or defrost mode.
-(Defog):With this setting, the outside air comes out
of both the floor and defroster outlets. Adjust the
temperature knob for warmer or cooler air. The air
conditioning compressor may operate in this setting to
dehumidify the air.
0(Defrost):This setting operates the defroster. Most
of the air comes out near the windshield, with some
going to the floor outlets and front side windows. The air
conditioning compressor may operate in this setting to
dehumidify the air.The defog setting is useful for cold weather with a large
number of passengers or very humid conditions to
help keep the windshield clear. Use defrost to remove
fog or ice from the windshield quickly in extremely
cold conditions. The temperature knob should be in the
red area and the fan control toward high. Do not
drive the vehicle until all the windows are clear.
Rear Window Defogger
The rear window defogger uses a warming grid to
remove fog or frost from the rear window.
Be sure to clear as much snow from the rear window as
possible.
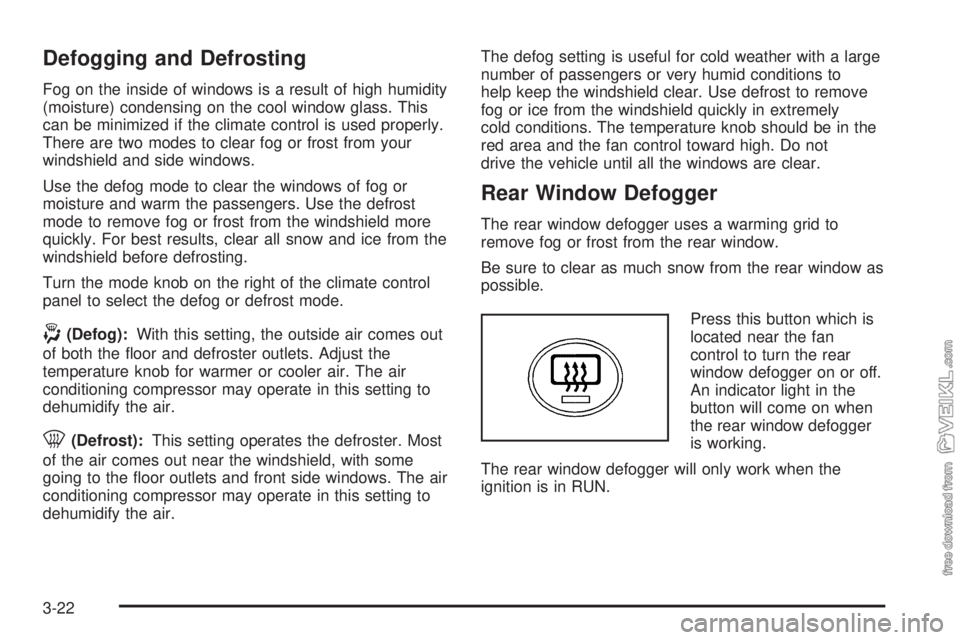
Press this button which is
located near the fan
control to turn the rear
window defogger on or off.
An indicator light in the
button will come on when
the rear window defogger
is working.
The rear window defogger will only work when the
ignition is in RUN.
3-22
Page 220 of 374
What Fuel to Use
In the United States, for best results use Number 2-D
diesel fuel year-round (above and below freezing
conditions) as oil companies blend Number 2-D fuel to
address climate differences. Number 1-D diesel fuel
may be used in very cold temperatures (when it stays
below 0°F or−18°C); however, it will produce a
power and fuel economy loss. Avoid the use of
Number 1-D diesel fuel in warm or hot climates.
It may result in stalling, poor starting when the engine
is hot and may damage the fuel injection system.
At a minimum, the diesel fuel you use should meet
specifications ASTM D975-03 (Grade Low Sulfur) in the
United States. In addition, the Engine Manufacturers
Association (EMA) has identified properties of an
improved diesel fuel for better engine performance and
durability. Diesel fuels corresponding to the EMA
Recommended Guideline on Premium Diesel Fuel
(FQP-1A) could provide better starting, less noise and
better vehicle performance. If there are questions
about the fuel you are using, contact your fuel supplier.
If your vehicle has the 6.6L engine, it is acceptable
to use diesel fuel containing up to 5% biodiesel (B5), but
the final blended fuel must meet the same specification,
ASTM D975-03 (Grade Low Sulfur), as other fuels
used in your vehicle, and the biodiesel used for making
this fuel must meet the ASTM D6751-03 specification.Biodiesel is produced from vegetable oils or animal fat
that have been chemically modified to reduce the
possibility of damage to your fuel system and engine.
Higher concentration (i.e., greater than B5)
biodiesel-containing fuels or the use of unmodified
bio-oils blended into diesel fuel at any concentration is
not recommended and could damage your fuel
system and engine. Such damage would not be covered
by your warranty. If there are questions about the
biodiesel-containing fuels you are using, contact your
fuel supplier.
Diesel fuel may foam when you fill your tank. This can
cause the automatic pump nozzle to shut off, even
though your tank is not full. If this happens, just wait for
the foaming to stop and then continue to fill your tank.
{CAUTION:
Heat coming from the engine may cause the fuel
to expand and force the fuel out of your tank.
If something ignites the fuel, a re could start
and people could be burned. To help avoid this,
ll your fuel tank only until the automatic nozzle
shuts off. Do not try to top it off.
5-8
Page 261 of 374
Four-Wheel Disc Brakes
(Hydraulic Only)
Your vehicle has four-wheel disc brakes.
Some driving conditions or climates may cause a brake
squeal when the brakes are first applied or lightly
applied. This does not mean something is wrong with
your brakes.
Brake linings should always be replaced as complete
axle sets.
Four-Wheel and Six-Wheel Drum
Brakes (Air Only)
The brake drums should be removed and inspected
each time the tires are removed for rotation or changing.
When you have the front brakes replaced, have the
rear brakes inspected, too.
Brake linings should always be replaced as complete
axle sets.
Brake Pedal Travel
See your dealer if the brake pedal does not return to
normal height, or if there is a rapid increase in
pedal travel. This could be a sign of brake trouble.
Brake Adjustment
Every time you make a brake stop, your brakes adjust
for wear.
Replacing Brake System Parts
The braking system on a vehicle is complex. Its many
parts have to be of top quality and work well together if
the vehicle is to have really good braking. Your
vehicle was designed and tested with top-quality
GM brake parts. When you replace parts of your braking
system — for example, when your brake linings wear
down and you need new ones put in — be sure you get
new approved GM replacement parts. If you do not,
your brakes may no longer work properly. For example,
if someone puts in brake linings that are wrong for
your vehicle, the balance between your front and rear
brakes can change — for the worse. The braking
performance you have come to expect can change in
many other ways if someone puts in the wrong
replacement brake parts.
5-49