CHEVROLET KODIAK 2008 Owners Manual
Manufacturer: CHEVROLET, Model Year: 2008, Model line: KODIAK, Model: CHEVROLET KODIAK 2008Pages: 384, PDF Size: 5.4 MB
Page 201 of 384
Adding a Snow Plow or Similar
Equipment
If you will be installing a snow plow on your vehicle, we
recommend that the vehicle have the snow plow
prep package (RPO ANQ). Before installing a snow
plow, see your dealer/retailer for information on
other recommended optional equipment and vehicle
weight restrictions.
Notice:The payload your vehicle can carry will be
reduced when a snow plow is installed. Your
vehicle can be damaged if either the front or rear
axle ratings, or the GVW, are exceeded. See
your dealer/retailer for more information.
{CAUTION:
On some vehicles that have certain front
mounted equipment, such as a snow plow, it
may be possible to load the front axle to the
front gross axle weight rating (GAWR) but not
have enough weight on the rear axle to have
proper braking performance. If your brakes can
not work properly, you could have a crash. To
help your brakes work properly when a snow
plow is installed, always follow the snow plow
manufacturer or installer’s recommendation for
rear ballast to ensure a proper front and rear
weight distribution ratio, even though the
actual front weight may be less than the front
GAWR, and the total vehicle weight is less
than the gross vehicle weight rating (GVWR).
Maintaining a proper front and rear weight
distribution ratio is necessary to provide
proper braking performance.
4-23
Page 202 of 384
Towing
Towing Your Vehicle
Consult your dealer/retailer or a professional towing
service if you need to have your disabled vehicle towed.
SeeRoadside Assistance Program on page 7-5.
Releasing Air-Operated Parking Brakes
If your vehicle has air brakes, you could have a
special towing problem. If your vehicle has to be towed
because of a complete loss of air pressure from
both systems, the parking brakes will have automatically
engaged. The tow operator can release the brakes
manually by using the following steps. Then your vehicle
can be towed with all wheels or only the rear wheels
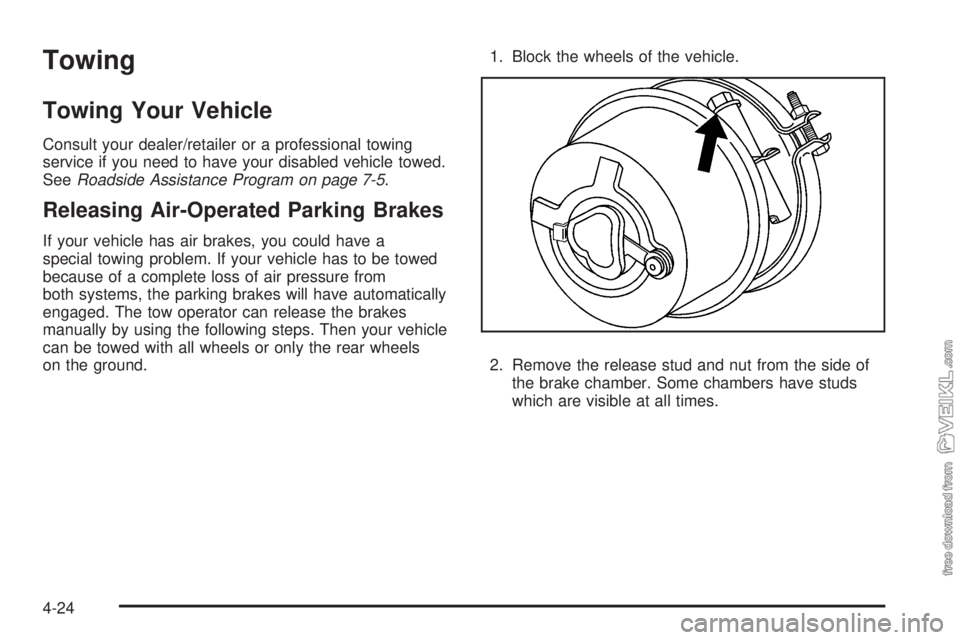
on the ground.1. Block the wheels of the vehicle.
2. Remove the release stud and nut from the side of
the brake chamber. Some chambers have studs
which are visible at all times.
4-24
Page 203 of 384
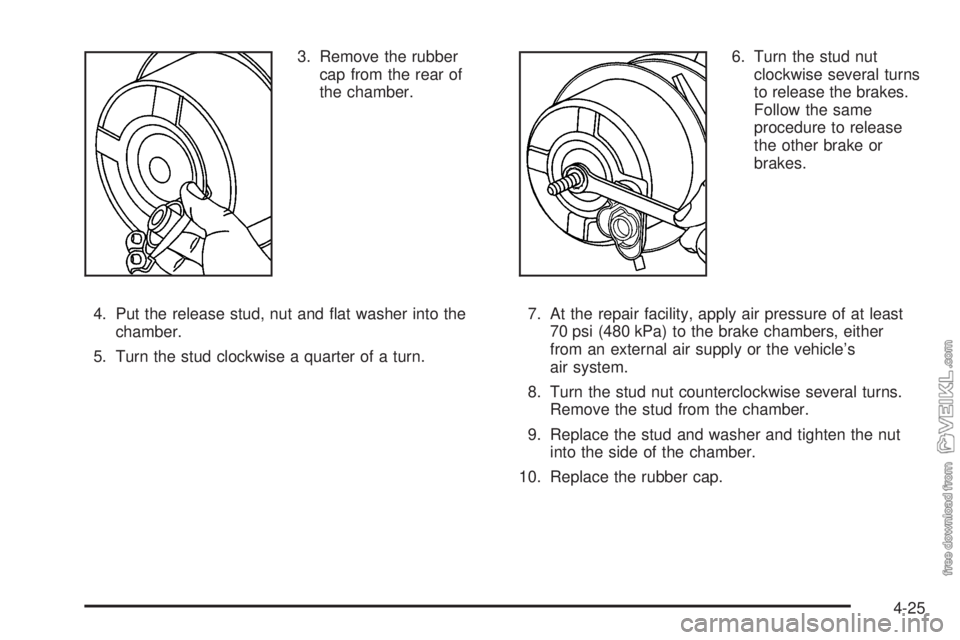
3. Remove the rubber
cap from the rear of
the chamber.
4. Put the release stud, nut and flat washer into the
chamber.
5. Turn the stud clockwise a quarter of a turn.6. Turn the stud nut
clockwise several turns
to release the brakes.
Follow the same
procedure to release
the other brake or
brakes.
7. At the repair facility, apply air pressure of at least
70 psi (480 kPa) to the brake chambers, either
from an external air supply or the vehicle’s
air system.
8. Turn the stud nut counterclockwise several turns.
Remove the stud from the chamber.
9. Replace the stud and washer and tighten the nut
into the side of the chamber.
10. Replace the rubber cap.
4-25
Page 204 of 384
Trailer Connections
Heavy-Duty Trailer Wiring Package
Your vehicle may be equipped with an eight-wire trailer
towing harness. This harness, with a seven-pin
universal heavy-duty trailer connector, is attached to a
bracket on the platform hitch.
The Center High-Mounted Stoplamp (CHMSL) wire is
tied next to the trailer wiring harness for use with a
trailer.
The eight-wire harness contains the following trailer
circuits:
•Yellow: Left Stop/Turn Signal
•Dark Green: Right Stop/Turn Signal
•Brown: Taillamps
•White: Ground
•Light Green: Back-up Lamps
•Light Blue: CHMSL
•Red: Battery Feed
•Dark Blue: Trailer Brake
Trailer Connections
(C7/C8 Models Only)
If your vehicle has these trailer connections, they are
located at the rear of the cab for a tractor and at the rear
of the chassis when towing a trailer. There will be an
air connection and an electrical connection.
Be sure that the couplings to the trailer are made
correctly.
Air Connections
If you are not connecting the trailer air line connections
to another piece of equipment, be sure to replace
their protective caps.
Electrical Connections
This system is a seven-wire cable that will connect to
the trailer, supplying power to the trailer’s lighting
system. When not in use, it is stored in the trailer
air-hose storage bracket.
4-26
Page 205 of 384
Service............................................................5-4
Accessories and Modifications..........................5-4
California Proposition 65 Warning.....................5-5
California Perchlorate Materials Requirements.....5-5
Doing Your Own Service Work.........................5-6
Engine Fan Breakage.....................................5-6
Fuel................................................................5-7
Gasoline Octane............................................5-7
Gasoline Specifications....................................5-7
Additives.......................................................5-8
Diesel Engine Fuel.........................................5-9
What Fuel to Use...........................................5-9
Very Cold Weather Operation.........................5-12
Water in Fuel...............................................5-12
Running Out of Fuel.....................................5-17
Fuel Filter Replacement.................................5-18
Fuels in Foreign Countries.............................5-19
Filling the Tank............................................5-20
Filling a Portable Fuel Container.....................5-21
Checking Things Under the Hood....................5-22
Hood Latches...............................................5-22
Engine Oil (Caterpillar
®Diesel Engine).............5-23
Engine Oil (Gasoline Engine)..........................5-24
Engine Oil (DURAMAX
®Diesel Engine)............5-28Engine Oil (Isuzu Diesel Engine).....................5-32
Engine Oil Life System (Gasoline Engine)........5-36
Engine Oil Life System (DURAMAX
®/Isuzu
Diesel Engines).........................................5-37
Engine Oil Life System (Caterpillar
®Diesel
Engine)....................................................5-39
Engine Air Cleaner/Filter................................5-39
Automatic Transmission Fluid.........................5-43
Manual Transmission Fluid.............................5-43
Engine Coolant (Caterpillar
®Diesel Engines).....5-44
Engine Coolant (Gas and DURAMAX®/
Isuzu 7.8L L6 Engines)..............................5-44
Coolant Surge Tank Pressure Cap..................5-47
Engine Overheating.......................................5-48
Cooling System............................................5-50
Engine Fan Noise.........................................5-54
Power Steering Fluid.....................................5-54
Windshield Washer Fluid................................5-55
Brakes........................................................5-57
Battery........................................................5-66
Jump Starting...............................................5-67
Rear Axle.......................................................5-72
Rear Axle Shift Motor....................................5-73
Section 5 Service and Appearance Care
5-1
Page 206 of 384
Four-Wheel Drive............................................5-73
Front Axle......................................................5-74
Noise Control System.....................................5-75
Tampering with Noise Control System
Prohibited.................................................5-75
Bulb Replacement..........................................5-76
Windshield Wiper Blade Replacement..............5-76
Other Service Items........................................5-78
Fuel Filter....................................................5-78
Primary Fuel Filter and Water Separator..........5-79
Secondary Fuel Filter and Water Separator/
Heater (Caterpillar
®Diesel).........................5-80
Front Wheel Bearings with
Oil-Filled Hubs..........................................5-81
Tires..............................................................5-82
Inflation - Tire Pressure.................................5-82
Wheel Loading.............................................5-83
Dual Tire Operation.......................................5-84
When It Is Time for New Tires.......................5-84
Buying New Tires.........................................5-85
Wheel Alignment and Tire Balance..................5-86Tightening the Wheel Nuts.............................5-86
Wheel Replacement......................................5-90
If a Tire Goes Flat........................................5-92
Appearance Care............................................5-94
Interior Cleaning...........................................5-94
Fabric/Carpet...............................................5-95
Instrument Panel, Vinyl, and Other Plastic
Surfaces..................................................5-96
Care of Safety Belts......................................5-96
Weatherstrips...............................................5-96
Washing Your Vehicle...................................5-97
Cleaning Exterior Lamps/Lenses.....................5-97
Finish Care..................................................5-97
Windshield and Wiper Blades.........................5-98
Aluminum or Chrome-Plated Wheels
and Trim..................................................5-98
Tires...........................................................5-99
Sheet Metal Damage.....................................5-99
Finish Damage.............................................5-99
Underbody Maintenance...............................5-100
Chemical Paint Spotting...............................5-100
Vehicle Care/Appearance Materials................5-100
Section 5 Service and Appearance Care
5-2
Page 207 of 384
Vehicle Identi�cation.....................................5-101
Vehicle Identification Number (VIN)................5-101
Service Parts Identification Label...................5-102
Electrical System..........................................5-102
Add-On Electrical Equipment.........................5-102
Headlamp Wiring........................................5-102
Windshield Wiper Fuses...............................5-102
Fusible Links..............................................5-103Power Windows and Other Power Options......5-103
Fuses and Circuit Breakers..........................5-103
Instrument Panel Fuse Block........................5-103
Underhood Fuse Block................................5-106
Capacities and Speci�cations........................5-109
Maintenance Replacement Parts....................5-115
Engine Drive Belt Routing............................5-117
Section 5 Service and Appearance Care
5-3
Page 208 of 384
Service
For service and parts needs, visit your dealer/retailer.
You will receive genuine GM parts and GM-trained and
supported service people.
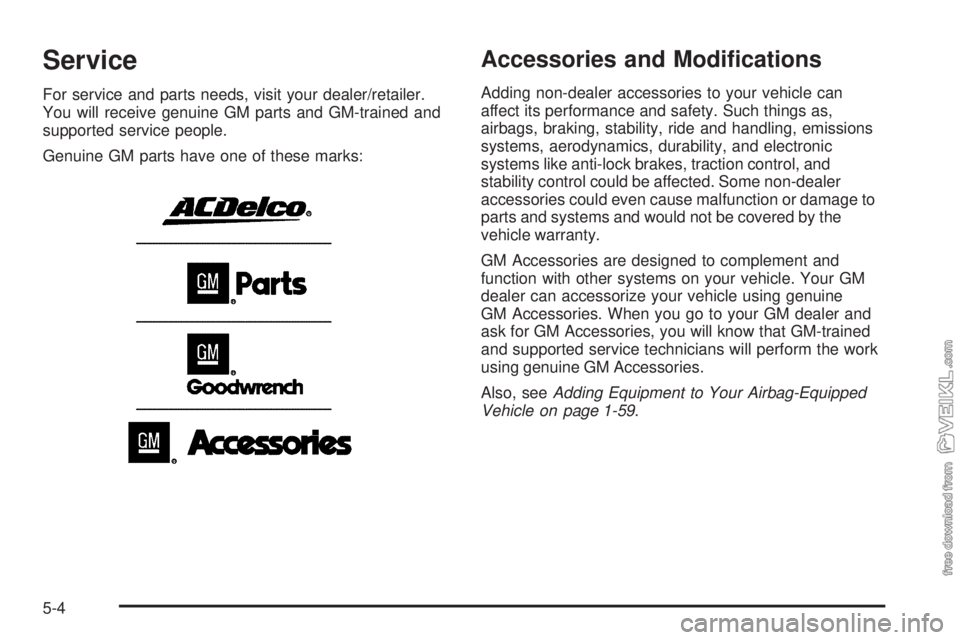
Genuine GM parts have one of these marks:
Accessories and Modi�cations
Adding non-dealer accessories to your vehicle can
affect its performance and safety. Such things as,
airbags, braking, stability, ride and handling, emissions
systems, aerodynamics, durability, and electronic
systems like anti-lock brakes, traction control, and
stability control could be affected. Some non-dealer
accessories could even cause malfunction or damage to
parts and systems and would not be covered by the
vehicle warranty.
GM Accessories are designed to complement and
function with other systems on your vehicle. Your GM
dealer can accessorize your vehicle using genuine
GM Accessories. When you go to your GM dealer and
ask for GM Accessories, you will know that GM-trained
and supported service technicians will perform the work
using genuine GM Accessories.
Also, seeAdding Equipment to Your Airbag-Equipped
Vehicle on page 1-59.
5-4
Page 209 of 384
Aftermarket Engine Performance
Enhancement Products and
Modi�cations
Some aftermarket engine performance products and
modifications promise a way to increase the horsepower
and torque levels of your vehicle’s powertrain. You
should be aware that these products could have harmful
effects on the performance and life of the engine, exhaust
emission system, transmission, and drivetrain. The
engines, transmissions, and drivetrains have been
designed and built to offer industry leading durability and
performance in the most demanding applications. Engine
power enhancement products may enable the engine to
operate at horsepower and torque levels that could
damage, create failure, or reduce the life of the engine,
engine emission system, transmission, and drivetrain.
Damage, failure, or reduced life of the engine,
transmission, emission system, drivetrain, or other
vehicle components caused by aftermarket engine
performance enhancement products or modifications
may not be covered under your vehicle warranty.
California Proposition 65 Warning
Most motor vehicles, including this one, contain and/or
emit chemicals known to the State of California to cause
cancer and birth defects or other reproductive harm.
Engine exhaust, many parts and systems (including
some inside the vehicle), many fluids, and some
component wear by-products contain and/or emit these
chemicals.
California Perchlorate Materials
Requirements
Certain types of automotive applications, such as airbag
initiators, seat belt pretensioners, and lithium batteries
contained in remote keyless entry transmitters, may
contain perchlorate materials. Special handling may be
necessary. For additional information, see
www.dtsc.ca.gov/hazardouswaste/perchlorate.
5-5
Page 210 of 384
Doing Your Own Service Work
{CAUTION:
You can be injured and your vehicle could be
damaged if you try to do service work on a
vehicle without knowing enough about it.
Be sure you have sufficient knowledge,
experience, the proper replacement parts,
and tools before you attempt any vehicle
maintenance task.
Be sure to use the proper nuts, bolts, and
other fasteners. English and metric
fasteners can be easily confused. If you
use the wrong fasteners, parts can later
break or fall off. You could be hurt.
If you want to do some of your own service work, you
will want to use the proper service manual. It tells you
much more about how to service your vehicle than this
manual can. To order the proper service manual, see
Service Publications Ordering Information on page 7-10.
Your vehicle has an airbag system. Before attempting to
do your own service work, seeServicing Your
Airbag-Equipped Vehicle on page 1-59.You should keep a record with all parts receipts and list
the mileage and the date of any service work you
perform. SeePart D: Maintenance Record on page 6-33.
Engine Fan Breakage
{CAUTION:
Changing the Fan Drive Ratio or Engine
Governed Speed:
If you change the fan drive ratio or increase
the governed speed of the engine, you may
increase stress and the fan could eventually fail.
If the fan breaks apart while it is rotating, pieces
can cause severe injury to anyone — such as a
service technician — who is nearby. And, of
course, the pieces can severely damage the
vehicle. Do not change the fan drive ratio or
increase the governed speed of the vehicle
without getting the necessary information from
your dealer.
CAUTION: (Continued)
5-6