CHEVROLET MALIBU 1998 Workshop Manual
Manufacturer: CHEVROLET, Model Year: 1998, Model line: MALIBU, Model: CHEVROLET MALIBU 1998Pages: 362, PDF Size: 19.35 MB
Page 51 of 362
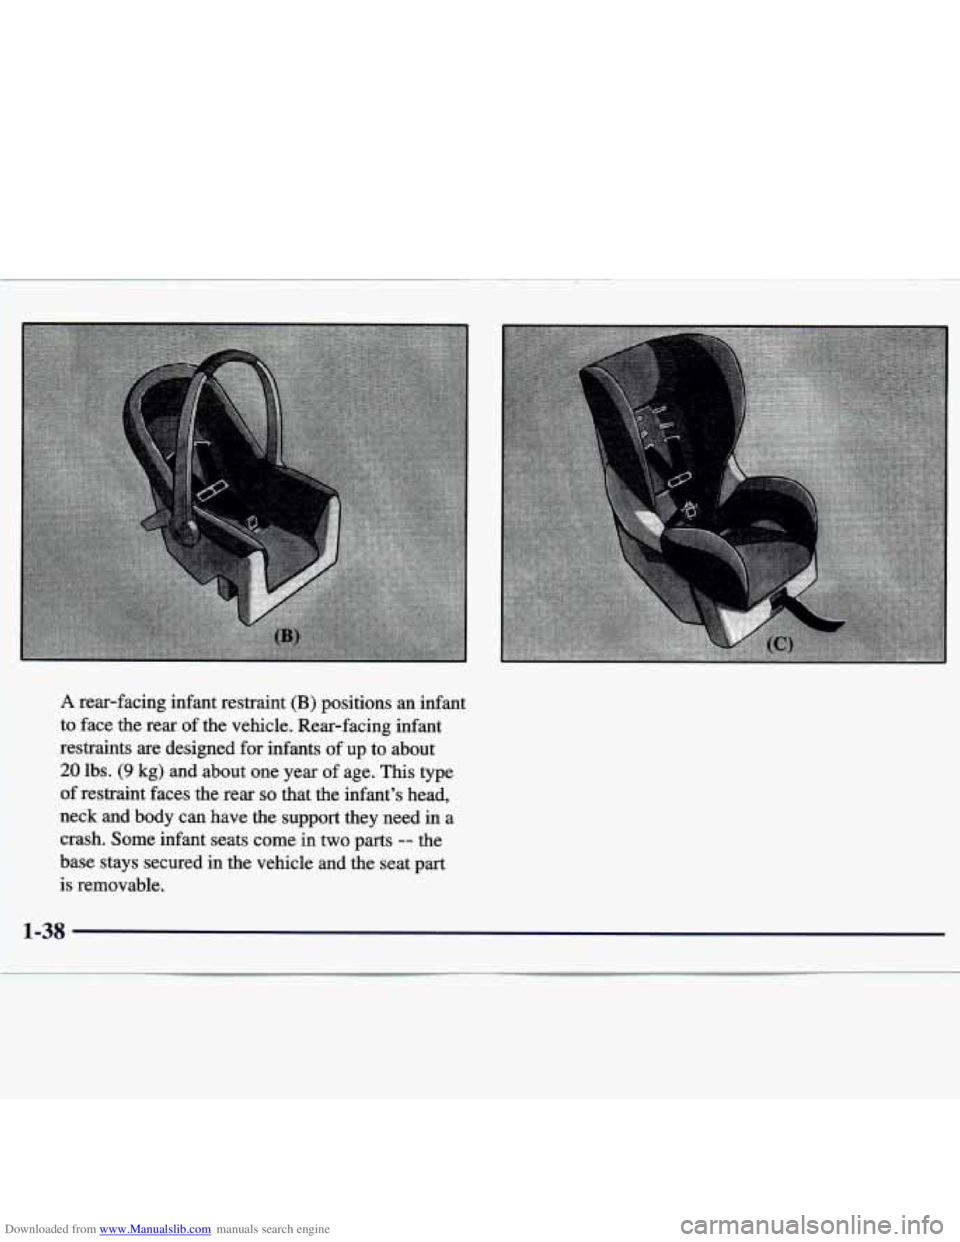
Downloaded from www.Manualslib.com manuals search engine A rear-facing infant restraint (B) positions an infant
to face the rear of the vehicle. Rear-facing infant
restraints are designed for infants of up to about
20 lbs. (9 kg) and about one year of age. This type
of restraint faces the rear
so that the infant’s head,
neck and body can have the support they need in a
crash. Some infant seats come in two parts
-- the
base stays secured in the vehicle and the seat part is removable.
1-38
Page 52 of 362
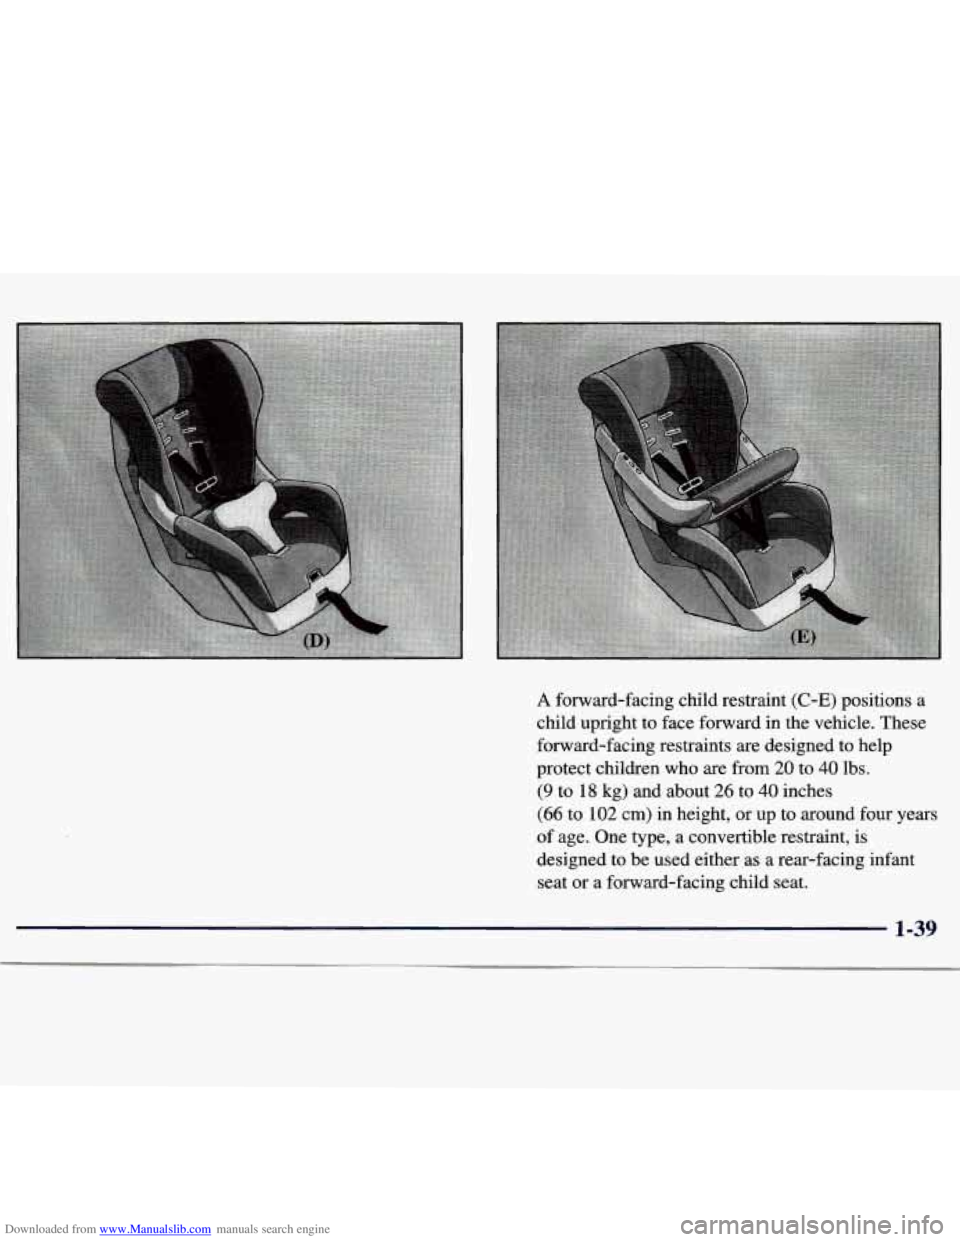
Downloaded from www.Manualslib.com manuals search engine A forward-facing child restraint (C-E) positions a
child upright to face forward in the vehicle. These
forward-facing restraints are designed to help
protect children who are from
20 to 40 lbs.
(9 to
18 kg) and about 26 to 40 inches
(66 to 102 cm) in height, or up to around four years
of age. One type, a convertible restraint, is
designed to be used either as a rear-facing infant
seat or a forward-facing child seat.
1-39
Page 53 of 362
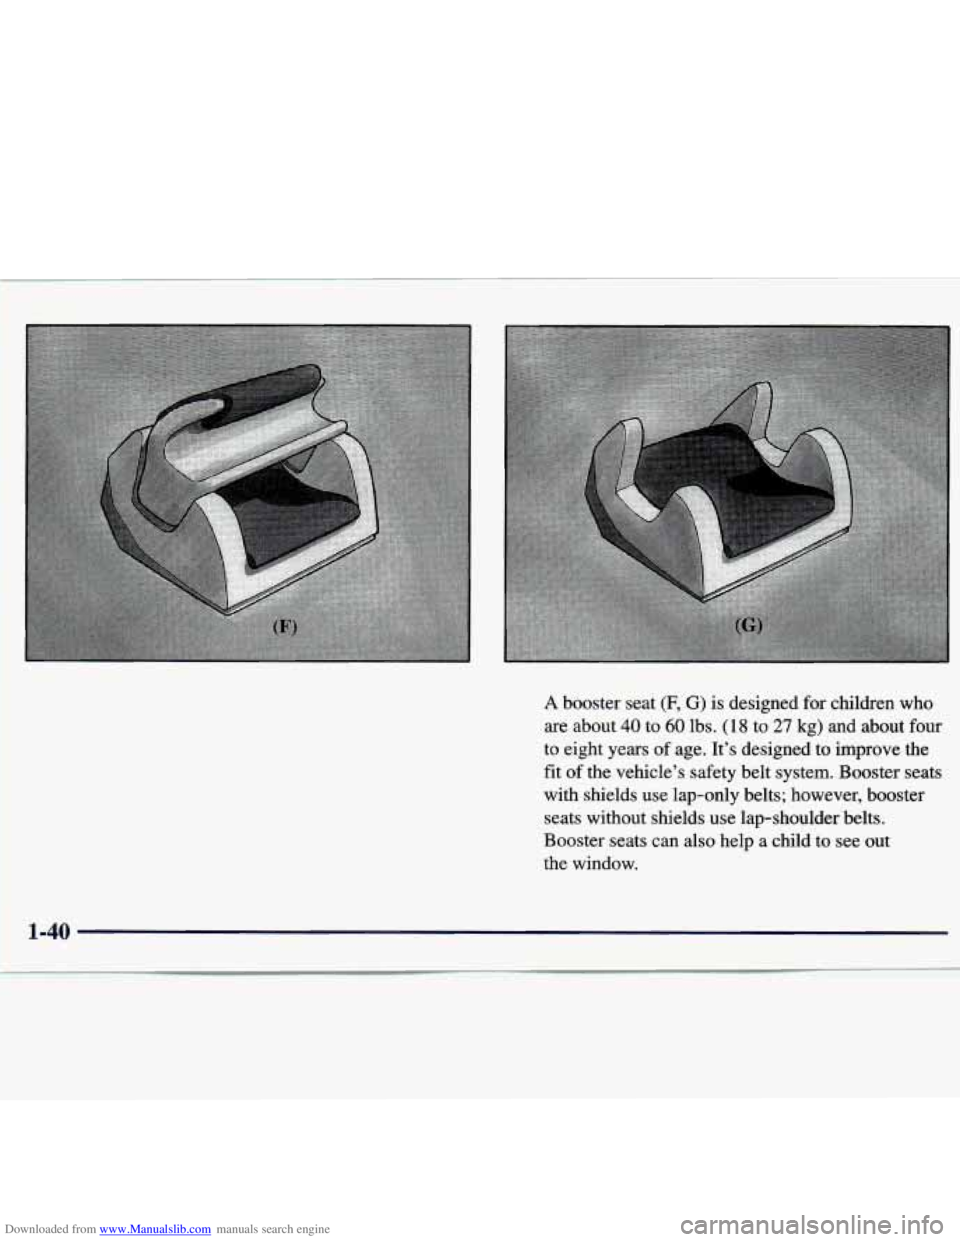
Downloaded from www.Manualslib.com manuals search engine A booster seat (F, G) is designed for children who
are about 40 to 60 lbs. (18 to 27 kg) and about four
to eight years of age. It’s designed to improve the
fit of
the vehicle’s safety belt system. Booster seats
with shields use lap-only belts; however, booster seats without shields use lap-shoulder belts.
Booster seats can also help a child to see out
the window.
1-40
Page 54 of 362
Downloaded from www.Manualslib.com manuals search engine When choosing a child restraint, be sure the child
restraint is designed to be used in a vehicle. If it is, it
will have a label saying that it meets Federal Motor
Vehicle Safety Standards.
Then follow the instructions for the restraint.
You may
find these instructions on the restraint itself or in a
booklet, or both. These restraints use the belt system in
your vehicle, but the child also has to be secured within
the restraint to help reduce the chance
of personal injury.
The instructions that come with the infant or child
restraint will show you how to do that. Both the owner’s
manual and the child restraint instructions are important,
so if either one of these is not available, obtain a
replacement copy from the manufacturer.
Where to Put the Restraint
Accident statistics show that children are safer if they
are restrained in the rear rather than the front seat. We at
General Motors therefore recommend that you put your
child restraint in the rear seat.
Never put a rear-facing
child restraint in the front passenger seat. Here’s why:
A child in a rearfacing child restraint can be
seriously injured if the right front passenger’s air
bag inflates even though your vehicle has reduced-force frontal air bags. This is because
the back of a rearfacing child restraint would be
very close to the inflating air bag. Always secure
a rear-facing child restraint in the rear seat.
You may, however, secure a forward-facing child
restraint in the right front seat. Before you secure
a forward-facing child restraint, always move the
front passenger seat as far back as it will go. Or,
secure the child restraint in the rear seat.
Wherever you install it, be sure to secure the child
restraint properly.
Keep in mind that an unsecured child restraint can move
around in a collision or sudden stop and injure people in
the vehicle. Be sure to properly secure
any child
restraint in your vehicle
-- even when no child is in it.
1-41
Page 55 of 362
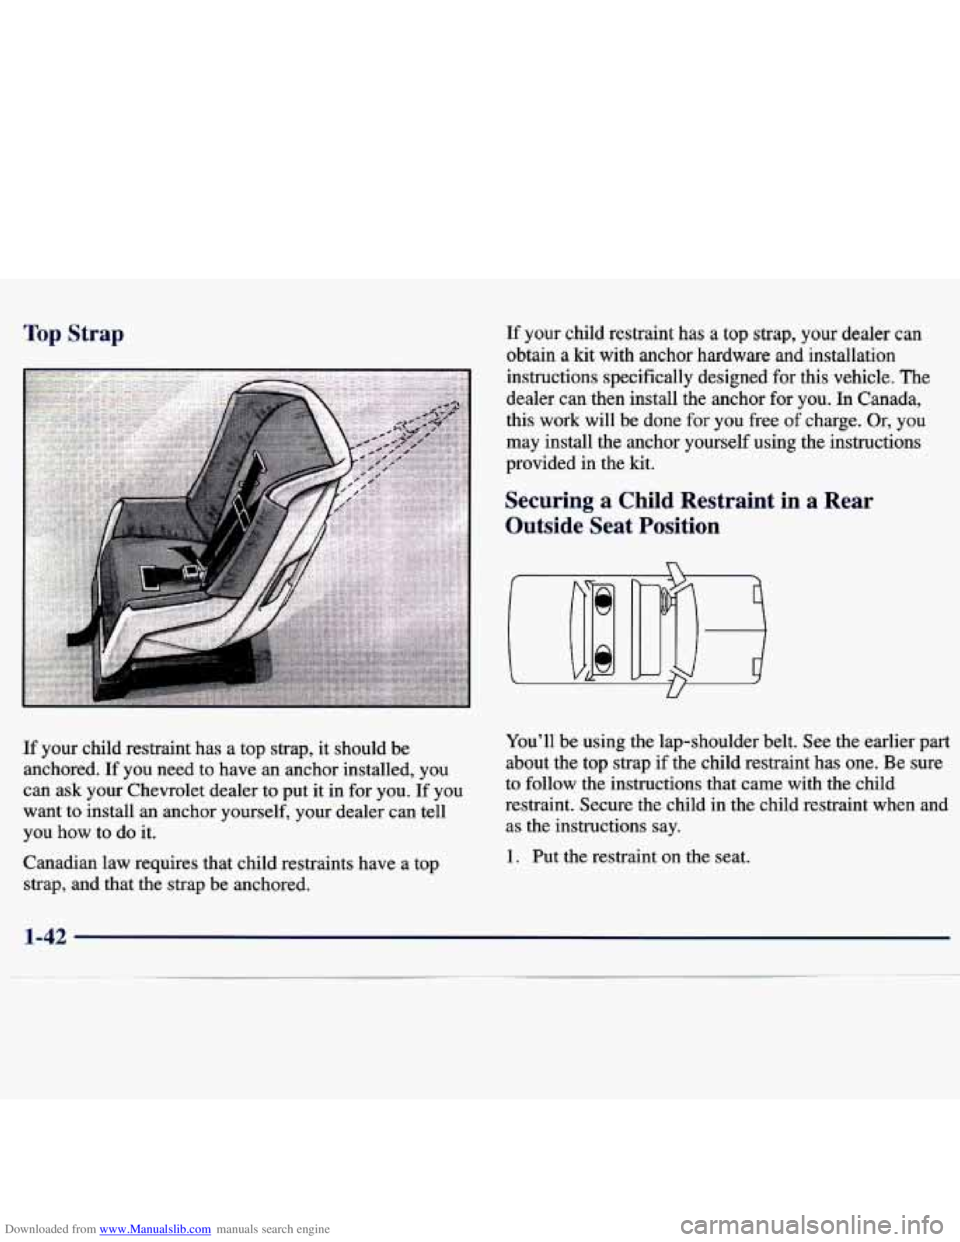
Downloaded from www.Manualslib.com manuals search engine Top Strap
If your child restraint has a top strap, it should be
anchored. If you need to have an anchor installed, you
can ask your Chevrolet dealer to put it in for
you. If you
want to install
an anchor yourself, your dealer can tell
you how to do it.
Canadian law requires that child restraints have a top strap, and that the strap be anchored.
If your child restraint has a top strap, your dealer can
obtain a kit with anchor hardware and installation
instructions specifically designed for this vehicle. The
dealer
can then install the anchor for you. In Canada,
this work will be done
for you free of charge. Or, you
may install the anchor yourself using the instructions
provided in the kit.
Securing a Child Restraint in a Rear
Outside Seat Position
You'll be using the lap-shoulder belt. See the earlier part
about the top strap if the child restraint has one. Be sure
to follow the instructions that came with the child
restraint. Secure the child in the child restraint when and as the instructions say.
1. Put the restraint on the seat.
1-42
Page 56 of 362
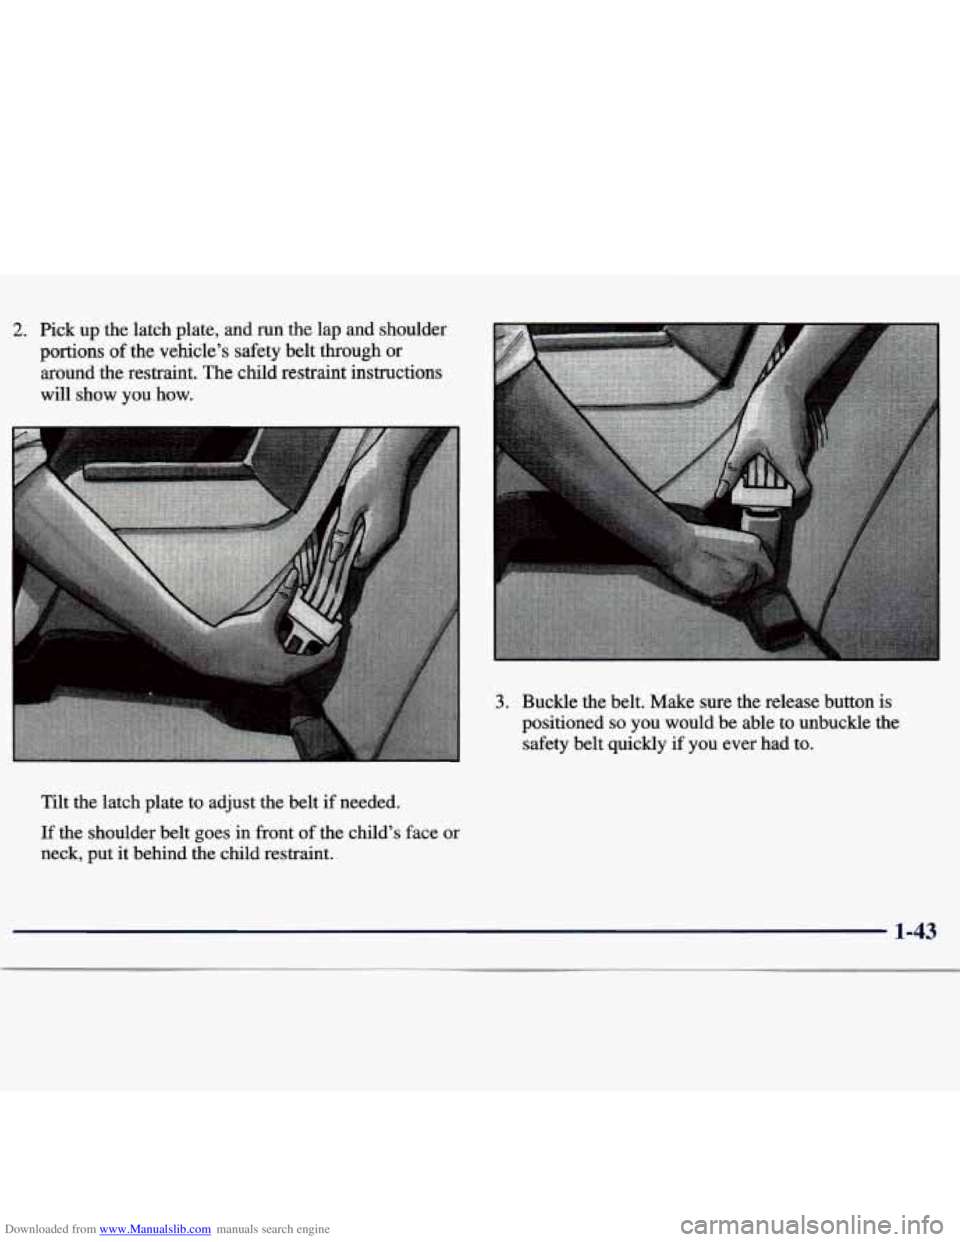
Downloaded from www.Manualslib.com manuals search engine 2. Pick up the latch plate, and run the lap and shoulder
portions
of the vehicle’s safety belt through or
around the restraint.
The child restraint instructions
will show you how.
3. Buckle the belt. Make sure the release button is
positioned
so you would be able to unbuckle the
safety belt quickly if you ever had to.
Tilt the latch plate to adjust the belt if needed.
If the shoulder belt goes in front of the child’s face or
neck, put it behind the child restraint.
1-43
Page 57 of 362
Downloaded from www.Manualslib.com manuals search engine To remove the child restraint, just unbuckle the vehicle’s
safety belt
and let it go back all the way. The safety belt
will move freely again and be ready to work for
an adult
or larger child passenger.
Securing a Child Restraint in the Center
Rear Seat Position
U
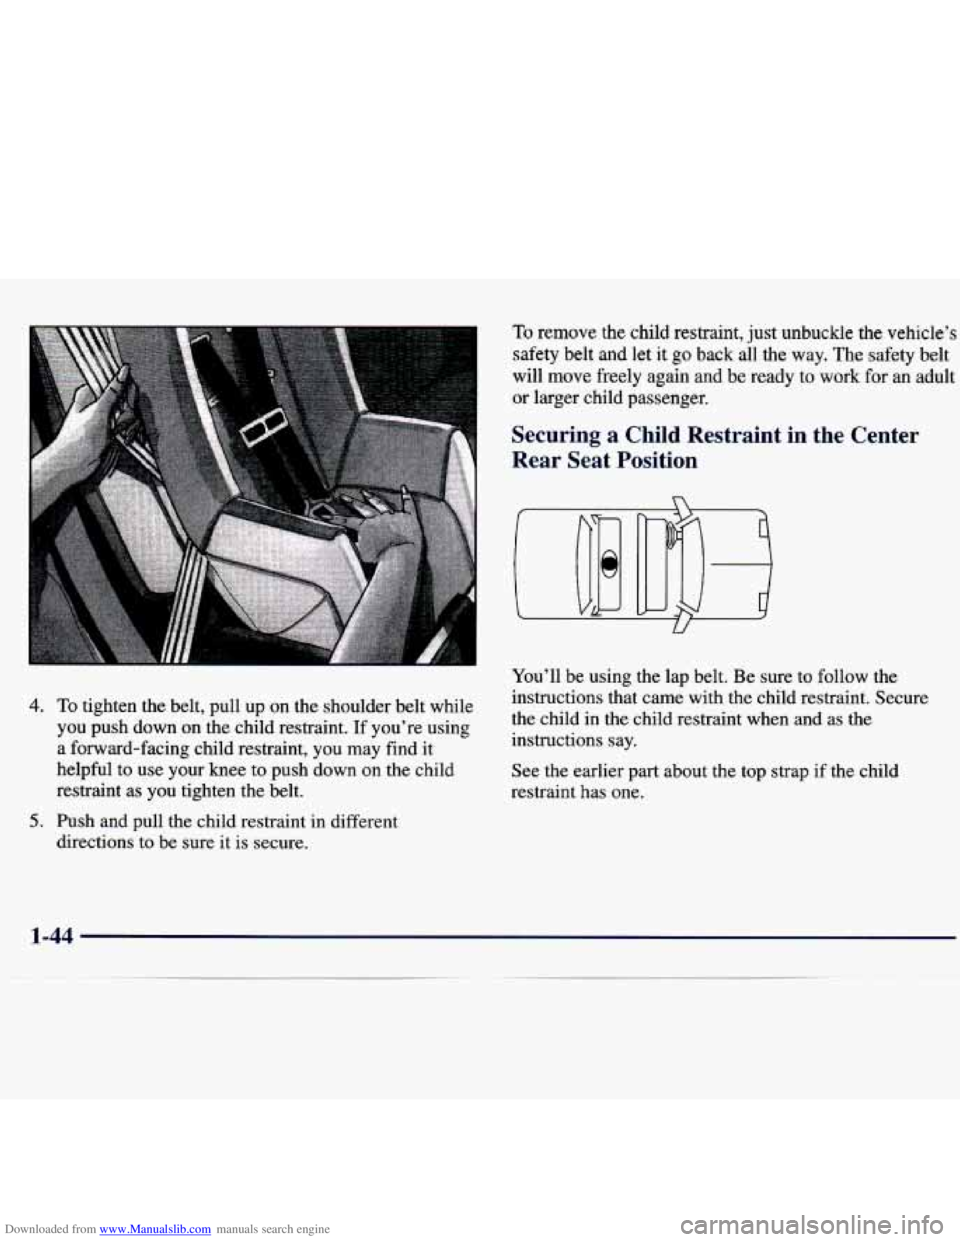
4. To tighten the belt, pull up on the shoulder belt while
you push down on the child restraint. If you’re using
a forward-facing child restraint, you may find it
helpful to use
your knee to push down on the child
restraint as
you tighten the belt.
directions to
be sure it is secure.
5. Push and pull the child restraint in different You’ll
be using the lap belt. Be sure to follow the
instructions that came with the child restraint. Secure
the child in the child restraint when and as the
instructions say.
See the earlier part about the top strap if the child
restraint has one.
1-44
Page 58 of 362
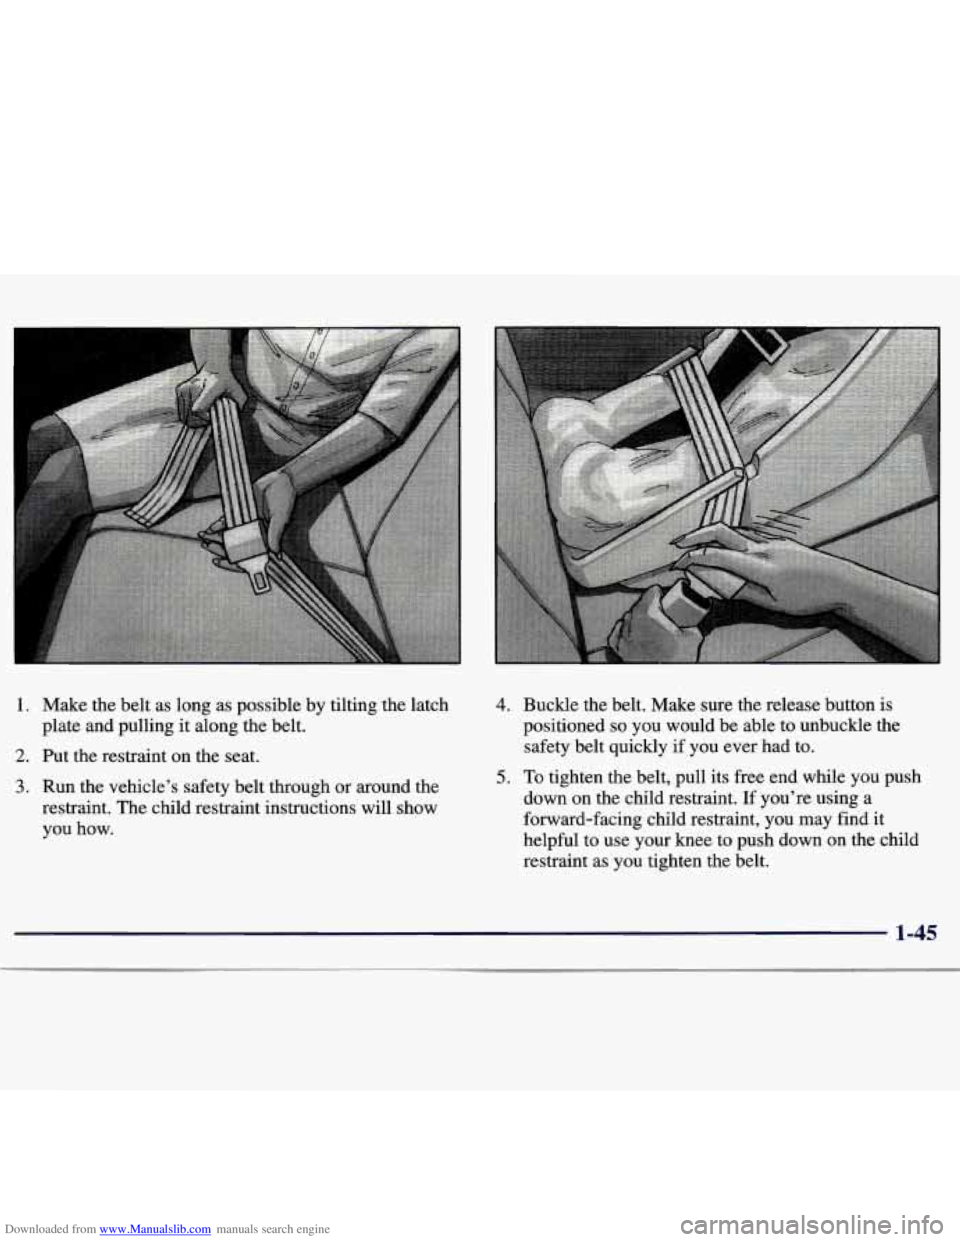
Downloaded from www.Manualslib.com manuals search engine 1. Make the belt as long as possible by tilting the latch
plate and pulling it along the belt.
2. Put the restraint on the seat.
3. Run the vehicle’s safety belt through or around the
restraint.
The child restraint instructions will show
you how.
4.
5.
Buckle the belt. Make sure the release button is
positioned
so you would be able to unbuckle the
safety belt quickly if you ever had to.
To tighten the belt, pull its free end while you push
down on the child restraint. If you’re using a
forward-facing child restraint, you may find it
helpful to use your knee
to push down on the child
restraint as you tighten the belt.
1-45
Page 59 of 362
Downloaded from www.Manualslib.com manuals search engine 6. Push and pull the child restraint in different
directions
to be sure it is secure.
To remove the child restraint, just unbuckle the vehicle’s
safety belt. It will be ready to work for
an adult or larger
child passenger.
Securing a Child Restraint in the Right
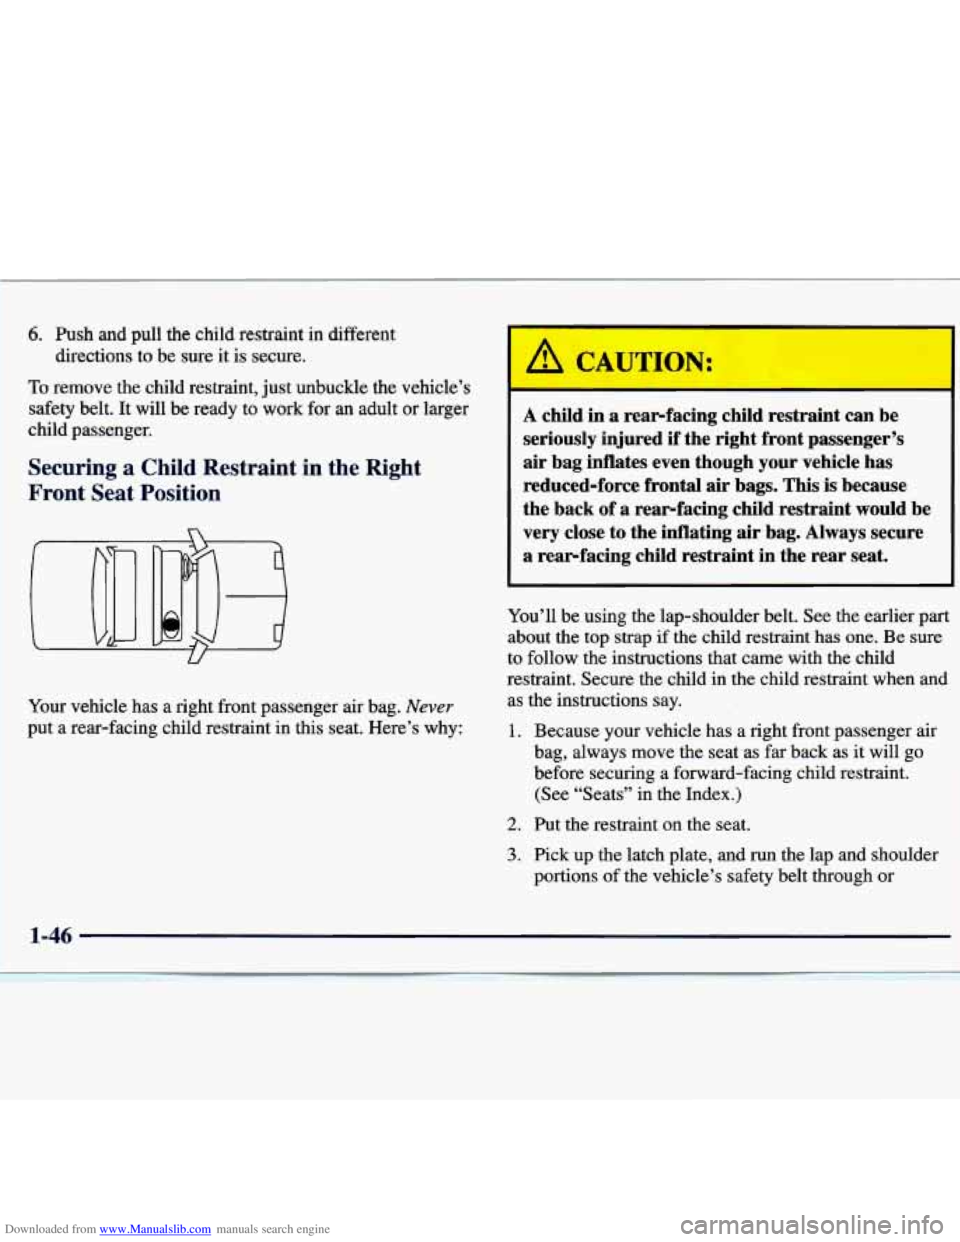
Front Seat Position
Your vehicle has a right front passenger air bag. Never
put a rear-facing child restraint in this seat. Here’s why:
1-46
/1 CAUTION:
A child in a rear-facing child restraint can be
seriously injured
if the right front passenger’s
air bag inflates even though your vehicle has
reduced-force frontal air bags. This is because
the back
of a rearfacing child restraint would be
very close to the inflating air bag. Always secure
a rearfacing child restraint in the rear seat.
Page 60 of 362
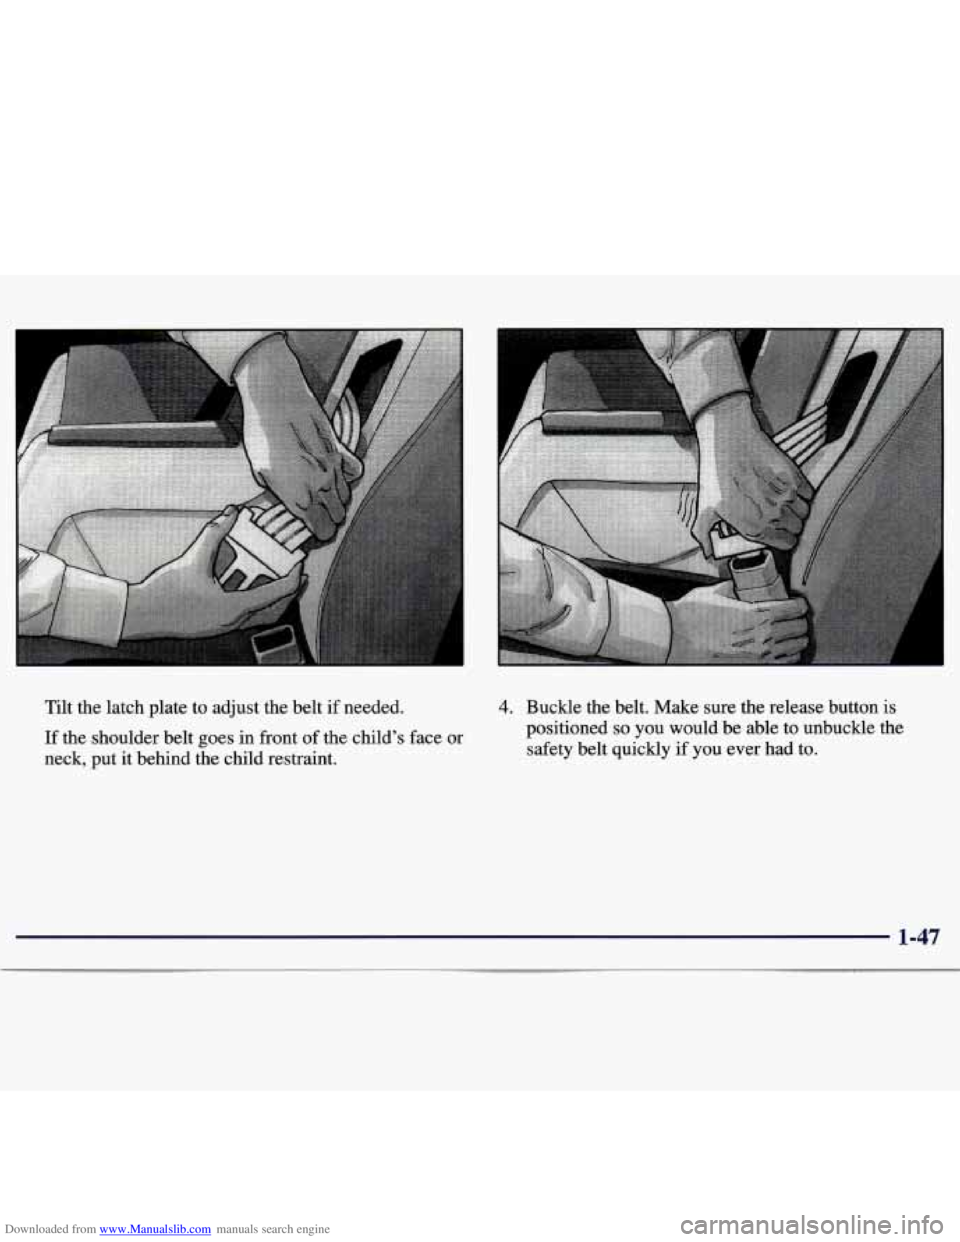
Downloaded from www.Manualslib.com manuals search engine Tilt the latch plate to adjust the belt if needed.
If the shoulder belt goes in front of the child’s face or
neck, put it behind the child restraint.
4. Buckle the belt. Make sure the release button is
positioned
so you would be able to unbuckle the
safety belt quickly if you ever had
to.
1-47