engine coolant CHEVROLET MONTE CARLO 1973 2.G Owners Manual
[x] Cancel search | Manufacturer: CHEVROLET, Model Year: 1973, Model line: MONTE CARLO, Model: CHEVROLET MONTE CARLO 1973 2.GPages: 86, PDF Size: 33.46 MB
Page 31 of 86
Downloaded from www.Manualslib.com manuals search engine _ '\' ' 2
1
5 , / '/ ,
[ e /~
O'v RPM !lOa -"-50
Optional Instrument and
Gauges
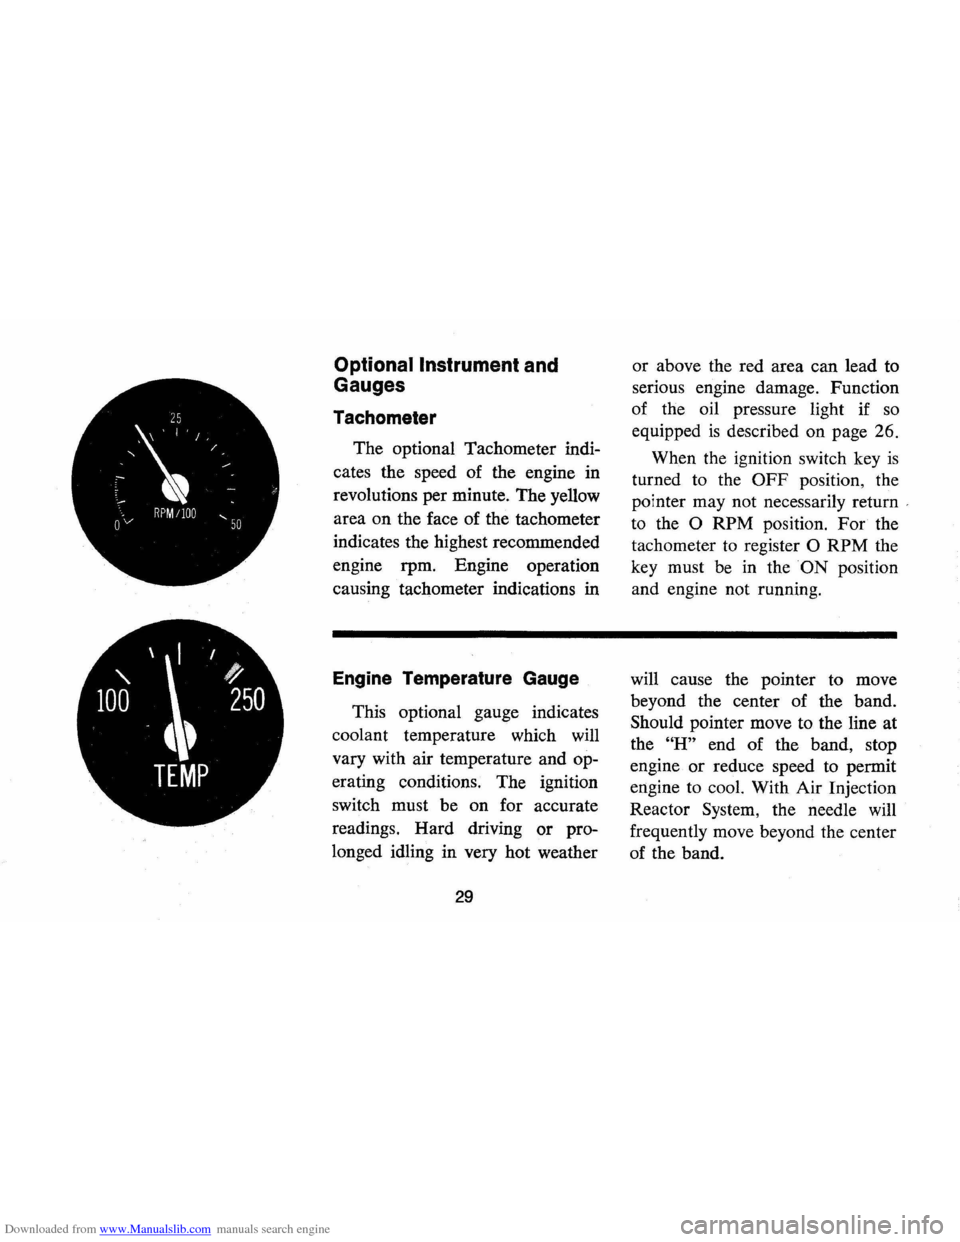
Tachometer
The optional Tachometer indi
cates the speed of the engine in
revolutions per minute. The yellow
area on the face of the tachometer
indicates the highest recommended
engine rpm. Engine operation
causing tachometer indications in
Engine Temperature Gauge
This optional gauge indicates
coolant temperature which will
vary with air temperature and op
erating conditions. The ignition
switch must be on for accurate
readings. Hard driving
or pro
longed idling in very hot weather
29
or above the red area can lead to
serious engine damage. Function
of the oil pressure light if
so
equipped is described on page 26.
When the ignition switch key
is
turned to the OFF position, the
pointer may not necessarily return
'
to the 0 RPM position. For the
tachometer
to register 0 RPM the
key must be in the
ON position
and engine not running.
will cause the pointer to move
beyond the center of the band.
Should pointer move to the line at
the
"H" end of the band, stop
engine
or reduce speed to permit
engine to cool. With Air Injection
Reactor System, the needle will
frequently move beyond the center
of the band.
Page 36 of 86
Downloaded from www.Manualslib.com manuals search engine Heater
The windshield defrosting and
defogging system assists in provid
ing good visibility through desig
nated areas of the windshield under
most inclement weather conditions.
For immediate operation of the ve
hicle , the windshield should be
scraped clear.
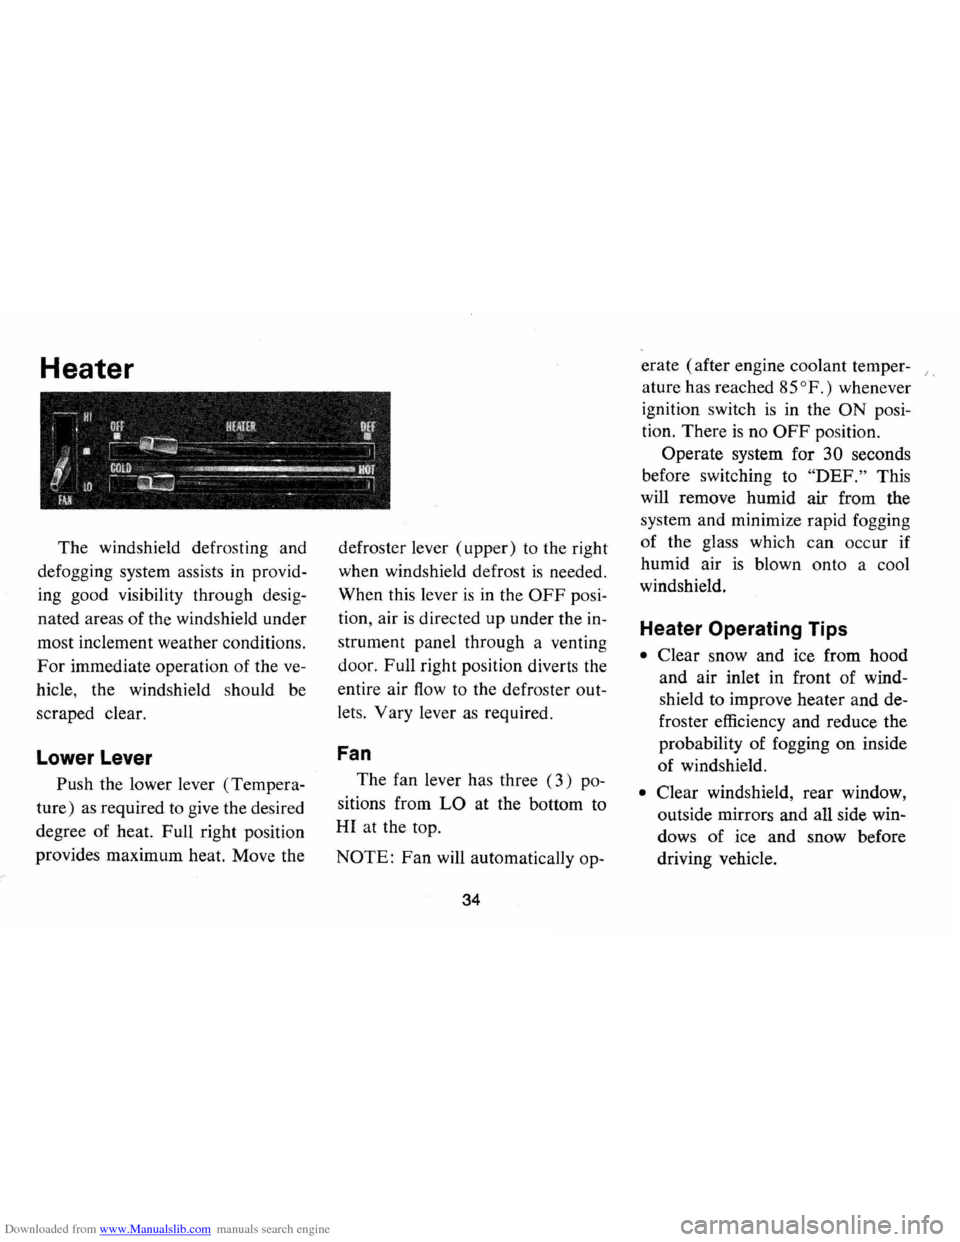
Lower Lever
Push the lower lever (Tempera
ture)
as required to give the desired
degree of heat. Full right position
provides maximum heat. Move the defroster
lever (upper) to the right
when windshield defrost
is needed.
When this lever
is in the OFF posi
tion , air
is directed up under the in
strument panel through a venting
door. Full right position diverts the
entire air
flow to the defroster out
lets. Vary lever
as required.
Fan
The fan lever has three (3) po
sitions from
LO at the bottom to
HI at the top.
NOTE: Fan will automatically op-
34
erate (after engine coolant temper- /,
ature has reached 85°
F.) whenever
ignition switch
is in the ON posi
tion. There
is no OFF position.
Operate system for
30 seconds
before switching to
"DEF." This
will remove humid air from the
system and minimize rapid fogging
of the glass which
can occur if
humid air
is blown onto a cool
windshield.
Heater Operating Tips
• Clear snow and ice from hood
and air inlet in front of wind
shield to improve heater and de
froster efficiency and reduce the
probability of fogging on inside
of windshield.
• Clear windshield, rear window,
outside mirrors and all side win
dows
of ice and snow before
driving vehicle.
Page 44 of 86
Downloaded from www.Manualslib.com manuals search engine 50 miles, provided driveline, axle
and transmission are otherwise
nor
mally operable.
Use only towing equipment spe
cifically designed for this purpose,
following the instructions of the
equipment manufacturer. Also, a
safety chain system must be used.
For such towing, the vehicle park
ing brake must be released, trans
mission must be in neutral and
igni
tion lock turned to OFF position.
Remember that power brake and
steering assists will not be available
when engine
is inoperative.
Emergency Starting
• Never tow the car to start be
cause the surge forward when
the engine starts could cause a
collision with the tow vehicle.
• Engines in vehicles with auto
matic transmissions cannot be
started
by towing or pushing
the car.
ENGINE COOLANT
• To start the car when the Ener
gizer (battery) is discharged, use
a single auxiliary battery or
Energizer of the
same nominal
voltage
(12 volts) as the dis
charged battery, with suitable
jumper cables.
• Make connections as set forth
below under
"J ump Starting
with Auxiliary (Booster)
bat
tery"
to lessen the chance of
personal injury or property
damage.
Do
not use these instructions in
connection with any vehicle having
a positive-ground electrical system
42
-either to start your vehicle or the
other
one-an explosion may result
which could cause personal injury
Page 59 of 86
Downloaded from www.Manualslib.com manuals search engine hood latch assembly and hood
hinge assembly as follows:
1. Wipe off any accumulation of
dirt or contamination on latch
parts.
2. Apply Lubriplate or equivalent
to latch pilot bolts and latch
locking plate.
3. Apply light engine oil to all
pivot points in release mecha
nism, as well
as primary and
secondary latch mechanisms.
4. Lubricate hood hinges.
5. Make hood hinge and latch
mechanism functional check to
assure the assembly
is working
correctly.
Air Conditioning
Have your Chevrolet Dealer
check your Air Conditioning
sys
tem at some time during the winter
months to be sure there has been no
loss in cooling output. During
NOTE: On vehicles equipped with
a
Pour Season Air Conditioning
System, the system will not operate
below ambient temperatures of
300P. regardless of control posi
tion.
the summer,
see your Chevrolet
Dealer immediately if you suspect
the system
is not performing as it
should .
Cooling System Care
Check the coolant level at each
engine oil change.
Engine Cooling System
The recovery type cooling sys
tem is standard on all Chevrolet
passenger cars and
is designed to
maintain the engine at proper op-
57
erating temperatures. The recovery
tank collects coolant that expands
with rising temperature that would
otherwi se overflow from the sys
tem. When the system temperature
drops, the coolant
is drawn from
the recovery tank back into the
radiator by the suction created by
coolant contraction. The cooling
system has been filled at the factory
with a high-quality , inhibited, year
around coolant that meets the stan
dards of General Motors Specifica
tion 1899-M. This coolant solution
provides freezing protection to
-20oP (-32° P in Canada), and
it has been formulated to be used
for two full calendar years or
24,000 miles, whichever first oc
curs, of normal operation without
replacement.
Cooling System Care
Check the coolant level in the
'see thru' coolant recovery tank
Page 60 of 86
Downloaded from www.Manualslib.com manuals search engine and in the radiator at least as fre
quently
as engine oil changes.
NOTE: Do not remove radiator
cap when coolant
is hot and under
pressure.
Level should be at the
"FULL
COLD"
mark on the recovery tank
and at the bottom of the radiator
filler neck when the system
is cold.
During normal warm weather op
eration the coolant should be at
the
"FULL HOT" mark on the re
covery tank.
If the recovery tank is
empty or coolant is below the
"FULL COLD" mark the radiator
level should be checked and cool
ant added to the radiator and re
covery tank
as needed. Use a 50/50
mixture of high-quality ethylene gly
col antifreeze and water for coolant
additions.
If regular additions are
required see your dealer for a cool
ing system check.
NOTE: If recommended quaIily
antifreeze is used, supplemental in
hibitors or additives claiming to
provide increased capability are
not necessary. They may be detri
mental
to the efficient operation of
the system, and represent an un
necessary operating expense.
Every year, the cooling system
should be serviced
as follows:
1 . Wash radiator cap and filler
neck with clean water.
2. Check coolant for proper
level and freeze protection.
3. Pressure test system and radi
ator cap for proper pressure
holding capacity (15 psi).
If
replacement of cap is re
quired, use the special AC
cap designed for coolant re
covery systems, specified for
your car model.
4. Tighten hose clamps and in
spect all hoses. Replace hoses
58
whenever swollen, checked or
otherwise deteriorated.
5. Clean frontal area of radiator
core and air conditioning
condenser.
Every two years or
24,000 miles,
whichever first occurs, the cooling
system should be flushed and re
filled using the following recom
mended procedure:
1. Run engine, with radiator cap
removed, until normal operat
ing temperature
is reached
and upper radiator hose
is hot
(indicates thermostat
is open.)
2. Stop engine and open radiator
drain valve to drain coolant.
(To speed this operation, the
drain plugs in the block can
also be removed.)
Page 61 of 86
Downloaded from www.Manualslib.com manuals search engine 3. If radiator is not equipped
with a drain valve start to
drain system
as follows:
a. With engine stopped , insert
one end of a 5-foot length
of
% inch tubing into the
filler neck until it touches
the bottom of the radiator.
b. Insert any type of large
syringe into the open end
of the tubing and initiate
the siphoning process by
squeezing and releasing the
ball.
c. Completely drain radiator
coolant through the siphon
tube. (To speed this
oper
ation, the drain plugs in
block can also be removed.)
d. Remove tubing (install
block drain plugs,
if re
moved) and add sufficient
water to
fill system.
4. Close drain valve (install
block drain plugs,
if removed)
if so equipped and add
suffi
cient water to fill system.
5 . Run engine, drain and refill
the system,
as described in
steps
1, 2, 3, and 4, a suffi
cient number of times until
the drained liquid
is nearly
colorless.
6. Allow system to drain com
pletely and then close radia
tor drain valve tightly if so
equipped (Install block drain
plugs,
if removed.)
7. Remove recovery cap leaving
hoses in place. Remove
cool
ant recovery tank and empty
of fluid. Plush tank with clean
water, drain and reinstall.
8. Add sufficient ethylene glycol
coolant, meeting GM
specifi
cation 1899-M, to provide the
required freezing and corro-
59
sion protection-at least a 44
percent solution
(_200P). Pill
radiator to the base of the
radiator filler neck and add
sufficient coolant to the
re
covery tank to raise level to
the
"PULL HOT" mark. Re
install recovery tank cap.
9. Run engine, with radiator cap
removed, until normal
operat
ing temperature is reached.
(Radiator upper hose becomes
hot.)
10. With engine idling, add cool
ant until level reaches bottom
of filler neck and install
radi
ator cap making certain ar
rows line up with overflow
tube.
It is the owner's responsibility
to keep the freeze protection at a
level commensurate with the
tem
peratures which may occur in the
area of vehicle operation.
Page 62 of 86
Downloaded from www.Manualslib.com manuals search engine • Maintain cooling system freeze
protection at
.;...200 F or below
to ensure protection against
corrosion and loss of coolant
from boiling , even though freez
ing temperatures are not
ex
pected.
• Add ethylene glycol base cool
ant that meets GM Specification
1899-M when coolant additions
are required because of coolant
loss or to provide additional
protection against freezing at
temperatures lower than
_200 F
(_320 F in Canada).
NOTE: Alcohol or methanol base
coolants or plain water are not
recommended for your Monte
Carlo at any time.
Radiator Pressure Cap
The radiator cap, a 15 lb. pres
sure type, must be installed tightly,
otherwise coolant may be lost and
damage to engine may result from
overheating. Radiator pressure caps
should be checked periodically for
proper operation.
If replacement is
required specify AC.
Thermostat
The cooling system is protected
and controlled by a thermostat in
stalled in the engine coolant outlet
to maintain a satisfactory operating
temperature of the engine. This
thermostat
is designed for continu
ous use through both winter and
summer and need not be changed
seasonally . When replacement
is
necessary, Delco parts are recom
mended.
60
Tires
The factory installed tires on
your car
as shown on the following
Tire Usage chart are designed to
provide the best all around per
formance for normal vehicle op
eration. When inflated
as recom
mended on the tire pressure plac
ard, located on the left door of
your vehicle, they have the load
carrying capacity to operate satis
factorily at all normal highway
speeds.
Tire Care
Tires should be checked regu
larly for proper inflation pressure,
wear, and damage. The following
information will assist you in prop
erly caring for your tires:
Page 73 of 86
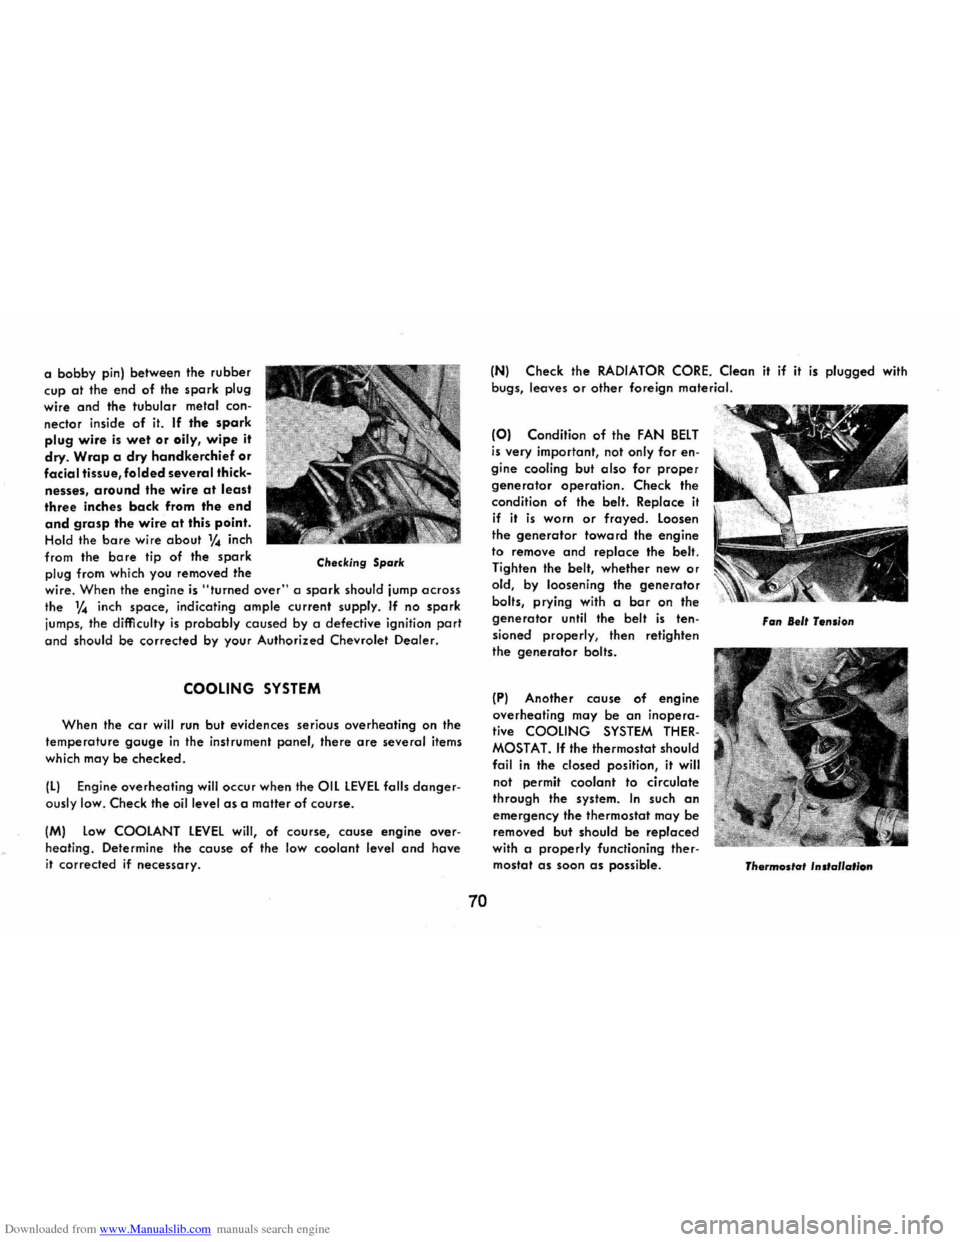
Downloaded from www.Manualslib.com manuals search engine a bobby pin) between the rubber
cup
at the end of the spark plug
wire
and the tubular metal con
nector inside
of it. If the spark plug wire is wet or oily, wipe it
dry.
Wrap a dry handkerchief or
facial tissue, folded several thick
nesses,
around the wire at least
three inches back from the end and grasp the wire at this point.
Hold the bare wire about V4 inch
from the
bore tip of the spark plug from which you removed the Checking Spark
wire. When the engine is "turned over" a spark should jump across
the 1,4 inch space, indicating ample current supply. If no spark
jumps, the difficulty is probably caused by a defective ignition part
and should be corrected by your Authorized Chevrolet Dealer.
COOLING SYSTEM
When the car will run but evidences serious overheating on the
temperature gauge in the instrument panel, there are several items
which may
be checked.
IL) Engine overheating will occur when the OIL LEVEL falls danger
ously low. Check the oil level as a mailer of course.
1M) Low COOLANT LEVEL will, of course, cause engine over
heating . Determine the
cause of the low coolant level and have it corrected if necessary.
70
IN) Check the RADIATOR CORE. Clean it if it is plugged with
bugs, leaves or other foreign material.
(0) Condition of the FAN BELT
is very important, not only for en
gine cooling but
also for proper
generator operation. Check the
condition of the belt. Replace it
if it is worn or frayed. Loosen
the generator toward the engine
to remove
and replace the belt.
Tighten the belt, whether new or
old, by loosening the generator
bolts, prying with a bar on the
generator until the belt is ten
sioned properly , then retighten
the
generator bolts.
(P) Another couse of engine
overheating may be
an inopera
tive
COOLING SYSTEM THER
MOSTAT. If the thermostat should
foil in the dosed position, it will
not permit
coolant to circulate
through the system. In such an
emergency the thermostat may be
removed but should be
replaced with a properly functioning ther
mostat as soon as possible.
Fan Belt Tension
Thermostat
'ns'alla"on
Page 81 of 86
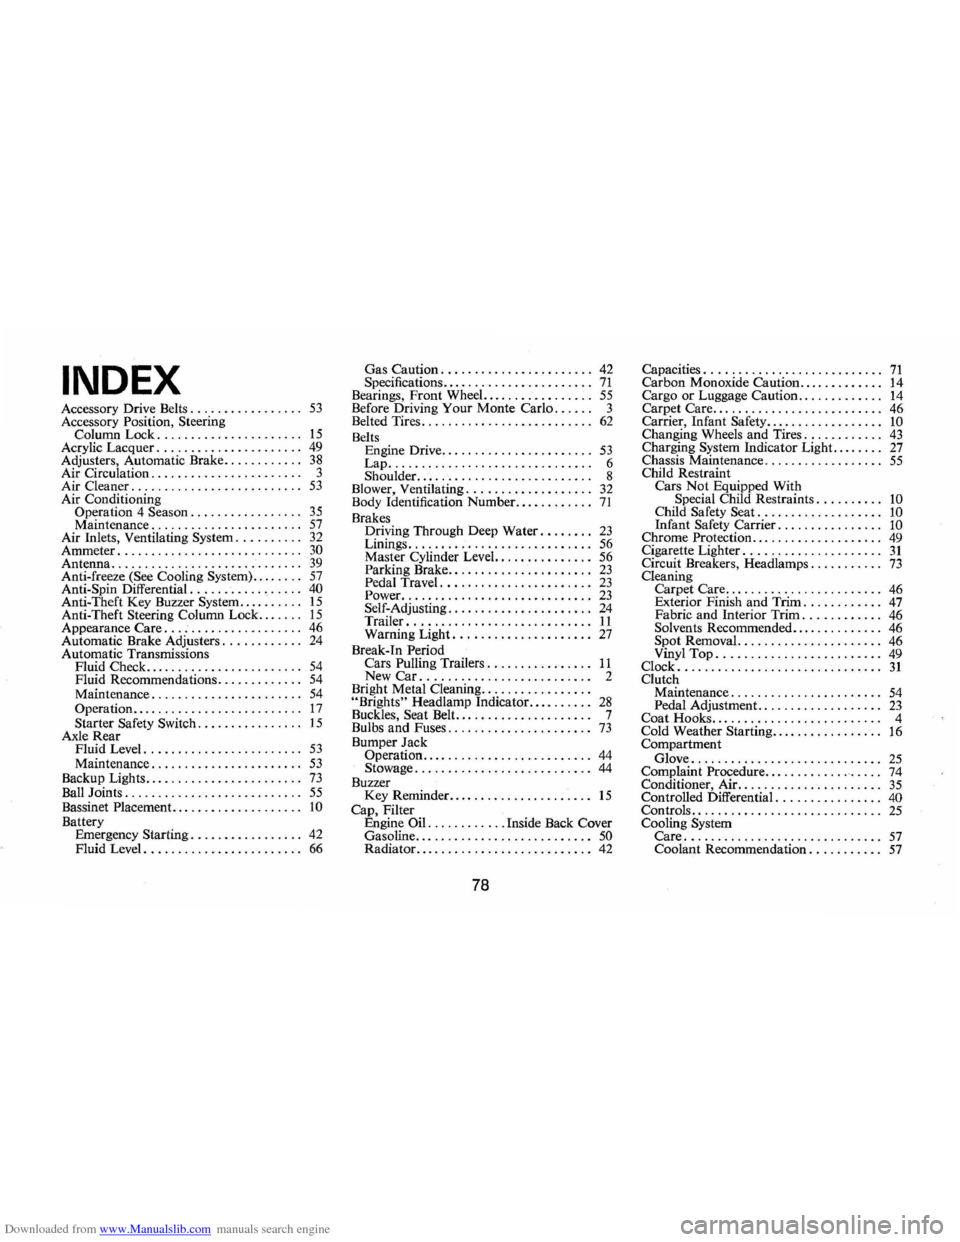
Downloaded from www.Manualslib.com manuals search engine INDEX
Accessory Drive Belts ............ , .... 53 Accessory Position, Steering Column Lock ...................... 15 Acrylic Lacquer ..................... , 49
Adjusters, Automatic Brake. . . . . . . . . . .. 38 Air Circulation . . . . . . . . . . . . . . . . . . . . . .. 3
Air Cleaner. . . . . . . . . . . . . . . . . . . . . . . . .. 53 Air Conditioning
Operation 4 Season. . . . . . . . . . . . . . . .. 35 Maintenance. . . . . . . . . . . . . . . . . . . . . .. 57 Air Inlets, Ventilating System .......... 32 Ammeter ............................ 30 Antenna ............................. 39 Anti-freeze (See Cooling System) ........ 57 Anti-Spin Differential. . . . . . . . . . . . . . . .. 40 Anti-Theft Key Buzzer System . . . . . . . . .. 15 Anti-Theft Steering Column Lock ....... 15 Appearance Care. . . . . . . . . . . . . . . . . . . .. 46 Automatic Brake Adjusters. . . . . . . . . . .. 24 Automatic Transmissions
Fluid Check ........................ 54 Fluid Recommendations. . . . . . . . . . . .. 54 Maintenance ...................... , 54 Operation.. . . . . . . . . . . . . . . . . . . . . . . .. 17 Starter Safety Switch ............... , 15 Axle Rear
Fluid Level. . . . . . . . . . . . . . . . . . . . . . .. 53 Maintenance ...................... , 53 Backup Lights ........................ 73 Ball Joints .......................... , 55 Bassinet Placement. .. . . . . . . . . . . . . . . . .. 10 Battery
Emergency Starting. . . . . . . . . . . . . . . .. 42 Fluid Level. . . . . . . . . . . . . . . . . . . . . . .. 66
Gas Caution ...................... , 42
Specifications. . .. . . . . . . . . . . . . . . . . . .. 71 Bearings, Front Wheel. ............... , 55 Before Driving Your Monte Carlo. . .. .. 3
Belted Tires. . . . . . . . . . . . . . . . . . . . . . . . .. 62
Belts
Engine Drive ...................... , 53 Lap ............................... 6 Shoulder ...... , .. . . .. .. . . . . .. . . .. .. 8
Blower, Ventilating ................... 32 Body Identification Number. ........... 71 Brakes
Driving Through Deep Water ........ 23 Linings ............................ 56
Master Cylinder Level. . . . . . . . . . . . . .. 56
Parking Brake. . . . . . . . . . . . . . . . . . . . .. 23 Pedal Travel ...................... , 23 Power ............................. 23 Self-Adjusting.. .. .. .. .. .. .. . . . . .. .. 24 Trailer ................. ........... 11 Warning Light. .................... 27 Break-In Period
Cars Pulling Trailers. . . . . . . . . . . . . . .. 11 New Car .......................... 2
Bright Metal Cleaning ................ . "Brights" Headlamp Indicator ......... , 28 Buckles, Seat Belt. . . . . . . . . . . . . . . . . . . .. 7
Bulbs and Fuses. . . . . . . . . . . . . . . . . . . . .. 73 Bumper Jack
Operation .......................... 44 Stowage .................... ....... 44 Buzzer
Key Reminder. . . . . . . . . . . . . . . . . . . . .. 15 Cap, Filter
Engine Oil ............ Inside Back Cover
Gasoline ....................... .... 50 Radiator. . . . . . . . . . . . . . . . . . . . . . . . . .. 42
78
Capacities. . . . . . . . . . . . . . . . . . . . . . . . . .. 71 Carbon Monoxide Caution ............. 14
Cargo or Luggage Caution. . . . . . . . . . . .. 14 Carpet Care ................... , .... " 46
Carrier, Infant Safety .................. 10 Changing Wheels and Tires. . . . . . . . . . .. 43 Charging System Indicator Light. ..... " 27 Chassis Maintenance .................. 55 Child Restraint
Cars Not Equipped With
Special Child Restraints. . . . . . . . .. 10 Child Safety Seat ............... .. " 10 Infant Safety Carrier. . . . . . . . . . . . . . .. 10 Chrome Protection.. . . . . . . . . . . . . . . . . .. 49 Cigarette Ligh ter. . . . . . . . . . . . . . . . . . . .. 31 Circuit Breakers, Headlamps ......... " 73 Cleaning
Carpet Care ...................... " 46
Exterior Finish and Trim. . . . . . . . . . .. 47 Fabric and Interior Trim. . . . . . . . . . .. 46 Solvents Recommended .............. 46 Spot Removal. . . . . . . . . . . . . . . . . . . . .. 46 Vinyl Top. . . . . . . . . . . . . . . . . . . . . . . .. 49
Clock ............................... 31 Clutch Maintenance. . . . . . . . . . . . . . . . . . . . . .. 54 Pedal Adjustment. . . . . . . . . . . . . . . . . .. 23 Coat Hooks... . .. .. . . .... .. . . .... . ... 4
Cold Weather Starting ................. 16 Compartment
Glove ............................. 25 Complaint Procedure .................. 74 Conditioner, Air ... , .................. 35 Controlled Differential .............. " 40 Controls ............................. 25 Cooling System Care .............................. 57 Coolant Recommendation. . . . . . . . . .. 57
Page 82 of 86
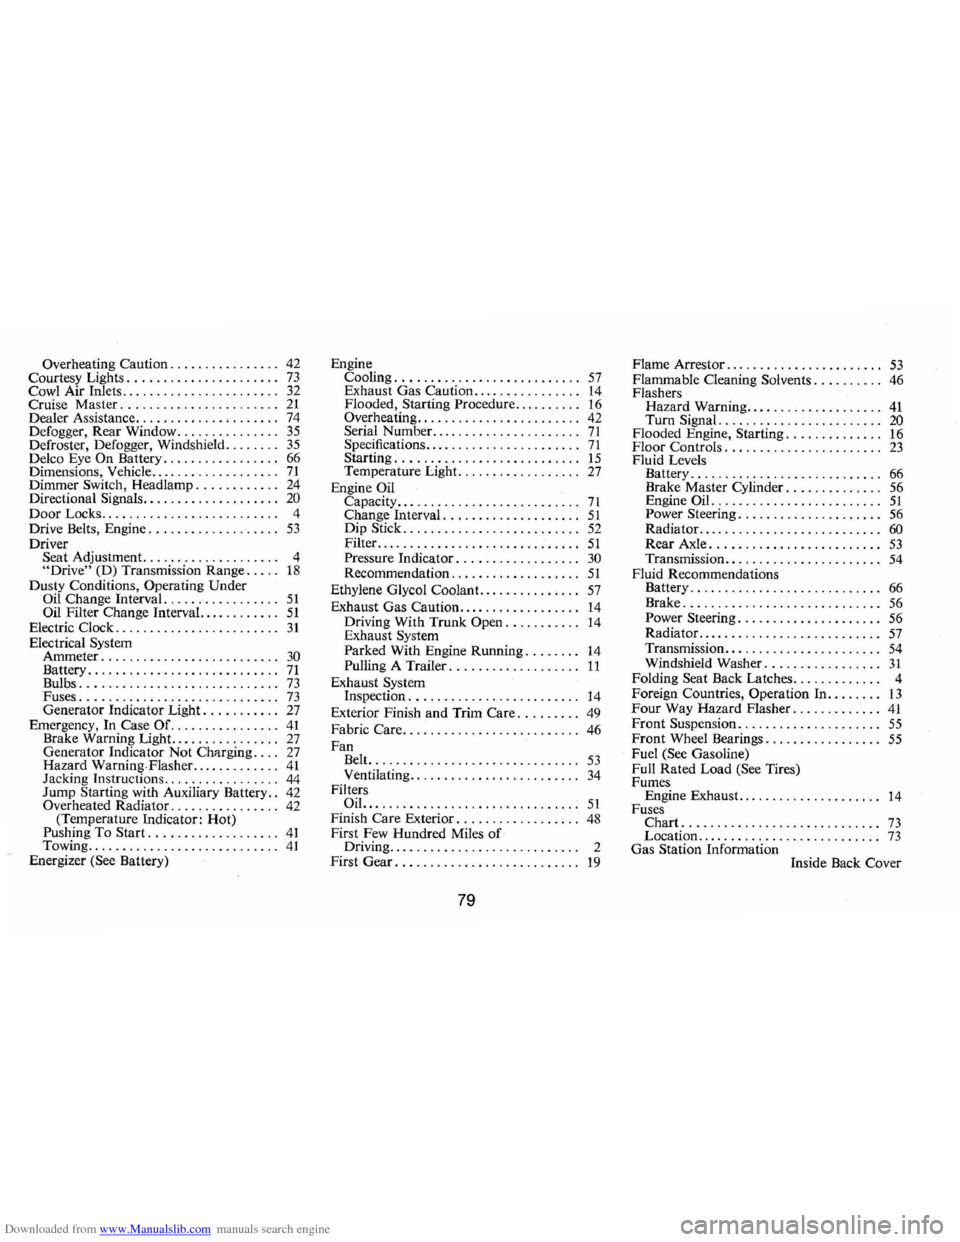
Downloaded from www.Manualslib.com manuals search engine Overheating Caution. . . . . . . . . . . . . . .. 42
Courtesy Lights ........... ........... 73 Cowl Air Inlets ....................... 32 Cruise Master ....................... 21 Deale r Assistance ............. , ...... , 74 Defogger, Rear Window ............... 35 Defroster, Defogger, Windshield ........ 35 Delco Eye On Battery. . . . . . . . . . . . . . . .. 66 Dimensions, Vehicle .................. , 71 Dimmer Switch, Headlamp. . . . . . . . . . .. 24 Directional Signals. . . . . . . . . . . . . . . . . . .. 20 Door Locks. . . . . . . . . . . . . . . . . . . . . . . . .. 4 Drive Belts, Engine. . . . . . . . . . . . . . . . . .. 53 Driver Seat Adjustment ................... , 4 "Drive" (D) Transmission Range ..... 18 Dusty Conditions, Operating Under
Oil Change Interval. ................ 51 Oil Filter Change Interval.. . . . . . . . . .. 51 Electric Clock ........................ 31 Electrical System Ammeter .......................... 30 Battery ............ ................ 71 Bulbs ............................. 73 Fuses ..... , ....................... 73 Generator Indicator Light. . . . . . . . . .. 27 Emergency, In Case Of. ............... 41 Brake Warning Light. . . . . . . . . . . . . . .. 27 Generator Indicator Not Chllrging ... , 27 Hazard Warning· Flasher. ............ 41 Jacking Instructions ................. 44 Jump Starting with Auxiliary Battery .. 42 Overheated Radiator. . . . . . . . . . . . . . .. 42 (Temperature Indicator: Hot) Pushing To Start. .................. 41 Towing ............................ 41 Energizer (See Battery) Engine
Cooling
........................... 57 Exhaust Gas Caution ................ 14 Flooded , Starting Procedure ......... , 16 Overheating. . . . . . . . . . . . . . . . . . . . . . .. 42 Serial Number. ....... .............. 71 Specifications .............. ..... ... , 71 Starting. . . . . . . . . . . . . . . . . . . . . . . . . .. 15 Temperature Light. . . . . . . . . . . . . . . . .. 27 Engine Oil Capacity.. . .. .. .. .. . . .. .. . . .. .. .. .. 71 Change Interval. . . . . . . . . . . . . . . . . . .. 51 Dip Stick. . . . . . . . . . . . . . . . . . . . . . . . .. 52 Filter. ....................... : . . . .. 51 Pressure Indicator . . . . . . . . . . . . . . . . .. 30 Recommendation. . . . . . . . . . . . . . . . . .. 51
Ethylene Glycol Coolant. . . . . . . . . . . . . .. 57
Exhaust Gas Caution ................. , 14 Driving With Trunk Open. . . . . . . . . .. 14
Exhaust System
Parked With Engine Running. . . . . . .. 14 Pulling A Trailer .................. , 11
Exhaust System Inspection ........................ , 14
Exterior Finish and Trim Care. . . . . . . .. 49
Fabric Care .... " .................... 46 Fan
Belt. .............................. 53 Ventilating. . . . . . . . . . . . . . . . . . . . . . . .. 34 Filters OiL ........... ....... , .. ......... , 51 Finish Care Exterior. . . . . . . . . . . . . . . . .. 48 First Few Hundred Miles of Driving........... ............. .. .. 2
First Gear. . . . . . . . . . . . . . . . . . . . . . . . . .. 19
79
Flame Arrestor ..... ........ ......... , 53 Flammable Cleaning Solvents. . . . . . . . .. 46 Flashers
Hazard Warning .................... 41 Turn Signal. . . . . . . . . . . . . . . . . . . . . . .. 20 Flooded Engine, Starting. . . . . . . . . . . . .. 16 Floor Controls. . . . . . . . . . . . . . . . . . . . . .. 23 Fluid Levels
Battery ...................... ..... , 66 Brake Master Cylinder. . . . . . . . . . . . .. 56 Engine Oil. ........................ 51 Power Steering. . . . . . . . . . . . . . . . . . . .. 56 Radiator. . . . . . . . . . . . . . . . . . . . . . . . . .. 60 Rear Axle. . . . . . . . . . . . . . . . . . . . . . . .. 53 Transmission. . . . . . . . . . . . . . . . . . . . . .. 54 Fluid Recommendations
Battery ........................... , 66 Brake ............................. 56 Power Steering . . . . . . . . . . . . . . . . . . . .. 56 Radiator. . . . . . . . . . . . . . . . . . . . . . . . . .. 57 Transmission .... ................... 54 Windshield Washer ................ , 31 Folding Seat Back Latches ............ , 4 Foreign Countries, Operation In ...... .. 13 Four Way Hazard Flasher ....... " .... 41 Front Suspension . ................... , 55 Front Wheel Bearings ................ , 55 Fuel (See Gasoline)
Full Rated Load (See Tires)
Fumes Engine Exhaust. . . . . . . . . . . . . . . . . . .
.. 14 Fuses Chart. ......................... .. , 73 Location .................... ...... , 73 Gas Station Information
Inside Back Cover