change time CHEVROLET MONTE CARLO 1995 5.G Owners Manual
[x] Cancel search | Manufacturer: CHEVROLET, Model Year: 1995, Model line: MONTE CARLO, Model: CHEVROLET MONTE CARLO 1995 5.GPages: 324, PDF Size: 16.74 MB
Page 4 of 324
Downloaded from www.Manualslib.com manuals search engine 7
, I. ..
GENERAL MOTORS, GM and the GM Emblem,
CHEVROLET and the Chevrolet Emblem and the name
MONTE CARLO are registered trademarks of General
Motors Corporation.
This manual includes the latest information at the time it
was printed. We reserve the right to make changes in the
product after that time without further notice. For
vehicles first sold in Canada, substitute the name
“General Motors of Canada Limited” for Chevrolet
Motor Division whenever it appears in this manual.
Please keep this manual in your Chevrolet,
so it will be
there if you ever need it when you’re on the road. If you
sell the vehicle, please leave this manual in
it so the new
owner can use it.
Litho in
U.S.A.
Part NO. 10254583 B Second Printing
fi-3 We support voluntary
technician certification.
WE SUPPORT VOLUNTARY TECHNICIAN
CERTIFICATION THROUGH
National Institute for
AUTOMOTIVE SERVICE EXCELLENCE
L
For Canadian Owners Who Prefer a
French Language Manual
Aux propriktaires canadiens: Vous pouvez vous procurer
un exemplaire de ce guide en franpis chez votre
concessionaire ou au DGN Marketing Services Ltd.,
1500 Bonhill Rd., Mississauga, Ontario L5T 1C7.
‘Copyright
G eneral Motors Corporation 1994
All Rights Reserved
ii
Page 62 of 324
Downloaded from www.Manualslib.com manuals search engine Matching Transmitter(s) To Your Vehicle
Each key chain transmitter is coded to prevent another
transmitter from unlocking your vehicle.
If a transmitter
is lost or stolen, a replacement can be purchased through
your dealer. Remember to bring any remaining
transmitters with you when you go to your dealer. When
the dealer matches the replacement transmitter to your
vehicle, the remaining transmitters must also be
matched. Once the new transmitter
is coded, the lost
transmitter
will not unlock your vehicle.
You can match a transmitter to as many different
vehicles as you own, provided they are equipped with
exactly the same model system. (General Motors offers
several different models of these systems on their
vehicles.) Each vehicle can have only two transmitters
matched to it.
See your dealer to match transmitters to another vehicle.
Battery Replacement
Under normal use, the batteries in your key chain
transmitter should last about two years.
You can tell the batteries are weak if the transmitter
won’t work at the normal range in any location.
If you
have to get close to your vehicle before the transmitter
works, it’s probably time to change the batteries.
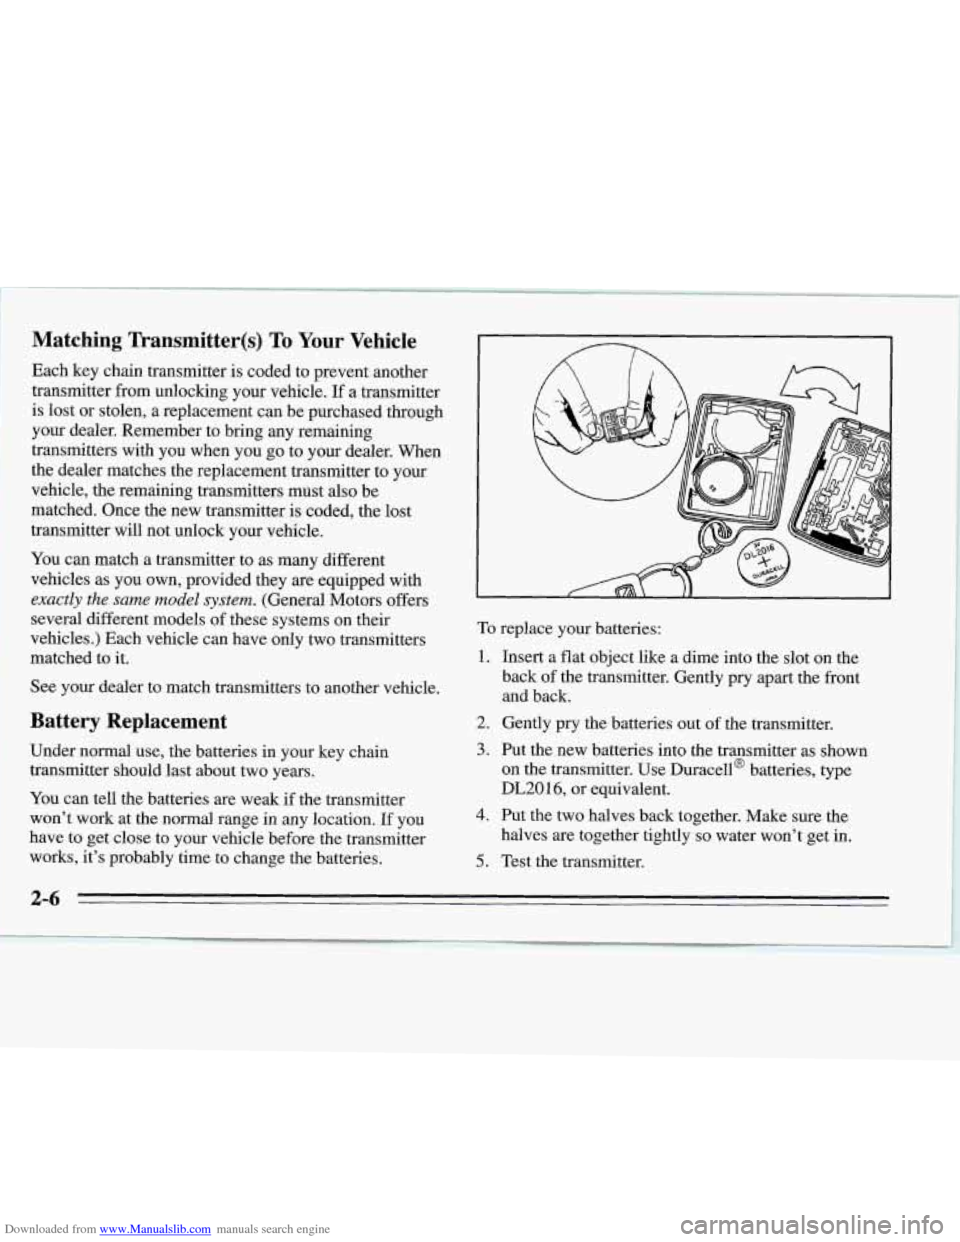
To replace your batteries:
1. Insert a flat object like a dime into the slot on the
back
of the transmitter. Gently pry apart the front
and back.
2. Gently
pry the batteries out of the transmitter.
3. Put the new batteries into the transmitter as shown
on the transmitter. Use Duracell@ batteries, type
DL20
16, or equivalent.
4. Put the two halves back together. Make sure the
halves are together tightly
so water won’t get in.
5. Test the transmitter.
2-6
Page 68 of 324
Downloaded from www.Manualslib.com manuals search engine To start your engine:
1. Without pushing the accelerator pedal, turn your
ignition key to START. When the engine starts, let
go of the key. The idle speed will go down as your
engine gets warm.
NOTICE:
Holding your key in mART for longer than
15 seconds at a time will cause your battery to
be drained much sooner. And the excessive heat
can damage your starter motor.
2. If your engine won’t start (or starts but then stops), it
could be flooded with too much gasoline. Try
pushing your accelerator pedal all the way to the
floor and holding it there as you hold the key in
START for about three seconds. If the vehicle starts
briefly but then stops again, do the same thing, but
this time keep the pedal down for five or six seconds.
This clears the extra gasoline from the engine.
NOTICE:
Your engine is designed to work with the
electronics in your vehicle.
If you add electrical
parts or accessories, you could change the way the
fuel injection system operates. Before adding
electrical equipment, check with your dealer.
If you
don’t, your engine might not perform properly.
If you ever have to have your vehicle towed, see
the part of this manual that tells how to do it
without damaging your vehicle. See “Towing
Your Vehicle” in the Index.
Driving Through Deep Standing
Water
NOTICE:
If you drive too quickly through deep puddles
or standing water, water can come in through
your engine’s air intake and badly damage your
engine. Never drive through water that is slightly
lower than the underbody
of your vehicle. If you
can’t avoid deep puddles or standing water, drive
through them very slowly.
2-12
Page 82 of 324
Downloaded from www.Manualslib.com manuals search engine As you signal a turn or a lane change, if the arrow
flashes faster than normal, a signal bulb may be burned
out and other drivers won’t
see your turn signal.
If a bulb is burned out, replace it to help avoid an
accident. If the green arrows don’t
go on at all when you
signal a turn, check the fuse (see “Fuses and Circuit
Breakers’’ in the Index) and for burned-out bulbs.
A chime will sound if you leave your turn signal on for
more than
1/2 mile (0.8 km).
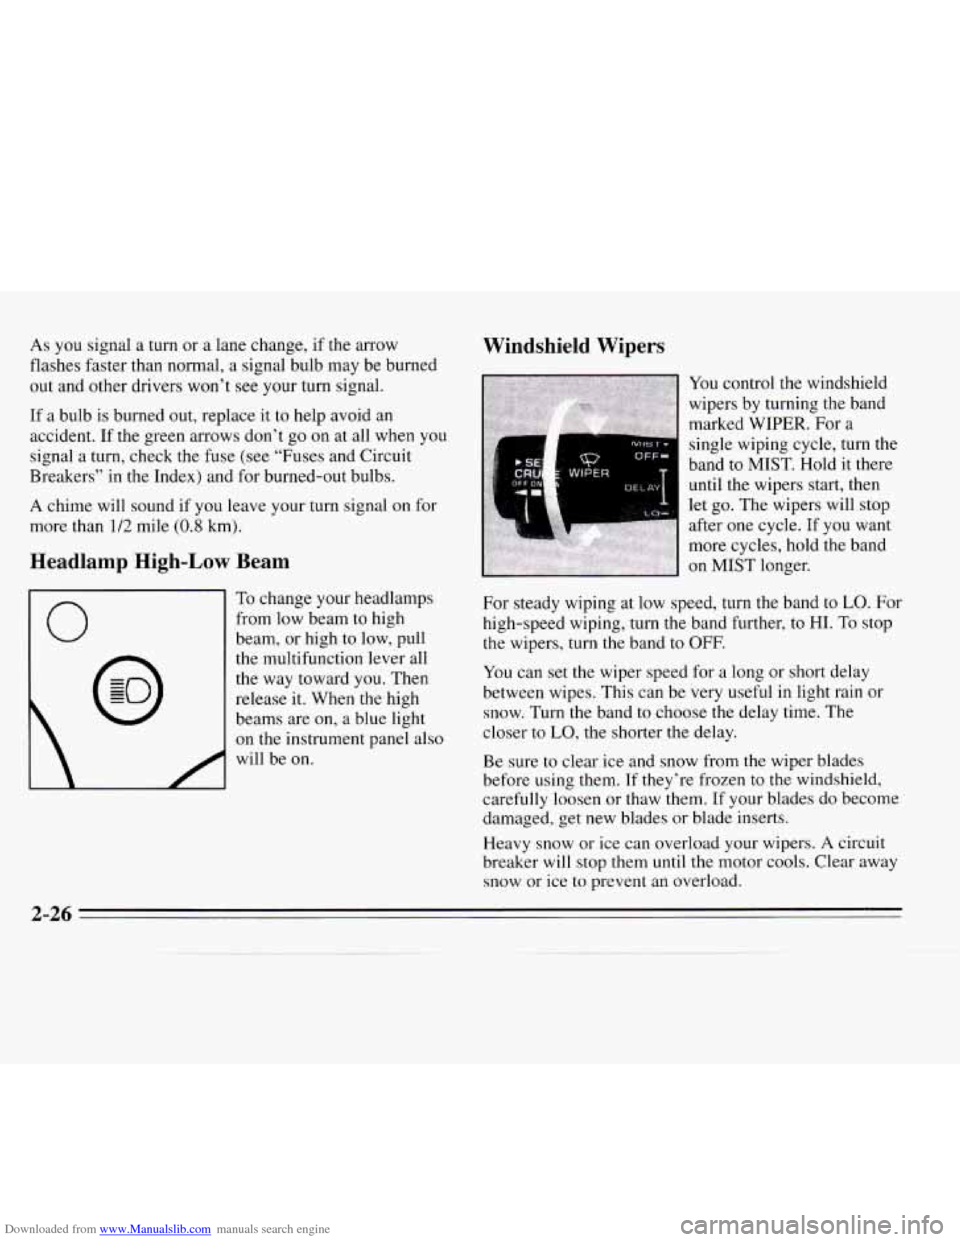
Headlamp High-Low Beam Windshield Wipers
You control the windshield
wipers by turning the band
marked WIPER. For a
6s WIPER
single wiping cycle, turn the
band to
MIST. Hold it there
until the wipers start, then
let
EO. The wipers will stop
0
To change your headlamps
from low beam
to high
beam, or high to low, pull
the multifunction lever all
the way toward you. Then
release it. When
the high
beams are on, a blue light
on the instrument panel also
will be on.
For steady wiping at low speed, turn the band to LO. For
high-speed wiping, turn the band further, to
HI. To stop
the wipers, turn the band
to OFF.
You can set the wiper speed for a long or short delay
between wipes. This can be very useful in light rain or
snow.
Turn the band to choose the delay time. The
closer to
LO, the shorter the delay.
Be sure to clear ice and
snow from the wiper blades
before using them.
If they’re frozen to the windshield,
carefully loosen or thaw them, If your blades
do become
damaged, get new blades or blade inserts.
Heavy snow or ice can overload your wipers.
A circuit
breaker will stop them until the motor cools. Clear away
snow or ice to prevent an overload.
2-26
Page 88 of 324
Downloaded from www.Manualslib.com manuals search engine Daytime Running Lamps (Canada Only)
Daytime Running Lamps (DRL) make it easier to see
the front of your vehicle during the day. DRL can be
helpful when it’s raining and in the short periods after
dawn and before sunset. Several countries, including
Canada, require
DRL.
A light sensor on top of the instrument panel makes the
DRL work,
so be sure it isn’t covered.
The DRL system will make your low-beam headlamps
come on at reduced brightness in daylight when:
0 The ignition is on,
0 The headlamp switch is off, and
0 The parking brake is released.
When the
DRL are on, only your low-beam headlamps
will be on. The taillamps, sidemarker and other lamps
won’t be
on. Your instrument panel won’t be lit up
either.
When it’s dark enough outside, your low-beam
headlamps will change to full brightness. The other
lamps that come on with your headlamps will also come
on.
When it’s bright enough outside, the regular lamps will
go off, and your low-beam headlamps change to the
reduced brightness of DRL.
To idle your vehicle with the DRL
off, set the parking
brake while the ignition
is in OFF or LOCK. Then start
your vehicle. The DRL will stay off until you release the
parking brake.
As with any vehicle, you should turn on the regular
headlamp system any time you need it.
Interior Lamps
When any door is opened, several lamps come on. These
lamps are courtesy lamps. They make it easy for you
to
enter and leave your vehicle. You can also turn these
lamps on by moving the dial near the headlamp knob all
the way
up.
Some of the lamps have switches so you can turn them
on, even when the doors are closed. These lamps are
reading lamps. To avoid draining your battery, be sure to
turn off all reading lamps when leaving your vehicle.
2-32
Page 123 of 324
Downloaded from www.Manualslib.com manuals search engine AM FM: Press this button to play the radio when a disc
is in the player. The letters
CD will go off the display.
CD AUX: Press this button to change to the disc
function when the radio is on.
CD will appear on the
display when the disc is active.
EJECT Press this button to remove the disc. The radio
will play.
If you turn off the ignition or radio with
a disc in the
player,
it will stay in the player. When you turn on the
ignition or system, the disc will start playing where
it
was stopped. If you press EJECT but don’t remove the
disc within
25 seconds, the player will pull the disc back
in
to protect it.
THEFTLOCK TM
Your system has this feature if it shows THEFTLOCK
on its face. THEFTLOCK is a theft-deterrent feature
that can
be used or ignored. If you ignore it, your system
will play normally. If you use it, your system can’t be
turned on if it is stolen because
it locks anytime battery
power is removed. To unlock it,
a code must be entered.
These instructions
will tell you how to enter a code into
your system. They
also tell you how to unlock the
system with your code and how to shut off the
THEFTLOCK system.
Entering a Code
1. Write down any number from 000 to 1999. This is
your code.
2. Turn the ignition to ACC or RUN.
3. Turn the radio off.
4. Press the 1 and 4 preset buttons at the same time and
hold until
“- - -7’ shows on the display.
You now have only 15 seconds between each of the
following steps.
5. Press MN and “OOO” will appear on the display.
6. Press MN again and hold until the last two digits of
your code appear.
7. Press and hold HR until the first digit or digits of
your code appear.
8. Press AM FM after you make sure the code matches
the one you wrote down. “rEP” will appear on the
display, meaning you should repeat Steps
5 through 7.
should appear on the display, meaning your system is
secured. If your ignition is off, THEFTLOCK will
flash in the display.
Store the paper with your code written on it
in a safe
place (not
in your vehicle).
9. After you repeat the steps, press AM FM. SEC
3-13
Page 136 of 324
Downloaded from www.Manualslib.com manuals search engine Remember: Anti-lock doesn’t change the time you need
to get your foot up to the brake pedal. If you get too
close to the vehicle in front of you, you won’t have time
to apply your brakes if that vehicle suddenly slows or
stops. Always leave enough room up ahead
to stop, even
though
you have anti-lock brakes.
To Use Anti-Lock
Don’t pump the brakes. Just hold the brake pedal down
and let anti-lock work for you.
You may feel the system
worhng, or you may notice some noise, but this is
normal. When your anti-lock system
is adjusting brake
pressure to help avoid a braking skid, the
LOW TRAC
light will come on. See “Anti-Lock Brake System
Active Light” in the Index.
Braking in Emergencies
Use your anti-lock braking system when you need to.
With anti-lock, you can steer and brake at the same
time.
In many emergencies, steering can help you more
than even the
very best braking.
Steering
Power Steering
If you lose power steering assist because the engine
stops or the system is not functioning, you can steer but
it will take much more effort.
Steering Tips
Driving on Curves
It’s important to take curves at a reasonable speed.
A
lot of the “driver lost control” accidents mentioned on
the news happen on curves. Here’s why:
Experienced driver
or beginner, each of us is subject to
the same laws of physics when driving on curves. The
traction of the tires against the road surface makes
it
possible for the vehicle to change its path when you turn
the front wheels. If there’s no traction, inertia will keep
the vehicle going in the same direction. If you’ve ever
tried to steer
a vehicle on wet ice, you’ll understand this.
Page 140 of 324
Downloaded from www.Manualslib.com manuals search engine Check your mirrors, glance over your shoulder, and
start your left lane change signal before moving out
of the right lane to pass. When you are far enough
ahead of the passed vehicle
to see its front in your
inside mirror, activate your right lane change signal
and move back into the right lane. (Remember that
your right outside mirror is convex. The vehicle you
just passed may seem to be farther away from you
than it really
is.)
Try not to pass more than one vehicle at a time on
two-lane roads. Reconsider before passing the next
vehicle.
Don’t overtake a slowly moving vehicle too rapidly.
Even though the brake lights are not flashing, it may
be slowing down or starting to turn.
0 If you’re being passed, make it easy for the
following driver
to get ahead of you. Perhaps you
can ease a little to the right.
Loss of Control
Let’s review what driving experts say about what
happens when the three control systems (brakes, steering and acceleration) don’t have enough friction where the
tires meet the road to do what the driver has asked.
In any emergency, don’t give up. Keep trying to steer
and constantly seek an escape route
or area of less
danger.
Skidding
In a skid, a driver can lose control of the vehicle.
Defensive drivers avoid most skids by taking reasonable
care suited to existing conditions, and by not
“overdriving” those conditions. But
skids are always
possible.
The three types of skids correspond to your Chevrolet’s
three control systems. In the braking skid your wheels
aren’t rolling. In the steering or cornering skid, too
much speed or steering in a curve causes tires
to slip and
lose cornering force. And
in the acceleration skid too
much throttle causes the driving wheels to spin.
4-12
Page 156 of 324
Downloaded from www.Manualslib.com manuals search engine Towing a Trailer
NOTICE:
Pulling a trailer improperly can damage your
vehicle and result in costly repairs not covered by
your warranty.
To pull a trailer correctly, follow
the advice in this part, and see your Chevrolet dealer for important information about towing a
trailer with your vehicle.
Your vehicle can tow a trailer. To identify what the
vehicle trailering capacity is for your vehicle, you
should read the information in “Weight of the Trailer’’
that appears later in this section. But trailering is
different than just driving your vehicle by itself.
Trailering means changes in handling, durability, and
fuel economy. Successful, safe trailering takes correct
equipment, and it has to be used properly.
That’s the reason for this part. In
it are many
time-tested, important trailering tips and safety rules.
Many of these are important for your safety and that of
your passengers.
So please read this section carefully
before you pull
a trailer.
Load-pulling components such
as the engine, transaxle,
wheel assemblies, and tires are forced to work harder
against the drag of the added weight. The engine is
required to operate at relatively higher speeds and under
greater loads, generating extra heat. What’s more, the
trailer adds considerably to wind resistance, increasing
the pulling requirements.
Page 210 of 324
Downloaded from www.Manualslib.com manuals search engine NOTICE:
If the air cleaner is off, a backfire can cause a
damaging engine fire. And, dirt can easily get
into your engine, which wiIl damage it. Always
have the air cleaner
in place when you’re driving.
Automatic Transaxle Fluid
When to Check and Change
A good time to check your automatic transaxle fluid
level is when
the engine oil is changed. Refer to the
Maintenance Schedule to determine when to change
your fluid. See “Scheduled Maintenance Services” in
the Index.
How to Check
Because this operation can be a little difficult, you may
choose to have this done at your Chevrolet dealer
Service Department.
If you do it yourself, be sure to follow all the
instructions here, or you could get a false reading on the
dipstick.
6-16