manual radio set CHEVROLET MONTE CARLO 2006 6.G Owners Manual
[x] Cancel search | Manufacturer: CHEVROLET, Model Year: 2006, Model line: MONTE CARLO, Model: CHEVROLET MONTE CARLO 2006 6.GPages: 392, PDF Size: 2.34 MB
Page 175 of 392
Exiting the Feature Settings Menu
The feature settings menu will be exited when any of
the following occurs:
The vehicle is shifted out of PARK (P).
The vehicle is no longer in RUN.
The trip/fuel or vehicle information DIC buttons are
pressed.
The end of the feature settings menu is reached
and exited.
A 40 second time period has elapsed with no
selection made.
Audio System(s)
Determine which radio your vehicle has and then read
the pages following to familiarize yourself with its
features.
Driving without distraction is a necessity for a safer
driving experience. SeeDefensive Driving on page 4-2.
By taking a few moments to read this manual and
get familiar with your vehicle’s audio system, you can
use it with less effort, as well as take advantage of
its features. While your vehicle is parked, set up your
audio system by presetting your favorite radio stations,
setting the tone, and adjusting the speakers.Then, when driving conditions permit, you can tune to
your favorite stations using the presets and steering
wheel controls if the vehicle has them.
{CAUTION:
This system provides you with a far greater
access to audio stations and song listings.
Giving extended attention to entertainment
tasks while driving can cause a crash and you
or others can be injured or killed. Always keep
your eyes on the road and your mind on the
drive — avoid engaging in extended searching
while driving.
Keeping your mind on the drive is important for safe
driving. For more information, seeDefensive Driving on
page 4-2.
3-59
Page 178 of 392
Radio with CD (Base)
Playing the Radio
O
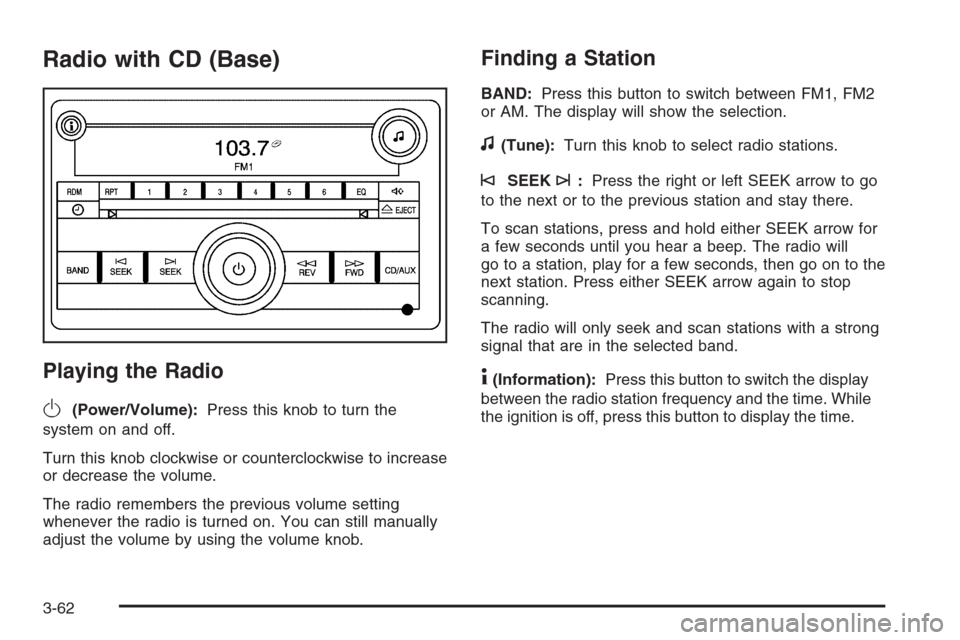
(Power/Volume):Press this knob to turn the
system on and off.
Turn this knob clockwise or counterclockwise to increase
or decrease the volume.
The radio remembers the previous volume setting
whenever the radio is turned on. You can still manually
adjust the volume by using the volume knob.
Finding a Station
BAND:Press this button to switch between FM1, FM2
or AM. The display will show the selection.
f(Tune):Turn this knob to select radio stations.
©SEEK¨:Press the right or left SEEK arrow to go
to the next or to the previous station and stay there.
To scan stations, press and hold either SEEK arrow for
a few seconds until you hear a beep. The radio will
go to a station, play for a few seconds, then go on to the
next station. Press either SEEK arrow again to stop
scanning.
The radio will only seek and scan stations with a strong
signal that are in the selected band.
4(Information):Press this button to switch the display
between the radio station frequency and the time. While
the ignition is off, press this button to display the time.
3-62
Page 179 of 392
Setting Preset Stations
Up to 18 stations (six FM1, six FM2, and six AM), can
be programmed on the six numbered pushbuttons,
by performing the following steps:
1. Turn the radio on.
2. Press BAND to select FM1, FM2, or AM.
3. Tune in the desired station.
4. Press and hold one of the six numbered
pushbuttons for three seconds until you hear a
beep. Whenever that pushbutton is pressed
and released, the station that was set will return.
5. Repeat the Steps 2-4 for each pushbutton.
Setting the Tone (Bass/Treble)
BASS/TREB (Bass/Treble):To adjust the bass or
treble, press the tune knob or the BASS/TREBLE
pushbutton until the desired tone control label appears
on the display. Turn the tune knob clockwise or
counterclockwise to increase or decrease the setting.
You can also adjust the setting by pressing either
the SEEK, FWD, or REV buttons. The display will show
the current bass or treble level. If a station’s frequency
is weak, or if there is static, decrease the treble.EQ (Equalization):Press this button to select preset
equalization settings.
To return to the manual mode, press the EQ button until
Manual appears on the display or start to manually
adjust the bass or treble by pressing the tune knob.
Adjusting the Speakers (Balance/Fade)
`
BAL/FADE (Balance/Fade):To adjust the balance
or fade, press this button or the tune knob until the
desired speaker control label appears on the display.
Turn the tune knob clockwise or counterclockwise to
adjust the setting. You can also adjust the setting by
pressing either the SEEK, FWD, or REV buttons.
Radio Messages
Calibration Error:The audio system has been
calibrated for your vehicle from the factory. If Calibration
Error appears on the display, it means that the radio
has not been con�gured properly for your vehicle and it
must be returned to your dealer for service.
Loc:This message is displayed while the
THEFTLOCK
®system has locked up the radio.
Take the vehicle to your dealer for service.
If any error occurs repeatedly or if an error cannot be
corrected, contact your dealer.
3-63
Page 186 of 392
To quickly adjust bass, midrange, or treble to the middle
position, press the pushbutton positioned under the
BASS, MID, or TREB label for more than two seconds.
You will hear a beep and the level will be adjusted to the
middle position.
To quickly adjust all tone and speaker controls to the
middle position, press the tune knob for more than
two seconds until you hear a beep.
EQ (Equalization):Press this button to select preset
equalization settings.
To return to the manual mode, press the EQ button until
Manual appears on the display or start to manually adjust
the bass, midrange, or treble by pressing the tune knob.
Adjusting the Speakers (Balance/Fade)
BAL/FADE (Balance/Fade):To adjust balance or fade,
press the tune knob until the speaker control labels
appear on the display. Continue pressing to highlight the
desired label, or press the pushbutton positioned under
the desired label. Turn the tune knob clockwise or
counterclockwise to adjust the highlighted setting. You
can also adjust the highlighted setting by pressing either
the SEEK, FWD, or REV button until the desired levels
are obtained.
To quickly adjust balance or fade to the middle position,
press the pushbutton positioned under the BAL or FADE
label for more than two seconds. You will hear a beep
and the level will be adjusted to the middle position.To quickly adjust all speaker and tone controls to the
middle position, press the tune knob for more than
two seconds until you hear a beep.
Finding a Category (CAT) Station
CAT (Category):The CAT button is used to �nd XM™
stations while the radio is in the XM™ mode. To �nd
XM™ channels within a desired category, perform
the following:
1. Press the BAND button until the XM™ frequency is
displayed. Press the CAT button to display the
category labels on the radio display. Continue
pressing the CAT button until the desired category
name is displayed.
2. Press either of the two buttons below the desired
category label to immediately tune to the �rst
XM™ station associated with that category.
3. Rotate the tune knob, press the buttons below the
right or left arrows displayed, or press the right or
left SEEK buttons to go to the next or previous
XM™ station within the selected category.
4. To exit the category search mode, press the FAV
button or BAND button to display your favorites
again.
3-70
Page 288 of 392
2. Get the vehicles close enough so the jumper cables
can reach, but be sure the vehicles are not touching
each other. If they are, it could cause a ground
connection you do not want. You would not be
able to start your vehicle, and the bad grounding
could damage the electrical systems.
To avoid the possibility of the vehicles rolling, set
the parking brake �rmly on both vehicles involved in
the jump start procedure. Put an automatic
transaxle in PARK (P) or a manual transaxle in
NEUTRAL before setting the parking brake.
Notice:If you leave your radio or other accessories
on during the jump starting procedure, they could
be damaged. The repairs would not be covered
by your warranty. Always turn off your radio and
other accessories when jump starting your vehicle.
3. Turn off the ignition on both vehicles. Unplug
unnecessary accessories plugged into the cigarette
lighter or the accessory power outlets. Turn off
the radio and all lamps that are not needed. This
will avoid sparks and help save both batteries. And
it could save the radio!
4. Open the hoods and locate the batteries. Find the
positive (+) and negative (−) terminal locations on
each vehicle.
You will not need to access your battery for jump
starting. Your vehicle has a remote positive (+) jump
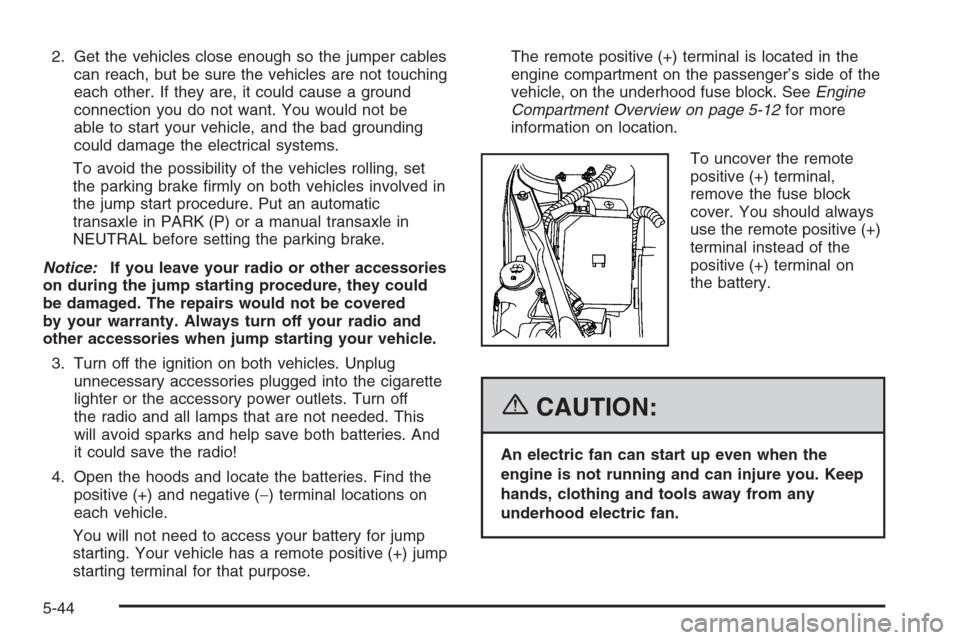
starting terminal for that purpose.The remote positive (+) terminal is located in the
engine compartment on the passenger’s side of the
vehicle, on the underhood fuse block. SeeEngine
Compartment Overview on page 5-12for more
information on location.
To uncover the remote
positive (+) terminal,
remove the fuse block
cover. You should always
use the remote positive (+)
terminal instead of the
positive (+) terminal on
the battery.
{CAUTION:
An electric fan can start up even when the
engine is not running and can injure you. Keep
hands, clothing and tools away from any
underhood electric fan.
5-44